BAR FRIDGES JC95B User manual
1 | P a g e
Operation Manual
Models JC95B, JC95W, JC132B, JC132W

2 | P a g e
TABLE OF CONTENTS
1
GENERAL INFORMATION
Pages
1.1
Foreword
3
1.2
General use
3
1.2.1
Children
3
1.2.2
Warnings
3
1.2.3
Safety
4
1.3
Controller Settings
5
1.4
Responsibility of the customer
5
2
TECHNICAL DATA
2.1
Materials and Refrigerant
5
3
INSTALLATION
3.1
Positioning
6
3.1.1
Cooler levelling
6
3.2
Electrical connection
6
4
MAINTENANCE
7
5
TROUBLESHOOTING
7
6
WARRANTY
8
6.1
Warranty Statement
9
6.2
Stainless Steel Care
10

3 | P a g e
1. GENERAL INFORMATION
1.1 FOREWORD
The purpose of this document is to provide important information regarding the installation,
use and maintenance of the cooler.
Before any operation, you should read carefully the information contained in this manual.
The manufacturer assumes no liability for parts or labour coverage for component failure or
other damages resulting from improper usage, installation or failure to clean and / or maintain
product as set forth in these instructions.
1.2 GENERAL USE
The cooler is designed for commercial use, warranty is voided if incorrectly
placed or unit is subjected to environments including actions of atmospheric
agents (rain, direct sun light). It’s sub-tropical rating means it will chill andwork,
but cannot be in direct sunlight or weather.
The manufacturer is not responsible for damages resulting from the improper use of the
product.
1.2.1 CHILDREN
Children should be supervised to ensure that they do not play with the appliance.
This appliance can be used by children aged from 8 years and above and persons with
reduced physical, sensory or mental capabilities or lack of experience and knowledge if they
have been given supervision or instruction concerning use of the appliance in a safe way and
understand the hazards involved.
Children shall not play with the appliance. Cleaning and user maintenance shall not be made
by children without supervision.
If the supply cord is damaged, it must be replaced by the manufacturer, its service agent or
similarly qualified persons in order to avoid a hazard.
1.2.2 WARNINGS
Keep ventilation openings, in the appliance enclosure or in the built-in structure, clear of
obstruction.
Do not use mechanical devices or other means to accelerate the defrosting process, other
than those recommended by the manufacturer.
Do not damage the refrigerant circuit.

4 | P a g e
Do not use electrical appliances inside the food storage compartments of the appliance,
unless they are of the type recommended by the manufacturer.
Do not Store explosive substances such as aerosol cans with a flammable propellant in this
appliance. Don’t store flammable liquids near unit that may omit vapour.
Unplug unit when not in use and also when maintenance and cleaning is taking place.
Correct Disposal of this product
This marking indicates that this product should not be disposed with other
household wastes. Please check with your local council on the correct way to
dispose of unit, this will prevent possible harm to the environment or human
health from uncontrolled waste disposal, recycle it responsibly to promote the
sustainable reuse of material resources.
If the supply cord is damaged, it must be replaced by the manufacturer, its service agent or
similarly qualified persons in order to avoid a hazard.
Caution: risk of fire.
1.2.3 Safety
-Do not pull plug directly from socket without turning ‘OFF’ first
-Do not try to access unit electrics unless authorized to do so and unless unit is
“OFF” and “UNPLUGGED”
-Do not have items near unit that could be damaged by heat, the condenser coils are
located in the walls so these get quite warm (40oC) during normal operation
-Do not rest heavy items (including the fridge) on the electrical lead
-Queensland installation/servicing requirement: Needs a Gas Repair Job
(hydrocarbon refrigerants) if the appliance gas system is being opened or charged.
Not to be used for preservation of Fresh Foods, this is a drinks fridge.
5 | P a g e
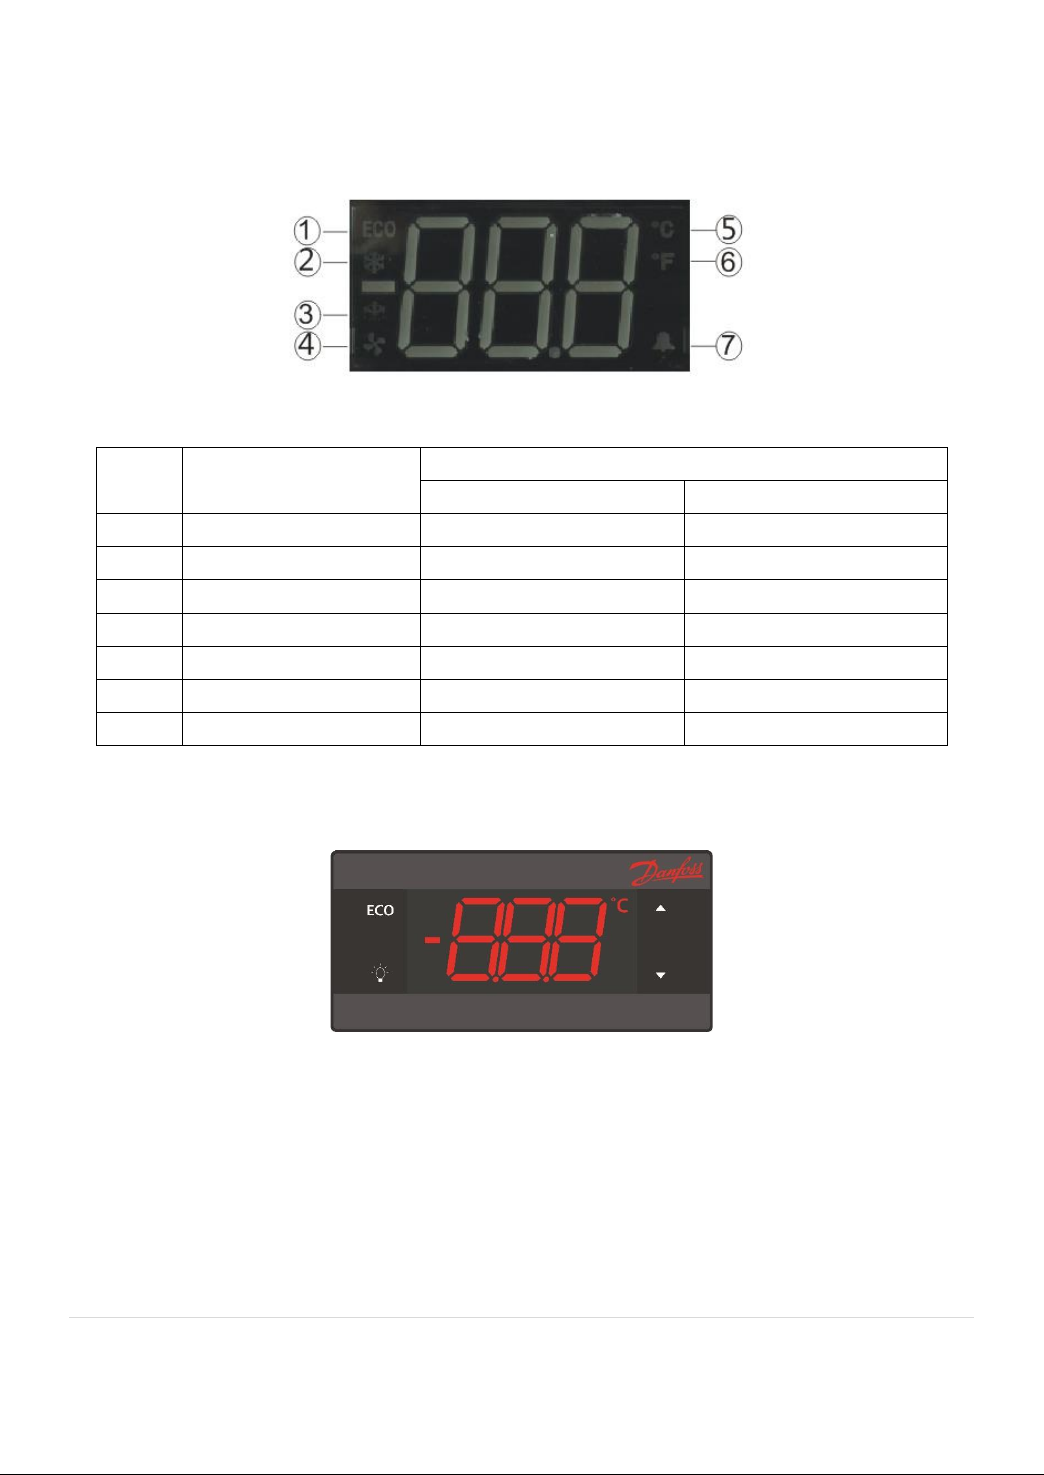
1.3 CONTROLLER SETTINGS
Interface
Explanation of the icons:
Item
Function
When controller is running
ON
OFF
1
ECO mode
ON
OFF
2
Compressor
ON
OFF
3
Defrost
ON
OFF
4
Evaporator fan
ON
OFF
5
Celsius
ON
OFF
6
Fahrenheit
ON
OFF
7
Alarm
In alarm
No alarm
Keypad introduction
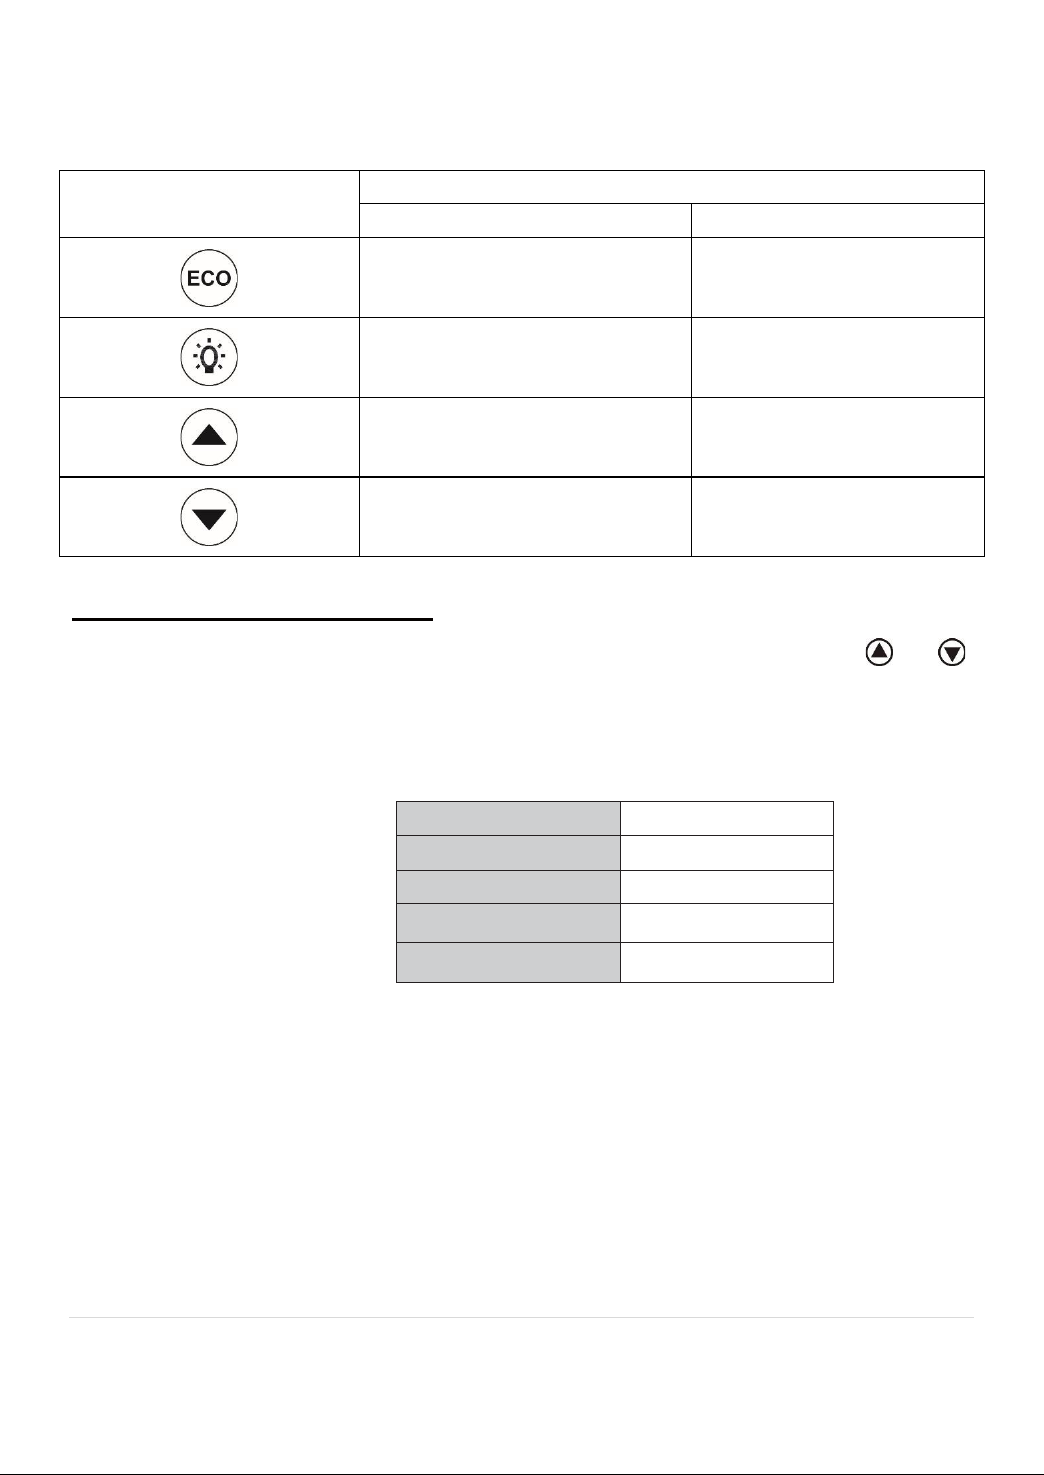
6 | P a g e
Explanation of the buttons
Buttons
Normal operation
Press for short press
Press for long press
Toggle ECO mode
Toggle defrost
Light ON/OFF
Power ON/OFF
Increase set point
/
Decrease set point
Toggle °C and °F
How to set the temperature
Set the desired cooling temperature by pressing the corresponding button or
. Each depression of the buttons will raise or lower the temperature setting. The
temperature selected will flash in the LED display for approximately 10 seconds,
then revert back to displaying the temperature of the cabinet interior.
Red Wines
15 - 18 ºC
Dry/White Wines
9 - 14 ºC
Rose Wines
10 - 11 ºC
Sparkling Wines
5 - 8 ºC
Beer
1 - 4 ºC
If you set your fridge to 0, your fridge will cycle from 0 –4 and keep your drinks around 2
degrees Celsius

7 | P a g e
1.4 INSTALLATION OF THE HANDLE
To install the handle, please follow these instructions
•Carefully pull the door gasket (seal) away from the door in the area where the
handle will be attached.
•Place the handle over the screw holes on the outside of the door and attach it
with the screws that have been provided. Tighten the screws.
•Press the door gasket back into its groove.
1.5 REVERSING THE DOOR SWING
This appliance has the capability of the door opening from either the left or right side.
The unit is delivered to you with the door opening from the left side. Should you
desire to reverse the opening direction, please follow the instructions below:
1. Carefully lay the appliance on its back. Use cushioning to protect the floor and
appliance.
2. Using a Philips screwdriver, remove the two screws and bottom right hinge
beneath the door. Keep the hinge in a safe place in case you need to reverse
the door again in the future.
3. Carefully slide the door off and place it on a padded surface.
4. Remove the bottom support bracket from the right side.
5. Remove the top right hinge and keep in a safe place in case you want to reverse
the door in the future.
6. Remove the screws from the top left and transfer to the right.
7. Install the top left hinge.
8. Install the bottom left hinge to the door. Do not over-tighten the screw.
9. Rotate the door 180º and relocate it on the top hinge.
10. Install the bottom support bracket.
11. Adjust door alignment. When set, tighten screw on hinge.
Please note: Keep the spare hinge plate(s) to be able to reverse the door back
again.
To prevent damaging the door gasket, make sure you have the door opened fully all
the way before pulling the shelves out.

8 | P a g e
1.6 RESPONSIBILITY OF THE CUSTOMER
Ensure that the electrical outlet is connected effectively to earth (ground), suitable to provide
the voltage indicated on the data plate. Make sure that the cooler is placed on a level surface.
2. TECHNICAL DATA
2.1 MATERIALS AND REFRIGERANTS
Interior or exterior surfaces that come into contact with the product are made of steel,
aluminium or non-toxic plastic materials. The refrigerant used is approved by government
regulations.
The type and quantity of the gas charged, in the refrigeration unit, is indicated on the data
plate, this unit is R600A.
3. INSTALLATION
For safe proper operation, follow the manufacturer’s instructions reported in this section.
3.1 POSITIONING
IMPORTANT NOTE: Coolers that have been tilted MUST remain in the upright position for 24
hours prior to plugging in the cooler, the cooler is built in style so can go under benches, front
grill must be clear. Keep away from heat sources, such as radiators or air conditioning pipes.
Allow free air circulation to the refrigerator unit if you have option, this can help lessen run
times.
The installation instructions furnished with the device indicate a clearance of min 10mm at
top, 100mm at the rear and min 10mm at each side.
Do not place unit in sunlight or behind a cupboard door.
The appliance should be placed where the ambient temperature is between 10 –38 degrees
Celsius for optimum performance. If the ambient temperature is above or below this range,
the performance of the unit may be affected. Placing your unit in extreme cold or hot
conditions may cause interior temperatures to fluctuate.
The shelf can withstand the maximum load 50kg (all glass bottles)
3.1.1 COOLER LEVELLING
To provide the best performance the cooler must remain level.

9 | P a g e
3.2 ELECTRICAL CONNECTION
Warning: Do not use extension cords
The cooler works on single-phase voltage (220-240V/50Hz) power supply. To switch on the
cooler, insert the plug into the outlet.
Ensure that: .
When the cooler is operating, check that the supply voltage is not dropping or increasing
under/over +10% the rated voltage (195 Volts to 253 Volts)
*Ensure the cooler is connected to correct voltage prior to plugging it in; there is a
description to identify the correct voltage on rear of the cooler.
*The vent should not be blocked when fridge is working (front Grill).
*Avoid any water dropping or leaking into, or on top of the cooler. It could cause damage to
the internal workings and is potentially dangerous.
*Danger-Risk of fire or explosion. Flammable refrigerant used. Do not use mechanical
devices to defrost refrigerator. Do not puncture refrigerant tubing.
*Danger-Risk of fire or explosion. Flammable refrigerant used. To be repaired only by
trained service personnel. Do not puncture refrigerant tubing. Consult repair manual/owner's
guide before attempting to service this product. All safety precautions must be followed.
The manufacturer is not responsible for damages or accidents arising from the misuse or
disregard of electrical laws relevant to the country where the cooler is used.

10 | P a g e
4. MAINTENANCE
- Before cleaning the cooler always remember to unplug it.
- Unplug the cooler at the electrical outlet; never pull the service cord.
- Do not use sharp objects for cleaning.
- Clean the inside cabinet of cooler with a clean damp cloth or with neutral soap. Avoid
damage by never using abrasive or flammable cleaning products.
- Clean the condenser every 6 –12 months with a vacuum cleaner or a brush to eliminate the
dust accumulation. This is located at rear of unit at the bottom and is the big wire part.
- Do not wash the cooler with direct or high pressure water jets.
- Clean door seal annually using clean cloth and eucalyptus oil
- If you have purchased a stainless steel model, please see stainless steel care
5. TROUBLE SHOOTING
Often problems that occur during normal operation can be resolved without the assistance of
a specialized technician. Before calling the technical assistance, verify the following:
a) The appliance does not operate.
- Check that the plug is correctly inserted into the electrical outlet.
- Verify that there is voltage at the electrical outlet (Use another Appliance in same socket)
b) The product is too warm.
- Check the setting of the thermostat. (See 1.3 Testing Section)
- Check the closing of the door, and ensure door gasket seals.
- Check that the interior fan is operating, and not blocked.
- Check and clean the condenser located at rear bottom section near compressor

11 | P a g e
c) The appliance is excessively noisy.
-Verify the equipment is level.
-Ensure that the equipment is not touching other equipment that could cause vibration, like
piping touching metal cover or other parts.
-If fan is causing noise it may be faulty bearing
For extra trouble shooting information please go to:
http://kb.bar-fridges-australia.com.au/
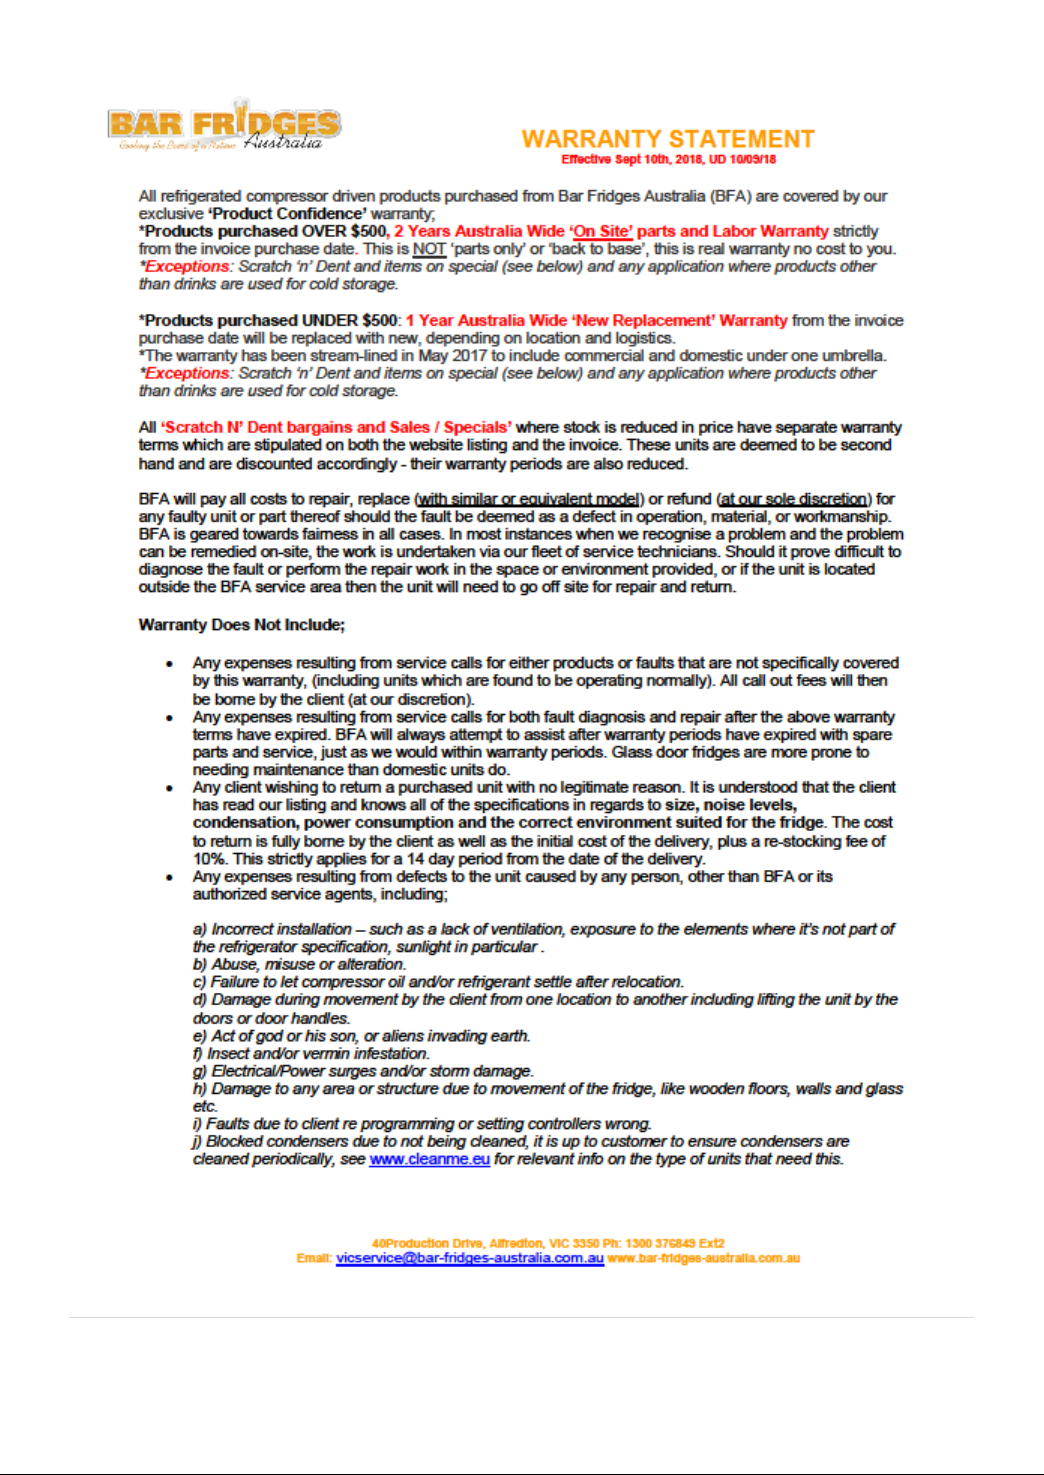
6. WARRANTY
Prepare to answer the following:
- The type of problem: (electrical, mechanical)
- The model, code and serial number of the cooler can be found on the manufacturer label
attached to the interior wall of the cooler
Refer to your WARRANTY STATEMENT that arrived with your Tax Invoice, it explains all
that is needed or go to our website: The hotline for warranty is 1300 170640, if there is no
answer leave a message and it will be attended to within 24Hrs.
You can always go to this link to lodge a claim also, where basic questions need to get
answered. https://www.bar-fridges-australia.com.au/making-a-warranty-claim.html
Bar Fridges Australia has a great reputation for back up service, so please don’t panic if
problems arise, it will be fixed.
“Thank you for choosing Bar Fridges Australia as supplier of your Glass Door Bar Fridge”
Postal: P.O Box 166, Sebastopol, Vic, 3356
Warehouse: 40 Production Drive, Alfredton, Vic, 3350
Phone: 03 53376399 Service 1300 170640
Email: sales@bar-fridges-australia.com.au
Web: www.bar-fridges-australia.com.au
Golden Bear Enterprises T/As Bar Fridges Australia ABN 13 101 612 239
12 | P a g e

13 | P a g e
This manual suits for next models
3
Table of contents
Popular Kitchen Appliance manuals by other brands

Silvercrest
Silvercrest SKMK 1200 A1 operating instructions

BLACK DECKER
BLACK DECKER JE9000BD manual

Goldmedal
Goldmedal 2174EL/ER instruction manual

Alto-Shaam
Alto-Shaam AR-7H ELECTRONIC CONTROL Specification sheet

Range Master
Range Master Elan 110 Ceramic User's guide & installation instructions

PizzaGroup
PizzaGroup IF17 VS manual


