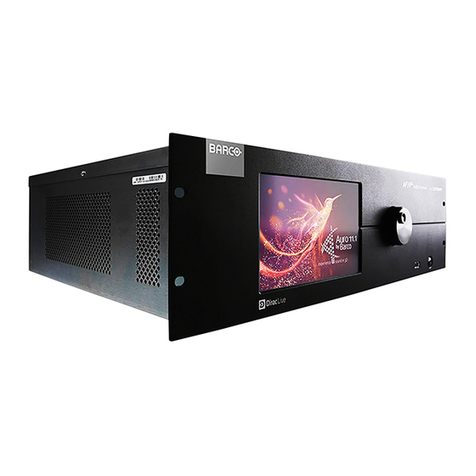
Barco IOSONO ONE Series User manual

IOSONO ONE
Installation And User Manual
R9801509
R9801506
R9801507
R5906747/00
16/05/2017

Barco Audio Technologies
Erich-Kästner-Str. 1a, 99094 Erfurt, Germany
Phone: +49 361 51143 670
Fax: +49 361 51143 677
Support: www.barco.com/en/support
Visit us at the web: www.barco.com
Barco NV
Beneluxpark 21, 8500 Kortrijk, Belgium
Phone: +32 56.23.32.11
Fax: +32 56.26.22.62
Support: www.barco.com/en/support
Visit us at the web: www.barco.com
Printed in Belgium

Changes
Barco provides this manual ’as is’ without warranty of any kind, either expressed or implied, including but not limited to the implied war-
ranties or merchantability and fitness for a particular purpose. Barco may make improvements and/or changes to the product(s) and/or the
program(s) described in this publication at any time without notice.
This publication could contain technical inaccuracies or typographical errors. Changes are periodically made to the information in this
publication; these changes are incorporated in new editions of this publication.
The latest edition of Barco manuals can be downloaded from the Barco web site www.barco.com or from the secured Barco web site
https://www.barco.com/en/signin.
Copyright ©
All rights reserved. No part of this document may be copied, reproduced or translated. It shall not otherwise be recorded, transmitted or
stored in a retrieval system without the prior written consent of Barco.
EN55022/CISPR22 Class A ITE (Information Technology Equipment)
Class A ITE is a category of all other ITE which satisfies the class A ITE limits but not the class B ITE limits. Such equipment should not
be restricted in its sale but the following warning shall be included in the instructions for use:
Warning: This is a class A product. In a domestic environment this product may cause radio interference in which case the user may be
required to take adequate measures.
Guarantee and Compensation
Barco provides a guarantee relating to perfect manufacturing as part of the legally stipulated terms of guarantee. On receipt, the purchaser
must immediately inspect all delivered goods for damage incurred during transport, as well as for material and manufacturing faults Barco
must be informed immediately in writing of any complaints.
The period of guarantee begins on the date of transfer of risks, in the case of special systems and software on the date of commissioning,
at latest 30 days after the transfer of risks. In the event of justified notice of complaint, Barco can repair the fault or provide a replacement
at its own discretion within an appropriate period. If this measure proves to be impossible or unsuccessful, the purchaser can demand a
reduction in the purchase price or cancellation of the contract. All other claims, in particular those relating to compensation for direct or
indirect damage, and also damage attributed to the operation of software as well as to other services provided by Barco, being a component
of the system or independent service, will be deemed invalid provided the damage is not proven to be attributed to the absence of properties
guaranteed in writing or due to the intent or gross negligence or part of Barco.
If the purchaser or a third party carries out modifications or repairs on goods delivered by Barco, or if the goods are handled incorrectly,
in particular if the systems are operated incorrectly or if, after the transfer of risks, the goods are subject to influences not agreed upon in
the contract, all guarantee claims of the purchaser will be rendered invalid. Not included in the guarantee coverage are system failures
which are attributed to programs or special electronic circuitry provided by the purchaser, e.g. interfaces. Normal wear as well as normal
maintenance are not subject to the guarantee provided by Barco either.
The environmental conditions as well as the servicing and maintenance regulations specified in this manual must be complied with by the
customer.
Disclaimer Of Warranty: This software and the accompanying files are sold as is and without warranties as to performance or mer-
chantability or any other warranties whether expressed or implied. In no event shall Barco be liable for damage of any kind, loss of data,
loss of profits, business interruption or other pecuniary loss arising directly or indirectly. Any liability of the seller will be exclusively limited
to replacement of the product or refund of purchase price.
Trademarks
Brand and product names mentioned in this manual may be trademarks, registered trademarks or copyrights of their respective holders.
All brand and product names mentioned in this manual serve as comments or examples and are not to be understood as advertising for
the products or their manufacturers.
Table of contents
TABLE OF CONTENTS
1. Introduction ........................................................................................................ 3
1.1 About This Manual. . ................................................................................................................. 3
2. Safety................................................................................................................ 5
2.1 General Considerations ............................................................................................................. 5
2.2 Important safety instructions ........................................................................................................ 5
2.3 Warranty ............................................................................................................................. 6
3. Hardware............................................................................................................ 7
3.1 Front Panel . . ........................................................................................................................ 7
3.2 Rear Panel........................................................................................................................... 8
4. Control Client Software .......................................................................................... 9
4.1 Connection To An IOSONO ONE ................................................................................................... 9
4.1.1 Connect the Control Client To An IOSONO ONE ............................................................................ 9
4.1.2 Factory Network Settings Of The IOSONO ONE............................................................................ 9
4.1.3 Connect To An IOSONO ONE With Unknown Network Settings............................................................ 9
4.2 Control Client Main Window.........................................................................................................10
4.3 File Browser ......................................................................................................................... 11
4.4 Factory Reset........................................................................................................................12
5. Play Config Software .............................................................................................13
5.1 Head Display And Navigation.......................................................................................................13
5.2 Main Page ...........................................................................................................................14
5.3 Status Page.......................................................................................................................... 15
5.4 Setup Page ..........................................................................................................................15
5.4.1 Clip Lists Tab.................................................................................................................. 16
5.4.2 Audio Tab......................................................................................................................18
5.4.3 Network Tab...................................................................................................................19
5.4.4 System Tab....................................................................................................................20
5.4.5 Restore Backup...............................................................................................................21
5.5 Create Backup.......................................................................................................................22
6. Use Cases ..........................................................................................................23
6.1 Software Update.....................................................................................................................23
6.2 Load an IOSONO CORE configuration.............................................................................................23
6.3 Noise Sequence .....................................................................................................................24
6.4 Create And Play A Clip List .........................................................................................................25
6.5 Remote control from external media controllers....................................................................................26
6.6 Passthrough Mode . .................................................................................................................27
6.6.1 Content Creation.............................................................................................................. 27
6.6.2 System Tuning ................................................................................................................ 27
7. Technical Specifications .........................................................................................29
7.1 Technical Specifications Of The IOSONO ONE....................................................................................29
8. Environmental Information......................................................................................31
8.1 Disposal Infomation .................................................................................................................31
R5906747 IOSONO ONE 16/05/2017 1

Table of contents
2R5906747 IOSONO ONE 16/05/2017

1. Introduction
1. INTRODUCTION
1.1 About This Manual
About
This manual is subject to the copyright of Barco N.V. All exploitation, publication, reproduction or distribution in whole or in part is
forbidden without the prior written permission of Barco N.V..
All rights created by patent grant or registration of a utility model or design patent are reserved. The manufacturer reserves the right
to amend this manual at any time and without notice as result of technical progress.
This manual is applicable to the IOSONO ONE and the software components Play Config and Control Client.
Read through this manual thoroughly before using the IOSONO ONE in order to avoid mistakes and dangers, and to inform yourself
about how to use the system safely.
R5906747 IOSONO ONE 16/05/2017 3

1. Introduction
4R5906747 IOSONO ONE 16/05/2017

2. Safety
2. SAFETY
About
Read this chapter thoroughly before attempting to install or operate the IOSONO ONE.
To prevent personal injury to users or physical damage to the IOSONO ONE while installing and using your IOSONO ONE, ensure
that you understand and follow all safety guidelines, instructions and warnings included in this chapter and this manual.
2.1 General Considerations
About
The IOSONO ONE is designed for installation in control cabinets.
The IOSONO ONE is a high-performance audio processor used to control and configure an IOSONO sound system.
The IOSONO ONE and all associated components may only be used if they are in perfect, technical working order, and for their
intended purpose, with safety in mind and an awareness of the dangers, and as stated in this manual.
The IOSONO ONE is operated via a graphic user interface. Reference is made to the currently valid guidelines for working with a
visual display unit.
There are additional documents for other components of the sound system containing warning, safety and working instructions.
These instructions must be observed independently of this manual.
2.2 Important safety instructions
About
The IOSONO ONEoffers an extremely high level of safety if used properly and in compliance with the instructions contained in this
manual. Read and comply with the following safety instructions before operating the device. Retain safety and operating instruc-
tions for future reference. Adhere to all warnings on the device and in the operating instructions manual. Follow all instructions for
operation and use.
Installation
The device may only be installed and operated by authorized, suitably qualified personal. More advanced configurations of the
apparatus may only be made by skilled personnel with knowledge of sound technology.
Place the device on a flat, solid and stable surface or fix the device to an appropriate rack mounting system that can support the
total weight of the device. If you use an unstable cart or stand, the device may fall, causing serious injury to a child or adult and
serious damage to the device.
Modifications to the unit
Do not modify this equipment without authorization of the manufacturer. No serviceable parts inside.
Electric shock or fire hazard
To prevent electric shock or fire hazard, do not remove cover. Do not insert any objects through aperture in the casing.
Power connection and transient over voltage
• To avoid the risk of electric shock, this equipment must only be connected to supply mains with protective earth.
• The equipment should be installed near an easily accessible outlet.
• The equipment is intended for continuous operation.
• If the device is not used for long time, disconnect it from the AC inlet to avoid damage by transient over-voltage.
• To fully disengage the power to the device, please disconnect all power cords from the AC inlets.
Power cords
Please always use the power cords provided with the product. Furthermore, make sure that the used power cord always corresponds
to the voltage of the power socket, is permitted to be used at your location and complies with the safety standards of your country.
Do not overload wall outlets and extension cords as this may result in fire or electric shock.
Mains lead protection (U.S.: Power cord): Power cords should be routed so that they are not likely to be walked upon or pinched
by items placed upon or against them, paying particular attention to cords at plugs and receptacles. The power supply cords should
be replaced by the designated operator only at all times.
R5906747 IOSONO ONE 16/05/2017 5

2. Safety
Water and moisture
Never expose the device to rain or moisture. Never use the device near water e.g. near a swimming pool.
Ventilation
Inadequate heat dissipation can lead to hardware faults and loss of data. Do not cover or block any ventilation openings in the side
and back of the set. When installing the device in a cupboard or another closed location, heed the necessary space between the
set and the sides of the cupboard. If necessary, consider additional external cooling, to ensure proper heat dissipation.
Material damage caused by electromagnetic fields
The apparatus contains parts sensitive to electromagnetic fields, like hard disc drives. Strong magnetic fields may lead to loss of
data or harm the system functionality partly or persistently. Do not place the apparatus within the range of strong magnetic fields.
2.3 Warranty
About
The manual and the hardware and software components described have been produced according to the currently applicable state
of the art. Nevertheless, the products described are continually being further developed so that we have to reserve the right to make
changes to the form, equipment and technology of the scope of supply and the software components included.
Barco N.V. shall not be liable for any damage arising from the use of the documentation or the hardware and software components.
No claims for changes to products already supplied can be asserted on the basis of the statements, illustrations and descriptions in
this documentation.
Barco N.V. shall not accept any liability for consequences or damages arising from improper use of the device. Unauthorized modi-
fications to the hardware or software configuration shall exclude liability for damage resulting therefrom.
6R5906747 IOSONO ONE 16/05/2017

3. Hardware
3. HARDWARE
3.1 Front Panel
Front Panel
Image 3-1
The front panel contains the following elements:
• Power button with LED
• Status LEDs
The power button LED and the status LEDs show the current states of the IOSONO ONE. Find out what they stand for in the following
lists.
Power Button LED Meaning
Dark Power off
Green blinking Power on, device initialising
Green solid Power on, device initialized, software running
Show LED Meaning
Dark No playlist cued
Green blinking Playlist cued
Red blinking Non existing playlist cued
Green solid Show running (a clip is played back)
Sync LED Meaning
Dark No sync source detected
Red blinking Sync source present, but not locked (e.g. worng sample rate)
Green solid Sync source present, locked
TC (Timecode) LED Meaning
Dark CHASE mode off
Green blinking CHASE mode on, no TC lock (e.g. when there is no incoming timecode)
Red blinking CHASE mode on, TC not correct (e.g. frame rate missmatch)
Green solid CHASE mode on, TC lock (TC valid, correct framerate)
Network LED Meaning
Dark No network connection
R5906747 IOSONO ONE 16/05/2017 7

3. Hardware
Network LED Meaning
Orange blinking Network command executed (Blinks once, then stays solid)
Orange solid Network (cable) connected
Fault LED Meaning
Dark No error detected
Red blinking System error detected, software not running
Red solid Software error detected, software running, but in error state
3.2 Rear Panel
Rear Panel
1
2
3
4
5
6
7
8
9
Image 3-2
Number and kind of audio drawers depends on IOSONO ONE configuration. For detailed information about connections and avail-
able hardware options see "Technical Specifications Of The IOSONO ONE", page 29.
Item No. Element Function
1USB connection Connection of USB storage devices for system backup and restore. Firmware
update
2 MAIN ethernet port Network connection to remote computer to control and setup the IOSONO ONE
with the Control Client software
3 AUX ethernet port Not Used
4COM port Media control
5Sync drawer Input and output of different sync signals
6 MADI drawer Electrical and optical MADI input and output connections
7AES drawer Electrical AES inputs and output connections
8 Blind drawer
9 Power supply Power supply of the IOSONO ONE
8R5906747 IOSONO ONE 16/05/2017

4. Control Client Software
4. CONTROL CLIENT SOFTWARE
About
The Control Client connects a remote computer to the IOSONO ONE. The Control Client Main Window allows access to the File
Browser, the Factory Reset options and the Play ConfigsoftwareoftheIOSONOONE.
For installation details of the Control Client Software, please see the Quick Start Guide that has been delivered with the IOSONO
ONE.
4.1 Connection To An IOSONO ONE
4.1.1 Connect the Control Client To An IOSONO ONE
To start the Control Client and connect to an IOSONO ONE
1. Set up a network connection between a remote computer and the IOSONO ONE (Port MAIN). Configure the remote computer’s
network interface to the same network as the IOSONO ONE.
Static IP: 192.168.1.x (x being a number between 2 and 254). Network mask: 255.255.255.0
2. Start the Control Client via Windows-Startmenu/Programs/IOSONO/Spatial Audio Processor. At connection dialog enter the IP
Address of the IOSONO ONE and select connect. (image 4-1)
Image 4-1
Connecting dialog
4.1.2 Factory Network Settings Of The IOSONO ONE
Factory Network Settings
Item Factory Settings
IP Adress 192.168.1.1
Subnet Mask 255.255.255.0
Gateway 0.0.0.0
DHCP OFF
4.1.3 Connect To An IOSONO ONE With Unknown Network Settings
About
In case the network configuration of the IOSONO ONE is corrupt or unknown, it becomes necessary to reset the network interface
configuration of the MAIN port of the IOSONO ONE, by doing the following:
To connect to an IOSONO ONE with unkown network settings
1. Connect an USB flash drive with a FAT file system to your remote computer
2. In the root file system of the USB flash drive, create a *.txt file and rename it to iosono_network_reset.ion
3. Type your desired network configuration in this file, e.g.:
IPADDR 192.168.1.1
NETMASK 255.255.255.0
GATEWAY 0.0.0.0
R5906747 IOSONO ONE 16/05/2017 9

4. Control Client Software
4. Save the file
Warning: The used text editor has to be able to create a UNIX textfile. This is not possible with the Windows text editor. You
canuseforexamplethefreeavailableeditor"Notepad++". In this editor you can use the menu entry Edit EOL
Conversion UNIX/OSX Format to convert a text file to UNIX mode.
5. Plug the USB flash drive in one of the USB connections at the backside of the IOSONO ONE
6. Turn on the IOSONO ONE, the network setting from the USB flash drive will be applied automatically during boot up. Connect
to the new IP address with the Control Client software and remove the USB flash drive.
4.2 Control Client Main Window
Control Client Main Window
1
2
3
4
5
76
Image 4-2
Status display of the Control Client window
Item No. Element Function
1System Network address of the IOSONO ONE
2Playback Information Name and position of current audio clip
3System Status Current state indicators. Same as LEDs on the front panel, see "Front Panel",
page 7
4Output Levelmeter Level indicators of the output channels
5Configuration Start Play Config software of the IOSONO ONE. See chapter 5 for detailed
description
6FileBrowser Start file browser, see "File Browser", page 11
7FactoryReset Clear user data and restore factory configuration, see "Restore Backup", page 21
10 R5906747 IOSONO ONE 16/05/2017

4. Control Client Software
4.3 File Browser
About
Files can be transmitted from and to the Control Client using the File Browser. To enter the File Browser use the folder button in the
lower right corner of the Control Client window. To copy files and folders from the remote computer to the IOSONO ONE, right click
on the specific item and choose Upload. The four buttons in the top left corner can be used to filter for certain types of files.
Files are automatically transferred to dedicated folders on the internal hard drive according to the active filter.
These folders are invisible to the user. There is no need for creating sub folders for clips, configurations, etc.
7 9
1 32 4
5
6
8
10 11
Image 4-3
File browser of the Control Client
Item No. Element Function
1Content filter Show only clip files (*.icf, *.imf)
2 Filter disabled Show all files and folders
3Configfilter Show only configfiles (*.icp, *.ilf, *.hid)
4Update filter Show only update files (*.isu, *.isu, *.CHK)
5Refresh Refreshs the file browser displays
6 Load drive and path Select drive at local computer. Shows current path and Network address of local
computer
7Local computer file browser Shows files and folders at local machine
8Context menu Context menu (right mouse button) of files or folders. Contains Upload, Remove
and create directory com- mands
9IOSONO ONE file browser Shows files and folders at IOSONO ONE
R5906747 IOSONO ONE 16/05/2017 11

4. Control Client Software
Item No. Element Function
10 Local disx space Shows free disc space of selected local drive
11 IOSONO ONE disc space Shows free disc space of IOSONO ONE
4.4 Factory Reset
About
Clear (uploaded) user data and/or restore factory configuration using the arrow button in the lower right corner of the Control Client
window (see "Control Client Main Window", page 10). Use the check boxes to select the reset options.
1
2
Image 4-4
Factory reset dialog
Item No. Element Function
1Clear User Data Deletes all user data, including audio files
2 Restore Factory
Configuration
Restores all configuration settings
To prevent undesired use of the reset function a displayed number sequence has to be entered before the
reset is executed.
WARNING:Factory reset deletes all configurations as well as all user content. Make sure you have relevant
data stored on external storage media as a backup before attempting. The backup function is described in
"Create Backup", page 22.
Reseting to factory configuration is useful when the IOSONO ONE is not working properly.
12 R5906747 IOSONO ONE 16/05/2017

5. Play Config Software
5. PLAY CONFIG SOFTWARE
5.1 Head Display And Navigation
Head Display And Navigation
1
2
3
4
5
67
8
9
10
11
Image 5-1
Head display and Navigation Bar of the Play Config software
Item No. Element Function
1 Position Timestamp of playback position of active clip
2Clip Name of active clip
3System Name System name. Background color indicates the the system state.
4 Volume Indicates the current main volume setting
5Volume + / - Increase / decrease main volume
6Mute Mute / Unmute all output channels
7Passthrough Mode When enabled, all input channels will be routed directly to their corresponding
output channels. Playback will be stopped. See "Passthrough Mode", page 27.
8Status Page Access the status page with information about Input / Output levels and Sync
information. See "Status Page", page 15.
9Setup Page Access the setup page containing all system, audio and playback settings of the
IOSONO ONE. See "Setup Page", page 15.
10 Restore Backup Restore system backup. See "Restore Backup", page 21
11 Create Backup Create system backup. See "Create Backup", page 22.
The Main Page is displayed when neither the Status-Page nor Setup-Page is selected at the Navigation Bar.
R5906747 IOSONO ONE 16/05/2017 13

5. Play Config Software
5.2 Main Page
Main Page
2 3 4 5
6 7 8 9
10 12
111
Image 5-2
Main page of Play Config
Item No. Element Function
1 Playlist Displays content of current clip list
2 Back Switches to previous clip within the playlist
3 Play Starts the playback of the current clip. During playback the button changes to
pause button
4 Stop Stops the playback of the current clip and resets the position to the beginning
of the clip
5Next Switches to next clip within the playlist
6 Single Mode A cued clip is played to the end, then the playback is stopped
7Loop Mode At the end of a clip, the next clip starts. At the end of the show, the playback
starts again at the first clip
8 List Mode Consecutive playback of all clips in a cued show, at the end of a clip, the next clip
starts. After the last clip, playback is stopped
9 Chase Mode The show starts according to incoming timecode at the LTC In port. Go to Clip
List tab (see "Clip Lists Tab", page 16) to set the start time and the frame rate of
the incoming timecode
Note: Check the status page ("Status Page", page 15) to check whether timecode
is coming in and recognized correctly. Check green status LED and timestamp
10 Eject Clears the currently cued clip list
11 Clip List Table with the existing clip lists
12 Cue Select a clip list and cue into the show
The Main Page is displayed when neither the Status-Page nor Setup-Page is selected at the Navigation Bar.
14 R5906747 IOSONO ONE 16/05/2017

5. Play Config Software
5.3 Status Page
About
1
2
4
5
3
Image 5-3
Status page of Play Config
Item No. Element Function
1Sync Sources Shows current sync state and sample rate of the IOSONO ONE. Channel count
and type of indicators depend on the hardware configuration of the used IOSONO
ONE
2 Inputs level meters Level meters for all audio inputs
3 Input expand Expands / collapses the input level meters section
4 Output level meters Level meters for all audio outputs
5TC Timecode status. Indicates the state of the incoming timecode, the current
timecode position as well as the detected frame rate
5.4 Setup Page
About
Access the setup page with the wrench button. The setup page comprises four tabs with different functionality:
•Clip Lists Tab - For editing clip lists.
•Audio Tab-Allowstheco
nfiguration of the clock source, sample rate, frame rate and controlling the noise sequence.
•Network Tab-Allowstheconfiguration of network and remote control settings.
•System Tab - Displays various information about the system.
R5906747 IOSONO ONE 16/05/2017 15

5. Play Config Software
5.4.1 Clip Lists Tab
Clip Lists Tab
16
2 3 4
7 9 11
5
108
Image 5-4
Clip list tab in system setup of Play Config
Item No. Element Function
1 Clip lists Overview and selection of available clip lists
2 New Clip list Create a new, empty clip list
3 Delete Clip list Delete selected clip list
4 Rename Clip list Rename selected clip list
5Start Timecode Set the start timecode for the selected clip list
6 Clip list content Shows all clips of the selected clip list with their length and start time. Volume of
each clip can be set separately. More editing options are available at Item No. 11
7Addclip Addanewcliptotheselectedcl
ip list
Note: A clip can be added and played, once the clip file is stored on the IOSONO
ONE (see "File Browser", page 11)
8Remove Clip Remove selected clip from the current clip list
9 Position Up Moves selected clip one position up
10 Position Down Moves selected clip one position down
11 Edit clip Display detailed information about a selected clip. Different parameters can be
eddited. See "Clip Lists Tab", page 16.
Edit Clip
To see details or to edit a selected clip, use the button EDIT CLIP. The Clip dialog opens an offers the following possibilities:
16 R5906747 IOSONO ONE 16/05/2017
This manual suits for next models
3
Table of contents
Other Barco Computer Hardware manuals

Barco
Barco DCPB-2160 User manual

Barco
Barco BlendPRO-II User manual

Barco
Barco S3-4K User manual

Barco
Barco ImagePRO-HD User manual

Barco
Barco ACSAR User manual

Barco
Barco S3 series User manual

Barco
Barco EX Installation and operating manual

Barco
Barco LED-PRO User manual

Barco
Barco ICP-D User manual

Barco
Barco TransForm SCN User manual

Barco
Barco AP20 User manual

Barco
Barco DCPB-2140 User manual

Barco
Barco iCon H600 User manual

Barco
Barco ImagePRO-II User manual

Barco
Barco ImagePRO-3G User manual

Barco
Barco ImagePRO-II User manual

Barco
Barco Encore VPx User manual

Barco
Barco DCPB-2120 User manual

Barco
Barco iCon H250 User manual

Barco
Barco DCPB-2100 User manual