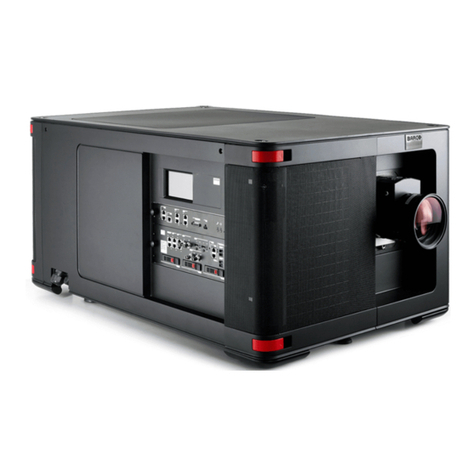
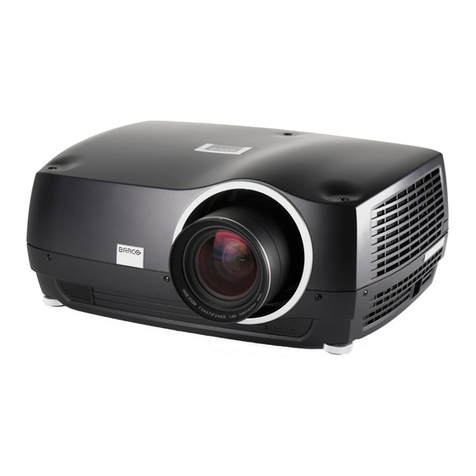
Barco BARCOIQ GRAPHICS 200L User manual

BARCO PROJECTION
BARCOIQGRAPHICS/REALITY 200L/300/400
R9002890 - R9002900
R9002700 - R9002730
R9002910 - R9002940
OWNER’SMANUAL
10062002 R5976367/02

Product revision
Software version: V1.20 (A)
Barco nv Intelligent Displays
Noordlaan 5, 8520 Kuurne
Phone: +32 56.36.82.11
Fax: +32 56.35.86.51
E-mail: [email protected]
Visit us at the web: www.barco.com
Printed in Belgium

Copyright ©
All rights reserved. No part of this document may be copied, reproduced or translated. It shall not otherwise be recorded, transmitted or
stored in a retrieval system without the prior written consent of BARCO.
Federal Communication Commission (FCC Statement)
This equipment has been tested and found to comply with the limits for a class B digital device, pursuant to Part 15 of the FCC rules.
These limits are designed to provide reasonable protection against harmful interference when the equipment is operated in a residential
environment. This equipment generates, uses, and can radiate radio frequency energy and, if not installed and used in accordance with the
instruction manual, may cause harmful interference to radio communications. Operation of this equipment in a residential area is likely to
cause harmful interference in which case the user is encouraged to try to correct the interference by one or more of the following measures.
Introduction to the user :
If this equipment does cause interference to radio or television reception, the user may try to correct the interference by one or more of the
following measures :
• Re-orientation of the receiving antenna for the radio or television.
• Relocate the equipment with respect to the receiver.
• Plug the equipment into a different outlet so that the equipment and receiver are on different branch circuits.
• Fasten cables connectors to the equipment by mounting screws.
The use of shielded cables is required to comply within the limits of Part 15 of FCC rules and EN55022.
Guarantee and Compensation
Barco provides a guarantee relating to perfect manufacturing as part ofthe legally stipulated terms of guarantee. On receipt, the purchaser
must immediately inspect all delivered goods for damage incurred during transport, as well as for material and manufacturing faults Barco
must be informed immediately in writing of any complaints.
The period of guarantee begins on the date of transfer of risks, in the case of special systems and software on the date of commissioning,
at latest 30 days after the transfer of risks. In the event of justified notice of compliant, Barco can repair the fault or provide a replacement
at its own discretion within an appropriate period. If this measure proves to be impossible or unsuccessful, the purchaser can demande a
reduction in the purchase price orcancellation of the contract (redhibition). All other claims, in particular those relating to compensation for
direct or indirect damage, and also damage attributed to the operation of software as well as to other services provided by Barco, being a
component of the system or independent service, willbe deemed invalid provided the damage is not proven tobe attributed tothe absence
of properties guaranteed in writing or due to the intent or gross negligence or part of Barco.
If the purchaser or a third party carries out modifications or repairs on good delivered by Barco, or if the goods are handled incorrectly,
in particular if the systems are commissioned operated incorrectly or if, after the transfer of risks, the goods are subject to influences not
agreed upon in the contract, all guarantee claims of the purchaser will be rendered invalid. Not included in the guarantee coverage are
system failures which are attributed to programs or special electronic circuitry provided by the purchaser, e.g. interfaces. Normal wear as
well as normal maintenance are not subject to the guarantee provided by Barco either.
The environmental conditions as well as the servicing and maintenance regulations specified in the this manual must be complied with by
the customer.
Trademarks
Brand and product names mentioned in this manual may be trademarks, registered trademarks or copyrights of their respective holders.
All brand and product names mentioned in this manual serve as comments or examples and are not to be understood as advertising for
the products or their manufactures.


Revision Sheet
To:
Barco nv Intelligent Displays
Noordlaan 5, 8520 Kuurne
Phone: +32 56.36.82.11, Fax: +32 56.35.86.51
From:
Date:
Please correct the following points in this documentation (R5976367/02):
page wrong correct
R5976367 BARCOIQGRAPHICS/REALITY 200L/300/400 10062002


Table of contents
TABLE OF CONTENTS
1. Packaging andDimensions .......................................................................................5
1.1 Boxcontent.............................................................................................................................. 5
1.2 ProjectorPackaging .................................................................................................................... 5
1.3 Lens Packaging ......................................................................................................................... 6
1.4 Dimensions.............................................................................................................................. 6
2. Installation Guidelines..............................................................................................9
2.1 Safetywarnings......................................................................................................................... 9
2.2 Installationguidelines................................................................................................................... 9
2.3 Projectorconfigurations................................................................................................................10
2.4 Lenses..................................................................................................................................13
2.4.1 Lenses ...........................................................................................................................13
2.4.2 Lens formulas ...................................................................................................................13
2.4.3 Lens installation .................................................................................................................14
2.4.4 Removingthelens...............................................................................................................14
2.4.5 Cleaning the lens................................................................................................................15
2.5 Batteries................................................................................................................................15
2.5.1 Batteryinstallation...............................................................................................................15
2.5.2 Batteryreplacement.............................................................................................................15
3. Connections.........................................................................................................17
3.1 Power connection......................................................................................................................17
3.2 Input source connection ...............................................................................................................17
3.2.1 Inputsection.....................................................................................................................18
3.2.2 Inputfacilities....................................................................................................................18
3.3 5-Cable input...........................................................................................................................19
3.4 Composite Video Input.................................................................................................................20
3.5 S-Videoinput...........................................................................................................................21
3.6 Digital Visual Interface (DVI) input ....................................................................................................22
3.7 Computer input.........................................................................................................................22
3.8 Serial Digital Interface (Optional)......................................................................................................23
3.9 Audio input/Output (Optional)..........................................................................................................24
3.10Communications Connections ........................................................................................................24
3.10.1RS232 IN connection ...........................................................................................................24
3.11Extended configuration................................................................................................................25
3.11.1Introduction......................................................................................................................25
3.11.25 cable extended configuration.................................................................................................25
3.11.3S-Video extended configuration ................................................................................................26
3.11.4Summarizing ....................................................................................................................27
4. Gettingstarted......................................................................................................29
4.1 RCU&Localkeypad...................................................................................................................29
4.2 Terminologyoverview..................................................................................................................30
4.3 Switchingon............................................................................................................................32
4.4 Lampruntime...........................................................................................................................32
4.5 Quicksetupadjustments..............................................................................................................34
4.5.1 QuicklensAdjustment ..........................................................................................................34
4.5.2 UsingtheRCU...................................................................................................................35
4.6 Projectoraddress......................................................................................................................36
4.6.1 Addresssetting..................................................................................................................36
4.6.2 Displaying and Programming addresses into the RCU ........................................................................37
4.7 Controlling the projector ...............................................................................................................37
4.8 DigitalZoom............................................................................................................................38
4.9 Menustructure.........................................................................................................................38
4.10Usingthemenu........................................................................................................................39
4.11Using the Dialogboxes ................................................................................................................39
5. SourceSelection...................................................................................................41
5.1 Flowchart...............................................................................................................................41
5.2 Source selection .......................................................................................................................42
5.3 CompositeVideo ......................................................................................................................43
5.4 S-Videoselection ......................................................................................................................43
5.5 TheVideoSelector.....................................................................................................................44
6. GeneralMenu.......................................................................................................47
6.1 Flowchart...............................................................................................................................47
6.2 Pause...................................................................................................................................47
6.3 Freeze..................................................................................................................................48
6.4 Standby Timer..........................................................................................................................48
6.5 Audio (Optional)........................................................................................................................49
6.5.1 AudioSetup .....................................................................................................................49
6.5.2 AudioSettings...................................................................................................................51
6.6 Identification............................................................................................................................51
R5976367 BARCOIQ GRAPHICS/REALITY 200L/300/400 10062002 1

Table of contents
7. ImageMenu .........................................................................................................53
7.1 Overview ...............................................................................................................................54
7.2 Settings.................................................................................................................................55
7.2.1 Contrast..........................................................................................................................55
7.2.2 Brightness.......................................................................................................................56
7.2.3 Color.............................................................................................................................56
7.2.4 Tint(hue).........................................................................................................................56
7.2.5 Sharpness .......................................................................................................................56
7.2.6 Gamma..........................................................................................................................57
7.2.7 Phase............................................................................................................................57
7.2.8 Noise reduction .................................................................................................................57
7.3 Aspectratio.............................................................................................................................57
7.4 Shownativeresolution.................................................................................................................58
7.5 Keystone ...............................................................................................................................59
7.6 Colortemperature......................................................................................................................59
7.7 Filmmodedetection....................................................................................................................61
7.8 Input balance...........................................................................................................................61
7.9 AGConVideo..........................................................................................................................63
7.10Manual Gain Control...................................................................................................................64
8. ToolsMenu..........................................................................................................67
8.1 Flowchart...............................................................................................................................67
8.2 IntroductiontoPiP .....................................................................................................................68
8.3 PiPselect...............................................................................................................................69
8.4 PiP add window ........................................................................................................................70
8.5 PiP remove window....................................................................................................................70
8.6 PiPlayout...............................................................................................................................71
8.6.1 PiPSave.........................................................................................................................71
8.6.2 PiPrenamelayout...............................................................................................................72
8.6.3 PiPdeletelayout ................................................................................................................73
8.7 PiPAdjust..............................................................................................................................73
8.8 Diagnostics.............................................................................................................................74
9. SignalMenu.........................................................................................................77
9.1 Flowchart ..............................................................................................................................77
9.2 Switchingmode........................................................................................................................77
9.3 Background ............................................................................................................................79
10.LampMenu..........................................................................................................81
10.1Flowchart...............................................................................................................................81
10.2Runtimes...............................................................................................................................81
10.3Mode...................................................................................................................................82
10.4History..................................................................................................................................84
10.5Resetruntime..........................................................................................................................84
10.6Runtimewarning.......................................................................................................................85
11.Imagefilesmenu...................................................................................................87
11.1Flowchart...............................................................................................................................87
11.2Load file................................................................................................................................88
11.3Editfile.................................................................................................................................88
11.4Renamefile............................................................................................................................91
11.5Copy ...................................................................................................................................92
11.6Delete..................................................................................................................................93
12.Installationmenu...................................................................................................95
12.1Flowchart...............................................................................................................................96
12.2Lens adjustments......................................................................................................................96
12.3Projectoraddress......................................................................................................................97
12.4Orientation.............................................................................................................................99
12.5Fullscreenrepresentation.............................................................................................................99
12.6Language .............................................................................................................................100
12.7Quickaccesskeys....................................................................................................................100
12.8RS232 baudrate ......................................................................................................................101
12.9Startupscreen........................................................................................................................102
12.10Automaticstartup....................................................................................................................102
12.11Textbox ..............................................................................................................................103
12.12Take screenshot.....................................................................................................................103
12.13Sliderboxposition ...................................................................................................................104
12.14AutoImageSetup....................................................................................................................105
12.15Changepassword...................................................................................................................107
A.Cleaning the dustfilters.......................................................................................... 109
A.1Dustfilters..............................................................................................................................109
A.2 Cleaning...............................................................................................................................109
B.Standard Image Files............................................................................................. 111
B.1Tableoverview........................................................................................................................111
2R5976367 BARCOIQ GRAPHICS/REALITY 200L/300/400 10062002

Table of contents
Glossary............................................................................................................... 115
Index.................................................................................................................... 117
R5976367 BARCOIQ GRAPHICS/REALITY 200L/300/400 10062002 3
Table of contents
4R5976367 BARCOIQ GRAPHICS/REALITY 200L/300/400 10062002
1. Packaging and Dimensions
1. PACKAGING AND DIMENSIONS
Overview
• Box content
• Projector Packaging
• Lens Packaging
• Dimensions
1.1 Box content
CEE7
European power plug to connect the power cord to the wall outlet.
ANSI 73.11
American power plug to connect the power cord to the wall outlet.
Content
• 1 projector BarcoIQ(weight ± 12,6 kg or 27.8 lbs)
• 1 remote control unit RCU + 2 batteries.
• 2 power cables with outlet plug type CEE7 and ANSI 73.11.
• 1 owners manual
• 1 safety manual
1.2 Projector Packaging
Way of Packaging
The projector is packed in a carton box. To provide protection during transportation, the projector is surrounded with foam. The
package is secured with banding and fastening clips.
To unpack
1. Release the fastening clips. (image 1-1)
2. Remove the banding. Handle as shown in the drawing.
3. Take the projector out of its shipping carton and place it on a table. (image 1-2)
R5976367 BARCOIQ GRAPHICS/REALITY 200L/300/400 10062002 5

1. Packaging and Dimensions
Image 1-1
Image 1-2
Save the original shipping carton and packing material, they will be necessary if you ever have to ship your
projector. For maximum protection, repack your projector as it was originally packed at the factory.
Save the original shipping carton and packing material, they will be necessary if you ever have to ship your
projector. For maximum protection, repack your projector as it was originally packed at the factory.
1.3 Lens Packaging
Way of Packaging
Lenses are supplied as an individual item.
They are packed in a carton box.
1.4 Dimensions
Dimensions overview
Dimensions are given in mm (1 inch = 25.4 mm)
6R5976367 BARCOIQ GRAPHICS/REALITY 200L/300/400 10062002
1. Packaging and Dimensions
Image 1-3
Lens length of projector combinable with cable
basket Remarks
SVD(2-2.5:1) 545mm YES Length with cable basket = 565mm
R5976367 BARCOIQ GRAPHICS/REALITY 200L/300/400 10062002 7

1. Packaging and Dimensions
Lens length of projector combinable with cable
basket Remarks
QVD(1.3-1.8:1) 600mm YES
QVD(1.9-2.6:1) 590mm YES
QVD(3.0-6.0:1) 620mm YES
QVD(0.85:1) 545mm NO
QVD(7.0:1) 540mm YES Length with cable basket = 560mm
8R5976367 BARCOIQ GRAPHICS/REALITY 200L/300/400 10062002

2. Installation Guidelines
2. INSTALLATION GUIDELINES
Overview
• Safety warnings
• Installation guidelines
• Projector configurations
• Lenses
• Batteries
2.1 Safety warnings
Before installing the projector, read first the safety instructions in the safety manual (R5975258) delivered with
the projector.
Insure that the projector is installed in an easy to evacuate room in case of a lamp explosion.
2.2 Installation guidelines
Ambient temperature check
Careful consideration of things such as image size, ambient light level, projector placement and type of screen to use are critical to
the optimum use of the projection system.
Max. ambient temperature : 40 C or 104 F
Min. ambient temperature : 0 Cor32 F
The projector will not operate if ambient air temperature falls outside this range (0 C- 40 Cor32F-104 F).
Environment
Do not install the projection system in a site near heat sources such as radiators or air ducts, or in a place subject to direct sunlight,
excessive dust or humidity. Be aware that room heat rises to the ceiling; check that temperature near the installation site is not
excessive
Harmful Environmental Contamination Precaution
Environment condition check
A projector must always be mounted in a manner which ensures the free flow of clean air into the projectors ventilation inlets as well
as free flow at the ventilation outlets. The installation must also allow easy access to the consumable parts ( dustfilters, lamps, ...)
For installations in environments where the projector is subject to airborne contaminants such as that produced by smoke machines
or similar (these deposit a thin layer of greasy residue upon the projectors internal optics and imaging electronic surfaces, degrading
performance), then it is highly advisable and desirable to have this contamination removed prior to it reaching the projectors clean
air supply. Devices or structures to extract or shield contaminated air well away from the projector are a prerequisite, if this is not
a feasible solution then measures to relocate the projector to a clean air environment should be considered. Make sure that the
projector never runs with dirty dustfilters as this will dramatically reduce the lifetime of the consumables. It is advised to clean the
dustfilters on a regular basis and to replace them at any lamp change. Barco reserves itself the right to refuse warranty replacement
of consumables if they have been used in a projector with dirty airfilters. Only use the manufactures recommended cleaning kit which
has been specifically designed for cleaning optical parts, never use industrial strength cleaners on a projectors optics as these will
degrade optical coatings and damage sensitive optoelectronics .
Failure to take suitable precautions to protect the projector from the effects of persistent and prolonged air contaminants will culmi-
nate in extensive and irreversible ingrained optical damage. At this stage cleaning of the internal optical units will be non-effective
and impracticable. Damage of this nature is under no circumstances covered under the manufactures warranty and may deem the
warranty null and void. In such a case the client shall be held solely responsible for all costs incurred during any repair. It is the
clients responsibility to ensure at all times that the projector is protected from the harmful effects of hostile airborne particles in the
environment of the projector. The manufacture reserves the right to refuse warranty repair if a projector has been subject to wantful
neglect, abandon or improper use.
R5976367 BARCOIQ GRAPHICS/REALITY 200L/300/400 10062002 9
2. Installation Guidelines
What about ambient light ?
The ambient light level of any room is made up of direct or indirect sunlight and the light fixtures in the room. The amount of ambient
light will determine how bright the image will appear. So, avoid direct light on the screen. Windows that face the screen should be
covered by opaque drapery while the set is being viewed. It is desirable to install the projection system in a room whose walls and
floor are of non-reflecting material. The use of recessed ceiling lights and a method of dimming those lights to an acceptable level
is also important. Too much ambient light will ‘wash out’ of the projected image. This appears as less contrast between the darkest
and lightest parts of the image. With bigger screens, the ‘wash out’ becomes more important. As a general rule, darken the room to
the point where there is just sufficient light to read or write comfortably. Spot lighting is desirable for illuminating small areas so that
interference with the screen is minimal.
Which screen type ?
There are two major categories of screens used for projection equipment. Those used for front projected images and those for rear
projection applications. Screens are rated by how much light they reflect (or transmit in the case of rear projection systems) given a
determined amount of light projected toward them. The ‘GAIN’ of a screen is the term used. Front and rear screens are both rated
in terms of gain. The gain of screens range from a white matte screen with a gain of 1 (x1) to a brushed aluminized screen with a
gain of 10 (x10) or more. The choice between higher and lower gain screens is largely a matter of personal preference and another
consideration called the Viewing angle. In considering the type of screen to choose, determine where the viewers will be located
and go for the highest gain screen possible. A high gain screen will provide a brighter picture but reduce the viewing angle. For
more information about screens, contact your local screen supplier.
Image size
The projector is designed for projecting an image size with a screenwidth from 1.00m (3.3ft) to 6.00m (19.7ft) with an aspect ratio of
4to3.
2.3 Projector configurations
The different configurations
1. Rear/Ceiling
2. Rear/Table
3. Front/Ceiling
4. Front/Table
Image 2-1
10 R5976367 BARCOIQ GRAPHICS/REALITY 200L/300/400 10062002

2. Installation Guidelines
Positioning the projector
Image 2-2
ON-Axis installation
a side view
b top view
c back view
x optical axis projection lens
pprojector
s screen
F floor
R5976367 BARCOIQ GRAPHICS/REALITY 200L/300/400 10062002 11
2. Installation Guidelines
Image 2-3
100% OFF Axis installation
a side view
b top view
c back view
x optical axis projection lens
pprojector
s screen
F floor
12 R5976367 BARCOIQ GRAPHICS/REALITY 200L/300/400 10062002

2. Installation Guidelines
2.4 Lenses
Overview
• Lenses
• Lens formulas
• Lens installation
• Removing the lens
• Cleaning the lens
2.4.1 Lenses
Available lenses
The following lenses are available, or will become available (contact a BARCO service center) as an option :
Lenses Standard version
QVD(0.85:1) R9841220
QVD(1.3-1.8:1) R9840950
QVD(1.9-2.6:1) R9840960
QVD(3.0-6.0:1) R9840970
QVD(7:1) R9841230
SVD(2.0-2.5:1) R9841240
2.4.2 Lens formulas
Formulas
Metric Formulas (meter) Inch formulas (inch)
QVD(0.85:1) PD = -0.034 + 0.863 x SW + 0.008 /SW PD = -1.34 + 0.863 x SW + 12.4 /SW
QVD(1.3-1.8:1) PDmin = 0.019 + 1.310xSW + 0.026/SW
PDmax = -0.001 + 1.706xSW + 0.069/SW
PDmin = 0.75 + 1.310xSW + 40.3/SW
PDmax = -0.04 + 1.706xSW + 107/SW
QVD(1.9-2.6:1) PDmin = 0.052 + 1.864xSW - 0.013/SW
PDmax = 0.110 + 2.509xSW - 0.055/SW
PDmin = 2.05 + 1.864xSW - 20.15/SW
PDmax = 4.33 + 2.509xSW - 85.25/SW
QVD(3.0-6.0:1) PDmin = 0.048 + 3.010xSW - 0.039/SW
PDmax = 0.060 + 6.032xSW - 0.038/SW
PDmin = 1.89 + 3.01xSW - 60.45/SW
PDmax = 2.36 + 6.032xSW - 58.25/SW
QVD(7:1) PD = 0.013 + 6.842xSW + 0.005/SW PD = 0.51 + 6.842xSW + 7.75/SW
SVD(2.0-2.5:1) PDmin = -0.139 + 1.867xSW + 0.092/SW
PDmax = 0.005 + 2.395xSW - 0.008/SW
PDmin = -5.47 + 1.867xSW + 142.60/SW
PDmax = 0.2 + 2.395xSW - 12.4/SW
Lens program to calculate the projector distance is available on the BARCO web site :
http://www.barco.com/projection_systems/customer_services/lens_program.asp
R5976367 BARCOIQ GRAPHICS/REALITY 200L/300/400 10062002 13

2. Installation Guidelines
2.4.3 Lens installation
How to install ?
1. Take the lens out of its packing material
2. Slide the lensdoor to the left (image 2-4)
3. Fix the lens by placing it in the housing
Note: In case of a motorized lens the female jack must be in front of the male jack located in the upper-left part of the housing
in the projector (image 2-5)
4. Push carefully to lock the lens in the housing
5. Slide back the lensdoor to the right
Image 2-4
Image 2-5
2.4.4 Removing the lens
How to remove the lens ?
1. Slide the lens door to the left.
2. Unlock the lens by pulling the handle located on the right side of the projector (image 2-6)
3. Remove the lens out of its housing
Image 2-6
14 R5976367 BARCOIQ GRAPHICS/REALITY 200L/300/400 10062002
This manual suits for next models
4
Table of contents
Other Barco Projector manuals

Barco
Barco OVF-708 User manual

Barco
Barco REALITY 9300 User manual

Barco
Barco DP-1500 User manual

Barco
Barco F35 User manual

Barco
Barco OV-501 User manual

Barco
Barco OverView cDG67-DL User manual

Barco
Barco MGP D5 Instruction Manual

Barco
Barco R9000972 User manual

Barco
Barco FL40 series User manual

Barco
Barco CINE 6 User manual

Barco
Barco R9001310 User manual

Barco
Barco F70 Series User manual

Barco
Barco DP2K-10S User manual

Barco
Barco CineVersum 120 User manual

Barco
Barco F70-W8 User manual

Barco
Barco UDX 4K22 User manual

Barco
Barco HDF W series User manual

Barco
Barco CLM R10+ R90501001 User manual

Barco
Barco F22 Series User manual

Barco
Barco DATA 808s SP User manual