Basher Nitro Circus 1/10 short course truck User manual

·
INSTRUCTION
MANUAl


I
l.
SAFETY
PRECAUTIONS
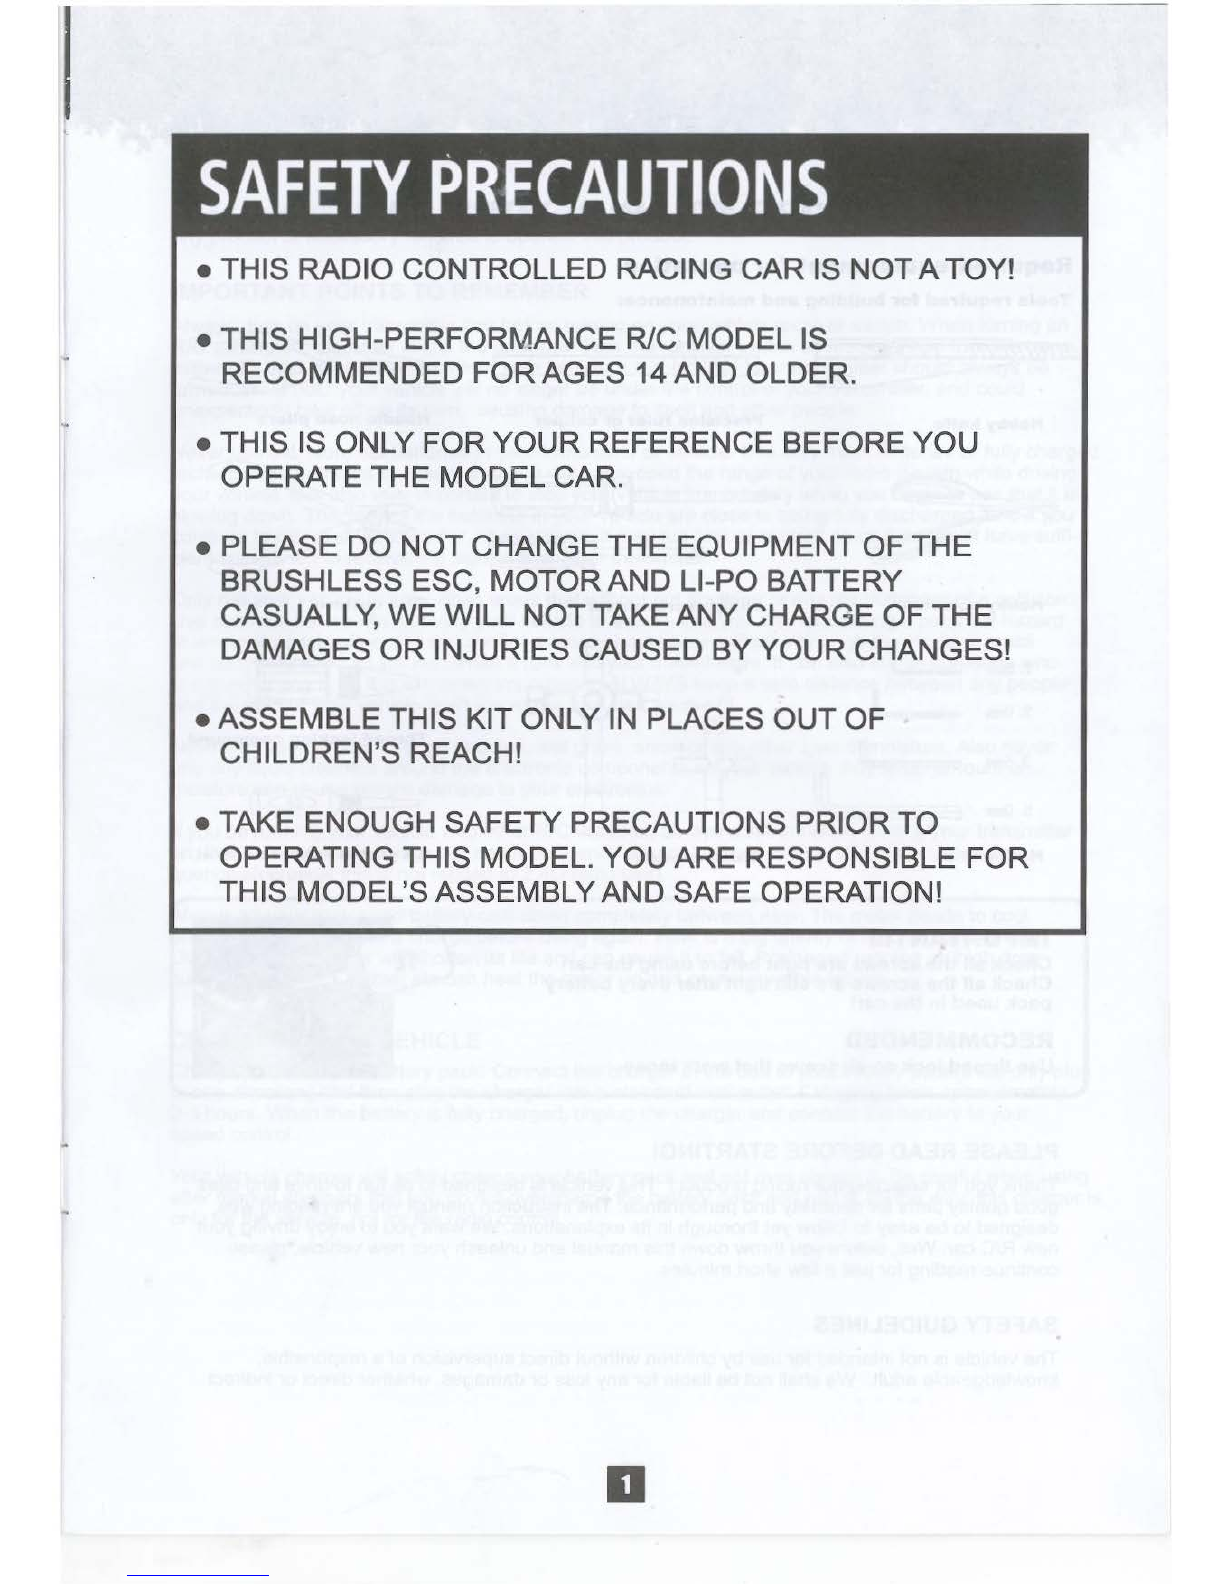
• THIS RADIO CONTROLLED RACING CAR IS NOTA TOY!
• THIS HIGH-PERFORMANCE RIC MODEL IS
RECOMMENDED
FORAGES
14AND
OLDER.
• THIS IS ONLY FOR YOUR REFERENCE BEFORE YOU
OPERATE THE MODEL CAR.
• PLEASE DO NOT CHANGE THE EQUIPMENT OF THE
BRUSHLESS ESC, MOTORAND LI-PO BATTERY
CASUALLY, WE WILL NOT TAKE ANY CHARGE
OF
THE
DAMAGES OR INJURIES CAUSED
BY
YOUR CHANGES!
• ASSEMBLE THIS KIT ONLY IN PLACES
OUT
OF
CHILDREN'S REACH!
• TAKE ENOUGH SAFETY PRECAUTIONS PRIOR TO
OPERATING THIS MODEL. YOU ARE RESPONSIBLE FOR
THIS MODEL'SASSEMBLYAND SAFE OPERATION!
D

... .
BEFORE YOU RUN YOUR CAR
Required
equipement
for
operation
Tools
required
for
building
and
maintenance:
mw»~
I'''''''''
Hobby
knife
Precision
ruler
or
caliper
-s=====:::=jt3E===5~
-s:::::========<
~~~
~
Hobby
scissors
Philips
screwdriver
1.5m
I
2.0am I
2.5mm
ill
5.0rmn
Hex
wrench
Cross
wrench
IMPORT
ANTI!!
Check
all
the
screws
are
tight
before
using
the
cart
Check
all
the
screws
are
still
tight
after
every
battery
pack
used
In
the
cart
RECOMMENDED
Usethread
lock
on
all
scews
that
work
loose
.
PLEASE READ BEFORE STARTING!
0
Needle
nose
pliers
Wire
cutters
Thread
locking
compound
c:
II(J
@:::>
D
CA
glue
&
rubber
cement
"'
~;<··
f~
Thank you for selecting our racing product ! This vehicle is designed
to
be fun to drive and uses
good quality parts for durability and performance.
The
instruction manual you are reading was
designed to
be
easy
to
follow yet thorough in its explanations. We want you to enjoy driving your
new
RIC car. Well, before you throw down this manual and unleash
your
new vehicle, please
continue reading for
just
a
few
short minutes.
SAFETY
GUIDELINES
The vehicle is notintended for use bychildren without direct supervision
of
a responsible,
knowledgeable adult. We shall not be liable for any loss
or
damages, whetherdirect
or
indirect
II

special, incidental,
or
consequential, arising from the use, misuse,
or
abuse
of
this product and/or
anyproduct
or
accessory required to operate this product.
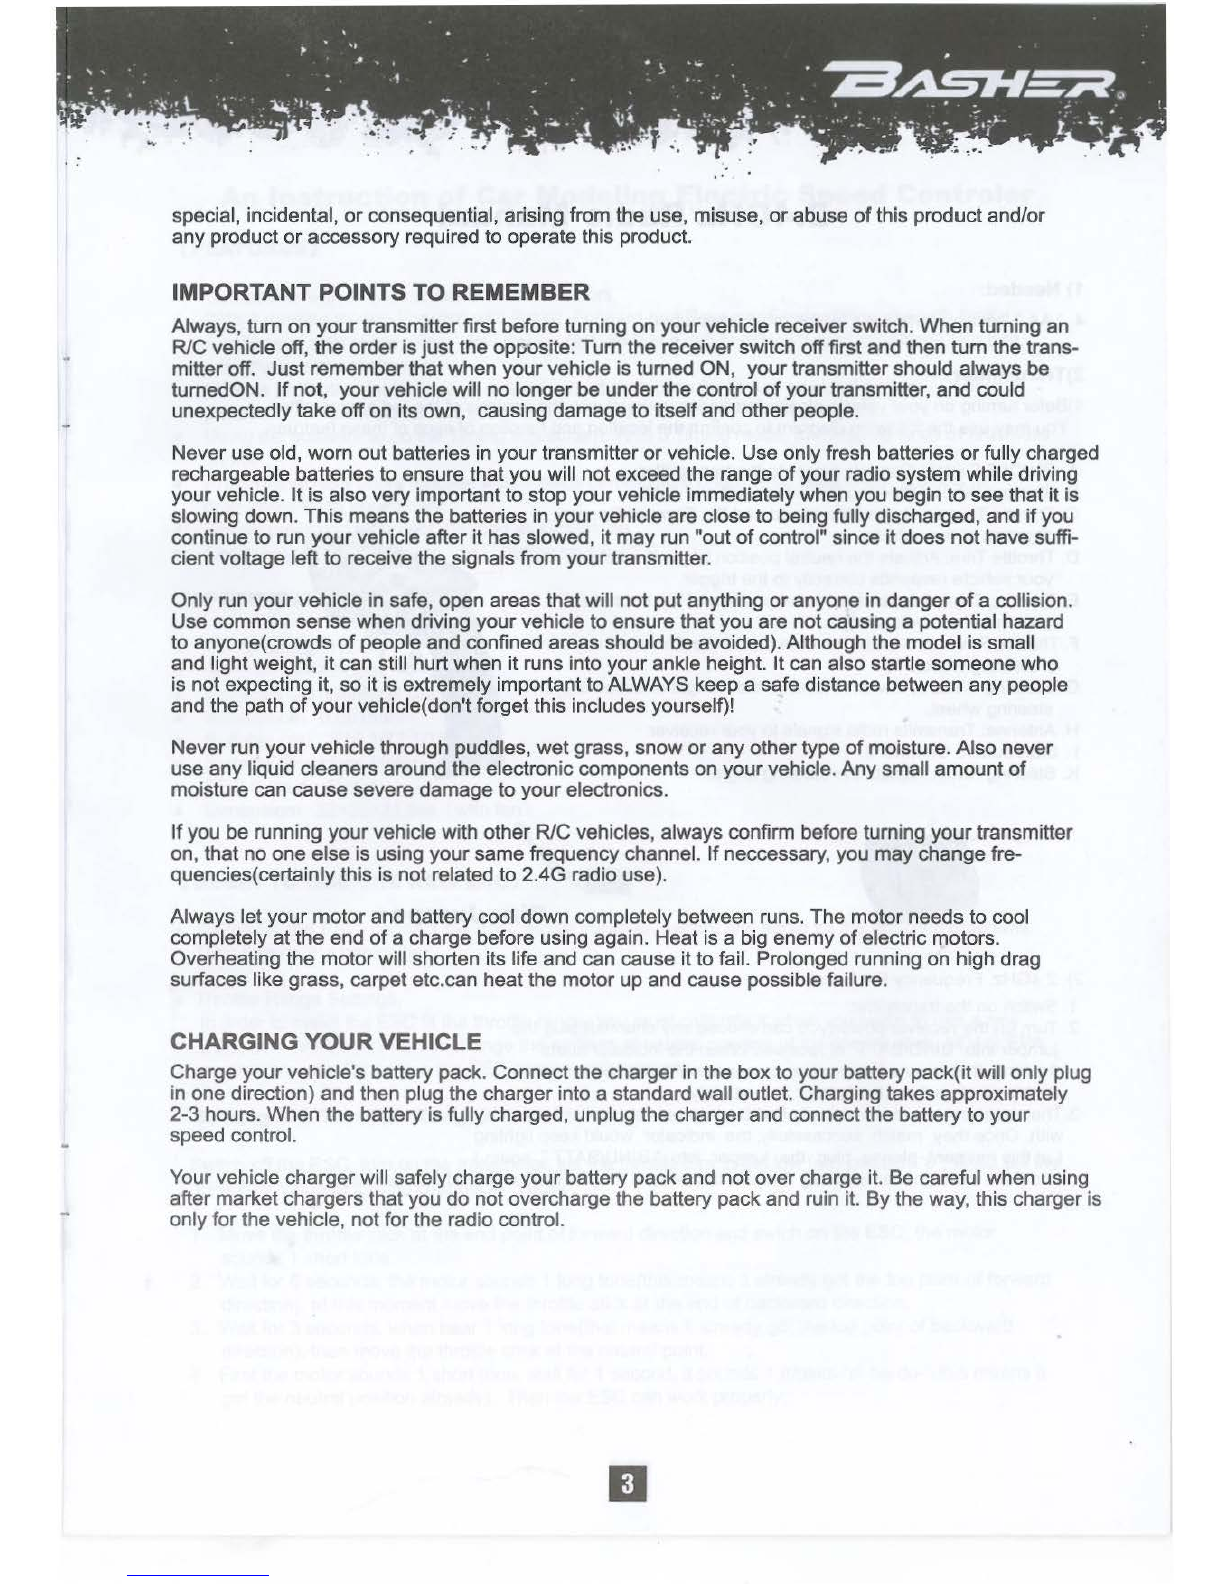
IMPORTANT POINTS TO REMEMBER
Always, tum on
your
transmitterfirst before turning on your vehicle receiver switch. When turning an
RIC vehicle off,
the
orderis
just
the opposite:
Tum
the
receiverswitch offfirst and then
tum
the trans-
mitter off. Just rememberthat when your vehicle is turned ON, yourtransmitter should always be
tumedON.
If
not, your vehicle will no longer
be
under the control
of
yourtransmitter, and could
unexpectedly
take
off
on its own, causing damage
to
itselfand other people.
Never use old, worn out batteries in your transmitter
or
vehicle. Use only fresh batteries
or
fully charged
rechargeable batteries
to
ensure that you will notexceed the range
of
your radio system while driving
yourvehicle.
It
is
also very important
to
stop
your
vehicle immediately when you begin
to
see that
it
is
slowing down. This means the batteries in your vehicle are close
to
being fully discharged, and
if
you
continue
to
run your vehicle after
it
has
slowed,
it
may run "out
of
control" since it does
not
have suffi-
cient voltage left to receive the signals from your transmitter.
Only run yourvehicle in safe, open areas that will not put anything
or
anyone in danger
of
a collision.
Use common sense when driving your vehicle
to
ensure that you are notcausing a potential hazard
to
anyone(crowds
of
people and confined areas should be avoided). Although the model
is
small
and lightweight, it can still hurt when it runs into your ankle height.
It
can also startle someone who
is notexpecting it,
so
it
is extremely important
to
ALWAYS keep a safe distance between any people
and the path
of
your
vehicle(don't forgetthis includes yourself}!
Never run your vehicle through puddles, wet grass, snow
or
any othertype
of
moisture. Also never
use any liquid cleaners around the electronic components on your vehicle. Any small amount
of
moisture can cause severe damage to
your
electronics.
If
you be running yourvehicle with other RIC vehicles, always confirm before turning
your
transmitter
on, that noone else is using your same frequency channel.
If
neccessary, you may change fre-
quencies(certainly this is notrelated to 2.4G radio use).
Always let your
motor
and battery cool down completely between runs.
The
motor
needs
to cool
completely
at
the
end
of
a charge before using again. Heat is a big enemy
of
electric motors.
Overheating the motor will shorten its life and can cause
it
to
fail. Prolonged running on high drag
surfaces like grass, carpet etc.can heatthe motorup and cause possible failure.
CHARGING YOUR VEHICLE
Charge
your
vehicle's battery pack. Connect the charger in
the
box
to
your
battery pack(it will only plug
in one direction)
and
then plug the charger into a standard wall outlet. Charging takes approximately
2-3 hours. When the battery is fully charged, unplug the charger and connect the battery
to
your
speed control.
Your vehicle chargerwill safely charge your battery pack and not
over
charge it. Be careful when using
after market chargers that you do notovercharge the battery pack and ruin it. By the way, this charger is
only
for
the vehicle, notfor the radio control.
II

2.4GHz
Radio
Manual
1)
Needed:
4
"AA"
alkaline batteries
(for
the radio transmitter)
2)Transmitter
1)Befor turning on your vehicle,please familiarize yourselfwith the controls
of
the radio transmitter.
You may use
the
following diagram
to
confirm the location and function
of
each
of
these featrues.
A.
ON/OFF Switch: Controls power to the transimitter.
B.
Steering Wheel: Steering the vehicle leftand right.
C. Throttle Trigger: Control the speed and the Forward/Recerse
direction
of
the vehicle.
D. Thrott
le
Trim: Adjuststhe neutral position
of
the throttel
so
your vehicle responds correctly to the trigger.
E. Steering Trim: Adjusts the neutral position
of
the throttel
so
yourvehicle travels straight.
F. Throttle Reverse Switch: Reverse the forward/reverse direction
of
steering wheel.
G. Steering Reverse Switch: Reverse the lift/right direction
of
steering wheel.
H.
Antenna: Transmits radio signals to your receiver.
I . Start button: Channel 3.
K.
Steering Knob: Adjusts the steering angle.
2) 2.4GHz Frequency Pin Setup
1. Switch on the transmitter.
Pin
.Jumper
2. Turn on the receiverpower(you can choose any channel),plug the
jumperinto "BIND/BATT"
of
recei
ver
. When the indicator starts
flashing, that means the receiver comes into the setcode mode.
Atthis point, pull out the jumperimmediately.
3.The receiver can automatically find the nearest transmitter to match
with. Once t
hey
match successfully, the indicator would keep lighting
(at
this moment please plug the jumper into " BIND/BATT" again ) .
And
if
the indicatorcontinuously flashes, that meansthey haven't matched successfully.
II

i
j
I
~
.
.....
E
....
An
Instruction
of
Car
Modeling
Electric
Speed
Controler
[FEATURES]
• C
om
patible with
all
senso
rl
ess
brushless motors.
•
With
3
runni
ng
modes-Forward
with
Brake,
Forward
an
d
Reverse,
Forward/Reverse
with
Brake.
• 4 options of start
mode,
from
slow
to
ve
ry
fast,
so
th
at it
can
tit different
road
conditions and
tyre,
effectively prevent
slippery.
• Multiple protect
ion
features:
Low
voltage cut-offprotection for lithium or nickel battery I Over-heat
protection I Throttle signal loss protection I Motor blocked
high
current protection.
•
Using
t
he
software
to
do
the
Ti
ming
adjustment.
Wi
th
5Timing
mode,
to
match
all
kinds
of
brushless
motor.
• Proportional
ABS
brake funct
ion
with
4s
te
ps
of
maximum
brake force a
dj
ustment, 6 stepsof
drag-bra
ke
force
adj
ustment.
• S
plash
proof
and
dustproof, prolong its service life.
• Easily
prog
rammed
wi
th
the
"SEr
button
on
the
ESC
(SPECIFICATIONS)
•
Mode
l no:
B1112-35A
• Battery: Li-xx2-3cell Ni-xx 5-9cell
• Constant
CurrenUBurst
Current: 35AI190A
• Resistance: 0.001
5ohm
• Suitable car:
1/10
1/
12
1/
16
• Suitable Brushless
Mo
tor: >10.5T
•
BEC
Output: 6V/2A
• Dimension:
32x30x31.511DD
<with
fan)
(BEGIN
TO
USE
THE
NEW
ESC]
•
Switch
off
the
ESC,
connect
the
ESC,
motor,
receiver,
battery
and
servo
as
the
attached diagrams.
Then
tum
on
the transmitter.
• Throttle Range Settings.
In
order
to
make
the
ESC
fit
the
throttle range,
you
must calibrate it
when
you
begin
to
us
e a new
ESC,
ora new transmitter, or change
the
settings ofneutral position oft
he
throttle stick,
ATV
or
EPA
parameters, etc. Otherwise
the
ESC
cannot work properly.
Setting
the
Throttle
Range:
Switch
offthe
ESC,
tum
on
the
transmitter, set
the
throttle t
rim
to
the low (off) position-"0", while set
the
"
EPAIATV"value
ofthrott
le
channel
to
"100%".
1.
Move
t
he
throttle stick atthe
end
point offorward direction
and
swich
on
the
ESC,
the
motor
sounds 1short to
ne.
2.·Waitfor 6seconds,
the
motor
so
u
nds
1long tone(this means it already got
the
top
po
int of
forward
direction), atthis moment
move
the
throttle stick atthe
end
of
backward
direction.
3.
Wait
for 3seconds,
whe
n hear
11ong
tone(that means it already got
the top
point ofbackwa
rd
direction), then
move
the
throttle stick at
the
neutral
po
int.
4. First
the
motor
sounds
1short
tone,
wa
it for 1
second
, it
sounds
1triplets "di-be-du-"(this
means
it
g
ot
the
neutral posi
tion
already).
Then
the
ESC
can
wo
rk
properly.

•
[
I
t:
Explanation
for
each
programmable
Item.
1. Running mode: With ·Forward with Brake" mode, the
car
can
go
forward and brake, butcannot
go
backward, this mode is suitable for competition; •Forward/Reverse• mode, the caronlycan
go
forward and
backward,
no
brake, this mode is usuallyused forthe Rock Crawler. "Forward/Reverse with Brake" mode,
which is suitable for daily training. When move the throttle stick from forward zone
to
backward
zone
for the
first time (The 1st"click"), the ESC begins
to
brake the motor, the motorspeeds down but
it
is still running, not
completely stopped, sothe backward action is NOThappened immediately. When the throttle stick is moved
to
the backward zone again (The 2nd "click"),
if
the motorspeed is slowed down
to
zero (i.e. stopped), the
backward action will happen. The"Double-Click" method can prevent mistaken reversing action when the
brake function isfrequently used in steering. By the way, in the process
of
brake
or
reverse,
if
the
throttle stick
is moved
to
forward zone, the motorwill run forward
at
once.
2. Reverse Force: Sets how much power will be applied in the reverse direction. Different value makes different
reverse speed.
3. Brake Force: The ESC provides proportional brake function. The brake force is related to the position
of
the
throttle stick. Maximum brake force refers
to
the force when the throttle stick is located
at
the
top
point
of
the
backward zone. A very large brake force can shorten the brake time, but it
may
damagethe gears.
4.
Drag Brake Force: It's a slightforce which caused
to
motorwhen the throttle
st
ick move to the neutral position.
It
is used
to
slowdown the glide speed.
5.
Throttle Neutral Range: It'sthe range when the throttle stickis in the neutral position but no output.
6.
Start Mode: It refers
to
the start force
of
ESC, you can choose differentstart mode according to t
he
road
condition, the tyre's ability
to
grip, and etc.
7.
liming
: The -.iming" item is usable for sensorless brushless motors.There are many differences among
structures and parameters
of
different brushless motors, soa fixed timi
ng
ESC is difficult
to
compatible with
all brushless motors.
It
is necessary
to
make the timing value programmable. Please select the mostsuitable
timing value according to the motoryou are just using. Generally, higher timing value brings out higher power
output, but the wholeefficiency
of
the system will be slightly lowerdown.
8.
Low Voltage Cut-Off: The function prevents the lithium battery pack from over discharging. It's designed for
prolonging its service life. Here,
we
suggest use the higher voltage protection value.
9.
Over-Heat Protection:
If
the function isactivated, the output power will
be
cut-off when the temperature
of
the
ESC is higherthan a factory-preset value, and the Green LED will flash. While motorwill emit 1 "beep-" tone
every 2 seconds. Itcan recover the output after the temperature down.
10.Protection mode: these two method is designed for the lipo battery achieving
at
the voltage protection value.
If
choosing cut offmain powerimmedaitely, the voltage achieve
at
the protection value, ESC
no
output. While
if
choosing lower power, the voltage achieve the protection value, ESC will still have a 20% poweroutput, the
car
can return back slowly, but
be
sure
to
change the battery.
•Program
the
ESC
with
Set
button.
First hold the "SET" key, switch on the ESC, motorwill sound a "beep" prompt tone.
.
1.
Hold SET key
for
3 seconds,
it
sounds 2
1ong
tones(Di-,
Du-)
, while red and green LED flash 2 times
at
the
sametime (*-,
*-
),then release the key and wait for 0.8 seconds
to
enterinto the programmable
item mode.
II

Battery
Ll-xx:
2-3cells
Nl-xx:5-9cells
=,__-I
'--------=~
[PROGRAM
THE ESCl
DC:6-12.6
SET
[QJ
CH1
DOD
CH2000
S+-
Receiver
Easily
programmed with the "SET" button.
Running Mode
Li-xx
3.0V/cell
No
protection
Servo
70%
100%

2.
First program the 1st
item"
running mode". motor emit"beep-", and the green LEDflashes
once
( *
-)
,
then release the SETkey to enter in. Motor emit"beep-, beep-", and green LED flashes
twice(*-,
* -),
enter the 2nd item; So,
if
motorsounds N tones, and green LED flashes N times, that meansenterthe Nth
items. But
if
the "N" is bigger than the number"5", a long time flash and long "beep--" tone will represent
·s·.
Forexample,
if
the situation is as following:
motorsounds 1 long tone "
beep-"and
1 short tone"beep-
",
and the green LEDflashes ( *
-,
* -) ,then
please release the key to enter the NO 6th item. While motoremit a long tone and 2 short
tone(Beep-,
beep-, beep-), and green LED flashes
<*
--, *
-,
*
-)
, release the key to enterthe 7th item.And so on.
After the 10th item programmed,
it
would enterthe 1stitem again.
3.
After hearthe indication voice
of
corresponding programmable items then press the set key
to
choose the
programmable value(you will hear a "beep" tone), the number
of
tones and flash times
of
red LED mean
the serial number
of
the value you are choosing.All the tones under this mode are start with two syllable
(di-du-), and red LED will flash
at
the same time(1 time means the 1st value, 2 time means the 2nd
value...). Short
of
pressing SET key afterhearthe corresponding prompttone,
it
will reenter the
programmable item mode.
4.
Hold
SET
key
for
3 seconds under programmable items, the motoremit2Jong tones(di
-d
u-),
red and
green LED flash
at
the same time C* -,
*-
) , this means
it
isgoing to enter the parameter storage
precedure. Wait
for
another 1 second, motoremit 1 long
tone(du-),
red and green LED flashes once
at
the
same time, this means the storage finished, release the SETkey, switch offthe ESC,
it
can work normally
when re-energized.
Attention:
1.
A short prompttone will emit after press the SET key each time.Thisjust means pressed the key already,
but
no
flash.
2.
The prompttone in programmable items mode are all with the green LED flashes. While the
tone
inthe
options
of
programmable value mode are with the red LED flashes.
3.
The parametervalue can be updated through SET key everyenergization.
4.
The parametervalue can be stored onlyunderthe programmable item mode to press the
SET
key
for
a
long time.
[
Reset
All
Items
To
Default
Values]
1.
Tum on thetransmitter,pull the throttle stick to the maximum position, then switch on the ESC.
2.
Wait for 6 seconds, motorsounds a long tone(beep--), press the "SET" button on the ESC.
3.
Hold SET key for 3 seconds, motorsounds 2 long
tone(beep-
,beep-),this means ESC enters intothe
parameters stored procedures. Wait
for
another 1 second when hear 1 long tone
it
means
the
restores
finished.
At
this moment release the SET key and throttle stick,
it
can work normallyafter separated.
[LED STATUS
AND
ALERT TONES]
1.Jn
normal use,
if
the throttle stick is in the neutral range, neitherthe red LED northe green LED lights.
2. The green LED flashes quicklywhen the
car
is running forward, while red LED lights when the
car
is braking
and
it
will flash quicklywhen
car
run backward
..
3.
When the over-heat protection happens, the green LED will flash and 1 alert tone will be emitted every 2
seconds.
4.
Battery voltage protection. The red LED flashes, and 1 alert tone(beep)
em
itted every 1 second;
5.
When the
ESC
can'tdetect the normal throttle signal, the red LED flashes, and 2 alerttones(beep, beep)
emitted every 1 second.
1!1

A
Special
Instructions
About
Batteries
Contents:
1. Keep batteries/storage batteries
out
of
reach
of
children.
2. Do not let batteries lie around openly. Tllere is a risk
of
batteries being swallowed by children
or
pets.
In such case,
seek
instant medical care!
3. Batteries/rechargeable batteries must neverbe short-circuited, taken apart
or
thown into fire.
They might explode!
4. Leaking
or
damage batteries/rechargeable batteries might cause acid
bums
when getting into contact
with skin. Therefore, use suitable protective gloves.
5.
Conventional batteries mustnot be recharged. Danger
of
fire and explosion! Only charge rechargeable
batteries which are intended forthis purpose, use suitable rechargeable battery chargers..
6. Pis observe conrect polarity
of
batteries/rechargeable batteries and the connection
of
a re-chargeable
battery pack{note plus/+ and minus/-) when inserting the batteries.
7.
If
the device is
not
used fora longer period
of
time (eg storage), take
out
the inserted batteries/
rechargeable batteries
of
the remote control to avoid damage from leaking batteries/rechargeable
batteries.
Recharge the rechargeable battery about every 3 months, because otherwise there may a so called
deep discharge because
of
the selfdischarge, which makes the rechargeable batteries useless.
8. Always exchange the entire set
of
batteries
or
rechargeable batteries.
Do notmix full batteries/rechargeable batteries with half-full ones.
Always use batt·eries
or
rechargeable batteries
of
the same type and manufacturer.
9.
Nevermix batteries and storage batteries. Either use eight batteries
or
eight rechargeable batteries
for
the remote control/transmitter.
Please Note:
Before the rechargeable battery pack delivery its maximum power, several complete dis-charge and
charge cycles are necessary.
Always drive the rechargeable battery pack empty, since recharging a
"half-
full" rechargeable battery
pack can cause a
so
called memory effect. That means that the rechargeable battery pack loses its
capacity,
it
no
longer releases all
of
its saved energy, drive time is decreased.
If
you are using several rechargeable battery packs
or
rechargeable batteries, purchasing a high quality
charger maybe worthwhile.
They are normally also suitable for fast charging
of
rechargeable batteries.
For this purpose, proceed as follows:
If the rechargealbe battery pack was taken directly from the vehicle and is
st
ill hot, wait untill the
rechargeable battery pack has cooled down before you recharge. (min.
of
5-10 minutes)
Connect the plug-in charger with a proper mains socket.
Connect the rechargeable battery packwith correct polarity with the plug-in charger.
Normally the special design
of
the two plugs avoids the incorrect connection
of
the rechargeable battery.

Attention:
Do
not use any force when plugging in it!
For
reason
of
safety place the rechargeable battery pack on a non-flammable surface,eg. a tiled floor.
Keep the rechargeable battery pack awayfrom flammable objects.
Neverleave the rechargeable battery pack unattended.
The
rechargeable battery pack getswarm during charging, this is normal.
Separate the rechargeable battery packfrom the plug-in charger aftercharging, pull the plug-in charger
from the mains socket.
Before using the rechargeable battery pack in the vehicle, wait until it has completely cooled down.
After
your
playing, please
do
not
forget
to
cut
the connections
of
battery and ESC!
Disposal:
The
user
is legally obliged(battery regulation) to return used batteries and storage batteries.
Do
not dispose
of
used batteries via the household rubbish!
Batteries/storage batteries containning harmful substances which been disposed via the household
rubbish
is
prohibited.
You can return used batteries/accumulators free
of
charge
to
any collecting point in your local
authority, so that you comply with your legal obligations and make yourcontribution
to
enviromental
protection.
Declaration for Using
of
Our Products
Even
if
the vehicle is quite small
at
the first glance, there
is
risk
of
injuries in the case
of
crash with
people(or animals), because
of
the high acceleration capacity and the high achievable speed.
Sharp edges and rotating parts also present a high danger!
This
is
why
you should drive very responsibly and carefully, this is especially the casefor inexperienced
drivers.
So, here
we
declaration as below:
1. Please do
note
this manual carefully, especially the attentions parts and
if
you are a new player
without enough experience, we will not take
any
responsibility for the cardamages
or
injuries caused
by
incorrect operation!
2. Please do not change the matches
of
the brushless ESC, motorand the Li-Po battery casually,
if
you
want
to
make a change, please do ask for ideas
of
professional people, incorrect and unsuitable
matches will effect the functions and the car's high performance, even itwill cause the damages
of
the electronic parts and the crash
of
the carl
We do nottake the responsibility
of
cardamages and injuries
of
unsuitable matches
or
equipment
changes!
3.
We
have right
to
change the specification and parameter
of
the model and without notice in advance.
pistake the material object
as
the standard!

1.Diff.
Gearbox
BS30063
BS30066
BS30037 BS30066
BS30065
BS30063
BS30064 BS33037
ss3oos1
2.
Gearbox
Assembly
BS30036
BS30036
m

3.
Aiumioumshock
absorber
Assembly
BS33068
•
4
.Servo
saver
Assembly
BS33145
•
-
-
-
-
-
-
8532643
-----c:!., WBS33021
m

5.Central
Diff.
gearboxAssembl
BS30095
BS32848
BS3314
~
BS3~6~
>(~~
,
K'*
,.,.
"'
,..
.,
,..,..,...
/
/
....-
"'
,
~
BS32848
BS33147
6.Motor
Assembl
y
BS30088
138
-T
m

II
7.
Exploded
view I
i
8530084
8533311
------
...
,/,()
I
I
I
I
I
I
I
'
....
8532770
8530801
•
8532~-
,'
853006
~:0---
~
8
---~
rt:,.
8532770
853314~53080
1
8530240
Al A
8532785
l ,
j53008
~
.1
'J~
8S,.331
5~
A
.4
85302/o
'
8530094
'
8530083
")..
,533156
~
t' & / -
....
13S32
~A
m
/
8533137
A
8S3278
5
,,
_:;~-
~
-.c...-
A
--A
~53291
1-,/,~
'
,853
' \
A
'
--~---'
....
_
,.
/'
-A
8532785
r
8530094
8530084
I
8533385

33068
BS30286
-
-~
BS30284
'-'-
286
~~
-
BS33139
' ,
·6
;
156
.
BS
3~8~
.-J.
BS33
1
56
.....
;~~
~S3~
~
7
~
3080
1 _
~--
', ' ' /
.--\
BS32630
',,BS32770
\
BS3006
~~
BS33143
v
BS32770
BS30801
BS30860
I
1/,----
----,
!
()
I
I f
I
I
BS33068--I
I
i'
'....._
._,
/
~
..
_____ /
I
I
I
I
I
I
m
' '
BS30100
I
I
BS30100

~3068
-6
530286
~
~86
30357-
T
~
6533139
---
I
6532924
1
56
65
3~8~
_A
6533156
S3~L
-
~~o
~
~
,_
r"''
--
0801
-----
~-\
6532630'
',,
6530372-T
\
653006
(.f'_:;•'
~533143
v
;~
6530801
6530372-
T
/
,-
---
! 0
I
I
1
I
1
6533068-
-~
l
I
i'
I
I' '
' ',
m
6533146
~
6533144
6530099~
6530109
.--6530083
sao~~a'27
~
~
,.,...-ssaoo97
~3146
6533036
R
6530099
653
2
61112
6533068
__
____
(
(
...
,
-~,-,
I (1
''
\I
)
'
6530100
I
I
I
6530100

Ia.
Upgraded Exploded view I ------
8$30099
8$30084
8$33311
8$30372-T
a:::·~~
-
-
BS3006~--
~
BS
/~
rr;,.
8530372
-T
8S3314;iS30801
8530240
A A
B$302/o
'
8$3009~
~
8530083
A-(.(
...
~533156
~
t
A.
/
-,A
13532
~
I
8533137
1
853278
5
~'
,~./-A
''·A
A
4, ,
,."-
'
-I.
J'
--1.
8532785
r
8530084
I
' ' \
/
853338
5

Troo
er
Nitro
Circus
s
8830023-UR
servo
mount
(SKU:A2016T·30023)
,,
8830064.Spur
gear
(A2016T
-30064)
B830100-BT3'14
BH
cross
screw-
10pcs
(A2016T
·
30100)
1tttt
11111
8
830028-An
t
enna
pipe&
cap
1set
(A2011T-30028)
I
I
8830065-Diff.
gear
complete-1pc
(A2016T·30065)
,,
BS30094-1803*10
FH
screws-10pcs
(A2018T
-3CJO!W)
,
,.
a
[!
0 n
8830107
.Susp.arm
linkage
plate-1pc
(A2016T-30107)
8830217
·Front B
8302
1
8·Rear
bulkheads
left&
bulkheads
left&
right
(A2016T-30217)
right (
249000230)
8830284-Front
shock
tower
A2018T..J0284)
8830285·Rear
shock
tower
(A2016T-30285)
8
830036-0iff.
gear
housing
(A2016T-30036)
8830066-Diff.
bevel
gear
8.w/shaft
(A2016T-30066)
8830095-IS03'15
FH
screw
10pcs
(A2016T
-30095)
88
30061-0iff.
gearbox
complete·
1pc
(A2016T-30061)
8830067
·wheelshaft
pin·10pcs
(A2016T·30067)
8830097
-B
T2.6"6
8H
screws-10pcs
(11
0BS..J0097)
IIIII
'''''
IIIII
'''''
8830109-Ball
stud
8(8)-10pcs
(A2016T-30109)
B830235.pln
for
upper
susp
.
arm·
4pcs
(A201&
T
-3023Sl
~
8830286·8ody
mount·2pcs
(A2016T-30266
)
\\
8830110·8all
stud
C-10pcs
(A2016T-30110)
B830236·pln
for
lower
susp
.
arm-4pcs
(A2016T·302
38)
,
8530299-Donbone-
2pcs
(A20
1
8T..J0299)
~
arts
8830062-Maln
pinion
gear
w/shaft
&
pin
(A201&T-3ooa2)
~
8830073-
8
all
bearingq~S'~p10*4·
2pcs
(A2016T
-3007
3)
8830085·M3*3
grub
scraws-10pcs
(1188-30085)
••
•••
list
8830063·
Diff.
bevel
gear
8.w/shaft
(A2016T-30063)
8830075-8all
bearing~p1
O'q~15"4·
2pCS(A2016T·30075)
BS30087
-M4
*4
grub
acrew
10
pcs
(A2G11T-30017)
•••••
•
•••
8830098-8T3'8
8H
883il099-BT3'10
screws-10pcs
8H
screw
10pcs
(249000001)
(A2016T-30099)
8830116-Unlv.joint
8
w/
M4*4
screws·
3pcs
(A2ot&T-30116)
8830240-1803
*
12
FH
screw-1
0pcs
(
A2016
T
-30240)
IIIII
,
••••
8830377
·
inner
sponge-2pcs
(
A20
16T
-30377)
11111
11111
8830117-Univ.joint
C
wl
M4'4
screws-
4pcs
(A2016T-30117)
8830249-Drive
shaft-2pcs
(A2016
T
-30249)
8830405..Shock
sleeve
(
A2016T
-3
0405)
(J.
,,
Table of contents
Other Basher Motorized Toy Car manuals
Popular Motorized Toy Car manuals by other brands

Lean Cars
Lean Cars KP-6699 installation instructions

BS RACING
BS RACING DUNE RACER instruction manual

Serpent
Serpent ninesixty 960 instruction manual

Famosa
Famosa FEBER Disney Princess Roadster manual

Carrera RC
Carrera RC Mario Kart 8 Mario Assembly and operating instructions

Peg-Perego
Peg-Perego IGOR0048 Use and care

Kyosho
Kyosho MINI-Z Racer AWD MA-10 Type instruction sheet

Jamara
Jamara BMW i8 instruction manual

Viessmann
Viessmann 8410 Operation manual

Tekno
Tekno EB410.2 Building instructions

Elenco Electronics
Elenco Electronics AmeriKit AK-870 Assembly instructions

Helion
Helion Conquest 10ST XB HLNA0762 Owner's manual & technical information