Baumr-AG BM X20i User manual

DIGITAL INVERTER
GENERATOR USER'S MANUAL
MODEL: BM X20i

1
PREFACE
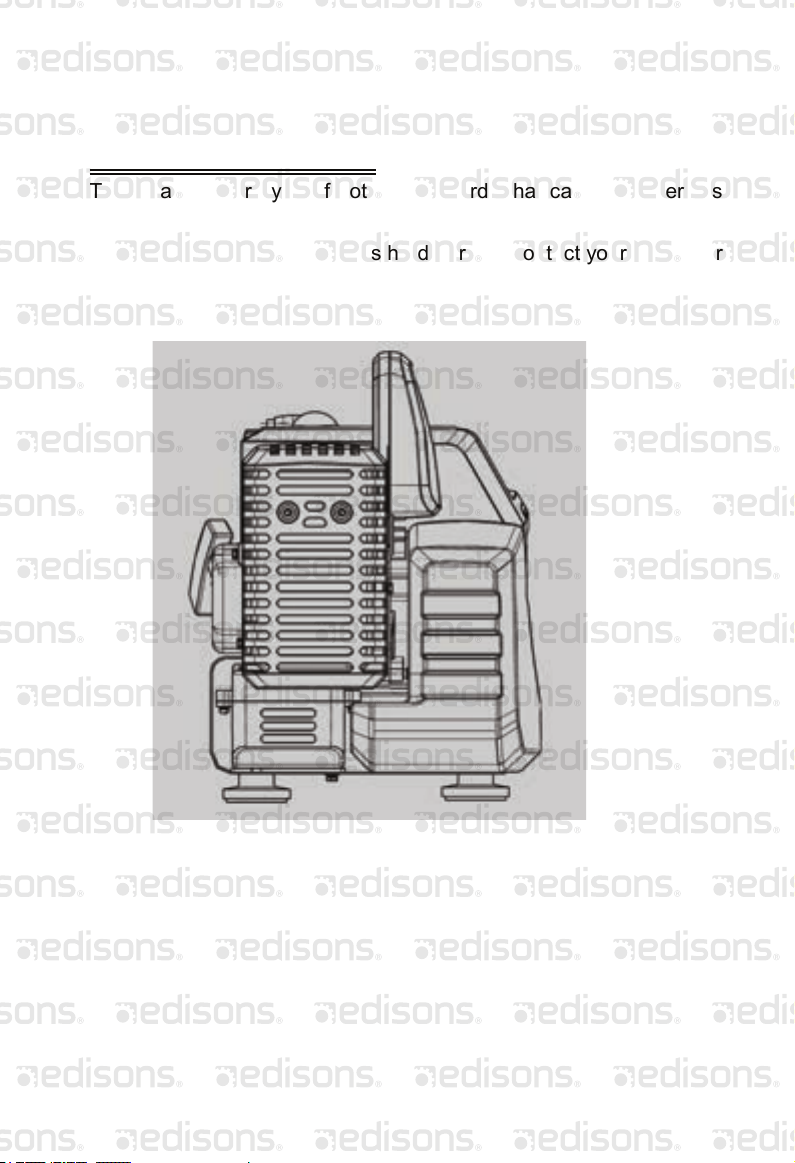
Thank you for purchasing the High-tech digital inverter generator.
This manual covers the information on how to operate and maintain
the BM X20i generator, please read it carefully. All information in this
publication is based on the latest product information available at
the best results from your new generator and to operate it safely.
As you read this manual, you will find information precede.
symbol. That information is intended to help you avoid
damage to your generator, other property, or the environment.
When your generator needs scheduled maintenance, keep in
mind that your servicing dealer is specially trained in servicing your
generators.
Pay special attention to statements preceded by the following
words.
You can be killed or seriously hurt if you don’t following
instructions.
You can be hurt if you don’t follow instructions.
ATTENTION:
The generator is a potential of electrical shock if misused.
Do not expose the generator to moisture, rain or snow.
Do not let the generator get wet, and do not operate it with hands.
Keep this owner’s manual handy, so you can refer to at any time.
This owner’s manual is considered a permanent part of the
generator and should remain with the generator if resold.
No part of this publication may be reproduced without written
permission.

2
CONTENTS
1. SPECIFICATION CHART…………………………………………3
2. SAFETY LABEL LOCATIONS……………………………………4
3. SAFETY INFORMATION…………………………………………5
4. PRE-OPERATION CHECK………………………………………7
5. STARTING THE ENGINE………………………………………8
6. GROUND SYSTEM………………………………………………9
7. GENERATOR USE………………………………………………10
AC APPLICITIONS………………………………………………11
AC OPERATION …………………………………………………12
HIGH ALTITUDE OPERATION…………………………………12
8. STOPPING THE ENGINE ………………………………………13
9. MAINTENANCE…………………………………………………13
10. TRANSPORTING/STORAGE …………………………………15
11. TROUBLE SHOOTING …………………………………………16
12. ELECTRICALWIRING DIAGRAM ……………………………18

3
Engine 2-stroke, single cylinder
Displacement 55cc
Compression 7.6:1
Rated RPM 5000
Ignition system Non-contract transistorized
ignition
Start system Recoil hand-operated
Fuel tank capacity 3.5l (0.92 gallon)
Fuel Non-ethanol unleaded petrol
Lubricant FB grade 2-stroke oil
Ratio of fuel & lubricant 50:1
Rated AC frequency 50Hz 60Hz 50Hz
Rated AC voltage
220v/230v
110v 240v
Rated AC current5.5A 7.2A 5.0A
Rated AC output 1200VA
Surge AC output 2000VA
Total harmonic distortion ≤3﹪
Power factor cos 1.0
Frequency stability ±0.1Hz
Voltage stability ±4V
Operating noise level 60Db(7m)
Fuel consumption (g/kw*h) 550 at full load
Continuous operation at
1/2 rated load
6.5h
Dry weight 8.5 kg
SPECIFICATIONS

4
SAFETY LABEL LOCATIONS
These labels warn you of potential hazards that can cause serious
injury. Read them carefully.
If a label comes off or becomes hard to read, contact your generator
dealer for a replacement.

5
Warning
Petrol/fuel/gasoline is extremely flammable – keep clear of naked flames or
other ignition sources.
• Do not spill fuel. If you spill fuel, wipe it from equipment immediately – if fuel
gets on your clothing, change them immediately
• Do not smoke near fuel.
• Always shut off the engine before refuelling.
• Do not refuel a hot engine.
• Open the fuel cap carefully to allow any pressure build-up in the tank to
release slowly.
• Always refuel in well ventilated areas.
• Always check for fuel leakage. If fuel leakage is found, do not start or run the
engine until all leaks are fixed.
• After every use, place the engine switch in the OFF position and close the
fuel tap.
Running petrol engines in confined areas CAN KILL IN MINUTES. Engine
exhaust fumes contain carbon-monoxide – a deadly gas that you cannot smell
or see.
NEVER run a petrol engine in confined areas EVEN IF windows and doors are
open. ONLY run petrol engines OUTDOORS and away from doors, windows
and vents.
Warning
Electrical shock and fire hazard - Never connect the generator to a mains
electrical circuit.
Electrical shock hazard - Keep the generator dry at all times. Never operate the
generator
with wet hands.
Please read the user's manual carefully before operating the
equipment.

6
if operated according to instructions. Read and understand this
owner’s manual before operating the generator. You can help
prevent accidents by being familiar with the generator controls,
and by observing safe operating procedures.
Operator Responsibility
■Know how to stop the generator quickly in case of emergency.
■Understand the use of all generator controls, output sockets, and
connections.
■Do not let children operate the generator.
Carbon Monoxide Hazards
■
Exhaust contains poisonous carbon monoxide, a colorless and
odorless gas. Breathing exhaust can cause loss of
consciousness and may lead to death. To keep exhaust gas
from accumulating, provide adequate ventilation.
Electric Shock Hazards
■
The generator produces enough electric power to cause a
serious shock or electrocution if misused.
Fire and Burn Hazards
■
The exhaust system gets hot enough to ignite some materials.
- Keep the generator at least 1 meter (3') away from buildings
and other equipment during operation.
- Do not enclose the generator in any structure.
- Keep flammable materials away from the generator.
■
Fuel vapors are extremely flammable and may ignite after the
engine has started. Make sure that any spilled fuelhas been
wiped up before starting the generator.
SAFETY INFORMATION
The generator is designed to give safe and dependable service

7
PREPARATION
1. Fuel.
Use a mixture of non-ethanol unleaded petrol and 2-stroke
engine oil in a ratio of 50:1 (20ml oil per liter of petrol). Use
a funnel when filling and do not over-fill the fuel tank.
2. Air filter.
Inspect the air filter for accumulations of dirt and dust. A
dirty filter reduces engine efficiency and power output. If
dirty, clean the air filter element in warm water and mild
detergent, then dry it. Place a few drops of oil it then
squeeze is to distribute the oil before re-installing it.
Air filter (appearances may
vary to that pictured)
ENGINE SWITCH
To run and stop the engine:
OFF ("O"): To stop the engine.
ON ("I"): To start and run the engine.
Engine Switch
(appearances may vary
to that pictured)

8
STARTING
1. Place the fuel tap in the ON position, then press the priming
build repeatedly until fuel can be seen in the clear tube.
2. If the engine is cold, place the choke in the COLD position. If
the engine is warm, place the choke in the RUN position.
3. Place the engine switch in the ON position.
4. Gently pull the starter cord until you feel it engage with the
motor, then pull rapidly.
Note: If excessive petrol ("flooding")
causes starting difficulty, remove the spark
plug, close the fuel tap, place the engine
switch in the OFF position, place the choke in
the RUN or HOT position and fully open the
throttle, then pull the starter several times.
Afterward, re-install the spark plug and follow
the normal starting procedure.
Do not allow the starter grip to snap
back against the engine. Return it gently to
prevent damage to the starter. Priming Bulb

9
GROUND TERMINAL
The generator ground terminal is connected to the generator
frame, the metal non-current-carrying parts of the generator, and the
ground terminals of each electrical connection socket.
Before using the ground terminal, consult a qualified electrician,
electrical inspector or electrical codes authority that apply to the
intended use of the generator.
Output Indicator
OVERLOAD ALARM INDICATOR
If the generator is overloaded (in excess of 1250VA ), or a short-
circuit occurs in a connected appliance, the indicator light will
become red. After approximately 4 seconds, current to the
connected appliances is shut off. When under normal loads, the
indicator is green.

10
GENERATOR USE
CONNECTIONS TO A BUILDING ELECTRICAL SYSTEM
Connections for standby power to a building electrical system must
be made by a qualified electrician. The connection must isolate the
generator power from utility power, and must comply with all
applicable laws and electrical codes.
Improper connections to a building electrical system can allow
electrical current from the generator to feedback into the utility lines.
Such feedback may electrocute utility company workers or others
who contact the lines during a power outage, and the generator may
explode, burn, or cause fires when utility power is restored. Consult
the utility company or a qualified electrician.
Ground Terminal

11
AC APPLICATIONS
Before connecting an appliance or power cord to the generator:
Make sure that it is in good working order. Faulty appliances or
power cords can create an electrical shock hazard.
If an appliance begins to operate abnormally, becomes sluggish or
stops suddenly, turn it off immediately. Disconnect the appliance,
and determine whether the problem is the appliance, or if the rated
load capacity of the generator has been exceeded.
Make sure that the electrical rating of the tool or appliance does not
exceed that of the generator. Never exceed the maximum power
rating of the generator. Power levels at the rated maximum
(1250VA) should be used for no more than 15 minutes continuously.
Substantial overloading will bypass the AC circuit protector.
Exceeding the time limit for maximum power operation will shorten
the service life of the generator.
Limit operation requiring maximum power to 15 minutes. Maximum
power is 1250VA.
For continuous operation, do not exceed the rated power of
1200VA.
In either case, the total power requirements (VA) of all appliances
connected must be considered. Appliance and power tool
manufacturers usually list rating information near the model or serial
number.

12
AC OPERATION
1. Start the engine and make sure the output indicator is green.
2. Plug in the appliance require more than their rated wattage for
startup.
3. If the generator is overloaded (in excess of 1250VA), or a short-
circuit occurs in a connected appliance, the indicator light will
become red. After approximately 4 seconds, current to the
connected appliances is shut off, then the output indicator light
(green) will go OFF. Stop the engine and investigate the problem.
Determine if the cause is a short-circuit in a connected appliance or
an overload. Correct the problem and restart the generator.
HIGH ALTITUDE OPERATION
High altitude performance can be improved by specific modifications
to the carburetor, If you always operate your generator at altitudes
above 1500 meters (5000'), have your servicing dealer perform this
carburetor modification. This engine, when operated at high
altitude with the carburetor modification, engine horsepower will
decrease about 3.5% for each 300m (1000') increase in altitude.
The effect of altitude on horsepower will be greater than this if no
carburetor modification is made.

13
STOPPING THE ENGINE
To stop the engine in an emergency, simply turn the engine switch to
the OFF position. Under normal conditions, use the following
procedure.
1. Unplug appliances from the generator sockets.
2. Turn the engine switch to the OFF position.
MAINTENANCE
1. Daily check
★Check all screws and nuts are tight.
★Check for fuel or air leaks.
2. Check after running 20 hours
★Clean the air filter and clean or replace as necessary.
★Clean the fuel strainer.
3. Check after running 50 hours
★ Tighten the cylinder head nuts.
★ Clean any accumulated carbon both in the combustion chamber
and in the exhaust of the cylinder
★ Clean any accumulated carbon on the spark plug, and adjust the
gap to 0.6mm.
★ Clean any accumulated carbon both in the intake and in the
exhaust.
Safety Precautions
■Make sure the engine is off before you begin any maintenance
or repairs. This will eliminate several potential hazards:
—Carbon monoxide poisoning from engine exhaust.
Be sure there is adequate ventilation whenever running the
engine.

14
—Burns from hot parts.
Let the engine and exhaust system cool before touching.
—Injury from moving parts.
Do not run the engine unless safe to do so.
■
Read the instructions before you begin, and make sure you
have the tools and skills required.
■
ProblemsThat May Affect Emissions
If you are aware of any of the following symptoms, have your engine
inspected and repaired by your servicing dealer.
■
Hard starting or stalling after starting.
■
Rough idle.
■Misfiring or backfiring under load.
■
Afterburning (backfiring).
■
Black exhaust smoke or high fuel consumption.
NOTE: Emission related items.
(1) Service more frequently when used in dusty areas.
(2) These items should be serviced by your servicing dealer, unless
the owner has the proper tools and is mechanically proficient.
See the Shop Manual.
(3) Log hours of operation to determine proper maintenance
intervals.

15
Recommended spark plug: L8RTC.
To ensure proper engine operation, the spark plug must be properly
gapped and free of deposits.
An incorrect spark plug can cause engine damage.
The gap should be: 0.50—0.70mm
STORAGE
If the engine is not to be used for an extended period, it must be
maintained as follows:
1. Remove the fuel in the tank and carburetor, then fully close the
choke.
2. Remove the spark plug, and pour approximately 30ml of engine oil
into the spark plug hole, then slowly draw the starter several times.
3. Bring the piston to the top dead center, the install the spark plug.
4. Use a soft cloth with a little engine oil to clean the surface of the
engine, then store the unit in a dry place.
0.50-0.70mm
SEALING WASHER
SPARK PLUG SERVICE
In order to service the spark plug, you will need a spark plug wrench
(supplied). Before removing the spark plug, clean around it to
ensure no dirt or material enters the engine.

16
TROUBLESHOOTING
1. Engine does not start
★Fuel contaminated with water. Drain fuel from tank and
carburettor, and replace fuel.
★The spark plug has accumulated carbon or is broken. Clean
and/or replace spark plug.
★Poor contact of the high-voltage wire with spark plug. Check
connection.
2. Engine starts, but runs slowly
★ Choke is closed. Place choke in HOT or RUN position.
★ Incorrect petrol-oil ratio. Ensure correct ratio (50:1)
★ Fuel contaminated with water. Drain fuel from tank and
carburettor, and replace fuel.
3. Engine runs, but lacks power
★ Blocked air filter. Clean and/or replace.
★ Accumulated carbon in the exhaust. Clean.
★ Piston, piston rings and cylinder worn. Replace parts as required.
★ Fuel strainer blocked. Clean.
★ Leak in air intake or combustion chamber not sealed. Repair.
4. Engine stops suddenly when running
★ Run out of petrol. Refuel.
★The spark plug has accumulated carbon or is broken. Clean and/
or replace spark plug.
★Poor contact of the high-voltage wire with spark plug. Check
connection.
★ Fuel strainer blocked. Clean.
★ Fuel contaminated with water. Drain fuel from tank and
carburettor, and replace fuel.
★ Vent hole in fuel cap blocked. Clean.

17
Appliance does notoperate:
Is the output indicator
light ON?
Is the overload
indicator on
Take generator to an
authorized service center
Check the electrical
appliance or equipment
for defects.
Replace the electrical
appliance or have it
repaired.
Restart the generator.
NO
YES
NO
NO DEFECTS
DEFECTS

18
ELECTRICAL WIRING DIAGRAM
BM X20i

Some experts believe the incorrect or prolonged use of almost any
product could causeserious injury or death. For information that
may reduce your risk of serious injury or death consult thepoints
below and additionally, the information available at
www.datastreamserver.com/safety
- Consult all documentation, packaging and
product labelling before use. Note that some
products feature online documentation which
should be printed and kept with the product.
- Check product for loose / broken / damaged /
missing parts, wear or leaks (if applicable) be fore
each use. Never use a product with loose / b roken
/ damaged / missing pa rts, wear or leaks (if
applicable).
- Products must be inspected and serviced (if
applicable) by a qualified specialist every 6
months assuming average residential use by a
person of average weight and strength, ab ove
average technical aptitude, on a property
matching average metropolitan specification.
Intended use outside these guidelines could
indicate the product is not suitable for intended
use or may require more regular inspection or
servicing.
- Ensure all possible users of the p roduct have
completed an industry recognised training course
before being given access to the product.
- The product has been supplied by a general merchandise
retailer that may not be familiar with your specific applic ation or
your description of the application. Be sure to attain third party
approval for your application from a qualified specialist before use
regardless of prior assurances by the retailer or its representatives.
- This product is not intended for use where fail-safe operation is
required. As with any product (take an au tomobile, aircraft,
computer or ball point pen for example) the re is always a small
chance of a technical issue that needs to be repaired or may
require replacement of the product or a part. If the possibility of
such failure and the associated time it takes to rectify could in any
situation inconvenience the user, business or employee or could
financially affect the user, business or employee then the product
is not suitable for your requirements. This p roduct is not for use
where incorrect operation or a failu re of any kind, including but
not limited to a condition requiring product return, replacement,
service by a technician or replacement of parts could cause a
financial loss, loss of empl oyee time or an in convenience
requiring compensation.
- If this item has been purchased in error considering the points
above simply contact the retailer directly for details of their
returns policies if required.
Table of contents
Popular Inverter manuals by other brands

York
York YVAG012 Operation & maintenance manual

FRONIUS
FRONIUS Symo GEN24 6.0.Plus operating instructions

Weco
Weco Pioneer Pulse 321MKS instruction manual

Unitor
Unitor UWI-230TP Assembly & preparation manual

CanadianSolar
CanadianSolar CS3W-PB-AG Series installation manual

Omron
Omron SYSDRIVE 3G3FV CE Series installation manual