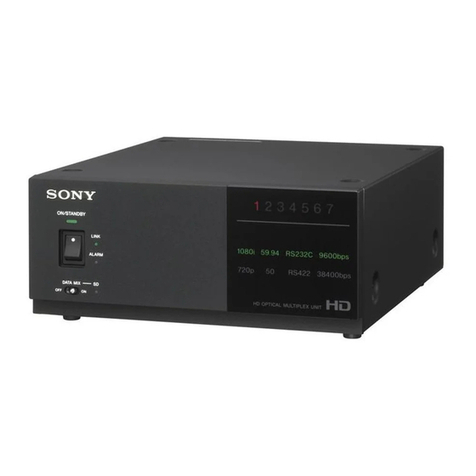
Baxall zmx plus User manual

Please read this manual before operating your multiplexer

Page 2
ZMX plus Operating Instructions
IMPORTANT
The first few pages of these instructions contain important information on safety and product
conformity. Please read, and ensure that you understand this information before continuing.

Page 3
Operating Instructions ZMX plus
CONTENTS
Important Safeguards ................................................................................................................................................................................ 4
Safety ........................................................................................................................................................................................................... 5
Overview ....................................................................................................................................................................................................... 6
Multiplexing ................................................................................................................................................................................................... 6
The Menu System ........................................................................................................................................................................................ 7
Key functions ................................................................................................................................................................................................ 8
Control disk/Arrow keys .............................................................................................................................................................................. 10
MODES OF OPERATION
How to Select Play mode ........................................................................................................................................................................... 11
How to select Live mode ............................................................................................................................................................................ 11
How to select Record mode ....................................................................................................................................................................... 11
How to select VCR view ............................................................................................................................................................................. 18
DISPLAY FUNCTIONS
How to select a camera .............................................................................................................................................................................. 11
How to select multiscreen displays ............................................................................................................................................................ 12
How to select which cameras are shown in a multiscreen display ........................................................................................................... 12
How to select active cameo mode ............................................................................................................................................................. 13
How to select an active cameo .................................................................................................................................................................. 13
How to change the position and colour of display titles ............................................................................................................................. 16
How to electronically zoom an image ........................................................................................................................................................ 17
How to electronically freeze an image ....................................................................................................................................................... 17
How to select which images are displayed by which monitors .................................................................................................................. 18
How to change the size and position of a Picture In Picture (PIP) Display.............................................................................................. 19
TELEMETRY FUNCTIONS
How to select telemetry functions .............................................................................................................................................................. 13
How to select a Telemetry Preset .............................................................................................................................................................. 14
Recording a Telemetry Preset .................................................................................................................................................................... 15
SEQUENCING
How to start a camera sequence ............................................................................................................................................................... 14
How to create a Full Screen Camera Sequence using the Autolist Function ........................................................................................ 14
How to create a Full Screen Playback Sequence using the Autolist Function ...................................................................................... 14
VCR FUNCTIONS
How to control a VCR with an RS232 interface using your multiplexer .................................................................................................... 18
How to adjust VCR playback contrast and brightness .............................................................................................................................. 18
VCR Playback ............................................................................................................................................................................................ 19
ALARM FUNCTIONS
How to Acknowledge an Alarm ................................................................................................................................................................... 16
How to manually activate an alarm ............................................................................................................................................................ 16
Alarm Displays ............................................................................................................................................................................................ 20
MISCELLANEOUS FUNCTIONS
How to play back a Macro .......................................................................................................................................................................... 19
How to select the Preset Park facility ........................................................................................................................................................ 15
How to select the Random Patrol facility ................................................................................................................................................... 15
How to adjust for Summer time and Winter time ....................................................................................................................................... 17
Motion Indicators ........................................................................................................................................................................................ 21
Video loss ................................................................................................................................................................................................... 21

Page 4
ZMX plus Operating Instructions
IMPORTANT SAFEGUARDS
This product is exclusively for use in CCTV applications and has no other purpose.
Read and Retain these instructions - All the safety and operating instructions should be read before the unit is
operated and should be retained for future reference.
Cleaning - Unplug the unit from the supply outlet before cleaning. Use a damp cloth for cleaning. Do not use
liquid cleaners or aerosol cleaners.
Attachments - Do not use attachments that have not been recommended by the product manufacturer as they
may cause hazards.
Water and Moisture - Do not use this unit near water. For example, near a bathtub, wash bowl, kitchen sink, or
laundry tub, in a wet basement, near a swimming pool, in an unprotected outdoor installation, or any area that is
classified as a wet location.
Accessories - Do not place this unit on an unstable stand, tripod, bracket, or mount. The unit may fall, causing
serious injury to a person and serious damage to the unit.Any mounting of the unit should follow the manufacturers
instructions, and should use a mounting accessory recommended by the manufacturer.
Ventilation - Openings in the enclosure are provided for ventilation to ensure reliable operation of the unit and
to protect it from overheating, these openings must not be blocked or covered. This unit should not be placed in
a built-in installation unless proper ventilation is provided. Do not place directly on other hot equipment, because
this may increase its operating temperature.
Power Sources - This unit should be operated only from the class 2 isolated power supply provided.
Plugs - This unit may be equipped with a 3 wire grounding-type plug, i.e. a plug having a third (grounding) pin.
This plug will only fit into a grounding-type power outlet. This is a safety feature. If you are unable to insert the
plug into the outlet, contact your electrician. Do not defeat the safety purpose of the plug.
Power-cord Protection - Power supply cords should be routed so that they are not likely to be walked on or
pinched by items placed upon or against them, paying particular attention to cords at plugs, and the point where
they exit from the appliance.
Overloading - Do not overload outlets and extension cords as this can result in a risk of fire or electric shock.
Object and Liquid Entry This equipment must be protected from the ingress of foreign materials. Never push
objects of any kind into this unit through openings as they may touch dangerous voltage points or short-out parts
that could result in a fire or electric shock. Never spill liquid of any kind on the unit.
Servicing There are no user-serviceable parts. Do not remove the covers as this may expose you to dangerous
voltages or other hazards. Refer all servicing to qualified service personnel.
Replacement Parts - When replacement parts are required, be sure the service technician has used the
replacement parts specified by the manufacturer. The use of unauthorised substitute components may result in
fire, electric shock or other hazards.
Safety Check - Upon completion of any service or repairs to this unit, ask the service technician to perform
safety checks to determine that the unit is in proper operating condition.
Coax Grounding - If an outside cable system is connected to the unit, be sure the cable system is grounded.
Lightning - For added protection of this unit during a lightning storm, or when it is left unattended and unused for
long periods, unplug it from the wall outlet and disconnect the cable system. This will prevent damage to the unit
due to lightning and power-line surges.

Page 5
Operating Instructions ZMX plus
SAFETY
If you have any problems, contact Baxall Limited.
WARNING
Installation is only to be carried out by competent, qualified and experienced personnel in accordance
with the country of installations National Wiring Regulations.
Your multiplexer contains no user-serviceable parts inside.
This unit contains a lithium battery whose expected life is in excess of five years. If your multiplexer
loses its settings each time it is switched off then the battery needs replacing. In this instance return
your multiplexer to Baxall Limited and we will replace the battery.
There is a danger of explosion if the lithium battery is incorrectly replaced. Replace only with the
same or an equivalent type recommended by the manufacturer. Dispose of unused batteries according
to the manufacturers instructions.
Do NOT use the 12V power leads in the RS-485 cable UNLESS it is to be used on a one-to-one connection
between a unit with 12V power and a unit with no 12V power. For example, from a multiplexer directly
to a keyboard that does not have its own power source.
In all other circumstances, such as multi-dropped multiplexers, do NOT use the 12V power leads in
the RS-485 cable.
Your multiplexer must not be used in a medical and/or intrinsically safe application.
Do not exceed the voltage and temperature limits given in the specification. Only operate your
multiplexer in a clean, dry, dust-free environment.
Note: The multiplexers main function is to multiplex video and its secondary function is to provide alarms. For
this reason, Baxall Limited recommend that you do not use your multiplexer as the main alarm system on your
site but install a dedicated intruder/fire alarm where necessary.

Page 6
ZMX plus Operating Instructions
OVERVIEW
The products described in this manual are:
ZMX+CS10 and ZMX+CS16 - 10 way and 16 way, Colour Simplex Multiplexer
ZMX+BS10 and ZMX+BS16 - 10 way and 16 way, Mono Simplex Multiplexer
You can check which particular model you have by looking at the label on the bottom right of the units front
panel.
Simplex multiplexers can be operated in one of the three modes of operation (Live, Play or Record) at any one
time. Your multiplexer has a maximum of 10 or 16 camera inputs. It has 10 or 16 alarm inputs (which may or may
not be associated with each camera), two alarm outputs, two monitor outputs (Monitor A and B) and VCR output
and input connections. A typical installation using the 16 way unit is shown in Figure 1.
Fig. 1 Typical Installation
The multiplexer provides sophisticated facilities for surveillance monitoring and it can record images from all of
the connected cameras to a single video recorder (VCR).
In the typical installation shown above, Monitor A is used for multiscreen, digital images which can be frozen or
electronically zoomed. In other words, you can choose to view more than one camera at once on the same
screen, you can freeze the images and you can select a camera and electronically enlarge (x2) it. Monitor B
provides full screen, live analogue images which cannot be frozen or zoomed. Monitor B is sometimes referred
to as a spot monitor in the security industry.
The alarm inputs can be any alarm to any camera. Alarms that have been activated can be indicated on the
monitor and an LED located on the front panel of your multiplexer can be made to flash and an audible warning
sounded. Depending on the way in which your system has been programmed, you may need to press the alarm
button to acknowledge an alarm. Alternatively, an alarm may cancel itself after a fixed period or after the alarm
device itself is deactivated. When an alarm does occur, an auxilliary monitor will display the appropriate camera
output and, if there are multiple alarms, will sequence between each alarm camera. Monitor A will behave
differently depending on which mode the multiplexer is operating in and how it has been programmed. For
example, the live camera display on Monitor A can be customised to show the most useful multiscreen possible.
Depending on your particular system, some or all of your cameras may have telemetry functions. Where this is
the case, you can control them from the multiplexers keyboard using the telemetry facilities.
MULTIPLEXING
The purpose of multiplexing is to reduce the number of VCRs and cassettes required on a site. A multiplexer
provides a VCR output with the ability to record all the connected cameras to a single VCR.
Explanation of Multiplexing
A PAL compatible TV shows a series of 25 still pictures per second which give the impression of motion. Normally
a VCR would record every picture. Time division multiplexing, as performed by your multiplexer, means that all
the camera signals are combined, one picture from each camera in turn and then back to the first (see Figure 2).
This means that a small amount of information is lost e.g. for a 10 camera installation, 1 out of every 10 images
is recorded giving rise to a slightly jerky image on playback.

Page 7
Operating Instructions ZMX plus
MULTIPLEXING
Cameras 1, 2 and 3
multiplexed recording
Camera 1
Camera 2
Camera 3
1
1
2
3
2
3
2
3
2
3
2
3
2
1
3
1
1
1
2
1
Fig. 2 Multiplexing
Time Lapse VCRs
The time-lapse VCR reduces the number of cassettes required for a site. It also reduces the amount of time
spent changing cassettes and the amount of storage space required for them. Time-lapse VCRs record and play
tapes more slowly by recording fewer images. The speed of operation for a normal VHS VCR is 3 hours. The
table below gives examples of how many fields can be recorded on a three hour tape per camera in various time-
lapse modes.
Time Lapse mode Fields per second Fields per second Fields per second
with 1 camera with 8 cameras with 16 cameras
3 hour 50 6.25 3.125
12 hour 12.5 1.56 0.78
24 hour 6.25 0.78 0.39
48 hour 3.13 0.39 0.2
Table 1 Time-Lapse Modes and Recorded Fields per Second
THE MENU SYSTEM
More advanced operation of your multiplexer involves use of the menu system. Your multiplexer provides user-
friendly, on-screen menus for entry of user data such as titles and for the selection of options (see the Programming
Reference manual for details).
Note that the alarm key is disabled while the menu system is active.

Page 8
ZMX plus Operating Instructions
KEY FUNCTIONS
A brief description of the various keys on your multiplexer is given below. The front panel of a 16 way multiplexer
is shown in Figure 3 and 3a (the 10 way unit has fewer camera keys).
Fig. 3 Key Locations
Fig. 3a LED Locations

Page 9
Operating Instructions ZMX plus
KEY FUNCTIONS
KEY DESCRIPTION
1
17
CAMERA KEY Used to select cameras, macros etc.
F
MACRO FUNCTION Used in conjunction with a camera key to select one of 10 or 16 macros
SEQUENCE Starts or stops full or multiscreen sequences.
LIVE Permits the viewing of live digital camera images.
RECORD This key places the multiplexer in Record mode. The indicator above the key will be
illuminated when the unit is in Record mode. (Also used with ALT key as VCR Record)
PLAY Selects Play mode. (Also used with ALT key as VCR Play)
ALARM Depending on how your system has been set up, you may need to press the alarm key to
clear the alarm.
ALT Provides access to alternate functions on certain keys. When pressed, the multiplexer enters
the ALT mode. ALT mode stays active until the ALT key is pressed again.
PRESET Use this key in conjunction with Camera keys 1 - 8 to select a preset camera position. The
camera must first be selected and the telemetry enabled.
FOCUS FAR Allows you to adjust the focus of a camera for distant scenes. The camera must first
be selected and the telemetry enabled.
FOCUS NEAR Allows you to adjust the focus of a camera for close scenes. The camera must first
be selected and the telemetry enabled.
CLOSE IRISAllows you to close the camera iris. The camera must first be selected and the telemetry
enabled.
OPEN IRIS Allows you to open the camera iris. The camera must first be selected and the telemetry
enabled.
ZOOM IN Causes the camera lens to zoom-in. The camera must first be selected and the telemetry
enabled.
ZOOM OUT Causes the camera lens to zoom-out. The camera must first be selected and the
telemetry enabled.
ELECTRONIC ZOOM This operates a x2 electronic zoom on the full screen digital image (in Live
and Play modes only).
TELEMETRY Enables or disables telemetry functions.
ENTER Allows you to make menu selections. (Also used with ALT key as VCR Stop)
MENU Allows you to enter the menu system. Press the menu key once then enter your password.
To exit from the menu system, press the menu key to close each level of menu until the menu
system is exited.
CAMERA POWER Enables you to turn the power on or off for the selected camera. The camera
must first be selected and the telemetry enabled. A red indicator will be lit when the camera power
is on.
WASH Press to activate camera screen wash. The camera must first be selected and the telemetry
enabled.
AUTOPAN Allows you to start or stop camera auto panning. The camera must first be selected and
the telemetry enabled. A red indicator will be lit when autopan is enabled.
LAMPS Allows you to switch the selected cameras lamps on or off. The camera must first be
selected and the telemetry enabled. A red indicator will be lit when the lamps are on.
1

Page 10
ZMX plus Operating Instructions
KEY FUNCTIONS
KEY DESCRIPTION
WIPE Allows you to switch the selected cameras wipe function on or off. The camera must first be
selected and the telemetry enabled. A red indicator will be lit when the wipe function is on.
FREEZE This key will freeze the current image (in Live and Play modes only). Press the Freeze key
again to unfreeze the image. Note that you must turn off Freeze before you can select other functions.
(Also used with ALT key as VCR Pause)
MONITOR B Toggles between Monitors A and B.
MULTISCREEN Allows you to step through the various permissible multiscreen layouts. Layouts
are selected sequentially e.g. 16 way, 13 way, 10 way, 9 way, 7 way, Quad, PIP, 16 way, 13 way, etc.
Note that multiscreen selection is valid in digital Live and Play modes. See page 12 for more
information. In addition, the multiscreen button will return control back to monitor A if monitor B is
currently selected (in Live and Play modes only).
CONTROL DISK/ARROW KEYS
The control disk /Arrow key combination is used to perform various functions. It is used to move around the
electronic zoom area or navigate in the menu system, to pan and tilt the selected camera when in telemetry
mode, to move and size the small cameo in the PIP multiscreen display format, to control a VCR, and to change
the brightness and contrast in playback mode.
Control disk / Arrow keys
Moving around an electronically zoomed area
Use the left/right and up/down arrow keys on the control disk to scroll the electronically zoomed image around
the monitor.
Navigating the menu system
The left/right and up/down arrow keys along with the enter key are used to move through the menus when in
menu mode. See the programming manual for more information.
Panning and tilting cameras
The left/right and up/down arrow keys control camera pan left/camera pan right and camera tilt up/camera tilt
down. They are used in conjunction with the telemetry key to gain control of the selected camera.
Move and re-size Picture In Picture (PIP)
When you are displaying the PIP multiscreen format, pressing the up and down arrow keys switches the small
cameo to top/left or bottom/right respectively. The left and right arrow keys toggle the cameo between three
preset sizes: left key to step down in size, right key to step up in size.
To move the active cameo selection about a multiscreen display format
When you are displaying a multiscreen format, pressing the enter key causes the active cameo to be activated
(this is indicated by flashing cameo/camera title text). You can select a different cameo using the arrow keys.
Controlling VCR functions
When used in conjunction with the ALT key, the control disk provides control of the VCR functions Fast Forward,
Rewind, Frame Advance and Frame Rewind.

Page 11
Operating Instructions ZMX plus
MODES OF OPERATION
Your multiplexer has several modes of operation, Live, Record and Play.
Record mode
Record mode provides a multiplexed output to the VCR. Single images from up to 10 or 16 video inputs are
assembled to form a continuous video signal which is then recorded onto the VCR - see figure 2.
Live mode
This mode displays digital live camera images on MonitorA. Several multiscreen display formats can be selected
- see figure 5.
Play mode
This mode enables a previously recorded multiplexed tape to be played back.
HOW TO SELECT A CAMERA
Select a camera by pressing the corresponding camera key (1 to 10 or 1 to 16). This will display the selected
camera full-screen. Selecting a camera will stop a sequence that is running or change a multiscreen display
back to a full screen display.
HOW TO SELECT PLAY MODE
This mode enables a previously recorded multiplexed tape to be played back. Your VCR must be playing in order
for you to view prerecorded data. Start your VCR manually or if using a VCR connected via RS232, by using the
VCR Play macro (ALT and Play ). When Play mode is entered by pressing the Play key, the multiplexer
will automatically revert to the multiscreen format that was last selected for playback. Playback may be viewed
in full screen or multiscreen formats - see figure 5. Your multiplexer automatically reconstructs, for each camera,
its identification number, its status, and the date and time which was current at the time of recording.
Your multiplexer can decode several VCR formats. The default format decodes recordings from Baxall ZMX+
multiplexers. Other modes can decode ZMX, DM compatible recordings and Sensormatic ROBOT recordings.
When Play mode is entered, an on-screen flag is displayed for about three seconds showing the playback
format selected.
HOW TO SELECT LIVE MODE
This mode displays digital live camera images on MonitorA. Several multiscreen display formats can be selected
using the multiscreen key - see figure 5. Live mode is selected by pressing the Live key . Note that recordings
cannot be made whilst in Live mode on a Simplex unit.
HOW TO SELECT RECORD MODE
Simplex Record mode is selected by pressing the Record key . Your multiplexer will automatically select
Record mode during power up. In Record mode, cameras will be multiplexed to the VCR as previously explained
and Monitor A will display full-screen, live, analogue pictures. The following functions are not available in Simplex
Record mode: multiscreen displays, digital picture freeze, digital zoom, active cameos and the ability to change
the colour and position of on-screen titles.
Monitor B is independent from Monitor A in Simplex Record mode but its camera titles will be shown on Monitor
A (see fig. 4). Note that if the menu system is entered whilst in Record mode, recording will stop until the menu
system is exited. An on-screen warning will appear if the menu system is entered during Record mode.
Fig 4. Monitor A display during Record mode

Page 12
ZMX plus Operating Instructions
HOW TO SELECT MULTISCREEN DISPLAYS
Your multiplexer allows up to 10 or 16 simultaneous camera images to be displayed on Monitor A. Depending on
the viewing mode selected, these can be live images or images played back from a VCR. The multiscreen key
will select the available formats cyclically e.g. 16 way, 13 way, 10 way, 9 way, 7 way, quad, PIP, back to 16
way, 13 way, etc. The individual areas of a multiscreen are called cameos.
Fig. 5 Multiscreen Formats
* 16 way and 13 way displays only available on 16 way unit in Live mode
HOW TO SELECT WHICH CAMERAS ARE SHOWN IN A MULTISCREEN DISPLAY
When a multiscreen display is being viewed, it is possible to select which camera is displayed in each cameo of
the display. This is done by selecting a cameo and then selecting which camera is assigned to the cameo.
1. Select active cameo mode by pressing the enter key whilst in a multiscreen display.
2. Using the arrow keys, move to the cameo you wish to change. This is indicated by the camera title flashing
within the selected cameo.
3. Press the desired camera key.
4. Press enter to exit Active Cameo mode
If you have set up the camera numbers and locations which are to be displayed in a particular multiscreen, then
the unit will automatically save that selection and will display the same camera selection and locations each time
that particular multiscreen is selected. (This is saved in volatile memory.)
For example, if cameras 9, 4, 7 and 2 are selected for the quad multiscreen, then whenever you select the quad
multiscreen, those cameras will be displayed, and in the same positions as you originally selected.
If you switch from a multiscreen display to a full-screen camera image, then when the Multiscreen key is next
pressed, you will automatically return to the last multiscreen format that was being viewed.
For example, if you are viewing a 7 way multiscreen and switch the display to a full-screen display, then if the
Multiscreen key is pressed later, the Monitor A display will switch directly back to the 7 way screen format.

Page 13
Operating Instructions ZMX plus
HOW TO SELECT TELEMETRY FUNCTIONS
Many cameras are equipped with remotely controllable pan and tilt heads, wash/wipe facilities, lens focus and
zoom etc. Where fitted, these features are controlled as follows:
Full screen display
1. Select the camera by pressing the camera key
2. Enable telemetry by pressing the Telemetry key
3. Press the telemetry function required (e.g. to perform a camera screen wash, press the Wash key ).
Multiscreen display
1. Select active cameo mode by pressing the enter key
2. Using the arrow keys, move to the cameo of the camera you wish to control (the cameras title will flash)
3. Enable telemetry by pressing the Telemetry key
4. Press the telemetry function required
Selecting a telemetry function on Monitor B
For example, to select telemetry on Monitor B:
1. Select Monitor B by pressing the Monitor B key .
2. Select the camera to be controlled by pressing the camera key
2. Enable telemetry by pressing the Telemetry key
3. Press the telemetry function required (e.g. to perform a camera screen wash, press the Wash key ).
HOW TO SELECT ACTIVE CAMEO MODE
A multiscreen display is made up of two or more areas called Cameos. Any camera can be displayed in any
position within a multiscreen display. The default multiscreen displays, show the cameras in ascending order. In
Live mode, you can display one camera in more than one position, while in Play mode each camera can be
displayed once only on each multiscreen.
To make it simple for you to select a camera for display in a cameo, the multiplexer uses the concept of Active
Cameos. An active cameo is simply an on-screen indication of which particular cameo will be affected by the
next front panel keystroke. Active cameos are used mainly to give you a simple way of specifying which camera
is to be displayed in which cameo, but other useful functions such as cameo freeze and zoom to full screen are
also available. To assign a camera to an active cameo, simply press the appropriate camera key. The selected
camera is added to the cameo and the next cameo in the multiscreen becomes the active one.
To select active cameo mode, press the Enter key while displaying any multiscreen. The top left cameo will be
the initial active cameo. The active cameo is indicated by flashing the camera number and the camera title. An
active cameo will only be present if you specifically select active cameo mode. Use the arrow keys to select a
different cameo.
The active cameo mode will stay active for 15 seconds after the last key is pressed, or until the Enter key is
pressed again to exit the mode. Active cameo mode will also stop immediately if a new multiscreen display is
selected, or if you switch between Live and Play.
HOW TO SELECT AN ACTIVE CAMEO
You may want to select a particular cameo in a multiscreen display in order to zoom in on it or freeze the image
etc. To select a cameo you must first be in active cameo mode. This is achieved by pressing the enter key whilst
in a multiscreen display. The cameos title will flash to show which cameo is currently selected. Use the arrow
keys on the control disk to select a different cameo. The selected cameo will be indicated by its flashing title.
Note that if the ALT key is pressed and the multiplexer is in ALT mode, then pressing the enter key will emulate
the VCR stop function. Ensure that the multiplexer is not in ALT mode (the LED above theALT key will be lit ifALT
mode is active).

Page 14
ZMX plus Operating Instructions
HOW TO CREATE A FULL SCREEN CAMERA SEQUENCE USING THE AUTOLIST FUNCTION
Your multiplexer is equipped with a system which allows you to teach it which cameras are to be sequenced and
for how long. This facility is calledAutolist. Autolist will record your actions as you select cameras including the
length of the pauses between selections. Up to 20 camera entries may be made in each Autolist and each
monitor can have an independent Autolist sequence programmed for it. To start the Autolist function enter full
screen Live mode for the desired monitor (ensure the multiplexer is not in Sequence mode). Next, press and
hold the Alarm key then press the Sequence key until the text PGM (program mode) is displayed. Next,
press the camera key of the first camera you require in the sequence. After the required dwell time for this
camera, press the camera key corresponding to the next camera in the sequence. Continue in this way until the
desired sequence has been built up. Next, press the Sequence key again to stop the recording. You can stop the
recording of a sequence at any time by pressing any key other than a camera key. Dwell times may be up to 30
seconds long.
Note that if the full screen dwell time is subsequently altered from within the menu system, the sequence will
revert to one of all cameras in numerical order for the newly selected dwell time
HOW TO START A CAMERA SEQUENCE
Pressing the sequence key will display selected cameras in a preselected order and for a preselected time.
The cameras and dwell times are selected using the Autolist function or by using the menu system - see the
Programming Reference manual for further information on selecting cameras and setting dwell times.
In multiscreen live or playback modes, it is possible to view all the cameras that are not currently selected for
display by pressing the sequence key. These cameras will be shown, in sequence, within the lower right hand
cameo of the display. The image from each camera will be shown for a period determined by the multiscreen
dwell time setting accessed through the menu system. The camera sequence is not programmable.
HOW TO CREATE A FULL SCREEN PLAYBACK SEQUENCE USING THE AUTOLIST FUNCTION
Your multiplexer is equipped with a system which allows you to teach it which cameras are to be played back in
which sequence and for how long. This facility is called Autolist. Autolist will record your actions as you select
cameras including the length of the pauses between selections. Up to 20 camera entries may be made. To start
the Autolist function enter full screen Playback mode (ensure the multiplexer is not in Sequence mode). Next,
press and hold the Alarm key and then press the Sequence key until the text PGM (program mode) is
displayed. Next, press the camera key of the first camera you require in the sequence. After the required dwell
time for this camera, press the camera key corresponding to the next camera in the sequence. Continue in this
way until the desired sequence has been built up. Next, press the Sequence key again to stop the recording. You
can stop the recording of a sequence at any time by pressing any key other than a camera key. Autolist playback
is only available on monitor A. Dwell times may be up to 30 seconds long.
CAUTION
This option must be used with caution if the VCR is set to time lapse speeds while playing back. When sequencing
the display during playback, do not set the VCRs play speed such that the frequency at which any one camera
is played back off the tape is slower than the frequency that the sequence list will switch through cameras in the
list. It is recommended that the VCR is set to its normal speed (3 hours for PAL) when sequencing playback
displays.
HOW TO SELECT A TELEMETRY PRESET
Your multiplexer can store up to eight preset camera positions for each camera. They can be recalled at any time
as follows:
1. Select the camera by pressing its corresponding camera key
2. Enable telemetry for the camera by pressing the Telemetry key
3. Press the Preset key
4. Press the number of the preset (1 to 8) using the camera keys

Page 15
Operating Instructions ZMX plus
RECORDING A TELEMETRY PRESET
Your multiplexer can store up to eight preset camera positions for each camera. The camera is first positioned
then the position is stored as follows:
1. Select the camera by pressing its corresponding camera key
2. Enable telemetry for the camera by pressing the Telemetry key
3. Steer the camera to the desired location using the arrow keys
4. Press the function key
F
3. Press the Preset key
4. Press a number key (1 to 8) to store the preset
HOW TO SELECT THE PRESET PARK FACILITY
Preset Park is an automatic command to a controllable camera to move it to preset position 1 if it has not
received any telemetry signals for approximately 10-20 minutes. Whether Preset Park is enabled or disabled for
a particular camera can be verified by selecting the camera and pressing the Telemetry key. If Preset Park is
enabled, the telemetry indicator will be displayed as TL1 (full screen) or 1(cameo). If the Preset Park facility is
disabled, the telemetry indicator will be displayed as TEL (full screen) or T(cameo). In order for the Preset Park
facility to operate, preset position 1 must be programmed for the camera.
To disable or enable Preset Park for a camera:
1. Select the camera by pressing its camera key.
2. Press the Telemetry key
3. Press the Preset key
4. Press the enter key
Notes
1) The key combination above has a toggle action and can be used to disable/enable Preset Park.
2) Preset Park is automatically disabled if Random Patrol is enabled for the camera.
HOW TO SELECT THE RANDOM PATROL FACILITY
Random patrol is an automatic command to a controllable camera to move to a preset position, randomly
selected from preset positions 1 to 8, made at random intervals between 1 and 4 minutes. For the facility to work
fully, all the preset positions must have been programmed for the camera (see the Programming Reference
manual).
The default state for all your cameras is for Random Patrol to be disabled. Whether Random Patrol is enabled
or disabled for a particular camera can be verified by selecting the camera and pressing the Telemetry key. If
Random Patrol is enabled, the telemetry indicator will be displayed as TL2 (full screen) or 2(cameo). If the
Random Patrol facility is disabled, the telemetry indicator will be displayed as TEL (full screen) or T(cameo).
To enable Random Patrol for a camera:
1) select the camera
2) press the Telemetry key
3) press the Preset key and the Sequence key .
Notes
1) The key combination, Preset and Sequence has a toggle action and can be used to disable Random Patrol
on
a camera for which it has been enabled.

Page 16
ZMX plus Operating Instructions
HOW TO SELECT THE RANDOM PATROL FACILITY
2) Another way of disabling Random Patrol on a camera is to select it, activate telemetry and use the pan or tilt
telemetry keys.
3) Random Patrol is disabled automatically if Preset Park is enabled for the camera.
4) While telemetry mode is active (the LED under the TELEMETRY key is illuminated) for a particular camera,
Random Patrol is suspended on all the other cameras. If Random Patrol is enabled on the selected camera,
however, it will be active on that camera, even when in telemetry mode. As soon as telemetry is deactivated
(by pressing the TELEMETRY key), Random Patrol becomes active for all the cameras for which it has been
enabled.
HOW TO ACKNOWLEDGE AN ALARM
Certain alarm conditions that arise, require operator intervention (i.e. a latched alarm). Usually, the monitor
displays are configured to provide a customised view for each alarm and so you will need to acknowledge the
alarm in order to return to your previous settings. An alarm is acknowledged simply by pressing the alarm
cancel/acknowledge key .
HOW TO MANUALLY ACTIVATE AN ALARM
Alarms are normally associated with cameras. For example, a motion sensor covering a room might be configured,
when activated, to call up a camera which provides the operator with a view of the room and another camera
covering the entrance to the room. However, you can initiate or force any of the alarms associated with a camera
by pressing and holding the alarm cancel/acknowledge key followed by the desired camera key. Note that
you cannot manually acivate an alarm when in the menu system.
HOW TO CHANGE THE POSITION AND COLOUR OF DISPLAY TITLES
Camera titles can be displayed either at the top or at the bottom of the camera view, or the titles can be switched
off. The titles can also be displayed as black, grey, or white characters. This feature is selectable for each
camera during either digital Live or Play modes.
To change the title positions and colours, select any camera in full-screen Live mode by pressing a camera key.
Press the ENTER key to select the title position and colour according to the table below. Repeated key presses
will cycle through the list.
Title Position Title Colour
Top Black
Top White
Top Grey
Bottom Black
Bottom White
Bottom Grey
No title (numbers still displayed) -
Notes
1) Settings only affect Monitor A. Monitor B is not affected.
2) In any digital full-screen Monitor A display, the title text and colour will move from the top to the bottom of the
screen, and change colours according to the above scheme. If you want to change the colour of the date and
time text, you can only do this if camera 1 is displayed full-screen. In this case, each time the above cycle is
completed, the date and time display colour will change from white to grey to black and back to white again.

Page 17
Operating Instructions ZMX plus
HOW TO ADJUST FOR SUMMER TIME AND WINTER TIME
Many countries adjust the time twice a year by one hour. A special function is installed on your Multiplexer to
allow adjustment without having to enter the menu system.
In March/April the time can be advanced by one hour (once only) by pressing the FUNCTION key
F
followed
by the SEQUENCE key . The same key sequence when used in September/October will decrement the time
by one hour (once only).
CAUTIO
N
Take care not to operate Summer/Winter adjustment accidentally because it cannot be undone without entering
the menu system.
HOW TO ELECTRONICALLY ZOOM AN IMAGE
When in digital Live or Play modes, you can electronically enlarge (zoom) any camera image by a factor of two.
The word ZOOM is displayed on screen while the image is zoomed.
Electronic zoom in a full screen display:
1. Press the zoom key once to activate the zoom facility.
2. Use the arrow keys to scroll the zoomed image around the monitor.
3. Press the zoom key to deactivate electronic zoom.
Electronic zoom in a multiscreen display
1. Enter active cameo mode by pressing the enter key.
2. Use the arrow keys to move to the desired cameo.
3. Press the zoom key once to change the screen to a full screen display of the selected cameo
4. Press the zoom key again to activate the zoom facility.
5. Use the arrow keys to scroll the zoomed image around the monitor.
6. Press the zoom key to deactivate electronic zoom.
HOW TO ELECTRONICALLY FREEZE AN IMAGE
When in digital Live or Play modes, you can freeze the currently selected image whether in a full screen display
or a multiscreen display. Whilst the image is frozen, FRZ will be displayed in a full screen display or *in a
multiscreen cameo.
Freezing a full screen display:
1. Press the freeze key to freeze the display.
2. To unfreeze the image, press the freeze key again.
Freezing a cameo in a multiscreen display
1. Enter active cameo mode by pressing the enter key.
2. Use the arrow keys to move to the desired cameo.
3. Press the freeze key to freeze the cameo.
4. To unfreeze the cameo, press the freeze key again.
Note that if the ALT key is pressed and the multiplexer is in ALT mode, then pressing the freeze key will emulate
the VCR pause function. Ensure that the multiplexer is not in ALT mode (the led above the
ALT key will be lit if ALT mode is active).

Page 18
ZMX plus Operating Instructions
HOW TO SELECT WHICH IMAGES ARE DISPLAYED BY WHICH MONITORS
Your multiplexer has two monitor outputs designated A and B. The output for Monitor A is digital and allows you
to view multiple images, zoom and freeze images etc. The output for Monitor B is analogue.
Monitor B always displays analogue live, full-screen images of the camera inputs, regardless of which mode is
selected. When an alarm condition is encountered, Monitor B will display the camera associated with the alarm.
Where several alarms are triggered, Monitor B will display the appropriate cameras in sequence.
Use the Monitor B key to switch between Monitor A and Monitor B. The first keypress will transfer control to
Monitor B; the next keypress will transfer control back to Monitor A.
HOW TO CONTROL A VCR WITH AN RS232 INTERFACE USING YOUR MULTIPLEXER
You can control the transport, record and play functions on your VCR from your multiplexer when it is connected
via RS232. The keys used are shown below and must be used in combination with the ALT (Alternate) key. The
ALT key has a toggle action. When pressed, the multiplexer enters ALT mode. The ALT key needs to be
pressed again to exit ALT mode.
Function Keypress
Stop +
Record +
Play +
Pause +
Rewind + Left Arrow
Fast Forward + Right Arrow
Frame Advance + Up Arrow
Frame Reverse + Down Arrow
HOW TO SELECT VCR VIEW
You can view the VCR output signal in order to check its output or settings. This is achieved by selecting the VCR
output as an input source. Press the Function key
F
then the Play key . The text VCR will be displayed on
Monitor B. To deselect VCR input, press the Function and Play keys again.
HOW TO ADJUST VCR PLAYBACK CONTRAST AND BRIGHTNESS
You can adjust the brightness and contrast of the playback image (these settings do not affect the live or
recorded image).
1. Select Play mode and start playing a previously recorded multiplexed tape in the VCR.
2. Call up the camera you wish to enhance onto monitor A full-screen by selecting the appropriate Camera key.
3. Use the Arrow keys to adjust the brightness and contrast. An adjustment scale will be superimposed over
the image on monitor A. The scale will initially show the current level of adjustment or the default position.
The default adjustment position is optimised for the VCR signal level programmed in the menu system and
may not be in the centre of the scale. Adjustments will be applied to the display of all the cameras when you
return to the multiscreen display.
The up arrow increases the brightness and the down arrow decreases the brightness (asterisks * show the level
of brightness on the scale). The left arrow reduces the contrast and the right arrow increases the contrast
(diamond symbols uindicate the level of contrast on the scale).

Page 19
Operating Instructions ZMX plus
HOW TO CHANGE THE SIZE AND POSITION OF A PICTURE IN PICTURE (PIP) DISPLAY
The Picture-In-Picture (PIP) format on Monitor A can be displayed in one of three sizes, and it can be displayed
in one of two positions. The sizes can be 1/4, 1/9, or 1/16 of the full screen size. The PIP can either be displayed
in the lower right hand corner of the display, or in the top left hand corner of the display.
The PIP size and position can be changed by using the arrow keys. The up and down arrow keys will change its
position, and the left and right arrows will change its size. The left arrow key will make the picture smaller, the
right will make the picture larger.
HOW TO PLAY BACK A MACRO
Your multiplexer may have up to 10 or 16 user-defined macros. Macros can contain up to 32 keystrokes and are
programmed via the menu system. To run a macro, press the Function key
F
followed by the camera key (1 to
16 or 1 to 10) corresponding to the macro you want to run. While the macro is playing back, an Fn and the macro
number is displayed on-screen. To stop a macro, press the Function key
F
.
Your system may contain some macros that are designed to run automatically without your intervention (timed
macros). Other macros may have been linked to certain alarm scenarios and will run each time the alarm
occurs.
VCR PLAYBACK
You must select the playback speed on the VCR, and not on the multiplexer. There is no related setup required
on the multiplexer during playback. The multiplexer will automatically adjust its display to match the VCR playback
speed.
On-screen Indicators
The on-screen indicator (P024 for example, for 24 hour mode) tells you the speed at which the tape was recorded.
It does not indicate the speed at which the tape is being played back. To find out the playback speed, you must
look at the VCRs playback speed indicator. If the recording was made using the Camera Switch Input (R EXT),
then the mode and speed indicator will read P EXT.
The time and date is displayed on-screen during Play mode. You should note, however, that this is the recorded
time, not the current system time.
If there was video loss at the time that the recording was made, the indicator, V, will be displayed in the
corresponding camera cameo or VDL, if full-screen,
Note: Any camera which is not detected on tape for eight or more consecutive cycles during playback, and is not
flagged as a video loss camera, will result in the warning message, N/A, signifying that it is Not Available. This is
a warning message only, and can appear during playback on full-screen or multiscreen formats on Monitor A.
Several circumstances can cause an N/A indication. These are:
1) The camera may not have been included in the record list at the time of recording.
2) The camera may have been disabled at the time of recording.
3) The images for that camera on tape have been corrupted and cannot be decoded at the time of playback.
4) The VCR play speed is very slow.
The Not Available indicator, N/A, helps you to tell the difference between images which are not being updated
during playback and images which are being updated from tape but have no movement within the image.
The alarm indicator, A, will be displayed with the corresponding camera image on Monitor A if there was an
active alarm at the time that the recording was made.
When Tapes Cannot Be Decoded
If the multiplexer cannot decode a tape which is being played back, the system will display a blank screen. The
fields will not be decoded or separated.

Page 20
ZMX plus Operating Instructions
ALARM DISPLAYS
Monitor A During Alarms
During alarms in live mode, Monitor A will automatically switch to a preprogrammed, multiscreen alarm display,
assuming that full screen alarm displays have not been specified. The alarm multiscreen includes not only the
camera in alarm, but also associated cameras covering areas in or around the alarm area. The system
automatically calls up a programmed custom quad display on Monitor A for a single alarm and optionally freezes
the alarmed camera. The frozen camera will display a *character, to indicate that it is frozen, and also display
the indicator, A. For two simultaneous alarms, the two cameras in alarm and all of their associated cameras are
displayed in a 10 way multiscreen. For three simultaneous alarms, the three cameras in alarm and two of their
associated cameras are displayed in a 9 way multiscreen. If there are more than three alarms, then a 9 way
multiscreen is displayed with up to 9 alarmed cameras. The remaining (unalarmed) cameos will simply show the
unalarmed cameras in consecutive order.
Freezing Alarm Displays On Monitor A In Live Mode
If the alarmed camera has not been frozen automatically, you can freeze all the cameras in the alarm display on
Monitor A by pressing the Freeze key, or you can select an individual camera full screen and then freeze it.
Monitor B Full Screen During Alarms
During alarms in Live mode, Monitor B will automatically switch to a display of the camera in alarm. If multiple
alarms are active, the auxilliary Monitor B will automatically sequence between the alarm cameras at a fixed 1
second dwell. This dwell is not programmable. Monitor B cannot freeze images.
Note: The Monitor B screen will not revert to its original fixed display after the alarm is cleared. It will continue to
display the last alarm camera. However, if sequencing was active on Monitor B before the alarm, then Monitor B
will continue to sequence after the alarm is cleared.
Alarm Displays In Play Mode
Regardless of the mode selected, Monitor B will always display live images, and when an alarm occurs, is
always switched to the camera in alarm.
In Play mode, when live alarm inputs occur, Monitor A will continue to display playback images and will not show
the live alarms.
Monitor A During Play Mode - Recorded Alarms
Monitor A display will not automatically provide alarm displays based on recorded alarm status. Monitor A will
display the playback images from the VCR according to your selected formats, and will display the normal A
alarm indicator only if a camera was in alarm at the time that a recording was made.
Note: If a camera which had an alarm at the time of recording is not selected by you for display, there will be no
on-screen indication that the alarm occurred. Thus if you are looking for cameras in alarm during playback,
ensure that all the cameras on tape are displayed on the multiscreen at once. There is an alarm buzzer on
playback that sounds when an alarm flag is detected on tape. Ensuring that the buzzer is enabled will assist
alarm detection during playback from tape.
Monitor B during Play Mode
Monitor B will continue to display live images, according to your selection. If a live alarm occurs during play
mode, then Monitor B will automatically switch to the camera in alarm. It will sequence at a 1 second dwell time
for multiple cameras in alarm. After you have cancelled the alarm, Monitor B will continue to display the alarm
camera which was on the screen at the time that the alarm was cancelled, or will continue to sequence if
sequencing was enabled.
Alarm LED And Internal Buzzer In Play Mode
The LED and internal buzzer alarm indicators will sound, if enabled. The alarm buzzer has a different duty cycle
so you can more easily identify it from the videoloss or playback buzzer. Note that the alarm buzzer may be
disabled via the menu system.
Other Baxall Multiplexer manuals
Popular Multiplexer manuals by other brands

Cisco
Cisco ONS 15454 DWDM Installation and operation guide

Pickering
Pickering 40-652A user manual

Racal Instruments
Racal Instruments 1260-38T user manual
American Fibertek
American Fibertek MTX-8485 instruction manual
Teledyne
Teledyne Everywhereyoulook T3SP-D4MX Operator's manual
Viessmann
Viessmann 5229 Operation manual
Pickering
Pickering 40-650A manual
Agilent Technologies
Agilent Technologies E1346A Service manual

Monacor
Monacor TVMP-1600 instruction manual

Lightscape Networks
Lightscape Networks mSDM-1RD Installation, operation and maintenance manual

Telecast
Telecast Diamondback instruction manual
Renu Electronics
Renu Electronics FP4101 Series quick start guide

