BBK DV214SI(RU) User manual

service manual
VerSI09.10
DV214SI(RU)

1.1 Safety precautions
1.1.1 Power supply
1.1.2 Precautions for antistatic
1.1.3 Precautions for laser head
1.1.4 About placement position
1.2 Maintenance method
1.2.1 Visualized method
1.2.2 Electric resistance method
1.2.3 Voltage method
1.2.4 Current method
1.2.5 Cutting method
1.2.6 Element substitution method
1.2.7 Comparison method
1.3 Required device for maintenance
Chapter Two Functions and Operation Instructions
2.1Features
2.2
2.2.1
2.2.2
2.2.3
2.2.4
2.3
2.4
2.4.1
2.4.2
2.4.3
2.4.4
2.4.5
Chapter One About Maintenance
Controls and functions
Front and side panels control
Rear Panel general view
LED display general view(NO DISPLAY FOR DV214SI)
Remote Control general view
Set list
FUNCTION SETTINGS
Function selection and change
Language settings
Image settings menu
Sound settings menu
Playback settings
1
1
1
1
1
2
2
2
2
2
2
2
3
3
3
4
4
5
5
5
6
6
7
7
7
7
8
8
9
Catalog

7.7 USB Board(DV214&DV216SI.PCB V2.0)
2.4.6 Karaoke
2.4.7 Preference
2.4.8
2.4.9
2.4.10
Chapter Three Block Diagram
3.1 OVERALL WIRING DIAGRAM FOR PLAYER
3.2 BLOCK DIAGRAM FOR PLAYER
Chapter Four Block Diagram of Unit Circuit
4.1 Servo Circuit
settings menu
settings
Parental Control
Initial setup menu
Reset to defaults
2.4.11 Exit setting menu
2.4.12 Channel delay set-up
2.5 MISCELLANEOUS
2.5.1 Useful notes
2.5.2 Trouble shooting
2.5.3Specification
4.2 Decode Circuit
4.3 Video Circuit
4.4 Audio Circuit
4.5 Power Circuit
Chapter Five Troubleshooting Flow Chart
Chapter Six Waveform Diagram
.
Chapter Seven PCB board
7.1 Surface layer of
Decode Board (SKY_CX2:03 2009.07.20)
7.2 Surface layer of A
V Board(SCART-OUT 2006.12.25)
7.3 Bottom layer of A
V Board(SCART-OUT 2006.12.25)
7.4 Power
Board (SKY-P00904A 2009.06.27 Ver2.0)
7.5 Surface layer of
Main Panel(DV214&216SI.PCB V2.0)
7.6 Bottom layer of
Main Panel(DV214&DV216SI.PCB V2.0)
10
10
10
10
10
11
11
13
13
13
14
15
15
16
17
17
18
18
19
19
20
23
27
27
28
28
28
29
29
29

7.8 Surface layer of
OK Board (DV214&216SI-MIC.PCB V2.0)
7.9 Bottom layer of
OK Board (DV214&216SI-MIC.PCB V2.0)
Chapter Eight
8.1 Decode Board (SKY_CX2:03 2009.07.20)
8.2 A
V Board (SCART-OUT 2006.12.25)
8.3 Power Board (SKY-P00904A)
8.4 Main Panel
(DV214&216SI.PCB V2.0)
8.5 OK Board (DV214&216SI-MIC.PCB)
8.6 USB Board (DV214&216SI.PCB-V2.0)
Chapter Nine BOM List
Circuit Diagram
30
30
31
31
34
35
36
37
38
39

Caution :
This service manual is only applicable to DV214SI(RU) SI09.10

Chapter One About Maintenance
1.1 Safety precautions
1.1.1 Power supply
When maintenance personnel are repairing DVD players, he should pay special attention to the
power board with 220V AC and 330V DC which will cause hurt and damage to persons!
1.1.2 Precautions for antistatic
Movement and friction will both bring static electricity which causes serious damages to integrated
IC. Though static charge is little, when a limited quantity of electric charge is added to large-
scaleintegrated IC, as the capacitance is very small in the meantime, now the integrated IC is very much
easy to be struck through by static electricity or the performance will decrease. Thus static electricity
prevention is of extraordinary importance. The following are several measures to prevent static
electricity:
1. Use a piece of electric conduction metal with the length of about 2 metres to insert into the earth,
and Fetch the lead wire from the top of the surplus metal and connect to the required static electricity
device. The length and depth of the metal embedded under the earth should be determined according to
the wettability of the local soil. For humid places, it may be shorter, and longer and deeper for dry places.
If possible, it can be distributed and layed in terms of “#” shape.
2. On operating table-board, the antistatic table cushion should be covered and grounded.
3. All devices and equipments should be placed on the antistatic table cushion and grounded.
4. Maintenance personnel should wear antistatic wrist ring which should be grounded.
5. Places around the operating position should also be covered with electric conduction cushion or
Painted with antistatic paint.
1.1.3 Precautions for laser head
1. Do not stare at laser head directly, for laser emission will occur when laser head is working, which
will Hurt your eyes!
2. Do not use wiping water or alcohol to clean laser head, and you may use cotton swab.
- 1 -

1.1.4 About placement position
1. Never place DVD player in positions with high temperature and humidity.
2. Avoid placing near high magnetic fields, such as loudspeaker or magnet.
3. Positions for placement should be stable and secure.
1.2 Maintenance method
1.2.1 Visualized method
Directly view whether abnormalities of collision, lack of element, joint welding, shedding welding,
rosin joint, copper foil turning up, lead wire disconnection and elements burning up among pins of
elements appear. Check power supply of the machine and then use hands to touch the casing of part of
elements and check whether they are hot to judge the trouble spot. You should pay more attention when
using this method to check in high voltage parts.
1.2.2 Electric resistance method
Set the multimeter in resistance position and test whether the numerical value of resistance of each
point in the circuit has difference from the normal value to judge the trouble spot. But in the circuit the
tested numerical value of resistance is not accurate, and the tested numerical value of integrated IC's
pins can only be used for reference, so the elements should be broken down for test.
1.2.3 Voltage method
Voltage method is relatively convenient, quick and accurate. Set the multimeter in voltage position
and test power supply voltage of the player and voltage of a certain point to judge the trouble spot
according to the tested voltage variation.
1.2.4 Current method
Set the multimeter in current position and test current of the player of a certain point to judge the
trouble spot. But when testing in current method, the multimeter should be series connected in the
circuit, which makes this method too trivial and troublesome, so it is less frequently used in reality.
1.2.5 Cutting method
Cutting method should be combined with electric resistance method and voltage method to use.
This method is mainly used in phenomena of short circuit and current leakage of the circuit. When
cutting the input terminal voltage of a certain level, if voltage of the player rises again, it means that the
trouble lies in this level.
- 2 -

1.2.6 Element substitution method
When some elements cannot be judged good or bad, substitution method may de adopted directly.
1.2.7 Comparison method
A same good PC board is usually used to test the correct voltage and waveform. Compared these
data with those tested through fault PC board, the cause of troubles may be found.
Through the above maintenance method, theoretical knowledge and maintenance experience, all
difficulties and troubles will be readily solved.
1.3 Required device for maintenance
Digital oscillograph ( 100MHE)
TV set
SMD rework station
Multimeter
Soldering iron
Pointed-month pincers
Cutting nippers
Forceps
Electric screw driver
Terminals connecting cord
Headphone
Microphone
- 3 -

2.1 Features
Compatible Disc Types
#Digital video playback: DVD-video, super VCD, VCD compatibility
#MPEG-4 standard support: compatibility with DivX3.11, DivX4, DivX5, DivX Pro, XviD compressed
video files
#Digital audio playback: CD(CD-DA)and HDCD compatibility
#Fully compatible with compressed audio files such as MP3,WMA and OGG Vorbis formats
#Playback of DVD-Video, VCD, CD+G Karaoke discs
#Digital graphic albums playback: Kodak picture CD, JPEG compatibility
Audio
#192 kHz/24 bit Audio Digital/Analog converter
#Coaxial and optical outputs for Dolby Digital/DTS/LPCM digital audio
#Mixed audio output for amplifier and TV connection
#Digital multi-channel decoders, providing Dolby Digital/DTS audio stream playing
#Built-in Dolby Pro Logic ll decoder makes available to convert stereo signal into multi-channel
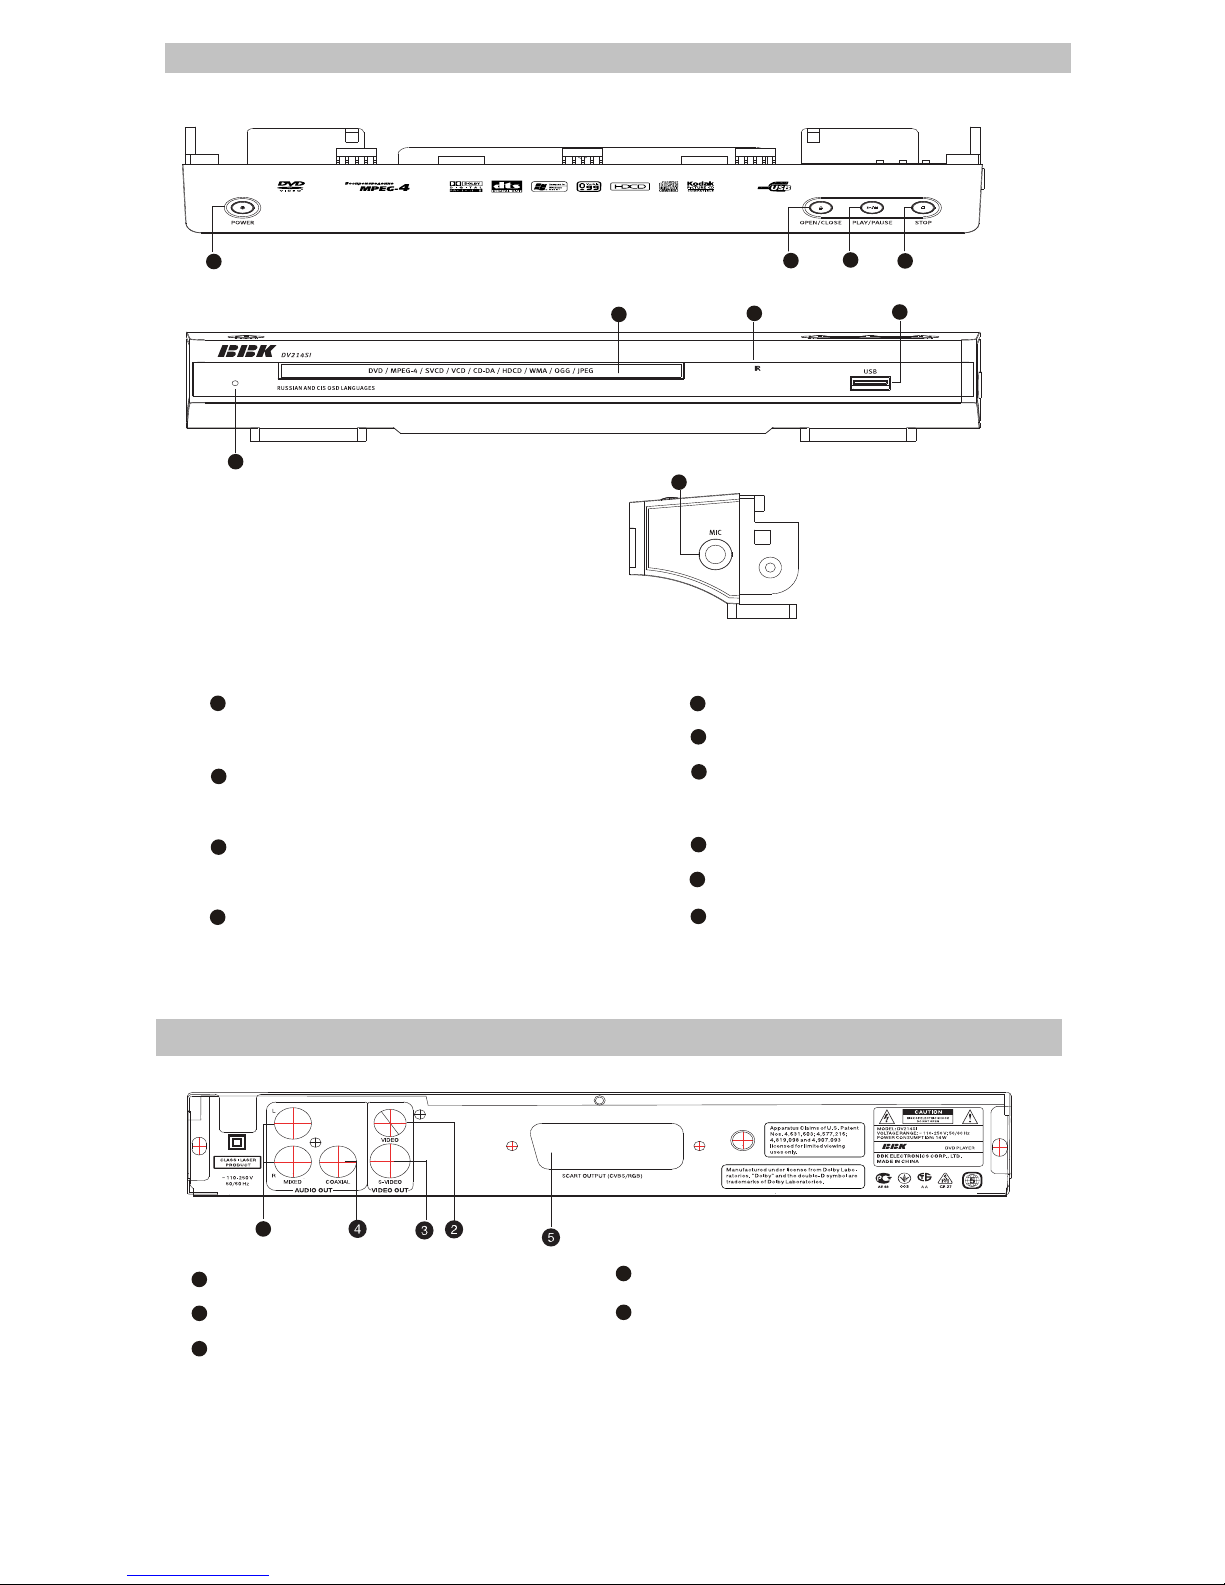
#MIC input for karaoke function(only for models DV611SI,DV615SI,DV624SI ,DV626SI,DV628SI)
#Headphones output(only for models DV626SI,DV628SI)
Video
#Progressive Scan Output(Y Pb Pr) producing flicker-free and stable images
#Composite, component(Y Cb Cr), S-Vidio and RGB/SCART outputs for various types of
Connections
#Capable of playing NTSC/PAL discs written in NTSC system
#Multiple dubbings, angles, subtitles support
#Sharpness,gamma, brightness, contrast, hue, saturation adjustment
Others
#Compatible disc types: CD-R/CD-RW,DVD-R/DVD-RW,DVD+R/DVD+RW
#USB interface to connect Mp3 player, flash card or digital camera
#KARAOKE+ system, expanding karaoke function
#Russia, Cls and Baltic States adaptation interface and filenames, ID3-tags and CD-Text support
simplifies device operation
#"Memory” function enables to save the last position after stop playback
#"Q-Play” function provides direct playback and allows to skip commercial impossible to rewind
#"Virtual Keyboard” function provides more convenient DVD playback control
#"Browser” function provides easy access to playback control
#Automatic Screensaver function
#Parental control function to protect children from watching inappropriate discs
#Super wide range of operating power supplies (~110-250v,50/60 Hz), automatic short circuit
protection
- 4 -
Chapter Two
Functions and Operation Instructions

- 5 -
2.2 Controls and functions
2.2.1 Front and side panels control
1POWER button(Press to switch ON/OFF
the device)
OPEN/CLOSE button(Press to open/close
the disc tray)
The indicator of operating mode/Standby mode
Sensor of infrared beams
2
3
Microphone input
STOP button(Press to stop the playback)
PLAY/PAUSE button(Press to
playback/pause)
Disc tray
USB port
Phones jack
5
6
7
8
9
10
11
NOTE:
#Presence and location of the buttons, sockets and regulators depend on a model of DVD player.
2
9
2.2.2 Rear Panel general view
Stereophonic audio output
Socket of video output S-Video
Socket of composite video output
1
2
3
4
5
5
Socket of coaxial digital audio output
SCART socket
NOTE:
#Presence and location of the buttons, sockets and regulators depend on a model of DVD player.
12
3
5
6
7
8
910
DV214SI
1

- 6 -
2.2.3 LED display general view
Playback time
2.2.4 Remote Control general view
[ ]
[ ]
[ ]
[ ]
Button
Press to open / close the disc tray.
LANG Button
Press to change the language
MEM button
Press to memorize the point where playback was
stopped/playback from the previously
memorized point.
DISP button
Press to display the disc information.
NUMeric buttons
BROWSE button
Press to turn on/off the browser function
Cursor buttons(UP/DOWN/LEFT/RIGHT)
SETUP button
Press to switch to setup mode.
Button
Press to turn on/off the Virtual Keyboard function.
KARAOKE button
Press to set karaoke function.
Button
Press to reverse scanning.
Button
Press to playback from the previous point.
REPEAT button
Press to repeat playback.
A-B buttons
Press to repeat the selected portion.
Button
Press to turn on/off the sound.
VOLUME+/-button
Press to adjust the volume.
DVD/USB button
Press to switch DVD/USB models.
Button
Press to playback from the following point.
Button
Press to stop playback.
Button
Press to forward scanning.
Button
Press to play/pause the playback.
ZOOM+/-button
Press to zoom in/out the image.
1
2
3
4
5
6
7
8
9
10
11
12
13
[ ]
[ ]
[ ]
[ ]
[ ]
14
15
16
17
18
19
20
21
CANCEL button
Press to go one level/cancel current
operation.
OK button
MENU button
DVD-disc menu/PBC function
ANGLE button
Press to change camera angle
Q-PLAY button
Press to turn the Q-Play mode on.
SUBT button
Press to change the subtitles
language/JPEG mode.
Button
Press to switch the device on/into standby. 22
23
24
25
26
27
28
29

- 7 -
2.4.2 Language settings
1. menu: interface language setup
#Options: Russian, English, Ukrainian,
Romanian.
#Default option: English.
2.DVD menu: selection of disc menu language
3.Soundtrack:selection of translation language
#Options:Russian,English,Estonian,Latvian,Kaz
akh,Romanian,Belarusian,UKrainian,Chinese.
#Default: English.
#Selection of other languages: select the
OTHERS item using the UP and DOWN
buttons and press OK. Enter the language
code using the numeric buttons and press OK.
#If the language you selected is not recorded on
the DVD disc, another available language will
be used.
4.DVD Subtitles: selection of DVD subtitles
language
#Options:Off,Russian,English,Estonian,Latvian,
Kazakh,Romanian,Belarusian,UKrainian,Chin
ese and others.
#Default option: Off.
#Selection of other languages: select the
OTHERS item using the UP and DOWN
buttons and press OK. Enter the language
code using numeric buttons and press OK.
#If the language you selected is not recorded on
the DVD disc, another available language will
be displayed.
5.MP4 subtitles: selection of Mp4 subtitles
language
#Options: Russian, English, Ukrainian,
Romanian.
#Default option: English.
High
Medium
Low
TV system
TV scan mode
Video output.
TV format
Sharpness
Gamma
Brightness
Contrast
Hue
Saturation
AUTO
IS
S-Vid.
4:3 LB
Med.
Off.
+48
+48
0
0
DVD player
Audio cord
Video cord
Remote control
Battery AAA
Warranty card
User’s manual
1PCS
1PCS
1PCS
1PCS
2PCS
1PCS
1PCS
2.3 Set list
TV system
TV scan mode
Video output
TV format
Sharpness
Gamma
Brightness
Contrast
Hue
Saturation
PAL
IS
S-Vid.
4:3 LB
Med.
Off
+48
+48
0
0
AUTO
PAL
NTSC
2.4 FUNCTION SETTINGS
2.4.1 Function selection and
change
Press the SETUP key to show the setup
menu. You will see the following image on the
screen, as shown on the figure:
Select the desired menu item using the UP
and DOWN buttons; press OK for confirmation.
1.For example, if you wish to change the image
settings, you have to select the lmage item
and press the OK.
2.Using the Up and Down buttons, select the
desired item and press OK.
For example, select the Sharpness item.
Settings will appear on the screen. Then select
the desired sharpness level and press OK for
confirmation.
3.Press LEFT key of the UP and DOWN buttons
for exit to previous menu level.
4. Press SETUP to exit setup menu.
Setup menu
DVD menu
Sound track
Subtitles
MP4 Subtitles
Off.
Language
Image
Sound
Playback
Karaoke
Preference
Parental control
Initial help
Reset settings
Exit

2.4.3 Image settings menu
1.TV system: TV system selection
#Options: Auto, PAL, NTSC.
#Default option: PAL.
2.TV scan mode: scan mode Selection
#
3.Video output: selection of video signal
#Options: S-Video, Comp, SCART.
#Default option: S-Video.
4.TV Format: image ratio settings
#Options 4:3 Pan&scan, 4:3 letterbox and 16:9
TV.
#Default option: 4:3 letterbox.
#Some discs are recorded with support of only
one ratio. The selected ratio must comply with
the TV screen.
5.Sharpness:image sharpness adjustment
#Options: High, Medium, Low.
#Default option: Medium.
Options: progressive, interlaced.
# Default option: Interlaced .
#Progressive scan is transferred only via a
component video output.
#Before switching to progressive scan, make
sure that your TV set supports this operation
mode.
TV system
TV scan mode
Video output.
TV format
Sharpness
Gamma
Brightness
Contrast
Hue
Saturation
PAL
IS
S-Vid.
4:3 LB
Med.
Off.
+48
+48
0
0
AUTO
PAL
NTSC
6.Gamma :adjustment of image color
temperature
#
Saturation:
Options: High, Medium, Low, Off.
#Default option: Off.
7.Brightness:adjustment of image brightness
8.Contrast:adjustment of image contrast.
9.Hues: adjustment of image hues.
10. adjustment of image saturation
Adjustment of image brightness, contrast, hues
and saturation:
#Select the desired item of the image
adjustment section using the Up and Down
buttons. Press OK or RIGHT key to start
adjusting the relevant option.
#Change the option value using the Up and
Down buttons.
#Upon completion press the LEFT key of the UP
and DOWN buttons to return to image setup
menu.
2.4.4 Sound settings menu
Mixer
Digital output
Tuning
Configuration
Stereo mix
Surr. Mix
Channels
Delays
PRO Logic II
St.
L+R
off
Auto
1.Mixer
A).Configuration: setting of the mode for
stereo signal
#Options : Stereo
#Default option: Stereo.
B).Stereo mix: playback set-up while playing the
disc with two independent audio channels.
#Options : L+R, L, R.
#Default options: L+R.
C.Surr. Mix: set-up of surround options while
playing the Stereo disc.
#Options : Off, Virt. Surr.
#Default options: Off.
D. Low band: distribution of low frequencies
through channels.
#Default options: Front F
#If you want the low-frequency component of the
sound signal enter only the subwoofer channel,
select and confirm the parameter Subwoofer
SW.
- 8 -
StereoConfiguration
Stereo mix
Surr. Mix
Channels
PRO Logic II
Delays
St.
L+R
off
Auto
E. Channel settings: separate adjusting of
volume by channels.

- 9 -
G. PRO Logic ll: function of stereo sound
conversion to 5-channel sound.
#Options: On, Off, Auto.
#Default option: Auto.
#In Auto position, the DVD player determines
itself, when to use the PRO Logic ll decoder.
Some discs do not support this function.
2. Digital audio output
A. SPDIF format: set-up of digital audio output
options
#Options: RAW , PCM.
#Default options: RAW.
#When you select the RAW option, the
undecoded signal is transferred to the DVD
player’s digital outputs, the decoded signal is
transferred to analog outputs. Decoding is
performed by the built-in decoder of the DVD
player. This feature is meant to ensure that
signal decoding at digital outputs is performed
by an external device(e.g.an amplifier)
#If you select the PCM option, a PCM coded
signal will be transferred to the DVD player’s
digital outputs.
B. LPCM: set-up of digital audio output options
to comply with different amplifiers and receivers.
#Options: 48 kHz 16 bit, 96 kHz 24 bit
#Default option: 48 kHz 16 bit.
3. Sound correction:
A. Max volume: max volume limiting.
#Using the Up and Down buttons, adjust the max
volume level.
#Press the LEFT key of the Up and Down
buttons to return to sound correction setup
menu.
B. Equalizer: equalizer modes.
#Options: Rock, Pop, Live, Dance, Techno,
Classic, Soft.
#Default option: Off.
C. Echo: echo effects.
#Options: Off, Concert, Living room, Hall,
Bathroom, Cave, Arena, Church.
#Default option: Off.
D. Tone balance
2.4.5 Playback settings
1. DVD: Advertisement skip: skip the
unskippable block while playing a DVD disc.
#Options: Yes, No.
#Default option: No.
2.VCD/SVCD: PBC menu : PBC menu on/off
#Options: On, Off.
#Default option: On.
#If On option is set, while reproducing discs, a
menu will appear, in which you can select the
order of playing the disc content. If the Off
option is set, the reproducing of content is
performed in the order, in which it is recorded
on the disc.
: adjustment of tone balance
level.
#Adjust the tone balance level using the Up and
Down buttons.
#Press the LEFT key of the Up and Down
buttons to return to sound correction setup
menu.
DVD
VCD/SVCD
Files
Repeat
Load effect
Advertisemenu No
A. P. V
Off.
Off.
NOTE:
#This function is possible with no disc loaded.

3.Files:selection of reproduced files on the disc
#Options: Audio, Picture, Video.
#Default option: A, P, V
4. Repeat : file repeat mode
#Options: Off, Single, All.
#Default option: Off.
5.Load effect: type of transition from one JPEG
file to another
#Options: Off, from top, from bottom
#Default option: Off.
2.4.6 Karaoke settings menu
1. Microphone: Microphone on/off
#Options: On, Off.
#Default option: Off.
2. Kar. help: karaoke disc playback mode
#Options: L Channel , R Channel , No ast , No
voc.
#Default option: No ast .
Microphone
Kar. Help
Volume
Echo
On
Off
Off
No VOC.
5
5
Microphone
Kar. help
Volume
Echo
On
No ast.
5
5
Microphone
Kar. help
Volume
Echo
On
No ast
5
5
3. Volume:
Microphone: microphone sound volume level.
#Using the UP/DOWN buttons adjust the
microphone volume level.
#Press LEFT key of the UP/DOWN buttons to
return to karaoke settings menu.
4.Echo: echo level while playing the karaoke disc
#Adjust the echo level Using the UP/DOWN buttons.
#Press LEFT key of the UP/DOWN buttons to return
to karaoke settings menu.
2.4.7 Preference settings
1.Gr. Equalizer: spectrum analyzer
#Options: On, Off.
#Default option: Off.
3.Screensaver:screen saver on/off
#Options: On, off.
#Default option: On.
- 10 -
On
Off
Gr. Equalizer
Screensaver
Off.
On
2.4.8 Parental Control
1.Category:setup of age restrictions to prevent
children from seeing undesirable discs.
#Options: Any, Kid, G, PG, PG-13, PGR, R, NC-
17.
#Default option: Any.
Any
Kid
G
PG
PG-13
PGR
R
NC-17
Allowed..
Set password
Any
2.Set password: setup of a four-digit password
to change the level of age restrictions.
#Default option: 7890.
Old password
New password
Verify
OK Cancel
Auto
PAL
NTSC
2.4.9 Initial setup menu
#Press the RIGHT key of the UP/DOWN buttons
to enter the initial setup menu, then select the
desired item using the buttons Up and Down
and press OK key for confirmation.
#While being in this menu section, you cannot
return to the previous level by pressing the
LEFT key of the UP/DOWN buttons.
2.4.10 Reset to defaul ts
Resetting all settings and restoring default
options, except age restrictions level and
password.

- 11 -
Language
Image
Sound
Playback
Karaoke
Preference
Parental control
Initial help
Reset settings
Exit
2.4.12 Channel delay set-up
Set-up of time delay in the surround
channel
Usually, time delay in the Dolby Digital
decoding system is preset to ensure best effect
while installing the Home Theater. However, in
case you wish to adjust your system more
precisely, please consult instructions given in
this manual. Set up of time delay for this device
is possible in both Dolby Digital and Dolby Pro
Logic modes..
To Set the desired delay you have to know the
distance from the place where you are ,to the
front speakers and Surround speakers as shown
in Fig. 1Consult Fig.2(Dolby Pro Logic mode)
and3(Dolby Digital mode) in order to determine
the distance to Surround speakers(axis Y in the
figure) and the distance to the front speakers
(axis in the figure).Crossing point of those two
lines on the chart will give the recommended
delay value.
Fig.1.Take into account the A-B distance; use both
figures for setting the desired time delay.
Optimum
Admissable
Not recommended
Fig.2.Detemine delay value as to Dolby Pro Logic mode
Distance to front speakers(inches)
Fig.3.Detemine delay value as to Dolby Digital mode.
Set-up of time delay in the central
channel
Sometimes several people are listening to
the music, and the space is limited. In this case,
you can install three speakers(two front ones
and a central one) as shown in Fig.1 with the
distance to the listener being approximately the
same. The central channel delay is to be set at
“0”.
Should the central speaker be in close
proximity to left and right front speakers as
shown in Fig. 2, or the central speaker be
nearer to listeners when compared with front
speakers’ location, or the central speaker be
nearer to the listener by 1 foot, in all these
cases you may set the delay value for the
central channel at 1 ms.
For instance, as shown in Fig.2, if the line C
is by 1 foot shorter than the lines R and L, the
delay value is to be set at 1 ms. If your sofa is
broad enough, and there are several listeners
sitting on it , it makes sense to locate the
speakers in one line, as shown in Fig.3 with the
delay value of the central to be set at “0”.
Finally, if it will be necessary to install the
central speaker behind the left and right front
speakers, the delay value shall be set at “0”.
2.4.11 Exit setting menu
Select the exit item using the Up and Down
buttons and press the OK to exit the menu.
Load factory settings
OK Cancel

Principle of compressing the acoustic signat’s dynamic
range.
whisper etc. have merely disappeared. To
avoid this, you just have to decrease the volume
of “loud” sounds by simultaneously increasing
the volume of “soft” sounds with the volume of
“average” sounds left unchanged, i.e. Just
decrease the dynamic range of sound
accompaniment. Only Dolby Digital system
provides for such a method of sound control. It
uses the principle of compressing the acoustic
signal’s dynamic range while recording;
therefore, while playing an inverse
transformation(volume expansion) takes place.
This is called”night” mode. The regulation limits
are restricted, however, to avoid distortions of
resultant signal.
The Dolby Digital system provides an
extremely broad dynamic range of playback
sound-from gentle to roaring. It creates the
presence effect, especially while seeing motion
pictures. However, at night a powerful sound
with a broad dynamic range may give pleasure
to you ,but disturb and annoy your family and
neighbors. If you just decrease the volume, you
will immediately notice that you ceased to hear,
e, g, dialogues as clear as you do at normal
volume, and such sound effects as rustle,
“Night” mode
Fig.1.Delay of central
channel=0
Fig.2.Small area Delay
of central channel=L=(or
Fig.3.Small area Delay
of central channel=0
L=R>C
Dolby Digital Dolby Pro Logic s urround
Rear channel Stereo 20 Hz -20 kHz Mono channel with li mited frequency
range(100Hz-7 kHz )
Low-frequency
channel(s ubwoofer) Available,20-120 Hz N/a
Sound field dis tribut ion Muitivariate From left t o right, from right to left, from
front to rear, from rear t o front
Channels 6 independent c hannels, each
reproducing it s own si gnal at a time
4 segment ed channels . Only one channel
is dec oded at a ti me.
Creates an opt imum s ound field with
illus ion of an equal distanc e from listener
to each speak er.
The most c ost-efficient way to ensure
high-qualit y surround effect.
Allows adjust ing the decompress ion
degree of sound infromati on("night "
mode).
Surround sound may be rec eived from
any signal s ource.
Miscell aneous
- 12 -

- 13 -
Miscell aneous
Poss ibili ty of programmable cont rol of the
decoder to t ransfer bass es int o low-
frequency c hannel in sys tems equipped
with broad-band speakers and a
subwoofer.
Compatibl e with exist iing and future t wo-
channel(s tereo) formats .
Undoubted progress in sound rec ording
technology, espec ially important for
program direct ors, fil m directors, sound
engineers and ac tors.
Big progress in c omparis on with
conventional s tereo, t he world's mos t
popular surround format.
2.5 MISCELLANEOUS
2.5.1 Useful notes
#To extend the service life of your DVD player make pauses of not less than 30 seconds between
switching off and repeatedly switching on the DVD player.
#Disconnect the DVD player from the wall outlet after shutdown.
#Some DVD player’s functions may not be applied to some discs.
#Use supply sources of rated voltage, otherwise the DVD player may not function or be damaged.
#In case of the DVD player’s occasional stops, please switch the power supply off and then on again.
2.5.2 Trouble shooting
Please check probable causes of malfunction before addressing the service center.
Sign of trouble Cause of trouble Act ions t o eliminate the t rouble
No sound 1.Poor audio cable c onnect ion
2.Disc dirty or damaged.
3. Sound disabled by the MUTE button.
1.Mak e proper connect ion
2. Clean the disc
3. Pres s the MUTE button.
No image 1.Poor video cable c onnection.
2. Incorrect s ettings of your TV s et.
3.The DVD player is in t he progressi ve
scan mode while y our TV set does not
support t his mode.
1. Mak e proper connect ion.
2. Correct the setti ng of your TV set.
3. Place t he DVD players in t he
interlac ed sc an mode through the
DVD-receiver's menu.
Blac k and white image 1. Incorrect TV color syst em selected.
2. Color level on theTV set adjust ed
incorrec tly .
1. Set the appropriate color s ys tem
via the menu: SE TUP>Image>TV
scan.
2.Readjust the c olor sy stem of your
TV s et
Disc s cannot be read 1. Dis c not inserted.
2.Disc ins erted incorrectl y.
3.Condensat e on the DVD play er's las er
head.
1.Insert the dis c.
2.Inst all the disc with the label s ide
facing up.
3.Switch the DVD play ers on without
disc for an hour.
Microphone does not
operate
1.Microphone is unplugged.
2.Low level of the mic rophone's sound
volume.
1.Connect the microphone.
2.Adjust the level of the mic rophone's
sound volume.

- 14 -
Remote control does not
operate
1.Remote control is incorrectly direct ed
at the DV D players's sc reen.
2. Distance to the DVD players is in
excess of 8 meters.
3.Run out bat teries.
1.Use the remote control ac cording
to the manual.
2.Decreas e the dis tance to the DVD
players.
3.Replace both batt eries.
Some functions do nor
work
1.Disc is recorded incorrectly.
2.Incorrect key sequence.
3.Static voltage on the DVD player's
housing.
1.W ait5-10 seconds and the DVD
players will automatically return to
normal state.
2.Repeat the operation one more
time.
3.Switch the DVD play ers off for 1-2
minutes and then switch it on again.
Unstable image 1.Incorrect TV set settings. 1.Correct the TV set settings.
2.5.3 Specification
Supported formats
Data medium
Inputs
Analog outputs:2.0CH output.
Digital outputs :Coaxial audio out
Video outputs: S-Video output, RGB/SCART output, Composite output
Audio c haracteristics
Voltage range
Temperature requirement
Moisture requirement 15-75%(not c ondensate)
Outputs
C:0.286V p-p(75 )
Signal s wing of component video output: 1.0Vp-p(75 )
Signal s wing of compos ite video output : 1.0V p-p(75 )
Signal s wing of S-Video out put: 1. 0Vp-p(75 )
DVD-Video, Super VCD, VCD, MPE G-4, CD-DA, CD+G, HDCD, MP3, WMA,
Kodak P icture CD, JPEG
CD-R, CD-RW , DVD-R, DVD+R, DVD-RW, DVD+RW
Microphone input(two microphone inputs for(DV611SI,DV624SI,DV626SI ,DV628SI
models.one microphone inputs for DV214&216SI)
Audio outputs
5-35
Cb/Cr:0. 7Vp-p(75 )
Video c haracteristics
Frequency: 20-20000 Hz( 1 db)
Signal-t o-noise rat ion: > 100 db
~110-250V, 50/60 Hz
#We improve quality of our production permanently, that’s why specification can change without
notification.
#Some discs, recorded in any supported format on any compatible device, can’t playback or can
playback incorrect over peculiarity of their record.
Model Dimensions(mm) Weight (kg) Power consumption(watt)
1.3
14
DV214SI
260×175×38
1.3
DV216SI
260×175×38

Figure 3.1.1 Overall Wiring Diagram of DV214&216SI(RU)
- 15 -
Chapter Three Block Diagram
3.1 OVERALL WIRING DIAGRAM FOR PLAYER
Overall wiring diagram of
DV214&216SI(RU)
player is shown in figure 3.1.1.
L O ADE R
LOAD-
LOAD+
TROUT
GND
TRIN
LOAD-
LOAD+
TROUT
GND
TRIN
SL+
SL-
LIMIT
GND
SP+
SP-
SL+
SL-
LIMIT
GND
SP+
SP-
F-
F+
T+
T-
C
D
IOA
RFO
A
B
F
GND
V20
VCC
E
VR-CD
VR-DVD
LD-CD
MDI
HFM
VCC
LD-DVD
GND
F-
F+
T+
T-
C
D
IOA
RFO
A
B
F
GND
V20
VCC
E
VR-CD
VR-DVD
LD-CD
MDI
HFM
VCC
LD-DVD
GND
RGB_CVBS
R/V
G/Y
GND
B/U
AV_TV
VIDEO
L
AGND
R
DECODEBOARD
SKY_CX2:03 2009.07.20
MIC1
MIC2
GND
FS0
LEDAT
LEDCK
LEDST
GND
VCC
IR
+
12
V
-12
V
GND
+5V
GND
VCC
POWER BOARD
SKY-00904A
MAINPANEL
OK BOARD
DV214&216SI-MIC.PCB
CN6 CN3
CN5
CON7
CN602
FS0
VSDA
VSCK
VSTB
GND
VCC
IR
KEY
KEY
CN4
VCC
USB_DM
USB_DP
GND
CON3
VCC
USB_DM
USB_DP
GND
AV BOARD
SCART-OUT 2006-12-25
KEY3
KEY2
DV214&216SI.PCB V2.0
190-214S07-01
DV214&216SI-POWER.PCB V2.0
190-214S16-01
800-904A01-0
190-SCAR12-40
821-051217-0
CN5
+
12
V
-12
V
CN1
CN4
CN2 CN11
CN10
MIC1
MIC2
GND
CN2
LED+ LED+
LED- LED-
This manual suits for next models
1
Table of contents
Other BBK DVD Player manuals