Beam 5000 User manual

Portable
Air Filtration
System
Instruction Manual
Model 5000
Read and
keep this manual for
reference purposes
Système portatif de
filtration de l’air
Manuel d’utilisation
Modèle 5000
Conservez ce manuel
pour vous y référer

Thank you for purchasing a Beam® portable air filtration system. With
proper care and maintenance, your Beam® system will provide many
years of reliable service, improving the quality of your air.
INSTALLATION
1. Place the unit in the area where you want the cleanest air.
2. Plug the unit into a grounded outlet.
3. To turn the unit on, press any of the 3 available speeds: ‘LOW’,‘MED’ or
‘HIGH’. An LED will illuminate indicating the current speed of opera-
tion. Three of the four available filter lights will also illuminate, showing
which filters are in operation. To turn the unit off, press the ‘OFF’ but-
ton. All LED’s will go out, indicating the unit is off.
4. The default LED filter monitoring light setting for the third stage filter is on
“V.O.C. Blanket”. If you have upgraded to the V.O.C. Canister, you
need to reset the third stage filter monitor. Press and hold the V.O.C.
Canister button for 3 seconds to activate the V.O.C. Canister timer.
When the operation is complete, the LED for the V.O.C. Blanket will go
out and the LED for the V.O.C. Canister will illuminate. You can reverse
the monitor back to the V.O.C. Blanket by pressing and holding the
V.O.C. Blanket button for 3 seconds.
CAUTION
1. Make sure the cord is not in the path of people walking or where any-
thing can be rolled over it.
2. Do not place any objects on top of the unit or allow anyone to sit on it.
3. NEVER place any liquids or plants on the unit. Moisture could leak into
the unit and damage the filter media or electrical components.
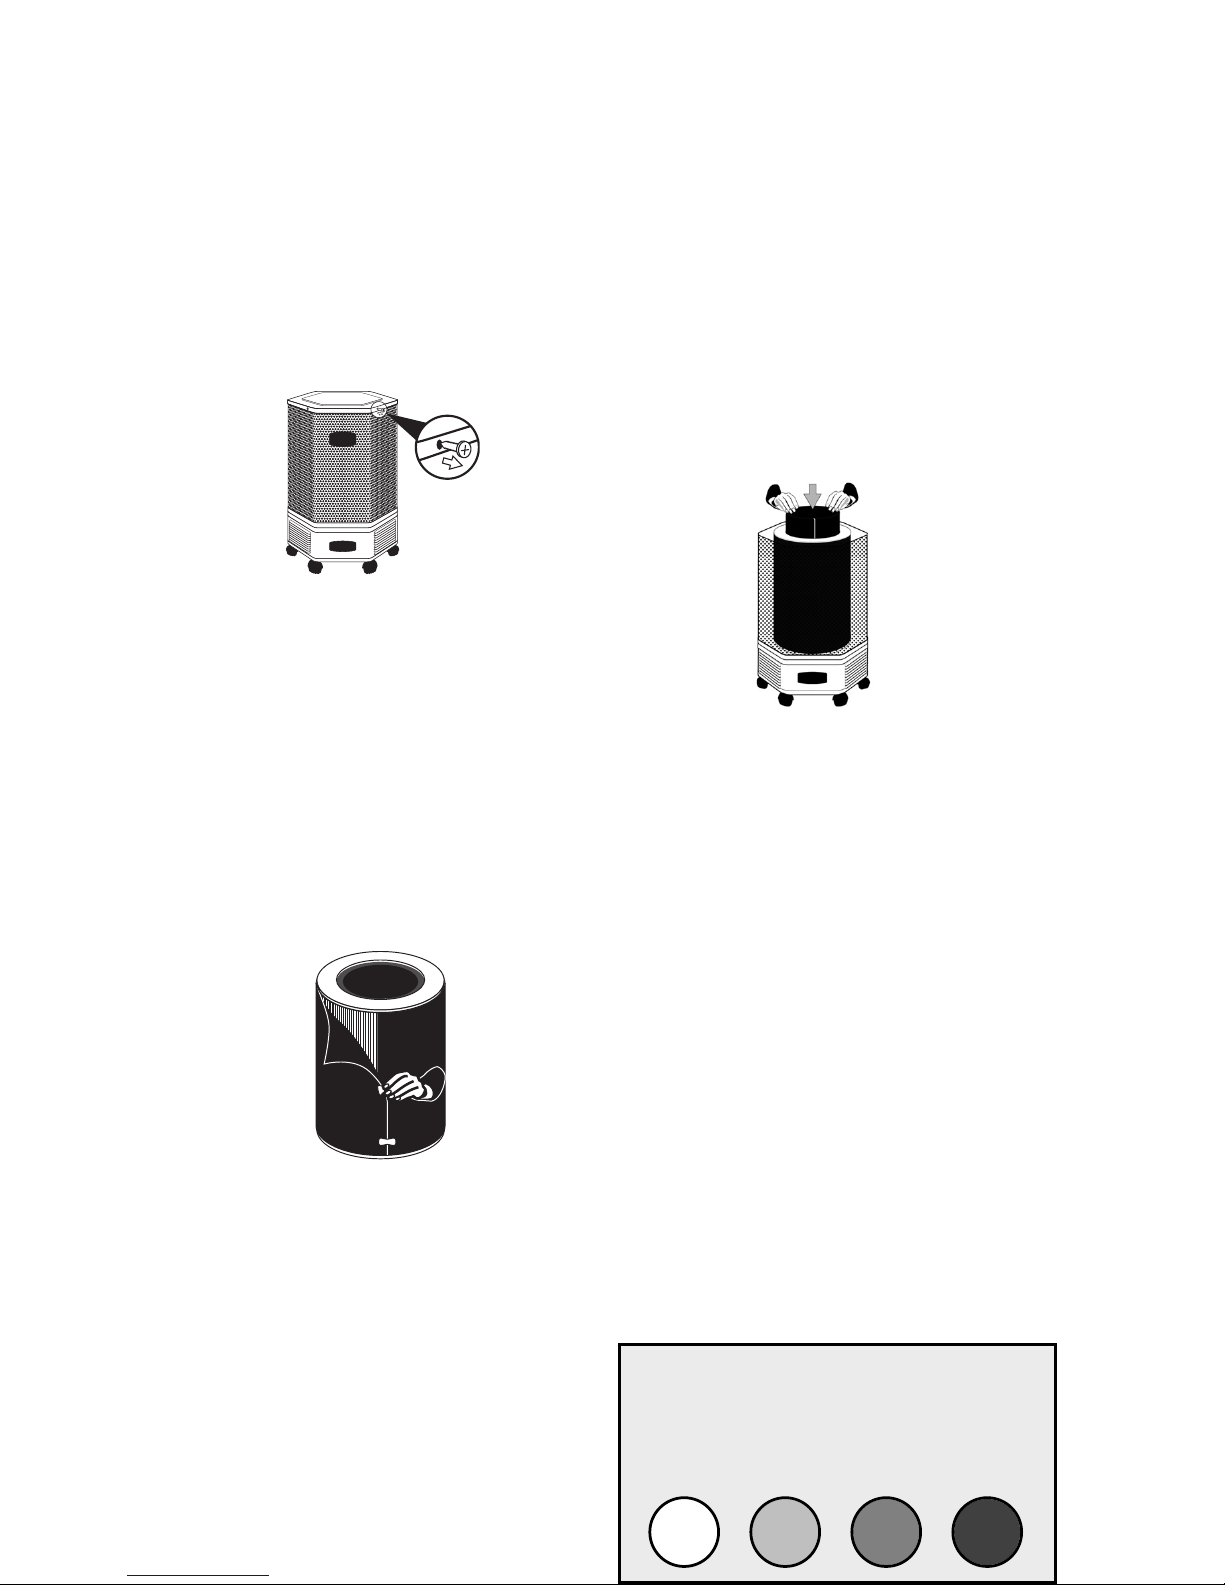
4. The air filtration system discharges the cleaned air through the vents
near the bottom on four of the six sides. On “HIGH” the velocity of the
air coming out is high to enhance circulation throughout the area
being cleaned. If the airflow is bothersome or creates a draft, turn the
unit until the air is directed toward an unoccupied area of the room.
NOTE: You may notice a slight “new” smell from the unit when your first
turn it on. The is normal and harmless and will dissipate within a few days.
FOUR-STAGE FILTRATION
STAGE 1: Prefilter
Removes large particulates and odors.
Extends the life of the HEPA filter.
STAGE 2: Silver Prefilter
Provides Antimicrobial protection
STAGE 3: HEPA filter
99.97% efficient @ 0.3 microns. Removes
dust, pollen, bacteria, animal dander,
attached viruses, cigarette smoke, radon
daughters and more.
STAGE 4: V.O.C. filter
Removes odors and hazardous chemicals
that may off-gas from cleaners, paints,
solvents, carpets, furniture and other items
containing synthetic materials.
Merci d’avoir acheté un filtre à air portatif Beam®. Si vous en faites un bon entretien,
votre filtre Beam® vous offrira plusieurs années de service fiable pour amélio-rer la
qualité de votre air.
INSTALLATION
1. Placez l’appareil là où vous désirez avoir l’air le plus propre possible.
2. Branchez l’appareil dans une prise de courant mise à la terre. Le cordon d’alimenta-
tion électrique a une prise de 110 V ou de 220 V suivant l’endroit où l’appareil a été
vendu.
3. Mettez l’appareil en marche en tournant le bouton de contrôle en sens horaire
jusqu’à ce que vous l’entendiez ou que vous le sentiez s’enclencher. L’unité se mettra
en marche à haute vitesse. Pour réduire le débit d’air, tournez le bouton de contrôle
en sens horaire.
4. Pour arrêter l’appareil, tournez le bouton de contrôle en sens antihoraire jusqu’à ce
que vous dépassiez la position «HIGH» ou jusqu’à ce que vous entendiez ou sentiez un
déclic en position «OFF»
MISE EN GARDE
1. Assurez-vous que le cordon d’alimentation électrique ne se trouve pas dans une aire
de circulation ou à un endroit où on pourrait rouler quelque chose sur le cordon.
2. Ne placez aucun objet sur le dessus de l’appareil et ne permettez à personne de s’y
asseoir.
3. NE PLACEZ JAMAIS de liquide ni de plante sur l’appareil. L’humidité pourrait s’infiltrer
dans l’appareil et endommager le filtre ou les composants électriques.
4. Le système laisse sortir l’air propre par des évents situés près du bas de l’appareil, sur
quatre des six côtés. Lorsque l’appareil fonctionne à grande vitesse, l’air est expulsé à
grande vitesse pour améliorer la circulation de l’air dans tout le secteur. Si le débit
élevé d’air cause des problèmes, tournez l’appareil vers un endroit inoccupé de la
pièce.
NOTA : Vous noterez peut-être un légère odeur de «neuf» lorsque vous mettrez l’appareil
en marche la première fois. C’est normal et inoffensif; cette odeur se dissipera en
quelques jours.
FILTRATION À 3 STADES
STADE 1 : Préfiltre
Retire les grosses particules et les
odeurs. Prolonge la durée de vie du
filtre HEPA.
STADE 2 : Filtre HEPA
Efficacité de 99,97 % @ 0,3 microns.
Retire la poussière, le pollen, les
bactéries, la squame animale, les
virus connexes, la fumée de ciga-
rette, les descendants du radon,
etc.
STADE 3 : Filtre des COV
Retire les odeurs et les produits
chimiques dangereux en prove-
nance des produits de nettoyage,
des peintures, des solvents, des
tapis, de l’ameublement et des
autres matières synthétiques.

Opening the cabinet
1. Turn the unit off and unplug it.
2. Unscrew the 5 lid screws. Once all five
screws are out, remove the metal
cover.
Pre-filters
1. Lift the complete filter cartridge
assembly from the unit. Remove and
discard the carbon prefilter. Discard
teh silver prefilter only if it requires
changing
2. Wrap the silver prefilter around the
HEPA cartridge, then wrap the new
prefilter around theHEPA cartridge
completely enclosing it. Use the 3
butterfly clips provided to hold the fil-
ters tightly around the HEPA car-
tridge.
3. Put the filter cartridge back in the
unit.
HEPA filter
1. Remove and carefully discard the old
HEPA cartridge.
2. Insert a new HEPA cartridge, com-
plete with new Pre-filter and Inner
Blanket.
3. Place a new O-ring seal in the outer
groove in the top of the HEPA car-
tridge. If the O-ring appears too big,
pinch it in several places until it fits in
the groove.
Inner Blanket
1. Fold the ends of the old Inner Blanket
in and remove it from the unit.
2. Insert the new Inner Blanket inside the
HEPA filter with the edges overlapped
by at least one inch. Once it is in posi-
tion press the Inner Blanket tightly
against the inner screen until the ends
butt together.
Closing the cabinet
1. Position the top cover on the unit with-
the centered screw hole at the rear of
the unit.
2. To replace the lid screws, apply firm
pressure to the top cover to align the
holes and then insert and fasten
screws.
3. Plug the unit in and turn it on.
4. With the unit on, press and hold the fil-
ter buttons for 3 seconds to reset the
timer(s) for any filter(s) you have
replaced. The LED lights for the corre-
sponding filters should stop flashing
and remain lit.
FILTER REPLACEMENT INSTRUCTIONS
NOTE: Your unit is equipped with an automated filter timer. Inspect the filters for
replacement when the corresponding filter lights on the control panel begin to
flash.
HEPA Filter Replacement
As the HEPA filter captures particulates, it will
darken over time. Replace the HEPA filter
when it darkens to example D.
A. New B. Used C. Used D. Replace
Ouverture du coffret
1. Mettre l'unité hors-tension et la débrancher.
2. Dévisser les cinq vis du couvercle. Une fois
l'ensemble des cinq vis retirées, enlever le
couvercle de métal.
Préfiltre
1. Soulever la cartouche entière de filtres et la
retirer de l'unité. Retirer le pré-filtre à charbon
et le jeter.
2. Enrouler le nouveau pré-filtre HEPA autour
de la cartouche pour l'envelopper entière-
ment
. Utiliser les trois attaches croisées
fournies pour maintenir fermement le filtre
autour de la cartouche HEPA.
3. Replacer la cartouche de filtres dans l'u-
nité.
Filtre HEPA
1. Retirez et jetez avec soin la vieille car-
touche HEPA.
2. Insérez la nouvelle cartouche HEPA avec le
nouveau préfiltre et le coussin intérieur.
3. Placez un nouveau joint torique dans l’en-
coche extérieure pratiquée à la partie
supérieure de la cartouche HEPA. Si le joint
semble trop gros, pincez-le à plusieurs
endroits jusqu’à ce qu’il puisse être inséré
dans l’encoche.
Coussin intérieur
1. Pliez les extrémités du vieux coussin intérieur
et retirez-le de l’appareil.
2. Insérez le nouveau coussin intérieur dans le
filtre HEPA; chevauchez les extrémités sur un
pouce au moins. Une fois que le coussin est
en place, enfoncez-le dans l’écran intérieur
jusqu’à ce que les extrémités se rencon-
trent.
Fermeture du coffret
1. Placez le couvercle sur l’appareil et placez
vers l’arrière la vis de protection contre
l’accès par les enfants.
2. Remettez les boutons en appliquant une
pression ferme sur le dessus du couvercle;
alignez les orifices et insérez les boutons.
3. Remettez en place la vis de protection
contre l’accès par les enfants. Branchez
l’appareil et mettez-le en marche.
CARTOUCHE OPTIONNELLE POUR LES COV POUR LE RETRAIT EN SERVICE
INTENSE DES GAZ ET DES ODEURS
REPLACEMENT DU FILTRE HEPA
À mesure que le filtre HEPA retient les particules, il
noircira graduellement. Remplacez le filtre HEPA
lorsqu’il parvient à la couleur indiquêe en D.
A. Neuf B. Usagé C. Usagé D. Remplacer

Electrolux Central Vacuum Systems
1700 W. Second
Webster City, IA USA 50595
Visit our website at: www.beam.com
Specifications
CLASSIFICATION
• Portable HEPA (High Efficiency
Particulate Air) 100% Sealed Air
Cleaning Device
• C.S.A. approved
MATERIALS: 24 gauge cold rolled steel
FINISH: Powder coated baked enamel
COLORS: Alloy
INTAKE (Upper Section)
Perforated steel enclosure surrounding
a three-stage filter assembly.
OUTFLOW (Lower Section)
Encloses motor/fan.
Model 5000
DIMENSIONS: 16" W 23”H
WEIGHT: 22 lbs.
AIR FLOW (C.F.M.): 50-225
POWER USAGE: 41-84 Watts
MOTOR/FAN
• Thermally protected Class “B”
insulated motor
• Designed for continuous operation
• Run tested for 50,000 hours
• Service: 120 Volt, 60 Hz.
CONTROL: Variable speed
ABOUT FILTERS AND SERVICE LIFE
The life spans of the individual filters are:
STAGE 1 PREFILTER: 3 to 6 months
STAGE 3 HEPA FILTER: 2 to 5 years
STAGE 4 INNER BLANKET: 6 to 12 months
The useful service life of the filters is directly related to the volume of air
passed through the system and the amount of contaminants in the air.
If your indoor air contains abnormally high levels of airborne contami-
nants (such as cigarette smoke) the life of the filters may be shortened.
The HEPA filter’s particulate removal efficiency actually improves with use
as it loads up with particulates. However, as it loads up it also becomes
more difficult to move air through the system. If you notice a significant
drop in air flow from the unit, inspect the HEPA filter. If the filter media is
darkened on the outer side, the HEPA filter should be replaced.
Fiche technique
CLASSIFICATION
• Portatif (retient les particules avec
grande efficacité) Appareil de net-
toyage de l’air entièrement scellé
• Approuvé par U.L. et CSA/ACNOR
MATÉTIAUX : Acier laminé à froid de
jauge 24
FINI : Émail en poudre cuit
ADMISSION (partie supérieure)
Enceinte perforée en acier avec fil-
tre à 3 stades
DÉBIT (partie inférieure)
Contient le moteur et le ventilateur.
MOTEUR/VENTILATEUR
• Moteur à protection thermique et
isolation de catégorie «B»
• Conçu pour fonctionner sans arrêt
• Vérifié pour 50 000 heures
• Service : 120 V, 60 Hz ou 230 V,
50/60 Hz
CONTRÔLE : Vitesse variable
Modèle 5000
DIMENSIONS : 16 po de larg. X
23 po de haut.
POIDS : 22 lb
DÉBIT D’AIR (pi. cu./min) : 50-225
CONSOMMATION D’ÉLECTRICITÉ :
41-84 W
SURFACE HEPA : 100 pi. ca.
QUELQUES MOTS AU SUJET DES FILTRES ET DE LEUR DURÉE DE VIE
La durée de vie des différents filtres est la suivante :
STADE 1 PRÉFILTRE : 3 à 6 mois
STADE 2 FILTRE HEPA : 2 à 5 ans
STADE 3 COUSSIN INTÉRIEUR : 6 à 12 mois
La durée de vie utile des filtres est directement rattachée au volume d’air qui
passe dans le système et à la quantité de contaminants contenus dans l’air. Si
l’air intérieur contient des niveaux anormalement élevés de contaminants en
suspension (comme la fumée de cigarette), la durée de vie des filtres peut être
réduite.
Plus le filtre HEPA contient de particules, plus son efficacité d’absorption est
grande, mais plus le passage de l’air à travers le filtre est difficile. Si vous notez
une diminution importante de la circulation de l’air dans l’appareil, inspectez le
filtre HEPA. Si la paroi extérieure du filtre est noircie, il faut remplacer le filtre HEPA.
Electrolux Central Vacuum Systems
1700 W. Second
Webster City, IA USA 50595
Visit our website at: www.beam.com
Part Number Part Description
172034 HEPA Cartridge Replacement 16” Replacement HEPA for 5000
172033 Annual FIlter Kit 16” - Standard 3 Carbon Prefilter, 1 Silver Prefilter,
2 Carbon Inner Blankets for 5000
BEAM MODEL 5000 Replacement Filters
3 Carbon Prefilter, 1 Silver Prefilter,
2 Carbon Inner Blankets for 5000
Annual FIlter Kit 16” - Standard172033
Replacement HEPA for 5000
HEPA Cartridge Replacement
16”
172034
DescriptionPartPart Number
BEAM MODEL 5000 Replacement Filters
Table of contents
Other Beam Air Cleaner manuals