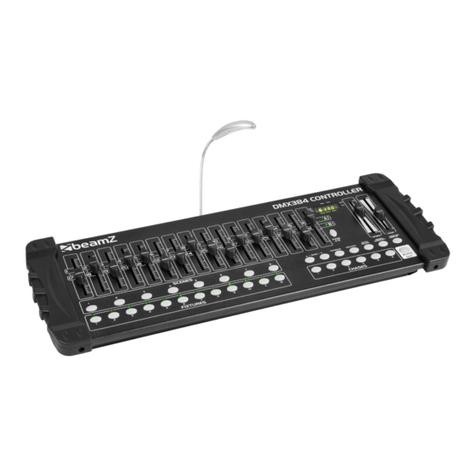
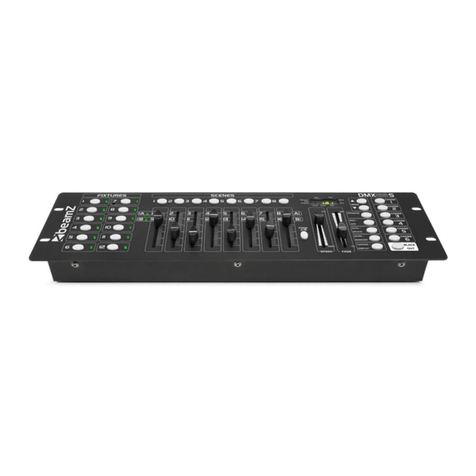
Beamz DMX240 User manual

DMX240 Controller
Ref. nr.: 154.090
INSTRUCTION MANUAL
V2.1

2

3
ENGLISH
Congratulations to the purchase of this Beamz product. Please read this manual thoroughly prior to using the product in order to
benefit fully from all features.
Read the manual prior to using the product. Follow the instructions in order not to invalidate the warranty. Take all precautions
to avoid fire and/or electrical shock. Repairs must only be carried out by a qualified technician in order to avoid electrical shock.
Keep the manual for future reference.
- Prior to using the product, please ask advice from a
specialist. When the unit is switched on for the first time,
some smell may occur. This is normal and will disappear
after a while.
- The unit contains voltage carrying parts. Therefore do
NOT open the housing.
- Do not place metal objects or pour liquids into the
product. This may cause electrical shock and
malfunction.
- Do not place the product near heat sources such as
radiators, etc. Do not place the unit on a vibrating
surface. Do not cover the ventilation holes.
- The product is not suitable for continuous use.
- Be careful with the mains lead and do not damage it. A
faulty or damaged mains lead can cause electrical shock
and malfunction.
- When unplugging the product from a mains outlet,
always pull the plug, never the lead.
- Do not plug or unplug the unit with wet hands.
- If the plug and/or the mains lead are damaged, they
need to be replaced by a qualified technician.
- If the product is damaged to such an extent that internal
parts are visible, do NOT plug the unit into a mains outlet
and DO NOT switch the product on. Contact your dealer.
Do NOT connect the product to a rheostat or dimmer.
- To avoid fire and shock hazard, do not expose the
product to rain and moisture.
- All repairs should be carried out by a qualified technician
only.
- Connect the product to an earthed mains outlet (220-
240Vac/50Hz) protected by a 10-16A fuse.
- During a thunderstorm or if the product will not be used
for a longer period of time, unplug it from the mains. The
rule is: Unplug it from the mains when not in use.
- If the product has not been used for a longer period of
time, condensation may occur. Let the unit reach room
temperature before you switch it on. Never use the
product in humid rooms or outdoors.
- During operation, the housing becomes very hot. Do not
touch it during operation and immediately after.
- To prevent accidents in companies, you must follow the
applicable guide lines and follow the instructions.
- Secure the product with an extra safety chain if the unit is
ceiling mount. Use a truss system with clamps. Make
sure nobody stands in the mounting area. Mount the
effect at least 50cm away from inflammable material and
leave at least 1 meter space on every side to ensure
sufficient cooling.
- This product contains high intensity LEDs. Do not look
into the LED light to prevent damage to your eyes.
- Do not repeatedly switch the product on and off. This
shortens the life time.
- Keep the unit out of the reach of children. Do not leave
the unit unattended.
- Do not use cleaning sprays to clean switches. The
residues of these sprays cause deposits of dust and
grease. In case of malfunction, always seek advice from
a specialist.
- Only operate the product with clean hands.
- Do not force the controls.
- If the product has fallen, always have it checked by a
qualified technician before you switch the product on
again.
- Do not use chemicals to clean the unit. They damage the
varnish. Only clean the product with a dry cloth.
- Keep away from electronic equipment that may cause
interference.
- Only use original spares for repairs, otherwise serious
damage and/or dangerous radiation may occur.
- Switch the product off prior to unplugging it from the
mains and/or other equipment. Unplug all leads and
cables prior to moving the product.
- Make sure that the mains lead cannot be damaged when
people walk on it. Check the mains lead before every use
for damages and faults!
- The mains voltage is 220-240Vac/50Hz. Check if power
outlet match. If you travel, make sure that the mains
voltage of the country is suitable for this product.
- Keep the original packing material so that you can
transport the product in safe conditions
This mark attracts the attention of the user to high voltages that are present inside the housing and that are of sufficient
magnitude to cause a shock hazard.
This mark attracts the attention of the user to important instructions that are contained in the manual and that he should
read and adhere to.
DO NOT LOOK DIRECTLY INTO THE LENS. This can damage your eyes. Persons who are subject to epileptic attacks
should be aware of the effects that this light effect may have on them.
The product has been certified CE. It is prohibited to make any changes to the product. They would invalidate the CE certificate
and their guarantee!
NOTE: To make sure that the unit will function normally, it must be used in rooms with a temperature between 5°C/41°F and
35°C/95°F.
Electric products must not be put into household waste. Please bring them to a recycling centre. Ask your local authorities or your
dealer about the way to proceed. The specifications are typical. The actual values can slightly change from one unit to the other.
Specifications can be changed without prior notice.
prior notice.
Do not attempt to make any repairs yourself. This would invalid your warranty. Do not make any changes to the product. This would also
invalid your warranty. The warranty is not applicable in case of accidents or damages caused by inappropriate use or disrespect of the
warnings contained in this manual. Beamz cannot be held responsible for personal injuries caused by a disrespect of the safety
recommendations and warnings. This is also applicable to all damages in whatever form.

4
UNPACKING INSTRUCTION
CAUTION! Immediately upon receiving the product, carefully unpack the carton, check the contents to ensure that all parts are
present, and have been received in good condition. Notify the shipper immediately and retain packing material for inspection if
any parts appear damage from shipping or the package itself shows signs of mishandling. Save the package and all packing
materials. In the event that the product must be returned to the factory, it is important that the product be returned in the original
factory box and packing.
If the device has been exposed to drastic temperature fluctuation (e.g. after transportation), do not switch it on immediately. The
arising condensation water might damage your device. Leave the device switched off until it has reached room temperature.
POWERSUPPLY
On the label on the backside of the product is indicated on this type of power supply must be connected. Check that the mains
voltage corresponds to this, all other voltages than specified, the light effect can be irreparably damaged. The product must also
be directly connected to the mains and may be used. No dimmer or adjustable power supply.
Always connect the device to a protected circuit (circuit breaker or fuse). Make sure the device has an appropriate
electrical ground to avoid the risk of electrocution or fire.
DMX-512 CONNECTION
If you are using a standard DMX controller, you can connect the DMX-output of the controller directly to the DMX-input of the
first unit in a DMX-chain. Always connect the output of one unit with the input of the next unit until all units are connected.
If you use a controller with 5 pin DMX connection you will need to use a 5-pin to 3-pin adapter.
At the last fixture, the DMX cable has to
be terminated. Solder a 120 Ohm
resistor between signal (-) and signal (+)
into a 3-pin XLR connector and plug this
into the DMX output of the last fixture in
the chain.
3-Pin XLR to 5-Pin XLR Conversion
Conductor
3-Pin XLR
Female
(Out)
5-Pin XLR Male
(In)
Ground/Shield
Pin 1
Pin 1
Data
Compliment (-
signal)
Pin 2
Pin 2
Data True (+
signal)
Pin 3
Pin 3
Not Used
Pin 4 – Do Not
Use
Not Used
Pin 5 – Do Not
Use

5
OVERVIEW
1. Fixture buttons (1 – 12)
Used to select relevant fixture for control.
2. Scene buttons (1-8)
Press the scene buttons to load or stored your scenes.
There are a maximum of 240 programmable scenes.
3. Segment Display
Shows the current activity or programming state.
4. Bank Buttons (Up/Down)
Press the Up/Down buttons to select a bank from 30 banks.
5. Chase Buttons(1-6)
Used to select your programmed chase consisting a
maximum of 240 scenes.
6. Program Button
Used to activate Program mode.
7. MIDI/Rec Button
Used to control MIDI operation or to record programs.
8. Auto/Del Button
Used to activate Auto mode or to delete scenes and
chases.
9. Music/Bank Copy
Used to activate Music mode or to create scenes and
chase programs.
10. Blackout Button
Used to disable channel output.
11. Tap Sync/Display
Used to create a standard beat or to change the values
display between % and 255.
12. Fade Time Slider
Used to adjust the Fade Time. Fade Time is the amount of
time it takes for a fixture(scanner) to move from one
position to another, for the dimmer to fade in or fade out.
13. Speed Slider
Used to adjust the speed at which the scenes will chase.
14. Page Select Button
Used to select faders for the fixture between Page A(1-8)
and Page B (9-16).
15. Faders
This faders are used to control the intensity of channel 1-8
or channel 9-16 depending upon the selected page.
16. Fine Button.
When Fine is on, the Pan or Tilt wheel will control the
scanner in the smallest increment.
17. Pan Wheel
This jog wheel is used to control the pan of the fixture or for
programming.
18. Mode button
Pressing Fine and Mode buttons allows to activate Assign
or Reverse mode.
19. Tilt Wheel
This jog wheel is used to control the Tilt of the scanner or
for programming.

6
REAR VIEW
1. Audio in
0.1V – 1Vp-p
2.Midi in
Receives MIDI data.
3. DMX Polarity select
Make sure the polarity of your fixture.
4. DMX Out
This connector sends your DMX value to the DMX scanner
or DMX pack.
5.DMX In
This connector accepts your DMX input signals.
6. DC Input
DC 9 – 12V, 300mA
7. USB
For connect a USB lamp
8. Power Switch
This switch turns On/Off the power.
1.0 OPERATION GUIDE
GENERAL
This unit allows you to program 12 scanners of 16 DMX channels, 30 banks of 8 programmable scenes, 6 chases of 240
programmed scenes using 8 faders and other function buttons. With the use of two jog wheels, you may easily control the Pan
or Tilt of the fixtures. To tailor your special effect lighting, this unit enables you to assign or reverse the DMX channels. In
addition, two or more units can communicate with each other so that they can send or receive file dump.
Display Information
The LCD Display contains a maximum of 2x8 characters.
LCD Display Message
Chase 5 Chase 5 is activated.
Step 002 The 2nd step of a chase
Data 151 DMX value(000-255)
SP: 1M36S The current speed is 1 minute and 36 seconds
TP: 5.32S The time of the last two taps is 5.32 seconds
FT: 10.5S Fade time is 10.5 seconds
ASS 07 08 Assign DMX channels 7 and 8
RES 10 13 Reverse DMX channels 10 and 13
SN 6 Scene 6
BK 03 Bank 03
1.1 PROGRAM ENABLE
When the power is turned on, this unit enters Manual mode automatically. Press the Program
button for three seconds to activate Program mode, a fast blinking light in the Segment Display
next to "PROG." Indicates its selection.

7
1.2 PROGRAMMING SCENES
1. Enter Program mode.
2. Press the Fixtures button to turn on its fader control, which is indicated by the lit LED. You may
select several scanners at a time by tapping of these Fixtures buttons, so you can assign several
fixtures at a time with this unit.
3. Create a desired scene using the faders. The DMX value is 0 when the fader is fully down(bottom)
and 255 when it is fully up(top).
4. If necessary, you may tap the Page Select button to control the second set of 8 DMX
channels.
5. Once the scene is satisfactory, tap the MIDI/Rec button to program this scene into memory.
6. Tap the Bank Up/Down button to select the bank you want to store your scene into. There are total
30 banks you can select, you may store up to 8 scenes into each bank.
7. Tap the Scene button to store your scene, all LEDs and the Segment Display will flash three times
briefly indicating this operation, then the Segment Display will show the bank and the scene.
8. Repeat steps 3-7until all desired scenes have been programmed into memory. Tap the fixtures
button again to turn off its fader control.
To assign another fixture, you may tap the corresponding Scanner button to turn on its fader control,
then you may begin your programming again.
9. If you wish not continue your programming, press and hold down the Program button for
three seconds to exit Program mode, the blinking light in the Segment Display goes out indicating
this selection.

8
EXAMPLE: Program 8 scenes with channel 1-8 at full in sequence into bank 2 and assign these scenes to fixtures 2.
1. Program enable.
2. Tap the Scanner 2 button to turn on its fader control.
3. Tap the Page Select button to select Page A.
4. Push Fader 1 to the top position.
5. Tap the MIDI/Rec button.
6. Select bank 2 using Bank Up/Down button.
7. Tap the Scene 1 button to store the first scene.
8. Repeat steps 4-7 until all 8 scenes have been programmed into bank 2.
9. Tap the Scanner 2 button again to turn off its fader control.
10. Press the Program button for 3 seconds to exit Programming mode.
1.3 SCENE EDITING
1. Program enable. 4. Use the Faders or jog wheels to
make your desired adjustments.
2. Tap the Bank Up/Down
button to select the bank
that contains the scene
you wish to edit.
3. Select the scene you want
to edit by tapping its Scene button.
5. Once you've made your changes,
tap the MIDI/Rec button.
6. Tap the Scene button that
corresponds to the
scene you're editing. This will
overwrite the
exited scene.
NOTE: Be sure to select the same scene in steps 3 and 6, otherwise you may accidentally record over an exited scene.
1.4 SCANNER COPY
This function allows you to copy the settings of one scanner to another.
1. Press and hold down the Scanner button you want to copy.
2. While holding the Scanner button, tap the Scanner button you want to copy to.

9
1.5 SCENE COPY
1. Program enable. 5. Tap the MIDI/Rec button.
2. Tap the Bank Up/Down button
to select the bank that contains
the scene you wish to copy.
3. Select the scene you want to 6. Tap the Scene button you wish to
copy by tapping its Scene button. copy the scene to.
4. Tap the Bank Up/Down button
to select the bank you wish to copy
the scene to.
1.6 DELETE ASCENE
1. Tap the desired Scene button to select the scene
you wish to delete.
2. Press and hold down the Auto/Del button. While holding down the Auto/Del
button, tap the Scene button that stores the scene you wish to delete.
When a programmed scene is deleted, all DMX channel in this scene is set to 0.
1.7 DELETE ALL SCENES
This function will reset all DMX channel to 0 output.
1. With the power off, press and hold down the Program and Bank Down buttons
at a time.
2. Apply power again, all scenes should be cleared.

10
1.8 BANK COPY 1. Program enable.
16
2. Tap the Bank Up/Down button to select the bank you wish to copy.
3. Tap the MIDI/Rec button.
4. Tap the Bank Up/Down button to select the bank you wish to copy to.
Pro
5. Tap the Music/Bank Copy button, all LEDs and the Segment Display will flash three times
briefly indicating the function has been completed.
6. Press the Program button for three seconds to exit Programming mode.
2.0 PROGRAMMING CHASES
You must program scenes before you can program chases, this function allows you to store up to 240 scenes into one chase.
1. Program enable.
2. Tap the Chase button to select the chase to program. Each time you can select a chase
only.
3. Select a desired scene from the bank that has stored scenes. (described in Programming
Scenes)
4. Tap the MIDI/Rec button.
5. Repeat steps 3-4 until you've reached your desired effect.
You may record up to 240 scenes into a chase.
2.1 PROGRAM ABANK OF SCENES INTO ACHASE
1. Program enable.
2. Select the chase using Chase buttons 1-6.
3. Use Bank Up/Down button to select the bank that contains the scenes you wish to copy.
4. Tap the Music/Bank Copy button.

11
5. Tap the MIDI/Rec Copy button, all LEDs and the Segment Display will flash three times
briefly indicating all 8 scenes in this bank have been programmed into this chase.
2.2 ADD ASTEP
1. Program enable.
2. Select the chase you wish to add a step to.
3. Tap the Tap Sync/Display button causing a highlight next to "Step", the first digit in the
Segment Display shows the chase and the next three digits show its step.
4. Tap the Bank Up/Down button to scroll to the step you wish to add a step after.
5. Tap the MIDI/Rec button, the Segment Display will read the step one higher than before.
For example, if you want to insert a step between step 3 and step 4, and you scroll to step
3, when you tap the MIDI/Rec button, the Segment Display will read step 4.
6. Tap the Tap Sync/Display button again, the Segment Display shows the current chase,
scene and bank. Create a desired scene and record it as a new step or select a
programmed scene you wish to add into this chase.
Hints: You may tap the Tap Sync/Display button to change the display mode between step
and the bank.
7. Tap the MIDI/Rec button again, all LEDs and the Segment Display will flash three times
briefly indicating the new step has been inserted into this chase.
2.3 DELETE ASTEP
1. Program enable.
2. Select the chase that contains the step you wish to delete.
3. Tap the Tap Sync/Display button causing the Segment Display shows the steps.
4. Tap the Bank Up/Down button to scroll to the step you wish to delete.
5. Tap the Auto/Del button to delete the step, all LEDs and the Segment Display will flash
three times briefly indicating that the step has been deleted.

12
2.4 DELETE ACHASE
1. Select the chase you wish to delete.
2. Press and hold down the Auto/Del button. Tap the Chase button while holding down the
Auto/Del button, all LEDs and the Segment Display will flash three times briefly indicating
this chase has been deleted.
2.5 DELETE ALL CHASES
1. With the power off, press and hold down the Auto/Del and Bank Down buttons at the
same time.
2. Apply the power again.
3.0 ASSIGN/REVERSE DMX CHANNEL
3.1 ASSIGN DMX CHANNEL
1. Program enable.
2. Press the Fine and Mode buttons at a time, the Assign LED light up indicating Assign mode is
active.
3. Use Bank Up/Down button to change between the Pan and Tilt, the corresponding LED lights
indicating this selection,
4. Tap the Tap/Display button to change between 8CH. And 16Ch. Mode, the LCD Reads
5. Tap the fixture button to select the fixture.
6. Tap the page select button to select page A or page B.
ASSXX XX
X/Y 08CH
ASSXX XX
X/Y 16CH

13
7. While pressing the mode button, tap the Scene button, all LEDs should flash
briefly indicating the D MX channel is assigned. (Scene button 1 stands for DMX
channel 1, Scene button 2 stands for DMX channel 2, and so on.
8. Continue steps 3-7, you may assign a maximum of 48 DMX channels for 12
fixtures.
3.2 REVERSE DMX CHANNEL
1. Program enable.
2. Press the Fine and Mode buttons the second time, the Reverse LED lights up
indicating Reverse mode is active.
3. Use bank Up/Down button to change between the Pan and Tilt, the
corresponding LED lights indicating this selection.
4. Tap the Tap/Display button to change between 8CH. and 16 Ch. Mode.
5. Tap the scanner button to select the scanner.
6. Tap the page select button to select page A or page B.
7. While pressing the mode button, tap the Scene button, all LEDs should flash
briefly indicating the DMX channel is assigned. (Scene button 1 stands for DMX
channel 1, Scene button 2 stands for DMX channel 2, and so on.
8. Continue steps 3-7, you may assign a maximum of 48 DMX channels for 12
fixtures.
3.3 FADE TIME/ASSIGN FADE TIME
1. With the power off, press the mode and TAP/Display buttons at a time.

14
2. Apply the power again, tap the TAP/Display button to change between Fade
time and assign fade time, the LCD reads
OR
3. Press the Mode and TAP/Display buttons at a time to store your setting into
memory. If you are not going to save your setting, tap the Blackout button to leave
this operation.
3.4 DELETE ASCANNER OF DMX CHANNEL
1. Activate assign or reverse mode
2. Tap the scanner button to select the scanner you wish to delete.
3. Press the Mode and Auto/Del buttons at a time, all LEDs should flash briefly,
indicating the scanner is deleted.
3.5 CLEAR ALL DMX CHANNELS
1. Turn the power off.
2. Press the Mode and Auto/Del buttons at a time.
3. While pressing the two buttons, apply the power again, all LEDs should flash
briefly, indicating all assigned or reversed DMX channel are cleared.
3.6 DISPLAY DMX CHANNEL1. Press the Fine and Mode buttons at a time, the assign LED light.
2. Press the Fine and Mode buttons the second time, the Assign LED goes out
and the Reverse LED light.
3. Tap the scanner button that holds the Pan and Tilt channel, the LCD shows the
Pan and Tilt.
ALL CH
FD Time
Only X/Y
FD Time

15
3.7 SET UP NEW LOGO
1. Turn the power off.
2. Press and hold down the fixture 6 and fixture 12 buttons at a time. Apply the power again
while pressing the two buttons, then release the two buttons.
3. Tap the Fixture 6(or 12) button to move the cursor to the left (or right).
4. Tap the Bank Up/Down button to scroll to the characters you want.
5. Continue steps 3-4. You may enter a maximum of 16 characters in two rows.
6. Press the fixture 6 and 12 buttons at a time to store the new characters into memory, all
LEDs should flash briefly indicating this operation. If you are not going to save these new
characters, just tap the Blackout button to leave this operation.
4.0 RUNNING SCENES
4.1 MANUAL MODE 1. When the power is turned on, this unit enters Manual mode automatically.
2. Make sure Auto trigger and Music trigger indicators in the Segment Display are both off.
3. Use the Bank Up/Down button to select the bank that contains the scenes you wish to
run.
4. Tap the Scene button to select the scene to run.
4.2 AUTO MODE This function allows you to run a bank of programmed scenes in a sequential loop.
1. Tap the Auto/Del button to activate Auto mode. The auto LED lights indicating auto mode
is active.
2. Use the Bank Up/Down button to select a bank of scenes to run.

16
3. After selecting the bank of scenes you wish to run, you can use the Speed slider (or Tap
Sync/ Display button) and Fade Time slider to adjust the scenes to your desired effect.
Hints:
The Tap Sync button is used to set the speed by tapping the button several times, the last
two taps will define the speed with a maximum of 10 minutes. Tap Sync will override any
previous setting of the Speed slider unless the slider is moved again.
4. Tap the Auto/Del button again to exit Auto mode.
4.3 MUSIC MODE 1. Tap the Music/Bank Copy button to activate Music mode. The music LED lights indicating
music mode is active.
2. Use the Bank Up/Down button to select the bank that holds the scenes you wish to run.
The scenes you've selected will chase in a sequential order according to the music rhythms
detected by the built-in microphone.
3. Tap the Music/Bank Copy button again to exit Music mode.
5.0 RUNNING CHASES
You must program scenes before you can run chases.
5.1 MANUAL MODE 1. When the power is turned on, this unit enters Manual mode automatically.
2. Select your desired chase by tapping one of the six Chase buttons. A second tap of this
button will deactivate this function.
3. Use the Speed slider(or Tap Sync button) and Fade Time slider to adjust the current
scenes to your desired effects.
4. Use the Bank Up/Down button to scroll through the chase to run all banks of scenes.’

17
5.2 AUTO MODE 1. Tap the Auto/Del button to activate Auto mode. The auto LED lights indicating music
mode is active.
2. Select your desired chase by tapping one of the six Chase buttons. A second tap of this
button will deactivate this function.
3. Use the Speed slider (or Tap Sync) and Fade Time slider to adjust the chase to your
desired effects. You may select several chases at a time, the chases will run in sequence
that you select the chases.
6.0 MIDI OPERATION
6.1 MIDI CHANNEL SETTING
1. Press and hold down the MIDI/Rec button for three seconds,
the last two digits of the Segment Display will flash to indicate MIDI
channel setting is ready.
2. Use the Bank Up/Down button to select the DMX channel 01-16
to assign to MIDI channel.
3. Press and hold down the MIDI/Rec button for three seconds to
store your setting and to deactivate MIDI setting. If you wish to give
up your setting, tap any other button(except Bank Up/Down buttons)
to exit MIDI mode.
6.2 IMPLEMENTATION
This unit receives Note On signals, which enables to run 15 banks(01-15) of scenes and 6 chases of scenes. In
addition, blackout function can be activated by MIDI signal.
Bank
Note number
Function
Bank 1
00 to 07
Turn on or off scenes 1 – 8 of bank 1
Bank 2
08 to 15
Turn on or off scenes 1 – 8 of bank 2
Bank 3
16 to 23
Turn on or off scenes 1 – 8 of bank 3
………….
…………..
…………..
Bank 14
104 to 111
Turn on or off scenes 1 – 8 of bank 14
Bank 15
112 to 119
Turn on or off scenes 1 – 8 of bank 15
Chase 1
120
Turn on or off Chase 1
Chase 2
121
Turn on or off Chase 2
Chase 3
122
Turn on or off Chase 3
Chase 4
123
Turn on or off Chase 4
Chase 5
124
Turn on or off Chase 5
Chase 6
125
Turn on or off Chase 6
126
Blackout

18
ESPAÑOL
Enhorabuena por la compra de este efecto de luces Beamz. Por favor lea atentamente este manual antes de usar el aparato
para disfrutar al completo de sus prestaciones.
Seguir las instrucciones le permite no invalidar la garantía. Tome todas las precauciones para evitar que se produzca fuego o
una descarga eléctrica. Las reparaciones solo deben llevarse a cabo por técnicos cualificados para evitar descargas eléctricas.
Guarde el manual para futuras consultas. Antes de usar el aparato, por favor pida consejo a un profesional. Cuando el aparato
se enciende por primera vez, suele sentirse cierto olor. Esto es normal y desaparece al poco tiempo.
- Este aparato contiene piezas que llevan voltaje. Por lo tanto
NO abra la carcasa.
- No coloque objetos metálicos o vierta líquidos dentro del
aparato Podría producir descargas eléctricas y fallos en el
funcionamiento.
- No coloque el aparato cerca de fuentes de calor tipo
radiadores, etc. No coloque el aparato en superficies
vibratorias. No tape los agujeros de ventilación.
- Este aparato no está preparado para un uso continuado.
- Tenga cuidado con el cable de alimentación y no lo dañe.
Un daño o defecto en el cable de alimentación puede
producir una descarga eléctrica o fallo en el funcionamiento.
- Cuando desconecte el aparato de la toma de corriente,
siempre tire de la clavija, nunca del cable.
- No enchufe o desenchufe el aparato con las manos
mojadas.
- Si la clavija y/o el cable de alimentación están dañados,
necesitan reemplazarse por un técnico cualificado.
- Si el aparato está dañado de modo que puedan verse sus
partes internas, NO conecte el aparato a la toma de
corriente y NO lo encienda. Contacte con su distribuidor. NO
conecte el aparato a un reostato o dimmer.
- Para evitar un fuego o peligro de descarga, no exponga el
aparato a la lluvia y a la humedad.
- Todas las reparaciones deben llevarse a cabo
exclusivamente por técnicos cualificados.
- Conecte el aparato a una toma de corriente con toma de
tierra (220-240Vca/50Hz) protegida por un fusible de 10-
16A.
- Durante una tormenta o si el aparato no va a usarse durante
un periodo largo de tiempo, desconéctelo de la toma de
corriente. La regla es: Desconéctelo si no lo va a usar.
- Si el aparato no se ha usado en mucho tiempo puede
producirse condensación. Deje el aparato a temperatura
ambiente antes de encenderlo. Nunca utilice el aparato en
ambientes húmedos o en el exterior.
- Durante el funcionamiento, la carcasa se calienta
muchísimo. No la toque durante el funcionamiento o
inmediatamente después.
- Para prevenir accidentes en las empresas, debe seguir las
directrices aplicables y seguir las instrucciones.
- Asegure el aparato con una cadena de seguridad extra si el
aparato se monta en un techo. Utilice un sistema de truss
con ganchos. Asegúrese de que nadie permanece en el
área de montaje. Monte el efecto a una distancia de al
menos 50cm de materiales inflamables y deje un espacio de
al menos 1 metro a cada lado para permitir que haya
suficiente ventilación.
- Este aparato contiene LEDs de alta luminosidad. No mire a
la luz del LED para evitar daños en su vista.
- No lo apague y encienda repetidamente. Esto acorta su
tiempo de vida.
- Mantenga el aparato fuera del alcance de los niños. No deje
el aparato sin vigilancia.
- No utilice sprays limpiadores para limpiar los interruptores.
Los residuos de estos sprays producen depósitos de polvo y
grasa. En caso de mal funcionamiento, siempre consulte a
un profesional.
- Solo maneje el aparato con las manos limpias.
- No fuerce los controles.
- Si el aparato se ha caído, siempre haga que lo verifique un
técnico cualificado antes de encenderlo otra vez.
- NO utilice productos químicos para limpiar el aparato.
Dañan el barniz. Tan solo límpielo con un trapo seco.
- Manténgalo lejos de equipos electrónicos ya que pueden
producir interferencias.
- Solo utilice recambios originales para las reparaciones, de
otro modo pueden producirse daños serios y/o radiaciones
peligrosas.
- Apague el aparato antes de desconectarlo de la toma de
corriente y/o de otros equipos. Desconecte todos los cables
y conexiones antes de mover el aparato.
- Asegúrese de que el cable de alimentación no puede
dañarse cuando la gente lo pise. Compruebe el cable de
alimentación antes de cada uso por si hay daños o defectos.
- El voltaje de funcionamiento es 220-240Vca/50Hz.
Compruebe que la toma de corriente coincide. Si tiene que
viajar, asegúrese de que el voltaje del país es el adecuado
para este aparato.
- Guarde el embalaje original para poder transportar el
aparato en condiciones seguras.
Esta señal advierte al usuario de la presencia de alto voltaje en el interior de la carcasa y que es de la suficiente magnitud como
para producir una descarga eléctrica.
Esta señal advierte al usuario de que el manual contiene instrucciones importantes que han de leerse y seguirse al pie de la
letra.
NO MIRE DIRECTAMENTE A LA S LENTES. Puede dañarle la vista. Las personas propensas a tener ataques epilépticos
deben tener en cuenta los efectos que este efecto de luces puede tener en ellos.
Este aparato ha obtenido el certificado CE. Está prohibido hacer cambios en el aparato. ¡Invalidaría el certificado CE y su garantía!
NOTA: Para asegurarse de que el aparato funcione correctamente, debe usarse en ambientes a una temperatura de entre 5°C/41°F y
35°C/95°F.
Los productos electrónicos no pueden tirarse a la basura normal. Por favor lleve este producto a un centro de reciclaje. Pregunte a la
autoridad local en caso de duda. Las especificaciones son generales. Los valores actuales pueden variar de una unidad a otra. Las
especificaciones pueden variar sin previo aviso.
Nunca intente reparar usted mismo este equipo. Esta manipulación anulará la garantía. No realice cambios en la unidad. Esta
manipulación anulará la garantía. Esta garantía no es aplicable en caso de accidente o daños ocasionados por uso indebido del aparato
o mal uso del mismo. Beamz no se hace responsable de daños personales causados por el no seguimiento de las normas e
instrucciones de este manual. Esto es aplicable también a los daños de cualquier tipo.

19
INSTRUCCIONES DE DESEMBALAJE
ATENCIÓN! Inmediatamente después de recibir un dispositivo, desempaque cuidadosamente la caja de cartón, compruebe el
contenido para asegurarse de que todas las partes están presentes, y se han recibido en buenas condiciones. Notifique
inmediatamente al transportista y conserve el material de embalaje para la inspección por si aparecen daños causados por el
transporte o el propio envase muestra signos de mal manejo. Guarde el paquete y todos los materiales de embalaje. En el caso
de que deba ser devuelto a la fábrica, es importante que el aparato sea devuelto en la caja de la fábrica y embalaje originales.
Si el aparato ha estado expuesto a grandes cambios de temperatura (tras el transporte), no lo enchufe inmediatamente. La
condensación de agua producida podría dañar su aparato. Deje el dispositivo apagado hasta que se haya alcanzado la
temperatura ambiente..
FUENTE DE ALIMENTACIÓN
En la etiqueta de la parte trasera del controlador se indica el tipo de fuente de alimentación que debe ser conectado.
Compruebe que la tensión de red corresponda a esto, todos los otros voltajes a la especificada, puede causar efectos
irreparable. El controlador también debe estar conectado directamente a la red para ser utilizado. No en ninguna fuente de
alimentación o dimmer ajustable.
Conecte siempre el producto a un circuito protegido (disyuntor o fusible). Asegúrese de que el producto tiene una
toma de tierra adecuada para evitar el riesgo de electrocución o incendio.
CONEXIÓN DMX-512
Si está utilizando un controlador DMX estándar, puede conectar la salida DMX del controlador directamente a la entrada DMX
de la primera unidad de una cadena DMX. Siempre conecte la salida de una unidad con la entrada de la siguiente unidad hasta
que todas las unidades estén conectadas.
Si utiliza un controlador con conexión DMX de 5 pines, deberá utilizar un adaptador de 5 pines a 3 pines.
En el último montaje, el cable DMX
tiene que terminar. Soldar un resistor de
120 ohmios entre la señal (-) y la señal
(+) en un conector XLR de 3 pines y
conectarlo a la salida DMX del último
aparato de la cadena.
Conversión de 3-Pin XLR a 5-Pin XLR
Conductor
3-Pin XLR
Hembra
(Salida)
5-Pin XLR
Macho
(Entrada)
Tierra
Pin 1
Pin 1
Datos
complementarios
(señal -)
Pin 2
Pin 2
Datos
verdaderos
(señal +)
Pin 3
Pin 3
SIN USO
Pin 4 – no se
usa
SIN USO
Pin 5 – no se
usa

20
VISTA FRONTAL
1. Botones fijos (1 – 12)
Se utiliza para seleccionar el accesorio a controlar.
2. Botones Escenas (1-8)
Presione los botones de escena para cargar o almacenar
sus escenas. Hay un máximo de 240 escenas
programables.
3. Visualización de segmentos
Muestra la actividad actual o el estado de programación.
4. Botones de Bank (Arriba/Abajo)
Pulse los botones Arriba / Abajo para seleccionar un banco
de 30 bancos.
5. Botones de Chase (1-6)
Se utiliza para seleccionar la persecución programada que
consta de un máximo de 240 escenas
6. Botón Program
Se utiliza para activar el modo de programa.
7. Botón MIDI/Rec
Se utiliza para controlar el funcionamiento MIDI o para
grabar programas.
8. Botón Auto/Del
Se utiliza para activar el modo automático o para eliminar
escenas y persecuciones.
9. Music/Bank Copy
Se utiliza para activar el modo automático o para eliminar
escenas y persecuciones.
10. Botón Blackout
Se utiliza para desactivar la salida del canal.
11. Tap Sync/Display
Se utiliza para crear un compás estándar o para cambiar la
visualización de valores entre% y 255.
12. Deslizador Fade
Se utiliza para ajustar el tiempo de fundido. Fade Time es
la cantidad de tiempo que se necesita para que un
dispositivo (escáner) se mueva de una posición a otra,
para que el dimmer se atenúe o se desvanezca.
13. Deslizador Speed
Se utiliza para ajustar la velocidad a la que las escenas
perseguirán.
14. Botón Selección Pagina
Se utiliza para seleccionar carpetas para el dispositivo
entre la página A (1-8) y la página B (9-16).
15. Faders
Estos faders se utilizan para controlar la intensidad del
canal 1-8 o del canal 9-16 dependiendo de la página
seleccionada.
16. Botón Fine.
Cuando Fine está activado, la rueda Pan o Tilt controlará el
escáner en el incremento más pequeño.
17. Rueda Pan
Esta rueda de desplazamiento se utiliza para controlar el
pan del aparato o para la programación.
18. Botón Mode
Presionando los botones Fine y Mode permite activar el
modo Asignar o Invertir.
19. Rueda Tilt
Esta rueda de desplazamiento se utiliza para controlar la
Inclinación del escáner o para la programación.
VISTATRASERA
1. Entrada Audio
0.1V – 1Vp-p
2. Entrada Midi
Recibe MIDI data.
3. Selector Polaridad DMX
Asegúrese de la polaridad de su aparato.
4. Salida DMX
Este conector envía su valor DMX al escáner DMX o al
paquete DMX.
5.DMX In
Este conector acepta sus señales de entrada DMX.
6. DC Input
DC 9 – 12V, 300mA
7. USB
Para conectar una lámpara USB
8. Power Switch
Este interruptor activa / desactiva la alimentación.
Table of contents
Languages:
Other Beamz Controllers manuals
Popular Controllers manuals by other brands

IFM Electronic
IFM Electronic CR0505 Mounting and installation instructions

Aqua Lung
Aqua Lung Titan Technical bulletin

Swann
Swann Smith's TCAS T1 Installation and user guide

Xylem
Xylem CentriPro SPD Plus instruction manual

Drayton
Drayton miGenie Wish 1 T714R installation guide

Peaktronics
Peaktronics DHC-300 troubleshooting guide

Mitsubishi Electric
Mitsubishi Electric FX3G-5DM Quick start manual

Allen-Bradley
Allen-Bradley Studio 5000 Logix Emulate Reference manual

Danfoss
Danfoss VLT AQUA Drive FC 202 operating guide

Emerson
Emerson MR98 Series manual

SSS Siedle
SSS Siedle EC 602-03 Product information

GEM
GEM 567 BioStar control operating instructions