Bedfont piCO+ Smokerlyzer User manual
0086
breath analysis is the new blood test

2
piCO+Operating Manual
English
www.bedfont.com
Contents
1Introduction and Intended Use 3
2Quick Start Guide 4
3Pack Contents and Specification 5
4Instrument Layout 6
5Display Symbols 7
6Warnings and Maintenance 8
7Operation 9-10
8Calibration 11-12
9Set-up: User Profiles 13
10 Set-up: Sounder Operation 14
11 Troubleshooting 15
12 COdata+Software 16
13 Frequently Asked Questions 17
14 Returns Procedure 18
15 Spares and Warranty 19

3
piCO+Operating Manual
English
Intended Use
The piCO+Smokerlyzer®is a breath carbon
monoxide monitor intended for multi-patient
use by healthcare professionals in smoking
cessation programmes and research.
Carbon monoxide (CO) is a toxic,
odourless, colourless, tasteless gas formed
by incomplete combustion of organic
material at high temperatures with an
insufcient oxygen supply.
When inhaled, CO competes successfully
with oxygen in the bloodstream to form
carboxyhaemoglobin (COHb). This starves
body tissues of the oxygen they need to
function and repair themselves in day-to-
day life. CO can remain in the bloodstream
for up to 24 hours, depending on a range
of factors including physical activity, gender
and inhalation intensity. The half life is
about 5 hours.
Correlation of CO (ppm) and
carboxyhaemoglobin (%COHb)
Breath carbon monoxide is measured
in parts per million (ppm CO) and blood
carboxyhaemoglobin in percentages
(%COHb). The two are compatible and
convertible, and the piCO+Smokerlyzer®
displays both measurements. Clinical
research has shown that a useful
relationship between carbon monoxide and
carboxyhaemoglobin can be identied after
a short period of a person holding their
breath. CO readings demonstrate the level
of poisonous inhaled CO, while the COHb
reading shows the percentage of oxygen
that has been replaced in the bloodstream.
The cut-off point between smoker and
non-smoker is regarded as 6ppm CO. The
piCO+Smokerlyzer® identies a non-smoker
as 0-6ppm, a low-dependence smoker as
7-15ppm, and strongly addicted smokers as
over 15ppm.
The piCO+Smokerlyzer®has been designed
so that it can also be used with young
smokers. As their smoking habits and views
are generally different from adult smokers,
the ranges can be altered to 0-4ppm for a
non-smoker, 5-6ppm a light smoker and
7ppm+ a more frequent smoker.
Other cut-off points can be adopted as
well as smoking classication at higher
CO levels. The piCO+ has a third prole
which can be set by the user with COdata+
software for complete exibility to suit most
circumstances.
Introduction

4
piCO+Operating Manual
English
www.bedfont.com
Quick Start Guide
1 Turn on the monitor by holding the
button down for three seconds.
2 Attach the breath sampling D-piece and
a new mouthpiece.
3 Inhale and double click the button to
start a breath test.
4 The user should hold their breath for
the 15-second countdown. If they are
unable to hold their breath for the full
countdown, see Operation – page 9.
5 A beep will sound during the last three
seconds of the countdown.
6 Blow slowly into mouthpiece, aiming to
empty the lungs completely.
7 The carbon monoxide (ppm) and
percentage carboxyhaemoglobin
(%COHb) readings will rise and the peak
values will remain on the screen. The
coloured LEDs will light up accordingly –
see the interpretation table on page 10.
8 Remove the D-piece between tests to
allow fresh air to circulate around the
sensor.
9 To repeat the breath test, double click
the button to return to main display and
continue from step 2.
10 To switch the monitor off, hold the
button down for three seconds. The unit
will auto power off after ve minutes of
inactivity.

5
piCO+Operating Manual
English
1
3
4
5
6
2
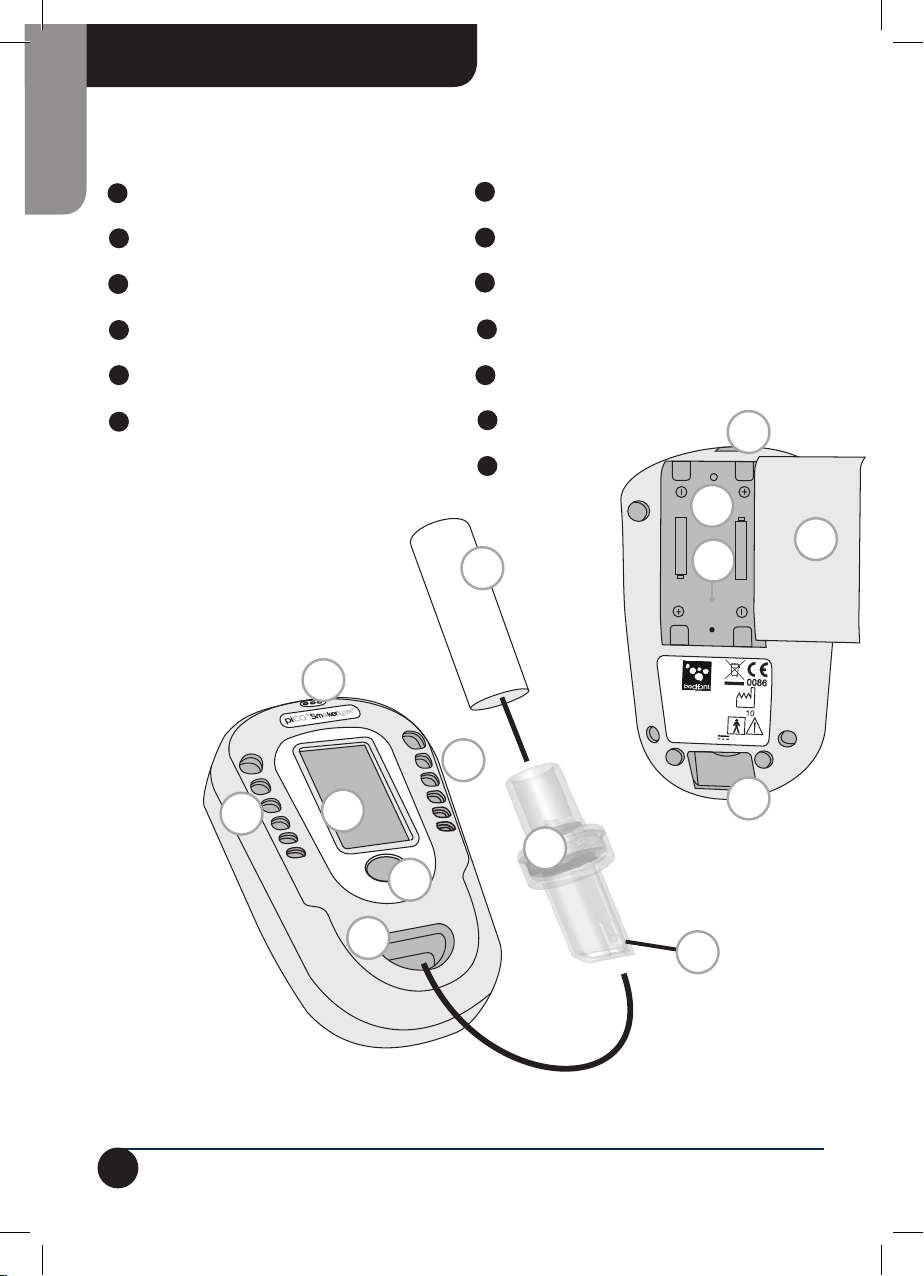
Pack Contents and
Specication
1 Instrument
2 Carry pouch
3 Operating Manual
4 Breath sampling D-piece
5 Disposable cardboard mouthpiece
6 2 × AA batteries
Infection control and maintenance guidelines
(not shown)
Specication
Concentration range: 0-100ppm
Display: LCD with 1ppm increments
Detection principle: Electrochemical sensor
Accuracy (repeatability of readings): ±2%
H2cross-interference: <10%
Power: 2 × AA (LR6 or equivalent) alkaline batteries
Response time: Typically <30 seconds to 90% FSD
Operating temperature range: 0-40ºC (storage 0-50ºC)
Operating humidity: 10-90% (storage 0-95%) non-condensing
Sensor operating life: Approx. 5 years, 2-year warranty
Sensor sensitivity: 1ppm
Dimensions: Approx. 45 × 75 × 120 mm
Weight: Approx. 200g including batteries
Monitor construction: Body: Polycarbonate/ABS blend with elastomeric overmould.
D-piece: Polypropylene
0086
6
piCO+Operating Manual
English
www.bedfont.com
20
3
V
2
x
AA/LR6
Bedfont
Scientific
Ltd
ME1 3QX,
England
T:
F:
E:
ask@bedfont.com
www.bedfont.com
0086
1
2
3
4
5
7
6
10
9
8
2
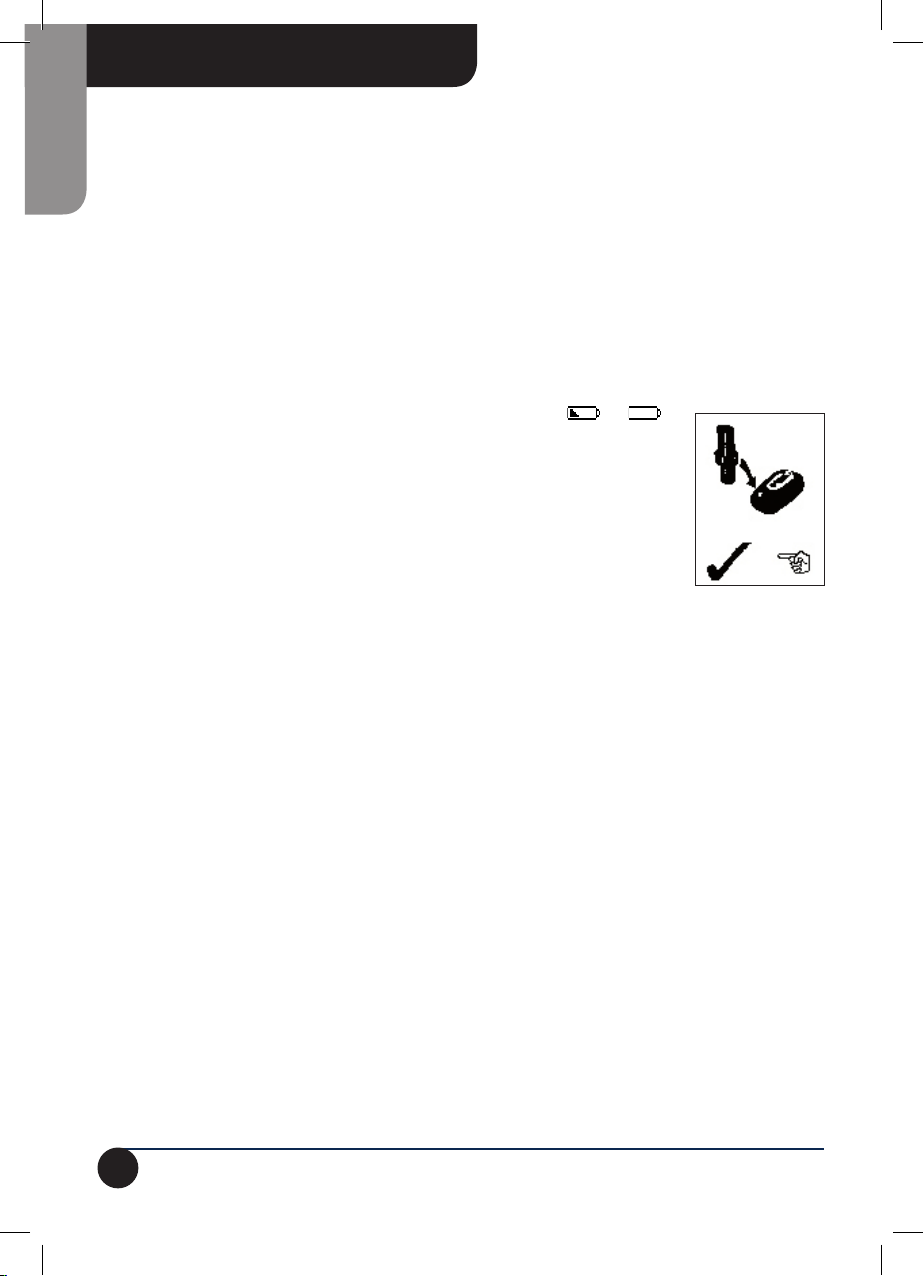
Instrument Layout
1 Display
2 Coloured LEDs
3 Button
4 Aperture for D-piece
5 Breath sampling D-piece
6 Securing lug on D-piece
7 Exhaust port for breath sample
8 Sounder
9 USB connector
10 Cardboard mouthpiece
11 Battery compartment
12 Reset button
13 Battery cover
12
11
Reset
+44(0)1634 673720
+44(0)1634 673721
13

7
piCO+Operating Manual
English
1 Start-up screens:
2 Battery condition: OK: Flat: Dead:
3 User prole: Adult: Adolescent: Custom:
4 Sounder: On: Mute:
5 Pointer:
6 Start breath test:
7 Enter calibration mode:
8 Enter set-up mode:
9 Inhale:
10 Breath-hold and countdown:
11 Exhale for breath test:
12 Peak CO reading (ppm and %COHb):
13 Set instrument zero in fresh air:
14 Apply calibration gas at 20ppm:
15 Calibration pass/fail: Pass: Fail:
16 Calibration reminder:
17 User prole selection:
18 Select adult user prole:
19 Select adolescent user prole:
20 Select custom user prole (if set via COdata+software on PC):
21 Contact Bedfont or distributor for help:
22 D-piece reminder
23 Return:
9.2
Display Symbols
8
piCO+Operating Manual
English
www.bedfont.com
Warnings and Maintenance
Warnings
People with lung disease or chest ailments
may not be able to achieve the 15-second
breath hold. In such cases, the user should
inhale and hold their breath when the breath
test is started, and exhale, if necessary,
before the countdown has completed.
A new mouthpiece should be used for each test.
Hands should be washed regularly in
accordance with infection control practice.
Wipe the instrument and the external
surfaces of the D-piece with a product
specically developed for the purpose.
Suitable Instrument Cleansing Wipes are
available from Bedfont.
NEVER USE ALCOHOL, cleaning agents
containing alcohol or other organic solvents
to clean the monitor. Long-term exposure to
such vapours will damage the internal CO
sensor.
Under no circumstances should the monitor
be immersed in or splashed with liquid.
Cleaning
Routine Maintenance
When the calibration reminder prompt is
displayed (see page 11), the instrument
should be calibrated using Bedfont 20ppm
CO in air calibration gas. Once calibration
has been carried out a reminder will recur in
six months.
Replace batteries when the battery symbol
resembles or .
Replace the breath
sampling D-piece when
prompted by the unit
(every 30 days) or if
it is visibly soiled or
contaminated.
The D-piece cannot be
cleaned or sterilised.
Batteries
Batteries should be removed if the
instrument is not likely to be used for
some time.
Additional technical information is available
on request from Bedfont or your local
distributor.
9
piCO+Operating Manual
English
Ensure that two AA batteries are correctly
inserted in the battery compartment.
The single button controls all functions:
• One long button press (>3 seconds) turns
the unit on.
• A single click scrolls the pointer through
the list of options.
• A double click selects the required option.
• One long button press (>3 seconds) turns
the unit off.
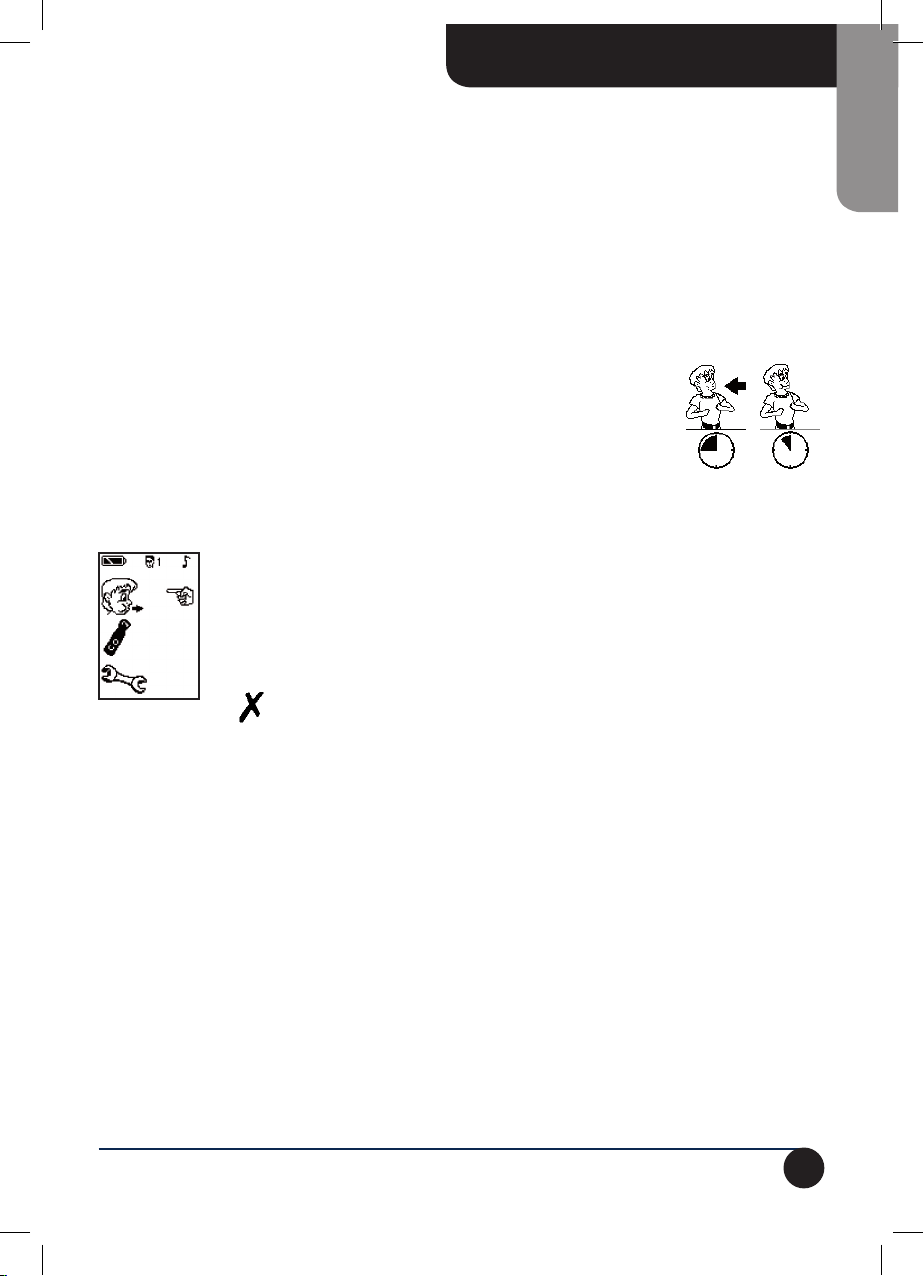
Press and hold the button for three
seconds until the display
becomes active. Release the
button. After a 10-second
warm-up period, during which
a start-up screen is displayed,
the main menu will appear.
If a appears instead of
the main menu, it means
that the instrument has failed to set a fresh
air zero during start-up, perhaps because
the ambient air was not free of carbon
monoxide. Ensure that the instrument is in
fresh air and then double click the button
to repeat the start-up test. If it fails again,
please see Troubleshooting – page 15.
When the pointer is opposite the picture
of an exhaling face, the piCO+is ready to
start a breath test. The green LEDs will
ash twice to indicate that the instrument
is ready.
Operation
Attach a breath sampling D-piece and a
new cardboard mouthpiece to the piCO+.
Check that all connections are pushed
rmly together.
To start a breath test, the patient should
inhale and hold their breath. Double
click the button to initiate the 15-second
countdown display.
10
piCO+Operating Manual
English
www.bedfont.com
Ensure that the breath is held
throughout the countdown. The
beep will sound during the last
three seconds of the countdown.
Once the countdown reaches zero, exhale
slowly but gently into the mouthpiece. Aim
to empty the lungs as much as possible.
If the patient cannot hold their breath for
the full 15 seconds, they should commence
exhalation at a comfortable point, but still
exhale completely.
The display will show a rising ppm value
alongside an equivalent %COHb reading.
The coloured LEDs will light up according
to the selected user prole.
The sounder will beeps at an increasing
frequency, according to the concentration
of CO measured. To temporarily mute the
sounder, single click the button.
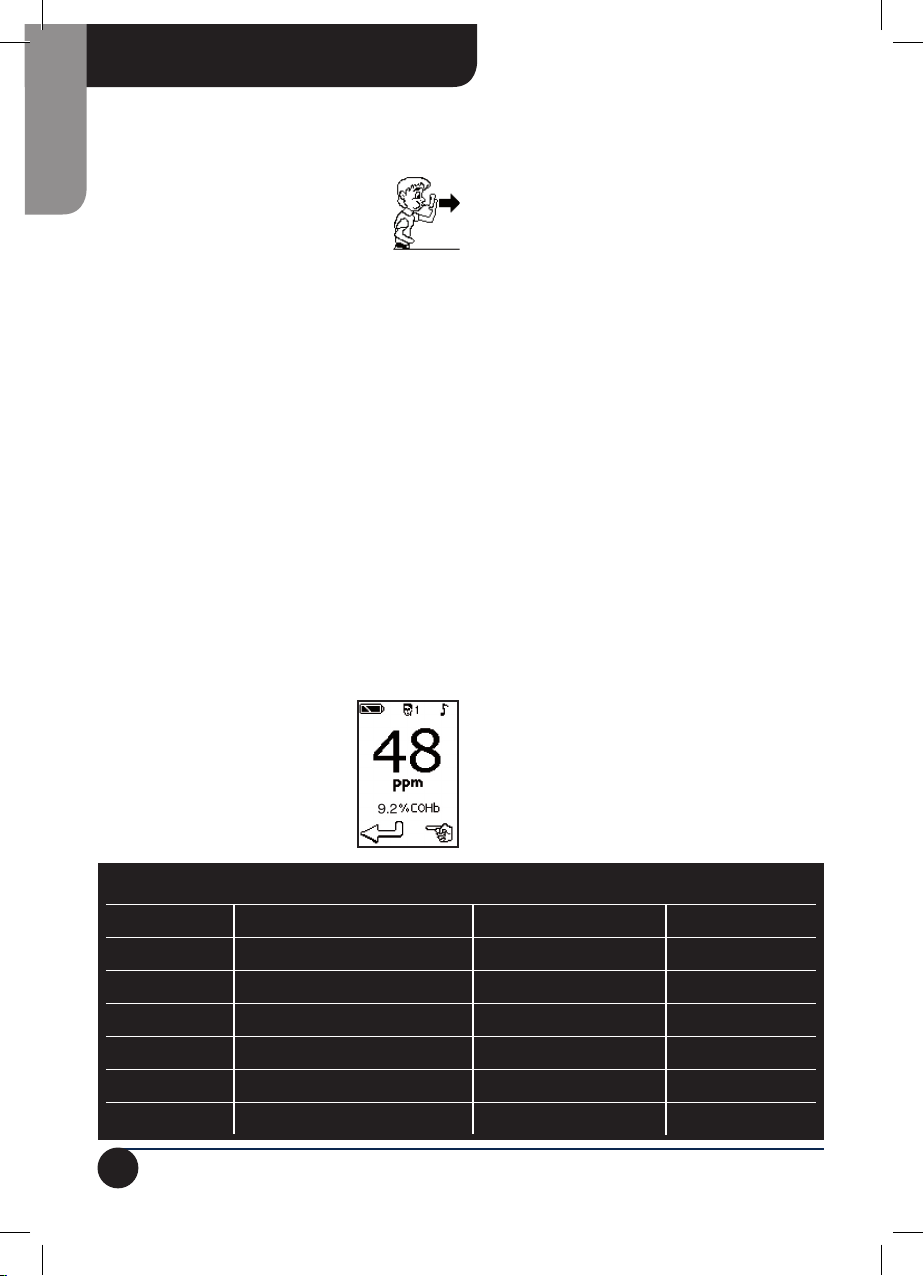
The peak reading during the breath
exhalation will remain on the
display. The test is complete
when the pointer and ‘return’
symbols appear at the bottom
of the display.
At this point, a single click of the button will
temporarily silence the sounder, if it is on.
To start another breath test, double click the
button to return to the main display. A new
mouthpiece should be used with every test.
Removing the D-piece between tests will
allow fresh air to circulate around the
sensor. It is good practice to wash your
hands after removing the D-piece.
If no further tests are required, the piCO+
should be turned off by holding the button
down for three seconds. If left on, the piCO+
will automatically turn off after ve minutes
of inactivity.
To re-calibrate the instrument, follow the
instructions on page 11.
To change the user prole from adult to
adolescent (or a custom prole if one has
been set using the COdata+user software),
see the instructions on page 13.
To permanently silence the sounder during
the breath test, follow the instructions on
page 14.
Operation (continued)
LED colour Description User Prole 1: User Prole 2:
Adult (ppm) Adolescent (ppm)
Green Non-smoker 0-6 0-4
Yellow Danger zone 7-10 5-6
1 Red Smoker 11-15 7-10
2 Reds Frequent smoker 16-25 11-15
3 Reds Addicted smoker 26-35 16-25
4 Reds Heavily addicted smoker 36-50 26-35
4 Reds ashing
Dangerously addicted smoker
51+ 36+
Table of contents
Other Bedfont Personal Care Product manuals


