BEER Turmix User manual

Turmix
Infra contact grill with Multi-Timer function
Quick start guide

Beer Grill AG
Beer Grill GmbH
Allmendstrasse 7
Tel. +41 (0)56 618 7800
Körnerstrasse 14 a
Tel. +49 (0)71 61 659 876
CH –5612 Villmergen
Fax +41 (0)56 618 7849
D –79539 Lörrach
Fax +49 (0)71 61 659 879
www.beergrill.com
Seite 2
Advice for grilling and roasting
Lightly oil the grill plates only when the grill plates have reached the required temperature. Use
pure groundnut oil. Meat should be seasoned shortly before cooking, marinated or brushed with
oil and placed on a heated grill. Ensure the upper plate comes into good contact with the food.
Olive oil should not be used if possible, because it is not sufficiently stable at high temperatures.
The best oil to use is a neutral cooking oil, e.g. peanut oil. After approximately half of the grilling
time gently turn the food over to achieve a particularly nice grill pattern. Irregularly-cut meat or
cutlets with bones etc may need turning again.
Both plates of the Turmix are already pre-treated so cooking can begin immediately after the
device is plugged in. If the grid plates have been taken off the grill, the upper surface of the
plates should be quickly cleaned with a damp cloth whilst they are still warm. After servicing,
clean the grill as stated in the instruction manual.
Turmix grill and plate spray
To be used on hot, well-cleaned, grill and roasting plates and prevents food from sticking. It
should be used after every basic plate clean (anti adhesion effect). Spray can also be used
instead of oil for grilling, if required. (Spray on the grill plate, oil on the meat).
Grilling and roasting
Red meat
Ensure that the grill plates are sufficiently heated.
If the meat feels tender and does not resist when lightly pressed then it is only slightly
coloured and is still raw in the middle (blue).
If the meat feels firm, similar to a rubber ball, then it is cooked medium rare.
If the meat, however, feels hard, then it is well-done.
White meat
Ensure that the grill is reasonably hot.
Fish (small or large)
Always cook on a fairly hot grill to avoid sticking. Before grilling, dry the fish well, then season
and leave to marinade in a little oil for a while. Use spray if necessary.
Toast
Comes out wonderfully crisp when you use clean, non-greased grill plates.
Warm sandwiches
Prepare open or club sandwiches.
Cooking large pieces (joints, poultry)
Separate the section required from, for example the bird, regardless of whether fresh or frozen,
wrap in cooking foil and place it between the hot grill plates. In this case you can deviate from
the general rule: 'The fatter the meat, the lower the heat' and work with very hot plates so that
the grilling process does not take much longer than if the meat was not wrapped in cooking foil.
Beer Grill AG
Beer Grill GmbH
Allmendstrasse 7
Tel. +41 (0)56 618 7800
Körnerstrasse 14 a
Tel. +49 (0)71 61 659 876
CH –5612 Villmergen
Fax +41 (0)56 618 7849
D –79539 Lörrach
Fax +49 (0)71 61 659 879
www.beergrill.com
Seite 3
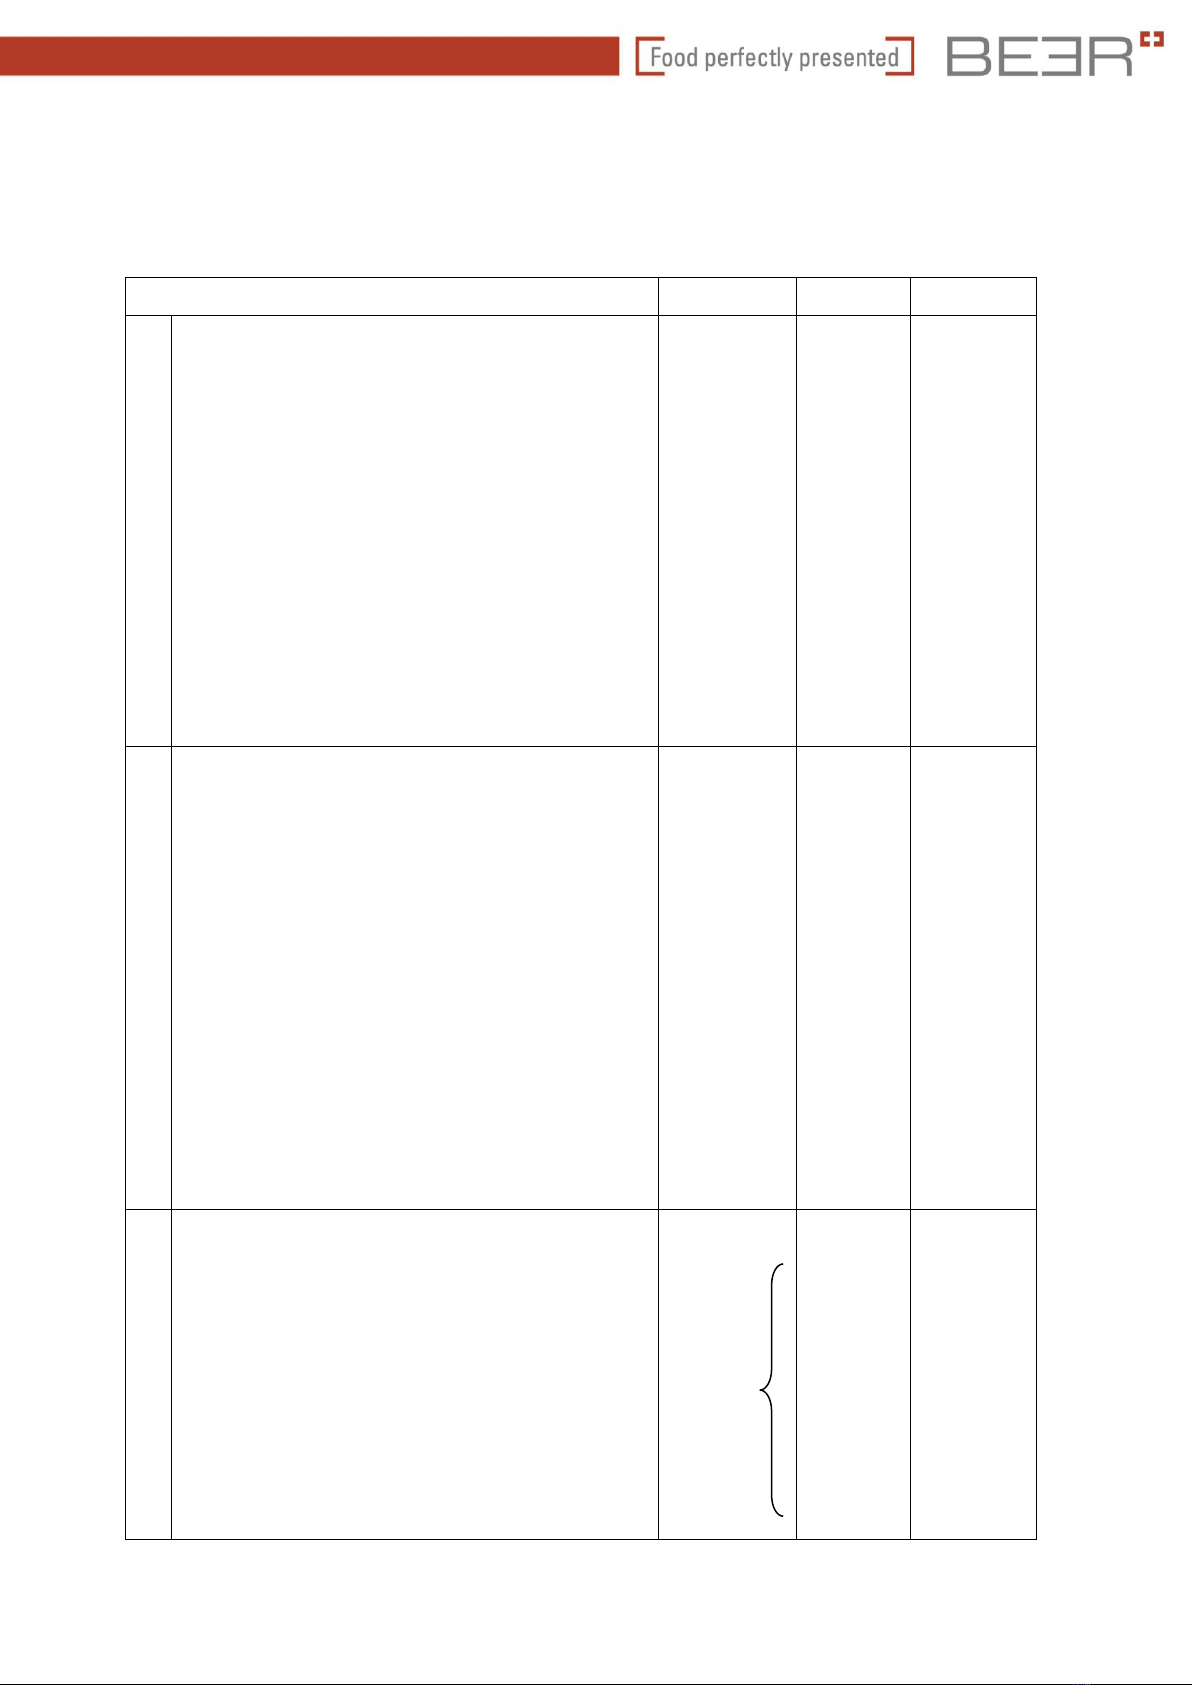
Turmix grill and roasting appliances
Item
Thermostat
position
Min.
Sec.
1.
Red meat
Beef or ox
Rib steak, 150 –200 g
Loin steak, 180 –200 g
Rump steak, 180 g
Mutton or lamb
Cutlet
Chops
Game (venison and wild boar)
Escalopes
Filet Mignon, 60 –80 g
Cutlet
4 ∆ 5
4 ∆ 5
4 ∆ 5
4 ∆ 5
4 ∆ 5
4 ∆ 5
4 ∆ 5
4 ∆ 5
1 –2
1 ½ –3
–
1 –2
1 –2
–
–
1
45
15 –20
30
2.
White meat
Veal
Steaks, approx. 150 g
Escalopes, approx. 80 –100 g
Cutlets, 160 –180 g
Pork
Chops, 150 –180 g
Escalopes, 100 –120 g
Breaded escalopes
Poultry
½ chicken in cooking foil
without cooking foil
Pigeon
4 ∆ 5
4 ∆ 5
4 ∆ 5
4 ∆ 5
4 ∆ 5
4 ∆ 5
4 ∆ 5
4 ∆ 5
4 ∆ 5
1
–
2 –3
3 –5
1 –2
–
10
10
5
20
30 –45
30 –50
3.
Fish and shellfish
Filet of sole
Sole
Pike
Fish fillet
Whitefish
Salmon
Turbot
Perch
Lobster
Crayfish
4 ∆ 5
–
4 –6
5 –6
3 –4
4 –5
6 –8
4 –6
–
5 –6
7 –8
50
30 –40

Beer Grill AG
Beer Grill GmbH
Allmendstrasse 7
Tel. +41 (0)56 618 7800
Körnerstrasse 14 a
Tel. +49 (0)71 61 659 876
CH –5612 Villmergen
Fax +41 (0)56 618 7849
D –79539 Lörrach
Fax +49 (0)71 61 659 879
www.beergrill.com
Seite 4
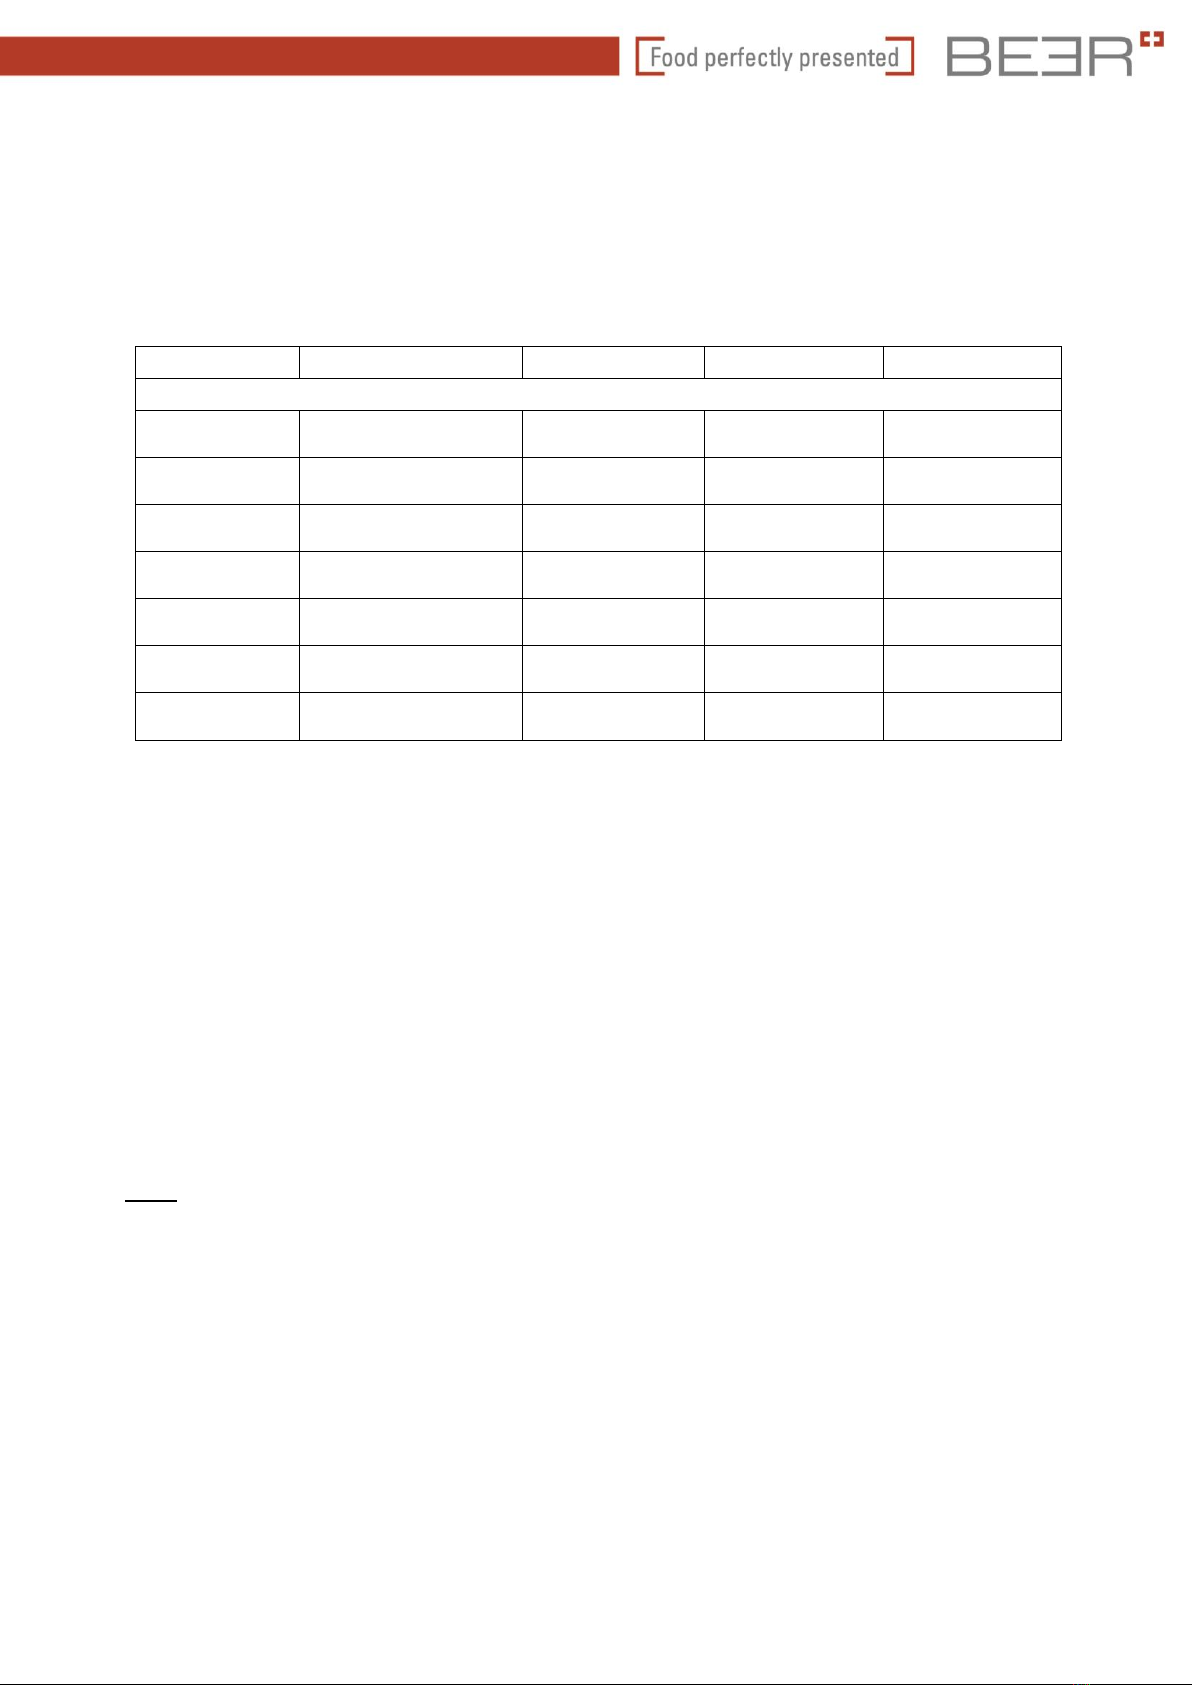
Item
Thermostat
position
Min.
Sec.
4.
Sausages, burgers, calves head
Bratwurst (blanched, cold, warm)
Wieners, Frankfurters
Cervelat
Minced beef steak, 150 g
Hamburger
Minced veal steak, 100 g
Sausage loaf (Fleischkäse)
Meat loaf
Rissoles
Calves head
Calves feet or pigs trotters
4 ∆ 5
-
3 –4
3 –6
3 –5
4 –5
1 –2
1 ½ –3
8 –12
3 –4
2 –3
2 –3
20 –40
5.
Grill specialities
Mixed grill (each piece 40 –60 g)
Kebabs
Cordon bleu
Calf's liver
Pork liver
Kidney (according to thickness)
Bacon and ham
Calf's tongue or ox tongue
4 ∆ 5
–
1 –3
1 –2
–
–
–
–
1
20 –40
20
20
20 –30
5 –10
6.
Vegetable, fruit
Tomatoes, unstuffed (whole)
Tomatoes, stuffed
Stuffed aubergines (halved)
Stuffed aubergines (slices)
Celery slices
Bananas
Apple jackets (in cooking foil)
4 ∆ 5
5 –6
5 –8
5 –7
–
2 –3
4 –5
4 –5
20
7.
Toast
Warmed sandwiches
'Au gratin', browned
4 ∆ 5
4 ∆ 5
–
1 –2
4 –5
50 –60
Please note
Water has the largest infrared radiation resistance (poor conductor of heat) so items with a
larger water content e.g. fish, tomatoes, apples etc require a longer cooking time.

Beer Grill AG
Beer Grill GmbH
Allmendstrasse 7
Tel. +41 (0)56 618 7800
Körnerstrasse 14 a
Tel. +49 (0)71 61 659 876
CH –5612 Villmergen
Fax +41 (0)56 618 7849
D –79539 Lörrach
Fax +49 (0)71 61 659 879
www.beergrill.com
Seite 5
Additional information and tips
In general, use as little fat as possible when grilling. If little fat is required then brush this onto the
food itself or onto the part of the grill that the food rests on. If possible only brush the fat onto the
German silver wire.
Grey iron has a very porous surface, which is visible under a microscope (similar to human skin).
Thereby the grey iron section becomes so soaked with fat, that the fat is practically redundant.
Use the Beer grill spray to spray the hot plates before the food is placed on the grill. Afterwards
cook as normal, use the short break from barbecuing to scrap both grill plates and the grooves
well (with the supplied implements). Afterwards immediately warm both plates and use the
supplied brush to make the plates wet. Then spray the hot plates again with the grill spray.
Repeatedly carrying outthis procedurewill remove burntin tracesof fatand fat which accumulates
in the drip tray.
Thanks to the 1.5 cm wide grey iron plates and the 4000/8000 Watt performance and with
repeated cleaning the Turmix contact grill is a high performer and suffers from no loss of
performance in the long term.
Tip: To simplify cleaning ensure that the hot plates are only folded together when clean.

Beer Grill AG
Beer Grill GmbH
Allmendstrasse 7
Tel. +41 (0)56 618 7800
Körnerstrasse 14 a
Tel. +49 (0)71 61 659 876
CH –5612 Villmergen
Fax +41 (0)56 618 7849
D –79539 Lörrach
Fax +49 (0)71 61 659 879
www.beergrill.com
Seite 6
Muti-Timer Operation
Start timer
By briefly pressing the Start/Stop button, the timer starts. The remaining time is counted down
in seconds and the colon flashes in the display.
Pause timer
If the Start/Stop button is pressed again during the timer cycle, the sequence is interrupted and
the display flashes. To continue the timer cycle press the Start/Stop button again briefly.
Cancel timer
If the Start/Stop button is pressed for 3 seconds after start or pause, the timer cycle is
cancelled and the display changes to "00:00 ". After releasing the Start/Stop button, the initial
operation time is shown.
Timer stop
After completion of the timer cycle the buzzer sounds for 5 seconds and the display flashes
"00:00". The buzzer can be acknowledged with the Down button. Note that the acknowledgment
is required before a restart or before time settings. The duration of the buzzer sound can be
adjusted. As well the buzzer can be deactivated completely.
Timer selection
The seven adjustable operating times can be selected with the respective button. Each press
will switch to the following operating time and the selection is indicated by the corresponding
LED 1...7. Upon change, the new operating time is ready for launch. The timer selection is
saved after power off.
Temporary setting
After selecting one of the provided operating times it can be adjusted using the up or down
button on the momentary needs, without saving the new value. The timer LED goes off to
indicate the temporary operating time. This time is valid until a new operating time 1...7 is
selected (or at mains off). The new operating time can be started as often as required.
Note that adjustment during the current timer cycle is indeed possible, but the new setting is not
yet effective for the current timer.
How to adjust operating times
If you press the Up or Down button to adjust an operating time there is a short delay after which
the setting is unlocked. This “adjusting mode” is indicated by the flashing colon in the display.
The value can now be set by tapping or permanently pressing the button. If no button is pressed
for more than 3 seconds, the controller returns to the initial state and the colon in the display
stops flashing.
Programming operating times
To permanently set the operating times, press the Prog button for 1 second. The LED of the
current selection flashes and indicates that the programming mode is accessed. The selection
and adjustment is now in the same manner as above, however, the values now are stored in the
permanent memory when returning to initial state.
Return to initial state takes place by pressing the Prog button, or automatically after 5 seconds.
Beer Grill AG
Beer Grill GmbH
Allmendstrasse 7
Tel. +41 (0)56 618 7800
Körnerstrasse 14 a
Tel. +49 (0)71 61 659 876
CH –5612 Villmergen
Fax +41 (0)56 618 7849
D –79539 Lörrach
Fax +49 (0)71 61 659 879
www.beergrill.com
Seite 7
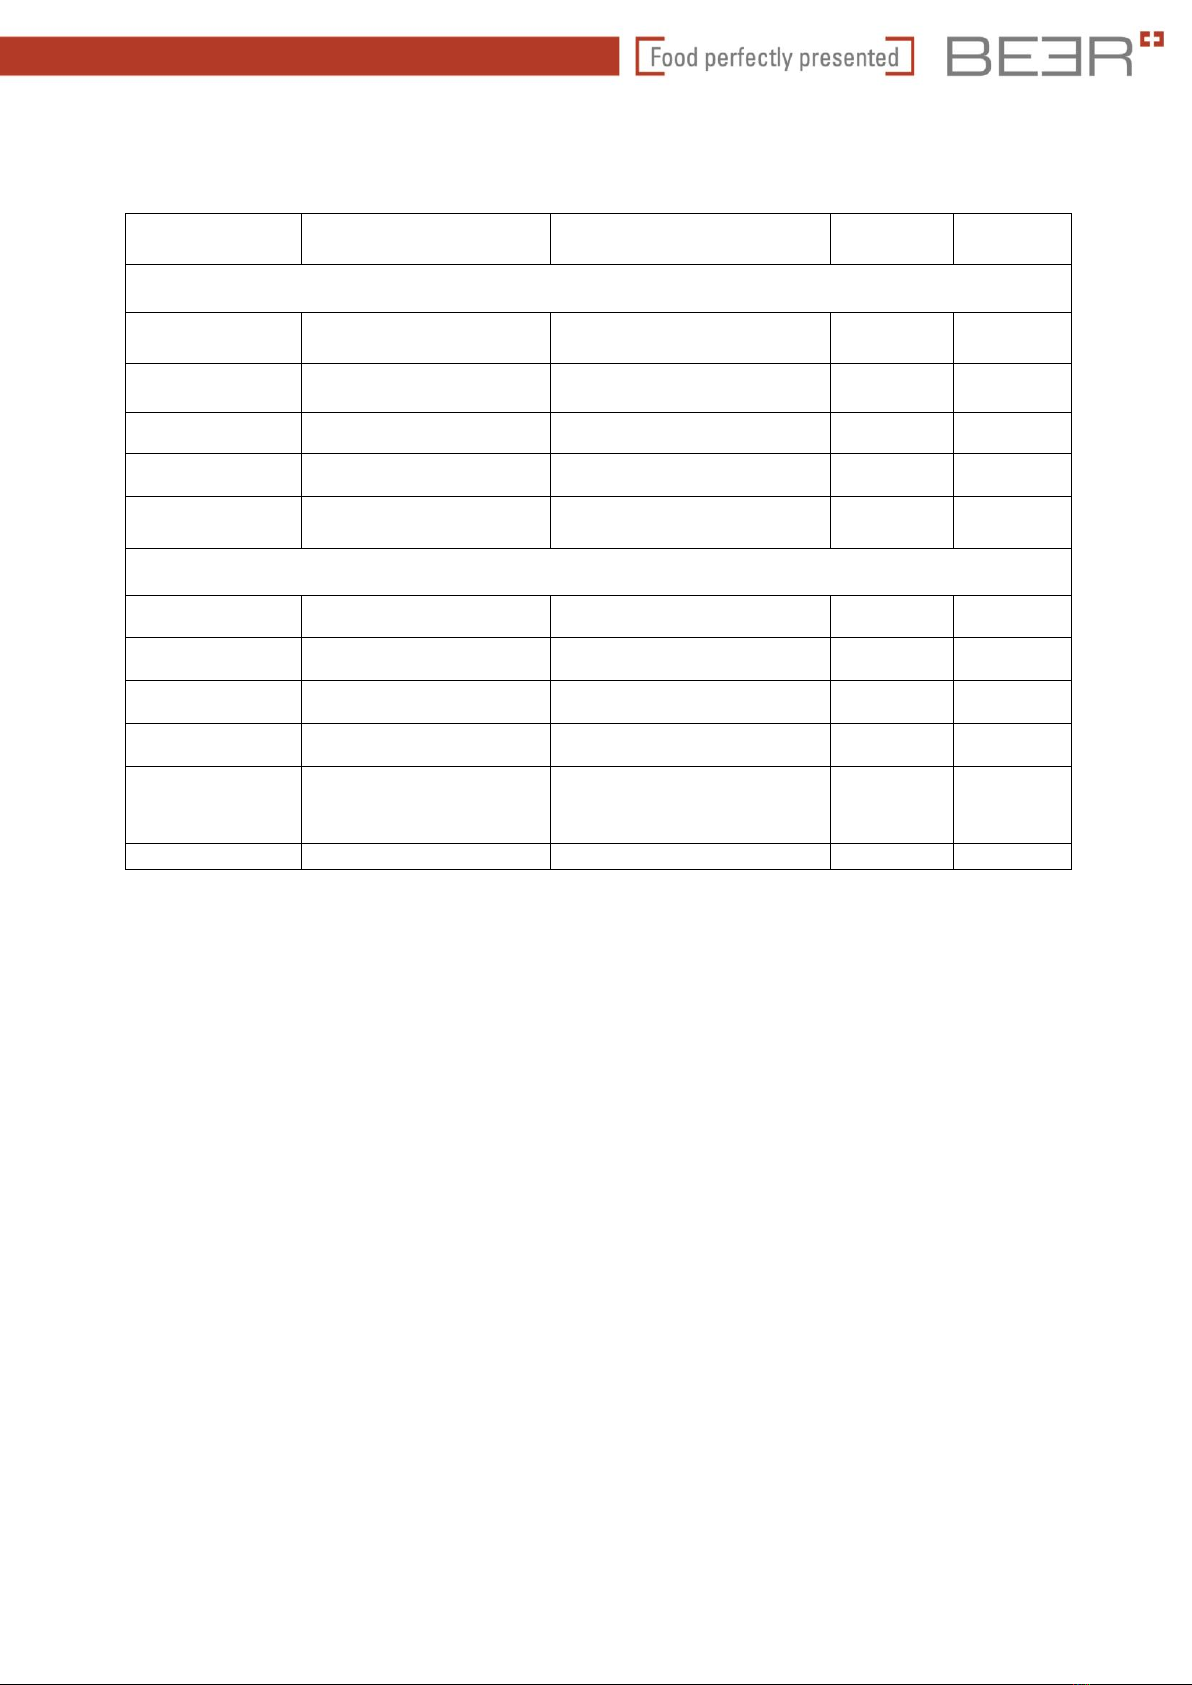
Operating times 1-7
As described above the operating times can be reached by directly pressing the specific button.
If operating times are to be stored permanently, the programming mod has to be accessed with
the Prog button.
Parameter
Function
Operating range
Standard value
Customer value
Group “Operating times”
S1
Operating time 1
00:00...99:59
min.
00:30 min.
S2
Operating time 2
00:00...99:59
min.
00:45 min.
S3
Operating time 3
00:00...99:59
min.
01:00 min.
S4
Operating time 4
00:00...99:59
min.
01:30 min.
S5
Operating time 5
00:00...99:59
min.
02:00 min.
S6
Operating time 6
00:00...99:59
min.
02:30 min.
S7
Operating time 7
00:00...99:59
min.
04:30 min.
Parameter level P and A
These parameters are accessible by pressing the Up and the Down button for 3 seconds at the
same time. This will give the first parameter of the P-level “P1”. The delay is to prevent
unauthorized access. The selection of other P-parameters is now only by pressing the Up or
Down button.
The value of the selected parameter appears after pressing the Prog button. His adjustment is
done by pressing the up or down button in addition to the Prog key.
Pressing only the Up button for 6 seconds after reaching the last P-parameter, an intermediate
level "PA" is accessed. Now, press the Up and Down button simultaneously for 3 seconds
again.
This will give the first parameter of the A-level “A1”. The adjustment corresponds to the P-level.
Note: Due to the “one-finger-setup” of operating times, it is possible that the apparently
simultaneous press of the Up and Down button falls accidentally into the operating times setting
before reaching the P level. The keys must then be re-released shortly.
Beer Grill AG
Beer Grill GmbH
Allmendstrasse 7
Tel. +41 (0)56 618 7800
Körnerstrasse 14 a
Tel. +49 (0)71 61 659 876
CH –5612 Villmergen
Fax +41 (0)56 618 7849
D –79539 Lörrach
Fax +49 (0)71 61 659 879
www.beergrill.com
Seite 8
Parameter
Function
Operating range
Standard
value
Customer
value
Parameter group P
P1
Buzzer duration
0...60 sec.
(0 = inactiv)
5 sec.
P2
No function
P3
No function
P4
No function
P19
Operating times
locking
0: not locked
1: operating times locked
0
Intermediate level „PA“
A1
No function
A2
No function
A3
No function
A4
No function
A19
Settings lock
0: not locked
1: P parameter locked
2: A parameter locked
0
Pro
Programm version
----

Beer Grill AG
Beer Grill GmbH
Allmendstrasse 7
Tel. +41 (0)56 618 7800
Körnerstrasse 14 a
Tel. +49 (0)71 61 659 876
CH –5612 Villmergen
Fax +41 (0)56 618 7849
D –79539 Lörrach
Fax +49 (0)71 61 659 879
www.beergrill.com
Seite 9
After sales service
In case of an electric breakdown contact the after sales service. Before calling check
mains connecting cable and fuses.
Important: When contacting after sales service always indicate serial-no. and type (on ratIng
plate) of the Culinario Easy.
Switzerland: Beer Grill AG
Allmendstrasse 7
CH-5612 Villmergen
Phone-no. +41 (0)56 618 78 28
Ireland: Caterline Catering Equipment Ltd.
U1, Block G
Greenogue Business Park
IE-Rathcoole Co. Dublin
Phone-no. +353 (0)1 401 90 11
Luxemburg: Luxcuisines Scheunert S.à.r.l.
Op Huefdréisch 2
L-6871 Wecker
Phone-no. +352 (0)26 71 610
Norway: Berg & Dahl AS
Haslevollen 3G
NO-0579 Oslo
Phone-no. +47 22 64 58 00
United Kingdom: Total Equipment
Servicing Limited
Crown Chambers
7 Market Place
GB-Melksham Wiltshire SN12 6ES
Phone-no. +44 1225 791 848
Table of contents
Other BEER Grill manuals

Popular Grill manuals by other brands


Beef Eater
Beef Eater SIGNATURE BSB2040BA Assembly and operating instructions

Char-Griller
Char-Griller Deluxe 2929 owner's manual

Best Choice Products
Best Choice Products SKY 1845 Assembly manual

Outdoorchef
Outdoorchef Porto 480 user guide

Char-Griller
Char-Griller Grillin' Pro 3001 owner's manual

Magic Chef
Magic Chef MCCCB24 user manual