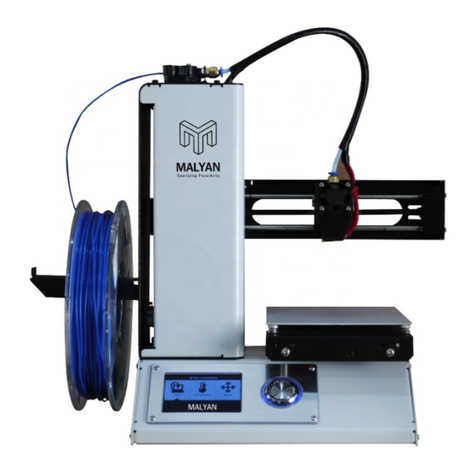
Beeverycreative Beethefirst User manual

EN - PT - DE - FR - IT


FRANÇAIS
BEEWELCOME!
V.18.11.2015
You can find updated versions of this guide on our website, at
www.beeverycreative.com. Here you can also get in touch with our
Customer Service Team if you have any questions.
This is the Quick Start Guide for using your BEETHEFIRST.
41
DEUTSCH
23
PORTUGUÊS
5
ENGLISH
Languages
59
77
ITALIANO


QUICK START
GUIDE FOR USING
BEETHEFIRST
ENGLISH

6
The current state of 3D desktop Art technology
Even though the only real limit is your own creativity, current 3D printing technology also
has its limits. You can find out what they are by reading our 3D Modelling Guidelines
document (https://www.beeverycreative.com/modelling-guidelines/)
The most relevant aspect to guarantee print quality is calibrating BEETHEFIRST.
Proper calibration is essential to performance and to ensure the desired results.
Poor calibration may keep you from printing the object you wish to make.
High resolution printing requires an even more demanding calibration. For this reason,
we advise you to print in low resolution until you’re a more experienced user.
Low resolution printing is also recommended whenever object resolution isn’t the main
concern, since this is quicker, more economical and more ecological.

20
TECHNICAL SPECIFICATIONS
10
UNPACKING AND INSTALLING BEETHEFIRST
8
SAFETY INFORMATION
INDEX

1. SAFETY INFORMATION

9
1. SAFETY INFORMATION
Even though the BEETHEFIRST 3D printer was designed to be as safe as possible,
we would like to remind you it was conceived for use by adults. Still, there are
safety concerns you must keep in mind:
1 - Adult supervision: because we can’t stress this enough, BEETHEFIRST was
developed to be used by adults. Should you wish that children also use it, you
must supervise them at all times while they do so. You must also take great care
with small printed objects, because children might try to swallow them, which
poses a danger of them choking.
2 - Extruder: whenever BEETHEFIRST is functioning, the extruder nozzle can
reach temperatures as high as 250º C (480º F), which can cause serious burns if
touched. For that reason, even though the extruder nozzle is shielded, you must
always be careful not to touch it.
3 - Moving parts: whenever it’s functioning, BEETHEFIRST has moving parts.
For that reason, you should always keep a safe distance from the printer while
it’s operating.
4 - Filament: BEETHEFIRST has been developed and tested to work best with
BEESUPPLIES, our brand of filament. You may use filament from other sources
but we recommend BEESUPPLIES for the best results.
5 - Cool and well-ventilated environment: BEETHEFIRST works best in cool
environments with some ventilation, just like any other electrical item. It is also
recommended to maintain an acceptable level of air quality around the printer.
6 - BEETHEFIRST integrity: never use BEETHEFIRST without it being fully
assembled. Using it without all of its components voids the warranty and can be
dangerous. For the same reasons, avoid spilling any liquid on the printer.
7 - Modifications to BEETHEFIRST: if you modify BEETHEFIRST in any way, this
will immediately void the warranty. If you still wish to modify it, get in touch with
us, explain your project and we might be able to provide you with useful information.

2. UNPACKING AND INSTALLING
BEETHEFIRST

11
1. Open the box and remove the printer’s protective foam.
2. Open the plastic bag removing the tape by pulling the tag, as shown in the
illustration on the outside of the bag
3. Remove the printer by the handle, NOT by pulling the foam casing, or you will
damage it. The handle comes out by pressing it on one side, then lifting it out.

12
4. Remove the packaging material as indicated by the numerical references.
5. Once you’ve unpacked everything, use the handle located on the top of the
printer to transport your BEETHEFIRST. If you wish to carry BEETHEFIRST
for longer trips, we recommend you use the BEEPACK.

13
6. Make sure the box contains the following items:
1 BEETHEFIRST
1 Printing table
1 Pair of Tweezers
1 Spatula
1 Allen Key
1 BEEPACK
1 Roll of blue tape
1 Power cable
1 USB connection cable
1 Filament spool
1 Spool holder

11
12
13
9
10
13
11
12
8
5
4
3
2
1 7
6
14
1
2
3
4
5
BEETHEFIRST DIAGRAM
Filament spool Filament entry
USB port
Spool holder
Extruder nozzle
Printing table
Calibration screws
6
7
8
9
10
Transport handle
Port for bootloader upgrade
Label with serial number
Power socket
ON/OFF switch
Cable Lock

15
INSTALLING BEESOFT
1. Before you begin, make sure your computer has a working internet connection
and that it’s connected to an electrical socket or has enough charge left in its
battery.
2. Next, log on to www.beeverycreative.com and download the most recent ver-
sion of BEESOFT for your particular operating system.
3. After BEESOFT has finished downloading, go to the download folder and run
the installation file.
4. Follow the installation instructions to the end, selecting the desired options.
5. Run BEESOFT by clicking on the shortcut on your Desktop or Applications
menu.
After installing BEESOFT, follow the steps in the maintenance wizard to calibrate
your BEETHEFIRST.

1. Make sure you’ve removed all the printer’s packaging material and check if the main
switch is in the “off” position.
2. Attach the power cable, connecting it first to BEETHEFIRST and then to an electrical
socket.
3. Connect the USB cable to BEETHEFIRST and to the computer.
4. Place one, and only one, layer of blue tape on the printer table, carefully to avoid any
overlapping.
12
34
16

17
7. Place assembled items (spool + spool holder) in BEETHEFIRST.
8. Flip the main switch to the “on” position.
56
7 8
5. Place the printer table on the magnetic supports
6. Place the spool holder inside the spool. Make sure to keep the filament wound tight,
because any looseness might cause kinks or knots to appear in the filament, which
makes printing impossible.

18
HOW TO PRINT
1. Make sure the blue tape is in an acceptable condition. If it’s damaged, it should be
replaced as described in point 4 of ‘Installing BEETHEFIRST’.
2. Make sure that no objects or filament debris are on the printer table.
3. Import the 3D model you wish to print. You can find a range of 3D models online, or
you can create your own 3D model by using modelling software (not included).
4. Make sure you’ve followed the steps laid out in BEESOFT’s printer calibration wizard.
5. Click on the “Import Model” button in BEESOFT and select the file you imported.
6. Click on the “Print” button and select the desired printing options.
7. BEESOFT will prepare the selected file for printing (a process called “slicing”), which
may take a few minutes. Once it’s ready, the printing process will begin.

19
AFTER PRINTING
After your print is over, you have to remove the object from the table. Try to do it first gen-
tly by hand without damaging it. If you are not able to do it, use the spatula parallel to the
table. If none of these techniques work, remove the blue tape. Don’t forget to replace the
blue tape before printing again.
To fully disconnect your BEETHEFIRST, you should always unplug it from the electrical
socket.
TROUBLESHOOTING
We recommend you read our FAQ and Troubleshooting pages available on the website
www.beeverycreative.com. If you can’t find the solution to a given problem, please contact
our Customer Service Team by using the form available on our website.

3. TECHNICAL SPECIFICATIONS
Other manuals for Beethefirst
1
Table of contents
Languages:
Other Beeverycreative 3D Printer manuals
Popular 3D Printer manuals by other brands
TierTime
TierTime Filament Dryer PRO instruction manual

Ackuretta
Ackuretta FreeShape 120 quick start guide
Ultimaker
Ultimaker S5 Material Station quick start guide
Felix Storch
Felix Storch 3.1 Single Assembly manual
NWA3D
NWA3D Afinibot A31 user manual

Stratasys
Stratasys Objet Series Replacement instructions

