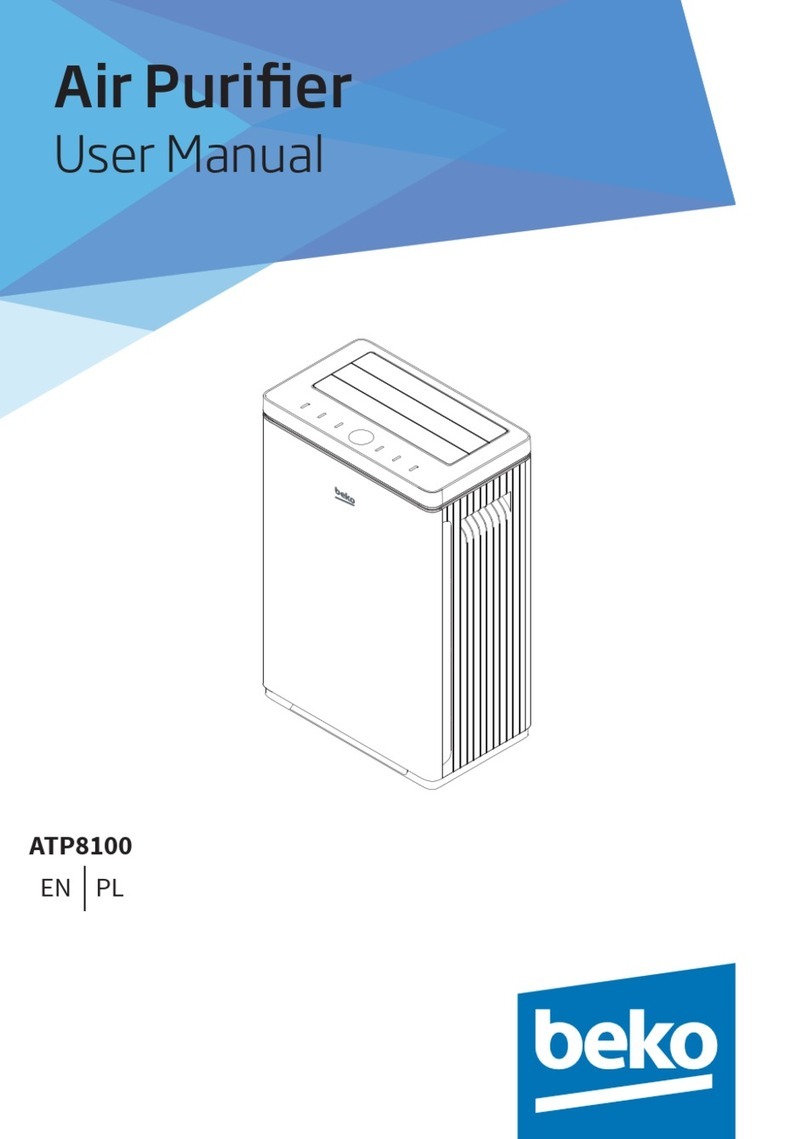
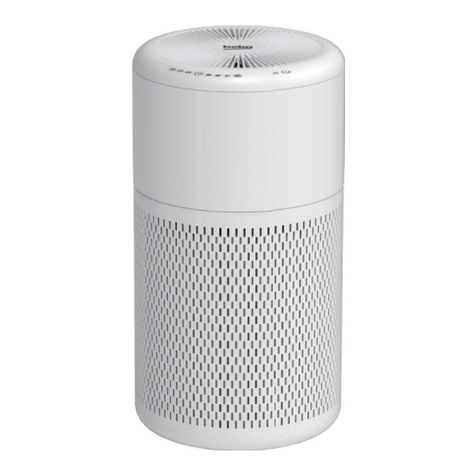
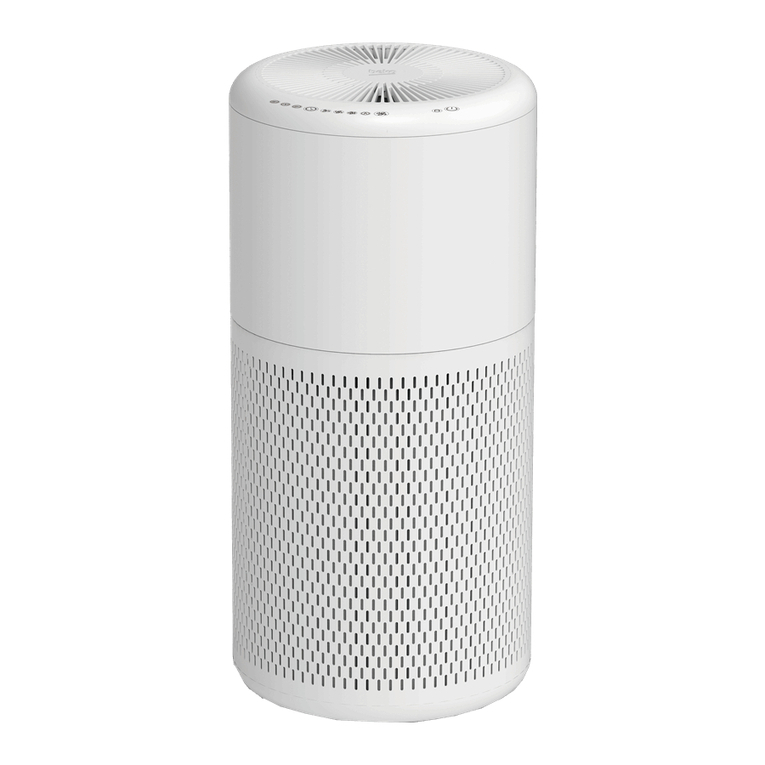
Beko ATP 7100I User manual

www.beko.com
01M-8895663200-2320-08
Ar Purfer
Instructıon Manual
ATP 7100 I
EN DE FR IT NL RO

Please read this user manual first!
Dear Valued Customer,
Thank you for preferring this Beko appliance. We hope that you get the best results
from your appliance which has been manufactured with high quality and state-of-the-
art technology. For this reason, please read this entire user manual and all other ac-
companying documents carefully before using the appliance and keep it as a reference
for future use. If you handover the appliance to someone else, give the user manual as
well. Follow the instructions by paying attention to all the information and warnings in
the user manual.
Remember that this user manual may also apply to other models. Differences between
models are explicitly described in the manual.
Meanings of the Symbols
Followng symbols are used n varous sectons of ths user manual:
C
Important nformaton and useful hnts about
usage.
A
WARNING:
Warnngs aganst dangerous stu-
atons concernng the securty of lfe and pro-
perty.
Complies with the WEEE regulation. It does not contain PCB.
This appliance has been manufactured in environmentally friendly modern
plants without giving any harm to the nature.

Air purifier/ Instruction Manual 3 / EN
CONTENTS
ENGLISH 04-13
DEUTSCH 14-25
FRANÇAIS 26-37
ITALIANO 38-49
NEDERLANDS 50-61
ROMÂNĂ 62-76

4 / EN Air purifier/ Instruction Manual
1.1 General Safety
•Check if the voltage indicated on
the appliance corresponding to
the local mains voltage before you
connect the appliance.
•To avoid fire hazard, never put the
cord under rugs, or near any heat
source.
•Carefully discard any plastic wrap-
ping that was used for the pack-
aging.
•Do not use the air purifier outside.
•Do not place the unit near any
heat source or in direct sunlight.
•Always unplug the air purifier be-
fore removing the grill, changing
the filters, cleaning the air purifier
or whenever it is not in use.
•Do not use in or around water or
any other liquids. Do not attempt
to wash the unit under running
water.
•Use appliance only for intended
household use as described in this
manual.
•Ensure that all air openings are
not restricted or covered in any
way.
•Do not place anything on top of
the unit.
•Never insert any object into any
openings.
•Do not use the air purifier if any
part is missing or damaged in any
way.
•Do not attempt to repair or adjust
any mechanical functions of this
unit. If the unit becomes dam-
aged call the service number on
the back of this manual.
•If the supply cord is damaged, it
must be replaced by the manufac-
turer, its service agent or similarly
qualified persons in order to avoid
a hazard.
•The air purifier contains no user
serviceable parts and should the
product suffer damage or break-
down call the service number on
the back of this manual.
•Should the air purifier stop work-
ing, first check the fuse/circuit
breaker at the distribution board
is operating, before contacting
the place of purchase.
•This appliance is not intended for
use by persons (including chil-
dren) with reduced physical, sen-
1 Important Safety and Envronmental Instructons
C
NOTE: Before readng these ns-
tructons, please vew the corres-
pondng llustratons. (fg.1/Page7)
C
NOTE: Wth proper care and use,
ths ar purfer wll gve you fresh,
clean ar for many years.

Air purifier/ Instruction Manual 5 / EN
sory or mental capabilities, or lack
of experience and knowledge, un-
less they have been given super-
vision or instruction concerning
use of the appliance by a person
responsible for their safety.
•Children should be supervised to
ensure that they do not play with
the appliance. This appliance can
be used by children aged from
8 years and above and persons
with reduced physical, sensory or
mental capabilities or lack of ex-
perience and knowledge if they
have been given supervision or
instruction concerning use of the
appliance in a safe way and un-
derstand the hazards involved.
Children shall not play with the
appliance. Cleaning and user
maintenance shall not be made by
children without supervision.
•This appliance is intended to be
used in household and similar ap-
plications such as:
– Staff kitchen areas in shops, of-
fices and other working environ-
ments;
– Farm houses;
– By clients in hotels, motels and
other residential type environ-
ments;
– Bed and breakfast type environ-
ments.
•Save these instructions
CAUTION: To prevent risk of
electric shock, remove cord plug
from outlet before activating the
appliance. To prevent risk of fire,
inspect and clean equipment reg-
ularly as noted in this manual.
•If the supply cord is damaged, it
must be replaced by the manufac-
turer, its service agent or similarly
qualified persons in order to avoid
a hazard.
1.2 Compliance with
the WEEE Directive and
Disposing of the Waste
Product:
This product complies with EU
WEEE Directive
(2012/19/EU). This product bears
a classification symbol for waste
electrical and electronic equipment
(WEEE).
This symbol indicates that
this product
shall not be disposed with
other household wastes at
the end of its service
1
Important Safety and Envronmental Instructons

6 / EN Air purifier/ Instruction Manual
life. Used device must be returned
to offical collection point for recy-
cling of electrical and electronic
devices. To find these collection
systems please contact to your
local authorities or retailer where
the product was puchased. Each
household performs important role
in recovering and recycling of old
appliance. Appropriate disposal
of used appliance helps prevent
potential negative consequences
for the environment and human
health.
1.3 Compliance with
RoHS Directive
The product you have purchased
complies with EU RoHS Directive
(2011/65/EU). It does not contain
harmful and prohibited materials
specified in the Directive.
1.4 Package Informa-
tion
Packaging materials of the
product are manufactured
from recyclable materials in
accordance with our National
Environment Regulations. Do not
dispose of the packaging materials
together with the domestic or oth-
er wastes. Take them to the pack-
aging material collection points
designated by the local authorities
.
1
Important Safety and Envronmental Instructons
1.5 Cleaning And Main-
tenance
1. Turn the air purifier off and un-
plug it before cleaning.
2. The outside of the air purifier can
be cleaned with a soft, clean damp-
ened cloth.
3. The air outlet and air inlet grill can
be cleaned of dust with a small, soft
brush.
4. If you wish to clean the inside of
the air purifier, please only use a
dry, soft cloth to wipe it down.
5. Wash the Pre-filter by following
the operation described in the sec-
tion of “VACUUM OR WASH THE
PRE-FILTER”.
6. Do not wash the HEPA filter.
A
WARNING:
Do not allow mois-
ture to come in contact with
the body of the air purifier.

Air purifier/ Instruction Manual 7 / EN
1
Important Safety and Envronmental Instructons
Groove
Fastener
Fg.1
1.6 Vacuum Or Wash
The Pre-filter
Occasionally vacuum the exterior of
the fabric pre-filter to remove dust.
Always unplug the unit before re-
moving the fabric pre-filter.
1. Carefully rotate the body anti-
clockwise and remove it from the air
inlet grill.
2. Remove the pre-filter from the
HEPA filter.
3. Wash the pre-filter in the wash-
ing machine.
4. After the pre-filter is cleaned well
and dried, attach the pre-filter onto
the HEPA filter.
5. Carefully put the HEPA filter with
pre-filter into the air inlet grill.
6. Put the body onto the air inlet
grill, then rotate the body clockwise
until the fastener locks into the
groove.

8 / EN Air purifier/ Instruction Manual
2
How The Ar Purfer Works
Fg.2
The ar purer removes up to 99.97%
of arborne allergens as small as 0.3
mcrons, ncludng ragweed pollen,
grass pollen, tree pollen, household
dust, dust mte debrs, pet dander,
smoke and odour from the ar passng
through the lter.
3
Know Your Ar Purfer
Air inlet grill
Pre-Filter
HEPA Filter
Body
Dust sensor
Timer button
Fan speed button
Air outlet
Air quality indicator

Air purifier/ Instruction Manual 9 / EN
4
Control Panel Introducton
Timer
Button
Air
Outlet
Fan Speed
Button
Power
Button Filter change
indicator
Fg.3

10 / EN Air purifier/ Instruction Manual
5
Operatng Instructons
5.1 İmportant notes
•Carefully unpack your air purifier.
•Select a firm level place where there are no
obstructions to the air inlet grill or air outlet.
•Remove all PE bags from filters before use.
•Do not point air outlet towards wall.
Power button
Touch the Power button, the machine will
start running under the default “Medium”
setting, and the indicator of “Medium” setting
will illuminate.
Fan speed button
There are 3 speed settings including Low,
Medium and High for selection. Touch the Fan
speed button to select your desired speed
setting.
Dust sensor
This Air Purifier has a built-in smart dust sen-
sor which can detect the air quality of current
environment automatically, and the air qual-
ity can be shown by the air quality indicator
which can illuminate in blue, pink and red
when the air quality is very good, good and
bad accordingly.
Tmer button
The timer allows you to run your air purifier
at your convenience, for up to 8 hours. With 3
6
Controls Introducton
settings including 2hr, 4hr and 8hr.
Ionzer rocker swtch
This appliance has an independent Ionizer
rocker switch equipped at the bottom of
body, feature which, when turned on, releas-
es negative ions into outgoing filtered air to
help the air purification process.
Fg.4
Ionizer rocker
switch

Air purifier/ Instruction Manual 11 / EN
7
To Operate Your Ar Purfer
1. Connect the appliance with power source,
one “Bi” can be heard.
2. Touch the Power button once, “Bi-Bi” can
be heard, the appliance starts to run under
under the default “AUTO” setting, its corre-
sponding indicator will illuminate, and the air
quality indicator will illuminate in blue, pink or
red according to the actual air quality.
- Very good air quality: The air quality indi-
cator illuminates in blue.
- Good air quality: The air quality indicator
illuminates in pink.
- Bad air quality: The air purifier illuminates
in red.
3. And you can select your required speed set-
ting by following the operation described in
“CONTROLS INTRODUCTION”. After select,
the corresponding indicator of selected speed
setting will turn on.
4. After turn on the air purifier and select your
required speed setting, you can activate the
timer by following the operation as below:
Touch down Timer button on the control
panel, one beep “Bi” can be heard. There are
3 settings including 2H, 4H and 8H for selec-
tion. After select your required timing, the
indicator of selected timing will illuminate.
When the timer expires, the air purifier will
power off automatically and the indicator of
selected timing will extinguish.
5. When the filter change indicator illumi-
nates in white, it is time to change the HEPA
filter. Please change the HEPA filter by follow-
ing the operation described in the section of
“CHANGE THE HEPA FILTER”.
Timer
Button
Air
Outlet
Fan Speed
Button
Power
Button
Filter change
indicator
Fg.5

12 / EN Air purifier/ Instruction Manual
8
Change The Hepa Flter
Always unplug the unit before changing the
HEPA filter.
1. When the filter change indicator illuminates in
white, it’s time to change the HEPA filter.
2. Turn off the unit and unplug it.
3. Carefully rotate the body anticlockwise and
remove it from the air inlet grill.
4. Remove the HEPA filter out of the air inlet grill.
5. Remove the pre-filter.
6. Replace a new HEPA filter into the air inlet grill.
7. Put the body onto the air inlet grill, then rotate
the body clockwise until the fastener locks into
the groove.
9
Troubleshootng
Problem Soluton
Unt wll not operate.
Check to make sure the unit is plugged in.
Check to make sure the unit is on.
Check condition of the filter and replace if necessary.
Check to ensure nothing is blocking the air inlet and
filtered air outlet.
Be sure the plastic bag has been removed from the filter.
Decreased ar flow.

Air purifier/ Instruction Manual 13 / EN
10
Techncal Data
Techncal and desgn modfcatons reserved.
Made n P.R.C.
Model No.
ATP7100I
Power supply
24.0V DC
Rated power
35 W
Contact detals for obtanng more nformaton
Arcelk A.S. Sutluce, Karaagac Cad. 2-6,
34445 Beyoglu Istanbul Turkey
Parameter of External Power Supply
Manufacturer
Dongguan Guanjn Electroncs
Technology Co., Ltd
Model Identfer
K36V240150G
Input Voltage
100-240V~
Input Frequency
50/60Hz
Input Current
0.9A
Output Voltage
24.0V DC
Output Current
1.5A
Output Power
36.0W
Average actve effcency 88,24%
Effcency at low load (10%) 83,69%
No-load power consumpton 0.099W

Lesen Sie bitte zuerst diese Bedienungsanleitung!
Sehr geehrter Kunde,
Vielen Dank, dass Sie dieses Beko-Gerät bevorzugen. Wir hoffen, dass Sie die besten
Ergebnisse mit Ihrem Gerät erzielen, das mit hoher Qualität und modernster Techno-
logie hergestellt wurde. Lesen Sie deshalb bitte vor der Benutzung des Geräts dieses
gesamte Benutzerhandbuch und alle anderen Begleitdokumente sorgfältig durch und
bewahren Sie es als Referenz für den späteren Gebrauch auf. Wenn Sie das Gerät an
jemand anderen ausgeliehen haben, geben Sie ihm auch das Benutzerhandbuch. Be-
folgen Sie die Anweisungen, indem Sie alle Informationen und Warnungen im Benut-
zerhandbuch beachten.
Denken Sie daran, dass dieses Benutzerhandbuch auch für andere Modelle gelten
kann. Die Unterschiede zwischen den Modellen werden im Handbuch explizit beschrie-
ben.
Bedeutungen der Symbole
De folgenden Symbole werden n verschedenen Abschntten deses
Benutzerhandbuchs verwendet:
C
Wchtge Informatonen und nützlche Hnwese
zur Benutzung.
A
WARNUNG:
Warnungen vor gefährlchen Stu-
atonen, de de Scherhet von Leben und Egen-
tum betreffen.
Entspricht der WEEE-Verordnung. Es enthält kein PCB.
Dieses Gerät wurde in umweltfreundlichen modernen Anlagen hergestellt,
ohne der Natur zu schaden.

Luftreiniger/ Bedienungsanleitung 15 / DE
1.1 Allgemeine Sicher-
heit
•Bitte überprüfen Sie, bevor Sie
das Gerät anschließen, ob die auf
dem Gerät angegebene Span-
nungswerte der Spannung im
örtlichen Stromnetz entsprechen.
•Um Brandgefahr zu vermeiden,
legen Sie die Schnur niemals
unter Teppiche oder in die Nähe
einer Wärmequelle.
•Entsorgen Sie vorsichtig jede
Plastikumhüllung, die für die Ver-
packung verwendet wurde.
•Verwenden Sie den Luftreiniger
nicht im Freien.
•Stellen Sie das Gerät nicht in der
Nähe einer Wärmequelle oder in
direktem Sonnenlicht auf.
•Ziehen Sie immer den Netzste-
cker des Luftreinigers, bevor Sie
den Grill abnehmen, die Filter
wechseln, den Luftreiniger reini-
gen oder wann immer er nicht in
Gebrauch ist.
•Verwenden Sie das Gerät nicht in
oder in der Nähe von Wasser oder
anderen Flüssigkeiten. Versuchen
Sie nicht, das Gerät unter fließen-
dem Wasser zu waschen.
•Verwenden Sie das Gerät nur
für den in diesem Handbuch be-
schriebenen Gebrauch im Haus-
halt.
•Stellen Sie sicher, dass alle Luft-
öffnungen in keiner Weise einge-
schränkt oder abgedeckt sind.
•Stellen Sie keine Gegenstände
auf das Gerät.
•Stecken Sie niemals etwas in Öff-
nungen.
•Verwenden Sie den Luftreiniger
nicht, wenn ein Teil fehlt oder in
irgendeiner Weise beschädigt ist.
•Versuchen Sie nicht, mechanische
Funktionen dieses Geräts zu re-
parieren oder einzustellen. Wenn
das Gerät beschädigt wird, rufen
Sie die Servicenummer auf der
Rückseite dieses Handbuchs an.
•Sollte das Netzkabel beschädigt
sein, muss es durch den Herstel-
ler, dessen Kundendienst oder
eine Person mit gleicher techni-
scher Qualifikation ausgetauscht
werden.
•Der Luftreiniger enthält keine
1 Wchtge Scherhets- und Umwelthnwese
C
ANMERKUNG: Bevor Se dese An-
letung lesen, sehen Se sch btte
de entsprechenden Abbldungen
an. (Abb.1/Sete7)
C
ANMERKUNG: Be rchtger Pflege
und Verwendung wrd Ihnen deser
Luftrenger vele Jahre lang frsche,
saubere Luft lefern.

16 / DE Luftreiniger/ Bedienungsanleitung
Teile, die vom Benutzer gewar-
tet werden können. Sollte das
Produkt beschädigt werden oder
ausfallen, rufen Sie die Service-
nummer auf der Rückseite dieses
Handbuchs an.
•Sollte der Luftreiniger nicht mehr
funktionieren, prüfen Sie zuerst,
ob die Sicherungse/der Schutz-
schalter am Verteiler funktioniert,
bevor Sie sich an die Verkaufs-
stelle wenden.
•Dieses Gerät darf nicht durch Per-
sonen (einschließlich Kindern) mit
eingeschränkten körperlichen,
sensorischen oder geistigen Fä-
higkeiten oder mangelnder Er-
fahrung und Wissen genutzt zu
werden, wenn sie nicht angemes-
sen beaufsichtigt werden bzw.
umfassend für die Benutzung des
Geräts durch eine für ihre Sicher-
heit zuständige Person angeleitet
werden.
•Kinder müssen beaufsichtigt wer-
den, um dafür zu sorgen, dass sie
nicht mit dem Gerät spielen. Die-
ses Gerät kann von Kindern ab 8
Jahre und Personen mit einge-
schränkten physischen, senso-
rischen oder geistigen Fähigkeit
oder fehlender Erfahrung und
Wissen verwendet werden, wenn
diese vorher über die sichere
Verwendung des Gerätes un-
terrichtet wurden und die damit
zusammenhängenden Gefahren
verstanden haben. Kinder dürfen
nicht mit dem Gerät spielen. Die
Reinigung und Anwenderwartung
sollte nicht von Kindern ohne Auf-
sicht durchgeführt werden.
•Dieses Gerät ist für den Einsatz im
Haushalt und zu vergleichbaren
Zwecken vorgesehen, wie:
- in Personalküchen in Geschäf-
ten, Büroräumen und anderen Ar-
beitsumgebungen;
- Bauernhäuser;
- für Gäste in Hotels, Motels und
vergleichbaren Unterkünften;
- kleineren Pensionen oder ver-
gleichbaren Einrichtungen.
•Bewahren Sie diese Bedienungs-
anleitung auf.
VORSICHT! Um die Gefahr eines
Stromschlags zu vermeiden, zie-
hen Sie den Netzstecker aus der
Steckdose, bevor Sie das Gerät
aktivieren. Um Brandgefahren
vorzubeugen, überprüfen und
reinigen Sie die Ausrüstung regel-
mäßig wie in diesem Handbuch
beschrieben.
1
Wchtge Scherhets- und Umwelthnwese

Luftreiniger/ Bedienungsanleitung 17 / DE
•Sollte das Netzkabel beschädigt
sein, muss es durch den Herstel-
ler, dessen Kundendienst oder
eine Person mit gleicher techni-
scher Qualifikation ausgetauscht
werden.
1.2 Einhaltung der
WEEE-Richtlinie und
Entsorgung des Altge-
räts:
Diese Gerät entspricht der WEEE-
Richtlinie EU
(2012/19/EU). Dieses Gerät trägt
das Klassifizierungssymbol für
Elektro- und Elektronik-Altgeräte
(EEAG).
Dieses Symbol weist darauf
hin, dass dieses Produkt
am Ende seiner
Nutzungsdauer nicht
zusammen mit anderen
Haushaltsabfällen entsorgt wer-
den darf.
Leben. Gebrauchte Geräte müssen
an einer offiziellen Sammelstelle
zum Recycling von elektrischen und
elektronischen Geräten abgegeben
werden. Um diese Sammelsysteme
zu finden, wenden Sie sich bitte
an Ihre lokalen Behörden oder den
Händler, bei dem das Produkt ge-
kauft wurde. Jeder Haushalt spielt
eine wichtige Rolle
bei der Rückgewinnung und dem
Recycling von Altgeräten. Die
sachgerechte Entsorgung von
Altgeräten hilft, mögliche negati-
ve Folgen für die Umwelt und die
menschliche Gesundheit zu ver-
meiden.
1.3 Einhaltung der
RoHS-Richtlinie
Das von Ihnen gekaufte Gerät ent-
spricht der RoHS-Richtlinie der EU
(2011/65/EU). Sie enthält keine
schädlichen und verbotenen
Materialien, die in der Richtlinie
aufgeführt sind.
1.4 Information zur Ver-
packung
Das Verpackungsmaterial
für dieses Erzeugnis wurde
aus Recyclingstoffen ge-
mäß unseren nationalen
Umweltschutzvorschriften herge-
stellt. Entsorgen Sie das
Verpackungsmaterial nicht mit dem
Hausmüll oder anderen Abfällen.
Bringen Sie es zu einer von den ört-
lichen Behörden eingerichteten
Sammelstelle für
Verpackungsmaterial.
.
1
Wchtge Scherhets- und Umwelthnwese

18 / DE Luftreiniger/ Bedienungsanleitung
1
Wchtge Scherhets- und Umwelthnwese
1.5 Reinigung und In-
standhaltung
1. Schalten Sie den Luftreiniger vor
der Reinigung aus und ziehen Sie
den Netzstecker.
2. Die Außenseite des Luftreinigers
kann mit einem weichen, saube-
ren, angefeuchteten Tuch gereinigt
werden.
3. Das Luftauslass- und
Lufteinlassgitter kann mit einer
kleinen, weichen Bürste von Staub
gereinigt werden.
4. Wenn Sie das Innere des
Luftreinigers reinigen möchten, wi-
schen Sie ihn bitte nur mit einem
trockenen, weichen Tuch ab.
5. Waschen Sie den Vorfilter, in-
dem Sie den im Abschnitt “DEN
VORFILTER ABSAUGEN ODER
WASCHEN”. beschriebenen
Vorgang befolgen.
6. Waschen Sie den HEPA-Filter
nicht.
A
WARNUNG:
Lassen Sie keine
Feuchtigkeit mit dem Körper
des Luftreinigers in Kontakt
kommen.

Luftreiniger/ Bedienungsanleitung 19 / DE
1
Wchtge Scherhets- und Umwelthnwese
Groove
Fastener
Abb.1
1.6 Absaugen oder Waschen des
Vorfilters
GelegentlichdieAußenseitedesGewebes
Vorfilters absaugen, um Staub zu entfer-
nen.
Trennen Sie das Gerät immer vom Netz,
bevor Sie den Gewebevorfilter entfernen.
1. Drehen Sie das Gehäuse vorsichtig ge-
gen den Uhrzeigersinn und nehmen Sie
es vom Lufteinlassgitter ab.
2. Entfernen Sie den Vorfilter aus dem
HEPA-Filter.
3. Waschen Sie den Vorfilter in der
Waschmaschine.
4. Nachdem der Vorfilter gut gereinigt
und getrocknet ist, befestigen Sie den
Vorfilter auf dem HEPA-Filter.
5. Setzen Sie den HEPA-Filter mit Vorfilter
vorsichtig in das Lufteinlassgitter ein.
6. Setzen Sie das Gehäuse auf das
Lufteinlassgitter und drehen Sie das
Gehäuse dann im Uhrzeigersinn, bis der
Verschluss in der Nut einrastet.
Nut
Verschluss

20 / DE Luftreiniger/ Bedienungsanleitung
2
We der Luftrenge funktonert
Abb.2
Der Luftrenger entfernt bs zu
99,97% der luftgetragenen Aller-
gene bs zu ener Größe von 0,3 Mk-
ron, enschleßlch Ambrosapollen,
Gräserpollen, Baumpollen, Hausstaub,
Staubmlbenreste, Hausterschuppen,
3
Kennen Se Ihren Luftrenger
Air inlet grill
Pre-Filter
HEPA Filter
Body
Dust sensor
Timer button
Fan speed button
Air outlet
Air quality indicator
Luftauslass
Indkator für Luftqualtät
Ventlatorstufentaste
Tmertaste
Gerätekörper
Staubsensor
Vorlter
Luftenlassgtter
HEPA-Flter
Rauch und Geruch aus der Luft, de
durch den Flter strömt.
Other manuals for ATP 7100I
2
Table of contents
Languages:
Other Beko Air Cleaner manuals