8 / 40 ENAirpurifer / User Manual
10 / 76 EN Air purifier / User Manual
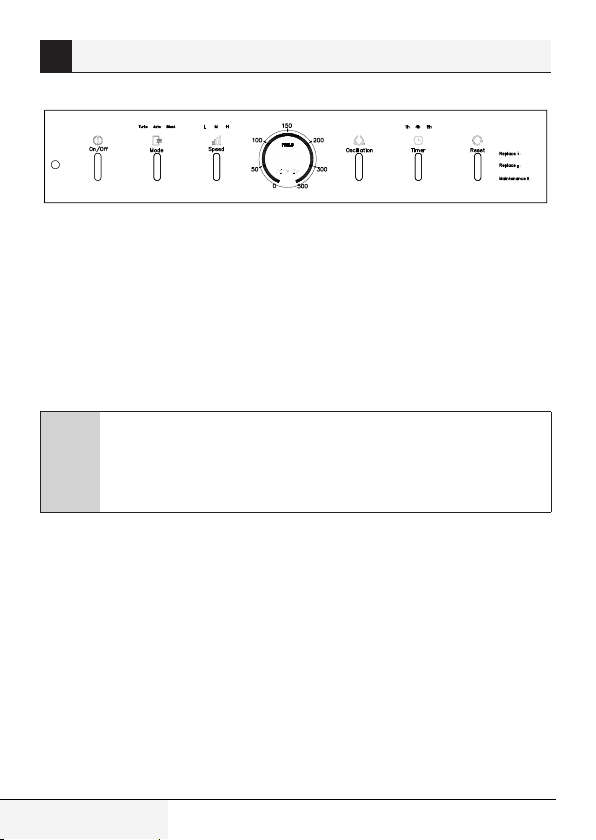
5. Timing function
The machine has timing function of 1 hour, 4 hours and 8 hours for users to select. When users press
the key, the countdown timer is activated and the 1-hour indicator light is on, indicating the time
setting is 1 hour. Press the key for the second time, the 4-hour indicator light is on, indicating the time
setting is 4 hours. Continue to press the key, the 8-hour is on, time setting is 8 hours.
6. Reset
The key also has the reset function. When the warning light indicating filter replacement is on, user
presses the key for 5 seconds after replacing the proper screen. The warning light will be off and the
data is updated. In this way, the secondary pollution from re-using contaminated screen by user to
purify air could be effectively avoided.
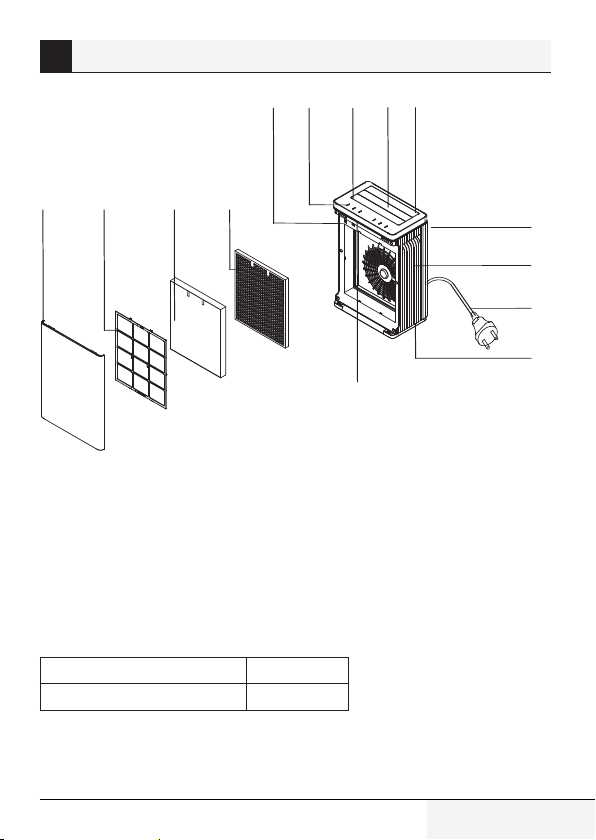
7. Filter replacement
Please clean and replace related filters when the replacement warning light is on, which
means the machine can not work properly, and after replacing filters, long press the reset key
by 5 seconds, otherwise, the warning light will be always on as a maintenance reminder.
Replacement 1 filter -------- Replace "Formaldehyde filter"
Replacement 2 filter -------- Replace "Dust-collecting filter"
Maintenance filter 3 -------- Clean "Primary filter"
3
Functions presentation
Air purifier / User Manual 9 / 76 EN
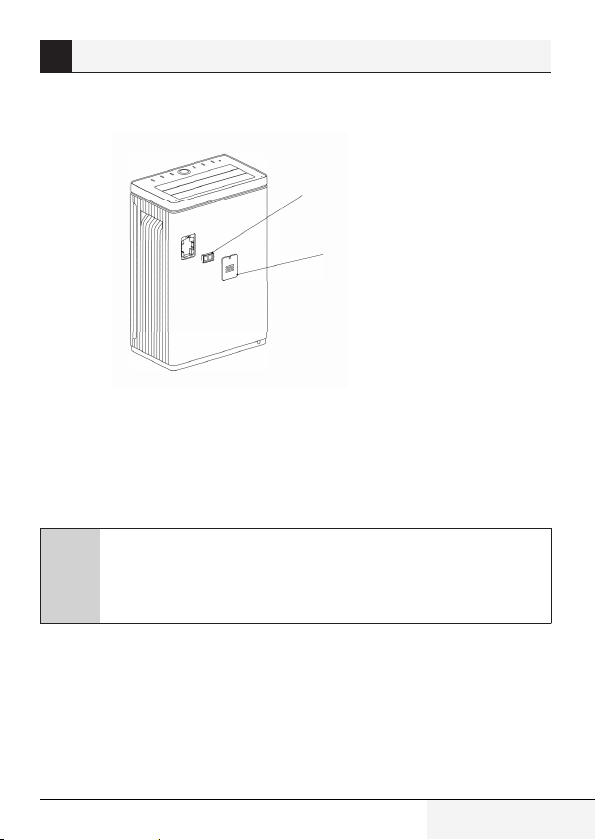
3. Air quality
This unit machine installed with dust sensor
Dust sensor primary filter
Dust sensor cover
•
The built in dust sensor detects the particles concentrations in the air, displaying it by PM2.5 data
shown on top panel as well as the different color LED lights. There are total 6 different LED light
colors to indicate the air quality from good to not good: blue-light blue-green-yellow-pinky purple-
red.
•
If PM 2.5 data is between 0~50 that represents a lower level of PM 2.5 in the air, which means the
quality level is good. If PM2.5 data is between 300~500 that represents a very high level of PM2.5 in
the air, which means the quality level is poor.
C
Note: The maximum PM2.5 value displayed in the product is 999.
Because of different locations and different tolerances on different sensor devices,
the PM2.5 parameter shown in this product might be different from other devices, or
mobile applications. All parameters are only for reference, and parameter may also
change on the same product with different fan speeds.
4. Wind direction adjustment
This air purifier product enables Oscillation function. Once Power on, the machine goes to “Auto” mode
automatically, and the air outlet will direct the wind among 45° to 90° from left to right, back and
forth, in order to deliver clean air to wider range. You can also press the “Oscillation” key to stop and
specify wind direction, and press again to be back to automatic oscillation again.
3
Functions presentation