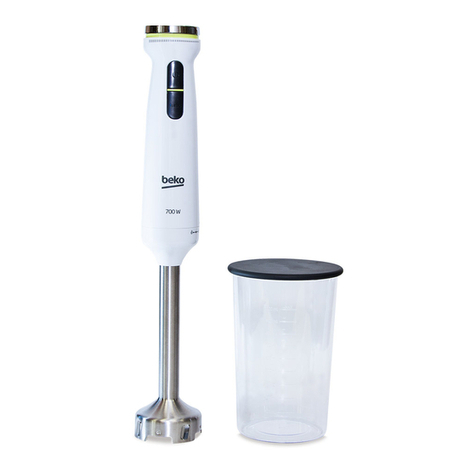
Beko HBA6700W User manual

HBA6700W
Hand Blender Set
User Manual
01M-8832833200-5015-01
EN DE FR TR ES PL RO

Please read ths user manual frst!
Dear Customers,
Thank you for selectng an Beko product. We hope that you get the best results from
your product whch has been manufactured wth hgh qualty and state-of-the-art
technology. Therefore, please read ths entre user manual and all other accompanyng
documents carefully before usng the product and keep t as a reference for future
use. If you handover the product to someone else, gve the user manual as well. Follow
all warnngs and nformaton n the user manual.
Meanngs of the symbols
Followng symbols are used n the varous secton of ths manual:
C
Important information and useful
hints about usage.
AWARNING:
Warnings for
dangerous situations concerning the
safety of life and property.
Materials are intended to be in
contact with food.
Do not immerse the appliance,
power cord or power plug in water or
in other liquids.
Potection class against electric
shock
Ths product has been produced n envronmentally-frendly, state-of-the-art facltes.
Comples wth the WEEE Drectve. It does not contan PCB.
Made n P.R.C.

3 / 26 EN
Hand Blender Set / User Manual
CONTENTS
1Important instructions for
safety and environment 4
1.1 General safety . . . . . . . . . . . . . . . . . . . . . . . . . . . . . . 4
1.2 Compliance with the WEEE Directive and
disposal of waste products . . . . . . . . . . . . . . . . . 5
1.3 Package information . . . . . . . . . . . . . . . . . . . . . . . 5
1.4 Things to do for energy saving . . . . . . . . . . . . . 5
2Hand Blender Set 6
2.1 Overview . . . . . . . . . . . . . . . . . . . . . . . . . . . . . . . . . . . 6
2.2 Technical data. . . . . . . . . . . . . . . . . . . . . . . . . . . . . . 6
3Operation 7
3.1 Preparation . . . . . . . . . . . . . . . . . . . . . . . . . . . . . . . . .7
3.2 Maximum quantities and processing time . .7
3.3 Blending. . . . . . . . . . . . . . . . . . . . . . . . . . . . . . . . . . . . .7
3.4 Chopping . . . . . . . . . . . . . . . . . . . . . . . . . . . . . . . . . . . 8
3.5 Whisking . . . . . . . . . . . . . . . . . . . . . . . . . . . . . . . . . . . 9
4Information 10
4.1 Cleaning and care . . . . . . . . . . . . . . . . . . . . . . . . . 10
4.2 Storage. . . . . . . . . . . . . . . . . . . . . . . . . . . . . . . . . . . . 10
4.3 Handling and transportation. . . . . . . . . . . . . . 10

4 / 26 EN Hand Blender Set / User Manual
This section contains safety
instructions that will help protect
from risk of personal injury or
property damage.
Failure to follow these instructions
invalidates the granted warranty.
1.1 General safety
• This appliance complies with the
international safety standards.
• This appliance may be used
by children and the people
whose physical, perceptive
or mental skills are impaired
or who are inexperienced or
not knowledgeable about the
appliance as long as they are
supervised or informed and made
understood the safe use of the
appliance and the encountered
dangers. Children should not play
with the appliance.
• This appliance shall not be used by
children.
• Keep the appliance and its cord
out of the reach of children.
• Do not use it if the power cable,
blades or the appliance itself is
damaged. Contact an authorised
service.
• Only use the original parts or
parts recommended by the
manufacturer.
• Do not attempt to dismantle the
appliance.
• Your mains power supply should
comply with the information
supplied on the rating plate of the
appliance.
• Do not use the appliance with an
extension cord.
• Do not pull the power cable when
unplugging the appliance.
• Wait for moving accessories to
stop and unplug the appliance
when left attended, while
installing/removing accessories
or before cleaning.
• Do not touch the plug of the
appliance with damp or wet hands.
• Do not use the device for hot food.
• To prevent overheating, do not
use the appliance continuously
for more than10 seconds. Leave to
cool for 1 minute in between each
10 seconds of operation.
• Use the appliance only with the
supplied rubber base and glass
container.
1Important nstructons for safety and
envronment

5 / 26 EN
Hand Blender Set / User Manual
• Do not operate the appliance
without the ingredients in the
bowl.
• Remove bones and stones from
food to prevent the blades and the
appliance from getting damaged.
• This appliance is not suitable for
dry or hard foods as this willquickly
cause the blades to become dull.
• Follow all warnings to prevent
injuries due to incorrect use.
• When emptying the container,
during cleaning and grabbing
chopping blades with bare hands
serious injuries could result
due to incorrect use. Use the
plastic section trying to hold the
chopping blade.
• After cleaning, dry the appliance
and all parts before connecting
it to mains supply and before
attaching the parts.
• Do not immerse the appliance,
power cable, or power plug in
water or any other liquids.
• Do not operate or place any part
of this appliance or its parts on or
near hot surfaces.
• If you keep the packaging
materials, store them out of the
reach of children.
1.2 Compliance with the WEEE
Directive and disposal of
waste products
This product does not include harmful
and prohibited materials specified in the
“Regulation for Supervision of the Waste
Electric and Electronic Appliances” issued
by the Ministry of Environment and
Urban Planning. Complies with the WEEE
Regulation.Thisappliancehasbeenmanufactured
with high quality parts and materials which can be
reused and are suitable for recycling. Therefore,
do not dispose the appliance with normal
domestic waste at the end of its service life. Take
it to a collection point for the recycling of electrical
and electronic equipment. Ask the local authority
in your area for these collection points. Help
protect the environment and natural resources by
recycling used products.
1.3 Package information
Package of the product is made of
recyclable materials in accordance with
our national legislation. Do not dispose
of the packaging materials together
with the domestic or other wastes. Take them to
the packaging material collection points
designated by the local authorities.
1.4 Things to do for energy
saving
Follow the times recommended in the manual
during use. Unplug the appliance after use.
1Important nstructons for safety and
envronment

6 / 26 EN Hand Blender Set / User Manual
2 Hand Blender Set
2.1 Overview
The values whch are declared n the markngs axed on your applance or the other prnted documents suppled wth t represent the values
whch were obtaned n the laboratores pursuant to the pertnent standards. These values may vary accordng to the usage of the applance and
ambent condtons.
1. On/Off button
2. Turbo button
3. Motor unit
4. Attachment release buttons
5. Blending attachment
6. Chopping lid
7. Chopping blade
8. Chopping bowl
9. Whisk holder
10. Measuring beaker
11. Balloon whisk
2.2 Technical data
Power supply:
220-240 V~, 50/60 Hz
Power:
700 W
Technical and design modifications reserved.
10
8
6
7
1
2
3
4
5
11
9

7 / 26 EN
Hand Blender Set / User Manual
3 Operation
3.1 Preparation
1. Remove all packaging and sticker materials
and dispose of them according to the
applicable legal regulations.
2. Before using the appliance for the first time,
clean parts which come into contact with food
(see the “Cleaning and care” section).
3. Cut the food into small pieces before
processing with the appliance.
3.2 Maximum quantities and
processing time
Ingredients Maximum
quantities Processing
time
Meat/Fish 200g 10-15 seconds
Herbs 20g 20 seconds
Nuts 200g 15 seconds
Cheese 150g 15 seconds
Bread 1 slice 20 seconds
Eggs
(hard-boiled) 2 eggs 5 seconds
Onions
(cut in 8 pieces) 100 g 10 seconds
3.3 Blending
1. Put the food that you would like to puree or
mix in the measuring beaker (10) or a similar
bowl.
2. Attach the blending attachment (5) to the
motor unit (3) by pushing the attachment to
the motor until it locks. Make sure the blending
attachment is properly attached to the motor
unit.
3. Insert the plug into the wall socket.
4. Immerse the blending attachment (5) in the
measuring beaker (10), that contains the
ingredients to be blended.
C
To prevent the ingredients from
splashing, do not press the On/Off
button (1) or turbo button (2) until
the blending attachment has been
immersed in the ingredients.
5. Press and hold down the On/Off button (1).
– The appliance starts operating.
6. Use the speed control to select a speed or press
and hold the turbo button (2).
– The speed indicator LED illuminates
according to the desired speed 1-6.
C
When you use the turbo button the
appliance operates at maximum
speed. In this case you cannot adjust
the speed with the speed control.
C
While using the turbo button (2), all
speed indicator LEDs illuminate.
7. Move the appliance slowly up and down and in
circles to blend the ingredients.
C
Always switch off the appliance
before taking out the processed
food.
8. Release the On/Off button (1) or turbo button
(2) when you are finished and disconnect the
power plug from the wall socket. Remove the
mixture from the measuring beaker (10).
9. Disassemble the blending attachment (5) only
by pushing the attachment release buttons (4)
at the sides of the appliance and pulling it off
from the motor unit.
C
To prevent overheating do not
operate the appliance continuously
for more than 10 seconds.
C
Never switch on the appliance
for longer than necessary for
processing the food.

8 / 26 EN Hand Blender Set / User Manual
C
To prevent overflowing of the
mixture do not overfill the
measuring beaker (10) or bowl.
Smaller amounts are easier to
process.
C
To prevent any accidents use the
beaker lid as anti-slip rubber pad by
putting the beaker base on the lid.
C
If you would like to use the blending
attachment directly in the pot, first
take the pot off the stove to prevent
the blending attachment from
overheating.
3.4 Chopping
C
Do not chop extremely hard items
such as coffee beans, ice cubes,
nutmeg, grains or bones. Remove
stalks from herbs, shells from nuts
and bones, tendons and gristle from
meat.
C
Cut the food in small pieces.
1. Put the chopping bowl (8) on an even surface.
2. Place the chopping blade (7) onto the fixed
shaft in the chopping bowl (8).
AWARNING:
Be careful when
inserting the chopping blade (7) as it
is very sharp.
AWARNING:
Do not touch the
chopping blade with bare hands.
3. Place the ingredients in the chopping bowl (8).
4. Put the chopping lid (6) on the chopping bowl
(8). Make sure that the claws on the chopping lid
are firmly locked on the bowl.
A
WARNING:
Never operate the
appliance if the chopping lid is not
properly seated on the chopping
bowl, as this could damage the
chopping blade.
5. Put the motor unit (3) on the chopping lid (6).
Push the motor unit so that it is firmly locked
in place. Make sure the motor unit is securely
attached to the chopping lid.
C
During operation always hold the
chopping bowl with one hand to
prevent it from tipping over.
6. Insert the plug into the wall socket.
7. Press and hold down the On/Off button (1).
– The appliance starts operating.
8. Press and hold the turbo button (2).
C
Do not use the appliance
continuously for more than 10
seconds.
C
To achieve the best results press
the On/Off button or turbo button
intermittently.
9. Release the On/Off button (1) or turbo button
(4) when you finish the process and disconnect
the power plug from the wall socket. Remove
the motor unit (3) from the chopping lid (8) by
pushing the attachment release buttons (4)
at the sides of the appliance and pulling it off.
Take the chopping lid (6) off. Take the chopping
blade (7) out of the chopping bowl (8) carefully
prior to removing the chopped food.
3 Operation

9 / 26 EN
Hand Blender Set / User Manual
Mixture Butter + Honey
Butter taken from the freezer (should be kept in the
freezer for min. 4 hrs. and cut into pieces of sizes
approximately 10-15 mm x 35-40 mm) and honey
taken from the refrigerator (should be kept in the
refrigerator min. 1 day).
3.5 Whisking
•You can use the balloon whisk (11) for whipping
cream and beating eggs.
•Never process more than 4 egg whites or 200 ml
cream.
1. Insert the balloon whisk (11) into the whisk holder
(9) until it clicks into place.
2. Connect the motor unit (3) to the whisk holder (9)
by putting the whisk holder onto the motor unit.
Push the whisk holder to the motor unit. Make
sure that the whisk holder is securely attached to
the motor unit.
3. Put the ingredients that you would like to process
in the measuring beaker (10) or a similar bowl.
4. Insert the power plug into the wall socket.
5. Hold the balloon whisk (11) into the mixture to be
processed.
6. Press and hold the On/Off button (1).
– The appliance starts operating.
7. Press and hold the turbo button (2).
8. Move the appliance slowly up and down and in
circles to whisk the ingredients.
9. Release the On/Off button (1) or turbo button
(2) when you are finished and disconnect the
power plug from the wall socket. Remove the
mixture from the measuring beaker (10). Remove
the motor unit (3) from the whisk holder (9) by
pushing the attachment release buttons (4) at the
two sides of the appliance and pulling it off.
3 Operation

10 / 26 EN Hand Blender Set / User Manual
4 Informaton
4.1 Cleaning and care
AWARNING:
Never use petrol
solvents, abrasive cleaners, metal
objects or hard brushes to clean the
appliance.
AWARNING:
Do not touch the
chopping blades with your bare
hands. The blades are very sharp.
Use a brush!
AWARNING:
Never put the motor
unit (3) or power cord in water or any
other liquids and never hold them
under running water.
1. Turn the appliance off and disconnect it from
the wall socket.
2. Let the appliance cool down completely.
3. Use a damp soft cloth to clean the motor unit
(3).
4. Immediately after using, clean the blending
attachment (5) and measuring beaker (10) with
warm, soapy water and dry them thoroughly.
Never wash them in dishwasher.
C
Before using or storing the appliance
after cleaning, dry all parts carefully
using a soft cloth.
4.2 Storage
•If you do not plan to use the appliance for a long
period of time, please store it carefully. Make
sure the appliance is unplugged and completely
dry.
•Store the appliance in a cool, dry place. Make
sure the appliance is kept out of the reach of
children.
4.3 Handling and
transportation
•During handling and transportation, carry
the appliance in its original packaging. The
packaging of the appliance protects it against
physical damages.
•Do not place heavy loads on the appliance or the
packaging. The appliance may be damaged.
•Dropping the appliance will render it non-
operational or cause permanent damage.

11 / 26 EE
Käsimikser / Kasutusjuhend
SISUKORD
1 Olulised ohutus- ja
keskkonnaalased juhised 12
1.1 Üldine ohutus . . . . . . . . . . . . . . . . . . . . . . . . . . . . . . . . . . . . . . . 12
1.2 Vastavus WEEE direktiivile ja toote jääkide
kõrvaldamise direktiividele . . . . . . . . . . . . . . . . . . . . . . . . 13
1.3 Pakendi teave . . . . . . . . . . . . . . . . . . . . . . . . . . . . . . . . . . . . . . . 13
1.4 Mida teha energia säästmiseks. . . . . . . . . . . . . . . . . . . 13
2 Käsiblenderi komplekt 14
2.1 Ülevaade. . . . . . . . . . . . . . . . . . . . . . . . . . . . . . . . . . . . . . . . . . . . . 14
2.2 Tehnilised andmed. . . . . . . . . . . . . . . . . . . . . . . . . . . . . . . . . 14
3 Kasutamine 15
3.1 Ettevalmistus . . . . . . . . . . . . . . . . . . . . . . . . . . . . . . . . . . . . . . . 15
3.2 Maksimaalsed kogused ja töötlemise aeg… . . . . 15
3.3 Segamine . . . . . . . . . . . . . . . . . . . . . . . . . . . . . . . . . . . . . . . . . . . 15
3.4 Hakkimine. . . . . . . . . . . . . . . . . . . . . . . . . . . . . . . . . . . . . . . . . . . 16
3.5 Vahustamine . . . . . . . . . . . . . . . . . . . . . . . . . . . . . . . . . . . . . . . 17
4 Teave 18
4.1 Puhastamine ja hooldus
4.2 Hoiundamine . . . . . . . . . . . . . . . . . . . . . . . . . . . . . . . . . . . . . . . 18
4.3 Käsitsemine ja transport . . . . . . . . . . . . . . . . . . . . . . . . . .18

Käsimikser / Kasutusjuhend
12 / 26 EE
See peatükk sisaldab
ohutusjuhiseid, mis aitavad kaitsta
kehavigastuste või materiaalsete
kahjude eest.
Nende juhiste mittejärgimine
tühistab ettenähtud garantii.
1.1 Üldine ohutus
• Seade vastab rahvusvahelistele
ohutusstandarditele.
• Seadet tohivad kasutada lapsed
ja isikud, kelle füüsilised, taju või
vaimsed oskused on halvenenud
või kellel puuduvad kogemused või
teadmised seadme kohta juhul, kui
neid juhendatakse või teavitatakse
ja nad saavad aru seadme ohutust
kasutamisest ja seonduvatest
ohtudest. Lapsed ei tohi seadmega
mängida.
• Lapsed ei tohi seadet kasutada.
• Hoidke seade ja selle juhe laste
käeulatusest eemal.
• Ärge kasutage kui toitejuhe, terad
või seade ise on kahjustatud. Võtke
ühendust volitatud hooldusega.
• Kasutage ainult originaalosasid või
tootja poolt soovitatud osasid.
• Ärge proovige seadet koost lahti
võtta.
• Teie põhitoiteallikas peaks
vastama seadme sildil olevale
teabele.
• Ärge kasutage seadet
pikendusjuhtmega.
• Ärge tõmmake seadet pistikust
välja võttes juhtmest.
• Oodake, kuni liikuvad tarvikud
peatuvad ja eemaldage seade
elektrivõrgust kui kui jätate
seadme järelevalveta või tarvikuid
paigaldades/eemaldades või enne
puhastamist.
• Ärge puudutage seadme pistikut
niiskete või märgade kätega.
• Ärge kasutage seadet kuuma toidu
jaoks.
• Ülekuumenemise vältimiseks ärge
kasutage seadet katkematult
rohkem kui 10 sekundit. Jätke iga
10-sekundilise töötamise järel 1
minutiks jahtuma.
• Kasutage seadet ainult kaasas
oleva kummialuse ja anumaga.
• Ärge kasutage seadet kui kausis
pole koostisaineid.
• Eemaldage kondid ja kivid, et terad
ja seade ei saaks kahjustatud.
1Olulsed ohutus- ja keskkonnaalased
juhsed

Käsimikser / Kasutusjuhend 13 / 26 EE
• Seade ei sobi kuiva või kõva toidu
jaoks, sest see muudab terad
nüriks.
• Ebaõigest kasutamisest
tulenevate vigastuste vältimiseks
järgige kõiki hoiatusi.
• Anuma tühjendamise,
puhastamise ja paljaste kätega
lõiketeradest haaramisega
võivad ebaõige kasutamise korral
kaasneda tõsised vigastused.
Lõiketera hoidmiseks kasutage
plastosa.
• Pärast puhastamist kuivatage
seade ja kõik osad, enne kui
ühendate selle elektritoitega ja
kinnitate osad.
• Ärge kastke seadet, toitejuhet või
toitepistikut vette või muudesse
vedelikesse.
• Ärge kasutage või asetage ühtki
selle seadme osa või selle tarvikuid
kuumadele pindadele või nende
lähedusse.
• Kui hoiate pakkematerjalid alles,
hoidke need laste käeulatusest
eemal.
1.2 Vastavus WEEE direktiivile
ja toote jääkide kõrvaldamise
direktiividele
See toode ei sisalda keskkonna- ja
linnaplaneerimise ministeeriumi poolt
välja antud „Elektri- ja
elektroonikajäätmete järelevalve
eeskirjas“ ära toodud kahjulikke ja
keelatud materjale. Vastavuses WEEE direktiiviga.
See seade on tehtud kõrge kvaliteediga osadest ja
materjalidest, mida saab taaskasutada ja mis on
sobivad ümbertöötlemiseks Seetõttu ärge visake
toote jääke selle kasutusea lõppedes ära koos
tavaliste olme- ja muude jäätmetega. Viige need
elektri- ja elektroonikajäätmete
kogumiskeskusesse. Palun pöörduge nende
kogumiskeskuste kohta teabe saamiseks kohalike
ametivõimude poole. Aidake kaitsta keskkonda ja
loodusvarasid, töödeldes kasutatud tooted ümber.
1.3 Pakendi teave
Toote pakend on tehtud
ümbertöödeldavatest materjalidest
vastavalt riiklikule seadusandlusele.
Ärge visake pakendimaterjale ära koos
olme- või muude jäätmetega. Viige nad kohalike
ametivõimude poolt määratud pakendimaterjalide
kogumispunktidesse.
1.4 Mida teha energia
säästmiseks
Järgige kasutamise ajal juhendis soovitatud aegu.
Võtke seade pärast kasutamist elektripistikust
välja.
1Olulsed ohutus- ja keskkonnaalased
juhsed

14 / 26 EE Käsimikser / Kasutusjuhend
2 Käsblender komplekt
2.1 Üldine kirjeldus
Antud seadmele või sellega koos tarnitud trükitud materjalidele märgitud väärtused on saadud
laboritingimustes ja kooskõlas kehtivate standarditega. Väärtused võivad erineda sõltuvalt seadme
1. Toitelüliti
2. Turbo nupp
3. Jõuseade
4. Tarvikute vabastamise nupud
5. Segamistarvik
6. Hakkimisnõu kaas
7. Hakkimisterad
8. Hakkimisnõu
9. Vispli hoidik
10. Mõõtenõu
11. Vispel
2.2 Tehnilised andmed
Seade on vastavuses järgmiste EL
direktiividega: 2004/108/EÜ,
2006/95/EÜ,
2009/125/EÜ ja 2011/65/EL.
Pinge:
230 V~, 50 Hz
Võimsus:
700 W
Tootja jätab endale õiguse konstruktsiooni
muudatuste tegemiseks ja tehniliste andmete
muutmiseks.
10
8
6
7
1
2
3
4
5
11
9

15 / 26 EE
Käsimikser / Kasutusjuhend
3 Kasutamine
3.1 Ettevalmistamine
1. Eemaldage pakend ja kleebised ning visake
need ära vastavalt kehtivatele õigusaktidele.
2. Enne seadme käivitamist tuleb pesta
kõiki toiduga kokkupuutuvaid osi (vt osa
„Puhastamine ja hooldus”).
3. Enne toiduainete seadmesse panekut tuleb
need lõigata väikesteks tükkideks.
3.2 Maksimaalsed kogused ja
valmistamisajad
Koostisosad: Maksimaalne
kogus Töötlemisaeg
Liha/kala 200 g 10-15 sekundit
Ürdid 20 g 20 sekundit
Pähklid 200 g 15 sekundit
Juust 150 g 15 sekundit
Leib 1 viil 20 sekundit
Munad (kõvaks
keedetud) 2 muna 5 sekundit
Sibul (8 osaks
tükeldatud) 100 g 10 sekundit
3.3 Segamine
1. Asetage mõõtenõusse (10) või väiksesse
kaussi kõik tükeldamiseks või segamiseks ette
valmistatud toiduained.
2. Kinnitage segamistarvik (5) jõuseadmele
(3) ja suruge seda, kuni see kohale lukustub.
Kontrollige, kas tarvik on korrektselt seadmele
kinnitatud.
3. Pange toitepistik seinakontakti.
4. Asetage segamistarvik (5) mõõtenõusse (10),
kuhu on pandud segamiseks ettevalmistatud
koostisosad.
C
Ärge vajutage toitenupule.
(1) või turbonupule (2) enne
segamistarvikute sisestamist. See
aitab vältida pritsimist.
5. Vajutage toitenupule (1) ja hoidke seda all.
– Seade alustab tööd.
6. Valige kiirus kiirusevaliku nupuga või vajutage ja
hoidke all turbonuppu (2).
– Kiirusnäidiku märgutuled süttivad vastavalt
valitud kiirusele vahemikus 1-6.
C
Turbonupu kasutamine põhjustab
seadme tööd suurimal kiirusel.
Sellisel juhul ei ole kiiruse
reguleerijaga võimalik seadistada
erinevaid kiiruseid.
C
Pärast turbonupule (2) vajutamist
süttivad kõik kiiruse märgutuled.
7. Koostisosade segamiseks liigutage seadet
aeglaselt ringjate liigutustega üles ja alla.
C
Enne valmistatud toidu välja võtmist
lülitage seade alati välja.
8. Kui olete lõpetanud, vabastage toitenupp (1) või
turbonupp (4) ja võtke toitepistik pesast. Võtke
segu mõõtenõust välja (10).
9. Võtke seadmelt segamistarvik (5), surudes
seadme külgedel paiknevatele tarvikute
vabastamisnuppudele (4) ja eemaldage tarvik
seadmelt.
C
Ärge kasutage seda seadet
katkematult kauem kui u 10
sekundit, kuna pikem kasutamine
võib põhjustada ülekuumenemist.
C
Seade ei tohi olla sisse lülitatud
kauem, kui see on vajalik toidu
valmistamiseks.

16 / 26 EE Käsimikser / Kasutusjuhend
C
Segu väljavoolamise vältimiseks
ärge pange mõõtenõusse (10) või
kaussi liiga palju segu. Lihtsam on
töödelda väiksemaid koguseid.
C
Õnnetuste vältimiseks kasutage
mõõtenõu kaant libisemisvastase
alusena, pannes mõõtenõu
aluse kaanele. See aitab vältida
õnnetusjuhtumeid.
C
Kui tahate kasutada segamistarvikut
otse keedupotis, võtke pott
kõigepealt pliidilt, et segamistarvik
üle ei kuumeneks.
3.4 Hakkimine
C
Ärge peenestage väga kõvasid
toiduaineid, nt kohviube,
jääkuubikuid, muskaatpähkleid,
teravilja ega luid. Eemaldage ürtidelt
varred, võtke pähklid koortest välja,
eemaldage lihast luud, kõõlused ja
kõhred.
C
Lõigake koostisosad väikesteks
tükkideks.
1. Asetage hakkimisnõu (6) tasasele aluspinnale.
2. Paigaldage lõiketera (7) hakkimisnõu (6) võllile.
AHOIATUS!
Olge tera (7)
paigaldamisel ettevaatlik, kuna see
on väga terav.
AHOIATUS!
Ärge puudutage
lõiketerasid paljaste kätega.
3. Pange toiduaineid hakkimisnõusse (8).
4. Pange hakkimisnõule (8) kaas (6). Enne
käivitamist kontrollige, kas kaane riivid on
tihedalt suletud.
AHOIATUS!
Ärge kasutage
seadet, kui kaas ei ole tihedalt
nõule paigaldatud, kuna see võib
põhjustada lõiketera kahjustumist.
5. Paigaldage seade (3) hakkimisnõu kaanele
(6). Pöörake seadet paremale, et see
paremini kinnitada. Kontrolli seadme kinnitust
hakkimisnõu kaanele.
C
During operation always hold the
chopping bowl with one hand to
prevent it from tipping over.
6. Pange toitepistik seinakontakti.
7. Vajutage toitenupule (1) ja hoidke seda (1).
– Seade alustab tööd.
Vajutage turbonupule (2) ja hoidke seda all.
CHOIATUS!
Ärge kasutage seda
seadet katkematult kauem kui u 10
sekundit.
CHOIATUS!
Parimate tulemuste
saavutamiseks vajutage toite- ja
turbonupule katkendlikult.
8. Kui olete lõpetanud, vabastage toitenupp (1)
või turbonupp (2) ja võtke toitepistik pesast.
Eemaldage jõuseade (3) kausi kaanelt (6),
vajutades seadme külgedel paiknevatele
tarvikute vabastamisnuppudele (4) ja
eemaldage tarvik. Eemaldage kaas (6). Võtke
hakkimisnõust (8) lõiketera (7) ning alles
seejärel peenestatud toiduained.
3 Operation

17 / 26 EE
Käsimikser / Kasutusjuhend
Retsept: või+mesi segu
Külmikust võetud või (peaks olema hoitud külmikus
vähemalt 4 tundi ja tükeldatud u 10-15 mm x 35-40
mm suurusteks tükkideks) ja külmikust võetud mesi
(peaks eelnevalt seisma külmikus vähemalt 1 päev).
3.5 Vahustamine
•Vispliga võite lüüa vahule rõõsa koore või munad.
•Ärge vahustage kunagi korraga rohkem kui 4
munavalget või 200 ml koort.
•Pange vispel (11) hoidikule (9), kuni see kohale
klõpsatab.
•Ühendage(3)jõuseadevispli hoidikuga(9). Lükake
vispli hoidik jõuseadmele. Kontrollige, kas vispli
hoidik on tugevalt jõuseadmele kinnitatud.
•Asetage soovitud toiduained mõõtenõusse (10)
või sarnasesse anumasse.
•Pange toitepistik seinakontakti.
•Hoidke visplit (11) töödeldavas segus.
•Vajutagetoitenuppu (1) ja hoidke seda all.
– Seade alustab tööd.
•Vajutage turbonupule (2) ja hoidke seda all.
•Koostisosade segamiseks liigutage seadet
aeglaselt ringjate liigutustega üles ja alla.
•Kui olete lõpetanud, vabastage toitenupp (1) või
turbonupp (2) ja võtke toitepistik pesast. Võtke
segu mõõtenõust välja (10). Võtke jõuseade (3)
vispli hoidikult (9), surudes seadme külgedel
paiknevatele tarvikute vabastamisnuppudele
(4) ja eemaldage tarvik seadmelt.
3 Operation

18 / 26 EE Käsimikser / Kasutusjuhend
4 Teave
4.1 Puhastamine ja hooldus
A
HOIATUS
! Ärge kasutage
seadme puhastamiseks
kunagi bensiini, lahustit,
abrasiivseid puhastusaineid,
metallesemeid ega kõva harja.
AHOIATUS
! Ärge puudutage
lõiketerasid paljaste kätega. Terad
on väga teravad. Kasutage harja!
AHOIATUS
! Ärge pange jõuseadet
(3) või toitejuhet vette või teistesse
vedelikesse ega hoidke neid voolava
vee all.
1. Lülitage seade välja ja ühendage see
seinakontaktist lahti.
2. Laske seadmel täielikult maha jahtuda.
3. Kasutage jõuseadme (3) puhastamiseks niisket
pehmet riidelappi.
4. Kohe pärast kasutamist puhastage
segamistarvik (5) ja mõõtenõu (10) sooja
seebiveega ning kuivatage need põhjalikult.
Ärge peske neid nõudepesumasinas.
C
Enne seadme kasutamist või
hoiundamist puhastamise järgselt,
kuivatage kõik osad hoolikalt pehme
riidelapiga.
4.2 Hoiundamine
•Kui te ei kavatse seadet pikema aja vältel
kasutada, hoiundage see hoolikalt. Veenduge,
et seade on elektrivõrgust eemaldatud ja täiesti
kuiv.
•Hoiundage seadet jahedas, kuivas kohas.
Veenduge, et seadet hoitakse laste
käeulatusest eem
al.
4.3 Käsitsemine ja transport
•Käsitsemise ja transportimise ajal kandke
seadet originaalpakendis. Seadme pakend
kaitseb seda füüsiliste kahjustuste eest.
•Ärge pange seadmele või pakendile raskeid
esemeid. Seade võib saada kahjustatud.
•Seadme mahapillamine võib muuta selle
mittetöötavaks või põhjustada püsivaid
kahjustusi
.

19 / 26 LT
Rankinis trintuvas / Vartotojo vadovas
TURINYS
1 Svarbios instrukcijos
skirtos saugumui
ir aplinkos apsaugai 20
1.1 Bendrosios saugos taisyklės. . . . . . . . . . . . . . . . . . . . 20
1.2 Atitinka EEĮ direktyvą ir atliekų šalinimo
reikalavimus. . . . . . . . . . . . . . . . . . . . . . . . . . . . . . . . . . . . . . .21
1.3 Pakuotės informacija. . . . . . . . . . . . . . . . . . . . . . . . . . . . .21
1.4 Elektros energijos taupymo patarimai. . . . . . . . . .21
2 Rankinio trintuvo rinkinys 22
2.1 Bendras aprašymas . . . . . . . . . . . . . . . . . . . . . . . . . . . . . 22
2.2 Techniniai duomenys . . . . . . . . . . . . . . . . . . . . . . . . . . . 22
3 Naudojimas 23
3.1 Paruošimas . . . . . . . . . . . . . . . . . . . . . . . . . . . . . . . . . . . . . . 23
3.2 Maksimalūs kiekiai ir apdorojimo laikas. . . . . . . . 23
3.3 Trynimas . . . . . . . . . . . . . . . . . . . . . . . . . . . . . . . . . . . . . . . . . 23
3.4 Smulkinimas. . . . . . . . . . . . . . . . . . . . . . . . . . . . . . . . . . . . . 24
3.5 Plakimas. . . . . . . . . . . . . . . . . . . . . . . . . . . . . . . . . . . . . . . . . . 25
4 Informacija 26
4.1 Valymas ir priežiūra . . . . . . . . . . . . . . . . . . . . . . . . . . . . . 26
4.2 Laikymas. . . . . . . . . . . . . . . . . . . . . . . . . . . . . . . . . . . . . . . . . 26
4.3 Tvarkymas ir transportavimas . . . . . . . . . . . . . . . . . 26

Rankinis trintuvas / Vartotojo vadovas
20 / 26 LT
Šiame skyriuje yra saugumo
instrukcijos, kurios padės
apsisaugoti nuo kūno sužalojimų ir
žalos turtui.
Jeigu šių instrukcijų yra nesilaikoma
suteikta garantija nebegalioja.
1.1 Bendrosos sau-
gos tasyklės
• Prietaisas atitinka tarptautinius
saugumo standartus.
• Šį įrenginį gali naudoti asmenys,
turintys ribotų fizinių, jutimo ar
protinių savybių, arba neturintys
žinių ir patirties, su sąlyga, kad
jie bus prižiūrimi ir įsisavins
instrukcijas dėl saugaus produkto
naudojimo ir galimų pavojų.
Įrenginiu draudžiama žaisti
vaikams.
• Įrenginiu draudžiama naudotis
vaikams.
• Prietaisą ir maitinimo laidą laikykite
vaikams nepasiekiamoje vietoje.
• Nenaudokite įrenginio, jei laidas,
ašmenys ar pats įrenginys yra
pažeistas. Susisiekite su įgaliotu
atstovu.
• Naudokite tik originalias dalis arba
gamintojo rekomenduojamas dalis.
• Nebandykite išardyti įrenginio.
• Jūsų elektros energijos tiekimo
šaltinis turėtų atitikti informaciją,
pateikiamą ant įrenginio nominalo
plokštelės.
• Nenaudokite įrenginio su laido
ilgintuvu.
• Netraukite paėmę už pačio laido,
atjungdami įrenginį.
• Išjunkite prietaisą prieš valydami,
išmontuodami, keisdami priedus
ir palaukite, kol jis visiškai nustos
veikti.
• Nelieskite įrenginio drėgnomis
arba šlapiomis rankomis.
• Nenaudokite įrenginio karštam
maistui.
• Siekiant išvengti perkaitimo,
nenaudokite plaktuvo ilgiau nei
10 sekundžių. Leiskite atvėsti 1
minutę tarpe tarp 10 sekundžių
veikimo.
• Prietaisą naudokite tik su tiekiamu
guminiu pagrindu ir stikliniu indu.
• Nejunkite prietaiso be ingredient
inde.
• Iš maisto pašalinkite kaulus ir
kitus pašalinius objektus, siekiant
išvengti žalos įrenginiui.
1Important nstructons for safety and
envronment
Other manuals for HBA6700W
2
Table of contents
Languages:
Other Beko Kitchen Appliance manuals

Beko
Beko SWM2971W User manual

Beko
Beko DVC6531 User manual

Beko
Beko DVC6522 User manual

Beko
Beko CSM 67000 G User manual

Beko
Beko Cook68TGK Double Cavity User manual

Beko
Beko DVC 5622 User manual

Beko
Beko BKK 2262 Y User manual

Beko
Beko HBA6702 User manual

Beko
Beko BDVF100 User manual

Beko
Beko HDCG 32220 F User manual

Beko
Beko HDG 32210 S User manual

Beko
Beko BKK 1156 User manual

Beko
Beko CSM 66001 G User manual

Beko
Beko HBS7750X User manual

Beko
Beko 01M-8817083200-4519-03 User manual

Beko
Beko STM 3116 W User manual

Beko
Beko BKK 2111 C User manual

Beko
Beko Cook57TSS Double Cavity User manual

Beko
Beko HDCG 32221 F User manual

Beko
Beko BKK 2144 User manual