-7-
Please Note: When not in use disconnect the
plug from the mains power supply.
4. Press the ( ) button on the side of
the TV. The standby indicator will
illuminate.
5. Press a Numeric button or the ( )
or ( ) button on the remote handset
or (PR+), (PR-) or (MENU) button
on the side panel to switch the TV
on.
The standby indicator remains on.
The picture will appear after a few
seconds.
Press the ( ) button to switch the TV
to standby. The standby indicator will
brighten.
Please Note: Do not leave the television in
standby unattended or overnight.
Switching the TV on for the first time
To install your TV, please read the sections
“TV controls” and “ Tuning the television”.
The batteries
Remove the back cover to reveal the battery
compartment and make sure you insert the batteries
the right way round.
Suitable battery types for this remote are
UM-4, IEC R03 or AAA 1.5V.
Do not throw your old batteries into a fire, dispose
of them in a designated disposal area.
Do not combine a used, old battery with a new
one or mix battery types.
The performance of the remote control will
deteriorate beyond a distance of 8 metres or
outside an angle of 30 degrees from the centre
of the TV.
Getting started
Remove your Television carefully from the box.
You may wish to store the packaging for future
use.
In the box
Inside the carton box you should have:
• Accessories box
• Mains lead
• Adapter
• Remote control
• Batteries
• Instruction book
Read these instructions before use.
Note: Scart, VGA and Phono leads are not
supplied.
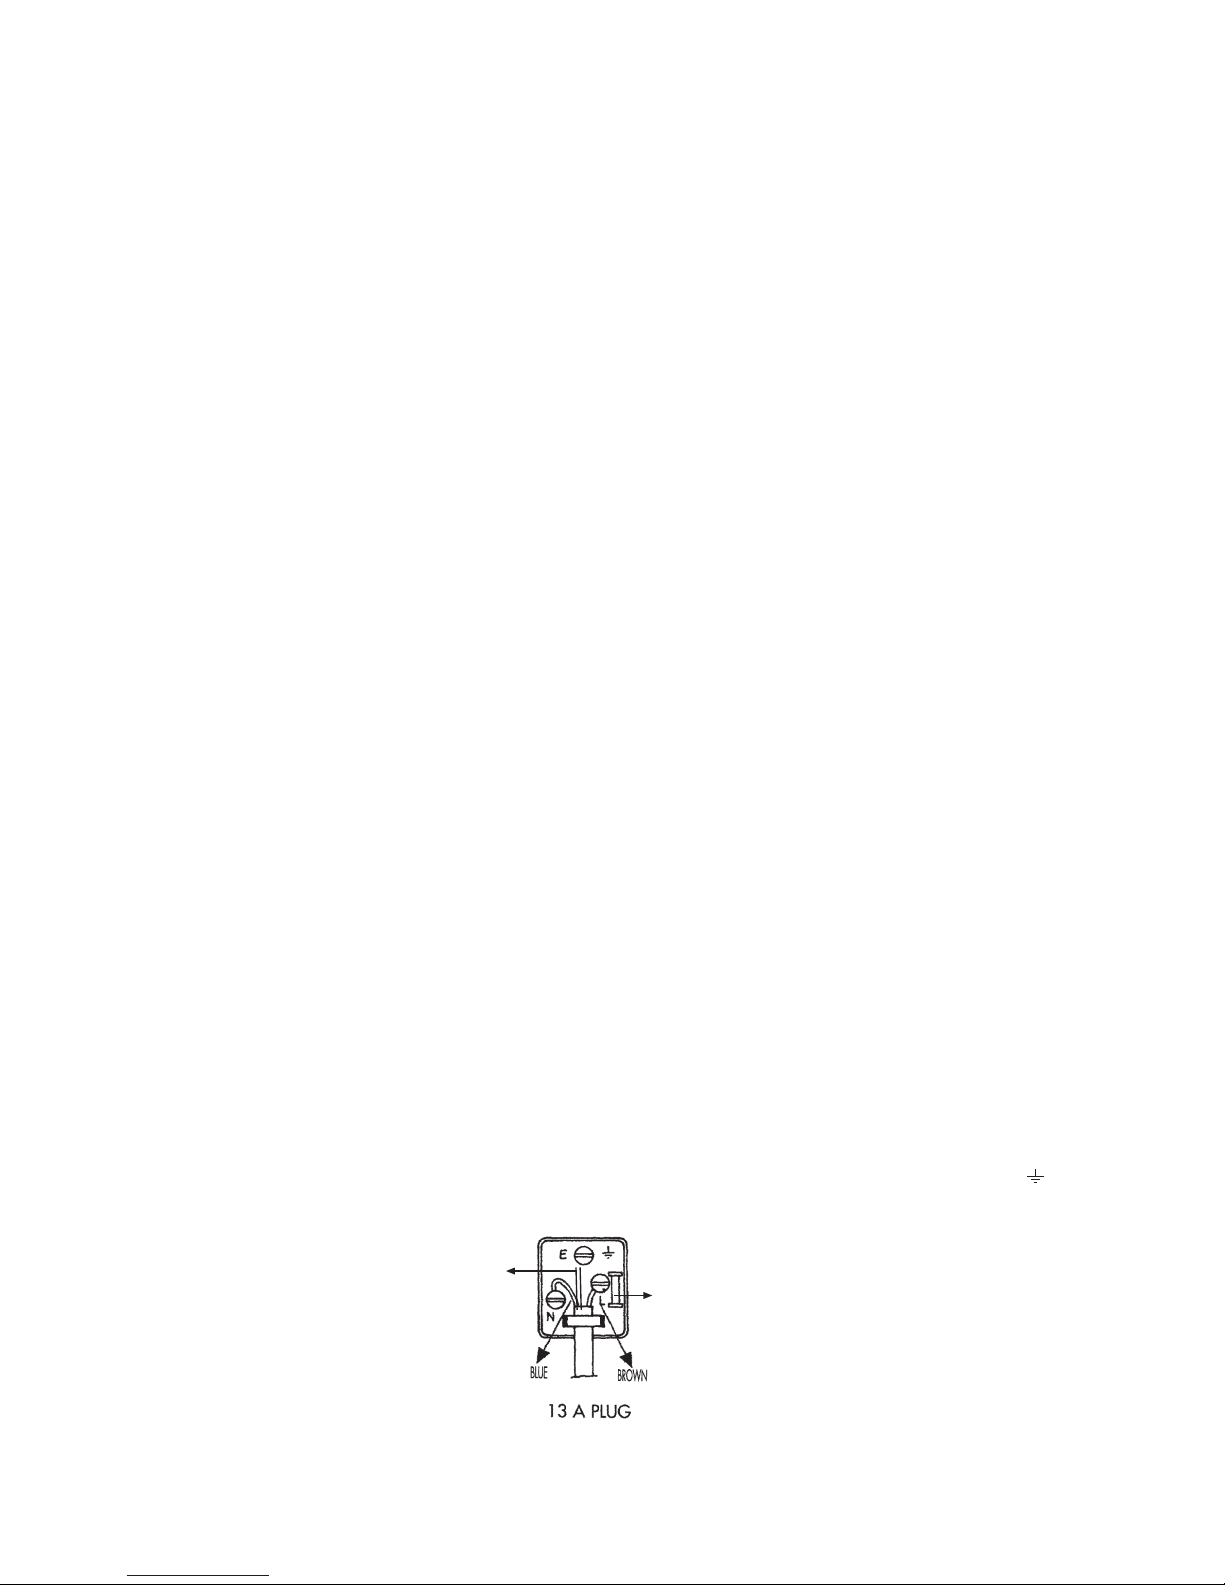
Aerial connection
To connect an aerial, plug the aerial lead into
the aerial socket on the rear of the TV.
You can use an outdoor or indoor aerial.
However, if you use an indoor aerial the quality
of the reception may be reduced and adjustment
of the aerial may be required when changing
programs.
Please note: If you live in a poor reception
area or use an indoor aerial you may experience
loss or corruption of teletext transmissions and
nicam sound.
Switching on and First Use
1. Connect the mains lead to the adapter.
2. Connect the input socket of the adapter to
the socket at the back panel of the LCD TV.
3. Connect the adapter to a suitable mains
socket.
Note 1: Your TV will move to stand-by mode
in five minutes when there is no broadcast signal.
Note 2: Your TV is equiped to operate with
side panel buttons, “MENU”, “PR+”, “PR-”, “VL+”,
“VL–” in case your R/C is broken or the batteries
are exhausted.