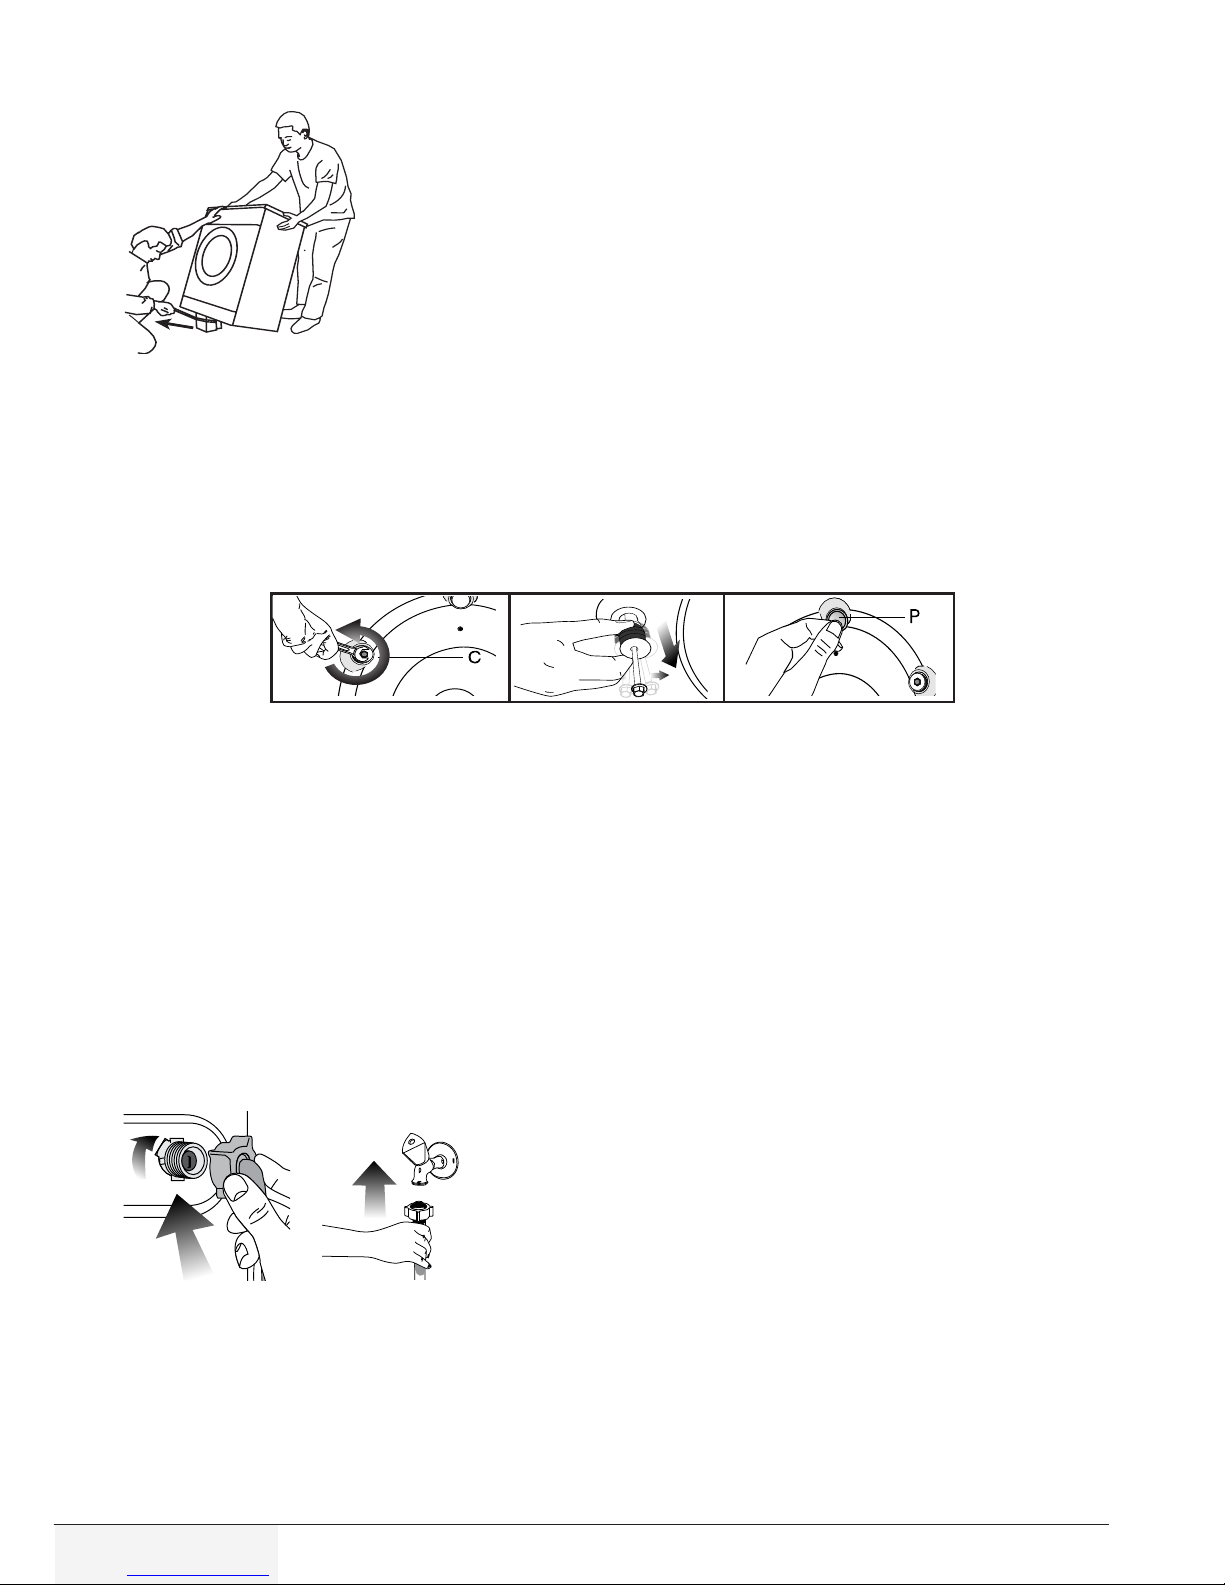
Beko SWRE 7512 XWW2 User manual

Washing Machine
User manual
Pralka automatyczna
EN PL
Document Number: 2820670672
SWRE 7512 XWW2


3/ EN
Washing Machine / User’s Manual
1 Important nstructons for safety and envronment
This section contains safety instructions that will help protect from risk of personal injury or proper-
ty damage. Failure to follow these instructions shall void any warranty.
1.1 General safety
• This product can be used by children at and above 8 years old and by persons whose physical,
sensory or mental capabilities were not fully developed or who lack experience and knowledge
provided that they are supervised or trained on the safe usage of the product and the risks it
brings out. Children must not play with the product. Cleaning and maintenance works should not
be performed by children unless they are supervised by someone.
• Children of less than 3 years should be kept away unless continuously supervised.
• Never place the product on a carpet-covered floor. Otherwise, lack of airflow beneath the machi-
ne will cause electrical parts to overheat. This will cause problems with your product.
• If the product has a failure, it should not be operated unless it is repaired by the Authorized
Service Agent. There is the risk of electric shock!
• This product is designed to resume operating in the event of powering on after a power interrup-
tion. If you wish to cancel the programme, see "Cancelling the programme" section.
• Connect the product to a grounded outlet protected by a 16 A fuse. Do not neglect to have the
grounding installation made by a qualified electrician. Our company shall not be liable for any
damages that will arise when the product is used without grounding in accordance with the local
regulations.
• The water supply and draining hoses must be securely fastened and remain undamaged.
Otherwise, there is the risk of water leakage.
• Never open the loading door or remove the filter while there is still water in the drum. Otherwise,
risk of flooding and injury from hot water will occur.
• Do not force open the locked loading door. The loading door will be ready to open just a few
minutes after the washing cycle comes to an end. In case of forcing the loading door to open, the
door and the lock mechanism may get damaged.
• Unplug the product when not in use.
• Never wash the product by spreading or pouring water onto it! There is the risk of electric shock!
• Never touch the plug with wet hands! Never unplug by pulling on the cable, always pull out by
grabbing the plug.
• Use detergents, softeners and supplements suitable for automatic washing machines only.
• Follow the instructions on the textile tags and on the detergent package.
• The product must be unplugged during installation, maintenance, cleaning and repairing proce-
dures.
• Always have the installation and repairing procedures carried out by the Authorized Service
Agent. Manufacturer shall not be held liable for damages that may arise from procedures carried
out by unauthorized persons.
• If the power cable is damaged, it must be replaced by the manufacturer, after sales service or a
similarly qualified person (preferably an electrician) or someone designated by the importer in
order to avoid possible risks.
• Place the product on a rigid, flat and level surface.
• Do not place it on a long-pile rug or similar surfaces.
• Do not place the product on a high platform or near the edge on a cascaded surface.
• Do not place the product on the power cable.
• Never use sponge or scrub materials. These will damage the painted, chrome plated and plastic
surfaces.
1.2 Intended use
• This product has been designed for domestic use. It is not suitable for commercial use and it must
not be used out of its intended use.
• The product must only be used for washing and rinsing of laundry that are marked accordingly.
• The manufacturer waives any responsibility arisen from incorrect usage or transportation.
1.3 Chldren's safety
• Packaging materials are dangerous to children. Keep packaging materials in a safe place away
from reach of the children.
• Electrical products are dangerous for the children. Keep children away from the product when it is
in use. Do not let them to tamper with the product. Use child lock to prevent children from inter-
vening with the product.

4/ EN
Washing Machine / User’s Manual
• Do not forget to close the loading door when leaving the room where the product is located.
• Store all detergents and additives in a safe place away from the reach of the children by closing
the cover of the detergent container or sealing the detergent package.
While washing the laundry at high temperatures, the loading door glass becomes
hot. Therefore, keep especially the children away from the loading door of the
machine while the washing operation is in progress.
1.4 Package nformaton
• Packaging materials of the product are manufactured from recyclable materials in accordance
with our National Environment Regulations. Do not dispose of the packaging materials together
with the domestic or other wastes. Take them to the packaging material collection points desig-
nated by the local authorities.
1.5 Dsposng of the waste product
• This product has been manufactured with high quality parts and materials which can be reu-
sed and are suitable for recycling. Therefore, do not dispose the product with normal domestic
waste at the end of its service life. Take it to a collection point for the recycling of electrical and
electronic equipment. Please consult your local authorities to learn the nearest collection point.
Help protect the environment and natural resources by recycling used products. For children's
safety, cut the power cable and break the locking mechanism of the loading door so that it will be
non-functional before disposing of the product.
1.6 Complance wth WEEE Drectve
This product complies with EU WEEE Directive (2012/19/EU). This product bears a classifi-
cation symbol for waste electrical and electronic equipment (WEEE).
This product has been manufactured with high quality parts and materials which can be
reused and are suitable for recycling. Do not dispose of the waste product with normal
domestic and other wastes at the end of its service life. Take it to the collection center for
the recycling of electrical and electronic equipment. Please consult your local authorities
to learn about these collection centers.
Compliance with RoHS Directive:
The product you have purchased complies with EU RoHS Directive (2011/65/EU). It does not con-
tain harmful and prohibited materials specified in the Directive.
2 Installation
Refer to the nearest Authorised Service Agent for installation of the product. To make the product ready
for use, review the information in the user manual and make sure that the electricity, tap water supply and
water drainage systems are appropriate before calling the Authorized Service Agent. If they are not, call a
qualified technician and plumber to have any necessary arrangements carried out.
CPreparation of the location and electrical, tap water and waste water installations at the place of installation is
under customer's responsibility.
Make sure that the water inlet and discharge hoses as well as the power cable are not folded, pinched or
crushed while pushing the product into its place after installation or cleaning procedures.
BWARNING: Installation and electrical connections of the product must be carried out by the Authorized
Service Agent. Manufacturer shall not be held liable for damages that may arise from procedures carried out
by unauthorized persons.
AWARNING: Prior to installation, visually check if the product has any defects on it. If so, do not have it
installed. Damaged products cause risks for your safety.
2.1 Appropriate installation location
•Place the machine on a rigid floor. Do not place it on a long pile rug or similar surfaces.
• Total weight of the washing machine and the dryer -with full load- when they are placed on top of each
other reaches to approx. 180 kilograms. Place the product on a solid and flat floor that has sufficient
load carrying capacity!
• Do not place the product on the power cable.
• Do not install the product at places where temperature may fall below 0ºC.
• Place the product at least 1 cm away from the edges of other furniture.

5/ EN
Washing Machine / User’s Manual
2.2 Removing packaging reinforcement
Tilt the machine backwards to remove the packaging reinforcement.
Remove the packaging reinforcement by pulling the ribbon.
2.3 Removing the transportation locks
AWARNING: Do not remove the transportation locks before taking out the packaging reinforcement.
WARNING: Remove the transportation safety bolts before operating the washing machine! Otherwise, the
product will be damaged.
1. Loosen all the bolts with a suitable spanner until they rotate freely (C).
2. Remove transportation safety bolts by turning them gently.
3. Attach the plastic covers supplied in the User Manual bag into the holes on the rear panel. (P)
CKeep the transportation safety bolts in a safe place to reuse when the washing machine needs to be moved
again in the future.
Never move the product without the transportation safety bolts properly fixed in place!
2.4 Connecting water supply
CThe water supply pressure required to run the product is between 1 to 10 bars (0.1 – 1 MPa). It is necessary to
have 10 – 80 liters of water flowing from the fully open tap in one minute to have your machine run smoothly.
Attach a pressure reducing valve if water pressure is higher.
If you are going to use the double water-inlet product as a single (cold) water-inlet unit, you must install the
supplied stopper to the hot water valve before operating the product. (Applies for the products supplied with
a blind stopper group.)
AWARNING: Models with a single water inlet should not be connected to the hot water tap. In such a case the
laundry will get damaged or the product will switch to protection mode and will not operate.
WARNING: Do not use old or used water inlet hoses on the new product. It may cause stains on your laundry.
2. Tighten all hose nuts by hand. Never use a tool when tightening
the nuts.
3. Open the taps completely after making the hose connection
to check for water leaks at the connection points. If any leaks
occur, turn off the tap and remove the nut. Retighten the nut
carefully after checking the seal. To prevent water leakages
and damages caused by them, keep the taps closed when the
machine is not in use.
2.5 Connecting to the drain
• The end of the drain hose must be directly connected to the wastewater drain or to the washbasin.
AWARNING: Your house will be flooded if the hose comes out of its housing during water discharge.
Moreover, there is risk of scalding due to high washing temperatures! To prevent such situations and to
ensure smooth water intake and discharge of the machine, fix the end of the discharge hose tightly so
that it cannot come out.

6/ EN
Washing Machine / User’s Manual
100cm
40cm
•The hose should be attached to a height of at least 40
cm, and 100 cm at most.
• In case the hose is elevated after laying it on the floor
level or close to the ground (less than 40 cm above the
ground), water discharge becomes more difficult and
the laundry may come out excessively wet. Therefore,
follow the heights described in the figure.
• To prevent flowing of dirty water back into the machine
and to allow for easy discharge, do not immerse the
hose end into the dirty water or do not drive it in the
drain more than 15 cm. If it is too long, cut it short.
• The end of the hose should not be bent, it should not
be stepped on and the hose must not be pinched
between the drain and the machine.
• If the length of the hose is too short, use it by adding an original extension hose. Length of the hose
may not be longer than 3.2 m. To avoid water leak failures, the connection between the extension hose
and the drain hose of the product must be fitted well with an appropriate clamp as not to come off and
leak.
2.6 Adjusting the feet
AWARNING: In order to ensure that the product operates more silently and vibration-free, it must stand level and
balanced on its feet. Balance the machine by adjusting the feet. Otherwise, the product may move from its place and
cause crushing and vibration problems.
1. Loosen the lock nuts on the feet by hand.
2. Adjust the feet until the product stands level
and balanced.
3. Tighten all lock nuts again by hand.
AWARNING: Do not use any tools to loosen the lock nuts. Otherwise, they will get damaged.
2.7 Electrical connection
Connect the product to a grounded outlet protected by a 16 A fuse. Our company shall not be liable for
any damages that will arise when the product is used without grounding in accordance with the local
regulations.
• Connection must comply with national regulations.
• Power cable plug must be within easy reach after installation.
• If the current value of the fuse or breaker in the house is less than 16 Amps, have a qualified electrician
install a 16 Amp fuse.
• The voltage specified in the "Technical specifications" section must be equal to your mains voltage.
• Do not make connections via extension cables or multi-plugs.
BWARNING: Damaged power cables must be replaced by the Authorized Service Agents.
Transportation of the product
1. Unplug the product before transporting it.
2. Remove water drain and water supply connections.
3. Drain all water that has remained in the product. See 6.5
4. Install transportation safety bolts in the reverse order of removal procedure; see 3.3.
CNever move the product without the transportation safety bolts properly fixed in place!
AWARNING: Packaging materials are dangerous to children. Keep packaging materials in a safe place away from reach
of the children.

7/ EN
Washing Machine / User’s Manual
3 Preparation
3.1 Sorting the laundry
• Sort laundry according to type of fabric, colour, and degree of soiling and allowable water temperature.
• Always obey the instructions given on the garment tags.
3.2 Preparing laundry for washing
• Laundry items with metal attachments such as, underwired bras, belt buckles or metal buttons will damage
the machine. Remove the metal pieces or wash the clothes by putting them in a laundry bag or pillow case.
• Take out all substances in the pockets such as coins, pens and paper clips, and turn pockets inside out and
brush. Such objects may damage the product or cause noise problem.
• Put small size clothes such as infant's socks and nylon stockings in a laundry bag or pillow case.
• Place curtains in without compressing them. Remove curtain attachment items.
• Fasten zippers, sew loose buttons and mend rips and tears.
• Wash“machine washable”or“hand washable”labeled products only with an appropriate programme.
• Do not wash colours and whites together. New, dark coloured cottons release a lot of dye. Wash them
separately.
• Tough stains must be treated properly before washing. If unsure, check with a dry cleaner.
• Use only dyes/colour changers and limescale removers suitable for machine wash. Always follow the
instructions on the package.
• Wash trousers and delicate laundry turned inside out.
• Keep laundry items made of Angora wool in the freezer for a few hours before washing. This will reduce
pilling.
• Laundry that are subjected to materials such as flour, lime dust, milk powder, etc. intensely must be shaken
off before placing into the machine. Such dusts and powders on the laundry may build up on the inner parts
of the machine in time and can cause damage.
3.3 Things to be done for energy saving
Following information will help you use the product in an ecological and energy-efficient manner.
• Operate the product in the highest capacity allowed by the programme you have selected, but do not
overload; see, "Programme and consumption table".
• Always follow the instructions on the detergent packaging.
• Wash slightly soiled laundry at low temperatures.
• Use faster programmes for small quantities of lightly soiled laundry.
• Do not use prewash and high temperatures for laundry that is not heavily soiled or stained.
• If you plan to dry your laundry in a dryer, select the highest spin speed recommended during washing
process.
• Do not use detergent in excess of the amount recommended on the detergent package.
3.4 Initial use
Before starting to use the product, make sure that all preparations are made in
accordance with the instructions in sections“Important safety instructions”and
“Installation”.
To prepare the product for washing laundry, perform first operation in Drum
Cleaning programme. If your product is not equipped with Drum Cleaning
programme, perform the Initial Use procedure in accordance with the methods
described under“5.2 Cleaning the loading door and the drum”section of the user
manual.
CUse an detergents suitable for the washing machines.
Some water might have remained in the product due to the quality control processes in the production. It is
not harmful for the product.
3.5 Correct load capacity
The maximum load capacity depends on the type of laundry, the degree of soiling and the washing
programme desired.
The machine automatically adjusts the amount of water according to the weight of the loaded laundry.
Awarning:Follow the information in the“Programme and consumption table”. When overloaded, machine's
washing performance will drop. Moreover, noise and vibration problems may occur.
3.6 Loading the laundry
1. Open the loading door.
2. Place laundry items loosely into the machine.
3. Push the loading door to close until you hear a locking sound. Ensure that no items are caught in the door.
CThe loading door is locked while a programme is running. The door can only be opened a while after the
programme comes to an end.

8/ EN
Washing Machine / User’s Manual
Awarning: In case of misplacing the laundry, noise and vibration problems may occur in the machine.
3.7 Using detergent and softener
CWhen using detergent, softener, starch, fabric dye, bleach or limescale remover read the manufacturer's
instructions on the package carefully and follow the suggested dosage values. Use measuring cup if available.
1
3
2
Detergent Drawer
The detergent drawer is composed of three
compartments:
– (1) for prewash
– (2) for main wash
– (3) for softener
– (*) in addition, there is siphon piece in the softener
compartment.
Detergent, softener and other cleaning agents
• Add detergent and softener before starting the washing programme.
• Never leave the detergent drawer open while the washing programme is running!
• When using a programme without prewash, do not put any detergent into the prewash compartment
(compartment nr. "1").
• In a programme with prewash, do not put liquid detergent into the prewash compartment (compartment
nr. "1").
• Do not select a programme with prewash if you are using a detergent bag or dispensing ball. Place the
detergent bag or the dispensing ball directly among the laundry in the machine.
• If you are using liquid detergent, do not forget to place the liquid detergent cup into the main wash
compartment (compartment nr. "2").
Choosing the detergent type
The type of detergent to be used depends on the type and colour of the fabric.
• Use different detergents for coloured and white laundry.
• Wash your delicate clothes only with special detergents (liquid detergent, wool shampoo, etc.) used solely
for delicate clothes.
• When washing dark coloured clothes and quilts, it is recommended to use liquid detergent.
• Wash woolens with special detergent made specifically for woolens.
A
warning:
Use only detergents manufactured specifically for washing machines.
warning:
Do not use soap powder.
Adjusting detergent amount
The amount of washing detergent to be used depends on the amount of laundry, the degree of soiling and
water hardness.
• Do not use amounts exceeding the dosage quantities recommended on the detergent package to avoid
problems of excessive foam, poor rinsing, financial savings and finally, environmental protection.
• Use lesser detergent for small amounts or lightly soiled clothes.
Using softeners
Pour the softener into the softener compartment of
the detergent drawer.
• Do not exceed the (>max<) level marking in the
softener compartment.
• If the softener has lost its fluidity, dilute it with
water before putting it in the detergent drawer.
Using liquid detergents
If the product contains a liquid detergent cup:
• Make sure that you have placed the liquid detergent cup in compartment nr. “2”.
• If the lqud detergent has lost ts fludty, dlute t wth water before puttng n the detergent cup.

9/ EN
Washing Machine / User’s Manual
Lght colours and whtes Colours Dark colours Delcates/Woollens/
Slks
(Recommended
temperature range based on
soiling level: 40-90 °C)
(Recommended
temperature range based
on soiling level: cold -40 °C)
(Recommended
temperature range
based on soiling
level: cold -40 °C)
(Recommended
temperature range
based on soiling level:
cold -30 °C)
Soiling Level
Heavly Soled
(dffcult
stans such as
grass, coffee,
fruts and
blood.)
It may be necessary to pre-
treat the stains or perform
prewash. Powder and liquid
detergents recommended
for whites can be used at
dosages recommended
for heavily soiled clothes.
It is recommended to use
powder detergents to clean
clay and soil stains and the
stains that are sensitive to
bleaches.
Powder and liquid
detergents recommended
for colours can be used at
dosages recommended
for heavily soiled clothes.
It is recommended to use
powder detergents to
clean clay and soil stains
and the stains that are
sensitive to bleaches. Use
detergents without bleach.
Liquid detergents
suitable for colours
and dark colours can
be used at dosages
recommended
for heavily soiled
clothes.
Prefer liquid detergents
produced for delicate
clothes. Woollen and
silk clothes must be
washed with special
woollen detergents.
Normally
Soled
(For example,
stans caused
by body on
collars and
cuffs)
Powder and liquid
detergents recommended
for whites can be used at
dosages recommended for
normally soiled clothes.
Powder and liquid
detergents recommended
for colours can be used at
dosages recommended
for normally soiled clothes.
Use detergents without
bleach.
Liquid detergents
suitable for colours
and dark colours can
be used at dosages
recommended for
normally soiled
clothes.
Prefer liquid detergents
produced for delicate
clothes. Woollen and
silk clothes must be
washed with special
woollen detergents.
Lghtly Soled
(No vsble
stans exst.)
Powder and liquid
detergents recommended
for whites can be used at
dosages recommended for
lightly soiled clothes.
Powder and liquid
detergents recommended
for colours can be used at
dosages recommended for
lightly soiled clothes. Use
detergents without bleach.
Liquid detergents
suitable for colours
and dark colours can
be used at dosages
recommended for
lightly soiled clothes.
Prefer liquid detergents
produced for delicate
clothes. Woollen and
silk clothes must be
washed with special
woollen detergents.
If the product does not contain a liquid detergent cup:
• Do not use liquid detergent for the prewash in a programme with prewash.
• Liquid detergent stains your clothes when used with Delayed Start function. If you are going to use the Delayed
Start function, do not use liquid detergent.
Using gel and tablet detergent
Apply the following instructions when using tablet, gel and similar detergents.
• If the gel detergent thickness is fluidal and your machine does not contain a special liquid detergent cup, put the
gel detergent into the main wash detergent compartment during first water intake. If your machine contains a
liquid detergent cup, fill the detergent into this cup before starting the programme.
• If the gel detergent thickness is not fluidal or in the shape of capsule liquid tablet, put it directly into the drum
before washing.
• Put tablet detergents into the main wash compartment (compartment nr. "2") or directly into the drum before
washing.
CTablet detergents may leave residues in the detergent compartment. If you encounter such a case, place the tablet
detergent between the laundry, close to the lower part of the drum in future washings.
Use the tablet or gel detergent without selecting the prewash function.
Using starch
• Add liquid starch, powder starch or the fabric dye into the softener compartment.
• Do not use softener and starch together in a washing cycle.
• Wipe the inside of the machine with a damp and clean cloth after using starch.
Using bleaches
• Select a programme with prewash and add the bleaching agent at the beginning of the prewash. Do not put
detergent in the prewash compartment. As an alternative application, select a programme with extra rinse and add
the bleaching agent while the machine is taking water from the detergent compartment during first rinsing step.
• Do not use bleaching agent and detergent by mixing them.
• Use just a little amount (approx. 50 ml) of bleaching agent and rinse the clothes very well as it causes skin irritation.
Do not pour the bleaching agent onto the clothes and do not use it for coloured clothes.
• When using oxygen based bleaches, select a programme that washes at a lower temperature.
• Oxygen based bleaches can be used together with detergents; however, if its thickness is not the same with the
detergent, put the detergent first into the compartment nr. "2" in the detergent drawer and wait until the detergent
flows while the machine is taking in water. Add the bleaching agent from the same compartment while the
machine is still taking in water.

10 / EN
Washing Machine / User’s Manual
4 Operating the product
4.1 Control panel
1 - Programme Selection knob (Uppermost
position On / Off)
2 - Display
3 - Delayed Start Indicator
4 - Programme Follow-up indicator
5 - Start / Pause button
6 - Auxiliary function button 3
7 - Auxiliary function button 2
8 - Auxiliary function button 1
9 - Spin Speed Adjustment button
10 - Temperature Adjustment button
4.2 Preparng the machne
1.Make sure that the hoses are connected tightly.
2.Plug in your machine.
3.Turn the tap on completely.
4.Place the laundry in the machine.
5.Add detergent and fabric softener.
4.3 Programme selecton and tps for effcent washng
1.Select the programme suitable for the type, quantity and soiling degree of the laundry in
accordance with the "Programme and consumption table" and the temperature table below.
2.Select the desired programme with the Programme Selection knob.
Indicative values for Synthetics programmes (EN)
Load (kg)
Water
Consumption (l)
Energy
Consumption
(kWh)
Programme
Duration (min) *
Remaining Moisture
Content (%) **
Remaining Moisture
Content (%) **
≤ 1000 rpm > 1000 rpm
Synthetics 60 3 65 1.20 100/120 45 40
Synthetics 40 3 63 0.75 90/110 45 40
* You can see the washing time of the programme you have selected on the display of the machine. It is normal that small
differences may occur between the time shown on the display and the real washing time.
** Remaining moisture content values may differ according to the selected spin speed.
1000
800
600
400

11 / EN
Washing Machine / User’s Manual
4.4 Programme and consumpton table
• : Selectable
** : Energy Label programme (EN 60456 Ed.3)
** "Cotton Economic 40°C and Cotton Economic 60°C are standard programmes." These programmes are known as '40°C
cotton standard programme' and '60°C cotton standard programme' and indicated with the symbols on the
panel.
C
Water and power consumption may vary subject to the changes in water pressure, water hardness and temperature,
ambient temperature, type and amount of laundry, selection of auxiliary functions and spin speed, and changes in
electric voltage.
You can see the washing duration on the display of your machine while selecting a programme. Depending on the
amount of laundry you have loaded into your machine, there may be a difference of 1-1.5 hours between the duration
shown on the display and the actual duration of the wash cycle. Duration will be automatically updated soon after the
washing starts.
The auxiliary functions in the table may vary according to the model of your machine.
Auxiliary
functions
Programme °C
Maximum load
(kg)
Water
consumption (l)
Power
consuption
(kVt/h)
Spin speed
Prewash
Quicl Wash
PHR
Temperature °C
Cottons 90 7 92 2.25 1000 • • • 90
Cottons 60 7 92 1.70 1000 • • • 90
Cottons 40 7 89 1.05 1000 • • • 90
Cottons Eco 60** 7 51.1 0.810 1000 60
Cottons Eco 60** 3.5 40.4 0.670 1000 60
Cottons Eco 40** 3.5 40.4 0.790 1000 60
Synthetics 60 3 65 1.20 1000 • • • 60
Synthetics 40 3 63 0.75 1000 • • • 60
Daily Xpress / Xpress Super Short 90 7 62 2.00 1000 • 90
Daily Xpress / Xpress Super Short 60 762 1. 10 1000 • 90
Daily Xpress / Xpress Super Short 30 760 0.20 1000 • 90
Daily Xpress / Xpress Super Short +
Quicl Wash 30 241 0.15 1000 • 30
Mix 40 40 3 65 0.75 800 • • 40
Woollens / Hand Wash 40 1. 5 55 0.55 1000 40
Delicate 30 3 51 0.65 1000 40
Down Wear 60 1. 5 70 1.25 1000 60
Outdoor / Sports 40 3 44 0.45 1000 • 40
Dark Wash / Jeans 40 2.5 82 0.85 1000 • • 40
Lingerie 30 1 65 0.30 600 30
Shirts 60 3 55 1.20 800 • • 60
BabyProtect 90 7 119 2.40 1000 20 - 90
Drum Clean 3II 90 - 73 2.10 600 90

12 / EN
Washing Machine / User’s Manual
4.5 Man programmes
Depending on the type of fabric, use the following main programmes.
• Cottons (Bawełna)
You can wash your durable cotton laundry (sheets, bedlinen, towels, bathrobes, underwear etc.) in this
programme. When the quick wash function button is pressed, programme duration becomes notably
shorter but effective washing performance is ensured with intense washing movements. If the quick wash
function is not selected, superior washing and rinsing performance is ensured for your heavily soiled
laundry.
• Synthetics (Syntetyki)
You can wash your laundry (such as shirts, blouses, synthetic/cotton blended fabrics etc.) in this
programme. The programme duration gets notable shorter and washing with high performance is ensured.
If the quick wash function is not selected, superior washing and rinsing performance is ensured for your
heavily soiled laundry.
• Woollens / Hand Wash (Wełna / Pranie Ręczne)
Use to wash your woolen/delicate laundry. Select the appropriate temperature complying with the tag of
your clothes. Your laundry will be washed with a very gentle washing action in order not to damage the
clothes.
“The wool wash cycle of this machine has been approved by The Woolmark Company for
the washing of machine washable wool products provided that the products are washed
according to the instructions on the garment label and those issued by the manufacturer of
this washing machine. M0000.”
“In UK, Eire, Hong Kong and India the Woolmark trade mark is a Certification trade mark.”
4.6 Addtonal programmes
For special cases, additional programmes are available in the machine.
C
Additional programmes may differ according to the model of the machine.
• Cottons Eco (Bawełna Eco)
Use to wash your normally soiled, durable cotton and linen laundry. Although it washes longer than all
other programmes, it provides high energy and water savings. Actual water temperature may be different
from the stated wash temperature. When you load the machine with less laundry (e.g. ½ capacity or less),
periods in programme stages may automatically get shorter. In this case, energy and water consumption
will decrease more, providing a more economic wash.
• BabyProtect
This is a long-duration programme that you can use for your laundry requiring a hygienic washing at high
temperatures with intensive and long washing cycle. The high level of hygiene is ensured thanks to long
heating duration and additional rinsing step.
• Delicate (Delikatne)
You can wash your delicate clothes such as cotton/synthetic blended knitwear or hosiery in this
programme. It washes with more delicate washing action. Wash your clothes whose colour you want to
preserve either at 20degrees or by selecting the cold wash option.
• Daily Xpress / Xpress Super Short (Codzienne Szybkie /Xpress Super Short)
Use this programme to wash your lightly soiled or unspotted cotton clothes in a short time. The programme
duration can be reduced up to 14 minutes when the quick wash function is selected. When the quick wash
function is selected, maximum 2 (two) kg of laundry must be washed.
• Dark Care / Jeans (Ciemne Ubrania / Jeansy)
Use this programme to protect the colour of your dark-coloured garments or jeans. It performs high
performance washing with special drum movement even if the temperature is low. It is recommended
to use liquid detergent or woolen shampoo for dark coloured laundry. Do not wash your delicate clothes
containing wool or etc.
• Mix 40
Use to wash your cotton and synthetic clothes together without sorting them.
• Shirts (Koszule)
This programme is used to wash the shirts made from cotton, synthetic and synthetic blended fabrics
altogether. It reduces wrinkles. When the quick wash function is selected, the Pre-treatment algorithm is
executed.
• Apply the pre-treatment chemical on your garments directly or add it together with detergent when
the machine starts to take water from the main washing compartment. Thus, you can obtain the same
performance as you obtain with normal washing in a much shorter period of time. Usage life of your shirts
increases.

13 / EN
Washing Machine / User’s Manual
• Outdoor / Sports (Sport)
You can use this programme to wash sports and outdoors garments that contain cotton/synthetics mix
and water repellent covers such as gore-tex etc. It makes sure your garments are washed gently thanks to
special rotating movements.
• Lingerie (Bielizna )
You can use this programme to wash delicate garments that are suitable for hand wash and delicate
women's underwear. Small amount of garments must be washed in a washing net. Hooks, buttons etc.
must be done up and zips must be zipped up.
• Down Wear (Puchowe)
Use this programme to wash your coats, vest, jackets etc. containing feathers with a "machine-washable"
label on them. Thanks to special spinning profiles, it is ensured that the water reaches the air gaps
amongst the feathers.
4.7 Specal programmes
For specific applications, select any of the following programmes.
• Rinse (Płukanie )
Use when you want to rinse or starch separately.
• Spin+Drain (Wirowanie + Odpompowanie)
You can use this function to remove the water on the garment of drain the water in the machine.
Before selecting this programme, select the desired spin speed and press Start / Pause button. First, the
machine will drain the water inside of it. Then, it will spin the laundry with the set spin speed and drain the
water coming out of them.
If you wish to drain only the water without spinning your laundry, select the Pump+Spin programme and
then select the No Spin function with the help of Spin Speed Adjustment button. Press Start / Pause button.
C
Use a lower spin speed for delicate laundries.
4.8 Temperature selecton
Whenever a new programme is selected, the recommended temperature value for the selected programme
appears on the temperature indicator.
To decrease the temperature, press the Temperature Adjustment button. Temperature will decrease
gradually. Temperature level lights will not turn on when the cold level is selected.
C
If the programme has not reached the heating step, you can change the temperature without switching the
machine to Pause mode.
4.9 Spn speed selecton
Whenever a new programme is selected, the recommended spin speed of the selected programme is
displayed on the spin speed indicator.
To decrease the spin speed, press the Spin Speed Adjustment button. Spin speed decreases gradually.
Then, depending on the model of the product, "Rinse Hold" and "No Spin" options appear on the display.
When "No Spin" is selected, the rinse level indicator lights will not turn on.
C
If the programme has not reached the spinning step, you can change the speed without switching the
machine to Pause mode.
4.10 Auxlary functon selecton
Select the desired auxiliary functions before starting the programme. Furthermore, you may also select or
cancel auxiliary functions that are suitable to the running programme without pressing the Start / Pause
button when the machine is operating. For this, the machine must be in a step before the auxiliary function
you are going to select or cancel.
If the auxiliary function cannot be selected or canceled, light of the relevant auxiliary function will blink 3
times to warn the user.
C
If a second auxiliary function conflicting with the first one is selected before starting the machine, the function selected first
will be canceled and the second auxiliary function selection will remain active.
An auxiliary function that is not compatible with the programme cannot be selected. (See, "Programme and consumption
table")
Auxiliary Function buttons may vary according to the model of the machine.

14 / EN
Washing Machine / User’s Manual
4.10.1 Auxlary functons
• Prewash (Pranie Wstępne )
A Prewash is only worthwhile for heavily soiled laundry. Not using the Prewash will save energy, water,
detergent and time.
C
Prewash without detergent is recommended for tulle and curtains.
• Fast+ (Szybkie Pranie)
When this function is selected, the durations of the relevant programmes get shorter by 50%.
Thanks to the optimised washing steps, high mechanic activity and optimum water consumption,
high washing performance is achieved in spite of the reduced duration.
C
When you select this function, load your machine with half of the maximum laundry specified in the
programme table.
• Pet hair removal (Funkcja Pupil)
This function helps to remove pet hair that remain on your garments more effectively.When you select this
function, Prewash and Extra Rinse steps are added to the normal programme. Thus, washing is performed
with more water (30%) and the pet hair is removed more effectively.
4.10.2 Functons/Programmes Selected by Pressng the Functon Buttons for 3 Seconds
• Drum Clean 3II
Press and hold the auxiliary function button 1 for 3 seconds to select the programme.
Use regularly (once in every 1-2 months) to clean the drum and provide the required hygiene. Operate the
programme while the machine is completely empty. To obtain better results, put powder lime-scale remover
for washing machines into the detergent compartment no. “2”. When the programme is over, leave the
loading door ajar so that the inside of the machine gets dry.
C
This is not a washing programme. It is a maintenance programme.
Do not run the programme when there is something in the machine. If you try to do so, the machine detects that there is
load inside and aborts the programme.
• Chld lock I
Use Child Lock function to prevent children from tampering with the machine. Thus you can avoid any
changes in a running programme.
C
If the Programme Selection knob is turned when the Child Lock is active, "Con" appears on the display. The Child Lock
does not allow any change in the programmes and the selected temperature, speed and auxiliary functions.
Even if another programme is selected with the Programme Selection knob while the Child Lock is active, previously
selected programme will continue running.
To activate the Child Lock:
2. Pres and hold the Auxiliary Function button for 3 seconds. C03, C02, C01 will appear on the display
respectively while you keep the button pressed for 3 seconds. Then, while the light of the Auxiliary Function
button 2 is flashing, "Con" will appear on the display indicating that the child lock has been activated. If you
press any button or turn the Programme Selection knob when the Child Lock is active, same phrase will
appear on the display.
To deactivate the Child Lock:
Press and hold the Auxiliary Function button 2 for 3 seconds while a programme is running. C03, C02, C01
will appear on the display respectively while you keep the button pressed for 3 seconds. Then, while the
light of the auxiliary function button 2 is flashing, "COF" will appear on the display indicating that the child
lock has been deactivated.
C
In addition to the method above, to deactivate the Child Lock, switch the Programme Selection knob to On / Off position
when no programme is running, and select another programme.
Child Lock is not deactivated after power failures or when the machine is unplugged.
4.11 Delayed Start
With the Delayed Start function the startup of the programme may be delayed up to 19 hours. Delayed start
time can be increased by increments of 1 hour.
C
Do not use liquid detergents when you set Delayed Start! There is the risk of staining of the clothes.

15 / EN
Washing Machine / User’s Manual
1. Open the loading door, place the laundry and put detergent, etc.
2. Select the washing programme, temperature, spin speed and, if required, the auxiliary functions.
3. Set the desired time by pressing the Delayed Start button.
4. Press Start / Pause button. The delayed start time you have set is displayed. Delayed start countdown
starts. “_” symbol next to the delayed start time moves up and down on the display.
C
Additional laundry may be loaded during the delayed start period.
5. At the end of the countdown, duration of the selected programme will be displayed. “_” will disappear and
the selected programme will start.
Changing the Delayed start period
If you want to change the time during countdown:
1. Press the Delayed Start button. Time will increase by 1 hour each time you press the button.
2. If you want to decrease the delayed start time, press Delayed Start button repeatedly until the desired
delayed start time appears on the display.
Canceling the Delayed Start function
If you want to cancel the delayed start countdown and start the programme immediately:
1. Set the Delayed Start period to zero or turn the Programme Selection knob to any programme. Thus,
Delayed Start function will be canceled. The End/Cancel light flashes continuously.
2. Then, select the programme you want to run again.
3. Press Start / Pause button to start the programme.
4.12 Startng the programme
1. Press Start / Pause button to start the programme.
2. Programme follow-up light showing the startup of the programme will turn on.
C
If no programme is started or no button is pressed within 1 minute during programme selection process, the machine will
switch to Pause mode and the illumination level of the temperature, speed and loading door indicator lights will decrease.
Other indicator lights and indicators will turn off. Once the Programme Selection knob is rotated or any button is pressed,
indicator lights and indicators will turn on again.
4.13 Progress of programme
Progress of a running programme can be followed from the Programme Follow-up indicator. At the
beginning of every programme step, the relevant indicator light will turn on and light of the completed step
will turn off.
You can change the auxiliary functions, speed and temperature settings without stopping the programme
flow while the programme is running. To do this, the change you are going to make must be in a step after
the running programme step. If the change is not compatible, relevant lights will flash for 3 times.
C
If the machine does not pass to the spinning step, Rinse Hold function might be active or the automatic unbalanced load
detection system might be activated due to the unbalanced distribution of the laundry in the machine.
4.14 Loadng door lock
There is a locking system on the loading door of the machine that prevents opening of the loading door in
cases when the water level is unsuitable.
Loading door light will start flashing when the machine is switched to Pause mode. Machine checks the
level of the water inside. If the level is suitable, Loading Door light illuminates steadily within 1-2 minutes
and the loading door can be opened.
If the level is unsuitable, Loading Door light turns off and the loading door cannot be opened. If you
are obliged to open the Loading Door while the Loading Door light is off, you must cancel the current
programme. See. "Cancelling the programme"
4.15 Changng the selectons after programme has started
Switching the machine to pause mode
Press the Start / Pause button to switch the machine to pause mode while a programme is running. The
light of the step which the machine is in starts flashing in the Programme Follow-up indicator to show that
the machine has been switched to the pause mode.
Also, when the loading door is ready to be opened, Loading Door light will also illuminate continuously in
addition to the programme step light.
Changing the auxiliary function, speed and temperature
Depending on the step the programme has reached, you can cancel or select the auxiliary functions. See,
"Auxiliary function selection".

16 / EN
Washing Machine / User’s Manual
You can also change the speed and temperature settings. See, "Spin speed selection" and "Temperature
selection".
C
If no change is allowed, the relevant light will flash 3 times.
Adding or taking out laundry
1. Press Start / Pause button to switch the machine to pause mode. The programme follow-up light of the
relevant step during which the machine was switched into the pause mode will flash.
2. Wait until the Loading Door can be opened.
3. Open the Loading Door and add or take out the laundry.
4. Close the Loading Door.
5. Make changes in auxiliary functions, temperature and speed settings if necessary.
6. Press Start / Pause button to start the machine.
4.16 Cancellng the programme
To cancel the programme, turn the Programme Selection knob to select another programme. Previous
programme will be cancelled. End / Cancel light will flash continuously to notify that the programme has
been canceled.
Your machine will end the programme when you turn the Programme Selection knob; however, it does not
drain the water inside. When you select and start a new programme, the newly selected programme will
start depending on the step the previous programme was canceled in. For example, it may take in additional
water or continue to wash with the water inside.
C
Depending on the step where the programme was canceled in, you may have to put detergent and softener again for the
programme you have selected anew.
4.17 End of programme
“End” appears on the display at the end of the programme.
1. Wait until the loading door light illuminates steadily.
2. Press On / Off button to switch off the machine.
3. Take out your laundry and close the loading door. Your machine is ready for the next washing cycle.
4.18 Your machne features "Standby Mode".
After you switch on your machine with On-Off button, if no programme is started or no other procedure is
performed at the selection step or no action is taken within approx. 2 minutes after the selected programme
ends, your machine will switch to energy saving mode automatically. The brightness of the indicator lights
will decrease. Also, if your product has a display that shows programme time, this display will be completely
turned off. If you turn the Programme Selection knob or touch any button, lights and display will switch back
to previous condition. The selections which you make when exiting from the energy efficiency may change.
Please check the correctness of your selections before starting the programme. If necessary, please make
your settings again. This is not an error.
5 Maintenance and cleaning
Service life of the product extends and frequently faced problems decrease if cleaned at regular intervals.
5.1 Cleaning the detergent drawer
Clean the detergent drawer at regular intervals (every 4-5 washing cycles)
as shown below in order to prevent accumulation of powder detergent in
time.
Lft the rear part of the sphon to remove t as llustrated.
C
If more than normal amount of water and softener mixture starts to gather in the softener compartment,
clean the siphon.
2 Wash the detergent drawer and the siphon with plenty of lukewarm water in a washbasin. Wear
protective gloves or use an appropriate brush to avoid touching of the residues in the drawer with
your skin when cleaning.
3 After cleaning, replace the siphon back to its seating and push its front section downwards to make
sure that the locking tab engages.

17 / EN
Washing Machine / User’s Manual
5.2 Cleaning the loading door and the drum
Residues of softener, detergent and dirt may accumulate in your machine in time and may cause
unpleasant odours and washing complaints. To avoid this, use the Drum Cleaning programme. If your
machine is not featured with Drum Cleaning programme, use Cottons-90 programme and select
Additional Water or Extra Rinse auxiliary functions as well. Run the programme without any laundry in
the machine. Before starting the programme, put max. 100 g of powder detergents into the main wash
detergent compartment(compartment nr. 2). If the detergent is in tablet form, put only one tablet into
compartment nr. 2. Dry the inside of the bellow with a clean piece of cloth after the programme has
come to an end.
CRepeat Drum Cleaning process in every 2 months.
Use an detergents suitable for the washing machines.
After every washing check that no foreign substance is left in the drum.
If the holes on the bellow shown in the figure is blocked, open the holes
using a toothpick.
CForeign metal substances will cause rust stains in the drum. Clean the stains on the drum surface by using
cleaning agents for stainless steel. Never use steel wool or wire wool.
AWARNING: Never use sponge or scrub materials. These will damage the painted and plastic surfaces.
5.3 Cleaning the body and control panel
Wipe the body of the machine with soapy water or non-corrosive mild gel detergents as necessary,
and dry with a soft cloth.
Use only a soft and damp cloth to clean the control panel.
5.4 Cleaning the water intake filters
There is a filter at the end of each water intake valve at the rear of the machine and also at the end of
each water intake hose where they are connected to the tap. These filters prevent foreign substances
and dirt in the water to enter the washing machine. Filters should be cleaned as they do get dirty.
1 Close the taps.
2 Remove the nuts of the water intake hoses to access
the filters on the water intake valves. Clean them with
an appropriate brush. If the filters are too dirty, take
them out by means of pliers and clean them.
3 Take out the filters on the flat ends of the water
intake hoses together with the gaskets and clean
thoroughly under running water.
4 Replace the gaskets and filters carefully in their places
and tighten the hose nuts by hand.
5.5 Draining remaining water and cleaning the pump filter
The filter system in your machine prevents solid items such as buttons, coins and fabric fibers clogging
the pump impeller during discharge of washing water. Thus, the water will be discharged without any
problem and the service life of the pump will extend.
If the machine fails to drain water, the pump filter is clogged. Filter must be cleaned whenever it is
clogged or in every 3 months. Water must be drained off first to clean the pump filter.
In addition, prior to transporting the machine (e.g., when moving to another house) and in case of
freezing of the water, water may have to be drained completely.
AWARNING: If the product is not in use, turn the tap off, detach the supply hose and drain the water inside
the machine against any freezing possibility in the region of installation.
WARNING: After each use close the supply hose tap of the product.

18 / EN
Washing Machine / User’s Manual
In order to clean the dirty filter and discharge the water:
1 Unplug the machine to cut off the supply power.
AWARNING: Temperature of the water inside the machine may rise up to 90 ºC. To avoid burning risk, clean
the filter after the water in the machine cools down.
2 Open the filter cap.
3 Some of our products have emergency draining
hose and some does not have. Follow the steps
below to discharge the water.
Discharging the water when the product has an
emergency draining hose:
a Pull the emergency draining hose out from its
seat
b Place a large container at the end of the hose.
Drain the water into the container by pulling out
the plug at the end of the hose. When the
container is full, block the inlet of the hose by replacing the plug. After the container is emptied, repeat
the above procedure to drain the water in the machine completely.
c When dranng of water s fnshed, close the end by the plug agan and fx the hose n ts place.
d Turn the pump filter to take it out.
Discharging the water when the product does not
have an emergency draining hose:
a Place a large container in front of the filter to
catch water from the filter.
b Loosen pump filter (anticlockwise) until water
starts to flow. Fill the flowing water into the
container you have placed in front of the filter.
Always keep a piece of cloth handy to absorb any
spilled water.
c When the water inside the machine is finished,
take out the filter completely by turning it.
4 Clean any residues inside the filter as well as fibers, if any, around the pump impeller region.
5 Install the filter.
6 If the filter cap is composed of two pieces, close the filter cap by pressing on the tab. If it is one piece, seat
the tabs in the lower part into their places first, and then press the upper part to close.

19 / EN
Washing Machine / User’s Manual
6 Technical specifications
Complyng Commsson Delegated Regulaton (EU) No 1061/2010
Suppler name or trademark Beko
Model name SWRE 7512 XWW2
Rated capacty (kg) 7
Energy effcency class / Scale from A+++ (Hghest Effcency) to D (Lowest Effcency) A+++
Annual Energy Consumpton (kWh) (1) 173
Energy consumpton of the standard 60°C cotton programme at full load (kWh) 0.810
Energy consumpton of the standard 60°C cotton programme at partal load (kWh) 0.670
Energy consumpton of the standard 40°C cotton programme at partal load (kWh) 0.790
Power consumpton n‘off-mode’(W) 0.25
Power consumpton n‘left-on mode’(W) 1.00
Annual Water Consumpton (l) (2) 9899
Spn-dryng effcency class / Scale from A (Hghest Effcency) to G (Lowest Effcency) C
Maxmum spn speed (rpm) 1000
Remanng mosture Content (%) 62
Standard cotton programme(3) Cotton Eco 60°C and 40°C
Programme tme of the standard 60°C cotton programme at full load (mn) 215
Programme tme of the standard 60°C cotton programme at partal load (mn) 195
Programme tme of the standard 40°C cotton programme at partal load (mn)185
Duraton of the left-on mode (mn) N/A
Arborne acoustcal nose emssons washng/spnnng (dB) 63/75
Bult-n Non
Rated capacty (kg) 7
Heght (cm) 84
Wdth (cm) 60
Depth (cm) 45
Net weght (±4 kg.) 62
Sngle Water nlet / Double Water nlet • / -
• Avalable
Electrcal nput (V/Hz) 230 V / 50Hz
Total current (A) 10
Total power (W) 2200
Woolmark M-1520
(1) Energy Consumpton based on 220 standard washng cycles for cotton programmes at 60°C and 40°C at full and partal load, and
the consumpton of the low-power modes. Actual energy consumpton wll depend on how the applance s used.
(2) Water consumpton based on 220 standard washng cycles for cotton programmes at 60°C and 40°C at full and partal load. Actual
water consumpton wll depend on how the applance s used.
(3) "Standard 60°C cotton programme" and the "standard 40°C cotton programme" are the standard washng programmes to whch
the nformaton n the label and the fche relates and these programmes are sutable to clean normally soled cotton laundry and
that they are the most effcent programmes n terms of combned energy and water consumpton.
Techncal specfcatons may be changed wthout pror notce to mprove the qualty of the product.

20 / EN
Washing Machine / User’s Manual
7 Troubleshooting
Programme cannot be started or selected.
• Washng machne has swtched to self protecton mode due to a supply problem (lne voltage, water
pressure, etc.). >>> To cancel the programme, turn the Programme Selecton knob to select another
programme. Prevous programme wll be cancelled. (See“Cancelng the programme”)
Water in the machine.
• Some water mght have remaned n the product due to the qualty control processes n the
producton. >>> Ths s not a falure; water s not harmful to the machne.
Machine vibrates or makes noise.
• Machne mght be standng unbalanced. >>> Adjust the feet to level the machne.
• A hard substance mght have entered nto the pump flter. >>> Clean the pump flter.
• Transportaton safety bolts are not removed. >>> Remove the transportaton safety bolts.
• Laundry quantty n the machne mght be too lttle. >>> Add more laundry to the machne.
• Machne mght be overloaded wth laundry. >>> Take out some of the laundry from the machne or
dstrbute the load by hand to balance t homogenously n the machne.
• Machne mght be leanng on a rgd tem. >>> Make sure that the machne s not leanng on
anythng.
Machine stopped shortly after the programme started.
• Machne mght have stopped temporarly due to low voltage. >>> It wll resume runnng when the
voltage restores to the normal level.
Programme time does not countdown. (On models with display)
• Tmer may stop durng water ntake. >>> Tmer ndcator wll not countdown untl the machne takes
n adequate amount of water. The machne wll wat untl there s suffcent amount of water to avod
poor washng results due to lack of water. Tmer ndcator wll resume countdown after ths.
• Tmer may stop durng heatng step. >>> Tmer ndcator wll not countdown untl the machne
reaches the selected temperature.
• Tmer may stop durng spnnng step. >>> Automatc unbalanced load detecton system mght be
actvated due to the unbalanced dstrbuton of the laundry n the drum.
• Machne does not swtch to spnnng step when the laundry s not evenly dstrbuted n the drum
to prevent any damage to the machne and to ts surroundng envronment. Laundry should be
rearranged and re-spun.
Foam is overflowing from the detergent drawer.
• Too much detergent s used. >>> Mx 1 tablespoonful softener and ½ l water and pour nto the man
wash compartment of the detergent drawer.
• Put detergent nto the machne sutable for the programmes and maxmum loads ndcated n the
“Programme and consumpton table”. When you use addtonal chemcals (stan removers, bleachs and
etc), reduce the amount of detergent.
Laundry remains wet at the end of the programme
• Excessve foam mght have occurred and automatc foam absorpton system mght have been
actvated due to too much detergent usage. >>> Use recommended amount of detergent.
• Machne does not swtch to spnnng step when the laundry s not evenly dstrbuted n the drum
to prevent any damage to the machne and to ts surroundng envronment. Laundry should be
rearranged and re-spun.
Awarning:If you cannot eliminate the problem although you follow the instructions in this section,
consult your dealer or the Authorized Service Agent. Never try to repair a nonfunctional product yourself.
Table of contents
Languages:
Other Beko Washer manuals

Beko
Beko WTL104151W User manual

Beko
Beko WTV 8612 XMCI2 User manual

Beko
Beko WMY 81243PTLMB3 User manual

Beko
Beko WMB 91442 LC User manual

Beko
Beko WEX740430S User manual

Beko
Beko WMI 71641 WMI 71441 User manual

Beko
Beko WM 94145W User manual

Beko
Beko WUE6512XWST User manual

Beko
Beko B3W5941IW User manual

Beko
Beko AUTOMATIC WASHING MACHINE WMA 657 S Troubleshooting guide

Beko
Beko BFL7510W User manual

Beko
Beko WTG741M1W User manual

Beko
Beko WMB 71001 M+ User manual

Beko
Beko WTE 7611 BWR User manual

Beko
Beko WMB 71442 S Operating instructions

Beko
Beko WM5101 Operating instructions

Beko
Beko WTV8744 X0 User manual

Beko
Beko 60081474CHD1 User manual

Beko
Beko WM310 User manual

Beko
Beko WITV 8712 XWG User manual