Belden Miranda Kaleido-Solo KS-910 User manual

A Miranda Quick-Start Guide
Loudness Monitoring &
Analysis
Using Kaleido-Solo KS-910
865-99M05-500 rev 4
April, 11 2013
Miranda Technologies
3499 Douglas-B.-Floreani
St-Laurent, Québec, Canada H4S 2C6
Tel. 514-333-1772
Fax. 514-333-9828
www.miranda.com
© 2013 Miranda Technologies


Kaleido-X Hardware –Description and Installation
2| Loudness Monitoring and Analysis using Kaleido-Solo and iControl Solo
Table of Contents
Introduction ...................................................................................................................................3
Task 1 –Connecting Kaleido-Solo to a network .........................................................................4
Task 2 –Firmware Verification and Upgrading ...........................................................................5
Task 3 –Loudness Measurement Setup on the Kaleido-Solo....................................................7
Task 4 –Managing Loudness Logging and Analysis using iControl ........................................9
Task 5 –Using the Audio Loudness Analyzer...........................................................................19

QUICK START GUIDE
Loudness Monitoring and Analysis using Kaleido-Solo and iControl Solo | 3
Loudness Monitoring and Analysis using the Kaleido Solo KS-910
Introduction
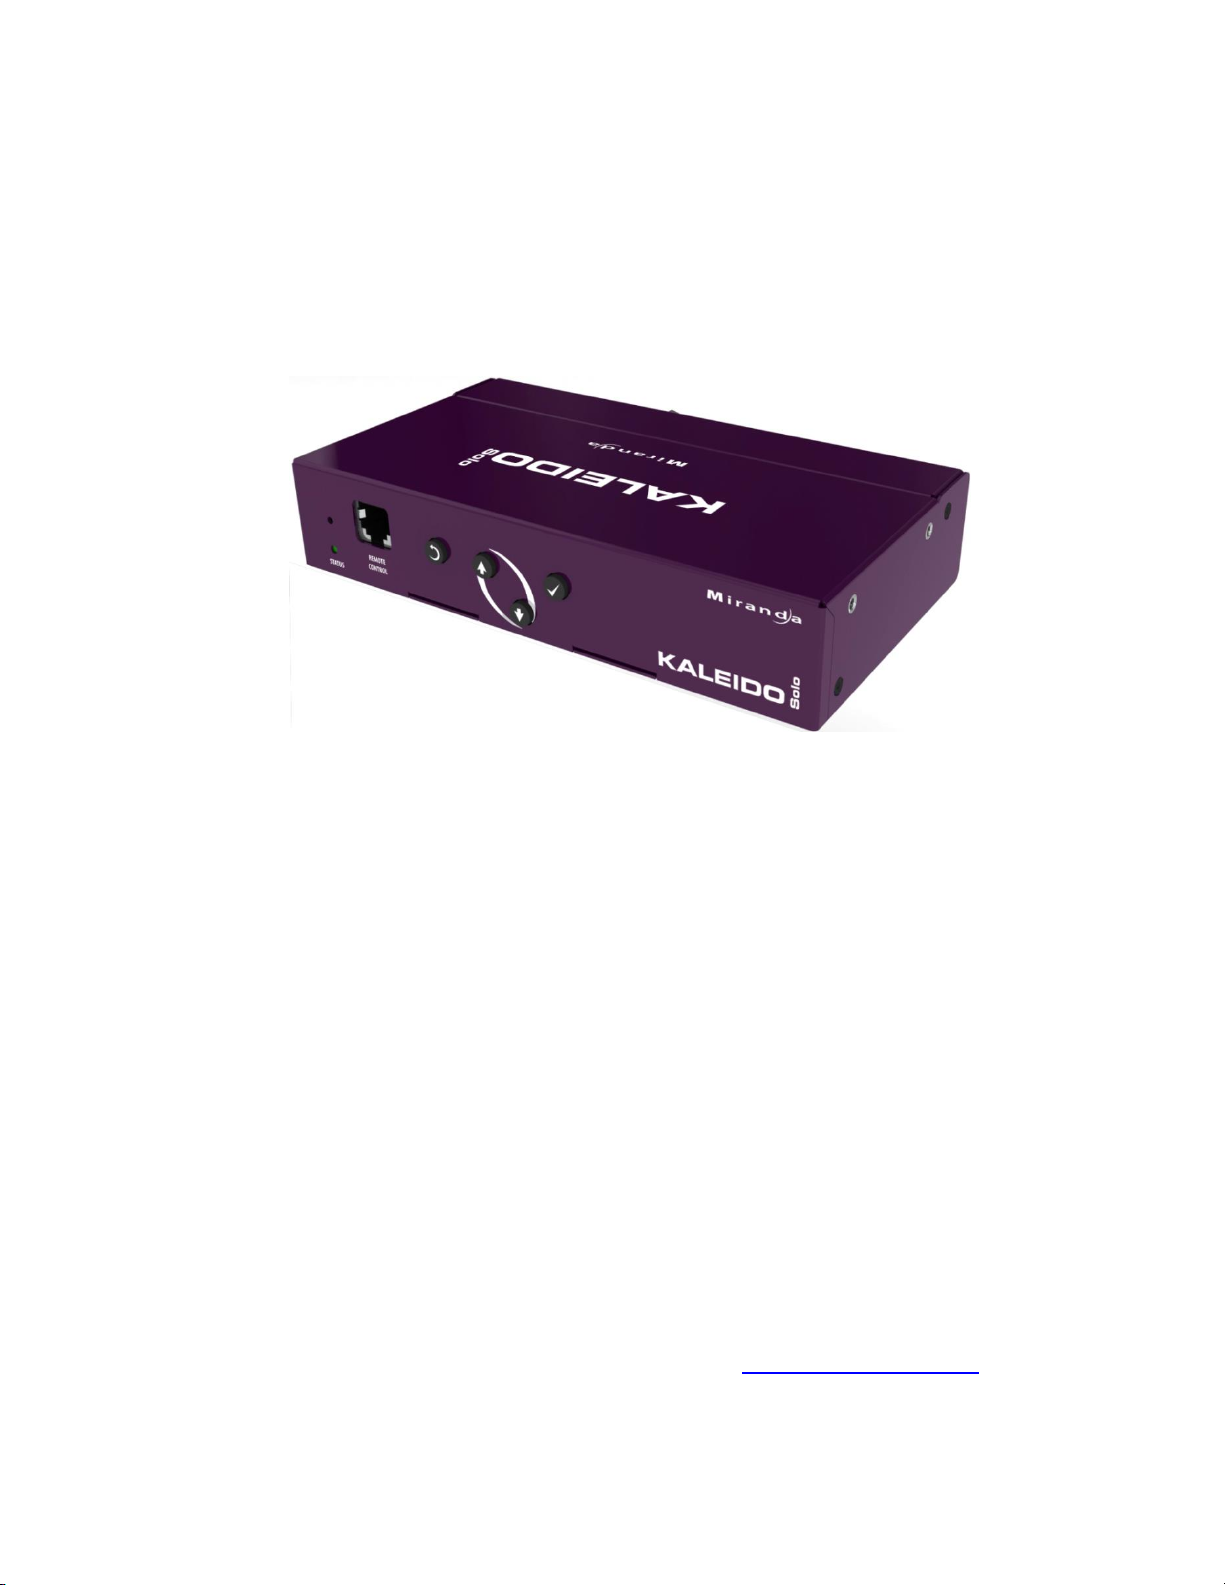
Kaleido-Solo is a compact, standalone 3Gbps/HD/SD video to HDMI converter, which allows low cost LCD displays to
be used for video and loudness/dialnorm monitoring. It’s ideal for many professional monitoring applications, including
production, mobile truck, post-production and broadcast.
An important feature of the KS-910 model is the provision for operators to monitor loudness and dialnorm levels
accurately over time, without the cost and complexity of a traditional loudness monitoring device.
Loudness data can be displayed and analyzed in two ways:
Using the on-board graphing capability, displayed on a monitor fed from the K-Solo’s HDMI output.
Using Miranda’s Audio Loudness Analyzer over an iControl interface.
The on-board loudness analysis is fully explained in the Kaleido Solo User’s Manual and will not be repeated here,
except as excerpted in step 3 of the following.
The purpose of this guide is to consolidate information about using the Audio Loudness Analyzer through iControl to
analyze loudness information originating from the Kaleido-Solo. The following tasks will be described:
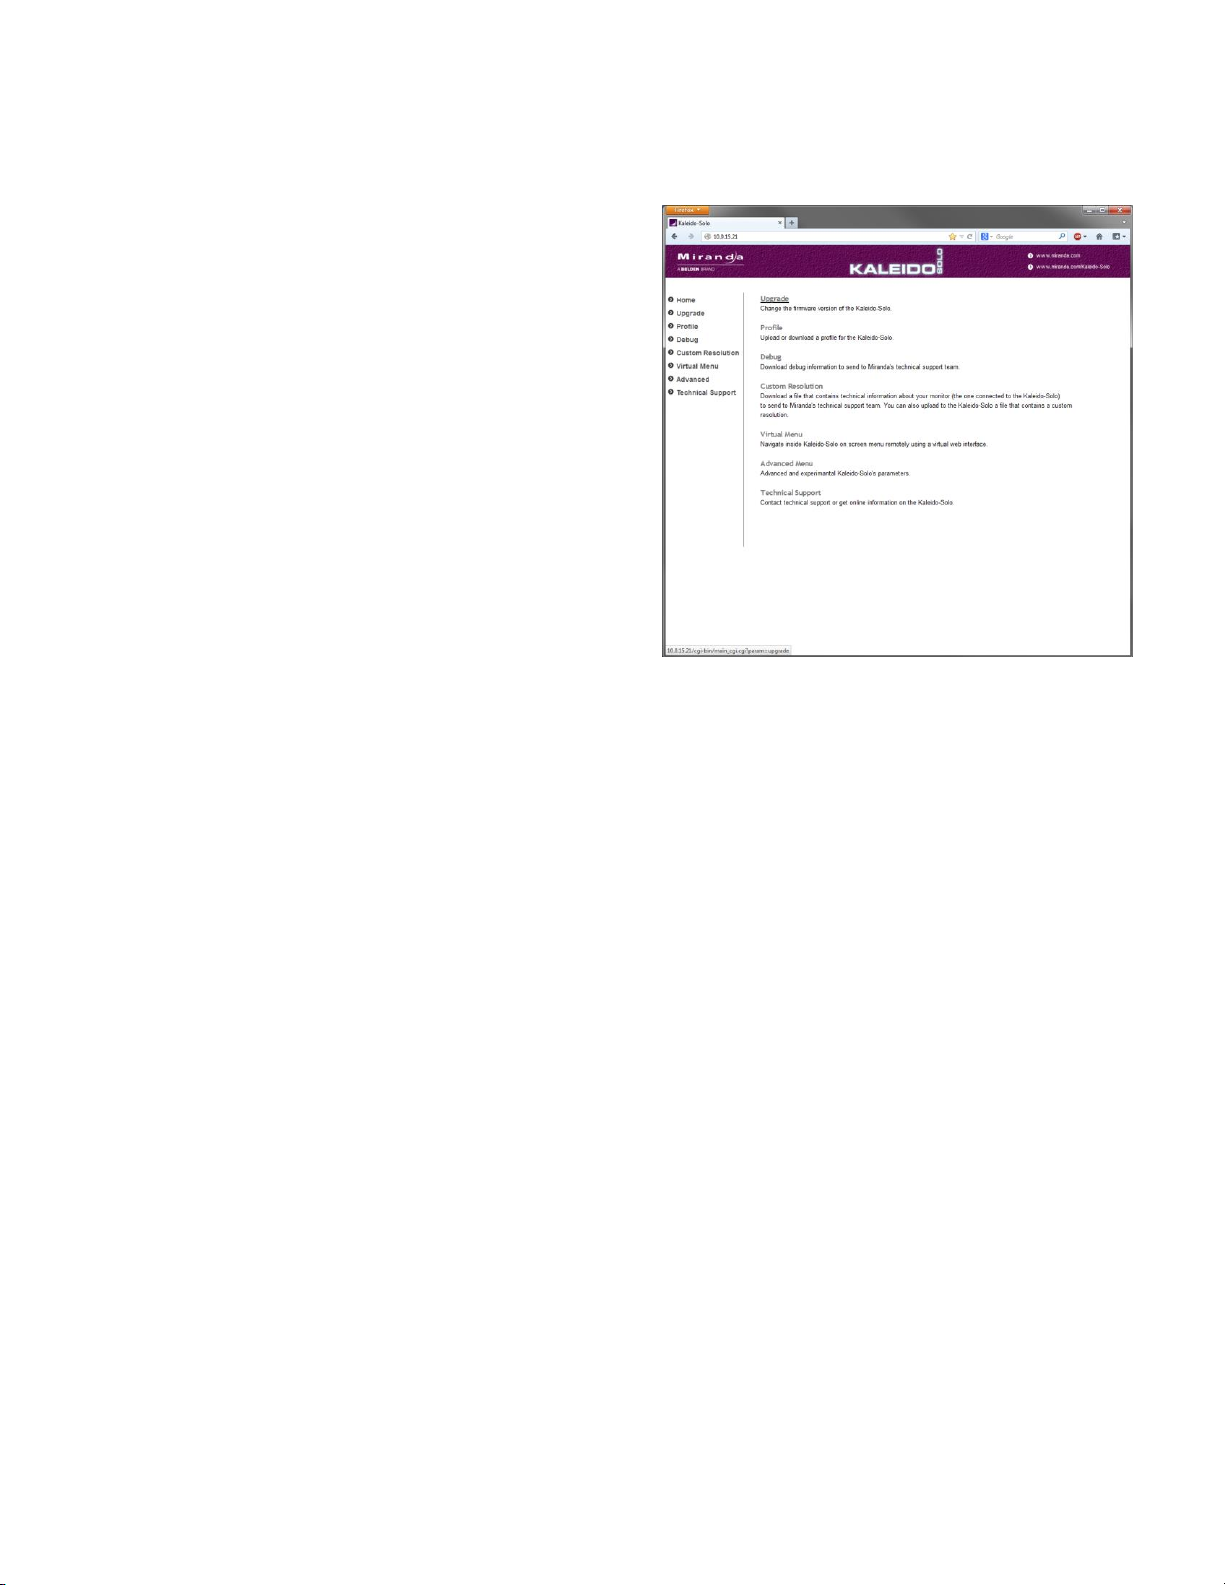
1. Connecting the Kaleido-Solo to a network
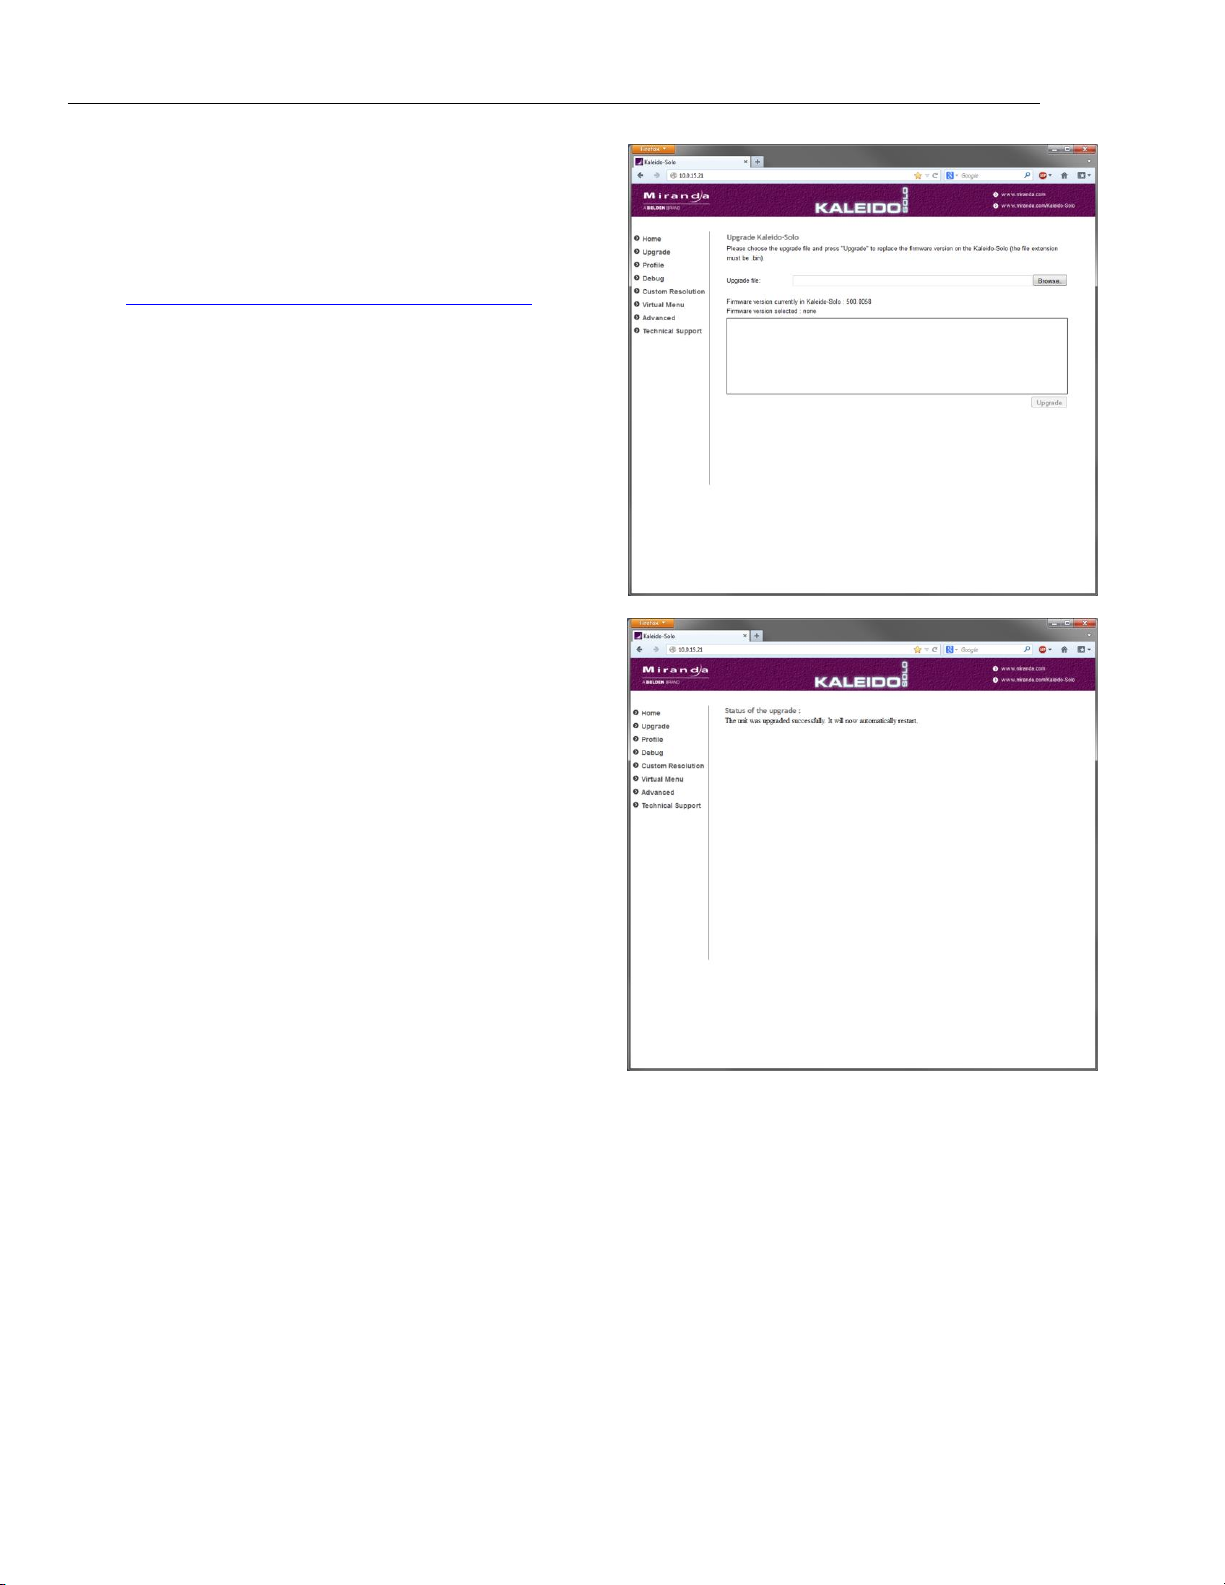
2. Making sure you have the correct firmware version installed on Kaleido-Solo, by verifying, and upgrading if
necessary.
3. Setting up the loudness measurement parameters on Kaleido-Solo
4. Managing loudness logging and analysis using iControl.
5. Running the Audio Loudness Analyzer
This guide is deliberately brief, and focused on specific functions of the named products (Kaleido-Solo, iControl,
iControl-Solo, Loudness Analyzer). When more information is required, the user should consult the product’s User
Manual.
User manuals for Miranda products are available for download at www.miranda.com/support

Kaleido-X Hardware –Description and Installation
4| Loudness Monitoring and Analysis using Kaleido-Solo and iControl Solo
Task 1 – Connecting Kaleido-Solo to a network
Prerequisites:
If you do not plan to use DHCP for your IP address, obtain the following information from your network administrator:
1. Static IP Address.
2. Net Mask.
3. Gateway.
Connect your Ethernet cable to the rear-panel Ethernet
port.
A button refresher:
= UP;
= DOWN;
= ENTER
= ESCAPE
View the output of the Kaleido-Solo on a monitor, and press ENTER on the Kaleido-Solo front panel to open the menu
display.
1. Use UP and DOWN to navigate to the Ethernet
panel.
2. ENTER to move into the Ethernet setup page
3. Using the buttons, navigate to the IP address,
position the highlight on the address box you want to
modify and press ENTER.
4. Using the UP & DOWN buttons set the desired
value.
5. Press ENTER to confirm the value.
6. Repeat 3 to 5 until all values have been entered.
7. Move to “Apply Settings” and press ENTER
From Windows Start Menu, click run, type cmd and
press <enter> on your keyboard or click OK in the Run
window.
In the DOS Command window type: “ping <your IP
Address>” and press <Enter>
If you receive a response from the Kaleido Solo, it
confirms that the IP address was correctly set, and
the command window can be closed.

QUICK START GUIDE
Loudness Monitoring and Analysis using Kaleido-Solo and iControl Solo | 5
Task 2 – Firmware Verification and Upgrading
Access the Kaleido-Solo’s web page:
1. Launch your Internet browser
2. Enter the IP address of your Kaleido-Solo, as set in
Task 1.

Kaleido-X Hardware –Description and Installation
6| Loudness Monitoring and Analysis using Kaleido-Solo and iControl Solo
If the current firmware version is not 400 or above,
you must perform a firmware upgrade. An upgrade to
the latest version is always a good idea.
1. Go to the Miranda Support site at
http://www.miranda.com/support/Kaleido-Solo
and download the latest version of the firmware.
Unzip the file and save it in a convenient location.
2. Click on the Browse button to open the Choose
File to Upload dialog box. Browse to the upgrade
file (.bin file) downloaded and unzipped in 1.
3. Select the file and click Open. The file name will
appear in the Upgrade File data box, and the
Upgrade button will be enabled.
4. Click the Upgrade button to begin the upgrade
procedure.
5. A pop-up warning will appear, listing things you
should NOT do while the Kaleido-Solo is upgrading:
When you are ready to proceed, click OK.
The main window will show that the upgrade is in
progress, and remind you of the things NOT to do.
When the upgrade is complete, the main window
will notify you that it was successful, and advise you
that the Kaleido-Solo will reboot automatically.
The Kaleido-Solo will reboot.

QUICK START GUIDE
Loudness Monitoring and Analysis using Kaleido-Solo and iControl Solo | 7
Task 3 – Loudness Measurement Setup on the Kaleido-Solo
The Kaleido-Solo can monitor the audio of two programs
at once for loudness measurement.
1. Navigate to Audio | Loudness
2. For each of the two programs (called 1st Loudness
and 2nd Loudness), select from among the
available options for:
Program Selection
Coding Mode
Target Src
3. Adjust the Input Selection to suit your signal
monitoring requirements.
4. Navigate to Audio | Loud Adv
5. Select the Meter Mode for each of the two
Loudness measurements, from among these
options:
EBU Mode R128
A85 ITU BS.1770-1
A85 ITU BS.1770-2
A85 ITU BS.1770-3
ARIB TR-B32

Kaleido-X Hardware –Description and Installation
8| Loudness Monitoring and Analysis using Kaleido-Solo and iControl Solo
6. Navigate to Audio | Loud Ctrl, and make sure the
Meter is “Running”.
You may need to cycle the Meter through
“Paused” and “Running” if the Kaleido-Solo
doesn’t begin logging when started in the
“Loudness Logger” application (see Step 5).
7. Navigate to OSD | Loudness.
8. Select the on-screen display mode from among
these choices:
Off Disable any loudness chart.
Meter 1 Shows 1 loudness chart with
first program settings.
Meter 2 Shows 1 loudness chart with
second program settings.
Meter 1-2 Shows 2 compact loudness
charts with both first and
second program settings.
Full Screen Meter Shows a special loudness-
oriented layout.
See section 5.4.5 in the Kaleido-Solo User Manual
for more details about these options.

QUICK START GUIDE
Loudness Monitoring and Analysis using Kaleido-Solo and iControl Solo | 9
Task 4 – Managing Loudness Logging and Analysis using iControl
If you are using iControl Navigator, go to page 15.
If you are using iControl Solo, proceed as follows:
. Prerequisites:
Before you can log loudness data and analyze loudness logs from your Kaleido-Solo, you must first make
sure certain features and services in iControl Solo are activated.
Instructions can be found on the indicated pages in:
iControl Solo v4.40 User Guide (Miranda document M786-1600-326)
Obtain and activate license(s) for Loudness logging in iControl Solo (pages 13 to 19). When the license is
activated, the window heading for iControl Solo will read “Miranda iControl Solo (Loudness version)”
Because log files can become very large, Miranda recommends that you mount a remote shared hard
drive to the designated loudness folder in your Application Server (pages 28 and 29).
The iControl Solo User Guide is available at Miranda Support Portal at //www.miranda.com/support/
1. Open iControl Solo on your desktop and double-click DensiteManager in the logical view.

Kaleido-X Hardware –Description and Installation
10 | Loudness Monitoring and Analysis using Kaleido-Solo and iControl Solo
2. In DensiteManager, click Add.
3. In the Target Information window, type the Kaleido-Solo’s IP address, and a descriptive name for this Kaleido-
Solo (NB the boxes are labelled Densite…).

QUICK START GUIDE
Loudness Monitoring and Analysis using Kaleido-Solo and iControl Solo | 11
4. Click OK. Your Kaleido-Solo will now appear in the DensiteManager window. Its status icon should be green,
showing it is online. If not, select it and click the Online button on the right.
The Kaleido-Solo (named as you specified in #3 above) will be added to the list of controlled devices in the
iControl Solo window.
5. Double-click Loudness Logger
The Loudness Logger window opens, showing a list of loudness monitoring resources, including your KS-910.

Kaleido-X Hardware –Description and Installation
12 | Loudness Monitoring and Analysis using Kaleido-Solo and iControl Solo
6. To specify the location for saving the loudness data, select the KS-910, and then click Settings
7. In the Loudness Logger Settings window, click the elipsis button to browse to the location in your local file
system where you would like to save loudness data.
IMPORTANT: Make sure you have sufficient storage space for loudness data
When specifying a location for storing loudness data, make sure you have enough
storage space available.
A Kaleido-Solo logging two audio programs may generate up to 18 MBytes/day of data
If the logger runs out of space when logging loudness data, it will stop logging.
Miranda recommends using a controlled remote storage device to ensure adequate
storage space.

QUICK START GUIDE
Loudness Monitoring and Analysis using Kaleido-Solo and iControl Solo | 13
8. Click Apply. If you choose a valid path, the Success message appears.
9. Click OK to return to the Loudness Logger window.
10. To start logging on an individual Kaleido-Solo, right-click on its icon and click Start.
The Status column will show that logging is in progress.

Kaleido-X Hardware –Description and Installation
14 | Loudness Monitoring and Analysis using Kaleido-Solo and iControl Solo
11. To stop logging, right-click on the individual Kaleido-Solo and click Stop.
The status column will show that logging is no longer in progress.
12. Close the Loudness Logger window by clicking the red Xin the upper right corner.
13. In the iControl Solo main window, double–click Loudness Analyzer.
Jump ahead to Task 5 –Using the Audio Loudness Analyzer on page 19.

QUICK START GUIDE
Loudness Monitoring and Analysis using Kaleido-Solo and iControl Solo | 15
If you are using iControl Navigator, proceed as follows:
Prerequisites:
Before you can log loudness data and analyse loudness logs from your Kaleido-Solo, you must first make
sure certain features and services in iControl are activated. Instructions can be found on the indicated pages
in:
iControl v4.40 User Guide (Miranda document M226-9900-279)
Start Loudness Logger and Loudness Analyzer services in iControl (pages 196 to 200).
Start the Densité Manager service in iControl (pages 666 to 669).
Because log files can become very large, Miranda recommends that you mount a remote shared hard
drive to the designated loudness folder in your Application Server (pages 200 to 204).
The iControl User Guide is available at Miranda Support Portal at //www.miranda.com/support/
1. Open iControl Navigator on your desktop.
2. Double-click on the DensiteManager associated with the Application Server on which you will be logging.

Kaleido-X Hardware –Description and Installation
16 | Loudness Monitoring and Analysis using Kaleido-Solo and iControl Solo
3. Click Add in the DensiteManager window
4. In the Target Information window:
Enter the IP address of your Kaleido-Solo in the Densite IP address
data box
Enter the name under which you would like the KS-910 to appear in
iControl in the Densite name databox.
Click OK
Back in the Densite Manager window, you will see that the
Kaleido Solo has been added.
5. Its status icon should be green, showing it is online. If not,
select it and click the Online button on the right.
6. Exit the Densite Manager by closing the window (click the red Xicon in the upper right corner)

QUICK START GUIDE
Loudness Monitoring and Analysis using Kaleido-Solo and iControl Solo | 17
7. Back in the iControl Navigator window, double-click on the Loudness Logger associated with the AppServer
on which you will be logging.
A list of loudness monitoring resources will appear, including your KS-910.
Important note: If you followed the set-up process above, you will have established the path to the loudness
log storage and both the Loudness Logger and the Loudness Analyzer will use it. If you experience difficulties,
click the Settings… button to open the Loudness Logger Settings screen, which shows the path, and provides
a link back to the setup process. This screen also allows you to configure alarm settings for the Loudness
Logger.
8. To start logging on an individual Kaleido-Solo, right-click on its icon and click Start
Alternatively, to start logging on all the loudness sources in the display, click the Start all button.
Look under “Status” and verify that logging is in progress.

Kaleido-X Hardware –Description and Installation
18 | Loudness Monitoring and Analysis using Kaleido-Solo and iControl Solo
9. To stop logging on an individual Kaleido-Solo, right-click on its icon and click Stop
Alternatively, to stop logging on all the loudness sources in the display, click the Stop all button
Look under “Status” and verify that logging is no longer in progress.
10. Close the Loudness Logger window by clicking the red Xicon in the upper right corner.
11. In the iControl Navigator main window, double–click Loudness Analyzer.
There may be several Loudness Analyzers available; choose the one associated with the AppServer on which
you installed the KS-910 and on which the logging was initiated. This will ensure that you have easy access to
the log files.
Table of contents
Other Belden Measuring Instrument manuals
Popular Measuring Instrument manuals by other brands

White Matter
White Matter NanoZ user manual

Psiber Data Systems
Psiber Data Systems NetXpert 1400 user manual

TSI Quest
TSI Quest SoundPro SE series user manual

RKI Instruments
RKI Instruments PS-2 Installation and operating instructions

VWR
VWR AVANTOR PV4 instruction manual

Pulsar
Pulsar SLUDGE FINDER 2 instruction manual