manuals.online logo
Brands
  1. Home
  2. •
  3. Brands
  4. •
  5. Belson
  6. •
  7. Styling Iron
  8. •
  9. Belson C18-I-6C Installation instructions

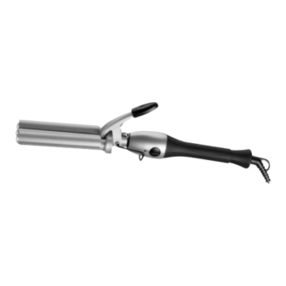
Belson C18-I-6C Installation instructions

Cet appareil est pour utilisation domestique seulement et peut être
branché dans toute prise de courant CA (courant domestique ordinaire).
N'utilisez pas d'autres genres de prises de courant.
AVERTISSEMENT: Le baril de ce fer à friser est chaud. Il faut être prudent
lorsqu’il est utilisé.
• Ne laissez pas le fer à friser entrer en contact avec la peau. Ne touchez
pas au baril du fer avec vos doigts.
• Pour les cheveux plus courts, placez un peigne en plastique mince
entre le cuir chevelu et le baril du fer à friser pour éviter de toucher
au cuir chevelu.
• Essayez sur une petite mèche de cheveux avant d’utiliser.
POUR UTILISER:
Pour un style complet, les cheveux doivent être propres, secs et exempts
de saleté, fixatif, crème, etc. (Le fer peut toujours être utilisé pour les
retouches rapides.)
PRÉCHAUFFAGE: Placez le fer à friser sur une surface douce plate.
Branchez-le et laissez le fer se réchauffer. Lorsque le point de fer prêt en
le baril devient foncé, le fer à friser est prêt à utiliser.
En prenant une mèche à la fois, placez le bout des cheveux sur le baril
avec la pince ouverte. Fermez la pince, assurant que le bout des cheveux
dépassent un peu la pince. Saisissez l’embout isolant de l’autre main, il
vous sera plus facile d’enrouler les cheveux.
La mèche de cheveux doit être tendue pendant que vous l’enroulez autour
du baril chaud en tournant la poignée d’une main et le bout isolant de
l’autre main. Enroulez la boucle vers le cuir chevelu aussi loin que vous le
désirez sans toucher au cuir chevelu avec le baril chaud. Retenez-la en
place pendant quelques secondes pour une grosse boucle ferme ou si les
cheveux sont difficiles à friser. Retenez-la moins longtemps si les cheveux
sont faciles à friser ou si vous désirez des boucles souples ou seulement
des cheveux ondulés.
Lorsque vous êtes prêtes à relâcher la boucle, déroulez-la d’environ un
demi-tour (pour les cheveux plus longs, déroulez-en un peu plus) et
pressez le levier de dégagement de la pince pour ouvrir la pince. Retirez
maintenant doucement le baril du centre de la boucle. Laissez la boucle
refroidir et essayez de ne pas déranger les boucles pendant que vous
procédez de la même manière autour de la tête.
Une fois que tous les cheveux sont bouclés et que les boucles ont refroidi,
brossez et peignez doucement les cheveux dans le style que vous désirez.
This appliance is for household use and may be plugged into any AC
electrical outlet (ordinary household current). Do not use any other
electrical outlet.
WARNING: The barrel of this curling iron is hot. Care should be taken
when using.
• Keep unit away from contact with all skin areas. Do not touch iron
barrel with fingertips.
• For shorter hair, place a thin plastic comb between scalp and curling
iron barrel to avoid touching scalp.
• Test on a small section of hair before using.
TO USE:
For a complete styling, hair should be clean, dry and free from dirt, hair
spray, creams, etc. (This iron can be used for quick touch-ups any time.)
PRE-HEAT: Rest the iron on a heat-resistant, flat surface. Plug in, and
allow iron to heat. When ready dot on barrel turns dark, the iron is ready
to use.
Taking one section at a time, place the ends of hair over the barrel with
the clamp open. Then close the clamp, making sure that the ends extend
just a bit beyond the clamp. Grasp the cool safety tip with the other hand,
and it will be easy to roll hair.
Keep the section of hair taut as you wind it around the hot barrel by
turning the handle with one hand and the cool safety tip with the other.
Wind the curl toward the scalp as far as you wish to go without touching
scalp with the hot barrel.
Hold the curl in place for several seconds for a large, firm curl or if hair is
hard to curl. Hold for less time if hair is easy to curl, or if you want loose
curls or just waves. When you are ready to release curl, unwind about
half a turn (for longer hair, unwind a bit more) and push down on the
clamp release lever to open the clamp. Now, gently withdraw the barrel
from the center of curl. Allow curl to cool, and try not to disturb curls as
you proceed in the same manner around whole head.
When completely finished, and all curls have cooled thoroughly, gently
brush and comb hair into the style you wish.
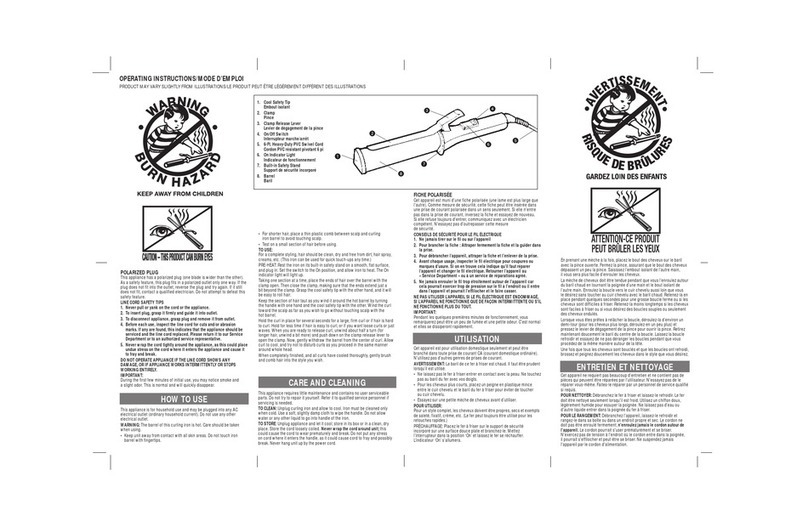
OPERATING INSTRUCTIONS/MODE D’EMPLOI
PRODUCT MAY VARY SLIGHTLY FROM ILLUSTRATIONS/LE PRODUIT PEUT ÊTRE LÉGÈREMENT DIFFÉRENT DES ILLUSTRATION
5
6
1
2
4
3
LINE CORD SAFETY TIPS
1. Never pull or yank on the cord or the appliance.
2. To insert plug, grasp it firmly and guide it into outlet.
3. To disconnect appliance, grasp plug and remove it from outlet.
4. Before each use, inspect the line cord for cuts and/or abrasion
marks. If any are found, this indicates that the appliance should be
serviced and the line cord replaced. Please return it to our Service
Department or to an authorized service representative.
5. Never wrap the cord tightly around the appliance, as this could place
undue stress on the cord where it enters the appliance and cause it
to fray and break.
DO NOT OPERATE APPLIANCE IF THE LINE CORD SHOWS ANY DAMAGE,
OR IF APPLIANCE WORKS INTERMITTENTLY OR STOPS WORKING
ENTIRELY.
IMPORTANT:
During the first few minutes of initial use, you may notice smoke and a
slight odor. This is normal and will quickly disappear.
HOW TO USE
This appliance requires little maintenance and contains no user
serviceable parts. Do not try to repair it yourself. Refer it to qualified
service personnel if servicing is needed.
TO CLEAN: Unplug curling iron and allow to cool. Iron must be cleaned
only when cold. Use a soft, slightly damp cloth to wipe the handle. Do not
allow water or any other liquid to go into handle of the iron.
TO STORE: Unplug appliance and let it cool; store in its box or in a clean,
dry place. Store the cord loosely coiled. Never wrap the cord around unit;
this could cause the cord to wear prematurely and break. Do not put any
stress on cord where it enters the handle, as it could cause cord to fray
and possibly break. Never hang unit up by the power cord.
CARE AND CLEANING Cet appareil ne requiert pas beaucoup d'entretien et ne contient pas de
pièces qui peuvent être réparées par l'utilisateur. N'essayez pas de le
réparer vous-même. Faites-le réparer par un personnel de service qualifié
si requis.
POUR NETTOYER: Débranchez le fer à friser et laissez-le refroidir. Le fer
doit être nettoyé seulement lorsqu'il est froid. Utilisez un chiffon doux,
légèrement humide pour essuyer la poignée. Ne laissez pas d'eau ou
d'autre liquide entrer dans la poignée du fer à friser.
POUR LE RANGEMENT: Débranchez l'appareil, laissez-le refroidir et
rangez-le dans sa boîte ou dans un endroit propre et sec. Le cordon ne
doit pas être enroulé fermement; n'enroulez jamais le cordon autour de
l'appareil. Le cordon pourrait s'user prématurément et se briser.
N'exercez pas de tension à l'endroit où le cordon entre dans la poignée,
il pourrait s'effilocher et peut-être se briser. Ne suspendez jamais
l'appareil par le cordon d'alimentation.
ENTRETIEN ET NETTOYAGE
CONSEILS DE SÉCURITÉ POUR LE FIL ÉLECTRIQUE
1. Ne jamais tirer sur le fil ou sur l’appareil
2. Pour brancher la fiche : Attraper fermement la fiche et la guider dans
la prise.
3. Pour débrancher l’appareil, attraper la fiche et l’enlever de la prise.
4. Avant chaque usage, inspecter le fil électrique pour coupures ou
marques d’usure. Si on en trouve cela indique qu’il faut réparer
l’appareil et changer le fil électrique. Retourner l’appareil au
« Service Department » ou à un service de réparations agréé.
5. Ne jamais enrouler le fil trop étroitement autour de l'appareil car
cela pourrait exercer trop de pression sur le fil à l'endroit ou il entre
dans l’appareil et pourrait l'effilocher et le faire casser.
NE PAS UTILISER L’APPAREIL SI LE FIL ÉLECTRIQUE EST ENDOMMAGÉ,
SI L’APPAREIL NE FONCTIONNE QUE DE FAÇON INTERMITTENTE OU S’IL
NE FONCTIONNE PLUS DU TOUT.
IMPORTANT:
Pendant les quelques premières minutes de fonctionnement, vous
remarquerez peut-être un peu de fumée et une petite odeur. C'est normal
et elles se dissiperont rapidement.
UTILISATION
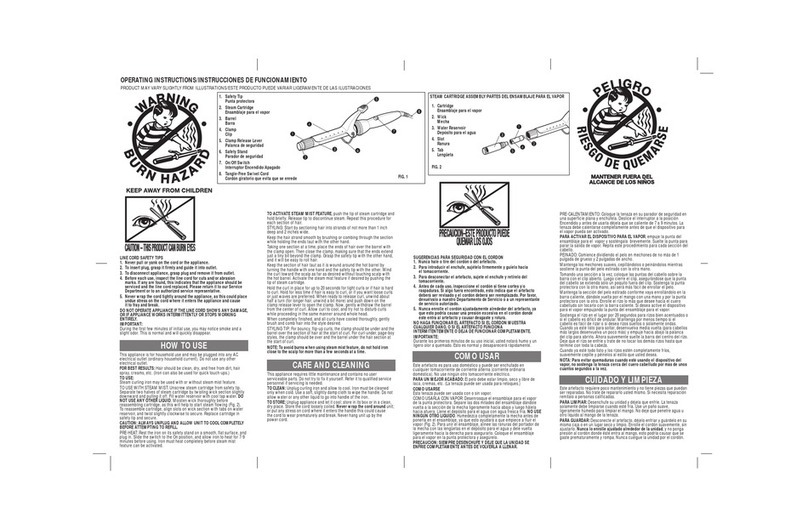
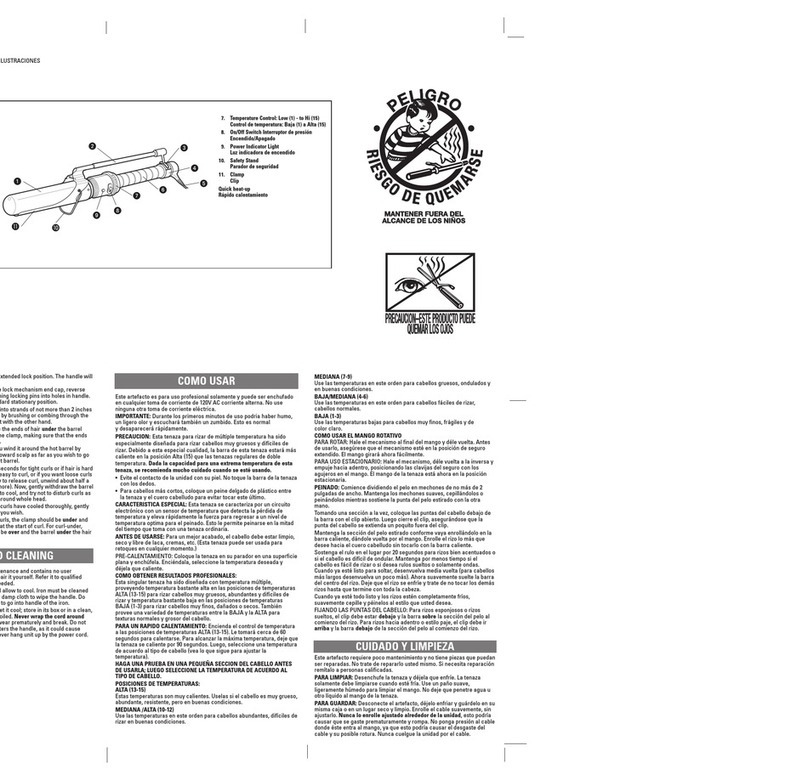
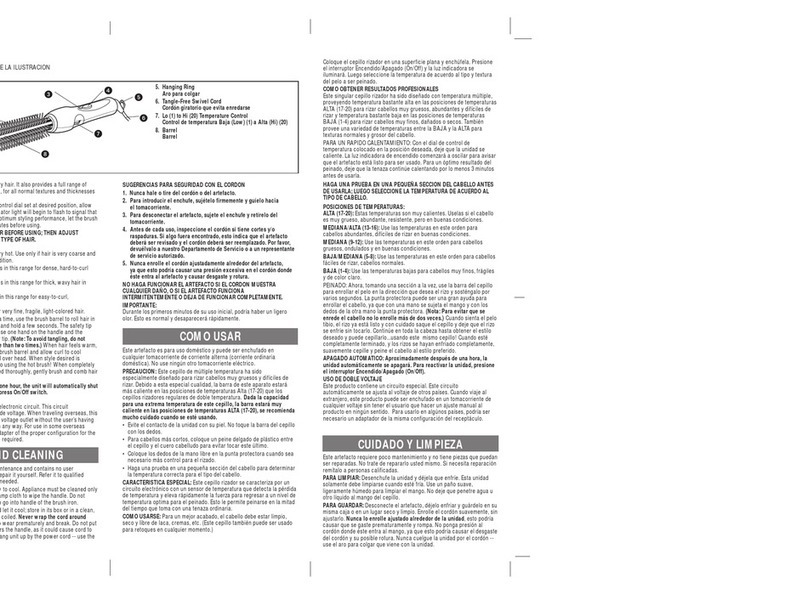
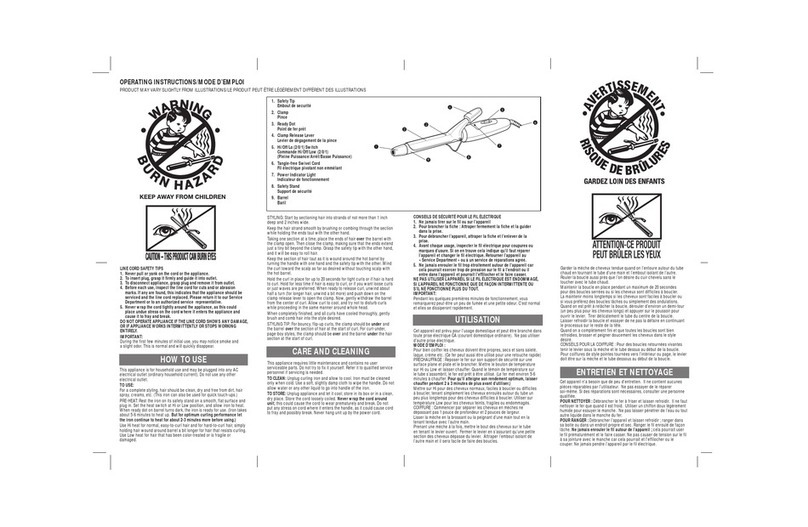
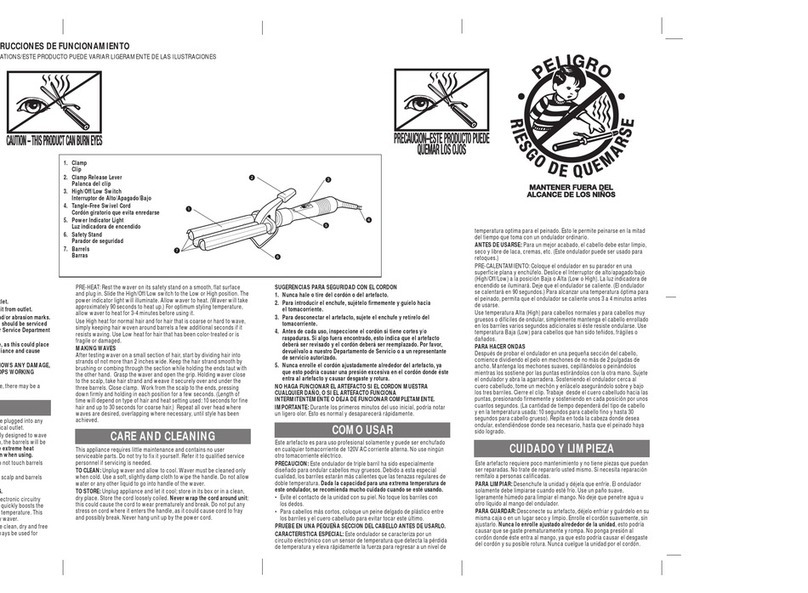
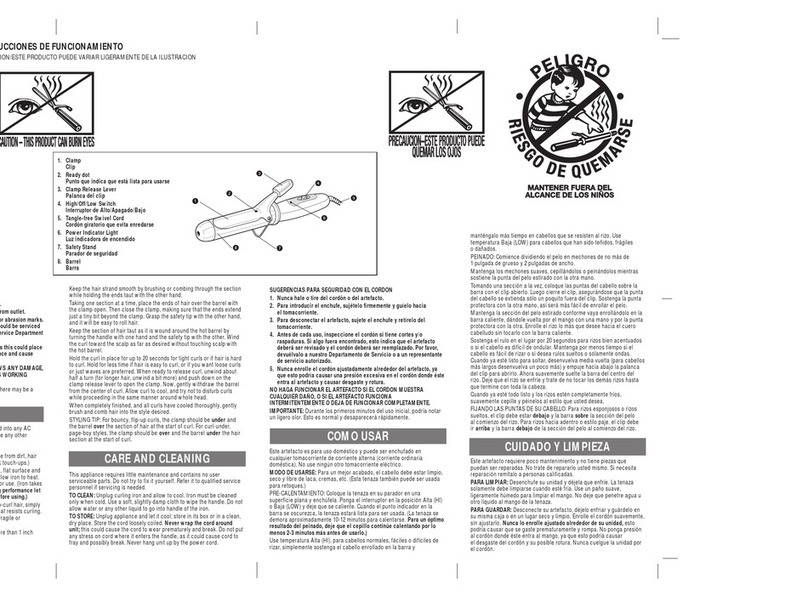
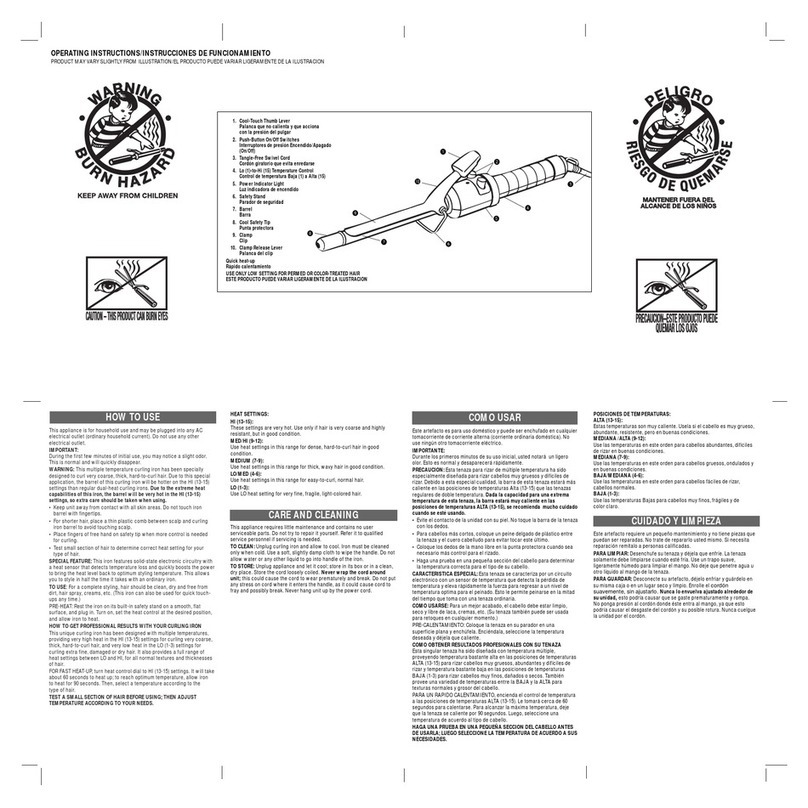
1. Cool Safety Tip
Embout isolant
2. Clamp
Pince
3. Ready Dot
Point de fer prêt
4. Clamp Release Lever
Levier de dégagement de la pince
5. Tangle-free Swivel Cord
Cordon pivotant antitorsion
6. Barrel
Baril
utilisez-le tel que décrit dans ce livret d'instructions. N'utilisez
pas d'accessoires non recommandés par le fabricant.
■N'utilisez pas cet appareil si le cordon ou la fiche est
endommagé ou s'il ne fonctionne pas proprement, s'il a été
échappé ou endommagé d'une façon quelconque ou échappé
dans l'eau. Apportez-le au centre de service le plus proche
pour inspection et réparation ou réglage mécanique.
■Gardez le cordon loin des surfaces chaudes ou chauffées.
N'enroulez pas le cordon autour de l'appareil.
■Ne l'utilisez jamais lorsque vous vous endormez ou si vous
êtes somnolent.
■N'échappez jamais ou n'insérez jamais d'objet dans les
ouvertures.
■Ne l'utilisez pas à l'extérieur ni dans un endroit ou des produits
en aérosol sont utilisés ou dans un endroit où de l'oxygène est
administré.
■Ce fer à friser et la pince sont chauds pendant l'utilisation.
Pour éviter de vous brûler, ne laissez pas vos yeux ou votre
peau nue toucher aux surfaces chauffées.
■Ne placez pas l'appareil chaud ou branché directement sur
une surface.
■N'utilisez pas un cordon de rallonge avec cet appareil.
Lors de l'utilisation d'appareils électriques, surtout à proximité
d'enfants, des mesures de sécurité de base doivent toujours être
suivies, incluant celles qui suivent:
■LISEZ TOUTES LES INSTRUCTIONS AVANT L'UTILISATION.
■GARDEZ L'APPAREIL LOIN DE L'EAU.
DANGER - Comme avec la plupart des appareils électriques, les
pièces sont sous tension même lorsque l'interrupteur
est dans la position d'arrêt.
Pour réduire le danger de choc électrique:
■"Débranchez-le" toujours immédiatement après utilisation.
■Ne l'utilisez pas en prenant un bain.
■Ne mettez pas ou ne rangez pas l'appareil dans un endroit où
il peut tomber ou être tiré dans une baignoire ou un évier.
■Ne le placez pas ou ne l'échappez pas dans l'eau ou autre
liquide.
■Dans le cas où un appareil tomberait dans l'eau,
"débranchez-le" immédiatement. Ne mettez pas vos mains
dans l'eau pour le récupérer.
AVERTISSEMENT - Pour réduire le risque de brûlures,
électrocution, incendie ou blessures
personnelles:
■Ne laissez pas l'appareil sans surveillance lorsqu'il est
branché ou lorsqu'il fonctionne.
■Il faut surveiller de près les enfants ou les invalides lorsque cet
appareil est utilisé par, sur ou près d'eux.
■Cet appareil est destiné à un usage domestique seulement,
■Keep the cord away from hot or heated surfaces. Do not wrap
the cord around the appliance.
■Never use while drowsy or while sleeping.
■Never drop or insert any object into any opening.
■Do not use outdoors or operate where aerosol (spray) products
are being used. Do not operate where oxygen is being
administered.
■This curling iron and clamp are hot when in use. To avoid burn
hazard, do not let eyes and bare skin touch heated surfaces.
■Do not place the heated unit directly on any surface while it is
hot or still plugged in.
■Do not use an extension cord with this appliance.
When using electrical appliances, especially when children are
present, basic safety precautions should always be followed,
including the following:
■READ ALL INSTRUCTIONS BEFORE USING.
■KEEP AWAY FROM WATER.
DANGER - As with most electrical appliances, electrical parts
are electrically live even when the switch is off.
To reduce the risk of death by electrical shock:
■Always "unplug it" immediately after using.
■Do not use while bathing.
■Do not place or store appliance where it can fall or be pulled
into tub or sink.
■Do not place in or drop into water or other liquid.
■If an appliance falls into water, "unplug it" immediately. Do not
reach into the water.
WARNING - To reduce the risk of burns, electrocution, fire,
or injury to persons:
■Do not leave appliance unattended while it is operating or is
plugged in.
■Close supervision is necessary when this appliance is used
by, on, or near children or invalids.
■Use this appliance only for its intended use as described in this
manual. Do not use attachments not recommended by the
manufacturer.
■Never operate this appliance if it has a damaged cord or plug,
if it is not working properly, if it has been dropped or damaged
in any manner or dropped into water. Take appliance to the
nearest service facility for examination and repair or
mechanical adjustment.
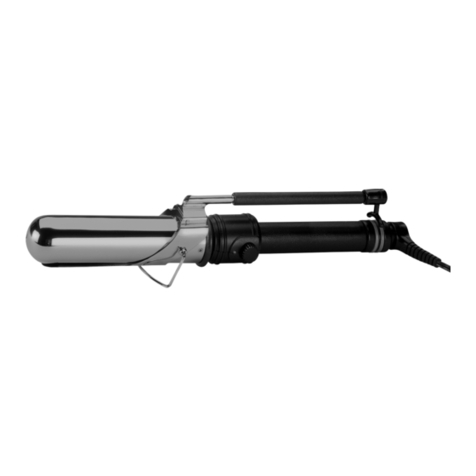
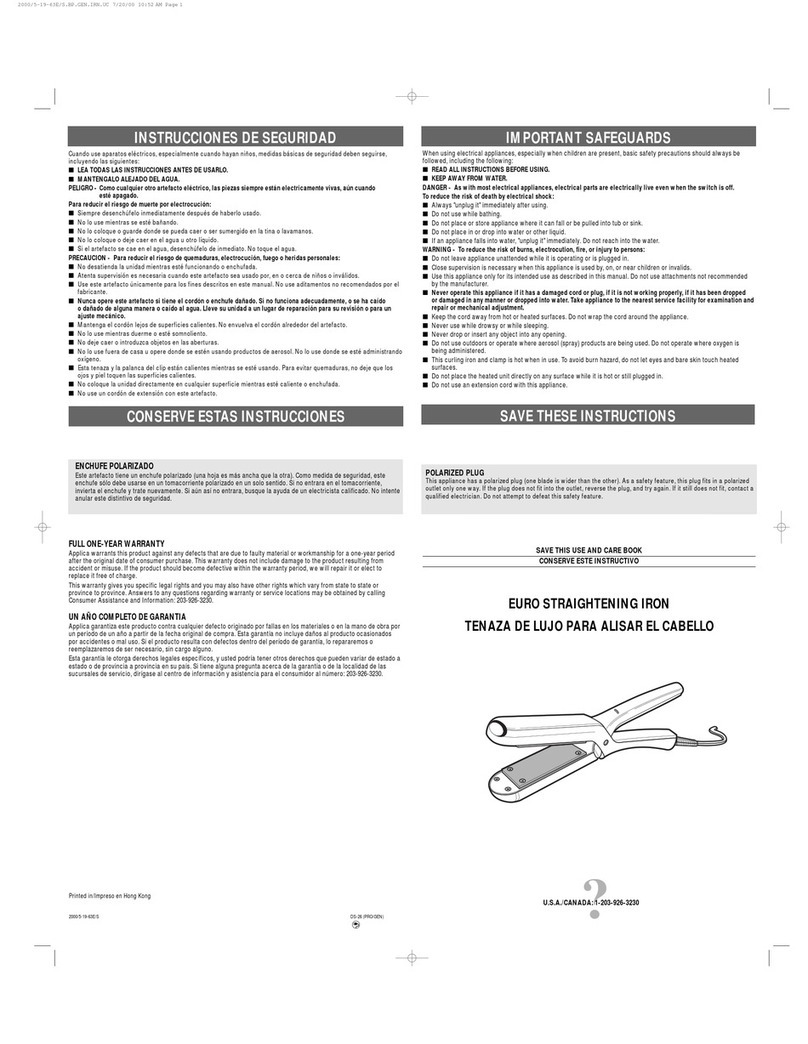
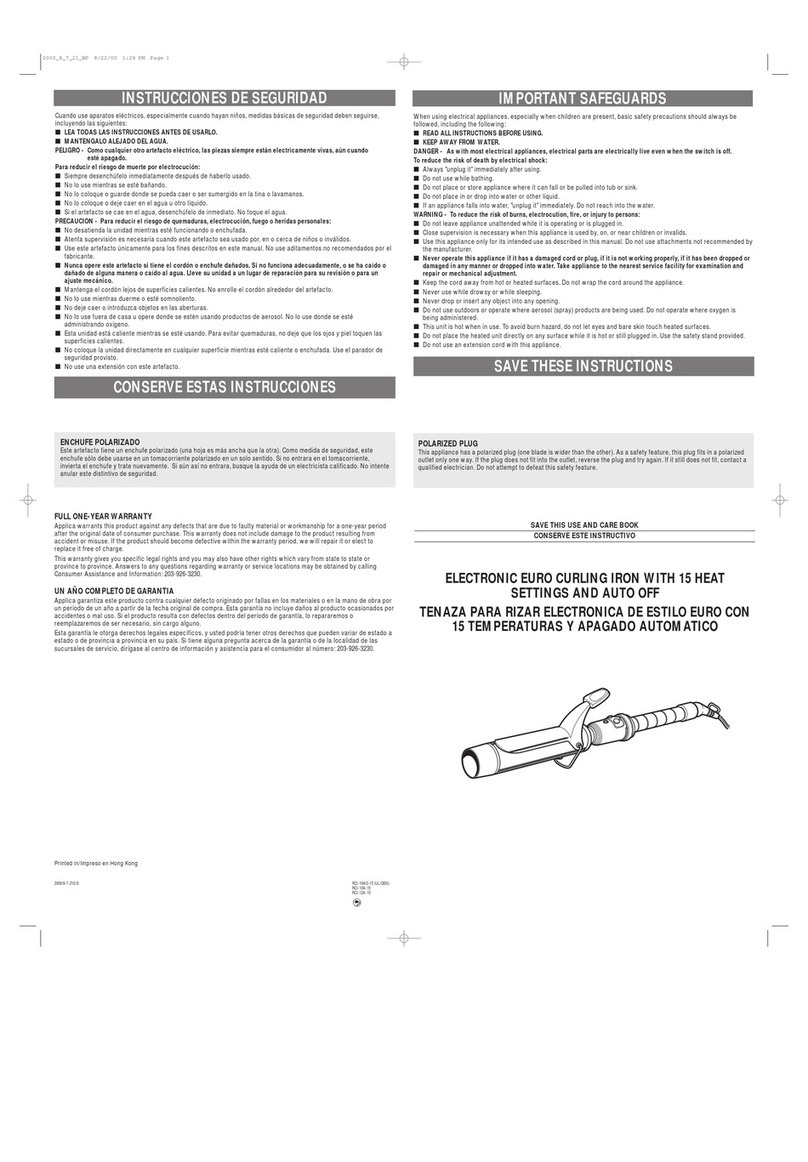
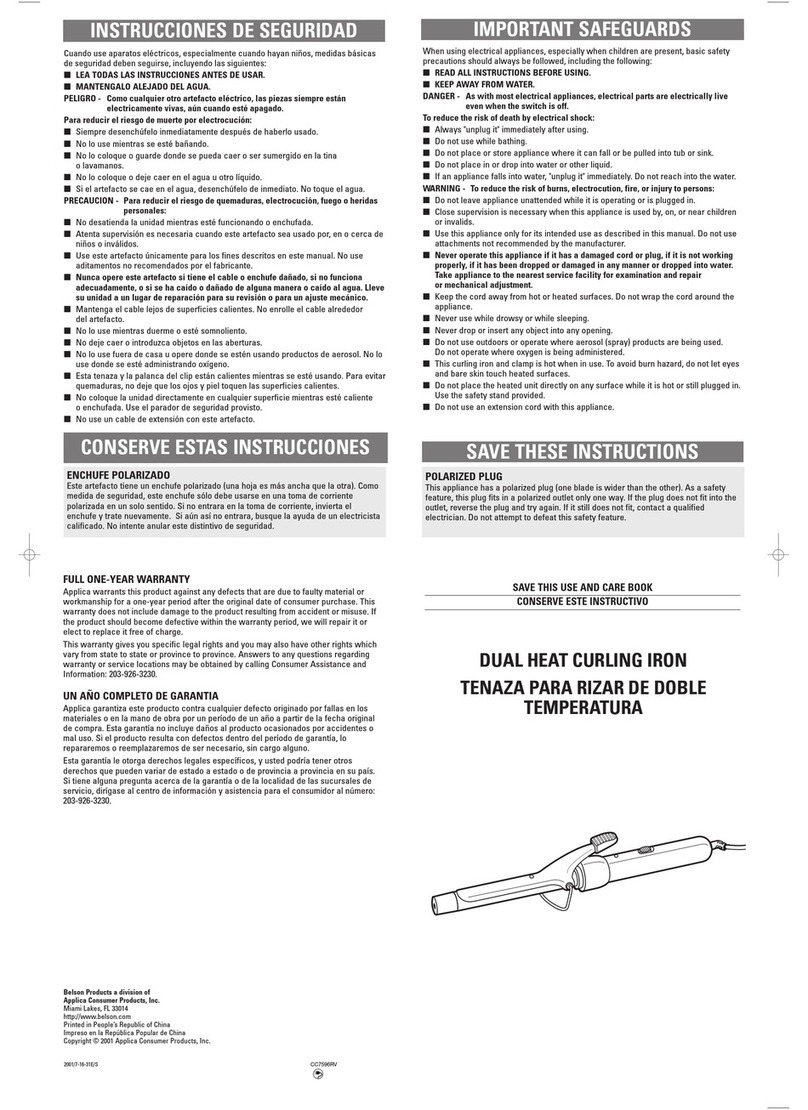
EURO-STYLE CURLING IRON
FER À FRISER GENRE EURO
ONE YEAR LIMITED WARRANTY
This product is warranted to be free from defects in materials and
workmanship for a period of one year from the date of purchase.
IMPORTANT: This warranty does not cover damages resulting
from accident, misuse or abuse, lack of reasonable care, the
affixing of any unauthorized attachments, loss of parts, or
subjecting the appliance to other than the specified voltage.
(Read directions carefully.)
Answers to any questions regarding warranty or service may be
obtained by calling Customer Service toll free: 1-800-557-9463.
SAVE THIS FOR YOUR RECORDS
GARANTIE SOUS RÉSERVE D’UN AN
Ce produit est garanti contre les défauts de matériaux et de
fabrication pour une période d’un an à partir de la date d'achat.
IMPORTANT: Cette garantie ne couvre pas les dommages
découlant d'accidents, d'abus, d'un manque de soins
raisonnables, de l'addition de tout accessoire qui n'est pas fourni
avec le produit, de la perte de pièces ou de l'utilisation de
l'appareil à une tension autre que celle spécifiée. (Lire
attentivement le mode d'emploi.)
Pour toutes questions sur la garantie ou les reparations appeler le
Service Clientele sans frais: 1-800-557-9463.
CONSERVEZ CETTE GARANTIE DANS VOS DOSSIERS
Printed in/Imprimé à Hong Kong
2000/8-25-106E/F C18-I-6C (CAN/SPE)
C18-I-4C
SAVE THIS USE AND CARE BOOK
CONSERVER CE GUIDE D’ENTRETIEN ET D’UTILISATION
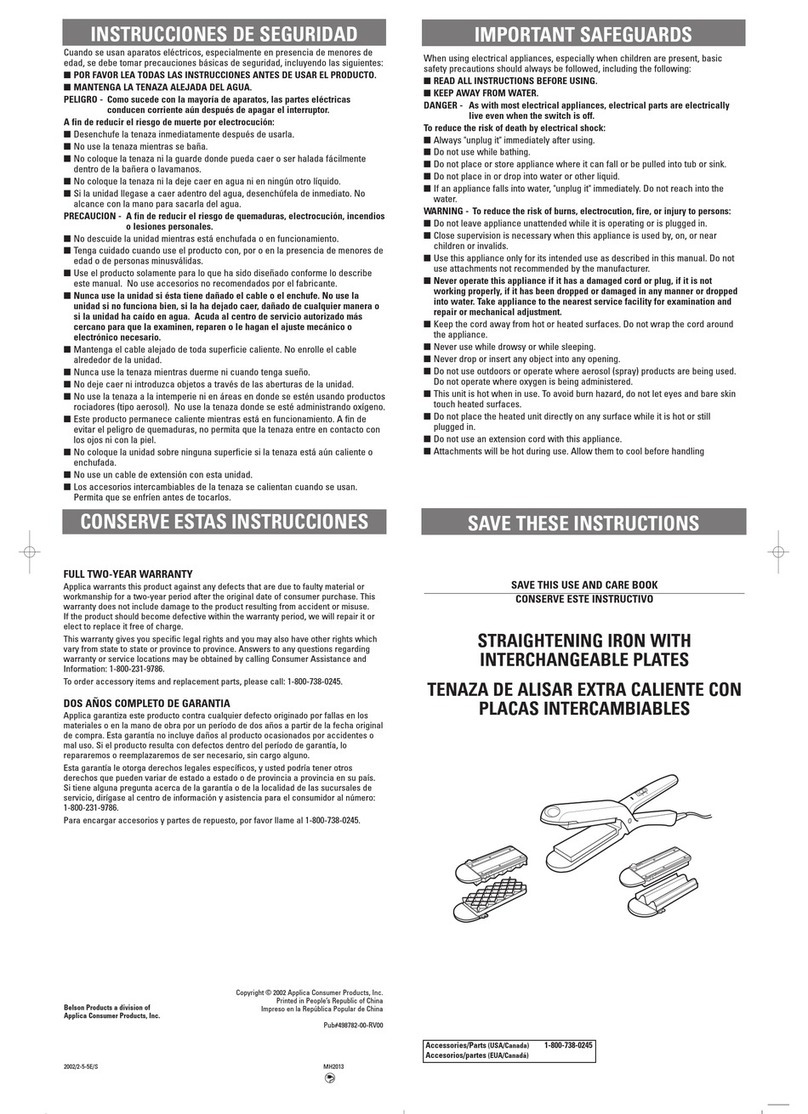
IMPORTANT SAFEGUARDS
SAVE THESE INSTRUCTIONS
POLARIZED PLUG
This appliance has a polarized plug (one blade is wider than the other).
As a safety feature, this plug fits in a polarized outlet only one way. If
the plug does not fit into the outlet, reverse the plug and try again. If it
still does not fit, contact a qualified electrician. Do not attempt to defeat
this safety feature.
FICHE POLARISÉE
Cet appareil est muni d'une fiche polarisée (une lame est plus large
que l'autre). Comme mesure de sécurité, cette fiche peut être insérée
dans une prise de courant polarisée dans un sens seulement. Si elle
n'entre pas dans la prise de courant, inversez la fiche et essayez de
nouveau. Si elle refuse toujours d'entrer, communiquez avec un
électricien compétent. N'essayez pas d'outrepasser cette mesure
de sécurité.
IMPORTANTES MISES
EN GARDE
CONSERVER CES MESURES

This manual suits for next models

1

Other Belson Styling Iron manuals

Belson MH5011 Installation instructions

Belson

Belson MH5011 Installation instructions

Belson DS-629S Installation instructions

Belson

Belson DS-629S Installation instructions

Belson MH2013 Installation instructions

Belson

Belson MH2013 Installation instructions

Belson C23-I-4 Installation instructions

Belson

Belson C23-I-4 Installation instructions

Belson C11-10 Installation instructions

Belson

Belson C11-10 Installation instructions

Belson MH5003 Installation instructions

Belson

Belson MH5003 Installation instructions

Belson PR2006 Installation instructions

Belson

Belson PR2006 Installation instructions

Belson C-11-12N Installation instructions

Belson

Belson C-11-12N Installation instructions

Belson C-28-B-6 User manual

Belson

Belson C-28-B-6 User manual

Belson DS-26 Installation instructions

Belson

Belson DS-26 Installation instructions

Belson DS-78 Installation instructions

Belson

Belson DS-78 Installation instructions

Belson CT-04M Installation instructions

Belson

Belson CT-04M Installation instructions

Belson CM2012 Installation instructions

Belson

Belson CM2012 Installation instructions

Belson TS-10F-1 Installation instructions

Belson

Belson TS-10F-1 Installation instructions

Belson RCI-10A-15 Installation instructions

Belson

Belson RCI-10A-15 Installation instructions

Belson C21-I-3 Installation instructions

Belson

Belson C21-I-3 Installation instructions

Belson C-335A Installation instructions

Belson

Belson C-335A Installation instructions

Belson C-328WS Installation instructions

Belson

Belson C-328WS Installation instructions

Belson C-328W Installation instructions

Belson

Belson C-328W Installation instructions

Belson C22-I-12 Installation instructions

Belson

Belson C22-I-12 Installation instructions

Belson CM2008 Installation instructions

Belson

Belson CM2008 Installation instructions

Belson CC7596RV Installation instructions

Belson

Belson CC7596RV Installation instructions

Belson RCI-4-15 Installation instructions

Belson

Belson RCI-4-15 Installation instructions

Belson C-28-1-4 Installation instructions

Belson

Belson C-28-1-4 Installation instructions

Popular Styling Iron manuals by other brands

Sinbo SHD 7027 instruction manual

Sinbo

Sinbo SHD 7027 instruction manual

Johnson Kono 18/25 Instructions for use

Johnson

Johnson Kono 18/25 Instructions for use

ARESA AR-3319 instruction manual

ARESA

ARESA AR-3319 instruction manual

Sharper Image CA898 instructions

Sharper Image

Sharper Image CA898 instructions

Carmen RB7700 manual

Carmen

Carmen RB7700 manual

HOME ELEMENT HE-HB410 user manual

HOME ELEMENT

HOME ELEMENT HE-HB410 user manual

VS Sassoon ELEGANCE SALON CURLS Instruction booklet

VS Sassoon

VS Sassoon ELEGANCE SALON CURLS Instruction booklet

Zelmer HS1400 user manual

Zelmer

Zelmer HS1400 user manual

APRILIA AHS 2045 instruction manual

APRILIA

APRILIA AHS 2045 instruction manual

Bosch PHS 7961GB instruction manual

Bosch

Bosch PHS 7961GB instruction manual

Rohnson HM-4018 instruction manual

Rohnson

Rohnson HM-4018 instruction manual

Melissa 16650098 user manual

Melissa

Melissa 16650098 user manual

Living & Co CL-HS612F instruction manual

Living & Co

Living & Co CL-HS612F instruction manual

BaByliss PRO NANO 200 manual

BaByliss

BaByliss PRO NANO 200 manual

Remington ShineTherapy S-9950 manual

Remington

Remington ShineTherapy S-9950 manual

Vitek VT-8295 Manual instruction

Vitek

Vitek VT-8295 Manual instruction

VS Sassoon CURL SECRET MULTI CURL VSP1300A user manual

VS Sassoon

VS Sassoon CURL SECRET MULTI CURL VSP1300A user manual

Profi Care PC-LW 3028 instruction manual

Profi Care

Profi Care PC-LW 3028 instruction manual

manuals.online logo
manuals.online logoBrands
  • About & Mission
  • Contact us
  • Privacy Policy
  • Terms and Conditions

Copyright 2025 Manuals.Online. All Rights Reserved.