benbat NIGHT&DAY Car Mirror User manual

KEEP FOR FUTURE REFERNCE
BM721-723
- Prevent strangulation or entanglement.
- Never place in or attach to a crib.
- Never add strings or ties to the product.
- Never leave child unattended.
- Inside car temperature can rise rapidly and create a safety hazard.
Children have died when left unattended inside vehicles.
- Do not attach to vehicle’s tether anchor if child safety seat is installed with the same tether anchor.
- KEEP MIRROR OUT OF BABY’S REACH AND DIRECT SUNLIGHT.
- Always follow car seat manufacturer’s directions for correct installation and position of child safety seat.
- Do not operate while driving.
- Always verify that the mirror is properly secured. Check frequently.
- Discard and replace if damaged.
- Do not mix old and new batteries
- Do not mix alkaline, standard (carbon-zinc), or rechargeable batteries.
- Do not charge non-rechargeable batteries.
- Insert batteries in the correct polarity position.
- Do not short circuit battery terminals.
- Remove batteries during long periods of non-use. Always remove exhausted batteries from product.
Dispose of batteries properly.
- Use caution when opening battery compartment as some batteries may leak, explode or catch on fire.
- Rechargeable batteries are to be removed before being charged.
- Rechargeable batteries are only to be charged under adult supervision.
- Do not submerge in water or other liquids.
WARNING!
FCC INFORMATION:
The device complies with part 15 of the FCC Rules. Operation is subject to the following two conditions:
(1) this device may not cause harmful interference, and (2) This device must accept any interference received,
including interference that may cause undesired operation.
WARNING!: change or modifications to this unit not expressly approved by the part responsible for compliance
could void the user’s authority to operate the equipment.
Note: this equipment has been tested and found to comply with the limits for a Class B digital device, pursuant
to part 15 of the FCC Rules. These limits are designed to provide reasonable protection against harmful
interference in a residential installation. This equipment generates, uses and radiate radio frequency energy
and if not installed and used in accordance with the instructions, may cause harmful interference to radio
communications. However, there is no guarantee that interference will not occur in a particular installation. If this
equipment does cause harmful interference to radio or television reception, which can be determined by turning
the equipment off and on, the user is encouraged to try to connect the interference by one or more of the
following measures:
- Reorient or relocate the receiving antenna
- Increase the separation between the equipment and receiver. Connect the equipment into an outlet on a circuit
different from that to which the receiver is connected.
- Consult the dealer or an experience radio/TV technician for help.
This CLASS(B) DIGITAL APPARATUS complies with CANDIAN ICES-3(B) NMB-3(B)
BATTERY SAFETY
INFORMATION
N&D_IM_EN_V01
INSTRUCTIONS FOR USE
EN

BACKSEAT HEADREST
A. Insert strap underneath headrest and place mirror downwards
facing your child’s rear car seat.
B. Lock strap buckle and tighten the strap over the headrest.
C1,C2,C3. Adjust mirror to needed angle so you can see your child
in the car’s rearview mirror.
For optimal positioning, use the adjustable back legs if required
(depending on your car headrest design) .
FRONTSEAT HEADREST
Note: use to attach the mirror to the backside of front passenger or
driver seat for entertaining forward facing kids only. Follow steps A
to C1,C2 and check that your child can see themselves in the mirror.
1.5V x 2
“AAA” (LR03)
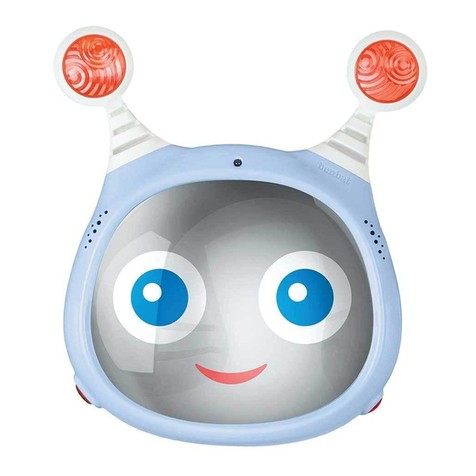
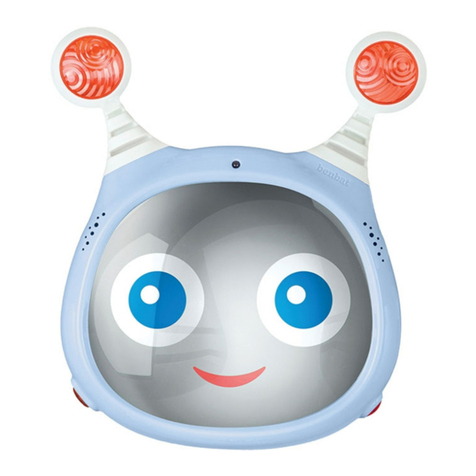
MIRROR
a. Remote Receiver
b. Mirror
c. ON\OFF Switch
d. Adjustable Strap
e. Battery Compartment
f. Adjustable Back Legs
a
b
c
d
e
gh
k
f
ij
REMOTE CONTROL
g. Soothing Mode
h. Entertainment Mode
i. Volume Button
j. Illumination Button
k. Remote Trasmitter
l. Battery Compartment
USING THE MIRROR
SOOTHING MODE (5 MELODIES)
ENTERTAINMENT MODE (5 MELODIES)
1. Move the ON/OFF button on the back of the mirror to the ON position.
NOTE: While the switch is in the OFF position, none of the mirror’s functions can be activated.
2. Select your preferred Mode:
NOTE: While the switch in in the ON position, without choosing a mode via remote control, none of the mirror’s
functions will be activated.
Press on the remote control to activate
Entertainment Mode. Press again to stop.
Press on the remote control to activate
Soothing Mode. Press again to stop.
NOTE: for Optimal performance of the remote control, make sure the remote has an unobstructed view of the mirror.
AUTO-STOP: mirror will stop automatically after 15 minutes in all modes. press the
same button again to restart, or press another button to activate a different mode.
TOTAL SHUT-OFF: move the ON/OFF switch on the back of the mirror to the OFF position to turn all the mirror’s functions OFF.
CLEANING
Wipe mirror & plastic body with damp cloth.
Do not apply water directly on the mirror
LIGHT
VOLUME
Press button to alternate between
3 volume levels: Medium, Mute & High.
Press button to alternate between
3 illumination levels: Medium, Off & High
C2
C1C3
AB
1.5V x 3
“AA” (LR6)
BATTERY INSTALLATION*
* Not included
MIRROR:
1. Unscrew the battery compartment door using a Phillips screwdriver.
2. Insert 3 new ‘AA’ batteries. Ensure correct polarity.
3. Close the compartment door and tighten the screw.
Note: the mirror battery usage is higher than the remote controls and
you may need to replace it more often.
REMOTE CONTROL:
1. Unscrew the battery compartment door using a Phillips screwdriver.
2. Insert 2 new ‘AAA’ batteries. Ensure correct polarity.
3. Close the compartment door and tighten the screw.
Note: in case the mirror does not respond, check if the batteries are placed correctly.
ATTACHING THE MIRROR *
l
* Please remove protective film from mirror for clear view
C3

FR
A CONSERVER POUR UN USAGE ULTÉRIEUR
BM721-723
- Prévenez l'étranglement ou l'enchevêtrement.
- Ne jamais placer ou attacher à un berceau.
- Ne jamais ajouter de cordes ou d'attaches au produit.
- Ne jamais laisser l'enfant sans surveillance.
- La température à l'intérieur de la voiture peut augmenter rapidement et créer un danger pour la sécurité.
- DES ENFANTS ONT PERDU LA VIE EN RESTANT SANS SURVEILLANCE DANS DES VÉHICULES.
- Ne pas fixer ce produit à l'ancrage d'attache du véhicule si le siège d'auto pour enfants est déjà installé
avec ce même ancrage.
- Suivez toujours les instructions du fabricant pour installer et positionner correctement le siège d'auto.
- Ne pas manipuler en conduisant.
- Toujours vérifier que le miroir est correctement sécurisé. Vérifiez fréquemment!
- Jeter et remplacer si endommagé.
- Ne pas mélanger des anciennes et nouvelles piles.
- Ne mélangez pas des piles alcalines, standard (carbone-zinc) ou rechargeables.
- Ne pas charger des piles non-rechargeables.
- Insérez les piles en respectant la polarité.
- Ne jamais court-circuiter la borne des piles.
- Retirez les piles si vous n'utilisez pas le produit pendant un long moment.
Toujours enlever les piles épuisées du produit.
- Jeter les piles de façon sécuritaire.
- Soyez prudent lorsque vous ouvrez le compartiment des piles car certaines piles peuvent fuir,
exploser ou prendre feu.
- Les piles rechargeables doivent être enlevées avant d'être chargées.
- Si des piles rechargeables sont utilisées, toujours les recharger sous la supervision d'un adulte.
- Ne pas plonger dans l'eau ou dans d'autres liquides.
ATTENTION!
FCC INFORMATION:
L'appareil est conforme à la section 15 de la réglementation de la FCC. Le fonctionnement est soumis aux deux
conditions suivantes:
(1) cet appareil ne doit pas causer d'interférences nuisibles, et (2) Cet appareil doit accepter toutes les
interférences reçues, y compris celles susceptibles de provoquer un fonctionnement indésirable.
AVERTISSEMENT!: Toute modification ou changement apporté à cet appareil non expressément approuvée par
la partie responsable de la conformité pourrait annuler l'autorité de l'utilisateur à utiliser l'équipement.
Remarque: Cet équipement a été testé et déclaré conforme aux limites imposées aux appareils numériques de
classe B, définies à la section 15 du règlement de la FCC. Ces limites sont conçues pour fournir une protection
raisonnable contre les interférences nuisibles dans une installation résidentielle. Cet équipement génère, utilise
et émet de l'énergie radiofréquence et, s'il n'est pas installé et utilisé conformément aux instructions, peut
causer des interférences nuisibles aux communications radio. Cependant, rien ne garantit que des
interférences ne se produiront pas dans une installation particulière. Si cet équipement provoque des
interférences nuisibles avec la réception de radio ou de télévision, ce qui peut être déterminé en éteignant et en
rallumant l'équipement, l'utilisateur est invité à essayer de connecter l'interférence en appliquant l'une ou
plusieurs des mesures suivantes:
- Réorienter ou déplacer l'antenne de réception
- Augmentez la distance entre l'équipement et le récepteur. Connectez l’équipement à une prise d’un circuit
différent de celui auquel le récepteur est connecté.
- Consultez le revendeur ou un technicien radio / télévision expérimenté pour obtenir de l'aide.
Cet appareil numérique de classe (B) est conforme aux normes CANADIENNES ICES-3 (B) NMB-3 (B).
INFORMATION
DE SÉCURITÉ SUR
LES PILES
N&D_IM_EN_V01
MANUEL D'INSTRUCTIONS
Fabriqué à WF DONGGUAN, CHINE
JOUR NUIT
&
Miroir de voiture

APPUI-TÊTE DE SIÈGE ARRIÈRE
A. Passer la sangle sous l'appui-tête et placez le miroir vers le bas
face au siège arrière de votre enfant.
B. Fermer la boucle et ajustez les sangles à l'appui tête.
(Voir dessins C1, C2, C3). Ajuster le miroir à l'angle désirez afin de
voir votre enfant dans le rétroviseur.
Pour un positionnement optimal, utilisez les jambes ajustables si
nécessaire (Cela dépend du design de votre appui-tête).
APPUI-TÊTE DE SIÈGE AVANT
Note: utilisez pour seulement divertir l'enfant, le miroir peut être
attaché au siège avant du passager ou au siège du conducteur.
Suivez les étapes de A à C et vérifiez que votre enfant se voit dans le
miroir.
1.5V x 2
“AAA” (LR03)
MIROIR:
a. Émetteur de la télécommande
b. Miroir
c. Bouton marche/arrêt
d. Sangle ajustable
e. Compartiment des piles
f. Pieds arrières ajustables
a
b
c
d
e
gh
k
f
ij
TÉLÉCOMMANDE
g. Mode apaisant
h. Mode divertissement
i. Bouton du volume
j. Bouton d'éclairage
k. Émetteur de la télécommande
l. Compartiment des piles
UTILISATION DU MIROIR
MODE APAISANT (5 MÈLODIES)
MODE DIVERTISSEMENT (5 MÈLODIES)
1. Mettre le bouton marche/arrêt qui se trouve au dos du miroir sur marche pour démarrer le miroir.
REMARQUE: Lorsque l’interrupteur est en position Arrêt, aucune des fonctions du miroir ne peut être activée.
2. Sélectionnez votre mode préféré:
REMARQUE: Lorsque l’interrupteur est en position Marche, sans choisir de mode via la télécommande,
aucune des fonctions du miroir ne sera activée.
Appuyez sur la télécommande pour activer l
e Mode Divertissement. Appuyez à nouveau
pour arrêter.
Appuyez sur la télécommande pour activer
le Mode Apaisant. Appuyez à nouveau pour arrêter.
REMARQUE: Pour une performance optimale de la télécommande, assurez-vous qu'elle ai une vue non obstruée du miroir.
ARRÊT AUTOMATIQUE: Le miroir s’arrête automatiquement après 15 minutes dans tous les modes. Appuyez à nouveau sur le même
bouton pour redémarrer, ou appuyez sur un autre bouton pour activer un autre mode.
ARRÊT TOTAL: Placez l’interrupteur MARCHE / ARRÊT situé à l’arrière du miroir sur la position ARRÊT pour désactiver toutes ces fonctions.
Instructions de nettoyage:
Essuyer le miroir et le corps en plastique avec
un chiffon humide.
Ne pas appliquer d'eau directement sur le miroir
Éclairage
VOLUME
Appuyez sur le bouton pour alterner entre 3
niveaux de volume: Moyen, Muet et Haut.
Appuyez sur le bouton pour alterner entre
3 niveaux d'éclairage: Moyen, Éteint et Élevé
C2
C1
AB
1.5V x 3
“AA” (LR6)
INSTALLATION DES PILES
*Piles non incluses
MIROIR:
1. Dévisser le compartiment des piles en utilisant un tournevis Phillips.
2. Insérer 3 nouvelles piles ‘AA’. Respectez la polarité.
3. Refermer le compartiment des piles et serrez la vis.
Note: Les piles du miroir étant plus utilisés que celle de la
télécommande nécessiteront d'être changé plus souvent.
TÉLÉCOMMANDE:
1. Dévisser le compartiment des piles en utilisant un tournevis Phillips.
2. Insérer 2 nouvelles piles ‘AAA’. Respectez la polarité.
3. Refermer le compartiment des piles et serrez la vis.
Note: Dans le cas ou le miroir ne fonctionne pas, vérifiez que les piles soient placées
correctement.
ATTACHEZ LE MIROIR *
l
C3
* Please remove protective film from mirror for clear view
C3

SP


PT


PL
C
M
Y
CM
MY
CY
CMY
K

C
M
Y
CM
MY
CY
CMY
K

!בושח עדימ ליכמ אוה - ידיתע שומישל תוארוהה ןולע לע ורמיש אנא
BM721-723
הבכרהו שומיש תוארוה
CE( )
ASTM( )
!תוריהז
.תוכבתסה וא קנח עונמל שי•
.הסירע ךותב רצומה תא םישל וא רבחל ןיא •
.רצומל םיטוח רבחל וא ףיסוהל ןיא •
.החגשה אלל דלי ריאשהל ןיא •
.הנכס תווהלו תוריהמב תולעל הלוכי בכרה םינפ תרוטרפמט •
.החגשה אלל בכר ךותב וראשוה רשאכ םתומ תא ואצמ םידלי
.הרישק ןגוע ותואל רבוחמ תוחיטבה אסכ םא בכרב הרישקה ןגועל רבחל ןיא •
.הרישי שמשלו ךקונית לש ודי גשיהל ץוחמ הארמה לע רומש שי •
.ךדלי לש תוחיטבה אסכ ןרצי לש הנקתהה תוארוה עוציב לע דפקה •
.הגיהנה תעב הארמה תא ליעפהל ןיא •
.תופוכת םיתיעל קודב .דימת בטיה תחטבואמ הארמה יכ אדוול שי •
.םוגפ רצומה םא ףילחהלו ךילשהל שי •
.רגובמ י"ע השעת תוללוסה תפלחה
.טלשלו הארמל קזנו תויווכל םורגל יושע רוע םע עגמבש ימיכ לזונ שירפהל תוללע תוללוסה םירידנ םירקמב
:הז בצממ ענמיהל תנמ לע
.םינוש םיגוסמ תונשיו תושדח תוללוס בברעל ןיא •
.תונעטנ וא (קניז-ןוברק) תויטרדנטס ,(ןיילקלא) תונעטנ אל תוללוס בברעל ןיא •
.תונעטנ ןניאש תוללוס ןיעטהל ןיא •
.הנוכנה תויבטוקה יפ לע תוללוסה תיבל תוללוסה תא סינכהל ודיפקה •
.תוללוסה תיב יעגמ תא רצקל ןיא •
.בר ןמז שומישב וניאש וא רצומה תא םינסחאמ םתא רשאכ טלשהו הארמהמ תוללוסה תא ואיצוה •
.רוזחימל תושמושמה תוללוסה תא וריבעה •
.םניעטהל תנמ לע רצומה ןמ תונעטנ תוללוס איצוהל שי •
.רגובמ י"ע קרו ךא ושעי תונעטנ תוללוס לש הנעטה •
.הז ןולעב תוללוסה תסנכה תוארוה לע ודיפקה •
.הז ןולעב תוצלוממה תוללוסב ושמתשה •
תוארוה
תוחיטב
תוללוסל
טלש םע בכרל הקיזומו תורוא םע תינורטקלא הארמ
www.ben-bat.com
מ“עב תבנב :ןאובי/ןרצי
6099000 םייפש 20.ד.ת
יבייב לבולג :הצפהו קווש
09-9588874 :תוחוקל תורש
ןומיר תג ,51 תונליא
www.babyboss.biz
ןיס :רוציי ץרא

םירויא ואר) ךרוצה תדימב םיפסונ םינוויכל הארמה
.העיגר תוליעפ בצמ תלעפהל טלשב לע ץחל
.רוצעל ידכב בוש ץחל
1.5V x 2
“AAA” (LR03)
a
b
c
d
e
gh
k
f
ij
C2C1
C3
A
B
1.5V x 3
“AA” (LR6)
l
C3
.תוערפה אללו רישי הארמל טלשה ןיב רשקה יכ אדו ,טלשה לש םייבטימ םיעוציב תלבקל :בל םיש
.תוליעפ בצמ לכב תוקד 15 רחאל תיטמוטוא רוצעת הארמה :תיטמוטוא הריצע
.שדחמ ליעפהל ידכב היוצרה תוליעפה ןצחל לע ץוחלל שי
.ןיטולחל רצומה תא תובכל ידכב OFF בצמל רצומה בגב הלעפהה ןצחל תא ריבעהל שי :טלחומ יוביכ
תנעשמ לא העוצרה תא וקדהו העוצרה יקלח ינש תא ולענ
תא ונווכו גהנה תארמ ךרד הארמה תא םיאור םתא יכ ואדו
הארמב שומיש
*הארמה תנקתה
.ON בצמל הארמה לש ירוחאה קלחב הלעפהה ןצחל תא רבעה .1
.הארמה לש היצקנופ ףא ליעפהל ןתינ אל ,OFF בצמב אצמנ הלעפהה ןצחל רשאכ :בל םיש
:יוצרה תוליעפה בצמ תא רחב .2
.לעפת אל הארמה לש היצקנופ ףא ,טלשה י"ע תוליעפ בצמ לש הריחב אלל ,ON בצמב אצמנ הלעפהה ןצחל רשאכ :בל םיש
יוקינ תוארוה
הלש קיטסלפה יקלחו הארמה בוגינ
.החל תילטמ תועצמאב
.הארמה לע תורישי םימ ךופשל ןיא
תוללוסה תנקתה הארמטלש
.רודיב תוליעפ בצמ תלעפהל טלשב לע ץחל
.רוצעל ידכב בוש ץחל
עמשה תמצוע תומר 3 ןיב רובעל ידכב לע ץחל
.הובג ,קתשה ,ינוניב :תוירשפאה
הרואתה תמצוע תומר 3 ןיב רובעל ידכב לע ץחל
.הובג ,יובכ ,ינוניב :תוירשפאה
(תוידולמ 5) רודיב – תוליעפ בצמ
עמש תמצועהרואת תמצוע
(תוידולמ 5) העיגר – תוליעפ בצמ
טלשה טלקמ
הארמ
ON\OFF – הלעפה ןצחל
רוביח תעוצר
תוללוס תיב
תוירוחא ןוויכ תוילגר
העיגר - תוליעפ בצמ
רודיב - תוליעפ בצמ
עמש תמצוע ןצחל
הרואת תמצוע ןצחל
טלשה רדשמ
תוללוס תיב
.a
.b
.c
.d
.e
.f
.g
.h
.i
.j
.k
.l
:הארמה רובע
.ספיליפ גרבמב שומיש י"ע תוללוסה תיב תלד תא הצוחה וגירבה
.הנוכנ תויבטוק לע ודיפקה .AA גוסמ תושדח תוללוס 3 וסינכה
.םיגרבה תא וקזחו תוללוסה תיב הסכמ תא ורגיס
:בל םיש
תוללוסה תא ףילחהל וצלאתש ךכ טלשבש וזמ רתוי ההובג הארמב תוללוסה תכירצ
.רתוי רידת ןפואב
:טלשה רובע
.ספיליפ גרבמב שומיש י"ע תוללוסה תיב תלד תא הצוחה וגירבה .1
.הנוכנ תויבטוק לע ודיפקה .AAA גוסמ תושדח תוללוס 2 וסינכה .2
.םיגרבה תא וקזחו תוללוסה תיב הסכמ תא ורגיס .3
:בל םיש
הנוכנ תויבטוקב וסנכוה תוללוסה םא וקדיב אנא ,טלשל הביגמ הניא הארמהו הדימב
.תוערפה אללו רישי רשק שי הארמהו טלשלשו
:בכרב ירוחאה אסכה לש שאר תנעשמל הארמה רוביח
A–
–
–
.בכרה לש שארה ןגמל תחתמ העוצרה תא וריבעה
.העיסנה ןוויכ דגנכ אצמנ רשא םכדלי אסכ יפלכ
B
C
C1, C2 ,C3
.(
שאר תנעשמל הארמה רוביח :בכרב ימדקה אסכה לש
גהנה דיל ימדק אסכל הארמה רוביח רובע שמשמ.העיסנה ןוויכםע וינפשכ בשויה ךכדלי עושעשל דעוימו ירוחא אסכל וא
םיבלש רחא ובקעAדעוC.הארמב ומצע תא תוארל לוכי םכדלי יכ וקדבו
הטמ הארמה תא ונפה
.הדימה לע רתי קדהל ןיא ,אסכה
בגבש היטהה תוילגרב ושמתשה .ךרוצה תדימב הארמ
רורב הארמ תלבקל הארמהמ הפוקשה הקבדמה תא רסה אנא*

KO

This manual suits for next models
2
Table of contents
Languages:
Other benbat Automobile Accessories manuals
Popular Automobile Accessories manuals by other brands
Raptor Series
Raptor Series MAGNUM RT GTS65TY manual
Whelen Engineering Company
Whelen Engineering Company ION installation guide

DV8 OFFROAD
DV8 OFFROAD FDBR-01 Product installation manual
Menabo
Menabo PROFESSIONAL AIRDYN E Fitting instructions
Brink
Brink 4767 Fitting instructions
KEKO
KEKO KC244GR installation guide
