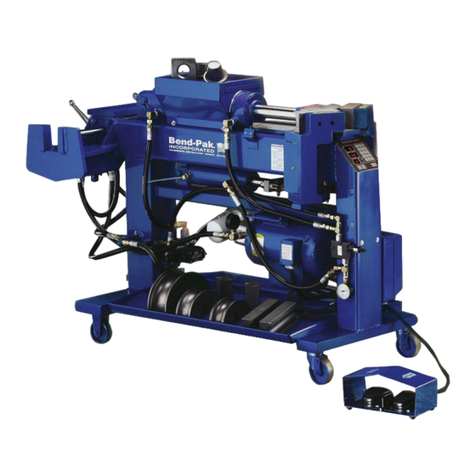
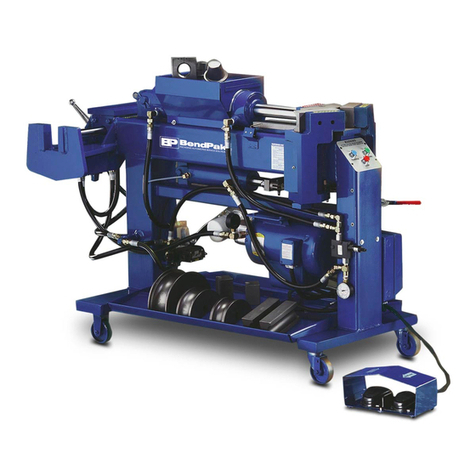
Bend-Pak BB 1302-BA Operation manual

OPERATION AND SERVICE MANUAL
“America’s Most Popular Tubing Bender”
MODELS:
BB (“Blue Bullet”)
1302-BAS 1302-BA
Model 1302-BA
shown.
SHIPPING DAMAGE CLAIMS
When this equipment is shipped, title passes to the
purchaser upon receipt from the carrier. Consequently,
claims for material damaged in shipment must be made by
the purchaser against the transportation company at the
time shipment is received.
BE SAFE
BendPak, Inc. Benders are designed and built with safety
in mind. However, your overall safety can be increased by
proper training and thoughtful operation on the part of the
operator. DO NOT operate or repair this equipment without
reading this manual and the important safety instructions
shown inside.
1645 Lemonwood Dr.
Santa Paula, CA. 93060, USA
Toll Free 1-800-253-2363
Tel: 1-805-933-9970
www.bendpak.com
Please read the entire contents of this manual prior to using the product.
Failure to follow the instructions and safety precautions in this manual
can result in serious injury or death. Make sure all other operators also read
this manual. Keep the manual near the product for future reference. By
proceeding with operation, you agree that you fully understand the
contents of this manual and assume full responsibility product use.
P/N# 5900103 Rev. D2 - June 2021
Keep this operation manual near the
machine at all times. Make sure that ALL
USERS read this manual .
©2021 by BendPak Inc. All rights reserved.

TABLE OF CONTENTS
Identification Data / Warranty.....................................................................................................................................3
Specifications .............................................................................................................................................................4
Important Safety Instructions......................................................................................................................................5
Definition Of Terms / Model Identification ..................................................................................................................6
Installing The Electrical Plug......................................................................................................................................7
Turning Your New Bender On ....................................................................................................................................8
Introduction Of Tooling Identification..........................................................................................................................8
Segment Identification Chart.....................................................................................................................................11
Typical End Finishing Illustrations.............................................................................................................................12
Description Of Digital Controls (BA Models).............................................................................................................12
Operating The Digital Control Board (BA Models)....................................................................................................13
Description Of Three-Button Control ((BAS Models)................................................................................................14
Operating The Manual Knee Control (BL / Bullet Models)........................................................................................15
Introduction Of Bending Operations..........................................................................................................................15
Using The Program Cards ........................................................................................................................................15
Pattern Bending.........................................................................................................................................................19
Blank Program Card..................................................................................................................................................20
Three Inch Tube Bending Procedure........................................................................................................................21
Stainless Tube Bending Procedure...........................................................................................................................22
Using The Standard Segment Expanders.................................................................................................................23
Using The Ball-Joint Segment Expanders ................................................................................................................24
Using The Flare Segment Expanders.......................................................................................................................24
Using The Manifold Flange Segment Expanders .....................................................................................................25
Introduction Of The Swaging Assembly....................................................................................................................25
Using The STED Expander Dies...............................................................................................................................25
Making Male Ball Expansions...................................................................................................................................26
Making Female Ball Expansions...............................................................................................................................27
Making 45 Degree Flares..........................................................................................................................................27
Making A Manifold Flange Using The HPF-300 Tool ................................................................................................28
Making A Manifold Flange Using The CFT Tool........................................................................................................30
Using the Reducing Tool ...........................................................................................................................................30
Using The Doming Die To Finish Tailpipe Ends........................................................................................................31
Making Header Collectors Using the HCT-2I4/2I2 Tool ............................................................................................ 3I
Maintenance..............................................................................................................................................................32
Hydraulic Oil Service.................................................................................................................................................32
Recommended Weekly / Monthly Procedures .....................................................................................................33-34
Pressure Settings......................................................................................................................................................35
Chain Adjusting Procedure........................................................................................................................................34
Aligning The Guide Plate ..........................................................................................................................................36
Barrel Bushing Maintenance.....................................................................................................................................37
Aligning The Swaging Box Cylinder..........................................................................................................................38
Pusher Block Maintenance........................................................................................................................................39
Calibrating The Depth-Of-Bend Plate Manual Models..............................................................................................40
Calibrating The Depth-Of-Bend Switch (BAS Models)..............................................................................................40
Calibrating The Digital Readout Display (BA Models)...............................................................................................41
Using The Jumper Board BA Models........................................................................................................................42
Operating The Machine Manually Using The Solenoid Valve...................................................................................43
Solenoid Valve Maintenance.....................................................................................................................................43
Checking The Micro-Switches (Automatic Models) .................................................................................................44
Motor Lead Connections...........................................................................................................................................44
Checking Motor Rotation...........................................................................................................................................45
Manual Electric Starter..............................................................................................................................................45
Trouble Shooting Procedures ..............................................................................................................................46-48
Bending Problems.....................................................................................................................................................49
Electrical Wiring Diagrams (Models BA & BAS) ..................................................................................................50-51
B-1 Die Package For Blue Bullet ..............................................................................................................................52
B-2 Die Package For Blue Bullet ..............................................................................................................................53
Economy 202 Die Package.......................................................................................................................................54
Deluxe 302 Die Package...........................................................................................................................................55
Parts Breakdowns ................................................................................................................................................56-63
Hose Routing .......................................................................................................................................................64-65
Three-Inch Tooling ordering information.............................................................................................................. 66-67
Notes ........................................................................................................................................................................ 68
2 Bender Operation Manual

YOUR NEW BENDER
This instruction manual has been prepared especially for you.
Your new Bender is the product of over 30 years of continuous research, testing and
development and is the most technically advanced Bender on the market today.
READ THIS ENTIRE MANUAL BEFORE OPERATION BEGINS.
The manner in which you care for and maintain your Bender will have a direct effect on
it's overall performance and longevity.
Record the Serial Number, Model Number, and Manufacture Date which is located
on the Data Plate at the front end of your machine.
Serial No. _________________
Model No. _________________
Manufacturing Date __________
Bender Operation Manual 3
WARRANTY
Your new Bender is warranted for five years on the equipment structure; one
year on all operating components and tooling to the original purchaser, to be free
of defects in material and workmanship. The manufacturer shall repair or replace
at their option for this period those parts returned to the factory freight prepaid
which prove upon inspection to be defective. The manufacturer will pay labor
costs for the first l2 months only on parts returned as previously described.
This warranty does not extend to defects caused by ordinary wear, abuse, mis-
use, shipping damage, or lack of required maintenance.
This warranty is exclusive and in lieu of all other warranties expressed or implied.
In no event shall the manufacturer be liable for special, consequential or inciden-
tal damages for the breach or delay in performance of the warranty. The manufac-
turer reserves the right to make design changes or add improvements to its prod-
uct line without incurring any obligation to make such changes on product sold
previously.
Warranty adjustments within the above stated policies are based on the model
and serial number of the equipment. This data must be furnished with all
warranty claims.
WARRANTY IS NOT VALID UNLESS
WARRANTY CARD IS RETURNED
LIABILITY
BendPak Inc. assumes no liability for damages resulting from:
• Use of the product for purposes other than those described in this manual.
• Modifications to the equipment without prior, written permission from BendPak Inc.
• Injury or death caused by modifying, disabling, overriding, or removing safety features.
• Damage to the equipment from external influences.
• Incorrect operation of the equipment.

4 Bender Operation Manual
Bending Capacity .............................Tubing from 1/2” OD - 3” OD
Maximum Capacity/Tube Thickness
....See Chart Below
Maximum Bending Radius ...............5”
Minimum Bending Radius ................3-1/2”
Swaging Capability*..........................Expansion / Reduction / Forming
Swaging Capacity.............................1” O.D. Tubing - 3” O.D. Tubing
Motor.................................................5 H.P / Single or Three-Phase /
220-380-440 VAC
Pump Output ....................................3 GPM / 4200 psi (max. output)
Operation Modes..............................Full Automatic or Manual Foot
Switch
Hydraulic Filter..................................Canister type
Bending Force..................................55,000 Pounds Maximum
Bend-Depth Control..........................
Degree Plate With Adjustable Pointer /
Automatic Stop and Return
Overall Length..................................62” 1302-BAS
Overall Width....................................30” 1302-BAS
Overall Height...................................41”
* Special Radius Dies are available.
** Reduction Tools do not come standard
DESIGN FEATURES
MODELS 1302-BAS
Bending Capacity .............................Tubing from 1/2” OD - 3” OD
Maximum Capacity/Tube Thickness
....See Chart Below
Maximum Bending Radius ...............5”
Minimum Bending Radius ................3-1/2”
Swaging Capability*..........................Expansion / Reduction / Forming
Swaging Capacity.............................1” O.D. Tubing - 3” O.D. Tubing
Motor.................................................5 H.P / Single or Three-Phase /
220-380-440 VAC
Pump Output ....................................3 GPM / 4200 psi (max. output)
Operation Modes..............................Manual Control Valve
Hydraulic Filter..................................Canister type
Bending Force..................................55,000 Pounds Maximum
Bend-Depth Control..........................
Manual / No
Automatic Stop
Overall Length..................................68” 1302-BL
Overall Width....................................30” 1302-BL
Overall Height...................................41”
* Special Radius Dies are available.
** Reduction Tools do not come standard
DESIGN FEATURES
MODELS 1302BL (BLUE BULLET)
GAUGE / WALL DECIMAL BENDER CAPACITY
THICKNESS EQUIVALENT RADIUS MAXIMUM
SIZE BEND DEPTH
Bending Capacity .............................Tubing from 1/2” OD - 3” OD
Maximum Capacity/Tube Thickness
....See Chart Below
Maximum Bending Radius ...............5”
Minimum Bending Radius ................3-1/2”
Swaging Capability*..........................Expansion / Reduction / Forming
Swaging Capacity.............................1” O.D. Tubing - 3” O.D. Tubing
Motor.................................................5 H.P / Single or Three-Phase /
220-380-440 VAC
Pump Output ....................................3 GPM / 4200 psi (max. output)
Operation Modes..............................Full Automatic or Manual Foot
Switch
Hydraulic Filter..................................Canister type
Bending Force..................................55,000 Pounds Maximum
Bend-Depth Control..........................
Digital Readout
Automatic Stop and Return
Overall Length..................................62” 1302-BA
Overall Width....................................30” 1302-BA
Overall Height...................................41”
* Special Radius Dies are available.
** Reduction Tools do not come standard
DESIGN FEATURES
MODELS 1302-BA
SPECIFICATIONS
4 .238 1”- 1-3/4 O.D. Tubing / Pipe
5 .220 1” - 7/8” O.D. Tubing / Pipe
6 .203 1” - 2” O.D. Tubing / Pipe
7 .180 1”- 2-1/8” O.D. Tubing / Pipe
8 .165 1”- 2-1/4” O.D. Tubing / Pipe
9 .148 1”- 2-1/4” O.D. Tubing / Pipe
10 .134 1”- 2-1/2” O.D. Tubing / Pipe
11 .120 1”- 2-1/2” O.D. Tubing / Pipe
12 .109 1”- 2-1/2” O.D. Tubing / Pipe
13 .095 1”- 3” O.D. Tubing / Pipe
14 .083 1”- 2-1/2” O.D. Tubing / Pipe
15 .072 1”- 2-1/2” O.D. Tubing / Pipe
16 .065 1”- 2-1/2” O.D. Tubing / Pipe
17 .058 1”- 2” O.D. Tubing / Pipe
18 .049 1”- 1-3/4” O.D. Tubing / Pipe
3-1/2” 135°
4” 145°
5” 172°
4” 150°
180° Style*
5” 180°
180° Style*
NOTE:
180° STYLE DIES ARE NOT
INCLUDED IN STANDARD
TOOLING PACKAGES.
Special size Dies not listed in this manual may be manufactured to your specifications.
Call factory for details. Special manufactured items require a 60-day minimum lead time.

3. Read and understand all safety warning procedures
before operating this machine.
4. Keep hands clear. Remove hands prior to bending,
forming, swaging or expanding Tubing. Avoid pinch
points.
5. Keep work area clean. Cluttered work areas invite
injuries.
6. Consider work area environment. Do not expose
equipment to rain. Do not use in damp or wet loca-
tions. Keep area well lighted.
7. Only trained operators should operate this machine.
All non-trained personnel should be kept away from
work area. Never let non-trained personnel come in
contact with, or operate machine.
8. Use Tooling correctly. Use all Tooling in the proper
manner. Never try to use a Tool for something that it
was not designed for. See manual for proper use.
9. Dress properly. Never wear loose gloves, clothing or
jewelry. They can be caught in moving parts. Non-
skid Steel - Toe Footwear is required when operating
machine. Wear protective hair covering to contain long
hair.
10. Always wear OSHA approved (publication 3151)
personal protective equipment at all times, when
installing, operating, maintaining or repairing the
Bender. Leather gloves, steel-toed work boots, eye
protection, back belts and hearing protection are
mandatory.
11. Do not overreach. Keep proper footing and balance
at all times.
12. Guard against electric shock. This machine must
be grounded while in use to protect the operator from
electric shock. Never connect the green power
cord wire to a live terminal.
14. Always unplug machine before servicing. Grasp
the Plug and then pull. Never yank the Power Cord
to disconnect it from the receptacle. Verify electri-
cal connections are good. Never use an Extension
Cord longer than 15 feet. If the Power Cord becomes
frayed, replace it. Never alter electrical components
on this machine. Never operate machine in or around
water or damp environments.
15. Warning! Risk of explosion. This equipment has
internal arcing or sparking parts which should not be
exposed to ammable vapors. This machine should
not be located in a recessed area or below oor level.
16. Maintain with care. Keep machine clean for better
and safe performance. Follow manual for proper
lubrication and maintenance instructions. Keep con-
trol handles and/or buttons dry, clean and free from
grease and oil.
17. Stay alert. Watch what you are doing. Use common
sense. Be aware.
18. Check for damaged parts. Check for alignment of
moving parts, breakage of parts or any condition that
may aect its operation. Do not use machine if any
component is broken or damaged.
19. Never remove electric Foot Switches from their
protective safety housing. Always remove foot from
pedal enclosure between bends.
20. Always allow for the “Safety Circle Of Swing”
around the Bender. There should be at least 10 feet
of space on both sides of the Bender so that the
Tubing will not come in contact with persons and/or
objects.
Bender Operation Manual 5
THESE SAFETY INSTRUCTIONS MUST BE GIVEN TO ALL OPERATORS TO READ.
IF THE INDIVIDUAL CANNOT READ, INSTRUCTIONS MUST BE READ TO THEM.
UPON DELIVERY
IMPORTANT SAFETY INSTRUCTIONS !
Read these safety instructions carefully and entirely!
1. Carefully remove the crating and packing materials.
2. Inspect the Bender for any signs of concealed ship-
ment damage or shortages. Remember to report any
shipping damage to the carrier and make a notation
on the delivery receipt.
13. Check the Voltage, Phase and Amperage
requirements for the Motor shown on the Motor Data
Plate. Wiring should be performed by a Licensed,
Certied Electrician only.
This manual suits for next models
1
Table of contents
Other Bend-Pak Construction Equipment manuals

