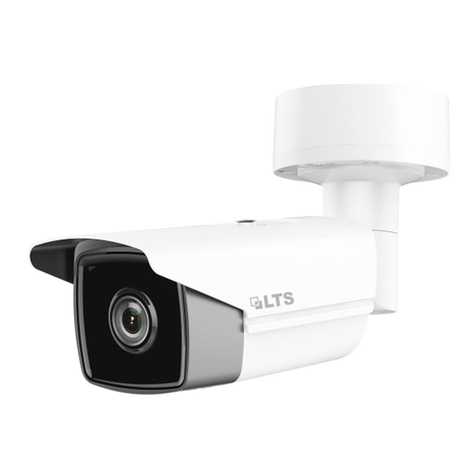
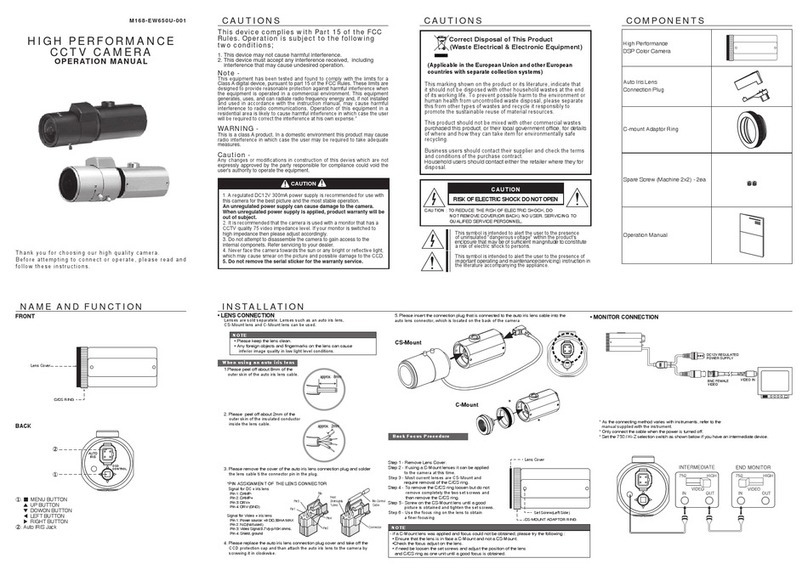
Beneston SDI Camera User manual

HD-SDI High Speed Dome Camera
1
Content
I、Safety Precautions---------------------------------------------------------------------------------------------------------------------------2
II、Warning----------------------------------------------------------------------------------------------------------------------------------------2
III、Features---------------------------------------------------------------------------------------------------------------------------------------3
IV、Installment Preparation--------------------------------------------------------------------------------------------------------------------3
V、Installation Type Guide---------------------------------------------------------------------------------------------------------------------4
VI、Installation Procedure Guide-------------------------------------------------------------------------------------------------------------6
1、In-Ceiling Mount--------------------------------------------------------------------------------------------------------------------------6
2、Wall Mount---------------------------------------------------------------------------------------------------------------------------------8
3、Corner Mount-----------------------------------------------------------------------------------------------------------------------------10
4、Pole Mount--------------------------------------------------------------------------------------------------------------------------------11
5、Pendent Mount---------------------------------------------------------------------------------------------------------------------------12
6、Parapet Mount----------------------------------------------------------------------------------------------------------------------------15
VII、Product connection -----------------------------------------------------------------------------------------------------------------------19
1、Testing Connection--------------------------------------------------------------------------------------------------------------------19
2、Video Matrix Connection-------------------------------------------------------------------------------------------------------------19
VIII、Function and Operation Guide---------------------------------------------------------------------------------------------------------20
OSD Main Menu----------------------------------------------------------------------------------------------------------------------------20
1、System setup----------------------------------------------------------------------------------------------------------------------------21
2、Camera setup---------------------------------------------------------------------------------------------------------------------------22
3、PTZ setup--------------------------------------------------------------------------------------------------------------------------------22
4、Auto set-----------------------------------------------------------------------------------------------------------------------------------23
5、Exit-----------------------------------------------------------------------------------------------------------------------------------------23
Appendix I. Lighting proof & Surge------------------------------------------------------------------------------------------------24
Appendix II. The Cleaning Of Down Cover--------------------------------------------------------------------------------------24
Appendix III. RS 485 Basic Knowledge-------------------------------------------------------------------------------------------24
Appendix IV. 24VAC Wire Diameter & Transmission Comparison Chart----------------------------------------------26
Appendix V. Wire Standard Comparison Chart--------------------------------------------------------------------------------27
Appendix VI. Trouble Shooting -----------------------------------------------------------------------------------------------------27
Appendix VII. Preset Position Function Table-----------------------------------------------------------------------------------28

HD-SDI High Speed Dome Camera
2
Appendix VIII. Technology Parameter Chart-------------------------------------------------------------------------------------29
I. Safety Precaution
1. Only qualified and experienced person can carry on this installation.
2. Always conform to national and local safety codes during installation.
3.Use reliable tools only, poor quality tools may cause danger. e.g. ladder.
4.Check the space and toughness of the site before installing. It should be able to bear 4 times the weight of the dome
and its accessories
5.Do install the speed dome to appropriate environment (Please refer to the chart below).
6. Keep all the original dome package materials in case of future repacking and transporting.
Model
Indoor
Outdoor
Max. Temperature Range
-10~+50℃
-40~+60℃
Humidity
<90%
<90%
Air Pressure
86~106Kpa
86~106Kpa
Power supply
24V/2.50A,50/60HZ
24V/2.50A,50/60HZ
7. Please refer to the user manual carefully.
II. Warning
1. Mind Transportation
Avoid press or to be stroked furiously In the process of transportation.
The product must be shipped in the form of accessories, the product wouldn’t within guarantee policy if product is not accordance with
transportation term in the process of transportation.
2.Fault occur
If the products fumes or can’t work well, user should turn off power, stop to use the speed dome immediately, then connect to
supplier.
3. Don’t dismantle or refit
Don’t dismantle shell, otherwise it will cause speed dome camera damaged. if user need to set some function or maintain the products,
please connect to supplier.
4. Don’t put other substances into PTZ camera
Make sure there is not metal substance or flammable substance in camera. If there is other substances, it will cause camera short circuit
or damage. If water or liquid leak into camera, please turn off power immediately, then connect to supplier directly. Keep camera
carefully, avoid water or seawater to corrode.
5. Mind to carry product
In order to avoid damaged , don’t drop the product on ground or let products be stroked forcefully.
6 .Fix product in places far from electric field or magnetic field
If camera is installed in those places near to TVL, wireless transmitter, Electromagnetism
equipment, transformer, speaker, the electromagnetism from them will interfere image effect.
7. Avoid humidity and dust
In order to avoid camera damage, don’t install camera in the place with dust or vapor or high temperature.
8. Avoid high temperature
Don’t install camera in places where bring heat source to camera, or sunshine can irradiate, otherwise it will cause camera distort, fade or
other damage.
9. Cleanness
Use soft cloth with scour to wipe off spot, then dry camera with soft cloth. Don’t use gasoline, dope thinner or other chemistry substance

HD-SDI High Speed Dome Camera
3
to clean product, otherwise it will cause product distortion or paint desquamated.
10. Don’t let camera aim at strong light
11. Please use product according to working temperature
Usage environment for outdoor speed dome camera:
Working Temperature
-40~+60℃
Humidity
<90%
Atmospheric Pressure
86~106Kpa
Power supply
24V/2.50A,50/60HZ
Usage Environment for indoor speed dome camera:
Working Temperature
-10~+50℃
Humidity
<90%
Atmospheric Pressure
86~106Kpa
Power Supply
24V/1.25A,50/60HZ
12. Prohibit to install indoor camera in outdoor environment
III. Main Features
1、Built-in decoder
Integrative design,high stability.
Auto work function
128 preset position, support auto tour, 8 sequences with 16 positions each
Support RS485,Multi-protocol
Auto switch between color and B/W
Auto home position
2、Build-in P/T
Precise Motor stepping drive,work steadily、sensitive reaction, Integrative design,compact structure;
Support 3 6 0°continuous pan,no blind area surveillance;
/S Pan, image don’t wobble;
180 degree vertical tilt, continuous surveillance;
3、Built-in camera with zoom lens, high sensitivity, high resolution.
Auto Focus
Auto BLC
AGC
Auto White Balance
Color/ white and black switch
4、Speed dome OSD Menu
English OSD menu for speed dome setting, easy to operate
Preset title setting, camera title setting, scanning title setting via OSD menu (max.16 characters)
With OSD menu, presets, scanning tracks, patterns, two position scanning can be set easily.
IV. Installation Preparation

HD-SDI High Speed Dome Camera
4
1. Tools Lists:
You may need following tools for the installation:
Screws and nuts, screw driver, Small slotted screw driver, Wire cutter, Ladder, Drill, Saw.
2、Cables:
Video Coaxial Cable
The video coaxial cable should be:
1) 75 Ohm impedance.
2) Solid copper wire.
3) 95% braided copper shield.
Check the max transmission distance referring to the chart below.
International Gauge Transmission Distance( Max.)
RG 59/U 750ft (229m)
RG 6/U 1,000ft (305m)
RG 16/U 1,500ft (457m)
● R S4 85 communication cable(refer to appendix Ⅲ)
● 24VAC power cable(refer to appendix Ⅳ)
4、Please keep all package materials
After you disconnect package, please keep all package materials well, in case there is something wrong with speed dome,user can
re-pack speed dome and send it to agent or factory to repair it.
V. Installation Type Guide
Three main kinds of installation are available for high speed dome:
1) In-ceiling Mount
2) Surface Mount
3) Bracket Mount
There are 5 bracket options for bracket mount:
1) Wall Mount
2) Corner Mount
3) Pole Mount
4) Pendant Mount
NOTE: Installation site should be able to withstand at least 4 times the weight of the dome.
Bracket mount dome has indoor type and outdoor type. Comparing to indoor type, outdoor type has extra sun-shield housing,
temperature sensor and heater. Outdoor type conforms to IP66 standard.
WARNING: DO NOT install indoor dome in outdoor environment.
After installation, the outside appearance is following:
⑴In-ceiling mount
Camera with ceiling mount is suitable for suspend ceiling of indoor environment

HD-SDI High Speed Dome Camera
5
Picture1
⑵Bracket mount
①Wall mount
Wall mount is suitable for firm wall of indoor and outdoor environment
Picture 2
②Corner Mount
Corner mount is suitable for firm wall of indoor and outdoor environment, it has 90 degree angle between wall and corner mount
Picture3
③Pole mount
Pole mount is suitable for firm pole of indoor and outdoor environment
Picture 4
④Pendant mount
Pendant mount has following three kinds:
a. Thick pole pendant mount
This kind of pendant mount is suitable for firm ceiling structure of indoor and outdoor environment.

HD-SDI High Speed Dome Camera
6
Picture 5
b. Pendant mount without pole
This kind of pendant mount is also suitable for firm ceiling structure of indoor and outdoor environment.
Picture 6
⑤Parapet mount
Parapet mount is suitable for indoor and outdoor firm wall structure
Picture 7
VI. Installation procedure guide
1、In-Ceiling camera installation
Installation environment
Embedded camera is suitable for indoor ceiling environment, Picture 8 is sketch map after installation, environment must meet following
condition:
⑴Upper space should be at least 200mm high;
⑵The thickness of ceiling must be 5~42mm;
⑶Ceiling should be able to withstand at least 4 times the weight of the dome.

HD-SDI High Speed Dome Camera
7
Picture 8
1). Draw a circle on ceiling
Take the paper pattern(accessory) as a template to draw a pattern on the ceiling. The paper pattern’s diameter is 225mm.
Picture 9
2). Connect Cables:
⑴connect power cable、RS485 control cable
Warning:Turn off power supply before connecting cable
⑵Connect Video output cable
3). Install Upper Cover:
⑴Adjust the height of the three mounting clips, swing the three mounting clips to cling them to housing.
⑵Push housing into ceiling and let the clips stretch out. Finally, screw the three clips to tighten the housing.
Note: Use even strength to adjust the three clips, or it may distort the shape of the housing.
(Picture 1 0)
Picture 10
4). Install all-in-one Camera:
⑴Pick up camera from carton to check it, then refer to “appendix VI” to set camera baud rate, protocol and address.
Note:If there is something wrong with camera in the process of using, please pack it well, then send it to supplier for repair.
⑵Unscrew 2 bolts in the picture 1,put the screw into hole of key and screw it tightly, then connect IDE26 plug to relevant plug on the
PCB board of camera.(refer to 11)

HD-SDI High Speed Dome Camera
8
Picture 11
Note:When screw down bolt, please hold camera by one hand, operate it by another hand, in case the camera revolve reverse in
the process of screwing. After installing camera,please check whether camera can work well under power supply was provided,
if it can’t work well, please refer to appendix Ⅹ.
5). Install down cover:
Fix the safety chain on housing. The safety chain prevents the down cover dropping down. Match the clasps and mounting holes
then turn the down cover frame anti-clockwise.
NOTE: 1.Let the safety chain inside the arc groove of the down cover, otherwise it may scratch the lens.
2. If you found difficult to fit in the down cover, try readjusting the three clips.(refer to picture 12)
Picture 12
Note:Please make sure that safety chain is in the arc slot of down cover to avoid dust to entry into camera.
Note:If you found difficult to fit in the down cover, try readjusting the three clips.
2. Wall mount installation
1). Installation condition:
Camera with wall mount is suitable for firm wall indoor and outdoor, installation requirement as follows:
⑴The wall mounting surface must be firm enough to install expansive screws
⑵The wall mounting surface must be firm enough to bear 4 times the weight of the speed dome
2). Install wall mount bracket:
1. Mark Screws Positions
Take the bracket base as the template to mark the screws positions on wall, drill the holes, refer to picture 13

HD-SDI High Speed Dome Camera
9
Picture 13
⑵refer to picture 14,insert M8 expansive screw,then let power cable, video/ control cable go through wall mount bracket and fix wall
mount on the wall.
Picture 14
Note:Apply silicone to the gap between bracket and wall in the case of outdoor dome.
2. Install upper cover:
Loosen the M4 bolt and swing away the power board holder, let cables go through upper cover, then cling upper cover to pipe and tighten
M4 screw.
(refer to Picture 15 )
Picture 15
Note:If the speed dome is used in outdoor environment,please wrap more belt on screw thread, then screw upper cover to wall
mount.
3. Connect Cable:
⑴Connect power cable and RS485 control cable
Warning: must turn off power supply when connecting cable
⑵Connect video output cable,
⑶Thunderproof ground cable connection
When speed dome is installed outdoor, ground wire must connect to ground alone, the resistance must be less than 4 ohm.

HD-SDI High Speed Dome Camera
10
4. Connect down cover:
Refer to picture 16,after taking off M3 screw from upper cover,insert the M3 screw into
safety chain of down cover, then screw it.
Picture 16
5. Install All-in-one Camera:
⑴Pick up camera from carton to check it, then refer to “appendix VI” to set camera baud rate, protocol, and address.(Before installing
down cover, take off shield to set DIP, then install shield)
Note: If there is something wrong with camera in the process of using, please pack it well, then send it to supplier for repair.
⑵Unscrew 2 bolts in the picture 1,put the screw into hole of key and screw it tightly, then connect IDE26 plug to relevant plug on the
PCB board of camera.(refer to 1 7)
Picture 17
Note:When screw down bolt, please hold camera by one hand, operate it by another hand, in case the camera revolve reverse in
the process of screwing. After installing camera,please check whether camera can work well under power supply was provided,
if it can’t work well, please refer to appendix Ⅹ.
6. Install down cover:
Loosen the two M4 screws on down cover ring. Apply lubricant to the O-ring to make down cover easier to slip in. Push upward the
down cover into the housing and then fasten down cover with two M4 screws.(refer to picture 18)
Picture18
3).Corner Mount installation
1. Installation Requirements:
Camera with Corner mount is suitable for firm wall which has 90 degree angle between two walls indoor and outdoor,Installation
environment as follows:
⑴The wall mounting surface must be firm enough to install expansive screws
⑵The wall mounting surface must be firm enough to bear 4 times the weight of the speed dome

HD-SDI High Speed Dome Camera
11
2. Install corner accessories, wall mount bracket:
⑴Refer to picture 19,take the bracket base as the template to mark the screws positions on wall, drill the holes and put expansion
screws inside.
Picture 19
⑵Refer to Picture 20,Put power/ RS485/video cables through the hole of corner base and use M8 nuts to fasten corner base on the
mounting surface.
Note: Put cables through the wall or aside the corner base
Picture 20
⑶Refer to picture 21,let power/RS485/video cables go through hole of wall mount and fix wall mount on corner accessories.
Picture 21
Note:If the camera is used outdoor environment, please seal gum water on the gap between wall mount bracket and corner mount
accessory.
Install upper cover: refer to upper cover installation of wall mount.
Connect cable: refer to cable connection of wall mount.
Connect down cover: refer to down cover connection of wall mount.
Install camera: refer to camera installation of wall mount.
Install down cover: refer to down cover installation of wall mount.
4). Pole mount installation

HD-SDI High Speed Dome Camera
12
Camera with pole mount is suitable for firm pole structure indoor and outdoor
1. Installation requirements:
1) The outside diameter of the pole must be in the range of 130-150mm (5.12 ~6 inches).
⑵The Pole structure must be firm enough to bear 4 times the weight of the speed dome.
2. Install Pole mount accessory and wall mount bracket:
1) Refer to picture 22, put Power/RS485/Video cables through the hole of corner base and use M8 nuts to fasten corner base on the
mounting surface.
NOTE: Put cables through the wall or aside the corner base.
Picture 22
⑵Refer to picture 23,let power/RS485/video cables go through hole of wall mount, and fix wall mount on pole mount accessories
.
Picture 23
Note: If the camera is used outdoor environment, please seal gum water on the gap between wall mount bracket and corner mount
accessory
Install upper cover: refer to upper cover installation of wall mount.
Connect cable: refer to cable connection of wall mount.
Connect down cover: refer to down cover connection of wall mount .
Install camera: refer to camera installation of wall mount.
Install down cover: refer to down cover installation of wall mount.
5) Pendent mount
Installation requirements:
(1) The ceiling must be firm enough to bear 4 times the weight of the speed dome.
(2) The wall mounting surface must be firm enough to install expansive screws.
1. Mark screws positions
Take the bracket base as the template to mark the screws positions on ceiling. Drill the holes and put expansion screws inside, refer to
Picture 24.

HD-SDI High Speed Dome Camera
13
Picture 24
2. Install base
Put Power/RS485/Video cables through the central hole of the bracket base, and then fix it on ceiling, refer to picture 25.
NOTE:Apply silicone along the top of bracket base in the case of outdoor dome.
Picture 25
3.Install suspender
Put cables through the cavity of suspender. Apply water-proof tape to the thread. Then turn the thread pipe head into the bracket
base and fasten the connection with an M4 screw, please refer to picture 26,also directly install upper cover on the base, refer to
picture 27.
NOTE: Apply silicone to the suspender as picture shows in the case of outdoor dome.
Picture 26
Picture 27
4. Unfasten the power board holder
Loosen the bolt and swing away the power board holder.

HD-SDI High Speed Dome Camera
14
5.Install housing
Insert cables through the hole at the top of the housing. Apply water-proof tape to the housing thread. Then turn the housing onto
the wall mount bracket and retain the connection with an M4 screw. If installation height is not high enough, mount housing directly
into the base
NOTE: Apply silicone to the gap between bracket and wall in the case of outdoor dome.
6.Connect cables
Insert cables into corresponding sockets on power board. After completing cable connection, swing the power board holder back
and then turn on the power. The red LED will light up. Turn off the power after checking. If not light up, check the cable connection.
Alarm
Power
Video&RS485
NOTE: There are signs for each port. Please connect cables as picture showed in page 3. Please MAKE SURE power is off before
doing connection.
7. Down cover preliminary installation
Attach the safety chain with an M3 nut as picture shows. The safety chain prevents the down cover from dropping down.
NOTE: Connect the heater plug into the socket in the case of outdoor dome.
8. Install black liner and Pan/Tilt Module
Push the black liner into the two locking tabs. Align the pan/tilt module to the two clips, red to red, black to black and match the holes
in pan/tilt module and the two guide poles. Gently push the module upward until you hear two click sound.

HD-SDI High Speed Dome Camera
15
NOTE: BE SURE the AMP sockets are clean without dust. DO NOT forget to remove the lens cover.
9. Install down cover
Loosen the two M4 screws on down cover ring.
Apply lubricant to the O-ring to make down cover easier to slip in. Push upward the down cover into the housing and then fasten
down cover with two M4 screws.
6、Parapet mount installation
Installation Requirements:
Camera with parapet mount is suitable for firm mount of indoor and outdoor environment, installation requirement as follows:
⑴The wall mounting surface must be firm enough to install expansive screws
⑵The wall mounting surface must be firm enough to bear 4 times the weight of the speed dome
1. Mark Screws Positions
Take the bracket base as the template to mark the screws positions on wall, drill the holes
Picture 28

HD-SDI High Speed Dome Camera
16
2. Install Base
Fix the bracket base on the wall with the M8 expansive screws.
Picture 29
3.Install Pipe Arm
Put the cables through the two trays of the base and pipe arm, and plug the pipe arm into two trays
Picture 30
Unfasten the power board holder
Loosen the M4 bolt and swing away the power board holder, let cables go through upper cover, then cling upper cover to pipe and tighten
M4 screw.
(Refer to Picture 3 1)
Picture 3 1

HD-SDI High Speed Dome Camera
17
5 Install the Housing
Insert cables through the hole at the top of the housing Apply water-proof tape to the housing thread. Then turn the housing onto
the wall mount bracket and retain the connection with an M4 screw.
NOTE: Apply silicone to the gap between bracket and wall in the case of outdoor dome.
6. Connect cables
Insert cables into corresponding sockets on power board. After completing cable connection, swing the power board holder back
and then turn on the power. The red LED will light up. Turn off the power after checking. If not light up, check the cable connection.
Alarm
Power
Video&RS485
NOTE: There are signs for each port. Please connect cables as picture showed in page 3. Please MAKE SURE power is off before
doing connection.
7. Down cover preliminary installation.
Attach the safety chain with an M3 nut as picture shows. The safety chain prevents the down cover from dropping down.
Connect the two
ports of the heater
Safety Chain
M3 Nut
NOTE: Connect the heater plug into the socket in the case of outdoor dome.

HD-SDI High Speed Dome Camera
18
8. Install black liner and Pan/Tilt Module
Push the black liner into the two locking tabs. Align the pan/tilt module to the two clips, red to red, black to black and match the holes
in pan/tilt module and the two guide poles. Gently push the module upward until you hear two click sound.
AMP Socket Red Clip
Red Lable
NOTE: Be sure the AMP sockets are clean without dust. DO NOT forget to remove the lens cover.
9. Install down cover
Loosen the two M4 screw on down cover ring. Apply lubricant to the O-ring to make down cover easier to slip in. Push upward the
down cover into the housing and then fasten down cover with two M4 screws.

HD-SDI High Speed Dome Camera
19
10. Fix the Pipe Arm
Rotate the pipe arm to the proper place, fix the pipe arm to the base with the two metal hoops.
Picture 32
VII、Products Connection
1、Test Connection
1). Power cable (AC24V, 50 Hz) 2). adapter connected toAC 24V power
3). TV Monitor 4). Monitor cable 5). System controller
6). Communication cable 7). Port connected to RS485 A/ B

HD-SDI High Speed Dome Camera
20
2、Connect Matrix system
1) communication Cable 2). Power cable 3). Video Cable
4). Video switcher or matrix 5). Video output 6). Monitor
7). communication cable 8) system controller 9). Port connected to RS485 A/B
VIII、Function Introduction and Operation Guide
Call main menu: call preset 95 or call preset 1 twice within 5 seconds
The method to call main menu is different between different control keyboards, so it depends on the keyboard you are
actually using.
The speed dome camera can be controlled by controlkeyboards and active viakeyboard commands, such as presets setting,
presets calls, scanning setting, start scanning, start cruising, etc. For more information, please refer to the manual of the control
device you are actually using.
Table of contents
