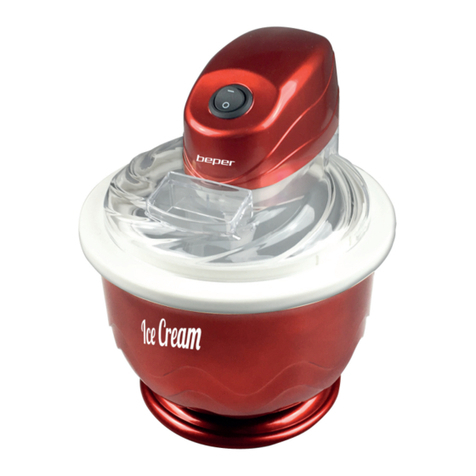
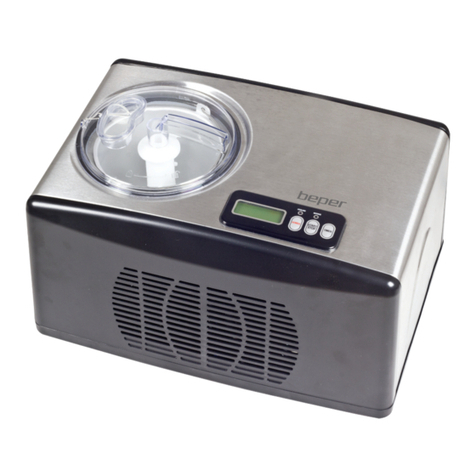
Beper 70.253 Quick guide

• GELATIERA - MANUALE DI ISTRUZIONI
• ICE CREAM MAKER - USE INSTRUCTIONS
• SORBETIÈRE - MANUEL D’INSTRUCTIONS
• EISMASCHINE - BETRIEBSANLEITUNG
• MÁQUINA PARA HACER HELADOS
MANUAL DE INSTRUCCIONES
R
Cod.: 70.253

ITALIANO
ENGLISH
FRANÇAIS
DEUTSCH
ESPAÑOL
pag. 4
pag. 9
pag. 13
pag. 18
pag. 23
For further information and/or for instructions for use in other languages, please visit:
www.beper.com

33

4
Gelatiera Manuale di istruzioni
ATTENZIONE: leggere attentamente le istruzioni per l’uso prima di utilizzare l’apparecchio e
conservarle per la successiva consultazione!
Informazioni speciche per la sicurezza
Il voltaggio indicato nella piastrina d’identicazione deve corrispondere a quello dell’alimentazione
elettrica.
Mai immergere il cavo, la spina, la presa o l’unità motore in acqua o altri liquidi.
Non tirare o attorcigliare il cavo di alimentazione. Qualora il cavo sia danneggiato, dovrà essere so-
stituito da un tecnico qualicato. Per evitare qualsiasi rischio, non utilizzare l’apparecchio se il cavo
o l’apparecchio stesso presenta danni.
Non inserire le dita o un utensile nel foro di riempimento. Non toccare le parti in movimento.
Prima di cambiare gli accessori, scollegare l’alimentazione.
Non utilizzare oggetti o utensili taglienti nel recipiente refrigerante. Dopo aver selezionato la moda-
lità “off”, servirsi di una spatola di gomma o di un cucchiaio di legno.
In caso di malfunzionamento, scollegare sempre l’apparecchio prima di aprire il coperchio o per
eseguire il montaggio o la pulizia.
L’apparecchio è destinato esclusivamente all’uso domestico.
Prima di ogni utilizzo, controllare la parte inferiore della ciotola refrigerante. Se sono visibili crepe o
rotture, l’apparecchio non può essere utilizzato.
Utilizzare sempre l’apparecchio su una supercie pulita, piana, solida e asciutta. Non posizionarlo
su un piano caldo (ad es. una piastra elettrica) e non utilizzarlo o lasciarlo vicino a amme libere.
Non riscaldare la ciotola refrigerante. Non utilizzarla nel forno o nel forno a microonde.
Non lasciare che il cavo di alimentazione tocchi una supercie calda o resti sospeso sopra il bordo
del tavolo o del piano di lavoro.
Non utilizzare ininterrottamente l’apparecchio per un tempo superiore a 1 ora. Attendere almeno 30
minuti tra una sessione e quella successiva.
Prima della pulizia e quando non lo si utilizza, spegnere l’apparecchio.
La ciotola refrigerante non deve essere esposta a temperature superiori a 40 °C. Non lavarla in
lavastoviglie e non riempirla con liquidi caldi.
Non toccare la ciotola refrigerante con le mani bagnate.
Conservare l’apparecchiatura in un luogo asciutto e, se possibile, nella confezione originale.
Questo apparecchio non è destinato a essere utilizzato da persone (anche bambini) con ridotte ca-
pacità psico-sico-sensoriali, o con esperienza e conoscenze insufcienti, a meno che non abbiano
potuto beneciare, mediante una persona responsabile della loro sicurezza, di una sorveglianza o
di istruzioni preventive sull’utilizzo dell’apparecchio.
Non permettere ai bambini di giocare con l’apparecchio.
Non può essere assunta alcuna responsabilità per qualsiasi danno causato dalla mancata confor-
mità alle presenti istruzioni o da un qualunque utilizzo improprio o manipolazione errata dell’appa-
recchio.

5
Gelatiera Manuale di istruzioni
Descrizione
1. Unità motore 4. Coperchio trasparente
2. Pulsante di alimentazione (on/off) 5. Spatola
3. Perno della spatola 6. Ciotola refrigerante
Prima di utilizzare l’apparecchio per la prima volta
Pulire la ciotola refrigerante, il coperchio, la spatola e il relativo perno utilizzando una spugna o un
panno bagnato con acqua tiepida e sapone neutro. Non utilizzare la lavastoviglie.
Sciacquare e asciugare completamente l’apparecchio.
Refrigerazione della ciotola
La fase più importante della preparazione del gelato è senza dubbio la corretta refrigerazione della
ciotola.
PRIMA di utilizzare la gelatiera e aggiungere la miscela di ingredienti, è necessario vericare che il
liquido contenuto all’interno della parete della ciotola sia completamente ghiacciato.
Mettere la ciotola refrigerante nel congelatore. Controllare che la temperatura del congelatore sia
intorno a -18 °C.
Il tempo necessario a congelare adeguatamente la ciotola refrigerante (minimo 8 ore) dipende dalla
temperatura del congelatore e dalla quantità di prodotti al suo interno. Per ottenere i risultati migliori,
posizionare la ciotola nella parte più bassa del congelatore, dove la temperatura è inferiore.
Per controllare il grado di congelamento, scuotere la ciotola; non si deve udire il rumore del liquido
interno che si muove.
Montaggio dell’apparecchio
Ruotare l’unità motore (1) e inserire il perno della spatola (3).
Montare l’unità motore nel coperchio trasparente (4); far combaciare la feritoia del perno con il bordo
del coperchio e premere il coperchio e l’unità motore una versa l’altra per farle ben incastrare.
Montare la spatola (5).
Estrarre la ciotola refrigerante (6) dal congelatore e vericare che sia adeguatamente ghiacciata.
Posizionare l’unità motore sopra la ciotola e ssarla in posizione ruotando in senso orario.
Premere il pulsante di alimentazione (2) per avviare la rotazione della spatola.
Aggiungere immediatamente la miscela di ingredienti attraverso l’apertura nella parte superiore del
coperchio trasparente.
Lasciar funzionare l’unità per circa 20-40 minuti. Non lasciare l’apparecchio acceso per più di 1 ora.
Suggerimento: la consistenza del gelato fatto in casa è solitamente più sofce di quella del gelato
industriale. Se il gelato è troppo liquido:
versarlo in un altro contenitore servendosi di una spatola di gomma o di un cucchiaio di legno e
mettere il contenitore nel congelatore per far indurire il gelato;
ridurre la quantità delle uova nel composto
tenere il composto in frigo per 30 minuti prima di versarlo nella ciotola

6
Gelatiera Manuale di istruzioni
Manutenzione
La ciotola refrigerante, la spatola e il coperchio possono essere lavati con acqua tiepida e sapone
neutro. Sciacquare accuratamente. Non lavare nessun pezzo in lavastoviglie.
Pulire l’unità motore con un panno umido tiepido. Mai immergere l’unità motore in acqua.
Prima di riporre l’apparecchio, controllare che tutti i pezzi siano completamente asciutti. Non mette-
re mai la ciotola refrigerante nel congelatore se non è perfettamente asciutta. Non conservare l’unità
motore, la spatola o il perno nel congelatore.
Caratteristiche tecniche
Capacità : 1L
Alimentazione : 12W
Tensione : 220-240V ~ 50Hz
In un’ottica di miglioramento continuo Beper si riserva la facoltà di apportare modiche e
migliorie al prodotto in oggetto senza previo preavviso.
Gelato alla vaniglia
Ingredienti: 3 tuorli - 50 g di zucchero - 200 ml di latte - 100 ml di panna - alcune gocce di estratto
di vaniglia
Portare il latte ad ebollizione. Sbattere i tuorli e lo zucchero in un contenitore nché il composto non
diventa chiaro. Versare lentamente il latte nel contenitore e mescolare bene. Travasare il tutto in
un tegame e riscaldare, mescolando con un cucchiaio di legno nché il composto non diventa denso
e forma come una pellicola sul retro del cucchiaio. Fare attenzione a non raggiungere l’ebollizione.
Incorporare la panna e l’estratto di vaniglia. Lasciar raffreddare e versare il composto nella ciotola
refrigerata, avviando la rotazione della spatola.
Yogurt alle fragole
Ingredienti: 200 g di fragole - 60 g di zucchero - 250 ml di yogurt al naturale
Frullare le fragole e passarle al setaccio per eliminare tutti i semi. Aggiungere lo zucchero e lo yo-
gurt. Versare il composto nella ciotola raffreddata, avviando la rotazione della spatola.
Sorbetto al limone
Ingredienti: 120 ml di succo di limone - succo di ½ arancia - 170 g di zucchero - 170 ml di acqua - 1
albume
Scaldare il succo di limone ed arancia, l’acqua e lo zucchero in un tegame. Portare ad ebollizione e
lasciar cuocere lentamente per 2-3 minuti. Lasciar raffreddare. Montare a neve l’albume e incorpo-
rarlo nel tegame. Versare il composto nella ciotola raffreddata, avviando la rotazione della spatola.

7
Gelatiera Manuale di istruzioni
TRATTAMENTO DEI RIFIUTI DELLE APPARECCHIATURE ELETTRICHE ED ELETTRONICHE
Il prodotto al termine del suo ciclo di vita deve essere smaltito seguendo le norme vigenti relative allo smaltimen-
to differenziato e non può essere trattato come un semplice riuto urbano.
Il prodotto deve essere smaltito presso i centri di raccolta dedicati o deve essere restituito al rivenditore nel caso
si voglia sostituire il prodotto con un altro equivalente nuovo.
Il costruttore si farà carico delle spese necessarie allo smaltimento del prodotto secondo quanto prescritto dalla
legge.
Il prodotto è composto da parti non biodegradabili e sostanze che possono inquinare l’ambiente circostante se
non opportunamente smaltite. Inoltre parte di questi materiali possono essere riciclati evitando l’inquinamento
dell’ambiente. E’ vostro e nostro dovere contribuire alla salute dell’ambiente.
Il simbolo indica che il prodotto risponde ai requisiti richiesti dalle nuove direttive introdotte a tutela del
l’ambiente (2011/65/EU) e che deve essere smaltito in modo appropriato al termine del suo ciclo di vita.
Chiedere informazioni alle autorità locali in merito alle zone dedicate allo smaltimento dei riuti.
Chi non smaltisce il prodotto seguendo quanto indicato in questo paragrafo ne risponde secondo le norme
vigenti.

CERTIFICATO DI GARANZIA
Questo apparecchio è stato controllato in fabbrica. La garanzia di applicazione è valida 24 mesi
dalla data di acquisto per difetti di materiale o di fabbricazione. Lo scontrino di acquisto e il certicato
di garanzia si devono presentare assieme nel caso di reclami.
Se l’apparecchio dovesse richiedere assistenza tecnica rivolgersi al venditore o presso la nostra
sede. Questo per conservare inalterata l’efcienza del vostro apparecchio e per NON invalidare la
garanzia. Eventuali manomissioni dell’apparecchio da parte di personale non autorizzato invalide-
ranno automaticamente la garanzia.
Condizioni di garanzia
Se ci sono guasti a causa di difetti di materiale e/o fabbricazione durante il periodo di garanzia,
garantiamo la riparazione del prodotto gratuitamente, a patto che:
- l’apparecchio sia stato usato in modo corretto ed ai ni per cui è stato costruito;
- l’apparecchio sia stato riparato da esperti, cioè da persone incaricate dal fornitore;
- venga presentato lo scontrino;
- non rientrano in garanzia le parti che dimostrano un normale logoramento.
Sono quindi escluse tutte le parti che hanno subito rotture accidentali o che sono soggette ad usura
(tra le quali lampade, batterie, resistenze) e difetti derivanti da un utilizzo non domestico dell’appa-
recchio, negligenza nell’uso o nella manutenzione, danni da trasporto e tutti quei danni non imputa-
bili direttamente al produttore.
Se entro il periodo di garanzia emerge un difetto che non può essere riparato, l’apparecchio viene
cambiato gratuitamente.
Assistenza tecnica
Anche dopo il periodo di garanzia prestiamo molta attenzione alle riparazioni.
Per l’assistenza tecnica e/o riparazioni fuori dal periodo di garanzia ci si può rivolgere direttamente
all’indirizzo sottostante.
BEPER SRL
Via Salieri, 30
37050 - Vallese di Oppeano - Verona
Tel. 045/7134674 – Fax 045/6984019
e-mail: assistenza@beper.com

ENGLISH
Ice Cream Maker Use instructions
9
ATTENTION: Please read these instructions carefully before using this appliance
and keep them in a safe place for future reference!
Specic safety information:
The voltage on the identication plate must match that of the mains supply.
Never immerse the cord, plug, socket or motor unit in water or any other liquid.
Do not pull at or twist the power cord. If the power cord is damaged, it must be replaced by a qua-
lied technician. To avoid any danger, do not use the appliance if the cord or the appliance itself is
damaged.
Do not insert ngers or a utensil into the lling hole. Do not touch any of the moving parts.
Disconnect the machine before changing accessories.
Do not use sharp objects or utensils inside the cooling vessel. A rubber spatula or wooden spoon
can be used when the unit is set in the “off” position.
Always disconnect the machine when there is a malfunction, whenever opening the cover or when
assembling or cleaning the machine.
Strictly for domestic use only.
Check the bottom of the cooling bowl prior to each use. Do not use the machine if there is a leak or
a crack.
Always use the appliance on a clean, at, hard, dry surface. Do not place the appliance on a hot
surface - a hot plate, for example, and not to use it or leave it near a naked ame.
Never heat the cooling bowl. Never use it in either a conventional or microwave oven.
Do not let the power lead touch any hot surface, or let it hang down over the edge of a table or
counter.
Do not let the appliance operate for more than one hour at a time. Let it stand for 30 minutes betwe-
en uses.
Switch off the appliance before cleaning and when not in use.
Do not expose the cooling bowl to a temperature greater than 40°C. Do not put it in a dishwasher
or ll it with hot liquid.
Never handle the cooling bowl with wet hands.
Store the apparatus in a dry place and ideally in its original box.
This appliance should not be used by anyone (including children) with reduced physical, sensory or
mental capacities or by anyone with insufcient experience or knowledge to use the device, unless
they are either supervised or provided with instructions on how to use the appliance in advance by
a person responsible for their safety.
Children must not be allowed to play with the appliance.
No responsibility can be taken for any damage caused by a failure to comply with these instructions
or by inappropriate use or poor handling of the appliance.

10
Ice Cream Maker Use instructions
Description:
1. Motor unit. 4. Transparent cover.
2. Power button (on/off). 5. Blade.
3. Axis of the blade. 6. Cooling bowl.
Before using for the rst time:
Clean the cooling bowl, cover, the blade and its axis using a sponge or cloth with warm water and
mild detergent. Do not use the dishwasher.
Rinse and fully dry the whole appliance.
Freezing the cooling bowl:
The most important step to make ice cream is to ensure that the cooling bowl is properly frozen.
The liquid between the walls of the cooling bowl must be completely frozen BEFORE using the ice
cream maker and adding your mix of ingredients.
Place the cooling bowl in your freezer. Check that the freezer temperature is around -18 ° C.
The time required to properly freeze the cooling bowl (minimum 8 hours) will depend on the tempe-
rature of and how full your freezer is. For best results, place the cooling bowl at the bottom of your
freezer where the temperature is the coldest.
Shake the bowl to check the level of freezing: you should no longer hear the sound of liquid inside.
Assembly of the appliance:
Turn the motor unit (1) and insert the axis of the blade (3).
Insert the motor unit in the transparent cover (4).
Attach the blade (5).
Remove the cooling bowl (6) from the freezer and ensure it is completely frozen. Secure the motor
unit and cover to the bowl by turning it clockwise.
Press the power button (2) to start the blade rotating.
Immediately pour in your mixture of ingredients through the opening located on top of the transpa-
rent cover.
Let the unit run for about 20-40 minutes. The maximum operating time is one hour.
Comment: The consistency of “homemade” ice cream is often softer than industrial produced ice
cream. If your ice cream is too liqueed, pour it into another container using a rubber spatula or
wooden spoon. Place this container in the freezer to harden the ice cream.
Maintenance:
The cooling bowl, blade, and the cover can be washed in warm water with a mild detergent. Rinse
thoroughly. Do not put any parts in the dishwasher.
The motor unit can be cleaned using a warm, damp cloth. And never immerse the motor unit in wa-
ter. Make sure all parts are completely dry before storing. Never put the ice pack in the freezer if it
is still damp. Never store the motor unit, blade or axis in the freezer.

11
Ice Cream Maker Use instructions
Technical Features
Capacity : 1L
Power : 12W
Voltage : 220- 240V ~ 50Hz
For any improvement reasons, Beper reserves the right to modify or improve the product
without any notice.
Vanilla ice cream
Ingredients: 3 egg yolks - 50g sugar - 200ml milk - 100ml thick crème fraiche- a few drops of vanilla
essence.
Boil the milk. Beat the egg yolks and sugar in a bowl until the mixture whitens. Then gently pour
the milk into the bowl and mix well. Pour the mixture into the saucepan and heat, stirring until the
mixture forms a lm on the back of a wooden spoon. Be careful not to boil it. Stir in the cream and
vanilla essence. After allowing to cool, pour the mixture into the chilled bowl (by rotating the blade).
Strawberry yoghurt ice-cream
Ingredients: 200g of strawberries - 60g of sugar - 250ml natural yogurt.
Mix the strawberries and put them through a sieve to avoid mixing in the seeds. Add the sugar and
yoghurt and mix. Pour the mixture into the cooled bowl (by turning the blade).
Lemon sorbet
Ingredients: 120ml of lemon juice - the juice of ½ an orange - 170g sugar - 170ml water - 1 egg
white.
Heat the juices, water and sugar in a saucepan. Stir until boiling and simmer for 2-3 minutes. Leave
to cool. Beat the whites until stiff and fold into the pan. Pour the mixture into the cooled bowl (by
turning the blade).
DISPOSAL OF OLD ELECTRICAL APPLIANCES
The European directive 2011/65/EU on Waste Electrical and Electronic Equipment (WEEE), re-
quires that old household electrical appliances must not be disposed of in the normal unsorted
municipal waste stream. Old appliances must be collected separately in order to optimize the reco-
very and recycling of the materials they contain, and reduce the impact on human health and the
environment.
The crossed out “wheeled bin” symbol on the product reminds you of your obligation,
that when you dispose of the appliance, it must be separately collected.

CONTACT YOUR DISTRIBUTOR IN YOUR COUNTRY OR AFTER SALES DEPARTMENT
BEPER. E-MAIL assistenza@beper.com
WHICH WILL FORWARD YOUR ENQUIRIES TO YOUR DISTRIBUTOR.
GUARANTEE CERTIFICATE
This appliance has been checked in the factory. From the date of original purchase a 24 month
guarantee applies to material and production defects. The purchase receipt and the guarantee cer-
ticate must be submitted together in case of claim to guarantee.
For any technical assistance, please contact directly the seller or our head ofce in order to preserve
the appliance’s efciency and NOT TO void the guarantee. Any intervention on this appliance by
non-authorized persons will automatically void the guarantee.
Guarantee conditions
If the appliance shows defects as a result of faulty material and/or production during the period of
guarantee, we guarantee repair free of charge on condition that:
- The appliance has been used properly and for the purpose for which it has been intended.
- Repairs are professionally carried out by qualied persons who are appointed by the supplier.
- The purchase receipt shall be presented.
- The appliance showing a fair wear and tear shall not be covered by this guarantee.
Therefore, any part that could be accidentally broken or having visible signs of use in consuma-
ble products (such as lamps, batteries, heating elements…) is excluded from the guarantee, and
any defect whatsoever resulting from non-respect of the rules for use, negligence in usage and/or
maintenance of the appliance, damage during transport and any other damage not attributable the
supplier.
For every defect that could not be repaired within the guarantee period, the appliance will be repla-
ced free of charge.
Technical assistance
Even after the guarantee period we will always pay attention to repairs for defected appliances.
For technical assistance and/or repairs after the guarantee period you can directly contact the below
address:

FRANÇAIS
Sorbetiére Manuel d’instructions
13
ATTENTION : Veuillez lire ce mode d’emploi attentivement avant d’utiliser cet appareil et
conservez-le pour consultation ultérieure !
Consignes particulières de sécurités :
La tension indiquée sur la plaque d’identication doit correspondre à celle de l’alimentation secteur.
Ne plongez pas le cordon, la prise, le socle ou le bloc moteur dans l’eau ou dans tout autre liquide.
Ne tirez pas et ne tordez pas le cordon électrique. Si le cordon de secteur est endom-
magé, il doit être remplacé par un technicien qualié. Pour éviter tout danger, n’utilisez
pas l’appareil si le cordon d’alimentation ou l’appareil lui-même est endommagé.
N’introduisez jamais les doigts ou un ustensile dans l’orice de remplissage. Evitez de
toucher les éléments en mouvement.
Coupez l’appareil avant de changer les accessoires.
N’utilisez pas d’objets ou d’ustensiles pointus à l’intérieur du récipient de refroidissement.
Une spatule en caoutchouc ou une cuillère en bois peut être utilisée, quand l’appareil est
en position “off”.
Débranchez toujours l’appareil en cas d’anomalie de fonctionnement, avant chaque ou-
verture de couvercle ou pour monter ou nettoyer l’appareil.
Utilisation strictement domestique.
Vériez le fond du bol réfrigérant avant chaque emploi. N’utilisez pas l’appareil s’il y a une
fuite ou une fente.
Utilisez toujours l’appareil sur une surface propre, plate, dure, et sèche. Ne pas poser l’appareil sur
une surface chaude, plaque chauffante par exemple, et ne pas l’utiliser ou le laisser à proximité
d’une amme nue.
Ne chauffez jamais bol réfrigérant. Ne jamais l’utiliser dans un four classique ni dans un four à
micro-ondes.
Ne laissez pas le cordon électrique toucher les surfaces chaudes, ne le laissez pas pendre sur le
côté de la table ou du comptoir.
Ne laissez pas l’appareil fonctionner durant plus d’une heure de suite. Laissez reposer durant 30
minutes entre chaque utilisations.
Débranchez l’appareil avant de le nettoyer et quand vous ne l’utilisez pas.
Ne pas porter le bol réfrigérant à une température supérieure à 40°C. Ne pas le mettre dans un
lave-vaisselle et ne pas le remplir d’un liquide chaud.
Ne jamais prendre le bol réfrigéré avec les mains mouillées.
Ranger l’appareil dans un endroit sec et de préférence dans sa boite d’emballage.
Cet appareil n’est pas prévu pour être utilisé par des personnes (y compris les enfants) dont les
capacités physiques, sensorielles ou mentales sont réduites, ou des personnes dénuées d’ex-
périences ou de connaissances, sauf si elles ont pu bénécier, par l’intermédiaire d’une personne
responsable de leur sécurité, d’une surveillance ou d’instructions préalables concernant l’utilisation
de l’appareil.
Il convient de surveiller les enfants pour s’assurer qu’ils ne jouent pas avec l’appareil.
Aucune responsabilité ne peut être assumée pour tout dommage dû au non respect de ces instruc-
tions ou toute utilisation inadéquate ou mauvaise manipulation.

14
Sorbetiére Manuel d’instructions
Description :
1. Bloc moteur. 4. Couvercle transparent.
2. Bouton d’allumage (on/off). 5. Pale.
3. Axe de la pale. 6. Bol réfrigérant.
Avant la première utilisation :
Nettoyez le bol réfrigérant, le couvercle, la pale et son axe à l’aide d’une éponge ou d’un chiffon
avec l’eau chaude et du détergent doux. N’utilisez pas le lave-vaisselle.
Rincez et séchez parfaitement l’ensemble.
Congélation du bol réfrigérant :
L’étape la plus importante pour faire de la glace est de s’assurer que le bol réfrigérant soit correcte-
ment gelé.
Le liquide entre les parois du bol réfrigérant doit être complètement congelé AVANT l’utilisation de
la glacière et l’introduction de votre mélange d’ingrédients.
Placez le bol réfrigérant dans votre congélateur. Vériez que la température du congélateur est
d’environ -18°C.
La durée nécessaire pour geler correctement le bol réfrigérant (minimum 8 heures) dépendra de la
température et du degré de remplissage de votre congélateur. Pour un meilleur résultat, placez le
bol réfrigérant au fond de votre congélateur où la température est la plus froide.
Secouez le bol pour vérier l’état de congélation : vous ne devez plus entendre le bruit du liquide à
l’intérieur.
Assemblage de l’appareil :
Retournez le bloc moteur (1) et insérez l’axe de la pale (3).
Insérez le bloc moteur dans le couvercle transparent (4).
Fixez la pale (5).
Sortez le bol réfrigérant (6) du congélateur et assurez-vous qu’il soit complètement gelé. Fixez
l’ensemble composé du couvercle et du bloc moteur au bol en le faisant pivoter dans le sens d’une
aiguille d’une montre.
Appuyez sur le bouton d’allumage (2) an d’enclencher la rotation de la pale.
Versez immédiatement votre mélange d’ingrédients par l’orice qui se trouve sur le dessus du cou-
vercle transparent.
Laissez tourner l’appareil durant environ 20 à 40 minutes. La durée maximale de fonctionnement
est d’une heure.
Remarque : La consistance d’une crème glacé « maison » est souvent plus molle que les glaces
industrielles. Si votre crème glacé est trop liquide, versez-la dans un autre récipient à l’aide d’une
spatule en caoutchouc ou une cuillère en bois. Placez ce récipient au congélateur an de faire durcir
la crème glacé.

15
Sorbetiére Manuel d’instructions
Entretien :
Le bol réfrigérant, la pale, et le couvercle peuvent être lavés à l’eau chaude et au détergeant doux.
Rincez ensuite abondamment. Ne mettez aucune pièce dans le lave-vaisselle.
Le bloc moteur peut être nettoyé en employant un chiffon légèrement humide. Et n’immergez jamais
le bloc moteur dans l’eau.
Assurez-vous que toutes les pièces soient complètement sèches avant de les ranger. Ne placez
jamais le bloc réfrigérant au congélateur s’il est encore humide. Ne stockez jamais le bloc moteur,
la pale ou son axe au congélateur.
Caractéristiques techniques :
Capacité : 1L
Puissance : 12W
Voltage : 220- 240V ~ 50Hz
Dans une optique d’amélioration constante Beper se réserve le droit de modier ou amélio-
rer cet appareil sans préavis.
Glace vanille
Ingrédients : 3 jaune d’œufs – 50 gr de sucre – 200 ml de lait – 100 ml de crème fraiche épaisse –
quelques gouttes d’essence de vanille.
Faites bouillir le lait. Battez, dans un bol, les jaunes d’œufs et le sucre jusqu’à ce que le mélange
blanchisse. Versez ensuite le lait délicatement dans le bol et mélangez bien. Reversez la prépara-
tion dans la casserole et faites chauffer en remuant jusqu’à ce que le mélange forme une pellicule
sur le dos d’une cuillère en bois. Attention à ne pas le faire bouillir. Incorporez la crème fraîche et
l’essence de vanille. Après avoir laissé refroidir, versez le mélange dans le bol réfrigéré (en faisant
tourner la pale).
Glace yaourt fraise
Ingrédients: 200 gr de fraises – 60 gr de sucre glace – 250 ml yaourt nature.
Mixez les fraises et passez-les dans un tamis pour éviter les grains. Ajoutez le sucre glace et le
yaourt et mélangez. Versez le mélange dans le bol réfrigéré (en faisant tourner la pale).
Sorbet au citron
Ingrédients: 120ml de Jus de citron – jus ½ orange - 170gr de sucre - 170ml d’eau – 1 blanc d’œufs.
Faites chauffer les jus, l’eau et le sucre dans une casserole. Remuez bien jusqu’à l’ébullition et fai-
tes mijoter pendant 2-3 minutes. Laissez refroidir. Battez le blanc en neige et incorporez le dans la
casserole. Versez le mélange dans le bol réfrigéré (en faisant tourner la pale).

16
Sorbetiére Manuel d’instructions
TRAITEMENT DES DECHETS DES APPAREILS ELECTRIQUES ET
ELECTRONIQUES
Le produit en n de vie doit être détruit selon les normes en vigueur relatives à l’élimination des
déchets et ne peut être traité comme simple déchet ménagé.
Le produit doit être détruit dans un centre d’élimination des déchets adapté ou être restitué au re-
vendeur dans le cas d’une substitution avec un autre produit équivalent neuf.
Le fabricant prendra à sa charge les frais occasionnés pour la destruction du produit selon les ter-
mes de la loi en vigeur.
Le produit est composé de pièces non biodégradables et substances qui peuvent polluer l’environ-
nement si détruites de façon inapropriée . Par ailleurs, certaines parties de ces matières peuvent
être recyclées évitant ainsi toute pollution pour l’environnement. Il est de votre et notre devoir de
préserver la santé de l’environnement.
Le symbole indique que le produit répond aux normes requises par les nouvelles
directives introduites en faveur de l’environnement (2011/65/EU) et que le produit doit être détruit de
façon appropriée au terme du cycle de vie.
Au besoin, informez-vous auprès des autorités locales compétentes en matière d’élimination des
déchets de votre commune.
Toute personne qui ne tiendra pas compte de ces règles d’élimination des déchets indiquées dans
ce paragraphe en répondra selon la loi en vigueur.

LE SERVICE APRÈS-VENTE EST EFFECTUÉ PAR VOTRE REVENDEUR OU PAR
L’IMPORTATEUR/DISTRIBUTEUR DES PRODUITS BEPER.
ÉCRIVEZ UN E-MAIL AU assistenza@beper.com POUR CONNAITRE LE CENTRE SERVICE
AGRÉE BEPER LE PLUS PROCHE DE CHEZ VOUS.
CERTIFICAT DE GARANTIE
Cet appareil a été contrôlé en usine. La garantie est valable 24 mois à partir de la date d’achat pour
tout défaut de matériel ou de fabrication. En cas de réclamation, le ticket de caisse et la garantie
devront être présentés ensemble.
En cas de besoin et pour toute assistance technique, veuillez contacter votre revendeur ou vous
adresser à notre siège. Cela vous permettra de conserver votre appareil dans de meilleures con-
ditions et de NE PAS invalider la garantie. Toute manipulation de l’appareil par une personne non
autorisée ou non qualiée annulera automatiquement la garantie.
Conditions de garantie
Pendant la durée de garantie, si des pannes provenant d’un défaut de materiel et/ou de fabrication
apparaissent, nous assurons gratuitement la réparation aux conditions énoncées ci-dessous :
- l’appareil a été correctement utilisé et ce uniquement à l’usage pour lequel il a été fabriqué ;
- l’appareil a été réparé par des experts, c’est-à-dire par des personnes mandatées par le fournis-
seur ;
- la présentation du ticket de caisse est obligatoire;
- les pièces présentant les signes évidents d’usure ne sont pas pris en compte dans la garantie.
En conséquence, sont exclus de la garantie toutes les pièces qui auraient subi des dommages
accidentels ou présentant des signes d’usure normale (parmi lesquelles, ampoules, batteries, piles,
résistances), toutes les pièces comportant des défauts dus à la non utilisation domestique, la négli-
gence dans la manipulation et l’entretien, les dommages lors du transport et tous les dommages
non imputables directement au producteur.
Si un défaut survient lors de la période de garantie et ne peut être réparé, l’appareil sera remplacé
gratuitement.
Assistance technique
Même après la n de la garantie, nous accordons toujours une grande importance à la reparation.
Pour toute assistance technique et/ou reparations en dehors de la garantie, veuillez vous adresser
directement à l’adresse ci-desous :

18
Eismaschine Betriebsanleitung
ACHTUNG: Lesen Sie diese Gebrauchsanleitung sorgfältig, bevor Sie das Gerät verwenden.
Bewahren Sie die Anleitung gut auf.
Besondere Sicherheitshinweise:
Die Spannung auf dem Typenschild muss mit der Netzspannung übereinstimmen.
Kabel, Stecker, Steckdose oder Motoreinheit niemals in Wasser oder andere Flüssigkeiten tauchen.
Nicht am Stromkabel ziehen oder dieses verdrehen. Wenn das Stromkabel beschädigt ist, muss es
durch eine qualizierte Person ersetzt werden. Das Gerät nicht verwenden, falls das Kabel oder das
Gerät beschädigt sind, um eine Gefahr zu vermeiden.
Keine Finger oder Utensilien in die Einfüllöffnung stecken. Keine sich bewegenden Teile berühren.
Gerät vor dem Wechsel von Zubehörteilen von der Stromversorgung trennen.
Keine scharfen Gegenstände oder Utensilien im Kühlbehälter verwenden. Bei ausgeschaltetem
Gerät kann ein Gummischaber oder ein Holzlöffel verwendet werden.
Bei Fehlfunktionen, beim Öffnen der Abdeckung, beim Zusammensetzen und beim Reinigen das
Gerät stets von der Stromversorgung trennen.
Das Gerät ist nur für Haushaltszwecke gedacht.
Vor der Verwendung stets die Unterseite des Kühlbehälters auf Risse oder Leckstellen untersuchen.
Falls der Behälter beschädigt ist, darf das Gerät nicht verwendet werden.
Das Gerät nur auf einer sauberen, ebenen, stabilen und trockenen Oberäche verwenden. Das
Gerät niemals auf eine heiße Oberäche (z. B. eine Herdplatte) stellen und keinesfalls in der Nähe
von offenen Flammen betreiben oder aufbewahren.
Den Kühlbehälter niemals erwärmen. Den Behälter nicht in einem Ofen oder einer Mikrowelle
verwenden.
Das Netzkabel darf nicht mit heißen Oberächen in Verbindung kommen. Das Netzkabel nicht über
Tisch- oder Arbeitsächenkanten hängen lassen.
Das Gerät darf nicht länger als eine (1) Stunde ohne Unterbrechung betrieben werden. Nach einer
Stunde muss das Gerät 30 Minuten lang abkühlen.
Den Netzstecker des Geräts ziehen, wenn es nicht benutzt oder gereinigt wird.
Der Kühlbehälter darf keinen Temperaturen über 40 °C ausgesetzt werden. Der Behälter ist nicht
spülmaschinenfest und darf nicht mit heißem Flüssigkeiten gefüllt werden.
Den Kühlbehälter niemals mit feuchten Händen berühren.
Das Gerät ist an einem trockenen Ort aufzubewahren – am besten in der Originalverpackung.
Dieses Gerät ist nicht dafür vorgesehen, von Personen (einschließlich Kindern) mit eingeschränkten
körperlichen, sinnlichen oder geistigen Fähigkeiten oder Personen ohne Erfahrung oder Kennt-
nis verwendet zu werden, außer wenn sie von einer für ihre Sicherheit verantwortlichen Person
überwacht werden oder vorherige Anweisungen zur Verwendung des Geräts erhielten.
Das Gerät ist kein Kinderspielzeug.
Bei Missachtung dieser Anleitung, unsachgemäßer Verwendung oder Bedienfehlern wird keinerlei
Haftung für Schäden übernommen.

19
DEUTSCH
Eismaschine Betriebsanleitung
Beschreibung:
1. Motoreinheit 4. transparente Abdeckung
2. Ein/Aus-Schalter 5. Rührarm
3. Antriebswelle 6. Kühlbehälter
Vor der ersten Benutzung:
Reinigen Sie Kühlbehälter, Abdeckung, Rührarm und Antriebswelle mit einem Schwamm oder Tuch
und warmem Wasser und einem milden Reinigungsmittel. Verwenden Sie zum Reinigen keinesfalls
eine Spülmaschine.
Spülen und trocknen Sie alle Teile sorgfältig.
Kühlen des Kühlbehälters:
Damit Ihre Eiscreme gelingt, muss der Kühlbehälter richtig kalt sein.
Das bedeutet, dass die Flüssigkeit in den Behälterwänden vollständig gefroren sein muss, damit Sie
die Speiseeismaschine verwenden und Ihre Zutaten einfüllen können.
Legen Sie den Kühlbehälter in ein Tiefkühlgerät oder ein Gefrierfach.
Die Temperatur muss etwa –18 °C betragen.
Die erforderliche Kühldauer richtet sich nach der Temperatur und der Füllmenge Ihres
Tiefkühlgeräts oder Gefrierfachs. Sie beträgt mindestens 8 Stunden. Beste Ergebnisse
erzielen Sie, wenn Sie den Kühlbehälter bei kältester Einstellung ganz unten bzw. hinten
ins Tiefkühlgerät oder Gefrierfach stellen.
Schütteln Sie den Behälter: Wenn keine Geräusche der Flüssigkeit in den Behälterwän-
den mehr zu hören sind, ist sie gefroren.
Zusammensetzen des Geräts:
Drehen Sie die Motoreinheit (1) so, dass Sie die Antriebswelle (3) in die Einheit stecken
können.
Setzen Sie dann die Motoreinheit in die transparente Abdeckung (4).
Bringen Sie den Rührarm (5) an.
Nehmen Sie den Kühlbehälter (6) aus dem Tiefkühlgerät bzw. dem Gefrierfach und prüfen Sie, ob
die Flüssigkeit darin wirklich gefroren ist. Bringen Sie Motor und Abdeckung durch Drehen im Uhr-
zeigersinn fest auf dem Behälter an.
Drücken Sie den Ein/Aus-Schalter (2), um den Rührarm in Bewegung zu versetzen.
Geben Sie nun Ihre Zutaten direkt durch die Öffnung in der transparenten Abdeckung in den Behäl-
ter. Lassen Sie das Gerät 20 bis 40 Minuten lang arbeiten. Die maximale Betriebsdauer beträgt eine
Stunde.
Hinweis: Die Konsistenz von selbstgemachtem Speiseeis ist gewöhnlich weicher als die von indu-
strieller Eiscreme. Falls Ihnen das Eis nicht fest genug ist, können Sie mit einem Gummischaber
oder einem Holzlöffel in einen anderen Behälter geben und diesen noch einige Zeit in ein Tiefkühl-
gerät oder das Gefrierfach stellen.

20
Eismaschine Betriebsanleitung
Pege:
Kühlbehälter, Rührarm und Abdeckung können in warmem Wasser mit einem milden Reinigung-
smittel abgewaschen werden. Spülen Sie die Teile gründlich ab. Geben Sie keine Bestandteile in
die Spülmaschine.
Die Motoreinheit kann mit einem warmen, feuchten Tuch gereinigt werden. Tauchen Sie die Moto-
reinheit niemals in Wasser. Lassen Sie alle Teile gründlich trocknen, bevor Sie sie lagern. Legen Sie
den Kühlbehälter keinesfalls in ein Tiefkühlgerät oder Gefrierfach, solange er noch feucht ist. Legen
Sie Motoreinheit, Rührarm oder Antriebswelle keinesfalls in ein Tiefkühlgerät oder Gefrierfach.
Technische daten
Kapazität : 1L
Leistung : 12W
Spannung : 220-240V ~ 50 Hz
In Hinblick auf eine Verbesserungsperspektive behält sich Beper das Recht vor, das betref-
fende Produkt ohne Voranmeldung zu ändern bzw. umzubauen.
Vanilleeiscreme
Zutaten: 3 Eigelb – 50 g Zucker – 200 ml Milch – 100 ml dicküssige Crème Fraîche – einige Tropfen
Vanillearoma.
Milch aufkochen lassen. Eigelbe und Zucker in einer Schüssel schlagen, bis die Mischung weiß
wird. Anschließend die Milch vorsichtig in die Schüssel geben und alles gut durchmengen. Die
Mischung in einen Kochtopf geben und erhitzen; dabei Rühren, bis die Mischung an der Rückseite
eines Holzlöffels eine Haut hinterlässt. Auf keinen Fall kochen lassen! Nun die Crème Fraîche und
das Vanillearoma einrühren. Die Mischung nach dem Abkühlen bei drehendem Rührarm in den
gefrorenen Kühlbehälter geben.
Erdbeerjoghurt-Eiscreme
Zutaten: 200 g Erdbeeren – 60 g Zucker – 250 ml Naturjoghurt.
Erdbeeren im Mixer pürieren und durch ein Sieb geben, um die Kerne herauszultern. Zucker und
Joghurt hinzugeben und vermengen. Die Mischung bei drehendem Rührarm in den Kühlbehälter
geben.
Zitronensorbet
Zutaten: 120 ml Zitronensaft – Saft von ½ Orange – 170 g Zucker – 170 ml Wasser – 1 Eiweiß.
Gesamten Saft, Wasser und Zucker in einem Kochtopf erwärmen. Unter Rühren aufkochen und
2 bis 3 Minuten köcheln lassen. Abkühlen lassen. Eiweiße steif schlagen und unterheben. Die Mi-
schung bei drehendem Rührarm in den Kühlbehälter geben.
Table of contents
Languages:
Other Beper Ice Cream Maker manuals
Popular Ice Cream Maker manuals by other brands

MAXXMEE
MAXXMEE 02350 manual

Westfalia
Westfalia ESM 41107 operating instructions

Ugolini
Ugolini MINIGEL PLUS Series Operator's manual

Linea 2000
Linea 2000 DOMO DO9243I Instruction booklet

Frigomat
Frigomat Taylor C119 06 Series Operating instructions and maintenance

Menuett
Menuett 802-486 User instructions