3
manuale di istruzioni
SORBETTIERA E GRATTUGIA 2 IN 1
abbiano esperienza e conoscenza sul prodotto.
• Non tentare mai di smontare o riparare l’unità da solo. Se il cavo di
alimentazione viene danneggiato, deve essere sostituito con uno speciale
cavo o gruppo di cavi disponibile presso un tecnico specializzato.
• Questo prodotto è ideato esclusivamente per l’uso domestico.
• Per proteggersi da scosse elettriche, non immergere il corpo, il cavo o la
spina in acqua o in altri liquidi.
• Per evitare incidenti e danni al dispositivo, tenere sempre le mani e gli
utensili da cucina lontano dalle lame e dai coni mobili.
• ATTENZIONE: Le lame del cono sono estremamente aliate! Maneggiare
con attenzione i coni, tenendoli sempre dalla parte in plastica.
• Non usarlo per più di 2 minuti per volta senza sosta.
• Non utilizzare il dispositivo vuoto o senza cono.
• Non sminuzzare, macinare o aettare carne cruda o cotta.
• Non usare il dispositivo qualora i coni / le lame siano FOSSERO
danneggiati.
• Non rimuovere i coni nché il motore non si è arrestato completamente!
• Non spingere mai il cibo con le mani, usare sempre il pestello.
• Non usare il dispositivo per il cibo con consistenza eccessivamente
compatta, es. zucchero, carne.
PRIMA DEL PRIMO UTILIZZO
Pulire gli accessori (coni, ciotola e pestello) con acqua saponata. Sciacquare
e asciugare completamente.
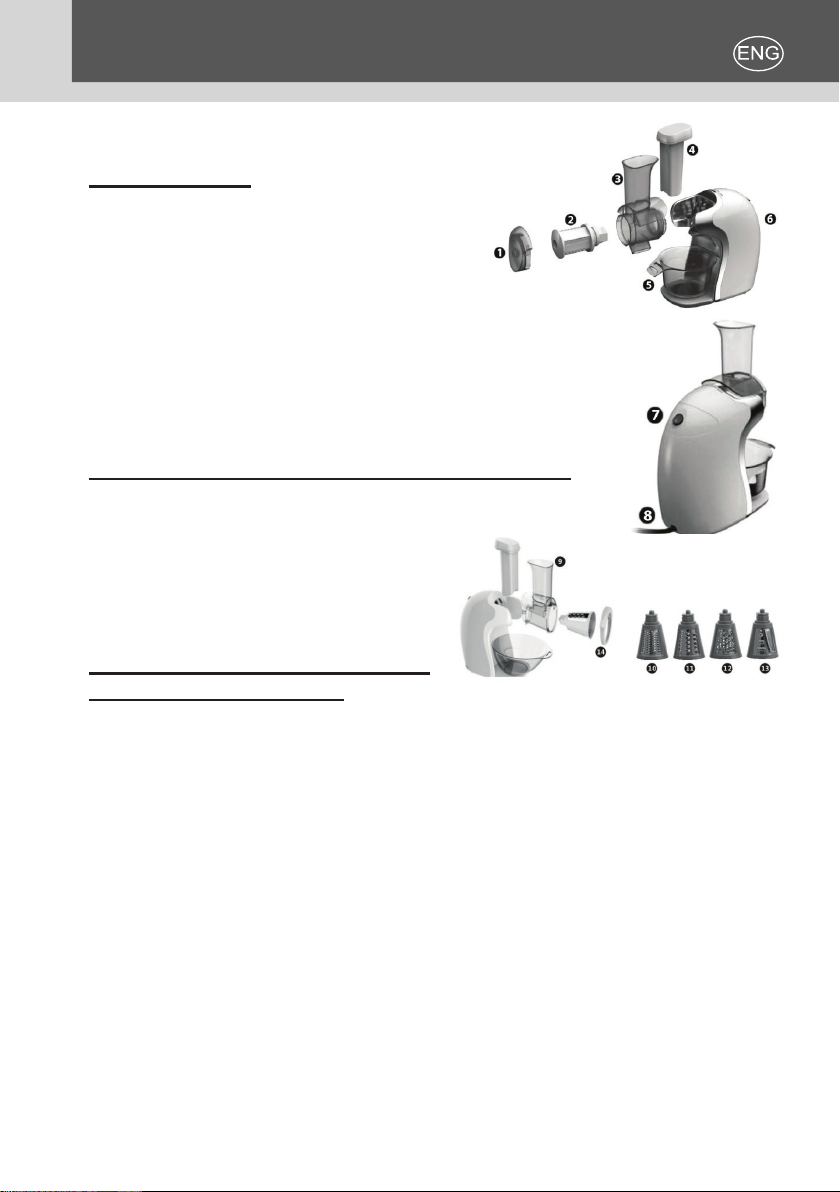
COME UTILIZZARE
• Selezionare il cono che corrisponde all’uso
desiderato. Inserire il cono intercambiabile nello
scivolo.
• Montare il tappo per la lama sullo scivolo e
bloccarlo.
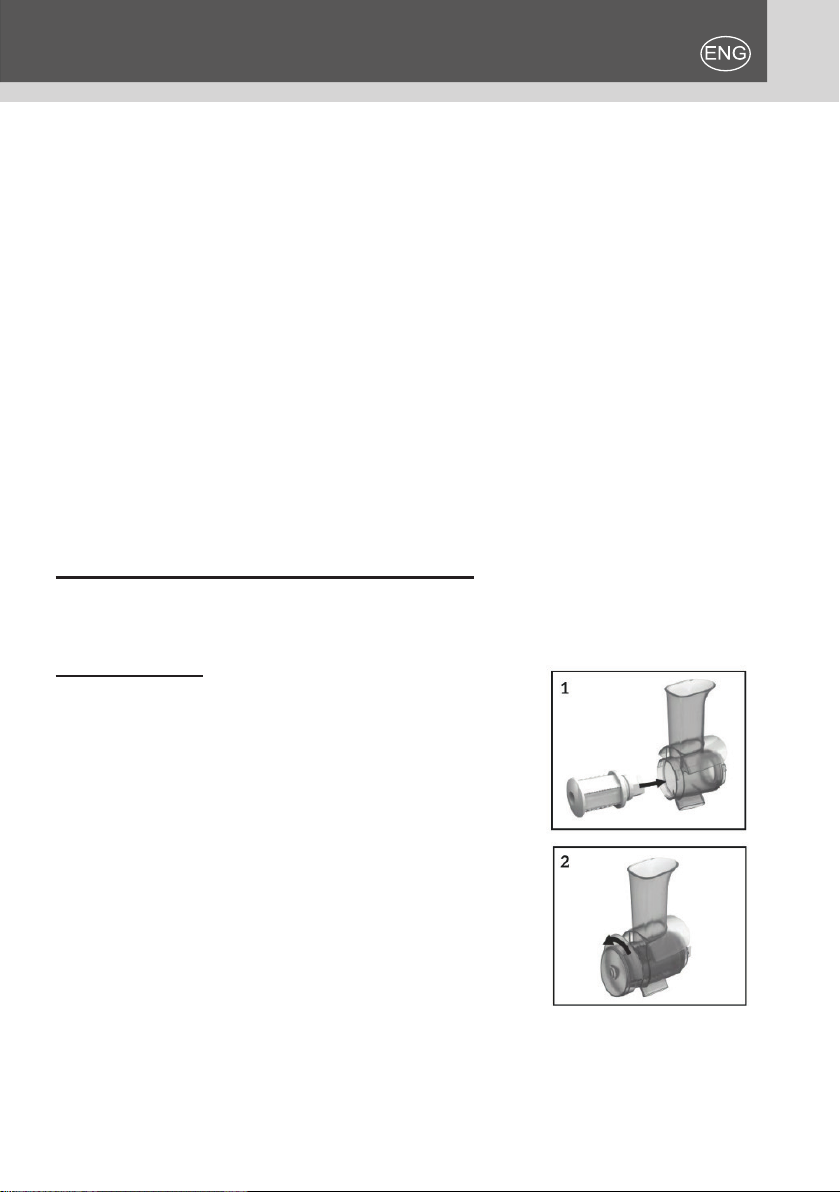
• Inserire lo scivolo nell’unità motore, in modo
che i coni si inseriscano perfettamente nel foro
corretto. Bloccare il cono ruotandolo in senso
antiorario.
• Mettere la ciotola sotto il tubo per il cibo.
• Collegare la spina del dispositivo e premere il
tasto di accensione ON, il cono inizierà a ruotare