Bergdahls HL350 User manual

Handtag
Lamphus
Gångjärn
Vridströmbrytare
Laddningssockel
Batterikapacitetsindikator
Lampans kontakts
Vägghållare
Laddningsenhet
Låsning för lampan
Vägghållarens kontakts
1
2
3
4
5
6
7
8
8a
8b
8c
9Ljusfilter, orange (ej med på bild)
Handlampa HL350
Att tänka på
· Läs noga igenom bruksanvisningen innan lampan tas i bruk.
· Bergdahls ansvarar ej för felaktigt bruk av lampa eller laddare.
· Lampan kan användas utomhus men bör skyddas mot vatten/regn. Laddaren får
endast användas inomhus.
· Innehåller smådelar, aktas för barn.
· Utsätt ej lampan och laddaren för höga/låga temperaturer.
· Vid rengöring koppla bort nätspänning och sätt vridströmbrytaren i läge 0 (off).
Rengör lampan/laddaren med en fuktig trasa.
· Denna produkt innehåller ett batteri som måste behandlas som miljöfarligt avfall.
· Låt lampan ladda minst 24 timmar innan den används första gången. Låt aldrig
lampan stå utan laddning under längre perioder. Batterier kan annars ta skada.
· Rikta aldrig ljusstrålen mot ögonen.
· Lampan uppfyller EEC direktivet LVD:2006/95/EC och EMC:2004/108/EC
Ikon Funktion
Lampan avstängd
Fast sken
Blinkande sken
Batterikapacitetsindikator
Funktion vridströmbrytare (4)
Ikon Status
Batteri låg spänning (röd)
Batteri medel (grön)
Batteri fulladdat (gul)
Lampa tänd och fungerar ok
Lampa laddas i nätdrift
Funktion batterikapacitetsindikator (6)
Ställ vridströmbrytaren i läge ”batterikapacitetsindikator”
för att läsa av status
1. Montera vägghållaren på en plan väggyta nära ett vägguttag i ett torrt utrymme inomhus.
2. Skruva fast den med 4 st 6mm skruvar.
Laddning av handlampan i vägghållaren
1. Innan handlampan sätts i vägghållaren, kontrollera att kontaktstiften på lampan (7) och vägghållaren (8c) är rena.
2. Vinkla lampan framåt och pressa den mot vägghållaren tills båda låsningarna (8b) på
vägghållaren klickar till och låser fast lampan.
3. Ställ vridströmbrytaren i önskat läge.
4. För att lossa lampan från vägghållaren, ta tag i handtaget (2) och dra det nedåt.
Vinkling av lamphus
Lamphuset kan vinklas 20oframåt och 90obakåt
Byte av batteri
1. Ta bort handlampan från vägghållaren och ställ vridströmbrytaren i läge 0.
2. Lossa de 6 skruvarna på baksidan av handlampan och plocka bort locket.
3. Plocka ur batteriet och lossa anslutningarna.
4. Ersätt batteriet med ett nytt av samma typ. Observera polariteten +=röd, -=svart.
Det gamla batteriet får ej kastas i hushållssoporna, det ska lämnas in på en miljöstation.
Byte av ljuskälla
1. Ta bort handlampan från vägghållaren och ställ vridströmbrytaren i läge 0.
2. Lossa lamphuset genom att vrida det motsols.
3. Lossa reflektor och byt ljuskälla. Rör ej ljuskälla eller reflektor med bara fingrar. Montera reflektor.
4. Montera tillbaka lamphuset genom att vrida det för hand medsols tills det tätar ordentligt.
LED 3W
6h vid fast sken, ca 8h vid blinkade sken
Slutet blybatteri 6V 4Ah
20-24 timmar vid helt urladdat batteri
4-5år vid omgivningstemperatur +20oC
Nätadapter 230Vac 50Hz alternativt billaddare 12Vdc
+5 till +25oC
IP43 (handlampa), IP20 (laddare)
290x130x150mm
1,35kg
Teknisk Data
Ljuskälla:
Brinntid:
Batteri:
Uppladdningstid batteri:
Livslängd batteri:
Inspänning:
Omgivningstemperatur:
Kapslingsklass:
Mått (hxbxdj):
Vikt:
Förbrukad produkt
Förbrukad produkt får ej kastas med vanligt hushållsavfall. Produkten ska lämnas till en miljöstation för återvinning av elektriska
produkter.
Vi förbehåller oss rätten till konstruktionsändringar
Funktion vid nätavbrott
Rekommenderat är att vridströmbrytaren vid laddning sätts i läge "fast sken" så att ljuskällan tänds vid ett spänningsbortfall så
att man hittar handlampan.
Montering av vägghållare
Tel. 013 36 44 60
www.bergdahls.com
R00490-B4-1
1. Tryck fast ljusfiltret mot lamphuset tills det fastnat
2. För att plocka bort ljusfiltret, dr flikarna i ljusfiltret rakt ut.
Montering av ljusfilter

Handheld emergency lamp HL350
Important warnings
· Carefully read the mounting instruction.
· Bergdahls cannot be liable for damages as result of improper/unreasonable and wrong use of the
product.
· The lamp is weatherproof and can be used outdoor, but it is recommended that it will be protected
from water and rain. The charger is only for indoor use.
· Keep away from Children.
· Preserve the product at low and appropriate environmental conditions.
· Whatever cleaning and maintenance product intervention must be done by disconnecting the unit
from the main supply and with rotary switch in mode “off”on lamp. Clean product with a damp cloth.
· This product contains a battery which could be toxic if improperly lost in the environment, please
follow local rules concerning recycling.
· The first charge of the product must be of a complete cycle of 24 hours continuously. Do not keep
the product with the battery flat for more than 6 months, since it could be damaged.
· Do not shine beam directly into eyes or toward objects in movements to avoid any dazzling.
· The lamp is in accordance with the provision of EEC directives LVD:2006/95/EC and EMC:2004/108/
EC
Carrying handle
Lamphead
Hinge
Rotary switch
Charging socket
Battery capacitor indicator
Lantern charging contacts
Wall Holder
Charge socket
Locking pin
Wallholder charging contacts
Reflector cap, orange (without fig.)
1
2
3
4
5
6
7
8
8a
8b
8c
9
Icon Function
Lamp is switched o
Continuous light
Flashing light
Battery capacitor indicator
Function of rotary switch (4)
Icon Status
Low battery level (red)
Middle/Full battery level (green)
Battery fully charged (yellow)
The lamp is on and working properly
Is charging and connected to the
main power supply
Function battery capacitor indicator (6)
Put the rotary switch in mode “battery capacitor
indicator” to be able to read status
Function in emergency mode
When used as emergency lamp it is recommended that the rotary switch is in mode ”continuous light” while lamp being charged.
This so that the lightsource light up during a power brake down so that you can find the lamp.
Mounting the wall holder
1. Position the wall holder on a suitable place on the wall, preferably near a wall socket indoor on a dry place.
2. Fasten it with 4 screws thru the mounting holes. Use 6mm screws.
Charging lamp in the wall holder
1. Before placing the lamp in the wall-mounting support, make sure the charging contacts (7)
of the lamp and the wall holder (8c) are free and clean.
2. Tilt the lamp forward and press it on the wall support until both pins (8b)
of the wall support lock audible together with the lamp.
3. Put the rotary switch to the wanted mode. Connect the power mains adapter with 230Vac
mains and the charging plug to the wall support.
4. To remove the lamp from the support. Grasp the carrying handle (2) and tilt the lamp forwards and out of the wall holder.
Adjusting the reflector head
The reflector head (1) can be tilted with built in hinge-joint (3) up to 20oforwards and 90obackwards.
Using the reflector cap
1. Press the reector cap into the plastic lamp head and press the cap until it is ush with the lamp head.
2. To remove the reector cap, grasp the pins of the cap and pull out.
Battery replacement
1. Take the lamp out of the wall holder and put the rotary switch in mode”o”.
2. Loosen the 6 screws on the back side and remove the lid.
3. Pull the lead acid battery out and disconnect the contacts. Replace battery with a new of same voltage rating.
4. Observe correct polarity +=red, -=black. The old battery must be taken care of and recycled according to local rules.
Light source replacement
1. Take the lamp out of the wall holder and put the rotary switch in mode ”off”.
2.
3.
Turn the screw cap of the lamp head counter clockwise.
Loosen the reflector and exchange the light sorce. Do not touch the reflector or new light source with bare fingers.
Mount the reflector back in place.
4. To tighten the lamp head, turn the screw cap in clockwise direction.
Technical features:
LED 3W
6h (continuous), 8h (flashing)
Sealed lead acid battery 6V 4Ah
20-24h when fully discharged
4-5 year at surrounding temperature +20oC
Adapter 230Vac 50Hz or charger for car 12Vdc included
+5 till+25oC
IP43 (lamp), IP20 (charger)
290x130x150mm
1,35kg
Light source
Burn time:
Battery type:
Charging time battery:
Life time battery:
Charging power:
Surrounding temperature:
Protection degree:
Size (hxbxdj):
Weight:
How to take care of waste
Lamp/charger must not be disposed with unsorted municipal waste, it must be separately disposed at the end of its useful life. This
according to local rules.
Specificaons are subject to change without noce.
Phone +46-13 36 44 60
www.bergdahls.com
Table of contents
Languages:
Popular Outdoor Light manuals by other brands
Shoof
Shoof FARM 224 427 Instructions for use
Paradise Datacom
Paradise Datacom GL23922 quick start guide
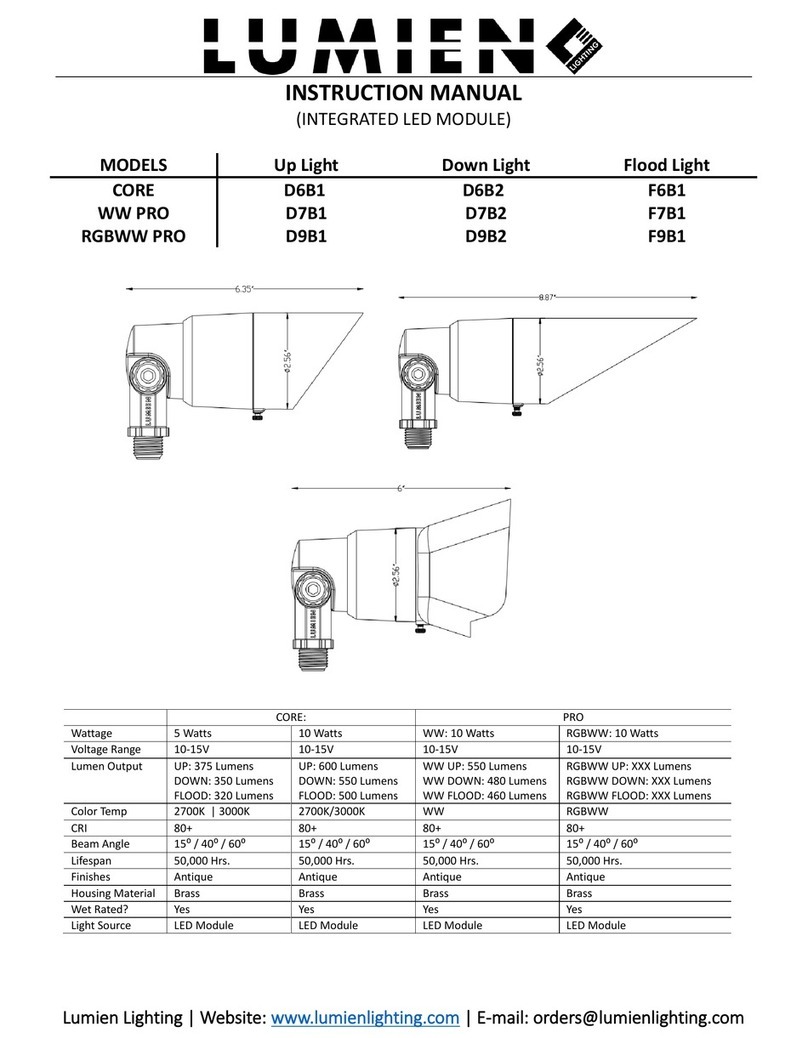
LUMIEN
LUMIEN CORE D6B1 instruction manual

Occhio
Occhio Mito terra 3d Mounting instructions / user manual

Urban Electric
Urban Electric GAS VIC Assembly and mounting instructions
LSI
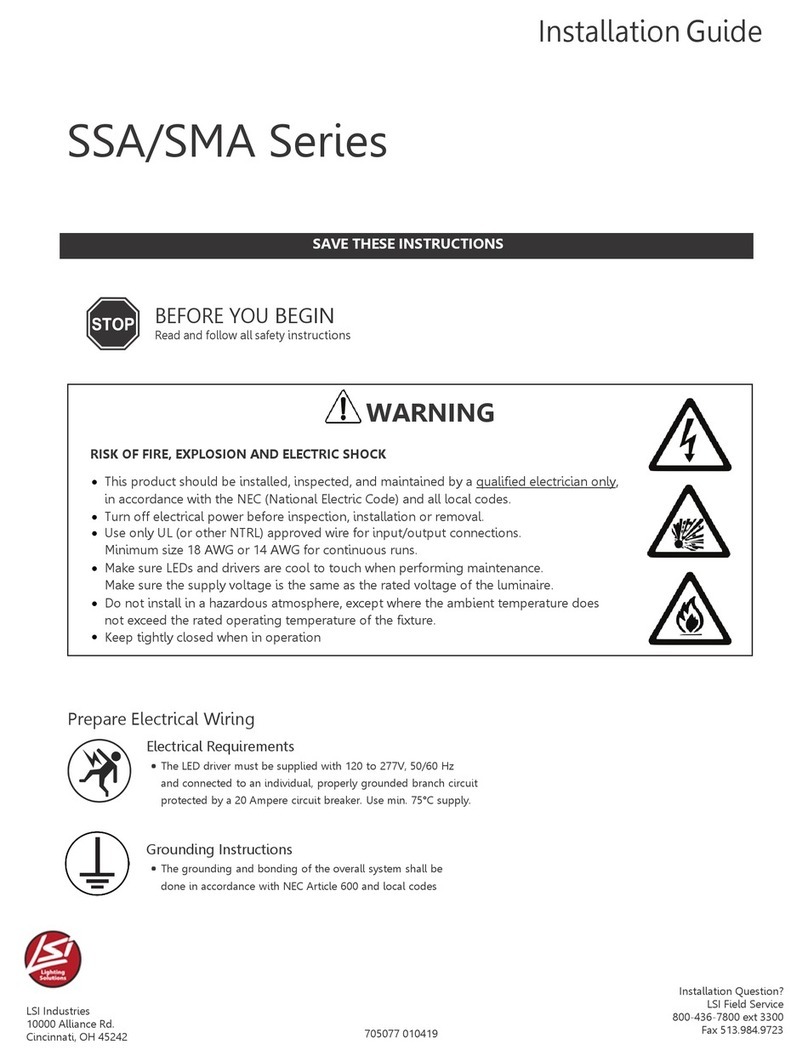
LSI SSA Series installation guide
Cariboni
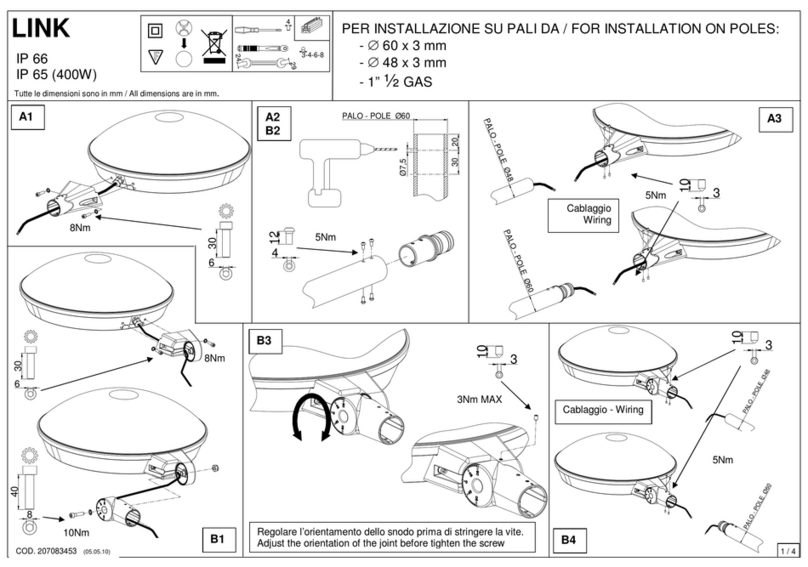
Cariboni Classic Link manual

Gainsborough
Gainsborough H520 Instructions for use
Sunlite
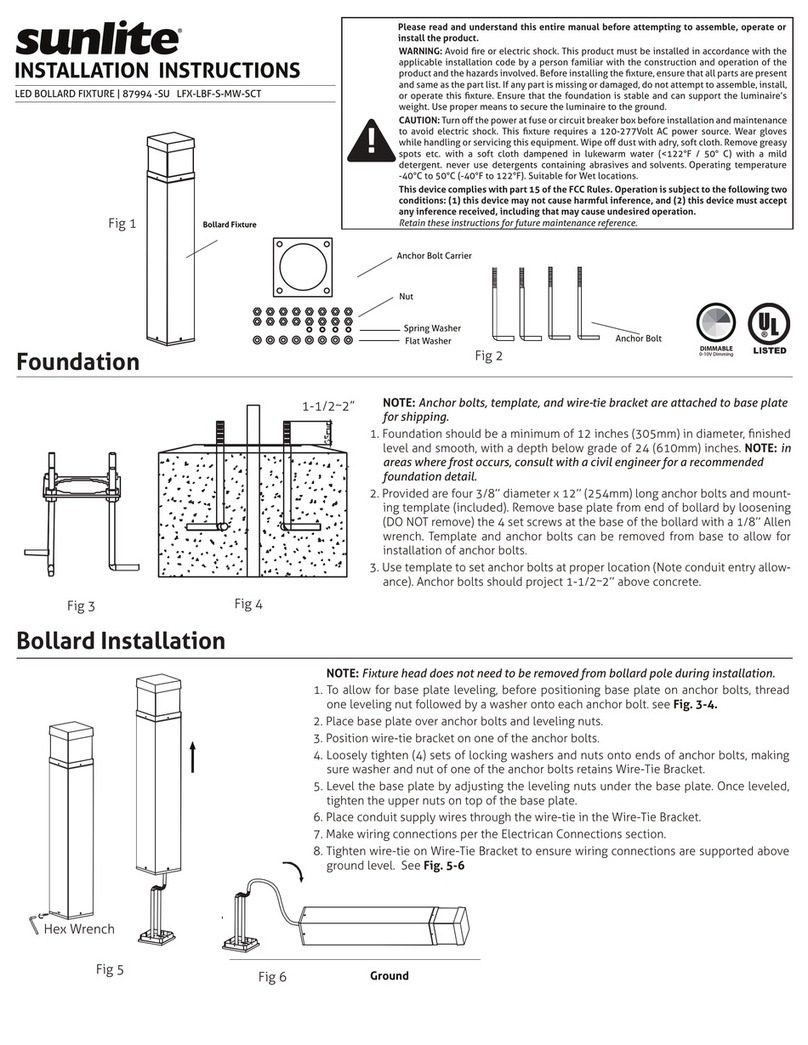
Sunlite 87994 -SU LFX-LBF-S-MW-SCT installation instructions

Home Decorators Collection
Home Decorators Collection F-9245 Use and care guide
JONATHAN Y
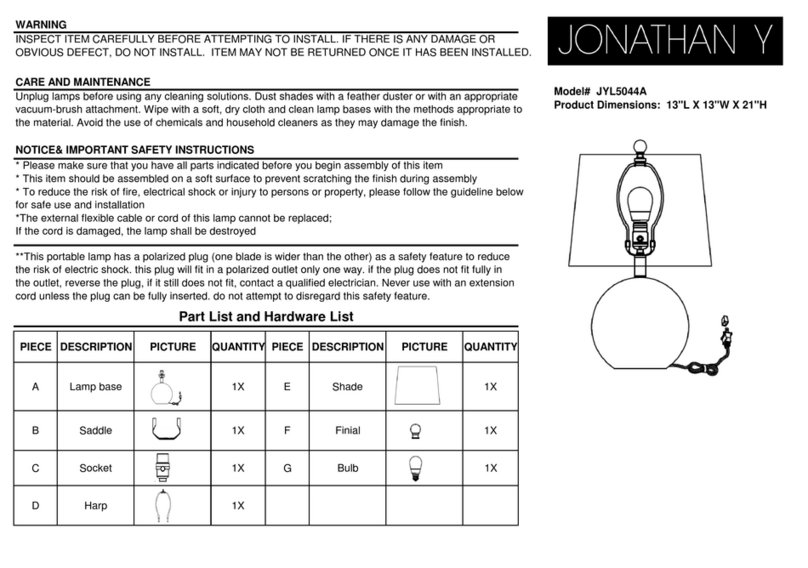
JONATHAN Y JYL5044A quick start guide

Homebase
Homebase EDIT instruction manual

