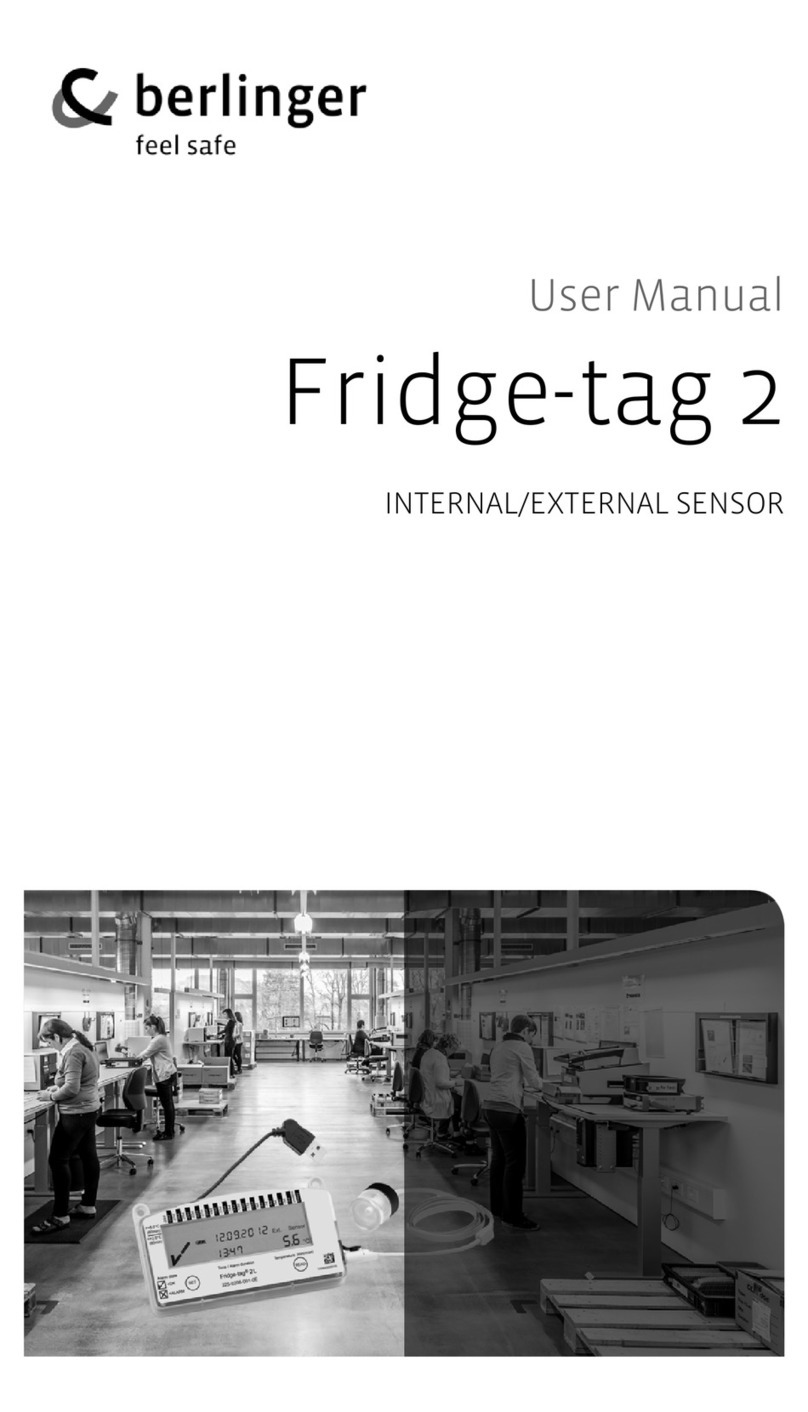
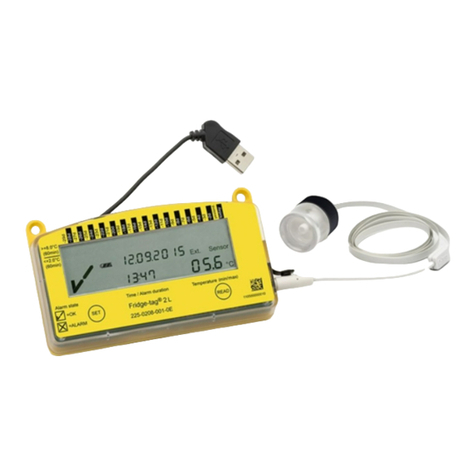
berlinger Fridge-tag 3 User manual

Fridge-tag®3
Server/SMS Version
with external sensor
OPERATION MANUAL
ENGLISH PAGE 1-40
1
Distributed by MicroDAQ.com www.MicroDAQ.com (603) 746-5524

1) Display explanations ____________________ 4
2) State of delivery/Sleep Mode _____________ 5
3) Quality check prior to activation __________ 5
4) Inserting the SIM card ___________________ 7
5) GPRSConguration ___________________ 10
6) Placing the sensor of the
Fridge-tag®3___________________________11
7) Activation process_____________________ 12
7.1) Overview sequences of activation 12
7.2) Activation 13
7.3) Setting the calendar format 13
7.4) Use of READ and SET 14
7.5) Setting the date 15
7.6) Setting the time 17
7.7) Connection error 19
8) READ and change settings/
How to correct setting mistakes__________ 20
8.1) Overview menu 21
8.2) Menu entry 22
9) Readout/Settings options via SMS________ 23
9.1) Status query 23
9.2) Assigning administrator rights 23
9.3) Changing alarm limits 24
9.4) Adding alarm recipients 24
9.5) Removing alarm recipients 25
9.6) Example of an alarm notication 25
9.7) Conrmation of alarm status 25
9.8) Alarm for weak battery status 26
Content Seite
2
Distributed by MicroDAQ.com www.MicroDAQ.com (603) 746-5524

English
9.9) SMS Commands 26
10) Readout/Settings options via ____________ 26
Logistimo Webserver
11) Display indication during measurement ___ 27
12) Warning symbol _______________________ 28
13) Daten auslesen________________________ 28
13.1) Option 1:
READ out day-per-day (30 day history) 29
13.2) Option 2:
READ out alarms (Alarm-Super-Jump function) 31
READ out audio Alarm 33
13.3) Option 3: READ out history via computer 34
13.4) Temperature record duration 36
13.5) Verycation process 37
14) Explanation of terms ___________________ 38
15) Expiry code explanation ________________ 38
16) Technicalspecications ________________ 38
17) Important Information __________________ 39
3
Distributed by MicroDAQ.com www.MicroDAQ.com (603) 746-5524

1OK ( ) or ALARM (X) indicator
2Daily HIGH/LOW alarm indicator
(showing history of the last 30 days)
3 Power on indicator (double point is ashing)
4Battery power
This icon indicates the remaining capacity of the battery
5Additional warning symbol
6Time, duration and text indicator
7Datum- und Textanzeige
8Indicator of measured minimum/maximum temperature
9Temperature display
10 Indicator of the temperature measurement
unit (°F/°C)
11 Indicator of activated sensor:
Int. = internal sensor (inside the Fridge-tag® 3)
Ext. = external sensor
(cable with temperature sensor)
12 signal (2G) 3G
13 SIM card
14 Data transfer
1) Display explanations
!
1-888
8808 2888
8888
min.
max. °F
°C
Int.SensorSensor
Ext.
11
1
2
4
3
5
6
7
89
10
12
13 14
3G
Fig. 1.1.0
4
back to menu
Distributed by MicroDAQ.com www.MicroDAQ.com (603) 746-5524

English
2) State of delivery/Sleep Mode
Temperature / Min. - Max
parameter 2
parameter 1
235-0208-003-E0E
Contains FCC ID: RI7GL865Q3
Contains IC: 5131A-GL865Q3
110700000223
-27d
-25d
-23d
-21d
-19d
-17d
-15d
-13d
-11d
-9d
-7d
-5d
-3d
yesterd.
-29d
-28d
-26d
-24d
-22d
-20d
-18d
-16d
-14d
-12d
-10d
-8d
-6d
-4d
-2d
today
-28d
Time / Alarm duration
Alarm state
= OK
= ALARM
Fridge-tag 3
®
Fridge-tag®3 ext. sensor is shipped in its
socalled „Sleep Mode“.
The display (LCD) is blank.
3) Quality check prior to activation
(in Sleep Mode)
The following chart shows which information will be
indicated on the LCD screen upon successive READ
button pressing while in Sleep Mode.
After approx. 60 seconds without any button pressing
the Fridge-tag®3 ext. sensor goes back into Sleep
Mode; the display is blank again.
Temperature / Min. - Max
parameter 2
parameter 1
235-0208-003-E0E
Contains FCC ID: RI7GL865Q3
Contains IC: 5131A-GL865Q3
110700000223
-27d
-25d
-23d
-21d
-19d
-17d
-15d
-13d
-11d
-9d
-7d
-5d
-3d
yesterd.
-29d
-28d
-26d
-24d
-22d
-20d
-18d
-16d
-14d
-12d
-10d
-8d
-6d
-4d
-2d
today
-28d
Time / Alarm duration
Alarm state
= OK
= ALARM
Fridge-tag 3
®
Press continuously
READ to readout
information
Fig. 2.1.1
Fig. 3.1.1
5back to menu
Distributed by MicroDAQ.com www.MicroDAQ.com (603) 746-5524

Indication of date and production test
result: 17. September 2016/PASS
Pressing the
READ-button
Displayed
Information
Display test:
all segments activated
Indication of the current temperature
and which sensor is activated (--.-°C if
ext. sensor is not connected)
Indicaton of the GPRS conguration
Status: ( ) congured
( ) not congured
*Indication of upper alarm settings.
Example shows duration and tempera-
ture limits: 10 hours, >+8°C, high
Indication of conguration ID number
(e.g. 1234)
*Indication lower alarm settings.
Example shows duration and tempera-
ture limits: 60 min., <-0.5°C, low
The display is blank again.
*(only indicated if factory preset, otherwise skipped)
80
1H
d r
u
1 000
°C
1st press of READ:
!
1-888
8808 2888
8888
min.
max.
°F
°C
Int.SensorSensor
Ext.
3G
Battery power:
3 bar = full (>70%)
2 bar = half-full (30-70%)
1 bar = low (0-30%), device should be
recharged immediately.
6101 2097
P SS4n
2nd press of READ:
258
°C
Sensor
Ext.
4th press of READ:
C1d
0000 0 0
1 342
5th press of READ:
6th press of READ:
-05
0L
d r
u
0 001
°C
7th press of READ:
8th press of READ:
11th press of READ:
9th press of READ:
0484 13
0051
PCb
0500 00
3491
S
Serial number of the device
PCb number
(manufacturer information only)
10th press of READ:
CP
4
n
100.0
3rd press of READ:
6
back to menu
Distributed by MicroDAQ.com www.MicroDAQ.com (603) 746-5524

English
4) Inserting the SIM card
Note: for server version, please ensure that the Logisti-
mo Server has been set up, before carring out the next
steps.
4.1 Installation of the SIM card
Only necessary if the SIM card is not included.
Remove the SIM card cover with a
screwdriver. (Screwdriver is not included.)
Slide the metal frame upwards
in the direction indicated by the
arrow.
Lift SIM card insert tray.
Fig. 4.1.1
Fig. 4.1.3
Fig. 4.1.2
SIM card specictaions SMS Version
Dimension: Mini(classic) SIM, 25 mm, 15 mm, 0,76 mm
Telephone
number::
when SIM card included, watch sticker on
the back
PIN-Code: when SIM card included, no code ist
necessary.
7back to menu
Distributed by MicroDAQ.com www.MicroDAQ.com (603) 746-5524

Insert SIM card as shown in g.
4.1.4. The diagonal edge of the
SIM card must
be located on
the front right if
device is placed
as shown on g.
4.1.5
SIM card insert with properly
inserted SIM card.
SIM card chip (contacts) facing
downwards.
The SIM card is locked correctly
when the SIM card insert tray can
no longer be opened.
Then close the SIM card cover with
the screwdriver.
See g. 4.1.1
Fig. 4.1.4Fig. 4.1.6
Press the SIM card insert tray down,
hold and slide* the metal frame
forwards to lock the SIM card insert
tray. See g. 4.1.6
*Slide the metal frame in the arrow
direction.
Fig. 4.1.7Fig. 4.1.8
Fig. 4.1.5
8
back to menu
Distributed by MicroDAQ.com www.MicroDAQ.com (603) 746-5524

English
4.2 Enter the SIM card pin code
(only required if the SIM card is locked with a PIN code
(secret number).)
Once the new SIM card is inserted, the following
display appears.
As soon as all 4 digits have been set and match the
PIN from the mobile provider, press the SET and
READ buttons simultaneously to save the password.
Attention: The SIM card will be locked after three (3) in-
correct PIN entries. The SIM card can only be unlocked
with a cellphonene using a matching PUK code. The
SIM card cannot be unlocked with the Fridge-tag®3.
Enter the rst digit of the PIN
code. Digit 1 ashes and is
ready for input. The PIN code is
always 4 digits long.
The digits are changed by
pressing the READ button. The
SET button conrms the input,
the ashing display moves to
the next digit.
Temperature / Min. - Max
parameter 2
parameter 1
235-0208-003-E0E
Contains FCC ID: RI7GL865Q3
Contains IC: 5131A-GL865Q3
110700000223
-27d
-25d
-23d
-21d
-19d
-17d
-15d
-13d
-11d
-9d
-7d
-5d
-3d
yesterd.
-29d
-28d
-26d
-24d
-22d
-20d
-18d
-16d
-14d
-12d
-10d
-8d
-6d
-4d
-2d
today
-28d
Time / Alarm duration
Alarm state
= OK
= ALARM
Fridge-tag 3
®
Pin
1
Fig. 4.2.1
Temperature / Min. - Max
parameter 2
parameter 1
235-0208-003-E0E
Contains FCC ID: RI7GL865Q3
Contains IC: 5131A-GL865Q3
110700000223
-27d
-25d
-23d
-21d
-19d
-17d
-15d
-13d
-11d
-9d
-7d
-5d
-3d
yesterd.
-29d
-28d
-26d
-24d
-22d
-20d
-18d
-16d
-14d
-12d
-10d
-8d
-6d
-4d
-2d
today
-28d
Time / Alarm duration
Alarm state
= OK
= ALARM
Fridge-tag 3
®
Pin
6853
Fig. 4.2.2
PRESS SET AND READ SIMULTANEOUSLY.
Temperature / Min. - Max
parameter 2
parameter 1
235-0208-003-E0E
Contains FCC ID: RI7GL865Q3
Contains IC: 5131A-GL865Q3
110700000223
-27d
-25d
-23d
-21d
-19d
-17d
-15d
-13d
-11d
-9d
-7d
-5d
-3d
yesterd.
-29d
-28d
-26d
-24d
-22d
-20d
-18d
-16d
-14d
-12d
-10d
-8d
-6d
-4d
-2d
today
-28d
Time / Alarm duration
Alarm state
= OK
= ALARM
Fridge-tag 3
®
Pin
6853
Fig. 4.2.3
9back to menu
Distributed by MicroDAQ.com www.MicroDAQ.com (603) 746-5524

5)Automaticinitialdeviceconguration
(only with server version)
Make sure that the GPRS signal strength is displayed
in the top right. The GPrS ConF display ashes while
the congurations les are downloading. This process
can take several minutes.
Note: Without Signal reception no conguration takes
place.
After successful conguration, the display shows an
OK symbol for 30 seconds then the display goes blank
and the screen is left empty. The initial conguration is
complete.
Error 3 appears if an error occurs during conguration.
Pressing the SET button for 3 seconds restarts the
conguration.
Temperature / Min. - Max
parameter 2
parameter 1
235-0208-003-E0E
Contains FCC ID: RI7GL865Q3
Contains IC: 5131A-GL865Q3
110700000223
-27d
-25d
-23d
-21d
-19d
-17d
-15d
-13d
-11d
-9d
-7d
-5d
-3d
yesterd.
-29d
-28d
-26d
-24d
-22d
-20d
-18d
-16d
-14d
-12d
-10d
-8d
-6d
-4d
-2d
today
-28d
Time / Alarm duration
Alarm state
= OK
= ALARM
Fridge-tag 3
®
GPrS
Conf
Fig. 5.1.1
3G
GPrS
Conf
Display for correct conguration
Fig. 5.1.2
3G3G
Display for failed conguration
Fig. 5.1.3
10
back to menu
Distributed by MicroDAQ.com www.MicroDAQ.com (603) 746-5524

English
6) Placing the sensor
of the Fridge-tag®3
Fridge-tag®3 with an external sensor
Two hours before activating the Fridge-tag®3 the
external sensor must be placed in its predetermined
location. It is recommended and important to place the
external sensor in the center of the refrigorator for a
perfect temperature observation.
For the right positioning of the ext. sensor within the
fridge, please follow the instructions of WHO, CDC or
any other governmental requirements of your country
(for more information visit www.berlinger.com).
External Sensor
Flat cable
Device Fridge-tag®3
Fig. 6.1.1
1
1
2
2
3
3
11 back to menu
Distributed by MicroDAQ.com www.MicroDAQ.com (603) 746-5524

7) Activation process
7.1) Overview sequences
of activation
NOTE: If the activation process has not been com-
pleted - after approx. 60 seconds without any button
operation - the device will go back into sleep mode.
The activation starts from the beginning.
If you want to read or change settings (e.g. change
°F to °C) after the activation has been comple-
ted, proceed as described in chapter „Read and
Change settings/How to correct setting mistakes“
7.2) Activation
7.5) Setting the date
7.3) Setting the calendar format
7.4) Usage of READ and SET
7.6) Setting the time
State of delivery
7.7) Connection error
12
back to menu
Distributed by MicroDAQ.com www.MicroDAQ.com (603) 746-5524

English
7.2) Activation of the device
To activate the device press the SET and the READ
button simultaneously for more than 3 seconds.
Successful activation is visible when the following
screen appears:
7.3) Setting the calendar format
7.3.1. Option 1: Setting the date format to:
dd.mm.yyyy
Press SET to save the calendar
format
Temperature / Min. - Max
parameter 2
parameter 1
235-0208-003-E0E
Contains FCC ID: RI7GL865Q3
Contains IC: 5131A-GL865Q3
110700000223
-27d
-25d
-23d
-21d
-19d
-17d
-15d
-13d
-11d
-9d
-7d
-5d
-3d
yesterd.
-29d
-28d
-26d
-24d
-22d
-20d
-18d
-16d
-14d
-12d
-10d
-8d
-6d
-4d
-2d
today
-28d
Time / Alarm duration
Alarm state
= OK
= ALARM
Fridge-tag 3
®
yyyd y__d
Temperature / Min. - Max
parameter 2
parameter 1
235-0208-003-E0E
Contains FCC ID: RI7GL865Q3
Contains IC: 5131A-GL865Q3
110700000223
-27d
-25d
-23d
-21d
-19d
-17d
-15d
-13d
-11d
-9d
-7d
-5d
-3d
yesterd.
-29d
-28d
-26d
-24d
-22d
-20d
-18d
-16d
-14d
-12d
-10d
-8d
-6d
-4d
-2d
today
-
28d
Time / Alarm duration
Alarm state
= OK
= ALARM
Fridge-tag 3
®
Fig. 7.2.1
yyyd y__d
Fig. 7.2.2
Fig. 7.3.1
13 back to menu
Distributed by MicroDAQ.com www.MicroDAQ.com (603) 746-5524

7.3.2. Option 2: Setting the date format to:
mm.dd.yyyy
Aftersettingthecaldendarformat,therstdigitof
thedatewillstartashing.
1
Then press SET to save the
calendar format
Press READ to change
the calendar format
Temperature / Min. - Max
parameter 2
parameter 1
235-0208-003-E0E
Contains FCC ID: RI7GL865Q3
Contains IC: 5131A-GL865Q3
110700000223
-27d
-25d
-23d
-21d
-19d
-17d
-15d
-13d
-11d
-9d
-7d
-5d
-3d
yesterd.
-29d
-28d
-26d
-24d
-22d
-20d
-18d
-16d
-14d
-12d
-10d
-8d
-6d
-4d
-2d
today
-28d
Time / Alarm duration
Alarm state
= OK
= ALARM
Fridge-tag 3
®
yyy_ ydd_
7.4) Instruction for the use of the
READ and the SET button
The READ button is used to adjust the number. Each
time you press the READ button, the ashing digit will
increase by 1. If you press READ more than necessary,
continue pressing the READ button until you obtain the
desired number.
The SET button is used to save the number. After
pressing the SET button the next digit will start ashing.
Note: If SET is pressed mistakenly, continue with the
set up. Instructions for changing the mistake are
described in chapter „Read and change settings/How
to correct setting mistakes„
2
Fig. 7.3.2
Press SET to conrm
Temperature / Min. - Max
parameter 2
parameter 1
235-0208-003-E0E
Contains FCC ID: RI7GL865Q3
Contains IC: 5131A-GL865Q3
110700000223
-27d
-25d
-23d
-21d
-19d
-17d
-15d
-13d
-11d
-9d
-7d
-5d
-3d
yesterd.
-29d
-28d
-26d
-24d
-22d
-20d
-18d
-16d
-14d
-12d
-10d
-8d
-6d
-4d
-2d
today
-28d
Time / Alarm duration
Alarm state
= OK
= ALARM
Fridge-tag 3
®
Fig. 7.4.2
Press READ to adjust the number
Temperature / Min. - Max
parameter 2
parameter 1
235-0208-003-E0E
Contains FCC ID: RI7GL865Q3
Contains IC: 5131A-GL865Q3
110700000223
-27d
-25d
-23d
-21d
-19d
-17d
-15d
-13d
-11d
-9d
-7d
-5d
-3d
yesterd.
-29d
-28d
-26d
-24d
-22d
-20d
-18d
-16d
-14d
-12d
-10d
-8d
-6d
-4d
-2d
today
-28d
Time / Alarm duration
Alarm state
= OK
= ALARM
Fridge-tag 3
®
Fig. 7.4.1
14
back to menu
Distributed by MicroDAQ.com www.MicroDAQ.com (603) 746-5524

English
The rst digit is
ashing:
The second digit is
ashing:
Temperature / Min. - Max
parameter 2
parameter 1
235-0208-003-E0E
Contains FCC ID: RI7GL865Q3
Contains IC: 5131A-GL865Q3
110700000223
-27d
-25d
-23d
-21d
-19d
-17d
-15d
-13d
-11d
-9d
-7d
-5d
-3d
yesterd.
-29d
-28d
-26d
-24d
-22d
-20d
-18d
-16d
-14d
-12d
-10d
-8d
-6d
-4d
-2d
today
-28d
Time / Alarm duration
Alarm state
= OK
= ALARM
Fridge-tag 3
®
7101 2026
7.5) Setting the date
The following example shows how to set the date
to: 16th Feb. 2017 (16.02.2017) in Europe format
Fig. 7.5.1Fig. 7.5.2
1
2
Press SET to save Press READ until „6“
appears as the second digit
1
2
Press SET to save Press READ until „1“
appears as the rst digit
15 back to menu
Distributed by MicroDAQ.com www.MicroDAQ.com (603) 746-5524

The fourth digit is
ashing:
The seventh digit is
ashing:
The third digit is
ashing:
Temperature / Min. - Max
parameter 2
parameter 1
235-0208-003-E0E
Contains FCC ID: RI7GL865Q3
Contains IC: 5131A-GL865Q3
110700000223
-27d
-25d
-23d
-21d
-19d
-17d
-15d
-13d
-11d
-9d
-7d
-5d
-3d
yesterd.
-29d
-28d
-26d
-24d
-22d
-20d
-18d
-16d
-14d
-12d
-10d
-8d
-6d
-4d
-2d
today
-28d
Time / Alarm duration
Alarm state
= OK
= ALARM
Fridge-tag 3
®
7101 2026
Note: The fth and sixth digit is set automatically.
1
2
Press SET to save Press READ until „0“
appears as the third digit
Fig. 7.5.3
1
Press READ until. „2“
appears as the fourth digit
Fig. 7.5.4
1
Press READ until „1“
appears as the seventh digit
Fig. 7.5.5
2
Press SET to save
2
Press SET to save
16
back to menu
Distributed by MicroDAQ.com www.MicroDAQ.com (603) 746-5524

English
The date is now set to: 16.02.2017
The eighth digit is
ashing:
Temperature / Min. - Max
parameter 2
parameter 1
235-0208-003-E0E
Contains FCC ID: RI7GL865Q3
Contains IC: 5131A-GL865Q3
110700000223
-27d
-25d
-23d
-21d
-19d
-17d
-15d
-13d
-11d
-9d
-7d
-5d
-3d
yesterd.
-29d
-28d
-26d
-24d
-22d
-20d
-18d
-16d
-14d
-12d
-10d
-8d
-6d
-4d
-2d
today
-28d
Time / Alarm duration
Alarm state
= OK
= ALARM
Fridge-tag 3
®
7101 2026
Aftersettingthedate,therstdigitofthetimewill
startashing.
7.6) Setting the time
This example shows how to set the time to: 13:47
Note: The clock function operates as a 24 hour clock
(e.g. 1:47 pm = 13:47).
The rst digit is
ashing:
Temperature / Min. - Max
parameter 2
parameter 1
235-0208-003-E0E
Contains FCC ID: RI7GL865Q3
Contains IC: 5131A-GL865Q3
110700000223
-27d
-25d
-23d
-21d
-19d
-17d
-15d
-13d
-11d
-9d
-7d
-5d
-3d
yesterd.
-29d
-28d
-26d
-24d
-22d
-20d
-18d
-16d
-14d
-12d
-10d
-8d
-6d
-4d
-2d
today
-28d
Time / Alarm duration
Alarm state
= OK
= ALARM
Fridge-tag 3
®
7101 2026
1 000
1
2
Press SET to save Press READ until „7“
appears as the eighth digit
Fig. 7.5.6
1
2
Press SET to save Press READ until „1“
appears as the rst digit
Fig. 7.6.1
17 back to menu
Distributed by MicroDAQ.com www.MicroDAQ.com (603) 746-5524

The time is now set to: 13:47
The third digit is
ashing:
The fourth digit is
ashing:
Temperature / Min. - Max
parameter 2
parameter 1
235-0208-003-E0E
Contains FCC ID: RI7GL865Q3
Contains IC: 5131A-GL865Q3
110700000223
-27d
-25d
-23d
-21d
-19d
-17d
-15d
-13d
-11d
-9d
-7d
-5d
-3d
yesterd.
-29d
-28d
-26d
-24d
-22d
-20d
-18d
-16d
-14d
-12d
-10d
-8d
-6d
-4d
-2d
today
-28d
Time / Alarm duration
Alarm state
= OK
= ALARM
Fridge-tag 3
®
7101 2026
1 403
Temperature / Min. - Max
parameter 2
parameter 1
235-0208-003-E0E
Contains FCC ID: RI7GL865Q3
Contains IC: 5131A-GL865Q3
110700000223
-27d
-25d
-23d
-21d
-19d
-17d
-15d
-13d
-11d
-9d
-7d
-5d
-3d
yesterd.
-29d
-28d
-26d
-24d
-22d
-20d
-18d
-16d
-14d
-12d
-10d
-8d
-6d
-4d
-2d
today
-28d
Time / Alarm duration
Alarm state
= OK
= ALARM
Fridge-tag 3
®
7101 2026
1 473
The second digit is
ashing:
Temperature / Min. - Max
parameter 2
parameter 1
235-0208-003-E0E
Contains FCC ID: RI7GL865Q3
Contains IC: 5131A-GL865Q3
110700000223
-27d
-25d
-23d
-21d
-19d
-17d
-15d
-13d
-11d
-9d
-7d
-5d
-3d
yesterd.
-29d
-28d
-26d
-24d
-22d
-20d
-18d
-16d
-14d
-12d
-10d
-8d
-6d
-4d
-2d
today
-28d
Time / Alarm duration
Alarm state
= OK
= ALARM
Fridge-tag 3
®
7101 2026
1 003
1
2
Press SET to save Press READ until „3“
appears as the second digit
Fig. 7.6.2
1
2
Press SET to save Press READ until „4“
appears as the third digit
Fig. 7.6.3
1
2
Press SET to save Press READ until „7“
appears as the fourth digit
Fig. 7.6.4
If you want to read or change settings (e.g. change °F to °C) after
the activation has been completed, proceed as described in chapter
„Read and Change settings/How to correct setting mistakes“.
18
back to menu
Distributed by MicroDAQ.com www.MicroDAQ.com (603) 746-5524

English
7.7) Connection error
After 10 minutes without a connection between the de-
vice and the sensor, the following alarm will be shown
on the display.
Please check the following two points:
1. If the sensor of the Fridge-tag®3 is properly con-
nected with the device. Be sure to rmly press and
twist the connector until you hear it „click“ into place.
2. If the sensor cable of the Fridge-tag®3 has any
defects.
As soon as one of the above mentioned errors have
been xed, the display shows current temperature
again, the measuring will now continue.
Note: During max. 1 minute after the connection no
temperature is displayed on the screen.
Temperature / Min. - Max
parameter 2
parameter 1
235-0208-003-E0E
Contains FCC ID: RI7GL865Q3
Contains IC: 5131A-GL865Q3
110700000223
-27d
-25d
-23d
-21d
-19d
-17d
-15d
-13d
-11d
-9d
-7d
-5d
-3d
yesterd.
-29d
-28d
-26d
-24d
-22d
-20d
-18d
-16d
-14d
-12d
-10d
-8d
-6d
-4d
-2d
today
-28d
Time / Alarm duration
Alarm state
= OK
= ALARM
Fridge-tag 3
®
!
7101 2026
--.-
°C
1 218
Fig. 7.7.1
Temperature / Min. - Max
parameter 2
parameter 1
235-0208-003-E0E
Contains FCC ID: RI7GL865Q3
Contains IC: 5131A-GL865Q3
110700000223
-27d
-25d
-23d
-21d
-19d
-17d
-15d
-13d
-11d
-9d
-7d
-5d
-3d
yesterd.
-29d
-28d
-26d
-24d
-22d
-20d
-18d
-16d
-14d
-12d
-10d
-8d
-6d
-4d
-2d
today
-28d
Time / Alarm duration
Alarm state
= OK
= ALARM
Fridge-tag 3
®
7101 2026
056
1 278
°C
Fig. 7.7.2
19 back to menu
Distributed by MicroDAQ.com www.MicroDAQ.com (603) 746-5524

8.1) Overview menu
8) Read and change settings/
How to correct setting mistakes
NOTE:
If you scroll through the menu and you reach the dis-
play of the measuring mode again you need to restart
from the begining by accessing the menu.
In order to adjust more than one setting (e.g. time &
°C/°F) you must complete each change and return to
menu mode for the 2nd change.
READ
SET
READ
READ READ
READ
READ
READ
READ
READ
READ
READ
READ
READ (exit)
SET
(exit)
SET
(exit)
SET
(exit)
SET
store and exit
SET
store and exit
SET
store and exit
SET
store and exit
SET, READ
(exit)
SET
(exit)
SET
Separate chart
Separate chart
SET
SET
SET
Menu mode
!
1-
8
8
8
8
8
0
8
2
8
8
8
8
8
8
8
min.
max.
°F
°C
Int.
Sensor
Ext.
°C
!
1-
8
8
8
8
8
0
8
2
8
8
8
8
8
8
8
min.
max.
°F
°C
Int.
Sensor
Ext.
!
1-
8
8
8
8
8
0
8
2
8
8
8
8
8
8
8
min.
max.
°F
°C
Int.
Sensor
Ext.
!
1-888
8808 2888
8888
min.
max. °F
°C
Int.Sensor
Ext.
!
1-
8
8
8
8
8
0
8
2
8
8
8
8
8
8
8
min.
max.
°F
°C
Int.
Sensor
Ext.
!
1-
8
8
8
8
8
0
8
2
8
8
8
8
8
8
8
min.
max.
°F
°C
Int.
Sensor
Ext.
°C
!
1-
8
8
8
8
8
0
8
2
8
8
8
8
8
8
8
min.
max.
°F
°C
Int.
Sensor
Ext.
°C
!
1-
8
8
8
8
8
0
8
2
8
8
8
8
8
8
8
min.
max.
°F
°C
Int.
Sensor
Ext.
°C
!
1-
8
8
8
8
8
0
8
2
8
8
8
8
8
8
8
min.
max.
°F
°C
Int.
Sensor
Ext.
°F
!
1-
8
8
8
8
8
0
8
2
8
8
8
8
8
8
8
min.
max.
°F
°C
Int.
Sensor
Ext.
!
1-
8
8
8
8
8
0
8
2
8
8
8
8
8
8
8
min.
max.
°F
°C
Int.
Sensor
Ext.
!
1-
8
8
8
8
8
0
8
2
8
8
8
8
8
8
8
min.
max.
°F
°C
Int.
Sensor
Ext.
!
1-
8
8
8
8
8
0
8
2
8
8
8
8
8
8
8
min.
max.
°F
°C
Int.
Sensor
Ext.
!
1-
8
8
8
8
8
0
8
2
8
8
8
8
8
8
8
min.
max.
°F
°C
Int.
Sensor
Ext.
20
back to menu
Distributed by MicroDAQ.com www.MicroDAQ.com (603) 746-5524
Other manuals for Fridge-tag 3
4
Table of contents
Other berlinger Accessories manuals
Popular Accessories manuals by other brands
DEUTA Controls
DEUTA Controls AL-602-03-868 EnoPuck BASIC manual
Mitsubishi Electric
Mitsubishi Electric PZ-70CSB-E Installation and instruction manual
Rockwell Automation
Rockwell Automation MagneMotion QuickStick HT user manual
Gutta
Gutta 4295157 Assembly instructions

Dräger
Dräger X-pid 800 Series Instructions for use
WATTECO
WATTECO Modbus Class A 50-70-080 quick start guide
