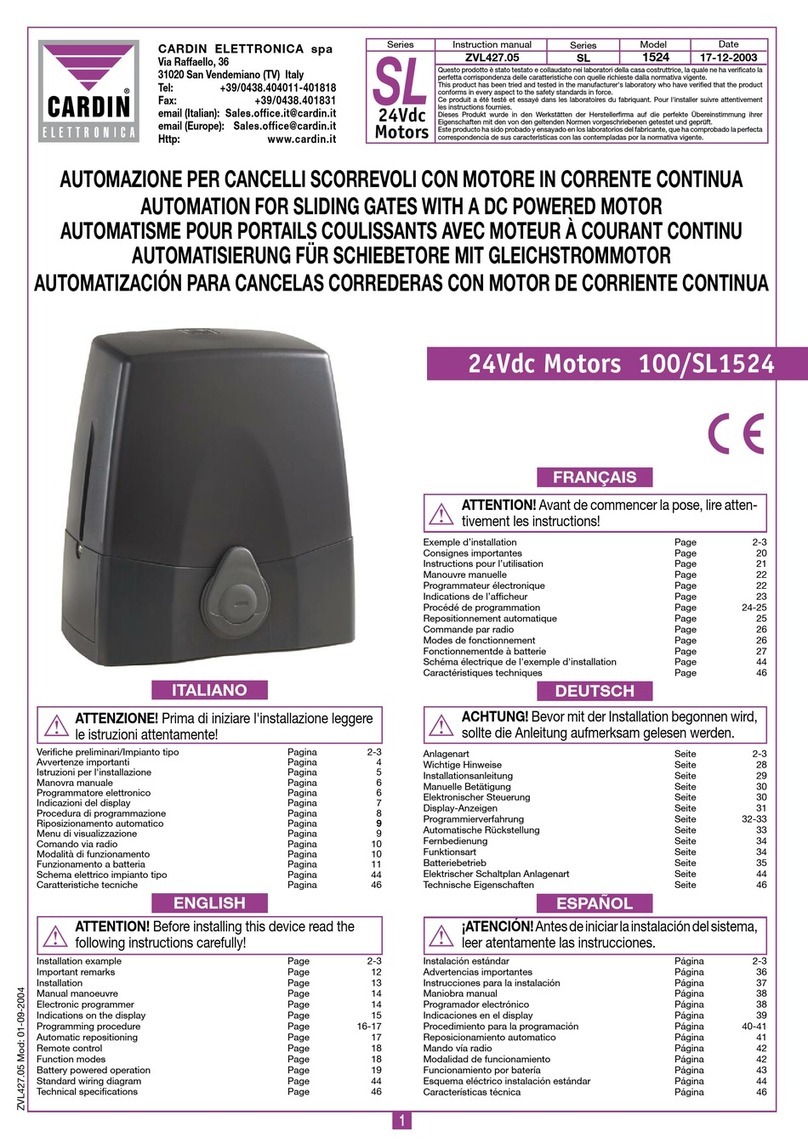
Bernal Rallye MC 45K User manual

Technische Daten, Technical data, Données techniques, Datos téchnicos
Rallye MC 45K 45Z 70K 70Z 120K 120Z
Netzanschluß, power supply,
tension d´alimentation,
alimentación eléctrica
230 V
50 Hz
230 V
50 Hz
230 V
50 Hz
230 V
50 Hz
230 V
50 Hz
230 V
50 Hz
Zug-/Schubkraft, force,
force de traction, fuerza de tracción 450 N 450 N 700 N 700 N 1200 N 1200 N
Mindesteinbauhöhe, headroom required
encombrement min. au plafond,
espacio min. requerido del techo a la
p
uerta
35 mm 35 mm 35 mm 35 mm 35 mm 35 mm
Antriebsmedium, drive mechanism,
entraînement, mechanismo de tiro
Kette, chain,
chaîne,
cadena
Zahnriemen, belt,
courroie
dentée, correa
Kette,chain,
chaîne,
cadena
Zahnriemen, belt,
courroie
dentée, correa
Kette,chain,
chaîne,
cadena
Zahnriemen,
belt, courroie
dentée, correa
Antriebslänge gesamt, overall length,
longueur totale, longitud total 3210 mm 3210 mm 3210 mm 3210 mm 3210 mm 3210 mm
Gewicht approx., approx. weight,
poids approx., peso aprox. 16 kg 16 kg 17 kg 17 kg 18 kg 18 kg
Laufweg (3m Schiene),
max. door opening (3m rail) ,
longueur utilisée (rail de 3m),
recorrido de apertura (guía de 3m)
2400 mm 2400 mm 2400 mm 2400 mm 2400 mm 2400 mm
max. Torfläche (leichte Stahltore),
max.door size (light steel doors),
limite d´utilisation (portes standard
légègers), tamâno máx. de la puerta
(puertas estándar ligera)
6 m26 m28 m28 m214 m214 m2
Motorleistung, engine output,
puissance du moteur, potencia del motor 110 W 110 W 180 W 180 W 320 W 320 W
Artikel-Nr: B 190.013
Rallye MC -1- 03-2004
Montage-Anleitung
Instructions Manual
Instructions de Montage
Instrucciones de Montaje

- 2-
2 Allgemeine Hinweise
Diese Betriebsanleitung wird von BERNAL oh-
ne jegliche Gewährleistung herausgegeben.
BERNAL behält sich das Recht vor, jederzeit
und ohne vorherige Mitteilung Verbesserungen
oder Veränderungen an den Geräten und die-
sem Handbuch vorzunehmen.
2.1 Allgemeine Sicherheitshinweise
Wichtige Sicherheitsanweisungen:
Die Montagedes
Garagentorantriebs nur von
Fachpersonal ausführen lassen.
Falsche Montage kann zu ernsthaften Ver-
letzungen führen ! Vor allen Arbeiten am
Antrieb Netzstecker ziehen (außer bei Test-
und Lernvorgängen) !
Bei der Durchführung der
Montagearbeiten sind die
geltenden Vorschriften zur Ar-
beitssicherheit / Berufsgenossenschaft zu
befolgen, z.B. UVV, DIN EN 60335-1und
VBG4.
Die bauseitige Elektroinstallation
ist von einer Elektrofachkraft
durchzuführen, und muss den
jeweiligen relevanten Schutzbestimmun-
gen nach DIN VDE 0100 und DIN VDE 0113
entsprechen. Die Schutzkontaktsteckdose
muss leicht zugänglich sein und darf max.
50cm vom Antriebskopf entfernt sein.
Die Inbetriebnahme der Toranlage,
in der dieser Torantrieb eingebaut
werden soll, ist so lange untersagt,
bis festgestellt wurde, dass diese
Toranlage den Bestimmungen der Richtli-
nie 98/37/EG entspricht und eine gültige
EG-Konformitätserklärung ausgestellt ist.
Der Hersteller übernimmt keine Gewähr-
leistung und Produkthaftung, wenn eine
unsachgemäße Installation durchgeführt
oder ohne dessen vorherige Zustimmung
eine Veränderung am Antrieb vorgenom-
men wurde. Der Einbau darf nur entspre-
chend den Montagerichtlinien ausgeführt
werden. Der Einbau oder die Mitverwen-
dung von Fremdteilen gefährdet die Si-
cherheit des Antriebs und ist deshalb un-
tersagt.
Es ist darauf zu achten, dass die nationa-
len VDE-Vorschriften für den Betrieb von
elektrischen Geräten berücksichtigt wer-
den. Wir übernehmen keine Verantwortung
für den nicht sachgemäßen Betrieb oder
die unsachgemäße Instandhaltung des To-
res, Zubehörs und des Antriebs.
2.2 Bestimmungsgemäße Verwen-
dung
Der Garagentorantrieb ist nur für den au-
tomatischen Betrieb von federausgegli-
chenen Schwing- und Sektionaltoren im
nicht gewerblichen Bereich einzusetzen.
Die empfohlenen max. Tormaße sind unter
1. Technische Daten aufgeführt. Das Tor
muss den jeweils geltenden Anforderun-
gen (z.B. DIN EN 12604 und DIN EN
12605) entsprechen. Vor der Antriebsmon-
tage muss das Tor von Hand leicht be-
dienbar sein.
Der Antrieb ist nur für den Betrieb in tro-
ckenen Räumen ausgelegt.
Die Garagendecke muss so konstruiert
sein, dass eine sichere Befestigung des
Antriebs möglich ist.
2.3 Hinweise für den Betrieb
Für Garagen ohne zweiten Zugang ist
eine Notentriegelung erforderlich. Diese
ist monatlich auf ihre Funktionsfähig-
keit hin zu überprüfen !
Nicht mit dem Körpergewicht an das Seil
der Notentriegelung hängen!
Achten Sie darauf, dass die Notentriege-
lung am Antrieb nicht an einem Dachträ-
gersystem oder sonstigen Vorsprüngen
des Fahrzeugs oder des Tores hängen
bleiben kann.
Informieren Sie alle Personen, welche
die Toranlage benutzen, über die ord-
nungsgemäße und sichere Bedienung.
Demonstrieren und testen Sie die Re-
version (mit einem 50 mm hohen Hin-
dernis bei max. 150 N) sowie die me-
chanische Entriegelung.
Betreiben Sie das Tor nur, wenn Sie
den gesamten Torbereich einsehen
können. Achten Sie darauf, dass sich
im Bewegungsbereich des Tores keine
Personen oder Gegenstände befinden.
ACHTUNG
FÜR DIE SICHERHEIT VON PERSONEN
IST ES LEBENSWICHTIG, ALLE ANWEI-
SUNGEN ZU BEFOLGEN.
DIESE ANWEISUNGEN AUFBEWAHREN.

- 3-
Warten Sie solange, bis das Tor zum
Stillstand gekommen ist. Personen oder
Fahrzeuge dürfen den Bewegungsbe-
reich des Tores erst dann betreten bzw.
befahren, wenn das Tor vollständig ge-
öffnet ist.
Kindern darf das Spielen
mit dem automatisierten
Tor nicht ermöglicht
werden. Handsender
von Kindern fernhalten !
Festinstallierte Zusatzgeräte (wie Taster
o.ä.) sind in Sichtweite des Tores anzu-
bringen. Der Abstand von sich bewe-
genden Teilen und die Höhe muss min-
destens 1,8 Meter betragen. Sie sind
unbedingt außer Reichweite von Kin-
dern zu montieren! Warnhinweise ge-
gen Einklemmen sind an auffälliger
Stelle oder in der Nähe des fest instal-
lierten Tasters anzubringen.
Tor, Antrieb und ggf. installierte Si-
cherheitseinrichtungen müssen regel-
mäßig überprüft werden. Beachten Sie
hierzu auch den Abschnitt 4 Wartung.
Achtung:
Das Tor kann bei schwachen, gebro-
chenen oder defekten Federn sowie bei
mangelhaftem Ge wichtsausgleich
schneller zulaufen. In diesem Fall kann
es beim Betätigen der Notentriegelung
zu unkontrollierten Bewegungen des
Tores kommen.
Den Torantrieb nicht benutzen, wenn
festgestellt wurde, dass Reparatur- o-
der Einstellarbeiten durchgeführt wer-
den müssen, da ein Fehler in der Anla-
ge oder ein falsch ausbalanciertes Tor
Verletzungen verursachen kann.

- 4-
2 General Instructions
This instruction manual is being released by
BERNAL without any warranty.
BERNAL reserves the right to make some
changes or modifications on the devices and
on this manual without making any
communication before.
2.1 General safety instructions
Important Safety orders:
The mounting of the garage door
opener should only be performed
by qualified personnel. Wrong
mounting may lead to serious injuries !
Before any operations on the device pull
out power plug (besides test and learning
procedures) !
While mounting the demanded
regulations for the operational
safety / employers mutual
insurance association have to be followed,
e.g. UVV, DIN EN 60335-1 and VBG4.
The practical electro installation
has to be performed by an electro
specialist, and has to fit to the
relevant protection norms according to DIN
VDE 0100 and DIN VDE 0113. The
protection power outlet has to be accessed
easily and must be distanced max. 50cm
away of the opener head.
The initial operation of the door
arrangement, in which this door
opener should be mounted, is
permitted until it is detected, that the door
arrangement is in accordance with the
instructions of the norm 98&37&EG and a valid
EC-Declaration of Conformity is certificated.
The manufacturer does not take on any
warranty or product liability, when there has
been an improper installation or if there was
made a change on the opener without his
previous approval. The installation must be
performed according to the mounting
directives. The installation of foreign parts
endangers the security of the opener and is
permitted.
You have to pay attention, that the national
VDE-regulations are regarded for operating.
We do not take on any responsibility for the
improper operating or maintenance of the
door, accessories and the opener.
2.2 Intended application
The garage door opener is only arranged for
the operation with well-balanced swing- and
sectional doors in the non-commercial sector.
The recommended max. door measurements
are listed under 1. Technical Data. The door
has to be in accordance with the valid
specifications (e.g. DIN EN 12604 and DIN EN
12605). Before mounting the opener the door
has to be moved easily by hand.
The opener is designed for the operation in dry
rooms.
The garage ceiling has to be constructed so
that a safe attachment of the opener is
possible.
2.3 Advices for operating
For garages without a second entrance a
locking-set is necessary. The locking/set
has to be checked monthly on its
efficiency!
Do not hang on the rope of the locking-set with
your weight!
Pay attention, that the locking-set of the
opener does not collide with the roof rack or
protrusions of the vehicle or the door.
Inform all persons, who are using the door
arrangement about a safe and proper
handling. Demonstrate and test the
reversion (with a 50 mm high obstacle at
max. 150 N) as well as the mechanical
locking.
Operate the door only, when you can watch
over the whole door area. Pay attention,
that there are no persons or subjects in the
area of operating of the door.
ATTENTION
FOR THE SAFETY AND LIFE OF
PERSONS IT IS ABSOLUTELY
NECESSARY TO FOLLOW ALL
INSTRUCTIONS.
KEEP THESE INSTRUCTIONS

- 5-
Wait until the complete standstill of the
door. Persons or vehicles are only allowed
to step or drive in the operating area of the
door, when the door is completely open.
Children do not have to be
allowed to play with
automated doors. Keep
transmitters away from
children !
Completely installed accessory parts (like
key device or similar) have to be attached
in sight of the door. The distance to the
moving parts and the height has the be
1,80m minimum. They have to be installed
out of the reach of children! Alert stickers
against pen in have to be put close to the
completely attached key device.
Door, opener and if so safety accessories
have to be checked regularly. Notice for
that chapter 4 maintenance.
Attention:
The door can shut down faster with weak,
broken or damaged springs as well as with
a defective counterweight. In this case
when using the locking set may lead to
uncontrolled movements of the door.
Do not use the opener, when it has been
detected, that service- or adjustment
workings have to be performed, because a
mistake on the arrangement or a bad
balanced door may cause injuries.

- 6-
2. Indications générales
BERNAL a sortie ces instructions de montage
sans aucune garantie. BERNAL se réserve le
droit de faire des améliorations ou des
modifications aux opérateurs et à cette manual
sans information précédente.
la montage de l´opérateur doit être
fait par des professionnels. Un
montage faux peut provoquer des
blessures sérieuses ! Enlevez le
câble du circuit avant chaque opération
(excepté à des opérations de
programmation) !
Pendant le montage les
prescriptions pour la sécurité du
travail / caisse d´assurance
mutuelle par exemple UVV, DIN EN 60335-1
et VBG4 sont à suivre.
L´installation d´électricité doit être
fait par un professionnel
d´électricité et doit être conforme
aux règlements de sécurité DIN
VDE 0100 et DIN VDE 0113. La prise de
courrant de protection contact doit être
facilement accessible et au maximum 50
cm distant du bloc moteur.
La mise en marche de
l´établissement dans laquelle
l´opérateur doit être installé est
interdit aussi longtemps qu´il y avait constaté
que l´établissement correspond aux
prescriptions des directives 98/37/EG et une
déclaration de conformité valide était établie.
Le fabricant ne prend pas de garantie si une
installation était faite mauvaise ou si il y
avaient fait des modifications à l´opérateur
sans une adhésion précédente. L´installation
ne doit que être fait correspondant aux
directives de montage. L´encastrement ou
l´utilisation d´autres parts met en danger la
sécurité de l´opérateur et est pour ça interdit.
Il faut faire attention que les prescriptions VDE
pour l´opération aux appareils électriques
soient respectés. On ne prend pas de
responsabilité pour une opérations mauvaise
ou un entretien mauvais de la porte de
l´accessoire ou de l´opérateur.
2.2 Utilisation selon destination
L´opérateur est seulement applicable pour
l´automatisation de portes battantes et
sectionelles équilibrées par ressorts dans la
domaine résidentielle. Les dimensions max.
recommandées pour la porte sont cités sur 1.
caractéristiques techniques. La porte doit être
conforme aux exigences valides (p.ex. DIN EN
12604 et DIN EN 12605). Avant l´installation
de l´opérateur il faut se rendre compte que la
porte peut facilement être manœuvrée à la
main.
L´opérateur est aligné à l´opération dans des
espaces secs.
Le plafond doit être construit dans la manière
que une fixation solide est possible.
2.3 Indications pour l´opération
Pour des garages sans entré
supplémentaire un déverrouillage
d´urgence est nécessaire. Le
fonctionnement de ce déverrouillage doit
être contrôlé chaque mois !
Ne s´attachez pas avec le poids du corps au
câble du déverrouillage !
Faites attention que le déverrouillage ne peut
pas s´accrocher à un porteur de voiture ou à
d´autres extrémités de la voiture ou de la
porte.
Informez toutes les personnes que utilisent
l´établissement sur l´opération régulière et
correcte. Démontrez et testez la réversion
(avec un obstacle de 50 mm d´hauteur à
max. 150 N) ainsi que le déverrouillage
mécanique.
Opérez la porte seulement dès que vous
pouvez voir la zone complète. Faites
attention qu´il ne se trouvent pas des
personnes ou des objets dans la zone de
mouvement de la porte.
ATTENTION
pour la sécurité des personnes il est
de l´intérêt vitale de suivre toutes les
instructions !
Gardez ces instructions !

- 7-
Attendez jusqu´au moment que la porte s´a
complètement arrêté. Se rendez compte
que avant votre entré ou votre sortie la
porte est complètement ouverte.
Tenez les télécommandes à
l´écart d´enfants !
Appareils supplémentaires, installés fixe
(comme poussoirs ou quelque chose
similaire) doivent être fixés au champ de
visibilité de la porte. La distance des objets
émouvants et l´hauteur doivent être au
minimum 1,5 mètres. Il faut les monter
impérativement à l´écart d´enfants !
Indications de précaution contre
étranglement doivent être visible ou tout
près d´un poussoir fixe.
La porte, l´opérateur et dispositifs de
sécurité doivent être contrôlés
régulièrement. S´il vous plaît notez aussi
paragraphe n° 4 entretien.
ATTENTION :
La porte peut se fermer plus vite si les
ressorts sont défectueux ou faibles ou si la
porte est mal équilibrée. Dans ce cas là, si
on utilise le déverrouillage, la porte pourrait
faire des mouvements incontrôlés.
S´il vous plaît n´utilisez pas l´opérateur
quand il avait noté que une réparation ou
un réglage soit nécessaire parce qu´il
existe un risque de blessures à cause d´un
erreur dans l´établissement ou à cause
d´une porte mal équilibrée.

- 8-
2 Indicaciones generales
BERNAL publica estas instrucciones de
montaje sin garantia. BERNAL se queda con
el derecho que puede hacer mejoras y
modificaciones a los operadores y a este
manual.
2.1 Indicaciones generales de
seguridad
Indicación de seguridad muy importante:
El montaje tiene que hacer un
profesional. Un montaje falso
puede llevar a heridas graves !
Antes de cada maniobras al operador se
tiene que tirar el enchufe de la red (excepto
a procesos de programación o de test) !
A la realización de las maniboras
de montaje se tiene que respectar
las validas prescripciones a la
seguridad del trabajo / cooperativa
professional, como por ejemplo UVV, DIN
EN 60335-1 y VBG4.
Un profesional del sector
electrónico tiene que hacer la
instalación de la electrónica. La
instalación debe ser conforme a las
normativas de protección DIN VDE 0100 y
DIN VDE 0113. La caja de enchufe de
protección contacto tiene que estar en un
lugar facilmente accesible ; la distancia del
enchufe al motor no debe pasar por encima
de 50 cm.
La operación de la instalación en la
que tiene que ser instalado el
operador es prohibido hasta que se
ha constatado que la instalación está
conforme a las normativas 98/37/EG y hasta
que existe una declaración de conformidad
EU.
El fabricante no acepta garantia si la
instalación fue mal hecho o si una
modificación al operador fue hecho sin
aprobación de él. La instalación tiene que ser
hecho según las directivas de montaje. La
instalación o la utilisación de partes extraños
compromete la seguridad del operador y por
eso es prohibido.
Es importante que las directivas VDE para la
operación de aparados eléctricos son
respectadas. Nosotros no aceptamos ninguna
responsibilidad para una operación mala o
para una reparación mala de la puerta, del
operador o del accessorio.
2.2 Utilización según prescripción
El operador puede solamente ser utilizado
para la operación automática de puertas
batantes y sectionnales equilibradas con
resortes en el sector residencial. Las
dimensiones máximas recomendadas para las
puertas son mencionado su 1. datos técnicos.
La puerta tiene que ser conforme a las
exigencias validas (por ejemplo DIN EN 12604
y DIN EN 12605). Antes de la montaje del
operador la puerta tiene que ser facilmente a
operar a mano.
El operador es previsto para operación en
espacios secos.
El techo de la garage tiene que ser solido así
que una fijación segura del operador es
posible.
2.3 Indicaciónes para la operación
Para garajes sin segunda entrada un
desbloqueo es necesario. Se tiene que
revisar este desbloqueo cada mes!
No se debe colgar con el peso del cuerpo a la
cuerda del desbloqueo!
Por favor respecte que el desbloqueo no
queda enganchado en la auto baca o en
alguna extremidad del coche o de la puerta.
Informe cada persona que utiliza la
instalación sobre la operación correcta y
segua. Demostre y pruebe la reversión (con
un obstaculo de 50 mm de altura a
máx.150N) tal como el bloqueo mecánico.
Solamente opere la puerta cuando se
puede ver toda la zona de la puerta. Fijese
que no haya personas o objetos en la zona
de movimiento de la puerta.
ATENCIÓN
para la seguridad de las personas es
vital de seguir todas indicaciones.
Tiene que conservar estas indicaciones !

- 9-
Por favor espere hasta que la puerta se ha
completamente parardo. Personas o
vehículos pueden sólo entrar la zona de
movimiento cuando la puerta está abierta.
A los niños no debe hacer
posible jugar con la puerta
automatizada. Los niños tienen
que ser llevado lejos de los
transmisores.
Aparados adicionales fijados (como
pulsadores o algo similar) tienen que ser
fijados en la alcance visual de la puerta. La
distancia de partes moviles y la altura tiene
que ser al mínimo 1,8 metros. Deben ser
fijados lejos del alcance de niños !
Indicaciones de aviso contra magulladura
tienen que ser colocadas visible y cerca de
los pulsadores fijados.
Puerta, operador y dispositivos de
seguridad tienen que ser revisados
regularmente. Por favor tome nota del
párrafo 4.
ATENCIÓN:
La puerta puede cerrar más rapido si los
resortes son defectos, quebrados o débils
o si la puerta está mal equilibrada. Este
caso puede, a la operación del desbloqueo,
conducir a movimientos incontrolados de
la puerta.
El operador no debe ser utilizado cuando
se ha notado que una reparación o una
maniobra de regulación sea necessario
porque haya un riesgo de heridas por un
error en la instalación o por una puerta mal
equilibrada.

Inhalt, contents, contenu, contenido
Kleinteile, small parts
petites piéces, piezas sueltas Werkzeuge, tools, outils, herramientas
17 13
O10
oder
or
ou
o
Je nach Modell
according to the model
selon le modéle
seúgún el modelo
5x 2x 6x
2x 4x 6x
2x 4x 13x 7x 1x
Kette
chain
chaîne
cadena
Zahnriemen
belt
courroie dentée
correa
TechnischeDaten, Technical data, Donnéestechniques, Datos téchnicos
50kp 50kp(B/Z) 60kp 60kp(B/Z) 120kp 120kp(B/Z)
Netzanschluß,powe rsupp ly,
alimentacióneléctrica
230V 230V 230V 230V 230V 230V
Zug-/Schubkraft,f orce, 500N 500N 600 N 600N 120 0N 1200N
Mindesteinbauhöhe,headroomrequired
espaciomin.requerido d e lt e choa la 35mm 35mm 35 mm 35mm 35mm 35mm
Antriebsmedium,drivemechanism,
entraînement,mech a n ismodetiro
Kette,chain,
chaîne ,
caden a
Zahnriemen,belt,
dentée,corre a
Kette,chain,
caden a
Zahnriemen,bel
t
dentée,correa
Kette,chain,
cade n a
Zahnriemen,
dentée,corre a
Antriebslängegesamt,overalllength, 3210mm 3210mm 3210mm 3210mm 3210mm 3210mm
Gewichta pp r o x.,approx.weight, 16kg 16kg 17kg 17kg 18kg 18kg
Laufweg(3mSchiene),
recorridodeap e r t u r a(guíade3m)
2400mm 2400mm 2400mm 2400mm 2400mm 2400mm
max.Torfläche(leichteStahltore),
limited´utilisation(portesstandard
(puertasestándarligera)
6m
26m
28m
28m
210m
210m
2
Motorleistung,engineoutput, 110W 110W 180W 180W 320W 320W
-10 -
min 35 mm min 35 mm
Torverriegelungen entfernen!
Deactivateall garage door locks!
Neutraliser t serrures de la porte!
Desactivetodas las cerraduras!
Einbauvoraussetzungen, prerequisites, conditions de montage,
requisitos de montaje
nur mit Zubehör B 146.66
with accessories only B 146.66
seulement avec accessoires B 146.66
con accessorios solamente B 146.66
nur mit Zubehör
with accessories
seulement avec accessoires
con accessorios solamente
2x
outes
1x

Tormitte
Tormitte, middle of the door,
milieu de la porte
1
2
3
4
Tormitte, middle of the door,
milieu de la porte
AA
4.4 Zusammenbau, assembly, montage
je nach Ausführung
according to each version
selon la version
- 11 -
Tormitte, centre of door
milieu de la porte Ø10
AA

- 12 -
Laufschienenmitte
middle of the rail
milieu du rail
centro de la guía
Auf die linke Seite!
To the left!
A gauche!
Al lado izquierdo!
Kette
chain
chaîne
cadena
Kette
chain
chaîne
cadena
Motor
Zahnriemen
belt
courroie dentée
correa

- 13 -
approx. 0,5 cm
Zahnriemen
toothed belt
courroie dentée
2) Kette / Zahnriemen spannen, tension chain / toothed belt, tendre la chaîne / courroie
approx. 0,5 cm
Kette
chain
chaîne
17
Laufschienenmitte
middle of the rail
milieu du rail
cventro de la guia
correa
cadena
Anziehen bis.....
tighten till.....
serrer .........
tensionar hasta....
Antriebskopf
Drive system head
Tête d'entraînement
Cabezal de accionamiento
Laufschiene, Track, Glissière, Riel
Laufschlitten in Endstellung TOR ZU TOR AUF
Slide in end position, door closed door open
Chariot en position finale Porte fermée Porte ouverte
Rieles en posición final Puerta cerrada Puerta abierta
4 Gummipuffer
selbstklebend
(Geräuschdämpfung)
1) Gummipuffer einsetzen, fit rubber buffer, utiliser un tampon en caoutchouc, emplear tampón de goma
Nur Kette, chain only, uniquement chaîne, sólo cadena
4 Self-adhesive
rubber buffer
(acoustic insulation)
4 Tampon caoutchouc
autocollant
(isolation sonore)
4 Tampón de goma
autoadhesivo
(amortiguación de ruidos)
Zahnriemen
belt
courroie dentée
correa
Kette
chain
chaîne
cadena

Betätigung von Hand (Test)
test manually
test manuel
Entriegeln!
Unlock!
Déverrouillez!
- 14 -
B
A
Zahnriemen
belt
courroie dentée
correa
Kette
chain
chaîne
cadena
13
13
13

13
- 15 -
1
2
3
Tormitte, middle of the door,
milieu de la porte
mitad de la puerta
2
2
1
1
>0
>0
13
1
2
Tormitte
middle of the door
milieu de la porte, mitad de la puerta
Tormitte
middleof the door
milieu de la porte, mitad de la puerta
3
1
2
3
13 13
Entriegeln!
Unlock!
Déverrouillez!
Desbloquer!

- 16 -
Einstellung der Endschalter, setting of the limits of travel,
réglage de limites de fin de course, ajuste de los finales de carrera
1.
Einstellung Endschalter "Tor-Auf-Position", setting of the limits of travel "door open",
réglage de limite de fin de course "porte ouverte",
ajuste del final de carrera "posición abertura de puerta".
2.
Start (Platine)
start (control board)
start (platine)
arranque (cuadro de control)
Weg kürzen, shorten way
raccoureir la parcours
reducir el camino
Weg länger, extended way
rallonger le parcours
alargar el camino
= < 0
2
1
Notentriegelung, manual release, déverrouillage de secours,
desbloqueo manual
+
Tor auf
door open
porte ouverte
puerta abierta
Tor auf
door open
porte ouverte
puerta abierta
Ø3

1.
Einstellung Endschalter "Tor-Zu-Position", setting of the limits of travel "door closed",
réglage de limite de fin de course "porte fermée", ajuste del final de carrera "posición cierre de puerta"
2.
Start (Platine)
start (control board)
start (platine)
arranque (cuadro de control)
24
Weg kürzen, shorten way
raccoureir la parcours
reducir el camino
Weg länger, extended way
rallonger le parcours
alargar el camino
= < 0
- Power +
Zugkraft, pulling force, force de traction, fuerza de tracción
max. 150 N max. 150 N
Kraft (Platine)
power (control board)
force (platine)
fuerza (cuadro de control)
25
> 5cm
- 17 -
min max
- Power +
F< F>
> 5cm
Sicherheitseinrichtungen:
Wenn die Antriebsleistung so eingestellt ist, daß an der Torkante bzw. den Scherstellen der Garagentor-Anlage eine Krafteinwirkung
von mehr als 150 N entsteht, bevor die Abschaltung erfolgt, muß gemäß den "UVV-Richtlinien für kraftbetätigte Fenster, Türen und
Tore" eine zusätzliche Absicherung durch Schaltleisten, Kontaktschläuche oder Lichtschranken vorgenommen werden. (Überprüfung
monatlich).
Saftey equipment:
According to the "UVV-Richtlinien für kraftbetätigte Fenster, Türen und Tore", if the power of the garage door opener is set so that a
force of more than 150 N is obtained at the door edges before the engine stops, it is necessary to install additional safety equipment
e.g. safety edge, hose-contact or photo-cells (monthly examination).
Dispositifs de sécurité:
Si la puissance de l'opérateur est ajustée de l'arrête de la porte avant la coupure du moteur, les directives "UVV-Richtlinien für
kraftbetätigte Fenster, Türen und Tore " prescrivent l'installation de dispositifs de sécurié tels que bandes palpeuses, tuyaux de contact
ou cellules photoélectriques (vérification mensuelle).
Medidas de seguridad:
Según la norma UVV para la automatización de ventanas, puertas y portones (UVV-Richtlinien für kraftbetätigte Fenster, Türen und
Tore), si el operador esta ajustado de tal manera, que en el borde de la puerta de garaje o en los bordes da las puertas a cerrar, la
fuerza creada sobrepasa los 150 N antes de que el operador pare es obligatorio instalar accesorios de seguridad, por ejemplo:
fotocélulas, bandas de seguridad, etc. (chequeo mensual).
ACHTUNG: Der Antrieb verfügt nicht über eine Funktion der automatischen Kraft- und Weglernung. Die Kraftabschaltschwelle wird
über ein Potentiometer eingestellt. Hier ist bei der Installation sicherzustellen, dass die Kraftabschaltwerte nach den neuesten
Normen nicht überschritten werden. Die Funktion der Kraftabschaltung ist monatlich zu überprüfen.
CAUTION: This garage door opener has no automatic travel and force programming function. The force limit at which the engine
stops gets adjusted through a potentiometer. At the installation you have to make sure, that the values at which the engine has to
stop referring to the latest standard will not be exceeded. The correct force limit has to be checked monthly.
ATTENTION: l´opérateur n'a pas le functionnement d'une programmation automatique de la force et de la course. La limite de force
à partir de laquelle l´opérateur s´arrête soit ajusté sur un potentiomètre. A l´installation il faut faire attention que le valeur à partir
duquel
l´opérateur doit s´arrêter selon les nouvelles normes ne devient pas dépassé. La limite de la force doit être contrôlé tous
les mois.
ATTENCIÓN: el operador no tiene función de programación automática de la fuerza y del recorrido. El límite de la fuerza en lo que
el operador se para es ajustado sobre un potenciómetro. A l´instalación es importante que el valor de fuerza a lo que el operador
tiene que pararse según las normas no es sobrepasado. Es necessario controlar cada mes la función del paro al límite de la fuerza.

2.0 Krafteinstellung in Power setting direction: ajustage de force direction ajuste de la fuerza en sentido
Richtung Tor Auf und Zu door opening / door closing porte ouverte et fermée puerta abierta y cerrada
2.6 Prüftaster test key bouton poussoir de test pulsador de comprobación
2.9 Lernen learn apprendre aprendizaje
4.0 schwarz trafo 24V~ black trafo 24V~ noir transformateur 24~ negro transformador 24V~
4.1 blau Trafo 0V~ blue trafo 0V~ bleu transformateur 0V~ azul transformador 0V~
4.2 gelb Trafo 12V~ yellow trafo 12V~ jaune transformateur 12V~ amarillo transformador 12V~
4.3 rot Motor red motor rouge moteur rojo motor
4.4 grün Motor green motor vert moteur verde motor
4.7 blau Endschalter
„Tor Zu"
blue limit switch „door closed" bleu limiteur course „port fermée" azul final de carrera „puerta
cerrada"
4.8 grey limit switch common gris limiteur course commune gris final de carrera común
(door open and closed) (port ouverte et fermée) (puerta abierta y cerrada)
4.9 rot Endschalter „Tor Auf" red limit switch „door open" rouge limiteur course porte
ouverte
rojo final de carrera (puerta
abierta)
4.12 Externer Taster external switch interrupteur externe pulsador externo
4.13 Externer Taster external switch interrupteur externe pulsador externo
4.21 contact 1 + 2 for safety edge or contact 1 et 2 pour bande de conexión 1 y 2 para regleta
photo cell sécurité ou cellule photo de seguridad o barrera
fotoeléctrica
(bei Lieferung gebrückt) (bridged when delivered) (ponté lors de la livrasion) (se suministra puenteada)
4.22 +15V DC +15V DC +15V DC +15V CC
4.32 Schlupftor stop contact contact stop contacto de parada
grau Endschalter
gemeinsam (Tor auf und
Zu)
Anschluß 1 + 2 für
Sicherheitsleiste oder
Lichtschranke
Jumper (Werkseinstellung), bei
Einsatz des mittleren Motors B
130.02-A muß der Jumper entfernt
werden
Jumper (factory setting), when using
the medium motor B 130.02-A you have
to remove the jumper
Jumper (ajustement de l´usine), en
utilisant le moteur moyen B 130.02-A il
faut enlever le jumper
Jumper (ajuste de la fábrica), usando
el motor medio B 130.02-A
se debe quitar el jumper
B 125.71-2
Erde
B 155 max 21W
( KFZ Bremslicht )
Antenne
Antenne
SchlupftorLichtschranke Start Test - Power +Lernen
910 11 12 13 14 15
8675432
1
Lampe
F1
4.4
4.3
4.0
4.2
4.1
4
.12
4
.13
2.6
2.0
2.9
4.7
4.8
4.9
max
min
4.32
4
.21
4
.22
Sicherung F1
700N + 1200N = 10A
T
- 18-

2.0 Krafteinstellung in Power setting direction: ajustage de force direction ajuste de la fuerza en sentido
Richtung Tor Auf und Zu door opening / door closing porte ouverte et fermée puerta abierta y cerrada
2.6 Prüftaster test key bouton poussoir de test pulsador de comprobación
4.0 schwarz trafo 24V~ black trafo 24V~ noir transformateur 24~ negro transformador 24V~
4.1 blau Trafo 0V~ blue trafo 0V~ bleu transformateur 0V~ azul transformador 0V~
4.2 gelb Trafo 12V~ yellow trafo 12V~ jaune transformateur 12V~ amarillo transformador 12V~
4.3 rot Motor red motor rouge moteur rojo motor
4.4 grün Motor green motor vert moteur verde motor
4.7 blau Endschalter
"Tor Zu"
blue limit switch "door closed" bleu limiteur course "port fermée" azul final de carrera "puerta
cerrada"
4.8 grau Endschalter
gemeinsam grey limit switch common gris limiteur course commune gris final de carrera común
(Tor auf und Zu) (door open and closed) (port ouverte et fermée) (puerta abierta y cerrada)
4.9 rot Endschalter
"Tor Auf"
red limit switch "door open" rouge limiteur course porte
ouverte
rojo final de carrera (puerta
abierta)
4.12 Externer Taster external switch interrupteur externe pulsador externo
4.13 Externer Taster external switch interrupteur externe pulsador externo
4.21 contact 1 + 2 for safety edge or contact 1 et 2 pour bande de conexión 1 y 2 para regleta
photo cell sécurité ou cellule photo de seguridad o barrera
fotoeléctrica
(bridged when delivered) (ponté lors de la livrasion) (se suministra puenteada)
4.22 +15V DC +15V DC +15V DC +15V CC
4.32 Schlupftor stop contact contact stop contacto de parada
4.40 Erde earth terre tierre
4.41 Antenne antenne antena
Jumper (Werkseinstellung), bei
Einsatz des mittleren Motors
B 130.02-A muß der Jumper entfernt
werden
Jumper (factory setting), when using
the mid-size motor B 130.02-A you
have to remove the jumper
Anschluß 1 + 2 für Sicher-
heitsleiste oder Licht-
schranke (bei Lieferung
gebrückt)
Jumper (ajustement de l´usine), en
utilisant le moteur moyen B 130.02-A il
faut enlever le jumper
Jumper (ajuste de la fábrica), usando
el motor medio B 130.02-A
se debe quitar el jumper
B 125.73-2
SchlupftorLichtschranke Start Test - Power +
910 11 12 13 14 15
8675
432
1
B 155 max 21W
( KFZ Bremslicht )
Lampe
F1
Sicherung F1
700N + 1200N = 10AT
4.4
4.3
4.0
4.2
4.1
4.12
4.13
2.6
2.0
4.7
4.8
4.9
max
min
4.32
4.21
4.22
Ant
4.41
Erde
antenne
4.40
Erde
- 19 -

DIP 1 Funktion function fonction función
OFF automatische Schließ-
funktion deaktiviert
automatic closing function
deactivated
fonction refermeture automatique
non active
función automática de cierre
desactivada
ON automatische Schließ-
funktion aktiviert
automatic closing function
activated
fonction refermeture automatique
active
función automática de cierre
activada
DIP 2 Funktion function fonction función
OFF nur zeitgesteuerte
Schließfunktion
closing function controlled only
by timer
fonction refermeture à temps
programmé
función de cierre controlada sólo
con temporizador
ON
zeit- und lichtschran-ken
gesteuerte
Schließfunktion
closing function controlled by
timer and photocell,
fonction refermeture à temps
programmé et par photocellule
función de cierre controlada sólo
con temporizador y fotocélula.
2.0 Power setting direction: ajustage de force direction ajuste de la fuerza en sentido
door opening / door closing porte ouverte et fermée puerta abierta y cerrada
2.6 Prüftaster test key bouton poussoir de test pulsador de comprobación
2.9 Lernen learn apprendre aprendizaje
4.0 schwarz trafo 24V~ black trafo 24V~ noir transformateur 24~ negro transformador 24V~
4.1 blau Trafo 0V~ blue trafo 0V~ bleu transformateur 0V~ azul transformador 0V~
4.2 gelb Trafo 12V~ yellow trafo 12V~ jaune transformateur 12V~ amarillo transformador 12V~
4.3 rot Motor red motor rouge moteur rojo motor
4.4 grün Motor green motor vert moteur verde motor
4.7 blau Endschalter
„Tor Zu"
blue limit switch „door closed" bleu limiteur course „port fermée" azul final de carrera „puerta
cerrada"
4.8 grey limit switch common gris limiteur course commune gris final de carrera común
(door open and closed) (port ouverte et fermée) (puerta abierta y cerrada)
4.9 rot Endschalter
„Tor Auf"
red limit switch „door open" rouge limiteur course porte
ouverte
rojo final de carrera (puerta
abierta)
4.12 Externer Taster external switch interrupteur externe pulsador externo
4.13 Externer Taster external switch interrupteur externe pulsador externo
4.21 contact 1 + 2 for safety edge or contact 1 et 2 pour bande de conexión 1 y 2 para regleta
photo cell sécurité ou cellule photo de seguridad o barrera
fotoeléctrica
(bridged when delivered) (ponté lors de la livrasion) (se suministra puenteada)
4.22 +15V DC +15V DC +15V DC +15V CC
4.30 contact 1 and 2 for warning contact 1 et 2 pour éclairage conexión 1 y 2 para la lámpara
lamp (potential free) auxillaire (sans potentiel) de advertencia (sin potencial)
4.32 Schlupftor stop contact contact stop contacto de parada
4.40 Erde earth terre tierre
4.41 Antenne aerial antenne antena
Anschluß
1
und
2
für
Warn-Lampe
(potentialfrei)
Anschluß 1 + 2 für
Sicherheitsleiste oder
Licht-schranke (bei
Lieferung gebrückt)
grau
Endschalter
gemeinsam (Tor auf und
Zu)
Krafteinstellung in Rich-
tung Tor Auf und Zu
Jumper (Werksein-stellung), bei
Einsatz des kleinen Motors B
130.02-A muß der Jumper entfernt
werden
Jumper (factory setting), when
using the small motor B 130.02-A
you have to remove the jumper
Jumper (ajustement de l´usine), en
utilisant le moteur petit B 130.02-A il
faut enlever le jumper
Jumper (ajuste de la fábrica),
usando el motor pequeño
B 130.02-A se debe quitar el jumper
DIP 3
OFF
OFF
ON
ON
DIP 4
OFF
ON
OFF
ON
Funktion, function,
fonction, función
90 s
70 s
50 s
30 s
B 125.74-2
Schlupftor Lichtschranke Start Test - Power +
910 11 12 13 14 15
8675432
1
4.4
4.3
4.0
4.2
4.1
4.12
4.13
2.6
2.0
4.7
4.8
4.9
max
min
4.32
4.21
4.22
Ant
4.40
4.41
Erde
Automatisches Schließen,
automatic closing,
refermeture automatique,
cierre automático
Automatic Warnlampe 24 V AC
16 17
4.30
DIP 1
DIP 2
DIP 4
DIP 3
ON
OFF
Erde
F1
Sicherung F1
700N + 1200N = 10A
T
B 155 max 21W
( KFZ Bremslicht )
Lampe
- 20 -
This manual suits for next models
5
Table of contents
Other Bernal Gate Opener manuals
Popular Gate Opener manuals by other brands
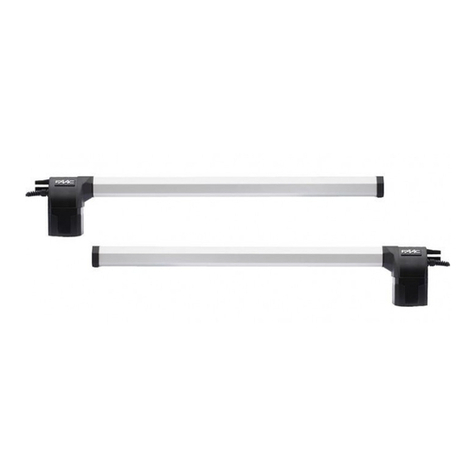
FAAC
FAAC 412 Compact installation manual
Nice
Nice LFAB4000 Instructions and warnings for installation and use
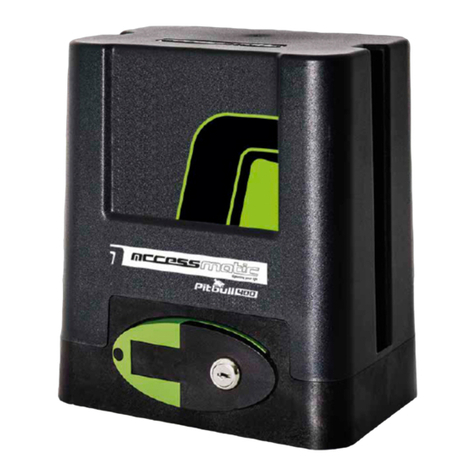
Accessmatic
Accessmatic Pitbull 400 user manual

Byan System
Byan System 800A Series Installation and technical manual
Aprimatic
Aprimatic ZT4 C manual
Proteco
Proteco MOVER Installation and use manual
