manuals.online logo
Brands
  1. Home
  2. •
  3. Brands
  4. •
  5. Bernina
  6. •
  7. Sewing Machine
  8. •
  9. Bernina BERNETTE 50 User manual

Bernina BERNETTE 50 User manual

Other Bernina Sewing Machine manuals

Bernina 1230 User manual

Bernina

Bernina 1230 User manual

Bernina Serger User manual

Bernina

Bernina Serger User manual

Bernina Kaffe 770 QE PLUS User manual

Bernina

Bernina Kaffe 770 QE PLUS User manual

Bernina 950 Industrial User manual

Bernina

Bernina 950 Industrial User manual

Bernina Bernette 56 User manual

Bernina

Bernina Bernette 56 User manual

Bernina 880 User manual

Bernina

Bernina 880 User manual

Bernina 790 PLUS User manual

Bernina

Bernina 790 PLUS User manual

Bernina 530 User manual

Bernina

Bernina 530 User manual

Bernina L460 User manual

Bernina

Bernina L460 User manual

Bernina 807 User manual

Bernina

Bernina 807 User manual

Bernina 555 User manual

Bernina

Bernina 555 User manual

Bernina 530-2 User manual

Bernina

Bernina 530-2 User manual

Bernina 1230 User manual

Bernina

Bernina 1230 User manual

Bernina Artista 200 s User manual

Bernina

Bernina Artista 200 s User manual

Bernina Bernette 43 User manual

Bernina

Bernina Bernette 43 User manual

Bernina Artista 180 User manual

Bernina

Bernina Artista 180 User manual

Bernina Artista 635 User manual

Bernina

Bernina Artista 635 User manual

Bernina B 590 Installation and user guide

Bernina

Bernina B 590 Installation and user guide

Bernina aurora 440 QE User manual

Bernina

Bernina aurora 440 QE User manual

Bernina 325 User manual

Bernina

Bernina 325 User manual

Bernina L460 Operation instructions

Bernina

Bernina L460 Operation instructions

Bernina classic 1008 User manual

Bernina

Bernina classic 1008 User manual

Bernina 700 User manual

Bernina

Bernina 700 User manual

Bernina C19 Installation and operation manual

Bernina

Bernina C19 Installation and operation manual

Popular Sewing Machine manuals by other brands

Riccar RL634DE user manual

Riccar

Riccar RL634DE user manual

Pfaff 3307-1 SERIES instruction manual

Pfaff

Pfaff 3307-1 SERIES instruction manual

Siruba C007JP Instruction book

Siruba

Siruba C007JP Instruction book

Husqvarna Viking Designer SE user guide

Husqvarna Viking

Husqvarna Viking Designer SE user guide

Singer 148-5 parts list

Singer

Singer 148-5 parts list

IKEA SY user guide

IKEA

IKEA SY user guide

Pfaff 571 instruction manual

Pfaff

Pfaff 571 instruction manual

Singer 15-91 Adjusters manual

Singer

Singer 15-91 Adjusters manual

Brother BB370 Quick setup guide

Brother

Brother BB370 Quick setup guide

Pegasus WT100 Series instructions

Pegasus

Pegasus WT100 Series instructions

Reliable 7100DB instruction manual

Reliable

Reliable 7100DB instruction manual

Pfaff 937 instruction manual

Pfaff

Pfaff 937 instruction manual

Singer 6038 Instruction book

Singer

Singer 6038 Instruction book

Singer 413K parts list

Singer

Singer 413K parts list

Pfaff 1471 E1 instruction manual

Pfaff

Pfaff 1471 E1 instruction manual

Kenmore 16677 - Serger Sewing Machine Servicing manual

Kenmore

Kenmore 16677 - Serger Sewing Machine Servicing manual

HIGHLEAD GC2008-M instruction manual

HIGHLEAD

HIGHLEAD GC2008-M instruction manual

Singer 400W4 List of parts

Singer

Singer 400W4 List of parts

manuals.online logo
manuals.online logoBrands
  • About & Mission
  • Contact us
  • Privacy Policy
  • Terms and Conditions

Copyright 2025 Manuals.Online. All Rights Reserved.

Quick on your FEET
BERNINA
Walking
Foot #50
A Walk
in the Park
This quilt is done entirely with
Walking Foot #50. The blocks are
stitched individually, and then
seamed so that the raw edges are
to the front of the quilt. The edges
are covered with bias strips and
the quilt is finished with traditional
binding.
By Nina McVeigh
Draw diagonal lines
connecting the corners of
each block.
Construction
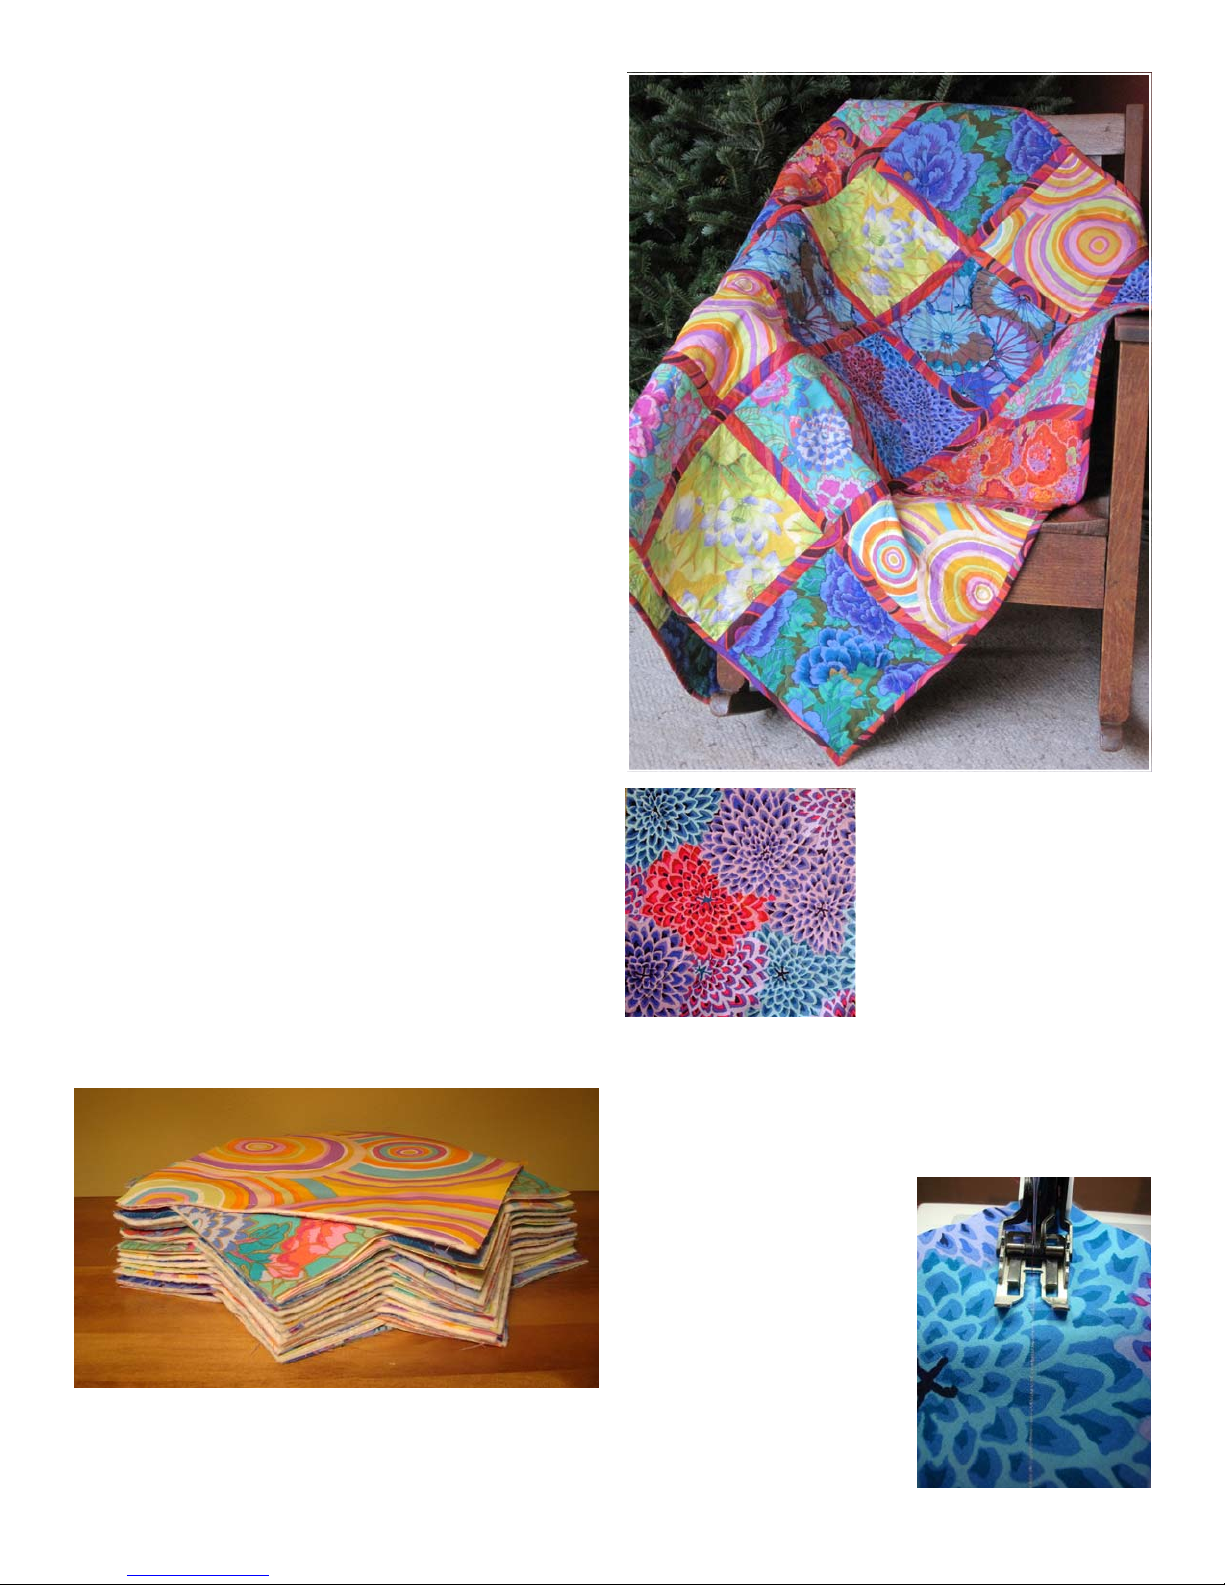
Attach the open-toe sole to Walking Foot #50;
this sole provides extra visibility. Attach Walking
Foot #50 to the sewing machine.
Insert a new #90/14
Embroidery needle into the
machine. Select an Isacord
thread color to complement
each of the 7 block fabrics.
Thread needle and bobbin
with the same thread color.
Select a decorative stitch
and quilt the block along
the diagonals. Choose open
stitches, avoiding satin-
based stitches.
Walking Foot #50 is a very helpful aid for working
with layers of fabric. It can be used with almost any
decorative stitch, making grid quilting much more
interesting! The ability to move the needle to any
position makes precision piecing a breeze. This quilt
is done entirely with Walking Foot #50. The blocks
are stitched individually, and then they are seam so
that the raw edges are to the front of the quilt. The
raw edges are covered with bias strips and the quilt
is finished with traditional binding.
Supplies
• ⅔yard of seven different fabrics
• 1¼ yards fabric for binding & strips between blocks
• 2¼ yards loft batting (or twin size batt)
• Isacord thread in eight colors to coordinate with
quilt fabrics (can use fewer colors if desired)
• Embroidery needle, size 90/14
• Denim needle, size 90/14
• Walking Foot #50 with Guides
• 1” Bias Tape Maker
• Water-soluble glue stick
• Spray starch
• Rotary cutting equipment
• 12½” square quilting ruler
• BERNINA Sewing Machine
Cutting Instructions
Using a rotary cutter, mat and ruler cut the 7 pieces
of fabric into 10¾” squares (8 from each piece).
Cut the batting into twenty-five 10¾” squares.
Preparation
Make 25 quilt sandwiches using the fabric and bat-
ting squares, layering the same print on the top and
bottom of each batting square.
You will have six extra fabric squares left over.
Attach the right hand
guide to Walking Foot
#50 and set it at 3”
from the needle.
Tighten the screw
to hold it in place.
Place the guide on
the previously stitched
line and sew the same
decorative stitch on
each side of the two
diagonal lines.
Stitch all blocks of
the same fabric with
the same thread,
choosing a different
decorative stitch for
each block. Choose
open decorative
stitches, avoiding the
satin-based stitches.
Repeat until you have stitched 25 blocks.
When all blocks are stitched, trim to 10” squares.
Arrange the blocks as desired in a 5 x 5 grid.
With wrong sides
(backs) together, sew
five blocks together in
a row. Guide the edges
with the ¼” seam mark
on the walking foot.
Make 5 rows.
Press seam allowances
open—they will be on
the right side of the quilt.
With wrong sides
(backs) together, stitch
the rows together to
make a square.
Press seam allowances
open.
Select a zigzag stitch
with length = 2mm,
width = 5mm. Zigzag
the seams open using
a thread that is comple-
mentary to all the blocks,
as it will show on the
back of the quilt.
Spray starch the binding fabric. To avoid seaming,
fold the fabric at a diagonal so that when you cut the
bias strips in the next step you will be cutting strips
as long as possible.
Cut eight 1¾”-wide bias strips that are at least 52”
long (seaming if necessary). Set aside the rest of the
fabric.
Load the bias tape
maker with a binding
strip. Pull the fabric
through the bias tape
maker and press as
the folded strip exits
the other end. (I found
that my strips were
more even and consistent when I pressed from the
top side of the fabric.)
Measure the width of
the pressed strip and
divide the measure-
ment in half. Measure
this distance out from
the seam and draw a
placement line for the
edge of the bias strip.
Position a folded bias strip over the seam, aligning
the edge with the marked line. Use a glue stick to
hold the strip in place.
Remove the guide from Walking Foot #50. Remove
the open-toe sole from the foot and attach the
standard sole. Since you will be stitching through
more layers of fabric you may want to change to a
#90/14 Denim needle.
Select a straight stitch
and move the needle
position 2 steps to the
right of center. Place
the quilt under the foot
with the edge of the
bias strip just inside
the right toe of the
foot. Stitch down the
side of the strip.
Repeat for the second
side of the strip.
Lay four strips in one
direction, then lay the
remaining four strips
in the other direction.
From the fabric left over from cutting the bias strips,
cut enough 2½”-wide bias strips to go around the
outer edge of the quilt—about 220”. Seam the bias
strips together. Press the long strip in half length-
wise, wrong sides together.
Place the folded bias
strip on the right side
of the quilt with the
raw edges even. Sew
the folded bias strip
to the quilt using a ⅜”
seam allowance. To
accomplish this, move
the needle position all
the way to the right and guide the raw edge of the
fabric along the outside edge of the foot.
When all of the binding is sewn to the front of the
quilt, press it out away from the quilt. Pull the binding
around to the back of the quilt and stitch along the
inner folded edge to hold the binding in place.
For additional information on Dual Sole
Walking Foot with Guides #50 and other
BERNINA presser feet, attachments, and
accessories, see Feetures, volumes 1-3.
Visit
www.berninausa.com
for additional projects and information.