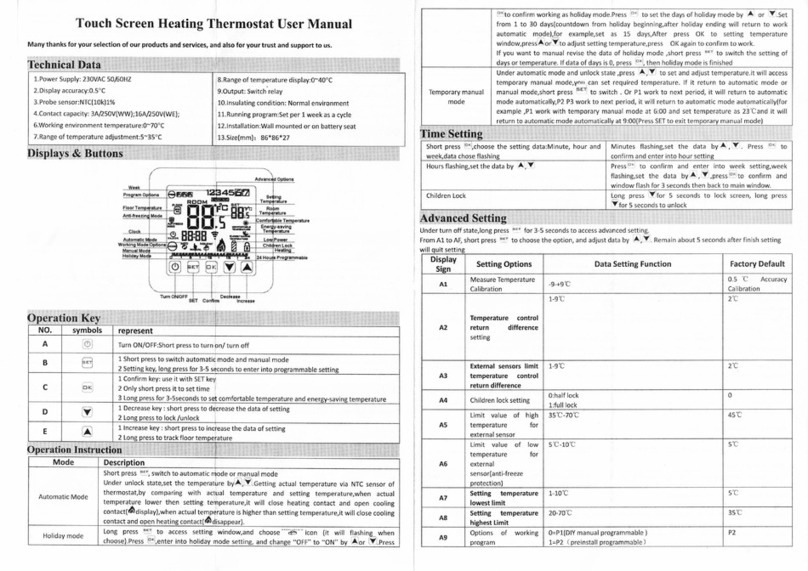
BERNSTEIN HT01 User manual

MONTAGEANLEITUNG - I / 2018
ASSEMBLY INSTRUCTIONS / NOTICE DE MONTAGE / ISTRUZIONI DI MONTAGGIO
DIGITALES THERMOSTAT
DIGITAL THERMOSTAT
THERMOSTAT NUMÉRIQUE
TERMOSTATO DIGITALE

2
HT01
Vorderseite Einbautiefe Positionierung
Der Bodensensor sollte in einem zugelassenen nicht leitenden Installationsrohr gemäß EN 61386-1 installiert werden, das in den Boden
eingelassen ist. Der Bodensensor sollte in gleichen Abständen zwischen zwei Läufen des Heizelements angeordnet sein, wobei die Spitze
mindestens 300 mm von der Außenkante des Heizelements entfernt sein muss.
Das mitgelieferte Sensorkabel kann mit einem separaten Kabel bis zu 50 m verlängert werden. Das Installationsrohr darf keine anderen Kabel
enthalten, z. B. die Zuleitungen zum Heizdraht. Die Schaltspitzen solcher Stromversorgungsleitungen können Störsignale erzeugen, die eine
optimale Thermostatfunktion verhindern. Das Heizkabel sollte in einer separaten Leitung verlegt werden.
Im Falle eines Sensorfehlers kann der Austausch des Sensors leicht durchgeführt werden, vorausgesetzt, der Sensor ist in einem exiblen
Kabelkanal installiert.
Der Bodensensor sollte niemals das Heizelement kreuzen.
Entfernen Sie diesen Sensor aus dem Stromkreis, bevor Sie Hochspannungsprüfungen durchführen.
Lösen Sie die Vorderseite
des Thermostats von der Basis.
Elektrische Anschlüsse wie im vorheri-
gen Abschnitt beschrieben.
Die elektrischen Anschlüsse sind wie im Diagramm dargestellt vorzunehmen. Der Stromkreis, der diesen Regler versorgt, muss durch einen
30 mA RCD geschützt sein. Alle elektrischen Anschlüsse sollten von einem qualizierten Elektriker durchgeführt werden. Die Prüfung aller
Fußbodenheizungen sollte vor der Verlegung der Bodenbeläge erfolgen.
Befestigen Sie das Basisteil des Ther-
mostats an einer Einbaudose oder an
einer Aufputzdose.
Platzierung des Bodensensors
Elektrischer Anschluss
Montage und Installation

3
HT01
Sensoren Auswahl
Thermostat Einstellungen
Datums- und Uhrzeiteinstellungen
Der Thermostat ist werkseitig auf die Verwendung der Raum- und Bodentemperatursensoren voreingestellt. Die folgenden Optionen sind
verfügbar. Um zu ändern, drücken Sie Mfür 3 Sekunden, dann Mnoch einmal. Optionen können dann mit den Tasten +/ -eingestellt werden.
Ihr neuer Thermostat hat die folgenden 3 Modi. Um manuell einen bestimmten Modus auszuwählen, drücken Sie M.
Während das Thermostat in einem der oben genannten Modi betrieben wird, kann die Temperatur manuell durch Drücken der Tasten + oder -
geändert werden. Die eingestellte Temperatur wird dann beim nächsten Moduswechsel auf den voreingestellten Wert zurückgesetzt.
Um das richtige Datum und die korrekte Uhrzeit einzustellen, drücken und halten Sie 3 Sekunden lang. Minuten blinken, drücken Sie
+/ -um zu ändern. Drücken Sie noch einmal , um die Stunden zu ändern (24-Stunden-Uhr). Drücken Sie noch einmal , um den Wo-
chentag zu ändern. Die Zahlen von 1bis 7am oberen Bildschirmrand stehen für Montag bis Sonntag.
Wenn das Thermostat mit Fußbodenheizungssystemen verwendet werden soll, die für andere Bodenbeläge als Keramik, Porzellan oder Stein
ausgelegt sind, sollte die Option „nur Bodensensor“ gewählt werden.
Die Modi (Komfort) , (Energiesparen) und (Urlaub) müssen alle überprüft werden, um sicherzustellen, dass die Betriebstempe-
raturen die von Ihrem Heizungs- / Bodenbelaglieferanten angegebenen Werte nicht überschreiten. Diese Temperaturstufen können durch
Halten von für 3 Sekunden geändert werden. Der erste Wert, der geändert werden kann, ist der Urlaubsmodus. Drücken Sie noch einmal
(schnell), um den Energiesparmodus zu ändern, und noch einmal für den Komfortmodus.
*
rS
FS
rFS
Raumsensor
Raum- und
Bodensensor
Komfortmodus
Energiespar-
modus
Urlaubsmodus
Bodensensor
Die Heizung wird vom Thermostat eingeschaltet, wenn die Raumtemperatur unter die programmierte Temperatur fällt.
Es gibt keine Begrenzung der Bodentemperatur.
Wählen Sie diesen Modus, um die Fußbodenheizung einzuschalten. Die Heizung wird auf der voreingestellten
Temperatur betrieben. Um die voreingestellte Temperatur zu ändern, halten Sie sie für 3 Sekunden gedrückt
und drücken Sie sie erneut zweimal. Werkseitig voreingestellte Temperatur: 25°C.
Wählen Sie diesen Modus, um die Fußbodenheizung auf eine niedrigere voreingestellte Temperatur herunter zu
stellen. Diese Temperatur kann so niedrig eingestellt werden, dass die Heizung effektiv ausgeschaltet wird. Um die
voreingestellte Temperatur zu ändern, halten Sie sie für 3 Sekunden gedrückt und drücken Sie noch einmal.
Werkseitig eingestellte Temperatur: 15°C.
Wählen Sie diesen Modus, um die Heizung auf einen sehr niedrigen Wert einzustellen, während der Raum für län-
gere Zeit nicht belegt ist. Dieser Modus sollte gewählt werden, um Frostschäden während des Urlaubs zu vermei-
den. Um die voreingestellte Temperatur zu ändern, halten Sie für 3 Sekunden gedrückt.
Werkseitig voreingestellte Temperatur: 5 ° C
Die Heizung wird vom Thermostat eingeschaltet, wenn die Bodentemperatur unter die programmierte Temperatur fällt. *
Die Heizung wird vom Thermostat eingeschaltet, wenn die Raumtemperatur unter die programmierte Temperatur fällt. Der
Thermostat schaltet die Heizung ab, wenn der Fußboden eine Temperatur erreicht, die höher als der programmierte Wert
ist. Werksseitig auf 65°C eingestellt. Dies kann vom Benutzer auf einer Stufe zwischen 30°C und 80°C neu eingestellt
werden. Empfohlen MAX: 40°C.
Spannung: AC230V ± 10% 50/60 Hz
Leistungsaufnahme: 5W
Einstellungsbereich: 5 ~ 30ºC
Bodenüberhitzung Schutz: 30 ~ 80°C (werkseitig auf 65°C eingestellt)
Schutzgehäuse: IP20
Gehäusematerial: ABS + PC feuerbeständig
Zertizierung: CE
Bodensensor: Gummi-Thermoplast NTC 10K Sensor
Interner Sensor: NTC 10K
Technische Daten

4
HT01
Erweiterte Einstellungen
Sicherheitsinformation
7 Tage Automatikmodus
Um den 7-Tage-Timer-Modus auszuwählen, drücken Sie M, bis auf dem LCD-Bildschirm angezeigt wird. Der
Thermostat schaltet dann zwischen Komfort- und Energiesparmodus (Ein / Aus) automatisch gemäß den Datums- und
Uhrzeiteinstellungen. Jeder Wochentag kann mit individuellen Einstellungen versehen werden.
Um den automatischen Modus einzurichten, drücken und halten Sie 3 Sekunden lang. Um den Wochentag
auszuwählen, der eingestellt werden soll, drücken Sie .
Unten auf dem Bildschirm wird ein Muster von 24 nummerierten Feldern angezeigt. Jedes Quadrat repräsentiert
eine Stunden eines 24-Stunden-Zyklus. Jede dieser Stunden kann auf Komfort- oder Energiesparmodus (Ein / Aus)
programmiert werden.
Um weitere Einstellungen einzugeben, halten Sie M3 Sekunden lang gedrückt.
Drücken Sie erneut Mfür jede weitere Funktion.
Temperaturkalibrierung. Wenn eine genaue Temperatur, die aus dem Raum oder Boden ausgelesen wird, von der
auf dem Thermostat abgelesenen Temperatur abweicht, kann der Thermostat mit dieser Funktion kalibriert werden.
Der Bereich beträgt -8°C bis + 8°C.
Sensorauswahl. rS Raumsensor _ FS Bodensensor _ rFS kombinierter Raum- Bodensensor
Wenn der Thermostat mit der Wahl des rFS-Sensors läuft, wird die Raumtemperatur am Thermostat angezeigt.
Mit dieser Funktion kann der Benutzer auch die aktuelle Fußbodentemperatur sehen.
Wenn der Thermostat mit der Wahl des rFS-Sensors betrieben wird, kann mit dieser Funktion die maximale Tempera-
tur geändert werden, die der Boden erreichen kann. Wenn die Bodentemperatur diesen Überhitzungsschutz-Sollwert
überschreitet, blinkt ALARM auf dem Bildschirm und die Heizleistung wird ausgeschaltet.
WARNUNG: GEFAHR EINES ELEKTRISCHEN SCHLAGS. Trennen Sie die Stromversorgung, bevor Sie elektrische
Verbindungen herstellen. Der Kontakt mit Komponenten, die gefährliche Spannung führen, kann einen elektrischen
Schlag verursachen und schwere Verletzungen oder Tod zur Folge haben.
Dieser Thermostat ist keine Sicherheitsvorrichtung und sollte nur mit sicherheitsrelevanten Fußbodenheizungssyste-
men verwendet werden, die für ihren spezischen Zweck ausgelegt sind. Um eine Beschädigung Ihres Fußbodens zu
vermeiden, stellen Sie sicher, dass die richtige Sensorauswahl und die Betriebstemperaturen während des Program-
miervorgangs ausgewählt werden.
1.
2.
3.
4.
Um Änderungen am zeitgesteuerten Programm vorzunehmen, drücken Sie +/ -, um den entsprechenden Zeitraum
auszuwählen. Drücken Sie dann , um den Modus auszuwählen. Durch Drücken von +oder -wird der Modus aus
den letzten 60 Minuten kopiert. Bei Inaktivität von 5 Sekunden werden die eingegebenen Einstellungen gespeichert
und der Thermostat kehrt in den normalen Betriebsmodus zurück.

5
HT01
Front Thickness Mounting Hole
The oor sensor should be installed within an approved non conductive installation pipe in accordance with EN 61386-1, which is embedded
in the oor. The pipe (exible conduit) should be placed as high as possible in the suboor. The oor sensor should be located equidistant
between two runs of the heating element with the tip at least 300mm away from the outside edge of the heater.
The enclosed 3 meter sensor cable can be extended up to 50m by means of a separate cable. The installation pipe must not contain any other
cables, such as the supplies to the heating wire. The switching peaks of such current supply lines may create interfering signals that prevent
optimum thermostat function. The heating supply cable should be placed in a separate pipe.
In the event of sensor failure, replacement of the sensor can be carried out with ease providing the sensor is installed within exible conduit.
The oor sensor should never cross the heating element.
1 Live from mains
2 Neutral from mains
3 Neutral to heaters
4 Live to heaters
5 Earth from heaters & mains
6 White wire from sensor
7 Black wire from sensor
Remove this sensor from circuit before performing any high voltage insulation tests.
IMPORTAT: ALWAYS DISCONNECT THE MAINS SUPPLY VIA THE SWITCH IN THE MAIN FUSE BOARD, CONSUMER UNIT BEFORE
COMMENCING ANY ELECTRICAL WORK. WHEN CONNECTING CABLES TO THE THERMOSTAT, ENSURE THAT ALL TERMINAL
SCREWS ARE FULLY TIGHTENED AND THAT EARTH WIRES ARE SLEEVED AND THAT NO BARE WIRES ARE SHOWING.
Release the front of the thermostat by
inserting a small at screwdriver into
the 2 slots on the base.
Make electrical connections as de-
tailed in previous section.
Electrical connections are to be made as detailed on diagram. The circuit supplying this controller must be protected by a 30mA RCD. All
electrical connections must be performed by a fully qualied and part P certied electrician. Any doubts surrounding the installation of this
controller should be passed to the distributer prior to installation. Testing of all under-oor heating systems should take place prior to oor
coverings being installed..
Mount base part of thermostat onto
either a BS recessed or surface
mounted box.
Mounting of the oor sensor
Electrical Connection
Mounting & Installation

6
HT01
Sensor Selection
Thermostat Programming
Date & Time Settings
The thermostat is factory preset to use the room and oor temperature sensors. The following options are available.
To change, press Mfor 3 seconds then Monce more. Option can then be selected by the +/ -buttons.
Your new thermostat has the following 3 modes. To manually select a specic mode press M.
Whilst the thermostat is operating in any of the modes above, the temperature can be manually altered by pressing the
+or – buttons. The set temperature will then revert back to the pre-set level at the next change of mode.
To set the correct date & time press and hold for 3 seconds. Minutes will ash, press +/ –to alter.
Press once again to alter hours (24 hour clock). Press once again to change week day.
The numbers from 1to 7at the top of the screen represent Monday to Sunday.
If this thermostat is to be used with any under oor heating system designed for oor coverings other than ceramic, porcelain or stone oor
tiles, the ‘oor sensor only’ option should be selected.
The (Comfort) , (Energy save) , and (Holiday) modes all need to be checked to ensure that the operating temperatures do not
exceed the values given by your heating / oor covering supplier. These temperature levels can be amended by holding for 3 seconds.
The rst value that can be changed is the holiday mode. Press once more (quickly) to amend the energy save value, and once more for the
comfort value.
*
rS
FS
rFS
Room sensor
ONLY
Room and
oor sensor
Comfort mode
Energy-saving
mode
Holiday mode
Floor Sensor
Heating will be switched on by the thermostat when the room temperature falls below the programmed temperature.
There is NO LIMIT on the temperature the oor can reach.
Select this mode to turn the under oor heating on. The heating will operate at the preset temperature.
To alter the preset temperature hold for 3 seconds then press again twice. Factory preset temperature : 25˚C
Select this mode to turn the under oor heating down to a lower preset temperature. This temperature can be set
low enough to mean the heating is effectively turned off. To alter the preset temperature hold for 3 seconds
then press once again. Factory preset temperature : 15˚C
Select this mode to set the heating to a very low level whilst the room in unoccupied for a long period of time.
This mode should be selected to avoid frost damage whilst on holiday. To alter the preset temperature hold
for 3 seconds. Factory preset temperature : 5˚C
Heating will be switched on by the thermostat when the oor temperature falls below the programmed temperature.*
Heating will be switched on by the thermostat when the room temperature falls below the programmed temperature. The
thermostat will cut power to the heating if the oor reaches a temperature higher than the programmed level. This is facto-
ry set at 65˚C This can re-programmed by the user at a level between 30˚C - 80˚C. RECOMMENDED MAX: 40˚C
Voltage: AC230V ± 10% 50/60HZ
Power Consumption: 5W
Setting Range: 5 ~ 30ºC
Floor overheating Protection: 30 ~ 80˚C (factory set @ 65˚C)
Protective housing: IP20
Housing Material: ABS + PC re-resistant
Certication: CE
Floor Sensor: Rubber-Thermoplastic NTC 10K Sensor
Internal Sensor: NTC 10K
Technical Data

7
HT01
Advanced Settings
Safety Information
7 Day Automatic mode
To select the 7 day timer mode press Muntil is displayed on the LCD screen. The thermostat will then switch
between comfort & energy saving mode (On/Off) automatically according to the day & time settings. Each day of the
week can be programmed with individual settings.
To set up the automatic mode, press & hold for 3 seconds.
To select the day of the week to be programmed press .
The bottom of the screen will show the following pattern of 24 numbered surfaces. Each eld represents a 1 hour
period of a 24 hour cycle. Each of these 1 hour periods can be programmed to comfort or energy-save (On/Off) mode.
To enter advanced settings press and hold Mfor 3 seconds. Press Monce again for each numbered function.
Temperature Calibration. If an accurate temperature read out from the room or oor differs from the read out on the
thermostat, providing the sensor has been checked against the stated resistance values, the thermostat can be calib-
rated using this function. The range is -8˚C ~ +8˚C.
Sensor Selection. See beginning of the Operating Instructions section for details.
When operating the thermostat with the rFS sensor selection, the room temperature will display on the thermostat.
This function allows the user to see the current oor temperature.
When operating the thermostat with the rFS sensor selection, this function allows the user to amend the maximum
temperature the oor can reach. If the oor temperature exceeds this over-heating protection set-point, ALARM will
ash on the screen and the heating output will cut out.
WARNING: RISK OF ELECTRIC SHOCK. Disconnect power supply before making electrical connections. Contact
with components carrying hazardous
voltage can cause electrical shock and may result in severe personal injury or death.
This thermostat is not a safety device and should only be used with safety certicated oor heating systems suitable
for their specic purpose. In order to avoid damaging your ooring, ensure the correct sensor selection & operating
temperatures are selected during the programming process.
1.
2.
3.
4.
To make changes to the timed program, press + / – to select the 60 minute period. Then press to select the mode.
Pressing + or – will copy the selected mode from the previous 60 minute period.
Whilst programming, inactivity of 5 seconds will save the settings entered & the thermostat will return to normal
operational mode.

8
HT01
Front Thickness Mounting Hole
The oor sensor should be installed within an approved non conductive installation pipe in accordance with EN 61386-1, which is embedded
in the oor. The pipe (exible conduit) should be placed as high as possible in the suboor. The oor sensor should be located equidistant
between two runs of the heating element with the tip at least 300mm away from the outside edge of the heater.
The enclosed 3 meter sensor cable can be extended up to 50m by means of a separate cable. The installation pipe must not contain any other
cables, such as the supplies to the heating wire. The switching peaks of such current supply lines may create interfering signals that prevent
optimum thermostat function. The heating supply cable should be placed in a separate pipe.
In the event of sensor failure, replacement of the sensor can be carried out with ease providing the sensor is installed within exible conduit.
The oor sensor should never cross the heating element.
1 Live from mains
2 Neutral from mains
3 Neutral to heaters
4 Live to heaters
5 Earth from heaters & mains
6 White wire from sensor
7 Black wire from sensor
Remove this sensor from circuit before performing any high voltage insulation tests.
IMPORTAT: ALWAYS DISCONNECT THE MAINS SUPPLY VIA THE SWITCH IN THE MAIN FUSE BOARD, CONSUMER UNIT BEFORE
COMMENCING ANY ELECTRICAL WORK. WHEN CONNECTING CABLES TO THE THERMOSTAT, ENSURE THAT ALL TERMINAL
SCREWS ARE FULLY TIGHTENED AND THAT EARTH WIRES ARE SLEEVED AND THAT NO BARE WIRES ARE SHOWING.
Release the front of the thermostat by
inserting a small at screwdriver into
the 2 slots on the base.
Make electrical connections as de-
tailed in previous section.
Electrical connections are to be made as detailed on diagram. The circuit supplying this controller must be protected by a 30mA RCD. All
electrical connections must be performed by a fully qualied and part P certied electrician. Any doubts surrounding the installation of this
controller should be passed to the distributer prior to installation. Testing of all under-oor heating systems should take place prior to oor
coverings being installed..
Mount base part of thermostat onto
either a BS recessed or surface
mounted box.
Mounting of the oor sensor
Electrical Connection
Mounting & Installation

9
HT01
Sensor Selection
Thermostat Programming
Date & Time Settings
The thermostat is factory preset to use the room and oor temperature sensors. The following options are available.
To change, press Mfor 3 seconds then Monce more. Option can then be selected by the +/ -buttons.
Your new thermostat has the following 3 modes. To manually select a specic mode press M.
Whilst the thermostat is operating in any of the modes above, the temperature can be manually altered by pressing the
+or – buttons. The set temperature will then revert back to the pre-set level at the next change of mode.
To set the correct date & time press and hold for 3 seconds. Minutes will ash, press +/ –to alter.
Press once again to alter hours (24 hour clock). Press once again to change week day.
The numbers from 1to 7at the top of the screen represent Monday to Sunday.
If this thermostat is to be used with any under oor heating system designed for oor coverings other than ceramic, porcelain or stone oor
tiles, the ‘oor sensor only’ option should be selected.
The (Comfort) , (Energy save) , and (Holiday) modes all need to be checked to ensure that the operating temperatures do not
exceed the values given by your heating / oor covering supplier. These temperature levels can be amended by holding for 3 seconds.
The rst value that can be changed is the holiday mode. Press once more (quickly) to amend the energy save value, and once more for the
comfort value.
*
rS
FS
rFS
Room sensor
ONLY
Room and
oor sensor
Comfort mode
Energy-saving
mode
Holiday mode
Floor Sensor
Heating will be switched on by the thermostat when the room temperature falls below the programmed temperature.
There is NO LIMIT on the temperature the oor can reach.
Select this mode to turn the under oor heating on. The heating will operate at the preset temperature.
To alter the preset temperature hold for 3 seconds then press again twice. Factory preset temperature : 25˚C
Select this mode to turn the under oor heating down to a lower preset temperature. This temperature can be set
low enough to mean the heating is effectively turned off. To alter the preset temperature hold for 3 seconds
then press once again. Factory preset temperature : 15˚C
Select this mode to set the heating to a very low level whilst the room in unoccupied for a long period of time.
This mode should be selected to avoid frost damage whilst on holiday. To alter the preset temperature hold
for 3 seconds. Factory preset temperature : 5˚C
Heating will be switched on by the thermostat when the oor temperature falls below the programmed temperature.*
Heating will be switched on by the thermostat when the room temperature falls below the programmed temperature. The
thermostat will cut power to the heating if the oor reaches a temperature higher than the programmed level. This is facto-
ry set at 65˚C This can re-programmed by the user at a level between 30˚C - 80˚C. RECOMMENDED MAX: 40˚C
Voltage: AC230V ± 10% 50/60HZ
Power Consumption: 5W
Setting Range: 5 ~ 30ºC
Floor overheating Protection: 30 ~ 80˚C (factory set @ 65˚C)
Protective housing: IP20
Housing Material: ABS + PC re-resistant
Certication: CE
Floor Sensor: Rubber-Thermoplastic NTC 10K Sensor
Internal Sensor: NTC 10K
Technical Data

10
HT01
Advanced Settings
Safety Information
7 Day Automatic mode
To select the 7 day timer mode press Muntil is displayed on the LCD screen. The thermostat will then switch
between comfort & energy saving mode (On/Off) automatically according to the day & time settings. Each day of the
week can be programmed with individual settings.
To set up the automatic mode, press & hold for 3 seconds.
To select the day of the week to be programmed press .
The bottom of the screen will show the following pattern of 24 numbered surfaces. Each eld represents a 1 hour
period of a 24 hour cycle. Each of these 1 hour periods can be programmed to comfort or energy-save (On/Off) mode.
To enter advanced settings press and hold Mfor 3 seconds. Press Monce again for each numbered function.
Temperature Calibration. If an accurate temperature read out from the room or oor differs from the read out on the
thermostat, providing the sensor has been checked against the stated resistance values, the thermostat can be calib-
rated using this function. The range is -8˚C ~ +8˚C.
Sensor Selection. See beginning of the Operating Instructions section for details.
When operating the thermostat with the rFS sensor selection, the room temperature will display on the thermostat.
This function allows the user to see the current oor temperature.
When operating the thermostat with the rFS sensor selection, this function allows the user to amend the maximum
temperature the oor can reach. If the oor temperature exceeds this over-heating protection set-point, ALARM will
ash on the screen and the heating output will cut out.
WARNING: RISK OF ELECTRIC SHOCK. Disconnect power supply before making electrical connections. Contact
with components carrying hazardous
voltage can cause electrical shock and may result in severe personal injury or death.
This thermostat is not a safety device and should only be used with safety certicated oor heating systems suitable
for their specic purpose. In order to avoid damaging your ooring, ensure the correct sensor selection & operating
temperatures are selected during the programming process.
1.
2.
3.
4.
To make changes to the timed program, press + / – to select the 60 minute period. Then press to select the mode.
Pressing + or – will copy the selected mode from the previous 60 minute period.
Whilst programming, inactivity of 5 seconds will save the settings entered & the thermostat will return to normal
operational mode.

11
HT01
Front Thickness Mounting Hole
The oor sensor should be installed within an approved non conductive installation pipe in accordance with EN 61386-1, which is embedded
in the oor. The pipe (exible conduit) should be placed as high as possible in the suboor. The oor sensor should be located equidistant
between two runs of the heating element with the tip at least 300mm away from the outside edge of the heater.
The enclosed 3 meter sensor cable can be extended up to 50m by means of a separate cable. The installation pipe must not contain any other
cables, such as the supplies to the heating wire. The switching peaks of such current supply lines may create interfering signals that prevent
optimum thermostat function. The heating supply cable should be placed in a separate pipe.
In the event of sensor failure, replacement of the sensor can be carried out with ease providing the sensor is installed within exible conduit.
The oor sensor should never cross the heating element.
1 Live from mains
2 Neutral from mains
3 Neutral to heaters
4 Live to heaters
5 Earth from heaters & mains
6 White wire from sensor
7 Black wire from sensor
Remove this sensor from circuit before performing any high voltage insulation tests.
IMPORTAT: ALWAYS DISCONNECT THE MAINS SUPPLY VIA THE SWITCH IN THE MAIN FUSE BOARD, CONSUMER UNIT BEFORE
COMMENCING ANY ELECTRICAL WORK. WHEN CONNECTING CABLES TO THE THERMOSTAT, ENSURE THAT ALL TERMINAL
SCREWS ARE FULLY TIGHTENED AND THAT EARTH WIRES ARE SLEEVED AND THAT NO BARE WIRES ARE SHOWING.
Release the front of the thermostat by
inserting a small at screwdriver into
the 2 slots on the base.
Make electrical connections as de-
tailed in previous section.
Electrical connections are to be made as detailed on diagram. The circuit supplying this controller must be protected by a 30mA RCD. All
electrical connections must be performed by a fully qualied and part P certied electrician. Any doubts surrounding the installation of this
controller should be passed to the distributer prior to installation. Testing of all under-oor heating systems should take place prior to oor
coverings being installed..
Mount base part of thermostat onto
either a BS recessed or surface
mounted box.
Mounting of the oor sensor
Electrical Connection
Mounting & Installation

12
HT01
Sensor Selection
Thermostat Programming
Date & Time Settings
The thermostat is factory preset to use the room and oor temperature sensors. The following options are available.
To change, press Mfor 3 seconds then Monce more. Option can then be selected by the +/ -buttons.
Your new thermostat has the following 3 modes. To manually select a specic mode press M.
Whilst the thermostat is operating in any of the modes above, the temperature can be manually altered by pressing the
+or – buttons. The set temperature will then revert back to the pre-set level at the next change of mode.
To set the correct date & time press and hold for 3 seconds. Minutes will ash, press +/ –to alter.
Press once again to alter hours (24 hour clock). Press once again to change week day.
The numbers from 1to 7at the top of the screen represent Monday to Sunday.
If this thermostat is to be used with any under oor heating system designed for oor coverings other than ceramic, porcelain or stone oor
tiles, the ‘oor sensor only’ option should be selected.
The (Comfort) , (Energy save) , and (Holiday) modes all need to be checked to ensure that the operating temperatures do not
exceed the values given by your heating / oor covering supplier. These temperature levels can be amended by holding for 3 seconds.
The rst value that can be changed is the holiday mode. Press once more (quickly) to amend the energy save value, and once more for the
comfort value.
*
rS
FS
rFS
Room sensor
ONLY
Room and
oor sensor
Comfort mode
Energy-saving
mode
Holiday mode
Floor Sensor
Heating will be switched on by the thermostat when the room temperature falls below the programmed temperature.
There is NO LIMIT on the temperature the oor can reach.
Select this mode to turn the under oor heating on. The heating will operate at the preset temperature.
To alter the preset temperature hold for 3 seconds then press again twice. Factory preset temperature : 25˚C
Select this mode to turn the under oor heating down to a lower preset temperature. This temperature can be set
low enough to mean the heating is effectively turned off. To alter the preset temperature hold for 3 seconds
then press once again. Factory preset temperature : 15˚C
Select this mode to set the heating to a very low level whilst the room in unoccupied for a long period of time.
This mode should be selected to avoid frost damage whilst on holiday. To alter the preset temperature hold
for 3 seconds. Factory preset temperature : 5˚C
Heating will be switched on by the thermostat when the oor temperature falls below the programmed temperature.*
Heating will be switched on by the thermostat when the room temperature falls below the programmed temperature. The
thermostat will cut power to the heating if the oor reaches a temperature higher than the programmed level. This is facto-
ry set at 65˚C This can re-programmed by the user at a level between 30˚C - 80˚C. RECOMMENDED MAX: 40˚C
Voltage: AC230V ± 10% 50/60HZ
Power Consumption: 5W
Setting Range: 5 ~ 30ºC
Floor overheating Protection: 30 ~ 80˚C (factory set @ 65˚C)
Protective housing: IP20
Housing Material: ABS + PC re-resistant
Certication: CE
Floor Sensor: Rubber-Thermoplastic NTC 10K Sensor
Internal Sensor: NTC 10K
Technical Data

13
HT01
Advanced Settings
Safety Information
7 Day Automatic mode
To select the 7 day timer mode press Muntil is displayed on the LCD screen. The thermostat will then switch
between comfort & energy saving mode (On/Off) automatically according to the day & time settings. Each day of the
week can be programmed with individual settings.
To set up the automatic mode, press & hold for 3 seconds.
To select the day of the week to be programmed press .
The bottom of the screen will show the following pattern of 24 numbered surfaces. Each eld represents a 1 hour
period of a 24 hour cycle. Each of these 1 hour periods can be programmed to comfort or energy-save (On/Off) mode.
To enter advanced settings press and hold Mfor 3 seconds. Press Monce again for each numbered function.
Temperature Calibration. If an accurate temperature read out from the room or oor differs from the read out on the
thermostat, providing the sensor has been checked against the stated resistance values, the thermostat can be calib-
rated using this function. The range is -8˚C ~ +8˚C.
Sensor Selection. See beginning of the Operating Instructions section for details.
When operating the thermostat with the rFS sensor selection, the room temperature will display on the thermostat.
This function allows the user to see the current oor temperature.
When operating the thermostat with the rFS sensor selection, this function allows the user to amend the maximum
temperature the oor can reach. If the oor temperature exceeds this over-heating protection set-point, ALARM will
ash on the screen and the heating output will cut out.
WARNING: RISK OF ELECTRIC SHOCK. Disconnect power supply before making electrical connections. Contact
with components carrying hazardous
voltage can cause electrical shock and may result in severe personal injury or death.
This thermostat is not a safety device and should only be used with safety certicated oor heating systems suitable
for their specic purpose. In order to avoid damaging your ooring, ensure the correct sensor selection & operating
temperatures are selected during the programming process.
1.
2.
3.
4.
To make changes to the timed program, press + / – to select the 60 minute period. Then press to select the mode.
Pressing + or – will copy the selected mode from the previous 60 minute period.
Whilst programming, inactivity of 5 seconds will save the settings entered & the thermostat will return to normal
operational mode.

14
HT01
Les renseignements gurant dans cette notice de montage ne sont communiqués qu’à titre d’information et peuvent être
mis à jour sans préavis. Toutes les gures et dessins présents dans ces instructions sont uniquement à titre d’illustration
et n’ont aucune valeur d‘actualité.
This instructions should only be considered as a standard manual. Modications applied to updated version of the pro-
duct might not be mentioned inside this document. In this case, please just use the manual as a reference. The company
reserves modication rights.
Il seguente manuale è solo una guida standard. Nel caso in cui dovessero essere presenti errori, dovuti a eventuali modi-
che postume del prodotto, si prega di considerare il manuale unicamente come riferimento per il montaggio. L´azienda
si riserva il diritto di modica.
ERKLÄRUNG
STATEMENT
EXPLICATIONS
DICHIARAZIONE
Die Bedienungsanleitung dient nur als Referenz. Diese Anleitung kann abweichende Angaben enthalten.
Die beschriebenen Produkte können jederzeit aktualisiert werden. Die Zeichnungen in dieser Anleitung dienen nur zur
Darstellung und haben keinen Anspruch auf Aktualität.
Table of contents
Other BERNSTEIN Thermostat manuals
