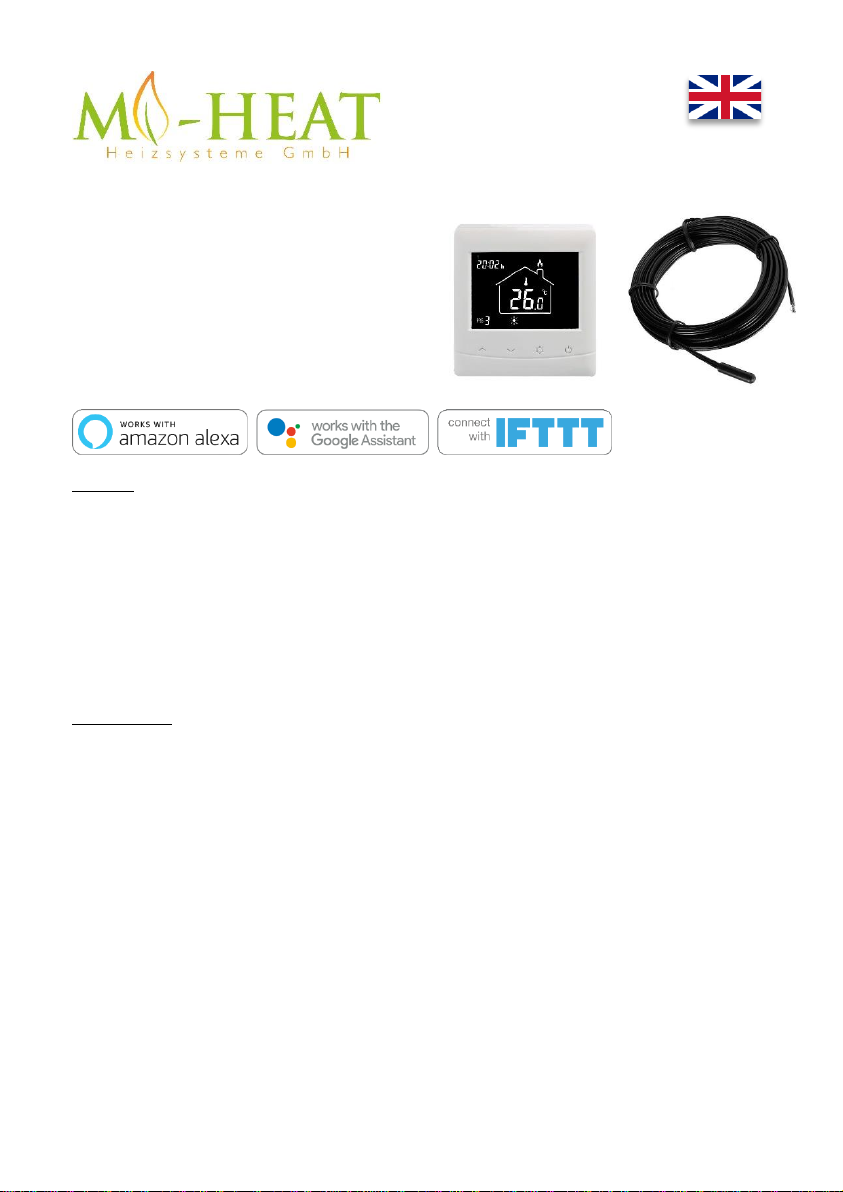
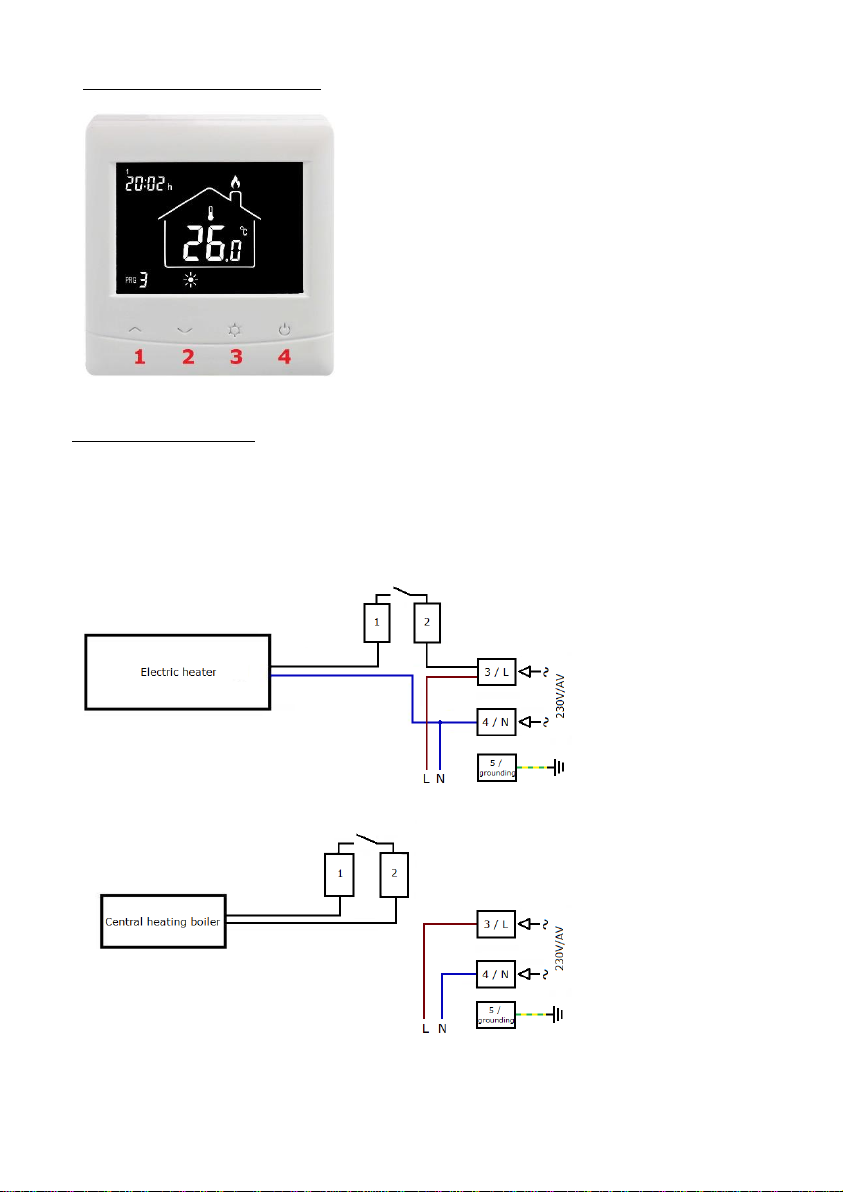
Mi-Heat Optima Wlan Classic User manual


This manual suits for next models
1
Other Mi-Heat Thermostat manuals

Mi-Heat
Mi-Heat TC-500 Wifi User manual

Mi-Heat
Mi-Heat E91 User manual

Mi-Heat
Mi-Heat TH213 User manual

Mi-Heat
Mi-Heat SAS816FHL-AP User manual

Mi-Heat
Mi-Heat MST1 User manual

Mi-Heat
Mi-Heat C16 User manual

Mi-Heat
Mi-Heat SAS816RF User manual

Mi-Heat
Mi-Heat TH213 User manual

Mi-Heat
Mi-Heat MTS200 User manual

Mi-Heat
Mi-Heat MH7H-EH User manual

Popular Thermostat manuals by other brands


Honeywell
Honeywell AQUASTAT L6188A reference guide

Venstar
Venstar T5900 Owner's manual and installation instructions

Lennox
Lennox ComfortSense 7000 series user guide

Watts
Watts W561 Installation, operation and maintenance manual

Lauda
Lauda RP 3050 C operating instructions

Resource Data Management
Resource Data Management PR0122-STA Installation & user guide

Tekmar
Tekmar 518 Installation & operation manual

White Rodgers
White Rodgers 1E30-373 installation instructions

ICM Controls
ICM Controls SC2201 Installation, operation & application guide

American Standard
American Standard Ceratherm T203.730 installation instructions

SST
SST MCS 350 user manual

OJ Electronics
OJ Electronics OCD4 user manual