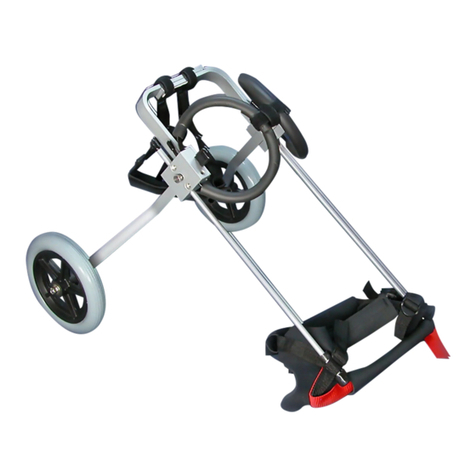
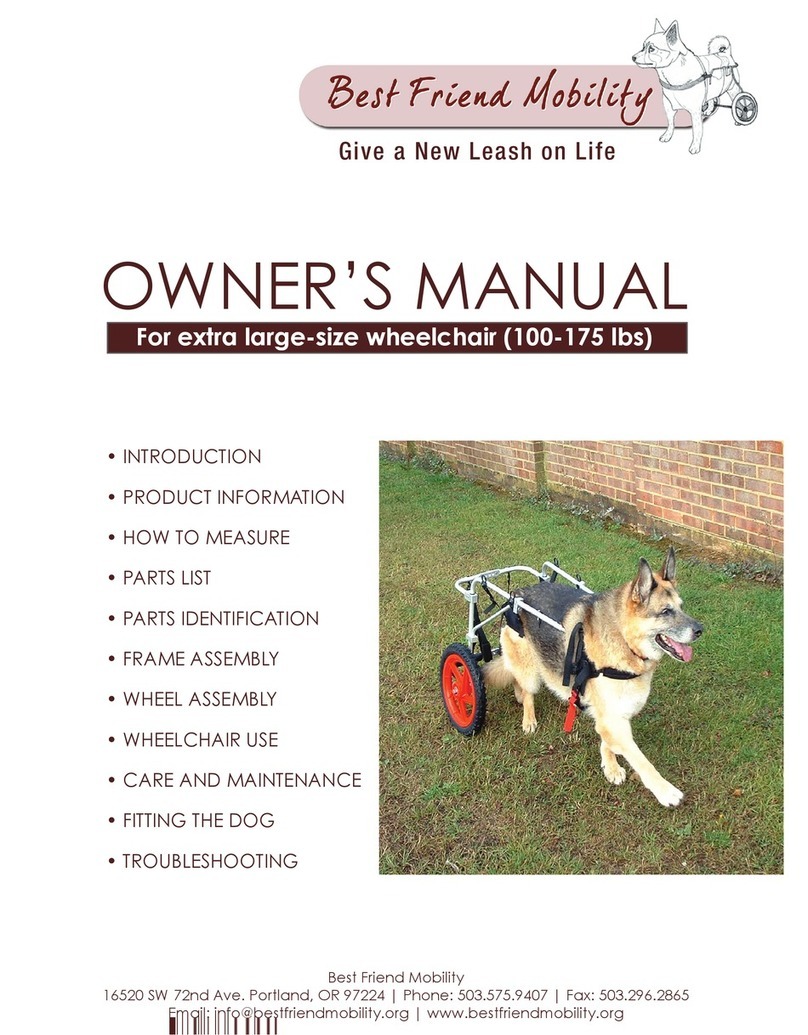
Best Friend Mobility SitGo User manual

USER’S MANUAL
SitGo™ Collapsible Rear Leg Support
Dog Wheelchair (Large adjustable to XL)

TABLE OF CONTENTS
INTRODUCTION ....................................................................................................
MEASURE YOUR PET ..............................................................................................
ASSEMBLY ............................................................................................................
Breakdown of Pre-assembled Parts .................................................................
Assembling the Wheelchair ............................................................................
FITTING YOUR DOG TO THE WHEELCHAIR ...............................................................
ADDITIONAL MEASUREMENTS ................................................................................
CARE AND MAINTENANCE ......................................................................................
PRODUCT INFORMATION ........................................................................................
The SitGo Motion ..........................................................................................
CONTACT US .........................................................................................................
1
3
4
4
8
19
30
32
32
33
35

INTRODUCTION
1
Best Friend Mobility® Rehabilitation Aids
Dear Pet Owner and Valued Customer:
The following guidelines, along with the attached assembly and tting instructions, will help
you get the best use of your dog wheelchair.
Please read and follow the Assembly instructions carefully before making any attempt to
place your pet in the wheelchair. Should you encounter any problems with assembly and
tting, please call Best Friend Mobility directly through our hotline (843) 492-5283.
If you think you need a different size, we can process the exchange for you easily. Just
This is a learning process and can take time. We realize that both you and your pet are
most likely unfamiliar with the use of a dog wheelchair so do not hesitate to contact us for
help. Please be advised that most dogs do not intuitively know how to use a wheelchair, and
they will require training and practice. Some dogs may be afraid in the beginning, so it is
important to give positive reinforcement when placing them in the chair, especially for the
rst time.
Use treats. Treats held in front of your pet will encourage it to take steps and move forward;
this will teach them to ambulate while in the chair. It may take several training sessions
before a dog is able to actually use the chair. It is okay and normal if your dog does
not take to the chair right away.
It is very important, especially with skittish animals, that they come into physical contact
with the wheelchair in some way every day. This should always be coupled with positive
reinforcement like praise, pets, and treats.
This will help to create a positive association with the wheelchair and help the animal to
eventually love the wheelchair and be able to learn to use it.
This process may take from days to months, so please don’t lose hope, persistence will pay
off. Contact us for any help or questions.
Thank you for purchasing a Best Friend Mobility dog wheelchair. Again, we love receiving
feedback, stories, photos, and videos of how your pets are doing in their wheelchairs.
Sincerely,
TIM CANTRELL
Vice President
Best Friend Mobility
Phone: (843) 492-5283
T
im Cantrel
l

2
Attention First Time Users
It is important to acclimatize your pet to the wheelchair. It is recommended that you do
not allow your pet to use the collapse or SitGo function for the rst few weeks of use.
You can set your pet’s wheelchair to non-collapsible manually. The instructions on how to
set the wheelchair from collapsible to non-collapsible is in section 6.2 under the section
“Assembling the Wheelchair.”
This will deactivate the collapse or SitGo motion function. Wait until your pet gets comfortable
using the wheelchair before you set the wheelchair to the collapsible setting.
The instructions on how to release the setting from non-collapsible to collapsible is in
section 6.1 under “Assembling the Wheelchair.” Once you set the wheelchair to the
collapsible setting, you must then set the proper tension for your pet’s weight. The
instructions for adjusting the tension for your pet’s weight are in section 7.
DO NOT LEAVE YOUR PET ALONE IN THE CART!
ALL PARTS INCLUDED IN THE BOX

3
LARGE SITGO VIDEO USB
MEASURE YOUR PET
Measure your pet to conrm that you have the correct size Best Friend Mobility SitGo Rear
Support wheelchair for your pet.
The only information you truly need to get the right size is the measurement from the oor
to your pet’s back—at its hindquarters. It’s that simple!
Depending on your pet’s current capabilities and its willingness to cooperate, this can be a
1-person or 2-person job.
If your pet has very little or no rear-limb strength, one person can be the support while the
other does the measuring.
Please watch assembly video while following along
with each step in the manual for effective and
proper assembly.

Wheel Bar Thumb Screw
Wheel Bar Thumb Screw
Socket Set Screw
Socket Set Screw
Pivot Assembly
Large Right Sidearm
Large Left Sidearm
Let us begin with the assembly by checking out all the pre-assembled parts and tools.
BREAKDOWN OF PRE-ASSEMBLED PARTS AND TOOLS
ASSEMBLY
4
A. Cart Frame Assembly

5
B. Large Rear Harness Assembly
C. Left and Right Front Harness Rod (x2)
D. Left and Right Wheels Assembly (x2)
Socket Set Screws
Rear Harness Supports
Pivot Shaft Connector
Size Adjusting Pin Holes
Rear Harness Bars
Front Harness Rings
Left and Right Wheel Arms
Air Intake Valves
Rubber Stops

ASSEMBLY
6
E. Size Adjusting Pin (x4)
F. Front Harness
G. Basic Rear Harness – gives better support for your dog’s body while harnessed to the
wheelchair.
Plastic Clamps

7
J-1. Big Wrench
J-2. Small Hex Wrench
J-3. Wheel Actuator Allignment Tool
I. Rear Leg Straps
H. Sports Rear Harness – gives better mobility for your pet while harnessed to the
wheelchair.
Plastic Clamps

ASSEMBLY
1.1. Insert rear harness bars (B) into the holes on the left and right side arms which are
near the pivot assembly of the cart frame assembly (A).
1.2. Do this simultaneously for both left and right sides.
Assembling the Wheelchair
1. Connecting the lower rear crossbar (B) to the left and right side arm assembly (A)
8

9
1.3. If the rear harness bars (B) do not align with the holes on the left and right side arms
(A), adjust the width of the rear harness bars (see section 5 on adjusting the width).
1.4. Insert a size adjusting pin (E) thru the holes on the right side arm (A). Make sure the
curved side and not the cornered side is facing up.
1.5. Push the size adjusting pin (E) thru the holes until it comes out the opposite end.

2.1. Insert the right front harness rod (C) into the hole of the large right side arm (A).
2.2. Make sure the front harness ring is facing downward when the right front harness rod
is installed.
2.3. Adjust to desired length. Make sure the hole on the right front harness rod (C) is
aligned with a hole on the large right side arm (A).
2.4. Insert a size adjusting pin (E) in the aligned hole until it comes out the other end.
2. To install the left and right front harness rods
10

2.5. Repeat 2.1. to 2.4. to left front harness rod (C) into the hole of the large left side arm
(A). Make sure the left and right front harness rods (C) are of equal distance when
adjusting their length.
3.1. Remove rubber end caps from left and right wheel assemblies (D).
3.2. Loosen wheel bar thumbscrew on pivot assembly (A).
3.3. Insert right wheel assembly (D). Make sure the side with hollowed circles is facing the
same side as the thumbscrew.
3. To attach left and right wheels
11

12
3.4. Make sure the wheel arm and rubber stop on the right wheel assembly (D) are facing
the same direction as the large rear harness assembly (B).
3.5. Adjust to desired height. Line up top of round wheelbar assembly to scored line like so
to ensure that thumbscrew lines up into corresponding divot. Tighten with pliers.
3.6. Return rubber end cap.
3.7. Repeat 3.1. to 3.6. to install the left wheel assembly (D) to the pivot assembly (A).
3.8. Inate the wheels if necessary with any standard air pump.

13
3.9. Tighten or loosen the wheel bolts with the big wrench (J-1) if necessary to ensure
free-wheeling movement of the wheels.
4.1. Loosen the socket set screws on the pivot shaft connector with the small hex wrench (J-2).
4.2. Also loosen the socket set screws on the pivot assembly with the small hex wrench (J-2).
4.3. Adjust the distance of the rear harness bars and pivot shaft connector according to
desired width. Align on both sides.
4. To adjust the width

4.4. Also adjust the distance of the side arms and pivot assembly according to desired width.
Align on both sides.
4.5. Tighten all the socket set screws on both the pivot shaft connector and pivot assembly
with the small hex wrench (J-2).
5.1. Slightly loosen the nut between the L-bracket and the Rubber Stopper bar. The L-bracket
should be loose enough to be moved but not loose enough slide on its own.
14
5. To adjust Rubber Stopper and setting L-Bracket angle
NOTE: This comes pre-assembled correctly from the factory - this section included for your
reference only in the unlikely event that the wheel assembly goes out of line and needs to be
re-calibrated.
The same procedure applies
to all wheelchair sizes. Shown
above and below are images
of the wheel assembly for the
SitGo large.

15
5.2. Place plastic wheel acuator alignment tool as shown in diagram to recalibrate properly.
5.3. Re-tighten the nut carefully, make sure not to move the position of the L-bracket. You
can use the rubber stopper bar to keep the L-bracket from moving while you tighten
the nut.
5.4. Make sure that the rubber stopper bar can move freely without excessive play.
HINT: If the Angle Bracket keeps moving away from its intended position when you tighten
the nut, adjust the Angle Bracket a bit off your intended position so that when you tighten
the nut the Angle Bar will move slightly to the intended position.
6.1. The SitGo’s collapsible setting is locked when shipped from the factory. Once you have
adjusted it to your pet’s size and once your pet has acclimated to using a wheelchair,
you can adjust or completely remove the bolt shown above to activate the SitGo’s
collapsible feature. Please note that the spring tension will need to be adjusted for the
weight of your pet (see number 7 of this section).
6. To switch the SitGo function to different settings

6.2. To release the SitGo function from its non-collapsible setting to the collapsible setting,
loosen the number 3 screw indicated in the picture above until you are able to collapse
the wheelchair all the way down.
6.3. To return the SitGo function from the collapsible to the non-collapsible setting, while
the wheelchair is fully upright fully tighten the number 3 screw indicated in the picture
above then fully tighten the jam nut. A longer 10-24 bolt may be used if needed. They
may be placed on either side of the bracket.
6.4. To allow the wheelchair to collapse but stop it from going back to its full upright position,
tighten the number 2 screw indicated in the picture above. This setting can be used in
conjunction with setting the wheelchair height if your pet is still too high for the
wheelchair.
7.1. Hold on to the Spring Adjuster to keep it from moving.
7. To adjust for the weight of the pet
16
Rotate backward and
downward
Spring Adjuster
Socket Screw

7.1.1 Use the pictured wrench as needed to increase leverage on the spring adjuster so
that it will be easier to tighten the spring to desired tension for your dog.
17
7.2. Loosen the set screw on the Spring Adjuster.
Rotate backward
and downward
Spring Adjuster
Socket Screw

Figure 1
You are done with the assembly!
18
7.3. Rotate the Spring Adjuster going backward and downward. The two arms work in the
same way. Their weight bearing capacity is additive. Meaning that each spring carries
half the weight of the back side of the dog.
7.4. Adjust the tension on the Spring Adjuster until there is sufcient tension to support
your pet when standing and also when moving from sitting or lying down position to
standing position. The tension should also not be too much so that your pet will need
little effort to move from standing position to lying down or sitting position. This will
take some effort to achieve because it will need a bit of trial and error until you nd
the perfect tension balance for your pet.
Hint: One method of doing this is to initially set the Spring Adjuster to a very high tension
position. Then slowly adjust the tension lower while having your pet try using the wheelchair
at each adjustment until you nd the right tension for your pet.
Table of contents
Other Best Friend Mobility Pet Care Product manuals
Popular Pet Care Product manuals by other brands
Kippy
Kippy Pet Finder quick start guide
D.T. System
D.T. System ULTRA MIN-E 2090 owner's manual
Melissa
Melissa 638-140 Specification sheet

Creative Cedar Designs
Creative Cedar Designs 2515 Assembly instructions

Oase
Oase biOrb CLASSIC operating instructions

SureFlap
SureFlap DualScan Microchip instruction manual
