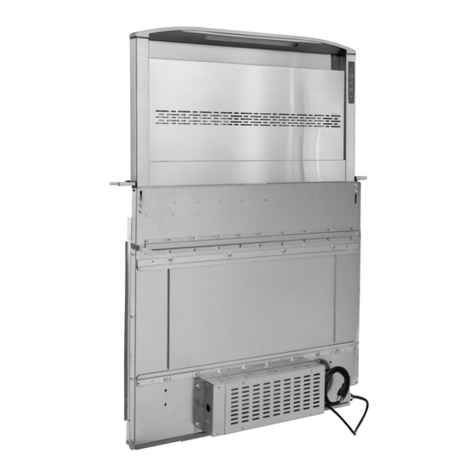
Best D49M30SB User manual

Page 1
Models D49M30SB • D49M36SB • D49M48SB
DOWNDRAFT
VENTILATOR
WARNING
READ AND SAVE THESE INSTRUCTIONS
WARNING
TO REDUCE THE RISK OF FIRE, ELECTRIC SHOCK, OR IN-
JURY TO PERSONS, OBSERVE THE FOLLOWING:
1. Use this unit only in the manner intended by the manufacturer.
If you have questions, contact the manufacturer at the address
or telephone number in the warranty.
2. Before servicing or cleaning unit, switch power off at service
panel and lock the service disconnecting means to prevent
power from being switched on accidentally.When the service
disconnecting means cannot be locked, securely fasten a
prominent warning device, such as a tag, to the service panel.
3. Installation work and electrical wiring must be done by a
qualified person(s) in accordance with all applicable codes
and standards, including fire-rated construction codes and
standards.
4. Sufficient air is needed for proper combustion and exhausting
of gases through the flue (chimney) of fuel burning equip-
ment to prevent backdrafting. Follow the heating equipment
manufacturer’s guideline and safety standards such as those
published by the National Fire Protection Association (NFPA),
and the American Society for Heating, Refrigeration and Air
ConditioningEngineers (ASHRAE),andthelocalcodeauthori-
ties.
5. When cutting or drilling into wall or ceiling, do not damage
electrical wiring and other hidden utilities.
6. Ducted fans must always be vented to the outdoors.
7. To reduce the risk of fire, use only metal ductwork.
8. Do not install this product with the activating switch directly
behind a burner or element. Minimum distance between the
switch and the edge of the burner should be 4 inches.
9. Loose-fitting or hanging clothing should never be worn when
operating this appliance. They may be ignited by burners/
elements on cooktop.
10. Children should not be left alone or unattended in the area
where this appliance is in use.
11. This unit must be grounded.
TO REDUCE THE RISK OF A RANGE TOP GREASE FIRE:
a) Never leave surface units unattended at high settings.
Boilovers cause smoking and greasy spillovers that may
ignite. Heat oils slowly on low or medium settings.
b) Always turn hood ON when cooking at high heat or when
cooking flaming foods.
c) Clean ventilating fans frequently. Grease should not be
allowed to accumulate on fan or filter.
d) Use proper pan size. Always use cookware appropriate
for the size of the surface element.
TO REDUCE THE RISK OF INJURY TO PERSONS IN THE
EVENT OF A RANGE TOP GREASE FIRE, OBSERVE THE
FOLLOWINGa:
1. SMOTHER FLAMES with a close-fitting lid, cookie sheet, or
metal tray, then turn off the burner. BE CAREFUL TO
PREVENT BURNS. If the flames do not go out immedi-
ately, EVACUATE AND CALL THE FIRE DEPARTMENT.
2. NEVER PICK UP A FLAMING PAN - You may be burned.
3. DO NOT USE WATER, including wet dishcloths or towels - a
violent steam explosion will result.
4. Use an extinguisher ONLY if:
A. You know you have a Class ABC extinguisher, and you
already know how to operate it.
B. The fire is small and contained in the area where it
started.
C. The fire department is being called.
D. You can fight the fire with your back to an exit.
aBased on “Kitchen Firesafety Tips” published by NFPA.
CAUTION
1. For indoor use only.
2. For general ventilating use only.Do not use to exhaust hazard-
ous or explosive materials and vapors.
3. To avoid motor bearing damage and noisy and/or unbalanced
impellers, keep drywall spray, construction dust, etc.off power
unit.
4. Clean filters and grease-laden surfaces frequently.
5. Do not repair or replace any part of this appliance unless
specifically recommended in this manual. All other servicing
should be done by a qualified technician.
6. Please read specification label on product for further informa-
tion and requirements.
7. To reducetherisk of fireandelectricshock,installthisdowndraft
only with blower models shown below. Other blower models
cannot be substituted. (Blowers sold separately).
Flex Blower Model PF6
Exterior Blower Models EB6, EB9, EB12, or EB15
In-Line Blower Models ILB3, ILB6, ILB9 or ILB11
For use with these blowers
(purchase blowers separately):
Model PF6 - Flex Blower - Interior
Models EB6, EB9, EB12, or EB15 - Exterior
Models ILB3, ILB6, ILB9 or ILB11 - In-Line
!
INSTALLER:
Save this manual for Electrical
Inspector and Homeowner to use.
Register your product online at: www.BestRangeHoods.com

Page 2
Models D49M30SB • D49M36SB • D49M48SB
PLANNING
ELECTRICAL SPECIFICATIONS
Model PF6 - Internal Flex:
120 VAC • 60 Hz • 3.0 A
Models EB6, EB9, EB12, or EB15 - Exterior
Models ILB3, ILB6, ILB9 or ILB11 - In-Line
120 VAC • 60 Hz • 6.0 A (max.)
TAKE MEASUREMENTS
Due to its flexible design, this downdraft system can be used to
exhaust airborne contaminants when cooking with a variety of gas
or electric cooking appliances - including cooktops,rangetops,
slide-in ranges and free-standing ranges.
It can be mounted in island, peninsula, or conventional wall
locations.The blower (purchase separately) and electrical panel
can be mounted to the downdraft unit, inside the cabinet, or in a
convenient remote location.
This unit can be easily installed following these basic steps:
•Cut out the countertop opening.
•Mount the unit in the cabinet.
•Install the blower and electrical panel.
•Connect the ductwork and electrical.
•Install the trim.
•Install the cooking appliance.
Note: the high level of air flow of this appliance may effect the
gas flame on some types of gas cooktops. This is NORMAL and
will cause no harm, but can be corrected by lowering the speed
of the blower.
A cooktop sealing kit is recommended for use with all gas
cooktops. The kit creates a seal between the cooktop and
the lower cabinet. Includes trim bracket and trim seal. See
"OPTIONAL ACCESSORIES".
PLAN THE DUCTWORK
1. Refer to the cooktop installation instructions for dimensions
of cooktop, countertop cut-out, and cabinet requirements.
However, it is recommended that oversized cabinets be used
for easier installation. Custom island designs need to account
for deeper cabinets - especially when installed with a range
in front of the downdraft or when mounting the blower behind
the downdraft.You must also plan for an access door.
2. Cooktop depth can vary greatly from one to another.This may
cause the fit of these two appliances to be rather tight.
Pay special attention to the areas of potential interference high-
lighted above. A countertop with (A) a raised lip and/or (B) a
backsplash may not allow enough flat countertop for a proper
installation. Note that 2-3/4" of flat countertop is required behind
cooktop and that 2-1/2" is necessary between the back edge of
the cooktop and the inside of cabinet back.
AB
C
DE
F
HOUSING
1. The downdraft blower system is designed for use with 8"
round ductwork using a flex blower or 10" Round ductwork
using a remote blower. (Purchase blowers separately.) Six
(6) different discharge connections are available:
A = 8" Round, Left Discharge out of Flex Blower
B = 8" Round, Right Discharge out of Flex Blower
C = 8" Round, Down Discharge out of Flex Blower
(Electrical Panel to be mounted remotely)
D = 1-7/8" x 19", Left Discharge out of Housing to
Remote Blower or Flex Blower in remote location.
Use 1-7/8" x 19" to 8" round transition, 1-7/8" x 19" to
10" round transition, or 1-7/8" x 19" ductwork
as appropriate.
E = 1-7/8" x 19", Right Discharge out of Housing to
Remote Blower or Flex Blower in remote location.
Use 1-7/8" x 19" to 8" round transition, 1-7/8" x 19" to
10" round transition, or 1-7/8" x 19" ductwork
as appropriate.
F = 1-7/8" x 19", Rear Discharge out of Housing to
Remote Blower or Flex Blower in remote location.
Use 1-7/8" x 19" to 8" round transition, 1-7/8" x 19" to
10" round transition, or 1-7/8" x 19" ductwork
as appropriate.
2. For best performance:Choose the ducting option which allows
the shortest length of ductwork and a minimum number of
elbows and transitions. Check location of floor joists, wall
studs, electrical wiring or plumbing for possible interference.
CONTENTS
These parts are included with your downdraft housing:
1 - Parts Bag containing:
2 - 2-in. Support Legs
2 - 4-in. Support Legs
2 - Screws, 1/4-20 x .50 Hex Head
2 - Screws, #8-18 x .375 Phillips
8 - Wood Screws, #10 x .50 Phillips Round Head
1 - Trim Door Kit
1 - Electrical Panel
2 - Support Brackets
1 - Countertop Cut-out Template
2-3/4"
2-1/2"
FLEX
BLOWER *
*Remote blowers use 8" or 10" round remote discharge plate
instead of flex blower.
ELECTRICAL
PANEL

Page 3
Models D49M30SB • D49M36SB • D49M48SB
PLAN THE WIRING
1. This downdraft blower using the Flex Blower (purchase
separately) draws 3.0 Amps and requires a 120 VAC, 60 Hz
circuit. If using a remote blower (purchase separately), the
system draws 6.0 Amps (max.) and requires a 120 VAC, 60
Hz circuit.
2. The unit has a 30 in. long power cord with a 3-pronged plug.
Plan to provide a grounded outlet in a location which will allow
the unit’s power cord to reach.
3. Install electrical box according to local codes.
PREPARE THE DOWNDRAFT
Installations ducting through front panel opening only:
1. Place the downdraft on its back on a table or flat work surface.
2. Removethe HEX NUTS toremovetheFRONTPANELCOVER.
FRONT PANEL COVER
(8)
#10-24 HEX
NUTS
FLEX
BLOWER
FRONT
PANEL
If blower discharge is
down, electrical panel
must be relocated.
See Step 6.
PLAN CABINET CUTOUTS
!
CAUTION: BEFORE CUTTING HOLE IN CABINET
FOR DUCTWORK, check for interference with floor
joists, wall studs, electrical wiring, or plumbing.
Use the dimensions in the above illustration to help plan how and
wheretoprovideductaccessthroughyourcabinet.Generally,1-7/8"
x 19" rectangular duct will be used through left, right, and back of
cabinet - while 8" round duct will be used through cabinet floor.
For left, right, or rear exhaust:
Allow at least 18" for transition and elbow or blower.
For left / right exhaust:
A 30" deep cabinet is recommended to align properly with flex
blower. Flex blower can be mounted to rear cabinet wall or to a
platform / frame (not provided) on the base of the cabinet floor.
(See flex blower instructions).
Cabinet depths of 24" to 30" are required - depending on the
type of cooking appliance.
INSTALLATION
CENTER LINE
HOLE
FOR
1 ” X 19”
DUCT &
TRANSITIONS
INSIDE
CABINET BACK
INSIDE
CABINET FLOOR
1½”
21”
centered 4”
5 ”
/8
7
2”
21”
4”
A
B
/8
7
REAR CORNER OF
COOKTOP CUT-OUT
24¾”
Electrical panel
can be mounted
remotely.
(8)
#10-24 HEX
NUTS
Hole in Cabinet Floor
Dimension A Dimension B
Using Flex Blower (Model
PF6 & 8" round duct straight
down through cabinet floor.)
(1½" left of installation center line)
Using Exterior or In-Line
Blower & 900Duct Elbow
(on installation center line)
5-5/8 inches
7-5/8 inches
(Model 432
- 8" round
elbow)
8-5/8 inches
(Model 418
- 10" round
elbow)
(Purchase Model PF6 Flex Blower separately.)
3. Determine whether FLEX BLOWER will discharge to the left,
right, or down.
Tighten the hex nuts to secure blower in place.
Installations using FLEX BLOWER only:

Page 4
Models D49M30SB • D49M36SB • D49M48SB
Installations using FLEX BLOWER (in remote location)
or REMOTE BLOWER only:
4. Use the REMOTE DISCHARGE PLATE.
Tighten the hex nuts to secure the REMOTE DISCHARGE
PLATE in place.
8" OR 10" ROUND
REMOTE
DISCHARGE
PLATE
(Purchase
separatly)
FRONT
PANEL
All Installations:
5. Slide UPPER SUPPORT BRACKETS into SLIDE CHANNEL
at top left and right of unit.
Attach LONG OR SHORT SUPPORT LEGS (depending upon
cabinet height) to bottom sides of unit with HEX SCREWS
provided. Do not tighten hex screws completely at this time.
UPPER
SUPPORT
BRACKET
SLIDE
CHANNEL
SUPPORT
LEGS
HEX SCREW
1/4-20 X .500
Flex Blower
shown
installed.
(8) #10-24
HEX NUTS
Installations using FLEX BLOWER only:
7. Attach BLOWER SUPPORT LEGS with (4) SCREWS
provided.
BLOWER
SUPPORT
LEGS
(4) SCREWS
Installations where ELECTRICAL PANEL needs to be
mounted in a remote location only:
6. Remove (4) #8-32 HEX NUTS and ELECTRICAL PANEL.5-ft.
extension cables (Model AEWD5 - purchase separately) may
be needed to mount electrical panel in a remote location. Do
not use more than 2 extension cables.
#8-32 HEX
NUTS
CAUTION: If flex blower will be mounted
remotely: Do not use legs alone for support. It
may be necessary to add extra support for the
flex blower. Use mounting brackets supplied with
the blower.
!

Page 5
Models D49M30SB • D49M36SB • D49M48SB
Installations ducting through left, right or rear only:
(Requires purchase of 1-7/8" x 19" to 8" or 10" round transition.
1-7/8" x 19" rectangular duct and connection adapters are
also available.)
8. Remove only one RECTANGULAR DISCHARGE COVER.
RECTANGULAR
DISCHARGE COVERS
This
Front Panel
remains
in place.
Installations ducting through left, right or rear only:
(Requires purchase of 1-7/8" x 19" to 8" or 10" round transition.
1-7/8" x 19" rectangular duct and connection adapters are
also available.)
9. Use nuts to connect 1-7/8" x 19" rectangular ductwork
connection adapter or 1-7/8" x 19" to 8" or 10" round transition
to housing when installing ductwork.
Ducting out right side of housing shown.
CUT COUNTERTOP OPENING
1. Lay out and cut the cooktop cut-out far enough FORWARD so
downdraft will fit behind it.
2. Set cooktop in place and slide it as far forward as possible
without exposing any gaps. Center and square it with edges
of countertop.
3. Place the plastic template against the back flange of the cook-
top or back edge of slide-in range countertop opening. Center
the template. Trace around template to mark the downdraft
opening.
4. Remove cooktop from countertop.
5. Cut downdraft opening. Be careful not to chip edges of countertop.
Template against back
edge of cooktop.
Template against back
edge of countertop opening.
COOKTOP
COUNTERTOP
OPENING FOR
SLIDE-IN RANGE

Page 6
Models D49M30SB • D49M36SB • D49M48SB
5. Extend SUPPORT LEGS and attach to bottom of cabinet with
(2) SCREWS through each leg. Tighten HEX SCREWS.
If cabinet bottom is removed:
Use blocks as spacers between floor and support legs.
SUPPORT LEG
(2) #10 X .500 WOOD SCREWS
HEX
SCREW
6. Extend UPPER SUPPORT BRACKETS and attached to sides
of cabinet with (2) SCREWS through each bracket.
(2)
#10 X .500
WOOD
SCREWS
UPPER
SUPPORT
BRACKET
7. Loosen (4) SCREWS attaching BLOWER SUPPORT LEGS
to FLEX BLOWER. Extend legs and secure them to bottom of
cabinet with a SCREW through each bracket.
FLEX
BLOWER
(4) 1/4-20
X .500
SCREWS
SCREWS
Installations using FLEX BLOWER only:
INSTALL HOUSING INTO
CABINET
1. Remove cooktop.
4. Make sure housing is level.
2. Plug UP BUTTON CABLE from right trim into UPPER
RECEPTACLE at bottom right side of downdraft housing and
connect ground wire to GROUND NUT.Run cable up along side
of housing and TAPE in place near top.
3. Set housing into cabinet / countertop opening as far back as
possible. Make sure up button cable threads through opening
as shown and is not pinched.
TAPE
UP
BUTTON
CABLE
UPPER
RECEPTACLE
GROUND
NUT

Page 7
Models D49M30SB • D49M36SB • D49M48SB
INSTALL DUCTWORK
1. Cut hole in cabinet as well as holes in wall or floor as necessary.
2. Mount the roof or wall cap and work back towards the cabinet,
attaching all ductwork, elbows and transitions as previously
planned.Tape all ductwork connections to make them secure
and air tight.
3. Connect ductwork (and transition, if required) to downdraft.
!
CAUTION: BEFORE CUTTING HOLE IN CABINET
FOR DUCTWORK, check for interference with floor
joists, wall studs, electrical wiring, or plumbing.
INSTALL FINISH TRIM
1. Remove TAPE BACKING.
2. WIPE SURFACES CLEAN on underside of right trim - so tape
adhesive will stick tightly.
TAPE
BACKING
WIPE
SURFACES
CLEAN
TOP
DOOR
TOP
DOOR
RIGHT
TRIM
WASHER
FLUSH
1/16" GAP
3. Press RIGHT TRIM in place.
Make sure trim:
•sits flat on countertop surface.
•is flush with TOP DOOR.
•has 1/16" GAP between trim and top door.
•wiring is not pinched.
4. Repeat Steps 1, 2 & 3 to install left trim.
TOP VIEW

Page 8
Models D49M30SB • D49M36SB • D49M48SB
FLEXIBLE
BLOWER
M
ELECTRICAL PANEL
WIRING
BOX
BLACK (HIGH 4)
WHITE (NEUTRAL)
BLUE (LOW 1)
GRAY (MED 2)
GROUND SCREW
ORANGE (MED-HIGH)
BLACK
WHITE
BLUE
RED
ORANGE
GREEN
LOWER
RECEPTACLE
ELECTRICAL
PANEL CABLE
CABINET BOTTOM
WIRING
BOX
COVER
INSTALL ELECTRICAL WIRING
1. Mounta standardwiring box,with 3-prongedreceptacle,within
reach of the downdraft's power cord.
2. Run appropriate power cable and connect it to receptacle.
CAUTION: All electrical wiring should be done
by a qualified person(s) in accordance with all
applicable codes and standards.
Installations using FLEX BLOWER only:
3. Remove WIRING BOX COVER and connect blower wires to
wires in wiring box. Black to black, white to white, blue to blue,
orange to orange, gray to red, and green to ground screw.
1. Mounta standardwiring box,with 3-prongedreceptacle,within
reach of the downdraft's power cord.
2. Run appropriate power cable into cabinet and connect it to
electrical box and receptacle.
3. These exterior or in-line blower can be used:
Models EB6, EB9, EB12, or EB15 - Exterior
Models ILB3, ILB6, ILB9, or ILB11 - In-Line
120 VAC • 60 Hz • 6.0 A (max.)
4. Run 2-wire plus ground power cable from the exterior or in-line
blower to wiring box on adaptor plate. Remove WIRING BOX
COVER.
5. Connect blower wires to power cable from exterior or in-line
blower. Black to black, white to white, and green to ground
screw.
CAUTION: All electrical wiring should be done
by a qualified person(s) in accordance with all
applicable codes and standards.
Installations using REMOTE BLOWER only:
REMOTE
BLOWER
M
ELECTRICAL PANEL
WIRING
BOX
BLACK
WHITE (NEUTRAL)
GROUND SCREW
4. Replace wiring box cover.
5 PlugELECTRICALPANELCABLEintoLOWERRECEPTACLE
as shown.
6. Plug the downdraft's power cord into the outlet.Make sure that
the power cord is routed away from the heat generated by the
cooktop.
6. Replace wiring box cover.
7. PlugELECTRICALPANELCABLEintoLOWERRECEPTACLE
as shown.
8. Plug the downdraft's power cord into the outlet.Make sure that
the power cord is routed away from the heat generated by the
cooktop.
LOWER
RECEPTACLE
ELECTRICAL
PANEL CABLE
CABINET BOTTOM

Page 9
Models D49M30SB • D49M36SB • D49M48SB
OPTIONAL
ACCESSORY DESCRIPTION /
APPLICATION
MODEL ACRD
REMOTEUP/DOWN CONTROL
Use when you cannot reach the UP/
DOWN Buttononthe downdraftchimney.
Can be located on counter top, face of
cabinetry or on the side cabinet of an
island. Cut-out size: 2¼" H x 2" W.
Cannot be used where remote control
will interfere with cooking, where hot
pans could be set, or where hot liquids
could be spilled on the control.
Remote wiring connects with 6-pin con-
nector on control box.
MODELS
ATSKD30
ATSKD36
ATSKD48
GAS COOKTOP SEAL KIT
Recommended for use with all gas
cooktops. Includes trim bracket and
trim seal.
30", 36" & 48" widths.
MODELS
MD6T
MD8T
MD10T
MAKE-UP AIR DAMPER
Use to provide make-up air when called
for to keep the home comfortable by
allowing the downdraft to operate at
optimum levels.
Directwire design works with select
BEST®downdrafts to balance indoor
air pressure by providing interlocked
make-up air; damper opens automati-
cally when the range hood is activated
8" round & 10" round diameters.
Connects to 2 CONTACTS on
ELECTRICAL PANEL.
MAKE-UP
AIR DAMPER
CONTACTS
MODELS
ATKD30SB
ATKD36SB
ATKD48SB
RANGE TRIM KIT
Use with free-standing range - where a
gap is present between back of range
and downdraft.
30", 36" & 48" widths.
OPTIONAL ACCESSORIES
OPTIONAL
ACCESSORY DESCRIPTION /
APPLICATION
MODEL AEWD5
EXTENSION CABLE - 5-FT.
Use where electrical panel is remotely
mounted. Extends electrical panel ca-
ble an additional 5-feet.
MODEL ANKD
NON-DUCT
RECIRCULATING KIT
Use where ducting is not feasible or
available. Mount to toe kick or base of
a cabinet and attach directly to Model
PF6 Flex Blower using 8" round duct.
Kit can be rotated so that the exhaust
is not directly at your feet. Includes
recirculation filter and decorative cover
plate.
MODEL AFCD
RECIRCULATION FILTER
REPLACEMENT
Replacement filter for ANKD Non-Duct
Recirculating Kit. Use to effectively
capture cooking contaminants.
MODEL AVDKD8
1-7/8" X 19" TO 8" ROUND
TRANSITION
Rectangular to 8" round transition for
left, right, or rear exhaust - using Model
PF6 Flex Blower. Can be attached
to downdraft unit or rectangular duct
(AEDD2). Includes S-clips for easy,
secure attachment.
MODEL AVDKD10
1-7/8" X 19" TO 10" ROUND
TRANSITION
Rectangular to 10" round transition for
left, right, or rear exhaust - using Model
PF6 Flex Blower. Can be attached
to downdraft unit or rectangular duct
(AEDD2). Includes S-clips for easy,
secure attachment.
MODEL AVDKD219
RECTANGULAR ADAPTOR
FOR 1-7/8" X 19"
Use to connect 1-7/8" x 19" rectangular
duct directly to downdraft when using
side or rear exhaust.

Page 10
Models D49M30SB • D49M36SB • D49M48SB
INSTALL COOKING APPLIANCE
1. Align the cooking appliance with downdraft and fasten appli-
ance in place following appliance instructions.
Note: Accurate alignment of cooking appliance and downdraft is
necessary to ensure that there is no interference when air vent
is raised and lowered.There should be a gap of 1/32" - 1/16" be-
tween the back of the cooktop and the front of the downdraft cover.
OPTIONAL
ACCESSORY DESCRIPTION /
APPLICATION
MODEL ATTD1
END CAP TRIM EXTENSION
+1" WIDTH - LH & RH
Use left and right to increase the
overall trim width by 1" - to 31", 37"
and 49".
MODEL ACVPD8
FRONT PANEL ROUGH-IN PLATE -
8" ROUND
Use where 8" round duct or elbow
attaches to front of airbox (Model PF6
remote blower installation).
MODEL ACVPD10
FRONT PANEL ROUGH-IN PLATE -
10" ROUND
Use where 10" round duct or elbow
attaches to front of airbox (exterior or
in-line blower installation).
MODEL 432 - 8" RD.
MODEL 418 - 10" RD.
900DUCTWORK ELBOW
Adjustable from straight to 900.
Galvanized steel construction.
MODEL 408 - 8" RD.
MODEL 410 - 10" RD.
STRAIGHT ROUND DUCT - 2-FT.
Galvanized steel construction.
MODEL AEDD2
RECTANGULAR DUCT - 2-FT.
SECTIONS (1-7/8" X 19")
Galvanized steel construction.
OPTIONAL ACCESSORIES
(CONTINUED)

Page 11
Models D49M30SB • D49M36SB • D49M48SB
USE AND CARE
Cooking
Always turn the downdraft blower on before you begin cooking
to establish an air flow in the kitchen. Let the blower run for a few
minutes to clean the air after you turn the cooktop off. This will
keep the whole kitchen cleaner and brighter.
WARNING: Always disconnect electric power
supply before cleaning and/or servicing unit.
Cleaning
BAFFLE
FRONT
PANEL
BAFFLE
TABS
EARS
FILTER
FILTER
To clean grease filters:
Lift FRONT PANEL and BAFFLES up and out and take out the
GREASE FILTERS. Wash filters in a mild detergent solution or
a dishwasher. Replace filters, baffles and front panel and before
using downdraft. Be sure to engage TABS on front panel behind
EARS as shown.
!
CAUTION:Failuretoengage tabs properlymaycause
chimney to jam and fail to raise up.
To clean inside chimney:
Lift FRONT PANEL and BAFFLES up and out and take out
the GREASE FILTERS. Use a mild detergent. DO NOT USE
ABRASIVE CLOTH, STEEL WOOL PADS, OR SCOURING
POWDERS. Replace filters, baffles and front panel and before
using downdraft. Be sure to engage TABS on front panel behind
EARS as shown.
!
CAUTION:Failuretoengage tabs properlymaycause
chimney to jam and fail to raise up.
It is recommended to use the rear burners when cooking with tall
pots or when the cooking method will generate high amounts of
smoke or steam. The combination of using the rear burners and
operating the unit at high speed will increase the likelihood that
all the smoke and steam will be removed by the downdraft.
Servicing
It may be necessary to remove the downdraft blower system from
the cabinet in order to service components such as the blower
motor or air vent mechanism.
Disconnect power to the cooktop and remove it first. Reverse the
steps under “INSTALL HOUSING INTO CABINET” to remove the
downdraft from the cabinet.

Page 12
Models D49M30SB • D49M36SB • D49M48SB
OPERATION
2-Level Task Light
Press once for LOW setting. Top of icon will illuminate.
Press 2x for HIGH setting. Top and bottom of icon will illuminate.
Press 3x to turn task light OFF.
4-Speed Fan Speed Control
PressonceforLOWsetting.Top-rightquadrantof icon willilluminate.
Press 2x for MEDIUM LOW setting. Top-right and bottom-right
quadrants of icon will illuminate.
Press 3x for MEDIUM HIGH setting. Top-right, bottom-right, and
bottom-left quadrants of icon will illuminate.
Press 4x for HIGH setting. All quadrants of icon will illuminate.
Press 5x to turn fan OFF.
10-Minute Delay Off
When fan is ON at any speed setting, press delay-off icon to start
10-minute timer. Fan and icon will shut off after 10 minutes.
To reset or de-activate delay-off, press icon again.
30-Hour Filter Clean Reminder
After 30 hours of blower "ON" time, filter clean icon will blink
continuously.
To reset, touch and hold icon for 2 or more seconds. Indicator
will turn off.
Down / Retract Chimney
To retract chimney, touch down button. Any feature that is active
will shut off.
Up Button
Touch up button on right trim to raise chimney. All functions will
return to their previous settings.
Heat Sentry
When the operating temperature is too high, the fan speed will
increase to its highest setting to protect sensitive components.
The fan icon will blink and cannot be overridden until the tem-
perature reaches an acceptable level. The fan speed will return
to the previous setting and the icon will stop blinking.
2-Level Task Light
4-Speed Fan Speed Control
10-Minute Delay Off
30-Hour Filter Clean Reminder
Down / Retract Chimney
Up Button

Page 13
Models D49M30SB • D49M36SB • D49M48SB
SERVICE PARTSWARRANTY
KEY 30N 36N 48N
NO. WIDTH WIDTH WIDTH DESCRIPTION
1 97019624 97019625 97019626 TOP CAP ASSY
2 99271515 99271516 99271517 LED LIGHT BAR
3 98011506 98011506 98011506 ANGLE BRACKET RH
4 98011507 98011507 98011507 ANGLE BRACKET LH
5 97019636 97019637 97019638 DOOR ASSY.
6 97020244 97020244 97020244 DOOR ASSY. COVER
WITH BUTTON RH
7 97019640 97019640 97019640 DOOR ASSY. COVER LH
8 99111677 99111677 99111677 CHIMNEY PLASTIC SLIDES
9 97019910 97019910 97019910 AIRBOX RAMP ASSEMBLY
10 99010405 99010406 99010407 FILTERS
11 99710032 99710032 99710032 SPACERS
* 99271510 99271510 99271510 WIRE HARNESS AIRBOX*
13 99271514 99271514 99271514 USER INTERFACE
14 99271524 99271524 99271524 LINEAR ACTUATOR
* 97019665 97019665 97019665 HEAT SENTRY ASSY*
16 97020255 97020226 97020227 AIRBOX FRONT
17 98011158 98011159 98011160 CHIMNEY FRONT GRILL
18 97020235 97020236 97020237 AIRBOX ASSY.
19 97019630 97019631 97019632 CHIMNEY ASSY.
20 98011401 98011401 98011401 LIFT GUIDE COVER
21 97019874 97019875 97019877 CHIMNEY SEAL
22 98011503 98011503 98011503 AIRBOX ADJUSTMENT LEG
RH (SHORT)
23 98011505 98011505 98011505 AIRBOX ADJUSTMENT LEG
RH (LONG)
24 98011502 98011502 98011502 AIRBOX ADJUSTMENT LEG
LH (SHORT)
25 98011504 98011504 98011504 AIRBOX ADJUSTMENT LEG
LH (LONG)
26 98011668 98011668 98011668 AIRBOX HOLE COVER
27 97019676 97019676 97019676 LIFT GUIDE PUCKS
(INCLUDES TOOL)
28 98011659 98011659 98011659 VENT COVERS
29 99271565 99271565 99271565 MAIN PCB
30 99271512 99271512 99271512 POWER SUPPLY
31 97019584 97019584 97019584 ELECTRICAL BOX ASSY.
32 98011688 98011687 98011686 RH BAFFLE
33 98011695 98011694 98011693 LH BAFFLE
* 97019570 97019570 97019570 PARTS BAG*
* Not Shown
ONE YEAR LIMITED WARRANTY FOR BEST®PRODUCTS
Warranty Period and Exclusions:Broan-NuTone LLC (the “Company”) warrants to the
original consumer purchaser of its BEST® product (“you”) that the BEST® product (the
“Product”) will be free from material defects in the Product or its workmanship for a period
of one (1) year from the date of original purchase.
The limited warranty period for any replacement parts provided by the Company and for
any Products repaired or replaced under this limited warranty shall be the remainder of the
original warranty period.
This warranty does not cover fluorescent lamp starters, tubes, halogen and incandescent
bulbs, fuses, filters, ducts, roof caps, wall caps and other accessories for ducting that
may be purchased separately and installed with the Product. This warranty also does not
cover (a)normal maintenance and service, (b)normal wear and tear, (c)any Products
or parts which have been subject to misuse, abuse, abnormal usage, negligence,
accident, improper or insufficient maintenance, storage or repair (other than repair by
the Company), (d)damage caused by faulty installation, or installation or use contrary to
recommendations or instructions, (e)any Product that has been moved from its original
point of installation, (f)damage caused by environmental or natural elements, (g)damage
in transit, (h)natural wear of finish, (i)Products in commercial or nonresidential use, or
(j)damage caused by fire, flood or other act of God. This warranty covers only Products
sold to original consumers in the United States by the Company or U.S. distributors
authorized by the Company.
This warranty supersedes all prior warranties and is not transferable from the original
consumer purchaser.
No Other Warranties:This Limited Warranty contains the Company’s sole obligation
and your sole remedy for defective products. The foregoing warranties are exclusive
and in lieu of any other warranties, express or implied. THE COMPANY DISCLAIMS AND
EXCLUDES ALL OTHER EXPRESS WARRANTIES, AND DISCLAIMS AND EXCLUDES
ALL WARRANTIES IMPLIED BY LAW, INCLUDING WITHOUT LIMITATION THOSE OF
MERCHANTABILITY AND FITNESS FOR A PARTICULAR PURPOSE. To the extent that
applicable law prohibits the exclusion of implied warranties, the duration of any applicable
implied warranty is limited to the period specified for the express warranty above. Some
states do not allow limitations on how long an implied warranty lasts, so the above
limitation may not apply to you. Any oral or written description of the Product is for the
sole purpose of identifying it and shall not be construed as an express warranty.
Whenever possible, each provision of this Limited Warranty shall be interpreted in such
manner as to be effective and valid under applicable law, but if any provision is held to
be prohibited or invalid, such provision shall be ineffective only to the extent of such
prohibition or invalidity, without invalidating the remainder of such provision or the other
remaining provisions of the Limited Warranty.
Remedy:During the applicable limited warranty period, the Company will, at its option,
provide replacement parts for, or repair or replace, without charge, any Product or part
thereof, to the extent the Company finds it to be covered by and in breach of this limited
warranty under normal use and service. The Company will ship the repaired or replaced
Product or replacement parts to you at no charge. You are responsible for all costs for
removal, reinstallation and shipping, insurance or other freight charges incurred in the
shipment of the Product or part to the Company. If you must send the Product or part
to the Company, as instructed by the Company, you must properly pack the Product or
part—the Company is not responsible for damage in transit. The Company reserves the
right to utilize reconditioned, refurbished, repaired or remanufactured Products or parts in
the warranty repair or replacement process. Such Products and parts will be comparable
in function and performance to an original Product or part and warranted for the remainder
of the original warranty period.
Exclusion of Damages: THE COMPANY’S OBLIGATION TO PROVIDE REPLACEMENT
PARTS, OR REPAIR OR REPLACE, AT THE COMPANY’S OPTION, SHALL BE YOUR SOLE
AND EXCLUSIVE REMEDY UNDER THIS LIMITED WARRANTY AND THE COMPANY’S
SOLE AND EXCLUSIVE OBLIGATION. THE COMPANY SHALL NOT BE LIABLE FOR
INCIDENTAL, INDIRECT, CONSEQUENTIAL OR SPECIAL DAMAGES ARISING OUT OF OR
IN CONNECTION WITH THE PRODUCT, ITS USE OR PERFORMANCE.
Some states do not allow the exclusion or limitation of incidental or consequential
damages, so the above limitation or exclusion may not apply to you. This warranty gives
you specific legal rights, and you may also have other rights, which vary from state to state.
This warranty covers only replacement or repair of defective Products or parts thereof at
the Company’s main facility and does not include the cost of field service travel and living
expenses.
Any assistance the Company provides to or procures for you outside the terms, limitations
or exclusions of this limited warranty will not constitute a waiver of such terms, limitations
or exclusions, nor will such assistance extend or revive the warranty.
The Company will not reimburse you for any expenses incurred by you in repairing or
replacing any defective Product, except for those incurred with the Company’s prior written
permission.
How to Obtain Warranty Service:To qualify for warranty service, you must (a)notify
the Company at the address or telephone number stated below within seven (7)days
of discovering the covered defect, (b)give the model number and part identification and
(c)describe the nature of any defect in the Product or part. At the time of requesting
warranty service, you must present evidence of the original purchase date. If you cannot
provide a copy of the original written limited warranty, then the terms of the Company’s
most current written limited warranty for your particular product will control. The
most current limited written warranties for the Company’s products can be found at
www.BestRangeHoods.com.
In USA: BEST®, 926 West State Street, Hartford, Wisconsin 53027 800-558-1711
In Canada: BEST®, 550 Bd Lemire, Drummondville, QC J2C 7W9 866-737-7770
www.BestRangeHoods.com

Page 14
Models D49M30SB • D49M36SB • D49M48SB
SERVICE PARTS
99045242E
1
2
3
4
5
6
7
8
9
10
11
11
13
14
16
17
18
19
20
21
22
23
24
25
26
27
28
28
29
30
31
32
33
8
9

Page 15
Modèles D49M30SB • D49M36SB • D49M48SB
VENTILATEUR
ENCASTRÉ
AVERTISSEMENT
LIRE CES DIRECTIVES ET LES CONSERVER
AVERTISSEMENT
AFINDE DIMINUER LES RISQUESD’INCENDIE,D’ÉLECTROCUTION
OU DE BLESSURES, SUIVEZ CES DIRECTIVES :
1. N’utilisez cet appareil que de la manière prévue par le fabricant. Si vous
avez des questions, communiquez avec le fabricant à l’adresse ou au
numéro de téléphone indiqués dans la garantie.
2. Avant de procéder à l’entretien ou au nettoyage de l’appareil, coupez
l’alimentation du panneau électrique et verrouillez l’interrupteur principal
afin d’empêcher que le courant ne soit accidentellement rétabli. S’il
est impossible de verrouiller l’interrupteur principal, fixez solidement
un message d’avertissement, par exemple une étiquette, sur le
panneauélectrique.
3. La pose de l’appareil et les travaux d’électricité doivent être effectués par
des personnes qualifiées conformément à la réglementation en vigueur,
notamment les normes de la construction ayant trait à la protection contre
les incendies.
4. Pour éviter lesrefoulements, l’apport d’air doitêtre suffisant pourbrûler les
gazproduits parles appareils à combustion et lesévacuer dans leconduit
de fumée (cheminée).Respectez les directives du fabricant de l’appareil
de chauffage et les normes de sécurité, notamment celles publiées par
la National Fire Protection Association (NFPA), l’American Society for
Heating, Refrigeration and Air Conditioning Engineers (ASHRAE) et les
codes des autorités locales.
5. Veillez à ne pas endommager le câblage électrique ou d’autres
équipements non apparents lors de la découpe ou du perçage du mur
ou du plafond.
6. Les ventilateurs canalisés doivent toujours rejeter l’air à l’extérieur.
7. Pour réduire les risques d’incendie, utilisez seulement des conduits
enmétal.
8. N’installez pasce produiten plaçantson interrupteurdirectement derrière
un brûleur ou un élément. La distance minimale entre l’interrupteur et le
bord du brûleur est de 10,2 cm (4 pouces).
9. Ne portez jamais de vêtements ou accessoires amples lors de l’utilisation
de cet appareil. Ils peuvent s’enflammer en raison des brûleurs ou des
éléments de la surface de cuisson.
10. Ne laissez jamais un enfant seul ou sans surveillance aux environs de
cet appareil lors de son utilisation.
11. Cet appareil doit être relié à une mise à la terre.
POUR RÉDUIRE LES RISQUES D’INCENDIE CAUSÉS PAR DE LA
GRAISSE SUR LE PLAN DE CUISSON :
a) Ne laissez jamais les éléments de surface allumés à haute température.
Les débordements peuvent causer de la fumée et occasionner des
écoulements de graisse inflammables. L’huile doit être chauffée
graduellement à basse ou à moyenne température.
b) Mettez toujours la hotte en marche lors de la cuisson à haute température
ou lors de la cuisson d’aliments à flamber.
c) Nettoyez souvent la hotte. Ne laissez pas la graisse s’accumuler sur le
ventilateur ou les filtres.
d) Utilisez des casseroles de dimension appropriée. Utilisez toujours une
batterie de cuisine adaptée à la dimension de la surface chauffante.
OBSERVEZ LES CONSIGNES SUIVANTES DE MANIÈREÀ RÉDUIRE
LESRISQUESDEBLESSURES CORPORELLESEN CASD’INCENDIE
CAUSÉ PAR DE LA GRAISSE SUR LE PLAN DE CUISSON :a
1. ÉTOUFFEZ LES FLAMMES à l’aide d’un couvercle étanche, d’une
tôle à biscuits ou d’un plateau en métal puis éteignez le brûleur.
FAITESATTENTION DE NE PASVOUS BRÛLER.SI LES FLAMMES
NE S’ÉTEIGNENT PAS IMMÉDIATEMENT, QUITTEZ LES LIEUX
ETAPPELEZ LE SERVICE DES INCENDIES.
2. NE SOULEVEZ JAMAIS UNE CASSEROLE EN FLAMMES – vous
pourriez vous brûler.
3. N’UTILISEZ PAS D’EAU, ni de serviettes ou de linges mouillés – une
violente explosion de vapeur pourrait survenir.
4. Utilisez un extincteur SEULEMENT si :
A. Vous savez qu’il est de classe ABC et vous connaissez déjà son
mode de fonctionnement.
B. L’incendie n’est pas très important et ne se propage pas.
C. Les pompiers ont été avisés.
D. Vous pouvez combattre l’incendie en faisant dos à une sortie.
aConseils tirés de la publication de la NFPA « Kitchen Fire Safety Tips ».
ATTENTION
1. Pour usage intérieur seulement.
2. Pour ventilation générale uniquement.N’utilisez pas cet appareil pour
évacuer des matières ou des vapeurs dangereuses ou explosives.
3. Pour éviter d’endommager les roulements du moteur, de déséquilibrer
les pales ou de les rendre bruyantes, débarrassez l’appareil de la
poussière de plâtre, de construction, etc.
4. Nettoyez fréquemment les filtres et les surfaces graisseuses.
5. Ne réparez ou ne remplacez aucune pièce de cet appareil à moins
que ce manuel le recommande précisément. Tout autre travail de
réparation doit être confié à un technicien qualifié.
6. Veuillez lire l’étiquette de spécifications du produit pour obtenir plus
de renseignements, notamment sur les exigences.
7. Pour réduire les risques d’incendie et de choc électrique, n’installez
cette hotte encastrée qu’avec les modèles de ventilateur indiqués
ci-dessous. D’autres ventilateurs ne peuvent pas leur être substitués.
(Ventilateurs vendus séparément.)
Ventilateur Flex de modèle PF6
Ventilateurs extérieurs de modèles EB6, EB9, EB12 ou EB15
Ventilateurs intermédiaires de modèles ILB3, ILB6, ILB9 ou ILB11
À utiliser avec les ventilateurs suivants
(ventilateursvendus séparément) :
Modèle PF6 - Ventilateur Flex - intérieur
Modèles EB6, EB9, EB12 ou EB15 - extérieurs
Modèles ILB3, ILB6, ILB9 ou ILB11 - intermédiaires
!
INSTALLATEUR :
Conservez ce manuel pour l’inspection
électrique et le propriétaire.
Enregistrez votre produit en ligne à : www.BestRangeHoods.com

Page 16
Modèles D49M30SB • D49M36SB • D49M48SB
PLANIFICATION
SPÉCIFICATIONS ÉLECTRIQUES
Modèle PF6 - Flex interne :
120 VCA • 60 Hz • 3,0 A
Modèles EB6, EB9, EB12 ou EB15 - extérieurs
Modèles ILB3, ILB6, ILB9 ou ILB11 - Intermédiaires
120 VCA • 60 Hz • 6,0 A (max.)
PRISE DES MESURES
En raison de sa polyvalence, ce système de hotte encastrée peut servir à
évacuer les contaminants aériens lorsque vous cuisinez avec une variété
d’appareils de cuisson au gaz ou à l’électricité - dont les surfaces de
cuisson,cuisinières,cuisinièresencastrables etcuisinièresautonomes.
Elle peut être installée dans un îlot, une péninsule ou un mur ordinaire. Le
ventilateur (vendu séparément) et le panneau électrique peuvent être fixés
à la hotte encastrée, ou installés à l’intérieur d’une armoire ou à distance
dans un endroit pratique.
Cette unité s’installe facilement en suivant ces étapes de base :
•Découpez l’ouverture dans le comptoir.
•Installez l’unité dans l’armoire.
•Installez le ventilateur et le panneau électrique.
•Raccordez les conduits et le câblage électrique.
•Installez la bordure.
•Installez l’appareil de cuisson.
Remarque : le débit d’air élevé de cet appareil peut affecter la flamme de
certains types de surface de cuisson au gaz. Ce phénomène est NORMAL
et ne causera aucun dommage mais il peut être corrigé en diminuant le
régime du ventilateur.
Il est conseillé d’utiliser un jeu de joints d’étanchéité avec toute surface de
cuisson au gaz. Ce jeu assure l’étanchéité entre la surface de cuisson et
l’armoire située en dessous. Il comprend un joint de bordure et les attaches
requises. Voir « ACCESSOIRES EN OPTION ».
PLANIFICATION DE LA POSE
DES CONDUITS
1. Consultez les directives d’installation de la surface de cuisson pour les
dimensions de l’ouverture à découper dans le comptoir et les dimensions
de l’armoire.Toutefois, il est recommandé que l’armoire soit plus grande
que nécessaire pour faciliter l’installation. Les îlots conçus sur mesure
doivent comporter des armoires plus profondes - particulièrement
lorsque la cuisinière est installée devant la hotte encastrée ou quand le
ventilateur est placé derrière la hotte.Vous devez également prévoir une
porte d’accès.
2. La profondeur de la surface de cuisson peut varier grandement d’un
produit à un autre. Il se peut que la pose de ces deux appareils soit
relativement serrée.
Faites particulièrement attention aux nuisances possibles indiquées ci-
dessous. Un comptoir avec (A) une lèvre soulevée à l’avant ou (B) un
dosseretrisque de laisser unesurfaceplane insuffisantepour l’installation.
Veuillez noter que le comptoir doit comporter une partie plane de 7 cm
(2-3/4 po) derrière le plan de cuisson et qu’une distance de 6,4 cm
(2-1/2po) est nécessaire entre la bord arrière du plan de cuisson et la
paroi arrière intérieure de l’armoire.
AB
C
DE
F
BOÎTIER
1. Le système de hotte encastrée est conçu pour utiliser des conduits
ronds de 20,3 cm (8 po) avec un ventilateur Flex ou des conduits ronds
de 25,4 cm (10 po) avec un ventilateur installé à distance. (Ventilateur
vendu séparément.) Six (6) différents raccords de sortie sont possibles :
A = 20,3 cm (8 po) rond, sortie à gauche, ventilateur Flex
B = 20,3 cm (8 po) rond, sortie à droite, ventilateur Flex
C = 20,3 cm (8 po), sortie vers le bas, ventilateur Flex
(panneauélectrique à monter à distance)
D = 4,8 cm x 48,3 cm (1-7/8 po x 19 po), sortie à gauche du boîtier
vers le ventilateur à distance ou le ventilateur Flex situé à distance.
Utiliser une transition de 4,8 cm x 48,3 cm (1-7/8 po x 19 po) à
20,3cm (8 po) rond, une transition de 4,8 cm x 48,3 cm (1-7/8 po
x19 po) à 25,4 cm (10 po) rond, ou un conduit de 4,8 cm x 48,3 cm
(1-7/8 po x 19 po) comme il convient.
E = 4,8 cm x 48,3 cm (1-7/8 po x 19 po), sortie à droite du boîtier vers le
ventilateur à distance ou le ventilateur Flex situé à distance. Utiliser
une transition de 4,8 cm x 48,3 cm (1-7/8 po x 19 po) à 20,3 cm
(8po) rond, une transition de 4,8 cm x 48,3 cm (1-7/8 po x 19 po) à
25,4 cm (10 po) rond, ou un conduit de 4,8 cm x 48,3 cm (1-7/8 po
x19 po) comme il convient.
F = 4,8 cm x 48,3 cm (1-7/8 po x 19 po), sortie à l’arrière du boîtier
vers le ventilateur à distance ou le ventilateur Flex situé à distance.
Utiliser une transition de 4,8 cm x 48,3 cm (1-7/8 po x 19 po) à
20,3cm (8 po) rond, une transition de 4,8 cm x 48,3 cm (1-7/8 po
x19 po) à 25,4 cm (10 po) rond, ou un conduit de 4,8 cm x 48,3 cm
(1-7/8 po x 19 po) comme il convient.
2. Pour la meilleure performance : Choisissez l’option qui permet l’utilisation
des conduits les plus courts possible et un nombre minimum de coudes
et de transitions. Vérifiez l’emplacement des solives du plancher, des
montants des murs, des fils électriques et de la plomberie pour éviter les
nuisances éventuelles.
CONTENU
Ces pièces sont incluses avec le boîtier de hotte encastrée :
1 - Sac de pièces contenant :
2 - Pieds de support de 5 cm (2 po)
2 - Pieds de support de 10 cm (4 po)
2 - Vis à tête hexagonale, 1/4-20 x 0,50
2 - Vis cruciformes, n° 8-18 x 0,375
8 - Vis à bois à tête ronde cruciforme, n° 10 x 0,50
1 - Ensemble de bordures de porte
1 - Panneau électrique
2 - Supports
1 - Gabarit de découpe du comptoir
7 CM (2-3/4 PO)
6,4 CM (2-1/2 PO)
VENTILATEUR
FLEX*
*Les ventilateurs installés à distance utilisent une plaque de sortie pour
conduits ronds de 20,3 cm (8 po) ou de 25,4 cm (10 po) au lieu d’un
ventilateur Flex.
PANNEAU
ÉLECTRIQUE

Page 17
Modèles D49M30SB • D49M36SB • D49M48SB
PLANIFICATION DU CÂBLAGE
1. Cette hotte encastrée utilisant un ventilateur Flex (vendu séparément)
consomme3,0A etexigeun circuitde 120VCA,60 Hz.Si un ventilateur
est installé à distance (vendu séparément), le système consomme
6,0 A et exige un circuit de 120 VCA, 60 Hz.
2. L’unité comporte un cordon électrique de 76 cm (30 po) de longueur
muni d’une fiche à trois broches. Prévoyez l’installation d’une prise
de courant permettant de brancher le cordon de l’appareil.
3. Installez la boîte électrique conformément aux codes locaux.
PRÉPARATION DE LA HOTTE
ENCASTRÉE
Conduitinstallé à traversl’ouverture dupanneau avantseulement :
1. Placez la hotte encastrée sur le dos sur une table ou une surface
de travail plane.
2. Enlevez les ÉCROUS HEXAGONAUX pour retirer le COUVERCLE
DU PANNEAU AVANT.
COUVERCLE DU
PANNEAU AVANT
(8)
ÉCROUS
HEXAGONAUX
10-24
VENTILATEUR
FLEX
PANNEAU
AVANT
Si la sortie du ventilateur
est en bas, placer le
panneau électrique
ailleurs. Voir l’étape 6.
PLANIFICATION DE LA
DÉCOUPE DU COMPTOIR
!
ATTENTION : AVANT DE DÉCOUPER L’OUVERTURE DES
CONDUITS DANS L’ARMOIRE, vérifiez que les solives du
plancher, les montants des murs, les fils électriques et la
plomberie ne présentent aucune nuisance.
Utilisez les dimensions indiquées dans l’illustration ci-dessus pour planifier
l’accès desconduits dansl’armoire.En règle générale, unconduit rectangulaire
de 4,8 cm x 48,3 cm (1-7/8 po x 19 po) est utilisé pour une sortie à gauche, à
droite ou à l’arrière de l’armoire - alors qu’un conduit rond de 20,3 cm (8po)
est utilisé pour une sortie vers le bas au travers du plancher de l’armoire.
Pour une sortie à gauche, à droite ou à l’arrière :
Prévoir au moins 46 cm (18 po) pour la transition et le coude ou le ventilateur.
Pour une sortie à gauche ou à droite :
Une armoire de 76 cm (30 po) de profondeur est recommandée pour un
alignement adéquat avec le ventilateur Flex. Le ventilateur Flex peut être
fixé à la paroi arrière de l’armoire ou à une plateforme ou un cadre (non
fourni) appuyé sur la base de l’armoire. (Consulter les instructions du
ventilateurFlex).
Une armoire de 61 à 76 cm (24 à 30 po) de profondeur est nécessaire selon
le type d’appareil de cuisson.
A
B
COIN ARRIÈRE DE
LA DÉCOUPE
DU COMPTOIR
LIGNE DE CENTRE DE
L’INSTALLATION
OUVERTURE POUR
CONDUIT DE
4,8 CM X 48,3 CM
(1-⅞PO
X 19 PO) ET
TRANSITION
INTÉRIEUR DE
L’ARMOIRE - ARRIÈRE
14,9 CM
(5 ⅞PO)
5 CM
(2 PO)
53,3 CM
(21 PO)
10 CM
(4 PO)
3,8 CM
(1 ½ PO)
62,9 CM
(24 ¾ PO)
INTÉRIEUR DE
L’ARMOIRE - BAS
53,3 CM
(21 PO) CENTRÉ
10 CM
(4 PO)
Le panneau
électrique doit être
posé à distance.
(8)
ÉCROUS
HEXAGONAUX
10-24
Ouverture dans le bas de l’armoire
Dimension A Dimension B
Ventilateur Flex (Modèle PF6 et conduit
rond de 20,3 cm (8 po) à la verticale
à travers le plancher de l’armoire.)
(à3,8cm (1 ½ po) à gauche de la
ligne de centre del’installation)
Ventilateur extérieur ou
intermédiaire avec coude de
90° (sur la ligne de centre
del’installation)
14,3 cm (5-5/8 po)
19,4 cm
(7-5/8po)
[Modèle 432 -
coude rond de
20,3 cm (8 po)]
21,9 cm
(8-5/8 po)
[Modèle 418-
coude rond
de 25,4 cm
(10 po)]
(Acheter un ventilateur Flex modèle PF6 séparément.)
3. Déterminez si le VENTILATEUR FLEX sortira à gauche, à droite ou
vers le bas.
Serrez les écrous hexagonaux pour fixer le ventilateur en place.
Installations avec VENTILATEUR FLEX seulement :

Page 18
Modèles D49M30SB • D49M36SB • D49M48SB
4. Utilisez la PLAQUE DE SORTIE À DISTANCE.
Serrez les écrous hexagonaux pour fixer la PLAQUE DE SORTIE
ÀDISTANCE.
PLAQUE DE SORTIE À
DISTANCE DE 20,3CM
(8 PO) OU 25,4 CM
(10 PO) (vendue
séparément)
PANNEAU
AVANT
5. Glissez les SUPPORTS SUPÉRIEURS dans la COULISSE en haut
à gauche et à droite de l’unité.
Fixez les PIEDS DE SUPPORT COURTS OU LONGS (selon la
hauteur de l’armoire) au bas de l’unité sur les côtés à l’aide des VIS
HEXAGONALES fournies. Ne serrez pas complètement ces vis à
cette étape-ci.
SUPPORT
SUPÉRIEUR
COULISSE
PIEDS DE
SUPPORT
VIS À TÊTE
HEXAGONALE
1/4-20 X 0,500
Ventilateur
Flex installé.
(8)
ÉCROUS
HEXAGONAUX
10-24
7. Fixez les PIEDS DE SUPPORT DU VENTILATEUR à l’aide des
quatre (4) VIS fournies.
PIEDS DE
SUPPORT DU
VENTILATEUR
(4) VIS
6. Enlevez lesquatre (4)ÉCROUS HEXAGONAUX 8-32 et le PANNEAU
ÉLECTRIQUE. Des câbles de rallonge de 1,5 m (5 pi) (vendus
séparément) peuvent être nécessaires pour monter le panneau
électrique à distance. N’utilisez pas plus de deux câbles de rallonge.
ÉCROUS
HEXAGONAUX
8-32
ATTENTION : Si le ventilateur Flex doit être monté à
distance : N’utilisez pas seulement les pieds comme
supports. Il peut être nécessaire d’ajouter d’autres
supports au ventilateur. Utilisez les profilés de montage
fournis avec le ventilateur.
!
Toutes les installations :
Installations avec VENTILATEUR FLEX seulement :
Installations dans lesquelles le PANNEAU ÉLECTRIQUE doit être
monté à distance seulement :
Installations avec VENTILATEUR FLEX (à distance) ou
VENTILATEUR À DISTANCE seulement :

Page 19
Modèles D49M30SB • D49M36SB • D49M48SB
(Exige l’achat d’une transition de 4,8 cm x 48,3 cm (1-7/8 po x 19po)
à 20,3 cm (8 po) ou 25,4 cm (10 po) rond. Des adaptateurs pour
conduits rectangulaires de 4,8 cm x 48,3 cm (1-7/8 po x 19 po) sont
aussi disponibles.)
8. Enlevez un seul COUVERCLE RECTANGULAIRE DESORTIE.
COUVERCLES
RECTANGULAIRES
DESORTIE
Le panneau
avantdemeure
enplace.
(Exige l’achat d’une transition de 4,8 cm x 48,3 cm (1-7/8 po x 19po)
à 20,3 cm (8 po) ou 25,4 cm (10 po) rond. Des adaptateurs pour
conduits rectangulaires de 4,8 cm x 48,3 cm (1-7/8 po x 19 po) sont
aussi disponibles.)
9. Utilisez des écrous pour raccorder l’adaptateur de conduit
rectangulaire de 4,8 cm x 48,3 cm (1-7/8 po x 19 po) ou la transition
de 4,8 cm x48,3cm (1-7/8 po x 19 po) à 20,3 cm (8 po) ou 25,4 cm
(10 po) rond lors de la pose du conduit.
Conduit sortant du côté droit du boîtier illustré.
DÉCOUPER L’OUVERTURE
DU COMPTOIR
1. Tracez et découpez l’ouverture de la surface de cuisson suffisamment
vers l’AVANT de sorte que la hotte puisse s’encastrer derrière.
2. Disposez la surface de cuisson en place et glissez-la le plus possible
vers l’avant sans qu’aucun écart ne soit visible. Centrez-la et vérifiez
son équerre avec les bords du comptoir.
3. Placez le gabarit en plastique contre la bordure arrière de la surface
de cuisson ou contre le bord arrière de l’ouverture de la cuisinière
encastrable. Centrez le gabarit. Tracez le pourtour du gabarit pour
marquer l’ouverture de la hotte encastrée.
4. Retirez la surface de cuisson du comptoir.
5. Découpez l’ouverture de la hotte. Prenez garde de ne pas ébarber les
bords du comptoir.
Gabarit contre le bord
arrièreducomptoir.
Gabarit contre le bord arrière
del’ouverture du comptoir.
SURFACE DE
CUISSON
OUVERTURE
DU COMPTOIR
POUR CUISINIÈRE
ENCASTRABLE
Installations avec conduit à gauche, à droite ou à l’arrièreseulement :

Page 20
Modèles D49M30SB • D49M36SB • D49M48SB
5. Allongez les PIEDS DE SUPPORT et fixez-les au fond de l’armoire
avec deux (2)VIS dans chaque pied. Serrez les VIS HEXAGONALES.
Si le fond de l’armoire est enlevé :
Utilisez des blocs ou des cales d’espacement entre le plancher et
les pieds de support.
PIED DE SUPPORT
(2) VIS À BOIS 10 X 0,500
VIS
HEXAGONALE
6. Allongez les SUPPORTS SUPÉRIEURS et fixez-les sur les côtés de
l’armoire avec deux (2) VIS dans chaque support.
(2) VIS À BOIS
10 X 0,500
SUPPORT
SUPÉRIEUR
7. Desserrez les quatre (4) VIS retenant les PIEDS DE SUPPORT DU
VENTILATEUR sur le VENTILATEUR FLEX. Allongez les pieds et
fixez-les au bas de l’armoire avec une VIS dans chacun.
VENTILATEUR FLEX
(4) VIS
1/4-20 X0,500
VIS
Installations avec VENTILATEUR FLEX seulement :
INSTALLER LE BOÎTIER
DANS L’ARMOIRE
1. Enlevez la surface de cuisson.
4. Assurez-vous que le boîtier est de niveau.
2. Branchez le CÂBLE DU BOUTON HAUT de la bordure de droite
dans la PRISE DU HAUT située en bas à droite du boîtier de la hotte
et raccordez le fil de terre sur l’ÉCROU DE MISE À LA TERRE.
Acheminez le câble le long du boîtier et maintenez-le en place avec
du RUBAN ADHÉSIF près du haut.
3. Insérez le boîtier dans l’ouverture du comptoir et l’armoire en le
poussant le plus possible vers l’arrière. Assurez-vous que le câble
du bouton HAUT est enfilé dans l’ouverture tel qu’illustré et qu’il n’est
paspincé.
RUBAN
CÂBLE DU
BOUTON
HAUT
PRISE DU HAUT
ÉCROU DE
MISE À
LA TERRE
Other manuals for D49M30SB
3
This manual suits for next models
2
Table of contents
Languages:
Other Best Fan manuals
Popular Fan manuals by other brands

AAON
AAON RN Series Installation operation & maintenance

Adler Europe
Adler Europe AD 7326 user manual

Home Decorators Collection
Home Decorators Collection HAVERBROOK AM634-PN Use and care guide

nedis
nedis FNST16CWT40 quick start guide

Poujoulat
Poujoulat RENOSHUNT installation instructions

Hunter
Hunter Contempo 59013 Owner's guide and installation manual