BESTip ATA 11L User manual

BESTip ATA 11L
VoIP Gateway
User Manual
Projectek Networking Electronics Corp.
Mar. 2009
BESTip ATA 11L User Manual
2
Copyright Notice
This publication may not be reproduced, in whole or in part,
without prior expressed written permission from Projectek
Networking Electronics Corp. All rights reserved.
Copyright © 2009, by Projectek Networking Electronics Corp.
Projectek Networking Electronics Corp. makes no warranties
with respect to the contents hereof and specifically disclaims
any implied warranties of merchantability or fitness for any
particular purpose. Furthermore, Projectek Networking
Electronics Corp. reserves the right to revise this publication
and to make changes from time to time in the content hereof
without obligation to notify any person or organization of such
revisions or changes.
Trademarks
BESTip. is the trademark of Projectek Networking Electronics Corp.
All other trademaks mentioned herein are the properties of their
respective owners.
Projectek Networking Electronics Corp.
5F-9, No. 16, Lane 609, Sec. 5, Chung Hsin Road,
San Chung, Taipei Hsien, Taiwan, R.O.C.
TEL: (886) 2-2278-7067 Fax: (886) 2-2278-7094
Technical Support:
http://www.iptelcom.com.tw

BESTip ATA 11L User Manual
3
Please fill in the following ID no. which you can find it on the
bottom of your BESTip ATA 11L. You may need it in the future.
PurchaseDate: (1 year warranty)
IDno:
Modelno:
Distributor:
BESTip ATA 11L User Manual
4
Table of Contents
Chapter 1: Overview.......................................................................5
Physical Description ..........................................................7
Chapter 2: Installation....................................................................9
Package Contents .............................................................9
Requirements to Use BESTip............................................9
Physical Installation.........................................................10
Chapter 3: Setup...........................................................................11
Entering Setup Mode.......................................................11
Using Buttons to Setup BESTip.......................................14
Function Select-System Info..........................................19
Function Select-System Setting ....................................20
Function Select-FXO Setting.........................................29
Function Select-Inward Password.................................37
Function Select - Factory Setting.....................................39
Function Select-System Upgrade..................................40
Chapter 4: To Make an Internet Call............................................42
Testing Before Making a Call...........................................42
To Make a BESTip-to-BESTip Call..................................43
To Make a BESTip-to-Phone Call....................................44
To Make Calls Through FXO Port of ATA 11L.................45
To Receive a BESTip Call ...............................................47
Appendix A: Specifications..........................................................48
Interface...........................................................................48
Voice Codec....................................................................48
Software/ Hardware.........................................................48
Physical...........................................................................49

BESTip ATA 11L User Manual
5
Chapter 1: Overview
Congratulations on your purchase of the BESTip! With the
BESTip, you will capture the power of the Internet by using your
existing LAN network to communicate over the Internet,
worldwide, free of long distance charges. The BESTip allows
you to take advantage of the vast reach and cost reduction of
the Internet for voice communication.
Lower Communication Charges
Reduced monthly phone charges are a big advantage of
converging voice calls with the existing data network. BESTip
can eliminate traditional circuit-switched networks, and save
your company substantial amounts in long-distance charges. A
BESTip network can quickly return your investment and begin
paying you back.
For example, companies with overseas branches stand to reap
the biggest rewards by eliminating international long-distance
charges. A company with the headquater and branch located in
Taipei and Los Angles could route calls to and from each office
over the network, and thus a major portion of long-distance
charges could be reduced.
Reduced Cost of Ownership
The lower cost associated with BESTip devices is not just to
lower monthly fees. BESTip also reduces the amount of
hardware needed (infrastructure overhead) by both converging
voice and data networks. With BESTip, you do not need to
replace your existing network connections, routers or phone
systems. The BESTip is helping to drive down the total cost of
business communications.
BESTip ATA 11L User Manual
6
Supporting multiple telephony interfaces
The BESTip ATA 11L supports 1 FXS and 1 FXO port for
connecting to PBX or central office exchange line and an
Ethernet interface for connecting to a home or office Local Area
Network.
Integrating FXS, FXO and Ethernet interfaces in a single box,
BESTip ATA 11L provides the users reliable and high quality
voice communications only at a lower cost while compared to
using PSTN.
Simplicity
A single unit of device supports both voice and data
communications. With BESTip, you avoid the expense of
replacing your existing network connections, routers or phone
systems required by other VOIP solutions.
Simply plug your BESTip into the Ethernet network. Minimum
requirements:
• Ethernet network
• LAN connection
• IP addresses
User Friendly
The BESTip ATA 11L is a standalone device, and possesses its
own processor and network interface. You can easily install
your BESTip device for its software and configuration can be
managed easily and securely. Just enter the IP addresses into
your BESTip with your phone keypads, dial the recipient’s
number on the telephone set, and you are ready to talk via
Internet. In fact, placing calls with the BESTip is like using your
existing phone system. All of the communication cost will be
eliminated except a local Internet connection charge.

BESTip ATA 11L User Manual
7
This manual gives you easy-to-follow instructions for installing
and using the BESTip ATA 11L.
For further details on these applications, please refer to
www.iptelcom.com.tw
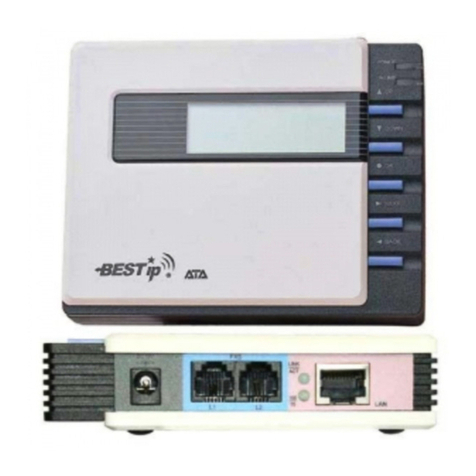
Physical Description
This section provides physical description of the BESTip.
Front Panel
There are five buttons on the front panel for quick and
easy configuration.
UP Button
NEXT Button
BACK Button
OK Button
DOWN Button
Green LED
Power Si
g
nal
Blue LED
On-Line Signal
LCD Dis
p
la
y
BESTip ATA 11L User Manual
8
Rear Panel
There are a switch and four connectors on the rear panel to
connect to the related devices. The description is listed below
(left to right).
DC 12V DC Adapter Connector: connects to the 12V DC
power adapter.
FXS RJ-11 Connector: FXS interface is for connecting
to the analog phone sets or C.O. port of PBX.
FXO RJ-11 Connector: FXO interface is for connecting
the extension line of PBX or PSTN Line.
LAN RJ-45 Connector: cables to your IP network.
DC 12V FXS FXO LAN

BESTip ATA 11L User Manual
9
Chapter 2: Installation
This chapter will describe how to connect your BESTip ATA
11L.
Package Contents
The package of the BESTip includes the following:
A BESTip ATA 11L
An DC power adapter
A R-J11 phone cord
A R-J45 network cable
Requirements to Use BESTip
Before making an Internet call with your BESTip, you also need
the following items:
1 touch-tone phone set (TONE mode)
An 110/220V electrical outlet
An active Internet connection (ADSL, Cable or others):
The following parameters must be known about the
network (LAN, WAN, Internet, etc.) to which the BSETip
will connect.
IP Address for BESTip
Gateway IP Address
IP Netmask
DNS (Domain Name Server)
IP Address
Note: Write down the values for these IP parameters. You may
need to enter these values in the following chapter.
BESTip ATA 11L User Manual
10
Physical Installation
Follow the instructions for correct connection:
1. Connect one end of an RJ-11 phone cord to the FXS
connector on the back of BESTip ATA 11L. Connect the
other end to the analog phone sets or C.O ports of the
PABX.
2. Connect one end of
3. Connect the provided network cable into the LAN port of
BESTip ATA 11L. Connect the other end of the cable to
your network eg. a router, hub or an ADSL modem.
4. Attach the DC power adapter cord into the power
connector of BESTip ATA 11L and a live power outlet.
Hookup for BESTip ATA 11L
Note: A crossover network cable may be required when connecting
to ADSL Modem.

BESTip ATA 11L User Manual
11
Chapter 3: Setup
After connection, follow the easy instructions to setup the
BESTip ATA 11L. You can establish your setup or modify it at
any time by launching the BESTip.
Be sure the BESTip is well connected and switch the power on.
You must allow the BESTip to finish booting before you enter
the setup mode.
Entering Setup Mode
1. After turned on, the BESTip will
start self-testing, and the LCD
screen will display as shown right.
2. After system finishing initializing,
the system will start up DSP.
3. For the first time, the LCD will
display Enter Setup Mode - Push
Down=Yes.Press button
on the front panel to enter setup
mode.
Note: At the BESTip finishes booting, you can always use
or buttons to scroll the menu and press button
to enter the current menu.
BESTip ATA 11L User Manual
12
1. You can press “DOWN” button at standby status to enter main
menu.
2. Then, you can press “NEXT” or “BACK” button to scroll the menu.
Press “Down” button
to enter main menu.
Press “NEXT” button
to scroll the menu.
Press “BACK” button
to scroll the menu.

BESTip ATA 11L User Manual
13
3. There are six options in the Function Select menu. The options will
be described in the following sections.
4. You can press “UP” button to return to standby status.
Press “UP” button to
return to standby status.
BESTip ATA 11L User Manual
14
Using Buttons to Setup BESTip
You can use the buttons on the front panel of the BESTip and
your telephone keypads to setup the BESTip. The functions of
five buttons on BESTip are described below.
1. Suppose now you want to input the “Country Code” option under
“System Setting” menu. Firstly, press “DOWN” button to enter
“Function Select” menu.
2. Press “NEXT” or “BACK” button to select “System Setting” menu.
Press “DOWN” button at
standby status to enter
“Function Select” menu.
Press “NEXT” or “BACK”
button to scroll the menu.

BESTip ATA 11L User Manual
15
3. Press “DOWN” button to enter “System Setting” menu.
4. Keep pressing “DOWN” button until you see “Country Code” option.
5. To input “Country Code”, press “OK” firstly and the title will start
flashing. Then you are able to input data.
The title will start flashing
Keep pressing “DOWN”
button until you see
“Country Code” option.
Press “OK” button to start
to input data.
Press “DOWN” button to
enter the menu.
BESTip ATA 11L User Manual
16
6. You can press “UP” or “DOWN” button to input data, please see the
Data Input Sequence below. You can use “NEXT” or “BACK” button
to select and erase the value.
(in the forward sequence) 1 2 3 4 5 6 7 8 9 0 . , @ _ % & = a A b B
c C d D e E f F g G h H i I j J l L m M n N o O p P q Q r R s S t T u
U v V w W x X y Y z Z ( in the backward sequence)
7. You can also use the keypad on the touchtone phone to input the
necessary data. Remember to pick up the phone handset while
using the phone keypad to input data. Please refer to the Typical
Phone Keypad and Configuration Sheet below to enter character.
Press “UP” or “DOWN”
button to input the data.
TypicalPhoneKeypad Configuration Sheet
The title is still flashing
Press “NEXT” or “BACK”
button to select and
erase the value.

BESTip ATA 11L User Manual
17
8. After entering the value, press “OK” button again and the title will
stop flashing. The new value has been stored in memory temporarily.
You may go to the next setting.
9. After finishing all the settings, please press “UP” button one or two
times until the screen displays “Update Setup” as following picture. All
the setting will be saved permanently.
Press “OK” button again to
stop inputting data and save
the value temporarily.
The title will stop flashing
Press “UP” button 1 or 2
times until the screen
displays “Update Setup”.
BESTip ATA 11L User Manual
18
10. It will return to standby status automatically after the configuration
data has been saved. Please refer to the following chapters to setup
your BESTip ATA 11L.

BESTip ATA 11L User Manual
19
Function Select-System Info
You can always get the system information for your BESTip
from the System Info menu.
1. Press buttontoenterthe
Function Select Mode. Press
button to enter System Info.
2. Device ID: Each BESTip device
has an unique 8 digit ID#. It is the
number for other BESTip users to
reach you over Internet. So, you need
to inform all of your friends or group
who use BESTip products the 8-digit
ID# to call you over BESTip.
3. ITSP Credit: It will display the
balance in your device account.
4. Software Version:It will display the
current software version of your
BESTip.
5. LAN MAC Address: It will display
the physical internet address which
your BESTip is conntected.
6. My IP Address: It will display the
IP address assigned to your BESTip.
7. NETMASK Address: It will display
the Netmask IP address.
BESTip ATA 11L User Manual
20
8. ROUTER Adress: It will display the
Router/ Gateway IP address.
9. Primary DNS Address: It will
display the primary DNS address.
10. Secondary DNS Address: It will
display the secondary DNS address.
11. Gatekeeper Type: It will display
the gatekeeper the device is
registered.
Function Select-System Setting
You can establish your setup or modify for your BESTip from
the System Setting menu at any time.
1. Press button to enter the
Function Select Mode.
2. Press or buttonto
scroll the main menu till it appears
Function Select - System Setting.
And then press to enter the option.
3. There are three options in the System Setting menu: for IP
Policy – DHCP, IP Policy – Static IP and IP Policy – ADSL
PPPoE. Just choose and configure the one to which network the
BESTip is connected.

BESTip ATA 11L User Manual
21
For the following setup, please consult
“Other Common Setup” in this chapter.
BESTip ATA 11L User Manual
22
IP Policy-DHCP
DHCP: Dynamic Host Configuration Protocol is a method for
assigning IP address and other IP parameters to computers on
the IP network in a single message with great flexibility. IP
addresses can be static or temporary depending on the needs
of the network.
1. Press button to enter the
Function Select Mode.
2. Press or button to
scroll the main menu till it appears
Function Select - System Setting.
And then press to enter the
option.
3. Press or buttonto
scroll the menu till it appears IP
Policy - DHCP. Then press
to enter the option.
4. Press to go to the next
option, and you do not need to
configure the information.
Please jump to the section “Other Common Setup” in this
Chapter for further instructions.

BESTip ATA 11L User Manual
23
IP Policy-Static IP
If you select Static IP mode, please consult your ISP or MIS to
have the information listed below. Please use the keypad on
your phone or the buttons on BESTip to input the information
obtained.
1. Press buttontoenterthe
Function Select Mode.
2. Press or buttonto
scroll the main menu till it appears
Function Select - System Setting.
And then press to enter the
option.
3. Press or buttonto
scroll the menu till it appears IP
Policy – STATIC IP. And then
press to enter the option.
4. My IP Address: The unique LAN
IP address assigned to the BSETip.
5. NETMASK Address: Please enter
netmask, normally it is
255.255.255.xxx.
6. Router Address: The IP address
of the router/gateway device that
connects your BESTip to the Internet.
7. Primary DNS : Enter the IP
address of the Domain Name Server.
8. Secondary DNS: Secondary DNS
is optional. You may leave it blank.
Afeter finishing the setup, please jump to the section “Other
Common Setup” in this Chapter for further instructions.
BESTip ATA 11L User Manual
24
IP Policy-ADSL PPPoE
1. Press button to enter the
Function Select Mode.
2. Press or button
to scroll the main menu till it appears
Function Select - System Setting.
And then press to enter the
option.
3. Press or buttonto
scroll the menu till it appears IP
Policy - ADSL PPPoE. And then
press to enter the option.
4. PPPoE Login Name: Enter the
login name provided by your ISP.
5. PPPoE Password: Enter the
password provided by your ISP.
6. PPPoE Type: There are two types
you can select: Type 1 or Type 2.
Normally set to 1.
7. PPPoE Timeout: Set the PPPoE
timeout by minutes. “0” means always
on-line.
After finishing the setup, please jump to the section “Other
Common Setup” in this Chapter for further instructions.

BESTip ATA 11L User Manual
25
Other Common Setup
After selecting and configuring the IP Policy, you
need to continue to set the following parameters.
Remember to press button to effect the
setting and go to the next option.
1. Station ID:The default value is
1. The configuration is needed to be
changed only when you connect
more than one BESTip devices at
NAT router. You must set these
BSETip devices with different
Station ID.
2. Gatekeeper: There are four
options you can select:AUTO, Type
1, Type 2 and OFF. “Auto” is
applicable most of the time. Select
OFF only if your BESTip is
connected in a private network.
3. Country Code: Please key in
your country’s telephone Country
Code. For example, “1” for USA,
“44” for U.K.
4. Area Code: Please key in your
state/city telephone Area Code.
5. IDD Prefix: Please key in the
International Direct Dial prefix code.
“00” in most cases.
BESTip ATA 11L User Manual
26
6. 2nd IDD Prefix: Please key in
the second International Direct Dial
code. This option is needed for
s7ome Caribbean Sea countries.
Keep this option blank if it is not the
case.
7. DDD Prefix: Please key in the
Domestic Direct Dial prefix code.
“0” in most cases.
8. Mobile Pincode: Turn it on
unless you have applied for
business use. See “Mobile Pincode”
in this chapter.
9. Play Volume: The default value
is 0dB. You can set from -31dB to
31dB. 0 dB is suitable for most
cases. Please don’t make it too big
or too small.
10. Record Volume: The default
value is 0dB. You can select from
-31dB to 31dB. 0 dB is suitable for
most cases. Please don’t make it
too big or too small.
11. Show CDR: Turn it on and
CDR will show on the display after
call finished.
12. Polarity Reverse: Normally set
to “OFF” unless your device is
applied for business purpose.

BESTip ATA 11L User Manual
27
13. LCD Contrast: The default
value is 0. The adjustable range is
from +5~-10.
14. FXS Hotline: Normally set to
“OFF”. If you turn hotline function,
please be advised this function
should be collocated with the setup
on ITSP platform. Please contact
our local dealer for setup hotline
function.
15. FXO Hotline: Normally set to
“OFF”. If you turn hotline function,
please be advised this function
should be collocated with the setup
on ITSP platform. Please contact
our local dealer for setup hotline
function.
16. One ITSP Account: Normally
set to “OFF”.
17. Network Testing: Normally set
to “OFF”. You can turn on to test
your network.
18. Voice Priority: Normally set to
“OFF”
19. Press button to save
configuration data in memory
BESTip ATA 11L User Manual
28
20. It will return to standby state
again after updated. Please restart
the device to make setup changes
effective.
Mobile Pincode
“Mobile Pincode” function is applied for business purpose.
Customer can buy "Mobile Pincode Card " from our authorized
agent and "Mobile Pincode Card" is just like so-called "Pre-Paid
Calling Card". The card can be used on any BESTip
devices anywhere and credits consumed is deducted from the
card. The device is simply a tool for calling out. Please contact
our agent for further information about “Mobile Pincode Card“.
Mobile Pincode Setting
1. Press button to enter the
Function Select Mode.
2. Press or button to
scroll the main menu till it appears
Function Select - System Setting.
And then press to enter the
option.
3. Keeppressing untilyou
see Mobile Pincode.
4. There are 4 options for Mobile
Pincode Application: Disable, FXS,
FXO, FXS + FXO.

BESTip ATA 11L User Manual
29
5. Press button to save
configuration data in memory
For mobile pincode usage, caller will hear "beep-beep" tone
when picking up the handset connecting to FXS port or calling
to the landline connecting to FXO port. It requests caller to
enter mobile pincode number.
Please dial " #11*pincode# " to sign in. If the pincode is good,
the caller will hear dial-tone, so caller can dial international
number as usual.
Caller can make multiple calls one after one, just press " ### "
quickly to end the current call, then dial-tone will come out to
notify that the device is ready to accept next call.
For sign out after last call, please dial “ #22# " or just hang-up
the call, it will sign out automatically after 8 sec. for ATA 11L.
Function Select-FXO Setting
This section will show you the steps to help you setup the voice
port of your BESTip.
There are seven options of FXO Setting.
BESTip ATA 11L User Manual
30
FXO Setting-FXO Gain
1. Press button to enter the
Function Select Mode.
2. Press or button to
scroll the main menu till it appears
Function Select - FXO Setting. And
then press to enter the option.
3. Press or buttonsto
scroll the menu till it appears FXO
Gain. And then press to enter
the option.
4. FXO Play Gain:
Press or buttonsto
select from –15 dB to +15 dB, and
then press to confirm.

BESTip ATA 11L User Manual
31
5. FXO Record Gain:
Press or buttonsto
select from –15 dB to +15 dB, and
then press to confirm.
FXO Setting-# Ring To Answer
1. Press button to enter the
Function Select Mode.
2. Press or buttonto
scroll the main menu till it appears
Function Select - FXO Setting. And
then press to enter the option.
3. Press or buttonsto
scroll the menu till it appears #Ring
To Answer. And then press
to enter the option.
4. You may decide after how many
rings the device waits to pick up the
phone call and transfer to FXO
interfaces. “0” means directly transfer
phone call to FXO interfaces while
ringing.
FXO Setting-Trunk Code
1. Press buttontoenterthe
Function Select Mode.
2. Press or buttonto
scroll the main menu till it appears
Function Select - FXO Setting. And
then press to enter the option.
BESTip ATA 11L User Manual
32
3. Press or buttonsto
scroll the menu till it appears Trunk
Code. And then press to
enter the option.
4. If your BESTip is connected to
extension line of the PBX system., you
need to enter the trunk code. “0” or “9”
apply to most of PBX system.
FXO Setting-Intercom Digit
1. Press button to enter the
Function Select Mode.
2. Press or button to
scroll the main menu till it appears
Function Select - FXO Setting. And
then press to enter the option.
3. Press or buttonsto
scroll the menu till it appears
Intercom Digit.
And then press to enter the
option.
4. The digit number of extension line
varies from different PBX systems.
Please enter the right setting. Ex: your
extension line is 11 (two digits), that
means Intercom Digit is 2. If it is 145
(three digits), then Intercom Digit is 3.

BESTip ATA 11L User Manual
33
FXO Setting-Blind Dialout
The BESTip will detect the dial tones (at least 1 second) before
dialing. If there are no dial tones detected, the BESTip will cut
the line. However, sometimes the audible frequencies and/or
cadence of the dial tones appear unstable, so you need to set
Blind Dialout ON to make the BSETip not to detect the dial tones
and dial only after 1 second.
1. Press buttontoenterthe
Function Select Mode.
2. Press or buttonto
scroll the main menu till it appears
Function Select - FXO Setting. And
then press to enter the option.
3. Press or buttonsto
scroll the menu till it appears Blind
Dialout. And then press to
enter the option.
4. To avoid failure of detecting dial
tone, you may force the device to dial
out. Turn on the function, the device
would dial out after one second
without detecting dial tone.
FXO Setting-Outward Password
1. Press buttontoenterthe
Function Select Mode.
2. Press or buttonto
scroll the main menu till it appears
Function Select - FXO Setting. And
then press to enter the option.
BESTip ATA 11L User Manual
34
3. Press or buttonsto
scroll the menu till it appears Outward
Password. And then press to
enter the option.
4. To protect FXO usage from stealing
credit, you may set up password. With
this setting, others have to enter the
password before using FXO calling
out.
FXO Setting-CP Tone Setup
CP Tone (Call Progress tone) Setup allows BESTip ATA 11L to
identify the type of telephony signaling tone for which tone
cadence are being specified. CP tone is a means provided by
telephone switch to indicate the progressive status of a call.
The BESTip ATA 11L is embedded with the DSP chipset and
call progress tone detection algorithm module, so it can detects
the presence of call progress tones including busy tone,
disconnection tone, ringback tone and dual ringback tone.
It is programmable to detect any call progress tones in specified
frequency range between 300 Hz and 650 Hz
Generally, busy tone, disconnection tone and ringback tone are
single duration call progress tone (as shown below). However,
in some regions and PBX systems, ringback tones belong to
dual duration call progress tone.
1st Tone
1st Tone
ON OFF
Single Duration Call Progress Tone

BESTip ATA 11L User Manual
35
1. Press buttontoenterthe
Function Select Mode.
2. Press or buttonto
scroll the main menu till it appears
Function Select - FXO Setting. And
then press to enter the optio
n
3. Press or buttonsto
scroll the menu till it appears CP
Tone Setup. And then press
to enter the option.
4. There are three options in the CP Tone Setup menu. CP
Tone Setup – New, CP Tone Setup –Modify, CP Tone
Setup – Erase. Please see the illustration below.
4.1 CP Tone Setup-New
ON
1st Tone
ON 1st Tone
OFF
Dual Duration Call Pro
g
ress Tone
2nd Tone 2nd Tone
OFF
BESTip ATA 11L User Manual
36
4.2 CP Tone Setup-Modify
4. CP Tone Setup-Erase
Note: You may encounter a problem when your call goes to
PBX via a VoIP connection, such as the caller may already
hang up the phone but the PBX port is still active. The cause of
this problem may be due to the CP tone mismatch.

BESTip ATA 11L User Manual
37
The BESTip allows you to configure 10 sets of call progress
tones. When the BESTip detects three continous busy tones or
disconnection tones, it will cut the call connection.
CP Tone Setup-CP Tone Type
1. Press or buttonsto
scroll the menu till it appears CP Tone
Setup.Andthenpress to
enter the option.
2. BSETip provides 4 type of CP
Tones: Busy, Disconnect, Ringack
and Dual_Ringback. Press
and buttons to scroll the
options, and then press to
enter your target option.
3. There are four kinds of time duration you can configure: 1ST
Tone ON Time, 1ST Tone OFF Time, 2nd Tone ON Time, and
2ND Tone OFF Time. Per unit is 0.01 second. For example, if
you want to set 0.5 second, please enter 50.
For Busy, Disconnect and Ringback types, you only need to
configure 1ST Tone ON Time and 1ST Tone OFF Time. For
Dual_Ringtone type, you need to set the four parameters.
Function Select-Inward Password
1. Press buttontoenterthe
Function Select Mode.
2. Press or buttonto
scroll the main menu till it appears
Function Select – Inward Password.
And then press to enter the
option.
BESTip ATA 11L User Manual
38
3. There are four options of Inward Password menu: New,
Modify, Erase and Application.
Inward Password-New
1. Press or button to
scroll the Inward Password menu till
it appears Inward Password – New.
And then press to enter the
option.
2. Pick up your handset. Key in the
password using the character
converter chart stated prior in this
chapter. Press to save.
3. Press and buttonto
selcet the password ranking among
High, Medium and Low.
Press to save and back to
the upper menu.
Inward Password-Modify
1. Press or buttonto
scroll the Inward Password menu till
it appears Inward Password – Modif
y
And then press to enter the
option.
2. Press or buttons to
find the number to modify. And then
press to confirm.
3.Press to confirm the
password.

BESTip ATA 11L User Manual
39
4. Press or buttons to
modify the password ranking among
High, Medium and Low.
Press to save and back to
the upper menu.
Inward Password-Erase
1. Press or buttonto
scroll the Inward Password menu till i
t
appears Inward Password – Erase.
And then press to enter the
option.
2. Press to confirm to erase
the password and back to the upper
menu.
Inward Password-Application
1. Press or buttonto
scroll the Inward Password menu till
it appears Inward Password –
Application. Then press to
enter the option.
2. Press or buttons to
scroll the options.There are four
options to select: Diable, FXO, FXS
and FXO+FXS. Press to
confirm your target option and back to
the upper menu.
Function Select - Factory Setting
BESTip has the auto-recovery capability. Just follow the steps
below to restore the factory settings.
BESTip ATA 11L User Manual
40
Note:Before proceeding to restoring, be sure that your BESTip
is connected to the Internet.
1. Press button to enter the
Function Select mode.
2. Press or buttonto
scroll the main menu till it appears
Function Select - Factory Setting.
And then press to enter the
option.
3. There are one option of Factory
Setting: CLEAR SYS SETUP.
Press to start the process.
4. Press to confirm.
Function Select-System Upgrade
To ensure the users to always have the latest Internet
telephony technologies, the BESTip has the online upgrade
feature.
You can upgrade your BESTip whenever a new software
version becomes available. Upgrades can enhance the
performance and add more features to your BESTip.
Note:Before proceeding to upgrade, be sure that your BESTip
is connected to the Internet.
To upgrade your BESTip with the newest software version,
follow the followign instructions. The upgrade process will only
take about 3~5 minutes depending on the Internet traffic.
Table of contents
Other BESTip Gateway manuals
Popular Gateway manuals by other brands
Dell
Dell Edge Gateway 3000 Series Getting started guide
IOGear
IOGear MediaShair 2 user manual
SignaMax
SignaMax 065-9066 user manual
Mercury
Mercury SCC-1 installation manual

Grandstream Networks
Grandstream Networks BroadWorks BroadSoft GXW-400X Quick installation guide
Belden
Belden GRASS VALLEY IPG-3901 Guide to installation and operation
NETGEAR
NETGEAR Lifestyle ASG1100 installation guide
TEKTELIC Communications
TEKTELIC Communications Kona Micro Gateway user guide
HMS Networks
HMS Networks Intesis INKNXSAM O000 Series Installation sheet
ISON
ISON IS-MS3180 Series user manual
AddPac
AddPac VoiceFinder AP200 user guide
Cisco
Cisco TelePresence ISDN GW MSE 8321 Getting started

