BETAFPV Lite 2S FC User manual

CONTENT
1. INTRODUCTION................................................................................................................................ 2
2. SPECIFICATION................................................................................................................................ 2
SPECIFICATIONS OF FC.............................................................................................................2
SPECIFICATIONS OF ESC.......................................................................................................... 2
3. DIAGRAM............................................................................................................................................ 3
4. BASIC FUNCTION............................................................................................................................. 4
5. RECEIVER CONNECTION AND BINDING METHOD................................................................ 4
5. 1 Frsky D8 Receiver.....................................................................................................................5
5. 2 SBUS Protocol........................................................................................................................... 6
5. 3 DSMX Protocol.......................................................................................................................... 7
6. OSD MENU..........................................................................................................................................8
6.1 How to Enter OSD Menu.........................................................................................................8
6.2 How to Operate OSD Menu....................................................................................................9
7. 1 OSD Illustration ...........................................................................................................................13
-OSD info interface-...................................................................................................................... 14
7.2 Channel Combination of Flight Mode..................................................................................14
7.3 Features of Different Flight Mode........................................................................................ 15
8. ASSEMBLY GUIDE......................................................................................................................... 15
8.1 Recommendation................................................................................................................... 15
8.2 Prop Out...................................................................................................................................15
9. DEVELOPMENT...............................................................................................................................15

1. INTRODUCTION
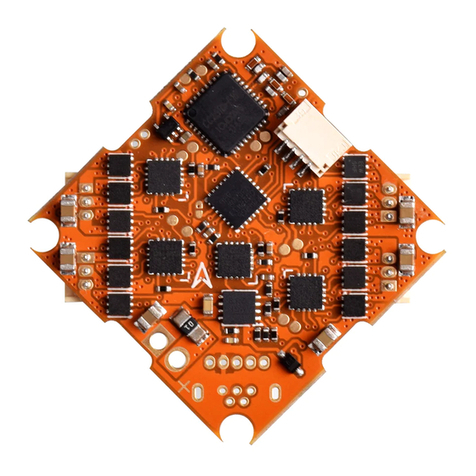
BETAFPV Lite 2S FC is a brushless flight controller with Silverware firmware. It is with
build-in Frsky D8 receiver, and it also supports external receiver with SBUS protocol and
DSMX protocol. For fans of Silverware firmware, now you could try it with brushless drone
like Beta85 Pro 2. The stock firmware is based on brushed NFE_Silverware, which is
used on popular ZER0 board. With an ingenious design of build-in OSD, it’s convenient
for users to observe the flying status and change the configuration like PID.
2. SPECIFICATION
Adopting updated and improved Silverware firmware brings you excellent flight
experience on Lite 2S FC.
SPECIFICATIONS OF FC
• CPU: STM32F042G6U6
•Six-Axis: MPU6050
•Size: 26mm x 26mm, whoop mounting pattern
•OSD:BETAFPV LiteOSD
•OSD Firmware:LiteOSD_f042_2s_bl_v1.0.HEX
•Build-in Receiver: Frsky D8 RX

•Supported Receiver:SBUS protocol or DSMX protocol
•Power Cable:55mm,with XT30 cable
•Weight:5.39g with XT30 cable
• FC Firmware:LiteSilverware_f042_2s_bl_v1.0.HEX
SPECIFICATIONS OF ESC
• Built-in ESC with 5A continuous and peak 6A current
• Input voltage: 2S lipo
• Motor Connectors: 1.25mm header pins connector
• Factory firmware: S_H_50_REV16_7.HEX
• Processor Chip: EFM8BB21
• Signal Support: D-shot150, D-shot300, D-shot600(Default), Oneshot125
3. DIAGRAM

4. BASIC FUNCTION
• Supports brushless drone up to 2S battery power
• Includes the OSD menu. Supports PID tuning, motor rotation, vtx frequency changing
and channel mapping checking via OSD menu
• Build-in receiver with Frsky D8 protocol and support for external receiver with SBUS
protocol or DSMX protocol
• Supports various flying mode: Acromode / Levelmode / Racemode_Angle /
Racemode_Horizon / Horizonmode
• Supports Turtle mode, easy to turn the drone over when the quad is inverted
5. RECEIVER CONNECTION AND BINDING METHOD
The FC integrates with Frsky D8 receiver, and also supports external receivers both

SBUS and DSMX protocol. Users could switch receiver communication protocol directly
via FC button.The status is indicated with 3 LED flashes. Receiver communication
protocol will be saved automatically when you power off, it will keep the same when you
power up again.
For more details, kindly check the picture below.
LED
Status
Description
Power LED
Solid
Power On
FC LED (Blue)
Solid
Power On
FC LED (Blue)
Off
Power Off
Receiver LED ( Green)
Flash
Binding Status
Receiver LED ( Green)
Off
Binding Successfully
5. 1 Frsky D8 Receiver
Lite 2S brushless FC is with build-in frsky D8 receiver. The communication protocol should
be set as INT_SBUS protocol when using frsky D8 receiver, as follows:
• Press the FC button on the bottom of the FC and plug the battery at the same time
• Release the FC button after 4 seconds
• Once “INT_SBUS ” shown, FC is successfully changed to INT_SBUS mode
How to bind:
Note: Please ensure that the the receiver communication protocol is in INT_SBUS
protocol.
• Press receiver button on the bottom of the FC and plug battery at the same time till

green LED is solid.
• Choose “bind” option in the transmitter, bind is successful when green led flashes.
• Power up again, if the data is successfully received, the green led will be solid.
5. 2 SBUS Protocol
Supports SBUS protocol, including Frsky xm / xm+ receiver, Futaba receiver. Here is the
diagram with SBUS protocol:
The communication protocol should be set as SBUS protocol when using the SBUS
protocol, as follows:
• Press the FC button on the bottom of the FC and plug the battery at the same time
• Release the button and press the FC button again within 4 seconds
• Once “SBUS”shown, FC is successfully changed to SBUS mode.

5. 3 DSMX Protocol
Supports DSMX protocol. Here is the diagram with DSMX protocol:
The communication protocol should be set as DSMX protocol when using DSMX receiver,
as follows:
• Press the FC button on the bottom of the FC and plug the battery at the same time
• Release the button and press the FC button TWICE within 4 seconds
• Once “DSMX”shown, FC is successfully changed to DSMX mode.

6. OSD MENU
AETR is the default channel mapping of Lite 2S Brushless.
Eight options on OSD Menu: PID, MOTO, RECEIVER, SMARTAUDIO, DISPLAY, RATES,
SAVE and BACK. When you choose PID, cursor will show on PID option.
Supports PID tuning, motor spinning direction changing, channel mapping checking,
frequency and vtx power changing via OSD menu. The operation of OSD Menu on Lite 2S
Brushless FC is same as Betaflight.
6.1 How to Enter OSD Menu
The method of entering OSD Menu on Lite 2S Brushless FC is same as Betaflight, Make
sure the drone is disarmed when entering OSD Menu on Lite 2S Brushless FC.

-Use Mode 2 (American Mode) as example-
Note: AETR is the default channel mapping of Lite 2S . If you can not enter the OSD
menu, it might cause by unmatched channel mapping.
6.2 How to Operate OSD Menu
By moving the cursor, you can enter sub-menu of PID, MOTO, RECEIVER and
SMARTSUDIO to change the related parameters.
If the parameters are changed, you can choose the SAVE option, and then select BACK to
return, so that they will be saved and take effect.
-Use Mode 2 (American Mode) as example-
6. 3 How to Tune PID
Here is the method of PID tuning
• Enter OSD menu
• Move the cursor to PID option and enter PID sub-menu, the PID for ROLL, PITCH and

YAW is available for tuning.
• If you want to change the PID parameters, please choose the EXIT option to exit from
PID sub-menu, then back to the OSD menu to select SAVE option, so that the parameters
you changed will be saved and take effect.
-PID menu interface-
-Use Mode two (American Mode) as example-
6.4 How to Change Motor Rotation
Here is the method of Motor rotation Changing
• Enter OSD menu.
• Move the cursor to MOTO option and enter MOTO sub-menu. M1, M2, M3 and M4
represent four motors on the drone. N represents normal, which means counter -
clockwise rotation, R represents reversed, which means clockwise rotation

• When changed the motor rotation, go back to the previous menu. SAVE and EXIT. The
changes will take effect and the FC will restart.
-Motor menu interface-
-Use Mode two (American Mode) as example-
6.5 How to Check the Channel Mapping: AETR / TAER
AETR is the default channel mapping of Lite 2S Brushless FC. Please note that the failure
of arming and OSD menu entering would be caused by the unmatched channel mapping
between transmitter and Lite 2S Brushless FC, please change the channel mapping of the
transmitter to AETR via transmitter.
How to check the channel mapping:
• Enter OSD menu
• Move the cursor to RECEIVER option and enter RECEIVER sub-menu

-RECEIVER menu interface-
There is one functional zone for RECEIVER sub-menu. It is on the bottom of sub-menu,
from which you can examine whether the channel mapping relationship of transmitter
among Roll, Pitch, Yaw and TRO is correct. Please note that CHN5-8 on the bottom
indicates the current AUX value of transmitter’s channel 5 to channel 8.
Please make sure transmitter’s CHN6 value is 0(Shown as CHN5-8:0:0:0:0), then you
can check whether the transmitter channel is correct in the below functional zone. To exit
receiver menu, please change the transmitter’s CHN6 value to 1(Shown as CHN5-8:
0:1:0:0)
-Use Mode two (American Mode) as example-

6.6 How to Change Frequency and Power of VTX
Lite 2S FC supports 48CH frequency, from A1: 5865 to E8: 5917. The power of vtx can be
switched between 25mW and 200mW directly via OSD menu.
How to change:
• Enter OSD menu
• Move the cursor to SMARTAUDIO option and enter SMARTAUDIO sub-menu
• Move the cursor to CHAN to change frequency or move the cursor to POWER to
change vtx power.
• When changed the parameter, SET and BACK. The changes will be saved and take
effect.
-SMARTAUDIO menu interface-
-Use Mode two (American Mode) as example-

6.7 How to Change the Display Position of OSD Info on Screen
There are 32 rows on the screen, OSD info can be set to any of the 32 rows.
How to change the position:
• Enter Display Menu, the value in the screen refers to the position of the OSD info. For
example, DISARM: 16 means that “DISARM” shows in Row 16.
• Change the value by stick. For example, if ‘’DISARM: 16’’ is changed to ‘’DISARM: 16’’,
“DISARM” will show in Row 16. If the value is changed to 0, the text will not show on the
screen.
Please note that there is an option :LOWBAT, it is for setting low voltage alarm, when the
voltage is below the setting value, ‘’Low Voltage’’ will show on the screen. This function is
same with the low voltage alarm function on Betaflight.
Row 1
Row2
Row.....
Row.....
Row31
Row32
- Display menu interface-

6.8 How to Set Rate
The default Rate is suitable for most users, but if it is not suitable for yours, it can be
changed by using Rates menu, so that you could find the most suitable Rate according to
your flying habit. Please note that PROFILE is used to set the ratio of Setpoint Weight and
Transition.
7. MANUAL FOR SWITCHING FLIGHT MODE
7. 1 OSD Illustration
There are six parts in OSD info interface: (Use OSD info in the pic as example)
• Arm or disarm: “DISARMING” mean that the drone is disarmed. The OSD info
interface will display “ARMINO” when the drone is armed.
• Receiver mode: “INT_SBUS” refers to the receiver mode you have choosed. If you
choosed the DSMX mode, “DSMX” will show on OSD info interface.
• Voltage: “A00.6” refers to the voltage.
• Current: “V7.82”refers the real current value.
• Flight mode: “LEVEL” refers to the flight mode you have choosed. If you choosed the
Acromode, the OSD info interface will display “ACRO”.
•Time: “TIME 00:00” refers to the flight time. If the drone fly about 30 seconds, the OSD
info page will display “TIME 00:30”

-OSD info interface-
7.2 Flight Mode Channel Combination
Lite 2S Brushless FC uses the channel combination to arm and switch flight mode.
• Disarm: CH5 is AUX Low
• Arm: CH5 is AUX High
• Turtle:CH6 is AUX Low, CH7 is AUX High
• Acromode:CH6 is AUX Low, CH7 is AUX Low
• Levelmode:CH6 is AUX High, CH7 is AUX Low,CH8 is AUX Low
• Racemode_angle:CH6 is AUX High, CH7 is AUX High, CH8 is AUX LOW
• Racemode_horizon: CH6 is AUX High, CH7 is AUX High, CH8 is AUX High
• Horizonmode:CH6 is AUX Hight,CH7 is AUX Low,CH8 is AUX High
CH5
CH6
CH7
CH8
Disarm
arm
Turtle
Acromode
Levelmode
Racemode_angle
Racemode_horizon
Horizonmode
AUX High
AUX Low
7.3 Features of Different Flight Mode

• Disarm: The motors are disabled and will not be allowed to run.
• Arm: The motors and controls are enabled, and props will be spinning at an idle speed.
• Turtle: Used to turn the drone over when the aircraft is inverted
• Acromode: A flight mode without auto-leveling, and stick deflection corresponds to a
rotational rate around input axis.
• Levelmode: A flight mode in which the maximum tilt angle is limited to 65 degrees.
• Racemode_Angle: A flight mode with levelmode behavior on roll axis and acromode
behavior on pitch axis.
• Racemode_Horizon: A flight mode with horizonmode behavior on roll axis and
acromode behavior on pitch axis.
• Horizonmode: A flight mode with leveling near center stick but the ability to roll or flip at
full stick deflection
8. ASSEMBLY GUIDE
8.1 Recommendation
There are varied methods for building a quad with Lite 2S Brushless FC. But we highly
recommend you to assemble the Lite 2S brushless FC on Beta85 Pro 2 and Beta75 Pro 2.
8.2 Prop Out
It must be installed as "props out" in default. Why we need "props out" direction?
Default props direction, quadcopter dips and "washes out" in hard corners. With reversed
props or "props out", no more dipping even in hardest cornering.
Know more about "Props Out".

9. DEVELOPMENT
Thanks to all the pilots who took part in our beta test and gave us feedback and advice.
With continuous optimization and research by our tech team, Lite 2S Brushless FC has
been greatly improved.
• Longer flight time of 4 mins comparing to the 3 mins of first edition.
• Added Butterworth Filter on the accelerometer data, solve the issue of drift in level
mode.
• Changed the operation time for sending motor rotation command , the command is
sent when the drone is on disarm mode.
• Optimized turtle mode. For the first version, except pushing the pitch and roll, throttle
stick also needs to be pushed to turn the drone over. For the new Lite 2S V1.0, users just
need to push the pitch and roll to turn the drone over.
• Solved the disarm problem when the users are using OSD menu. The new Lite 2S
V1.0 cannot be disarmed when users operate the OSD menu. It can be disarmed only
when users exit the OSD menu.
• Solved the issue of statics and flash on the OSD information. The data is more stable
since the communication method is changed from SPI to UART.
Besides that, contribution of bugfixes and new features is encouraged. All the source
code for the flight controller and OSD is open in Github.
Source code of the flight controller: https://github.com/BETAFPV/LiteSilverware
Source code of the OSD:https://github.com/BETAFPV/LiteOSD
The programmer ports for the FC MCU STM32F042G6U6 and OSD MCU EFM8BB21 are
showed as below.

STM32F042 is the processor of FC and a STM32 programmer is needed to flash the
firmware through the SWD port (CLK, SWDIO) of the controller. We would recommend the
ST-LINK or BeeLink USB Flasher.The programming port is also compatible with the
NewBeeDrone BeeLink USB Flasher.
EFM8BB21 is the processor of OSD. You need a efm8 programmer to upload the
firmware through the C2 port (C2CK, C2D) of the controller. We would recommend the
Silicon Lab debug adapter.
Other manuals for Lite 2S FC
1
Table of contents
Other BETAFPV Controllers manuals
Popular Controllers manuals by other brands
Emerson
Emerson Fisher 657C instruction manual
Federal Signal Corporation
Federal Signal Corporation UltraVoice Installation, operation and service manual
ESP Safety
ESP Safety UPES-50D operating manual
Honeywell
Honeywell dcp100t Operator's manual

Aspira
Aspira S-0241.02 manual
THOMSON
THOMSON Electrak GX installation manual

Taconova
Taconova FWCK Installation and operating instructions for manual and remote control options
Bender
Bender ICC1324 manual
Amtrol
Amtrol GUARDIAN CP DC2 Installation & operation instructions

Condair
Condair HP manual

Superfeed
Superfeed SC41 Opertional manual

Asahi/America
Asahi/America S20HC1C3W user manual
