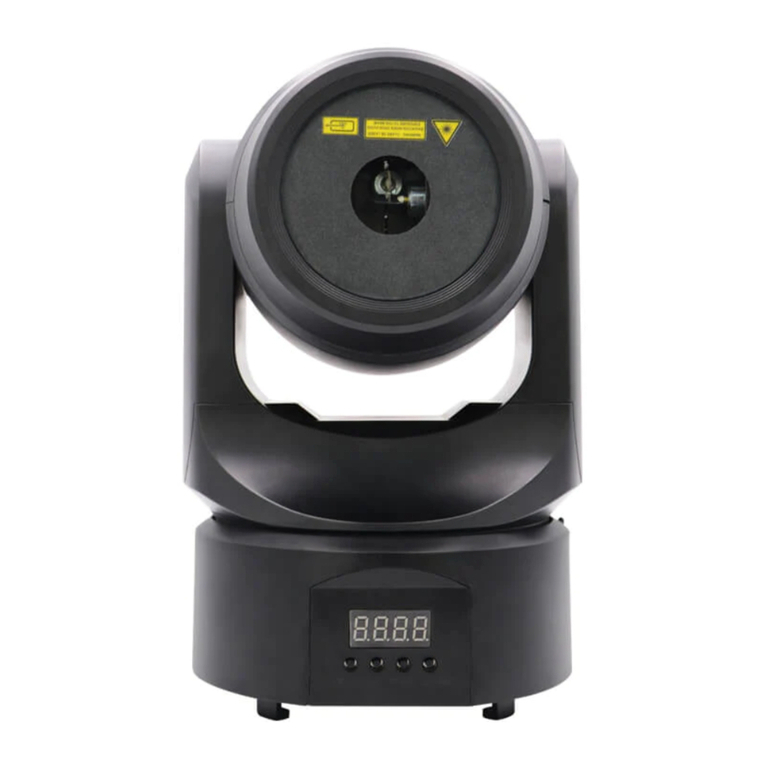
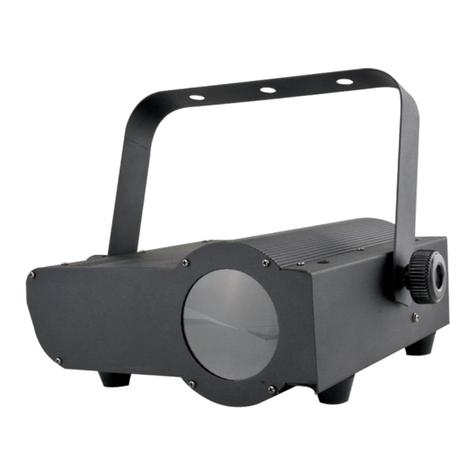
BETOPPER Beam Moving Head Light User manual

REV: 1.00
Beam Moving Head Light
User Manual
Please read this manual carefully before operating

Beam Moving Head User Manual
(16 Channel/Mute Type)
Warnings:
This product is only suitable for professional use, and does not
apply to security for other purposes. After you got the lights, please
check the package whether have any damage caused by transportation.
If there is any damage, do not use this fixture, and please contact the
dealer or manufacturer as soon as possible.
This product is only suitable for indoor, IP20 protection class. Lamps
should be kept dry to avoid Moisture, overheating or dusty environment.
Prevent lamps come into contact with water or any other liquid. The use
of this product should pay attention to: fire, heat, electric shock,
ultraviolet radiation, the lamp to explode or Shedding caused serious or
fatal injury.
Need to read the instructions before use energized or installing.
Follow through the operation of security methods and pay attention to
the warning signs on the specification and equipment.
Please don't choose the item " factory default" , or all the data will
be missing, and the machine can use only by resetting.
Page 1
Beam Moving Head Light after service
Product warranty card
Please fill in the following content properly and keep it safe for
future maintenance. Accordingly, for your each purchase of our systems we have
archive Serial number and parameters for future reference.
Testing : warranty: non-warranty:
Mode:Serial No.:
Distributor
:
Address
:
Tel
:
About Product Warranty
1.Any product buy from our company (or authorized agent), which
used properly,and with this card, can have 1 year warranty for Lights,
mechanical parts, electronic parts. If out of the warranty situation,
we can provide the paid maintenance service.
2
.
The warranty is no longer valid in the following situations:
* Warranty cards and products have no serial numbers.。
* Product is damaged or show significant signs of self-disassembly.
*Any unauthorized modification (removal or replacement)
made to product or it’s components.
*Improper or excessive use of inappropriate repairs which result
in a repair failure or injury。
* Did not follow instructions or use in an environment not suitable
for product..
*Product damage caused by strong impact
*The warranty cannot be extended if the product as been serviced
*Light Source normal degradation
*Warranty card must be filled out with receipt of purchasing in order
for the warranty to be valid.
*Product is damaged due to abnormal voltage or caused by
other accidents (ex. Natural disasters).
3
.
The Company reserves the right to interpret the provisions above.
The content of these articles is subject to change without notice!

Maintence
Optical components should be cleaned gently,Do not use disruptive
solvent, otherwise it will damage the plastic or coated surface.
1. After the power if off, cooled completely, then open the case.
2. Blowing machine with a vacuum cleaner or pressure blower, gently
blow away dust and floating objects.
3Use odorless paper or cotton cloth soaked with water or distilled water
to wipe particulate, do not rub surfaces, blow any floating object with a
pressurized gas.
4.Dip cotton of the alcohol or unscented tissue paper to remove dust
and residues, glass cleaner may also be used, but residues must be
removed with distilled water, to the circle on each side, wipe from the
Center, and then wiped dry with a soft cotton cloth.
5.Using a soft brush, cotton paper, air cleaners or stress on stomatal
and hair dryers that the dust from the fan out. Excessive dust, smoke
and damage caused by non-normal use, out of the scope of warranty.
Declare
The product is with good performance and complete package when it is
delivered. The end-user of this product should follow all the above
instructions and warnings. Any damage caused by misuse, malfunction
and problem caused by ignoring the instructions are not included in
the repair guarantees of the manufacturer or dealers.
Page 13
Inspection
In order to use the product securely and properly, please read the
manual before using and follow the instructions strictly to prevent
personal safety trouble and product damage caused by misuse.
Take care of the product, check the possibility of the product damage
caused by transportation and check all the listed items are present upon
receipt of the product:
Beam Moving Head 1 Use Manual 1
Power cable 1 Handle: 2
Installation
1. Make sure there is no flammable or explosive subjects within min 1.5
meter nearby the installation.
2.Before installation, please check and make sure the power supply
voltage meet request of the system.
3. Please check ventilation and fans or exhaust passages are cleared.
4. The equipment should be fixed firmly.
5. For security reasons, the appliance must be earthed.
Page 2

Buttons Operation Instruction
“”、“” :Similar functions
To return to the previous interface.
“”、“”Button:
To slect、edit.
“OK”Button:
Operating function、go to edit、exit editing mode.
How to modify DMX Address:
1.Press " " button one or several times to go back to previous or main
page.
2.Press " "/" " button to highlight "Setting" button.
3.Press "OK" button to modify "Setting".
4.Press " "/" " button to highlight "DMX address".
5.Press "OK" button to go into "DMX address".
6.Press " "/" " button to modify "DMX address".
7.Press "OK" button to exit "DMX address" editing mode.
Page 3
Technical parameters
Model
Parameters
Model A Model B Model CModel D
Power
Power supply
100-240V/50-60HZ
Power
consumption
400W
Light Source
Lamp
230W
200W
Color
temperature
8000K
Average
Lifespan
2000 hour
Color/Pattern
Color
14 color + blank color
Gobo
17 fixed gobo + blank gobo
Prism
rotation 8-face prism, Bilateral rotation
Lens
high precision optical lens, with zoom
Focus
linear adjustment
Dimmer
0-100% linear dimmer
Scanning Angle
PAN
540°
TILT
270°
Operation
Control Mode
Auto / Sound/ DMX / Master-slave
DMX
16/20CH
Security & Package
Work
environment
Indoor: 0°C-40°C
Macro
functions
Reset/ lamp on or off can be controlled by controller;
Thermal shutdown circuit;Over-
current Protection
Circuit;
excellent ventilation and cooling effect by
vertical axis fan;Fixture and lamp usage time display;
Built-in analyzer for easy fault finding, error messages
Product Size
480*405*550MM
N.W./G.W.
21/22.6KG
In the box
Power cord: x1
Handle: x2
Page 12

Focus – channel 9
BIT
Effect
Remarks
255
Dimmer 100%
……
……
0
Dimmer 0%
Pan– channel 10
Pan Fine– channel 11
Tilt– channel 12
Tilt Fine– channel 13
Macro function- channel 14
Can choose the pattern, repeat operation mode to self-propelled
self-propelled 1- 4
Reset– channel 15
Bit
Effect
Remarks
128-255
Complete Reset
Reset is activated
when it is in unused
range for 5 seconds.
77-127
Pan/Tilt Reset
26-76
Effects Reset
0-25
Unused Range
Lamp Control– channel 16
Bit
Effect
Remarks
101-255
Lamp On
Lamp switches on
when it is in unused
range for 5 seconds.
10-100
Lamp Off
0-9
Unused Range
Extended Speed Channel
Channel
Timing
Channel
Channel function
Remarks
Channel 17
Pan-Tilt time
Pan-Tilt-(Pan fine-Tilt
fine)
255 Slow
Speed
…… ……
0 Fast
Speed
Channel 18
Colour time
Colour wheel
Channel 19
Beam time
Dimmer-Prism-Frost
Channel 20
Gobo time
Static Gobo
Page 11
Touch Screen
The 2 buttons on top right corner used for Chinese/English
Language shift and Screen Rotation button.
4 buttons at the bottom of screen: Setting、Information、Manual
control button、Advanced button.
Settings Button:
Page 4
Option
Description
Running
mode DMX
Slave status: Receive DMX Singal
from control or master
Auto1
Auto2
Auto3
Auto 4
Up 8
Before painting to0
Forward vertical8
Forward sleep8
Random
Sound- Control
Master Status:Operate
automatically and send out DMX
signal to slaves
Note:If the lamp is extinguished
before, does not lighted
automatically.If you need to observe
the light effects, please light bulb
first,then go into automatic status.
DMX
address 1~512
Press “OK” button to go into edit
mode. Then press the button, the
channel value is incremented by the
1-512, press the key channel value
is decremented by the 512-1.Press
“OK” button to exit edit mode.
Channel
mode
Standard 16CH
From 17-Channel to 20-Channel
invalid
Extended20CH
From 17-Channel to 20-Channel
valid
X inverse
Off
On
Y inverse
Off

On
XY inverse
Off
On
Exchange function of X & Y (fine
adjustment include)
XY decoder
On
Rectify location by optical couple
Off
No rectification
No DMX Signal
Maintain
Runs by default status
Clear to Zero
Motor reset. stops running
Screen saver
On
Backlight turns off in 330 seconds
Off
Backlight always on
Auto on
Off
Lights are off
On
Automatically lights on
Linear change
color wheel
On
Off
Default Setings
Press “OK” button to see the
confirmation box, press “OK” button
again to restore default settings.
Manual Control Button:
This function is for lamp control. There is no DMX signal in or out.
Option
Description
Color wheel
0~255
Press "OK" button to enter the edit
mode. Then press the button, the
channel value is incremented by the
0-255, press the key channel value is
decremented by the 255-0.
……
0~255
Cut strobe light
0~255
Dimming
0~255
0~255
Gobo wheel speed
0~255
Prism
0~255
Prism rotation
0~255
Prism Focus
0~255
Atomization
0~255
Focusing
0~255
X-axis
0~255
X-axis fine-tuning
0~255
Y-axis
0~255
Y-axis fine-tuning
0~255
Marco Function
0~255
Reset
Pressing “OK” button, will bring up the
confirmation page. Press “OK” button
again, to reset motor.
Lamp controlling
On
Off
Page 5
90
Fast Rotation
85
Gobo 17
Number is always
multiples of 5
80
Gobo 16
75
Gobo 15
70
Gobo 14
65
Gobo 13
60
Gobo 12
55
Gobo 11
50
Gobo 10
45
Gobo 9
40
Gobo 8
35
Gobo 7
30
Gobo 6
25
Gobo 5
20
Gobo 4
15
Gobo 3
10
Gobo 2
5
Gobo 1
0
White
Prism Insertion - channel 5
Bit
Effect
Remarks
128-255
Prism Insertion
0-127
Prism Excluded
Prism Rotation - channel 6
Bit
Effect
Remarks
191-255
Prism Jitter(Gradually Fast)
130-190
Countra Rotation (Gradually
Fast)
64-129
Postive Rotation(Gradually Slow)
0-63
Angle Adjust
Effects Movement - channel 7(No used)
Frost – channel8
Bit
Effect
Remarks
128-255
Frost Inserted
0-127
Frost Excluded
Page 10

Static Gobo Change - channel 4
Bit
Effect
Remarks
255
Gobo 17 Shake, Fast Speed
5 figures correspond to a
pattern
……
……
251
Gobo 17 Shake, Slow Speed
250
Gobo 16 Shake, Fast Speed
……
……
246
Gobo 16 Shake, Slow Speed
……
……
180
Gobo 2 Shake, Fast Speed
……
……
176
Gobo 2Shake, Slow Speed
175
Gobo 1 Shake, Fast Speed
……
……
171
Gobo 1 Shake, Slow Speed
170
Fast Rotation
……
……
135
Slow Rotation
130-134
Stop
129
Slow Rotation
……
……
Page 9
System interface:
Option
Description
Software version
Present version
DMX channel
value monitoring
Display DMX value on screen
System error
records
If red ERR indicator light is on. That means there is
an error. Go to sub-menu to check error. After
checking. Press “OK” button to delete the error log.
4Total service
time
Accumulate service time
Present service
time
Accumulate present service time
Total bright
bubble time
The total time recorded several light bulbs
The bright
bubble time
Time recording this bright bulb
Channel
Channel Model
16
20
1
Colour Wheel
Colour Wheel
2
Stop/Strobe
Stop/Strobe
3
Dimmer
Dimmer
4
Static Gobo Change
Static Gobo Change
5
Prism Insertion
Prism Insertion
6
Prism Rotation
Prism Rotation
7
Effects Movement(Un
used)
Effects Movement(Un
used)
8
Frost
Frost
9
Focus
Focus
10
Pan
Pan
11
Pan Fine
Pan Fine
12
Tilt
Tilt
13
Tilt Fine
Tilt Fine
14
Marco Function
Marco Function
15
Reset
Reset
16
Lamp Control
Lamp Control
17
Pan-Tilt-Time
18
Colour Time
19
Dimmer –Prism-Frost time
20
Gobo Time
Page 6

Color Wheel -channel 1
Bit
Effect
Remarks
255
Fast Rotation
The color digits are always
a multiple of 5.
The color scale can be
adjusted, for example: If
digit is 5: 50% white,50%
red; if digit is 4: 60% white
and 40% red; If digit is 6:
40% white,60% red.
……
……
150
Slow Rotation
145
Amaranth +White
140
Amaranth
135
Light Yellow + Amaranth
130
Light Yellow
125
Clay Bank + Light Yellow
120
Clay Bank
115
Blue Green + Clay Bank
110
Blue Green
105
Fluorescence + Blue Green
100
Fluorescence
95
Dark Yellow + Fluorescence
90
Dark Yellow
Page 7
85
Brown + Dark Yellow
80
Brown
75
Light Blue Purple + Brown
70
Light Blue Purple
65
Gold Color + Light Blue Purple
60
Gold Color
55
Blue + Gold Color
50
Blue
45
Green + Blue
40
Green
35
Rose Red + Green
30
Rose Red
25
Yellow + Rose Red
20
Yellow
15
Red + Yellow
10
Red
5
White+ Red
0
White
Stop/Strobe–channel 2
Bit
Effect
Remarks
252-255
Open Light
Controlled by the
dimmer channel
213-251
Random Strobe(Gradually Fast)
208-212
Open Light
Controlled by the
dimmer channel
4-207
Strobe(Gradually Fast)
0-3
Close Light
Dimmer-channel 3
Bit
Effect
Remarks
255
100%
……
……
0
0%
Page 8

Static Gobo Change - channel 4
Bit
Effect
Remarks
255
Gobo 17 Shake, Fast Speed
5 figures correspond to a
pattern
……
……
251
Gobo 17 Shake, Slow Speed
250
Gobo 16 Shake, Fast Speed
……
……
246
Gobo 16 Shake, Slow Speed
……
……
180
Gobo 2 Shake, Fast Speed
……
……
176
Gobo 2Shake, Slow Speed
175
Gobo 1 Shake, Fast Speed
……
……
171
Gobo 1 Shake, Slow Speed
170
Fast Rotation
……
……
135
Slow Rotation
130-134
Stop
129
Slow Rotation
……
……
Page 9
System interface:
Option
Description
Software version
Present version
DMX channel
value monitoring
Display DMX value on screen
System error
records
If red ERR indicator light is on. That means there is
an error. Go to sub-menu to check error. After
checking. Press “OK” button to delete the error log.
4Total service
time
Accumulate service time
Present service
time
Accumulate present service time
Total bright
bubble time
The total time recorded several light bulbs
The bright
bubble time
Time recording this bright bulb
Channel
Channel Model
16
20
1
Colour Wheel
Colour Wheel
2
Stop/Strobe
Stop/Strobe
3
Dimmer
Dimmer
4
Static Gobo Change
Static Gobo Change
5
Prism Insertion
Prism Insertion
6
Prism Rotation
Prism Rotation
7
Effects Movement(Un
used)
Effects Movement(Un
used)
8
Frost
Frost
9
Focus
Focus
10
Pan
Pan
11
Pan Fine
Pan Fine
12
Tilt
Tilt
13
Tilt Fine
Tilt Fine
14
Marco Function
Marco Function
15
Reset
Reset
16
Lamp Control
Lamp Control
17
Pan-Tilt-Time
18
Colour Time
19
Dimmer –Prism-Frost time
20
Gobo Time
Page 6

On
XY inverse
Off
On
Exchange function of X & Y (fine
adjustment include)
XY decoder
On
Rectify location by optical couple
Off
No rectification
No DMX Signal
Maintain
Runs by default status
Clear to Zero
Motor reset. stops running
Screen saver
On
Backlight turns off in 330 seconds
Off
Backlight always on
Auto on
Off
Lights are off
On
Automatically lights on
Linear change
color wheel
On
Off
Default Setings
Press “OK” button to see the
confirmation box, press “OK” button
again to restore default settings.
Manual Control Button:
This function is for lamp control. There is no DMX signal in or out.
Option
Description
Color wheel
0~255
Press "OK" button to enter the edit
mode. Then press the button, the
channel value is incremented by the
0-255, press the key channel value is
decremented by the 255-0.
……
0~255
Cut strobe light
0~255
Dimming
0~255
0~255
Gobo wheel speed
0~255
Prism
0~255
Prism rotation
0~255
Prism Focus
0~255
Atomization
0~255
Focusing
0~255
X-axis
0~255
X-axis fine-tuning
0~255
Y-axis
0~255
Y-axis fine-tuning
0~255
Marco Function
0~255
Reset
Pressing “OK” button, will bring up the
confirmation page. Press “OK” button
again, to reset motor.
Lamp controlling
On
Off
Page 5
90
Fast Rotation
85
Gobo 17
Number is always
multiples of 5
80
Gobo 16
75
Gobo 15
70
Gobo 14
65
Gobo 13
60
Gobo 12
55
Gobo 11
50
Gobo 10
45
Gobo 9
40
Gobo 8
35
Gobo 7
30
Gobo 6
25
Gobo 5
20
Gobo 4
15
Gobo 3
10
Gobo 2
5
Gobo 1
0
White
Prism Insertion - channel 5
Bit
Effect
Remarks
128-255
Prism Insertion
0-127
Prism Excluded
Prism Rotation - channel 6
Bit
Effect
Remarks
191-255
Prism Jitter(Gradually Fast)
130-190
Countra Rotation (Gradually
Fast)
64-129
Postive Rotation(Gradually Slow)
0-63
Angle Adjust
Effects Movement - channel 7(No used)
Frost – channel8
Bit
Effect
Remarks
128-255
Frost Inserted
0-127
Frost Excluded
Page 10

Focus – channel 9
BIT
Effect
Remarks
255
Dimmer 100%
……
……
0
Dimmer 0%
Pan– channel 10
Pan Fine– channel 11
Tilt– channel 12
Tilt Fine– channel 13
Macro function- channel 14
Can choose the pattern, repeat operation mode to self-propelled
self-propelled 1- 4
Reset– channel 15
Bit
Effect
Remarks
128-255
Complete Reset
Reset is activated
when it is in unused
range for 5 seconds.
77-127
Pan/Tilt Reset
26-76
Effects Reset
0-25
Unused Range
Lamp Control– channel 16
Bit
Effect
Remarks
101-255
Lamp On
Lamp switches on
when it is in unused
range for 5 seconds.
10-100
Lamp Off
0-9
Unused Range
Extended Speed Channel
Channel
Timing
Channel
Channel function
Remarks
Channel 17
Pan-Tilt time
Pan-Tilt-(Pan fine-Tilt
fine)
255 Slow
Speed
…… ……
0 Fast
Speed
Channel 18
Colour time
Colour wheel
Channel 19
Beam time
Dimmer-Prism-Frost
Channel 20
Gobo time
Static Gobo
Page 11
Touch Screen
The 2 buttons on top right corner used for Chinese/English
Language shift and Screen Rotation button.
4 buttons at the bottom of screen: Setting、Information、Manual
control button、Advanced button.
Settings Button:
Page 4
Option
Description
Running
mode DMX
Slave status: Receive DMX Singal
from control or master
Auto1
Auto2
Auto3
Auto 4
Up 8
Before painting to0
Forward vertical8
Forward sleep8
Random
Sound- Control
Master Status:Operate
automatically and send out DMX
signal to slaves
Note:If the lamp is extinguished
before, does not lighted
automatically.If you need to observe
the light effects, please light bulb
first,then go into automatic status.
DMX
address 1~512
Press “OK” button to go into edit
mode. Then press the button, the
channel value is incremented by the
1-512, press the key channel value
is decremented by the 512-1.Press
“OK” button to exit edit mode.
Channel
mode
Standard 16CH
From 17-Channel to 20-Channel
invalid
Extended20CH
From 17-Channel to 20-Channel
valid
X inverse
Off
On
Y inverse
Off

Buttons Operation Instruction
“”、“” :Similar functions
To return to the previous interface.
“”、“”Button:
To slect、edit.
“OK”Button:
Operating function、go to edit、exit editing mode.
How to modify DMX Address:
1.Press " " button one or several times to go back to previous or main
page.
2.Press " "/" " button to highlight "Setting" button.
3.Press "OK" button to modify "Setting".
4.Press " "/" " button to highlight "DMX address".
5.Press "OK" button to go into "DMX address".
6.Press " "/" " button to modify "DMX address".
7.Press "OK" button to exit "DMX address" editing mode.
Page 3
Technical parameters
Model
Parameters
Model A Model B Model CModel D
Power
Power supply
100-240V/50-60HZ
Power
consumption
400W
Light Source
Lamp
230W
200W
Color
temperature
8000K
Average
Lifespan
2000 hour
Color/Pattern
Color
14 color + blank color
Gobo
17 fixed gobo + blank gobo
Prism
rotation 8-face prism, Bilateral rotation
Lens
high precision optical lens, with zoom
Focus
linear adjustment
Dimmer
0-100% linear dimmer
Scanning Angle
PAN
540°
TILT
270°
Operation
Control Mode
Auto / Sound/ DMX / Master-slave
DMX
16/20CH
Security & Package
Work
environment
Indoor: 0°C-40°C
Macro
functions
Reset/ lamp on or off can be controlled by controller;
Thermal shutdown circuit;Over-
current Protection
Circuit;
excellent ventilation and cooling effect by
vertical axis fan;Fixture and lamp usage time display;
Built-in analyzer for easy fault finding, error messages
Product Size
480*405*550MM
N.W./G.W.
21/22.6KG
In the box
Power cord: x1
Handle: x2
Page 12

Maintence
Optical components should be cleaned gently,Do not use disruptive
solvent, otherwise it will damage the plastic or coated surface.
1. After the power if off, cooled completely, then open the case.
2. Blowing machine with a vacuum cleaner or pressure blower, gently
blow away dust and floating objects.
3Use odorless paper or cotton cloth soaked with water or distilled water
to wipe particulate, do not rub surfaces, blow any floating object with a
pressurized gas.
4.Dip cotton of the alcohol or unscented tissue paper to remove dust
and residues, glass cleaner may also be used, but residues must be
removed with distilled water, to the circle on each side, wipe from the
Center, and then wiped dry with a soft cotton cloth.
5.Using a soft brush, cotton paper, air cleaners or stress on stomatal
and hair dryers that the dust from the fan out. Excessive dust, smoke
and damage caused by non-normal use, out of the scope of warranty.
Declare
The product is with good performance and complete package when it is
delivered. The end-user of this product should follow all the above
instructions and warnings. Any damage caused by misuse, malfunction
and problem caused by ignoring the instructions are not included in
the repair guarantees of the manufacturer or dealers.
Page 13
Inspection
In order to use the product securely and properly, please read the
manual before using and follow the instructions strictly to prevent
personal safety trouble and product damage caused by misuse.
Take care of the product, check the possibility of the product damage
caused by transportation and check all the listed items are present upon
receipt of the product:
Beam Moving Head 1 Use Manual 1
Power cable 1 Handle: 2
Installation
1. Make sure there is no flammable or explosive subjects within min 1.5
meter nearby the installation.
2.Before installation, please check and make sure the power supply
voltage meet request of the system.
3. Please check ventilation and fans or exhaust passages are cleared.
4. The equipment should be fixed firmly.
5. For security reasons, the appliance must be earthed.
Page 2

Beam Moving Head User Manual
(16 Channel/Mute Type)
Warnings:
This product is only suitable for professional use, and does not
apply to security for other purposes. After you got the lights, please
check the package whether have any damage caused by transportation.
If there is any damage, do not use this fixture, and please contact the
dealer or manufacturer as soon as possible.
This product is only suitable for indoor, IP20 protection class. Lamps
should be kept dry to avoid Moisture, overheating or dusty environment.
Prevent lamps come into contact with water or any other liquid. The use
of this product should pay attention to: fire, heat, electric shock,
ultraviolet radiation, the lamp to explode or Shedding caused serious or
fatal injury.
Need to read the instructions before use energized or installing.
Follow through the operation of security methods and pay attention to
the warning signs on the specification and equipment.
Please don't choose the item " factory default" , or all the data will
be missing, and the machine can use only by resetting.
Page 1
Beam Moving Head Light after service
Product warranty card
Please fill in the following content properly and keep it safe for
future maintenance. Accordingly, for your each purchase of our systems we have
archive Serial number and parameters for future reference.
Testing : warranty: non-warranty:
Mode:Serial No.:
Distributor
:
Address
:
Tel
:
About Product Warranty
1.Any product buy from our company (or authorized agent), which
used properly,and with this card, can have 1 year warranty for Lights,
mechanical parts, electronic parts. If out of the warranty situation,
we can provide the paid maintenance service.
2
.
The warranty is no longer valid in the following situations:
* Warranty cards and products have no serial numbers.。
* Product is damaged or show significant signs of self-disassembly.
*Any unauthorized modification (removal or replacement)
made to product or it’s components.
*Improper or excessive use of inappropriate repairs which result
in a repair failure or injury。
* Did not follow instructions or use in an environment not suitable
for product..
*Product damage caused by strong impact
*The warranty cannot be extended if the product as been serviced
*Light Source normal degradation
*Warranty card must be filled out with receipt of purchasing in order
for the warranty to be valid.
*Product is damaged due to abnormal voltage or caused by
other accidents (ex. Natural disasters).
3
.
The Company reserves the right to interpret the provisions above.
The content of these articles is subject to change without notice!
Table of contents
Other BETOPPER Light Fixture manuals
