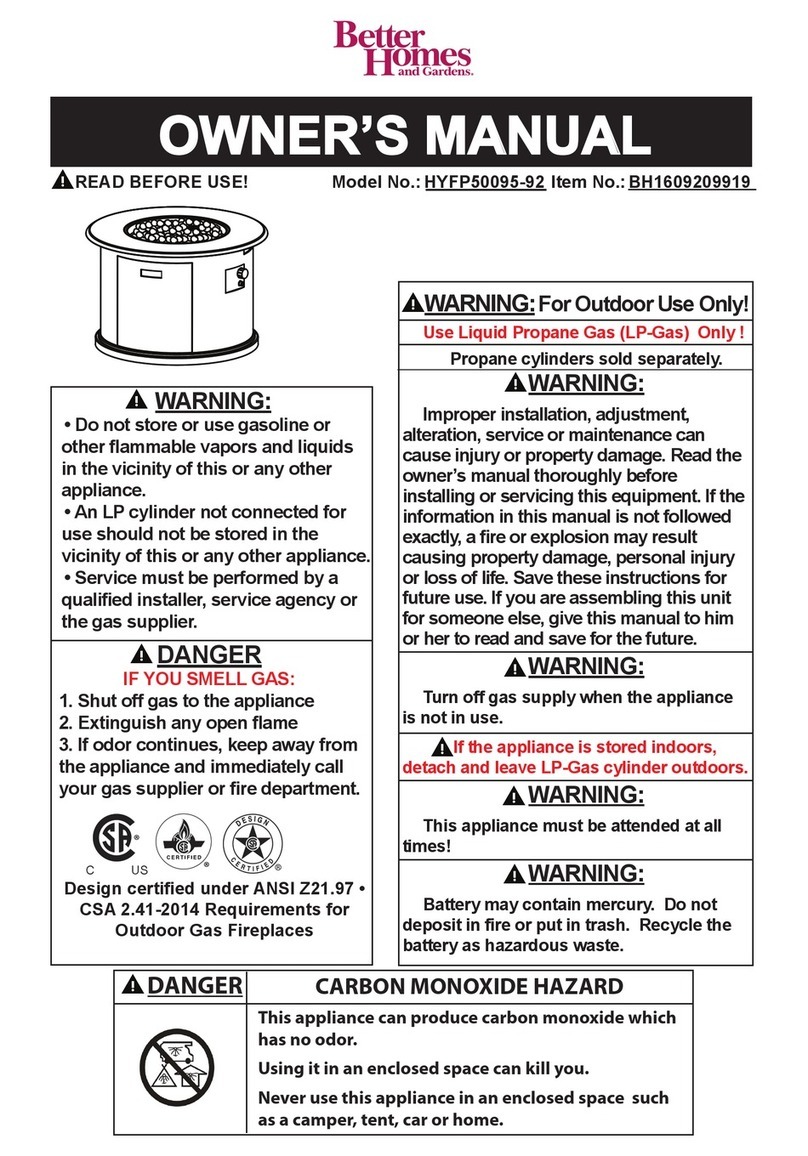
better homes HYFP50095-96 User manual

WARNING
Improper installation, adjustment, alteration, service or maintenance can cause injury or
property damage. Read the owner’s manual thoroughly before installing or servicing this
equipment. If the information in this manual is not followed exactly, a re or explosion may
result causing property damage, personal injury or loss of life.
Save these instructions for future use. If you are
assembling this unit for someone else, give this
manual to him or her and read and save for the
future.
DANGER
WARNING
WARNING
If you smell gas:
1. Shut off gas to the appliance.
2. Extinguish any open ame.
3. If odor continues, keep away from
the appliance and immediately call
your gas supplier or re department.
Do not store or use gasoline or other
ammable vapors and liquids in the
vicinity of this or any other appliance.
An LP-cylinder not connected for use
shall not be stored in the vicinity of
this or any other appliance.
For outdoor use only.
Owner’s Manual
-PIECE SLAT BACK GAS FIRE PIT SET - FIRE PIT
Item# BH1609209917
Model# HYFP50095-96
5

WARNING
Before you assemble or operate this unit, please carefully read this entire manual. Failure to do so
may result in a re, explosion, injury or death.
SAFETY INFORMATION
• The installation of this unit must adhere to local codes or either the National Fuel Gas Code, ANSI
Z223. 1/NFPA54, OR CAN/CGA-B149.1, National Gas and Propane Installation Code.
• THIS UNIT IS INTENDED FOR OUTDOOR USE ONLY! This product shall be used outdoors, in a
ventilated space and shall not be used in any enclosed area.
• This unit is to be used with propane gas only! (sold separately)
• Do not attach a remote gas supply to this unit.
• Only use propane gas for this unit.
• This unit is not intended for natural gas.
• Converting this unit to natural gas is dangerous and not recommended. The conversion of this unit
will void the manufacturer warranty.
• Do not use any solid fuel or charcoal for this unit.
• When igniting this unit, stay away from the burner as the ame will light up and may cause injury.
• LP GAS WARNING: Do not use any more than 1/4in depth lava rocks/pumice stones/LavaGlass™
above the burner holes. Doing so will suffocate the ame.
• If the propane gas tank is leaking gas, you may hear, see, or smell a hiss. Do the following:
1. Disconnect the propane gas tank. 2. Do not attempt to x the problem yourself. 3. Contact your gas
supplier or re department for help.
• Applying too much propane may result in gas pooling and will not burn. Allow fresh air into the unit
so that the remaining gas may escape.
• Do not use a ame to check for gas leaks.
• The max. inlet supply pressure: max. Gas supply 11 in w.c. (2.74kPa)
•
• You must use a propane tank that has a collar to protect the gas valve.
• DO NOT ll tank over 80 percent full.
• The tank system must be set up for vapor withdrawal.
• Discontinue use if any part of the propane tank is damaged. Rust and dents may be hazardous and
should be inspected by a gas supplier.
• Do not burn anything other than the provided materials for this re table.
• Keep away from the unit for the rst 20 minutes after igniting your unit for the rst time, as lava
rocks/pumice stones/LavaGlass™ could pop out and cause injury. Should any rocks pop out, discard
them.
• Always ensure that lava rocks/pumice stones/LavaGlass™are completely dry before use. Failure to
do so will cause them to crack or pop.
• Do not operate unit until all parts are fully assembled.
• Do not paint or color any part of this heating unit.
• Unit may be hot while in use, do not attempt to move it while in use.
• Never leave this heating unit unattended while in use.
• This unit is not intended for cooking.
• Keep any ammable items away and do not use any other replace cover for this unit.
• Keep a safe distance to avoid burning skin or clothing.
• Do not sit or rest hands or feet on this heating unit.
• Never place hands or ngers on upper portion of this unit while in use.
• Keep all electrical cords and fuel supply hose away from heated surfaces.
Use LP propane tanks with the following dimensions: diameter 12 in, height 18 in - capacity 20 lbs.
SAFETY INFORMATION
Page 2

1-866-771-2663 | Page 3
• Combustible material should not be within 72 inches of the top of the unit, or within 48 inches
around the entire unit.
• Keep the appliance area clear and free from combustible material, gasoline and other ammable
vapors and liquids.
• If the ame goes out while burning, turn the gas valve off. Wait 5 minutes before repeating the initial
lighting procedure. Once you have a ame started, hold down the control knob for 1 minute.
• Do not add water into the unit.
• Do not operate unit if any part has been under water. Immediately call a qualified service
technician to inspect the appliance and replace any part of the control system and any gas
control that has been under water.
• Do not disconnect any part while unit is in use.
• Do not store a spare propane tank on or near this unit.
• If the heating unit is indoors, detach the propane tank and leave outdoors.
• Do not operate on a boat or vehicle. This unit must be used on a at surface and outdoors ONLY.
• Always remove protective cover before operating (if applicable).
• Do not set the protective cover over the unit until it is turned off and completely cooled down.
• Check for leaks after not using the unit for long periods of time.
• Children should never operate this unit. Children must be supervised while near this unit.
• Keep gas tank at least 5 feet away from unit when lit. (if external tank)
• The maximum gas supply pressure is 250psi.
• All installation and repair should be done by a qualied professional. This unit should be
inspected annually and cleaned regularly.
• Inspect all elements of this heating unit before each use. If there is damage, the burner must be
replaced.
• Keep the hose out from any pathways to eliminate any accidental damage. (if external tank)
• Be aware of the hazards of high temperatures and stay away from the unit to avoid any burns or
injury.
• The gas supply tank should be constructed and marked with the specications for the LP gas tanks
of the U.S. Department of Transportation or the National Standard of Canada CAN/CSA-B339, LP gas
tanks, spheres and tubes for Transportation of Dangerous Goods; and Commission.
• The LP gas tank must have a listed overlling prevention device and a QCCI or Type I, (CGA810) LP
gas tank connection.
• This heating appliance should not be used on plastic or articial wood desks.
• Children and adults should be alerted to the hazards of high surface temperatures and should
stay away to avoid burns or clothing ignition.
• Young children should be carefully supervised when they are in the area of the appliance.
• Clothing or other ammable materials should not be hung from the appliance or placed on or
near the appliance.
• Any guard or other protective device removed for servicing the appliance shall be replaced
prior to operating the appliance.
• Installation and repair should be done by a qualied service person. The appliance should be
inspected before use and at least annually by a qualied service person. More frequent cleaning
may be required as necessary. It is imperative that the control compartment, burners and
circulating airways of the appliance are kept clean.
IF APPLICABLE:
• Allow heating item to cool completely before placing on lid.
• DO NOT use heating item while lid is installed. Always remove the lid while heating item is in use.
• DO NOT use heating item while lid is installed. Always remove the lid while heating item is in use.

Page 4
SAFETY INFORMATION
Only use the regulator and hose assembly provided with this unit. Replacement parts must be supplied
directly by Bond Manufacturing Co.
Inspect the burner before use of this unit. If the burner shows any kind of damage, do not operate
the appliance. For assistance with repair or replacement of the burner or any other parts, calls Bond
Manufacturing at 1.866.771.2663.
NOTE: You must follow all steps to properly assemble this heating item. Make sure the gas
valve is turned “OFF” before assembling. Do NOT attempt to assemble without proper tools.
Min. Clearance
48 in (121.9 cm)
Min. Clearance
48 in (121.9 cm)
Min. Clearance
48 in (121.9 cm)
Min. Clearance
48 in (121.9 cm)
Combustible materials should not be within 72
inches of the top of the unit, or within 48 inches
around the entire unit.

1-866-771-2663 | Page 5
CONTENTS
CONTENTS
A
B
C
DE
F
G
H
I
Item Description Qty
A Firebowl 1
B Body 1
C Door 1
D Burner 1
E Guard 1
F Lava Rocks 2 boxes
G Protective Cover 1
H Battery 1
I Control Knob (preassembled) 1
J Electronic Igniter (preassembled) 1
J

Page 6
ASSEMBLY INSTRUCTIONS
1. Check that the control knob (I) for the gas
supply system is turned to the “OFF” position
before starting any assembly.
2. Remove door from body (B) and place propane
gas tank (not included) into the metal stand inside
of the body (B).
CYLINDER VALVE
PRESSURE
RELIEF VALVE
BLEED-OFF
VALVE
BLACK COUPLING NUT
REGULATOR
turn clockwise to connect
turn clockwise
to reseal
3. Turn the cylinder valve on the tank
clockwise to close the propane tank.
Attach the preassembled regulator
from the body (B) to the cylinder valve
by turning the regulator coupling nut
clockwise. Make sure it is fastened
securely and tighten connections by hand
only.
B
ASSEMBLY INSTRUCTIONS
I

1-866-771-2663 | Page 7
B
C
4. Once the tank is attached to the regulator,
make sure the propane gas tank sits on the
metal stand inside body (B) completely. Turn the
preassembled wing screw on the outer part of
metal stand clockwise to secure the propane gas
tank tightly.
6. Remove the rubber cap on the electronic ignitor
(J) by unscrewing and slide battery (H) into the
battery slot. Make sure the positive side of the
battery faces outwards. Screw the electronic
ignitor cap (J) over the battery tightly.
5. Replace door (C) onto the body (B).
B
J
H

Page 8
ASSEMBLY INSTRUCTIONS
7. Pour the lava rocks (F) into the rebowl (A).
To ensure proper function, the screen (E) on this
burner (D) should be free of lava rocks at all times.
WARNING
A
F

1-866-771-2663 | Page 9
To Light
To Extinguish
Before performing a leak test, be sure that no sparks can occur and you are in a spacious outdoor
area. Connect the propane gas tank to the regulator and turn the valve on the unit to the “off”
position. Brush a soap and water mixture on all connections. Turn the gas supply on; if bubbles
occur on any connection there may be a leak. If you smell gas or a leak is discovered turn the
gas valve off, disconnect propane gas tank and do not use the appliance until the leak is
repaired.
Do not use the heating unit without inspecting the gas hose. If there are signs of wear or abrasion
you must replace the hose (if applicable). If there are signs of wear or abrasion you must replace the
hose. Pumice stones/lava rocks/LavaGlass™could pop up and strike somebody’s face during the
process of lighting this unit; stand away from the unit for the rst 20 minutes after igniting. Flame
height should be a yellow/blue color between 2 - 10 inches in height.
Wait 5 minutes after extinguishing ame prior to placing a lid (if applicable) or protective cover on
heating item.
1. Make sure the control knob (I) is in the “off” position.
2. Remove door (C) and slowly open the valve on the propane gas tank by turning the knob
counterclockwise.
3. Replace the door (C) on the body (B).
4. Push and hold in the electronic ignitor (J) to create sparks within the electrode, continue to hold.
5. Push in the control knob (I) and turn to the “low” position. Keep holding down the control knob (I)
to allow gas to ow for 15 seconds.
6. If ignition doesn’t occur within a few seconds release the control knob (I) and rotate to the “OFF”
position. Wait for 5 minutes for gas to clear and then repeat the above lighting instructions.
7. Once the re product is lit, the ame intensity may be controlled by turning the control knob (I)
between the “low” and “high” positions.
1. Turn control knob (I) clockwise to the “low” position; let the knob pop up and continue turning the
control knob (I) to the “off” position.
2. Close the cylinder valve on the propane gas tank if you don’t intend to use it for a long time.
OPERATION

Page 10
MAINTENANCE
•Before performing any maintenance always disconnect propane gas tank.
•Keep the heating item free and clear from combustible materials.
•Visually inspect burner for obstructions and keep tank enclosure free and clear from debris.
•Use a soft brush to get rid of the mild stains, loose dirt and soil after the burner and pumice stones/
lava rocks/LavaGlass™ are completely cooled down. Wipe down with a soft cloth.
•Harsh weather conditions may cause stubborn stains, discoloration and possibly rust pitting.
•Permanent damage may occur if powder or solvent comes in contact with painted or plastic
components on this heating unit.
•Keep the heating unit stored away from direct sunlight.
•If storing this unit inside, disconnect the propane gas tank from the gas valve.
•Not using manufacturer approved or supplied parts/accessories may result in a defective condition
and void the warranty of this heating unit.
•Always place lid (if applicable) or protective cover on heating item when not in use.
Envirostone™Surface Care
Our Envirostone™ material has been sealed with a patented treatment to prevent staining and
moisture absorption, but it does require proper maintenance to ensure the integrity of the surface.
Please see below for recommendations on maintaining your Envirostone™ surface for years of
pleasure:
• Clean any spills immediately to prevent permanent Envirostone™ surface staining or damage.
Blot any liquid spills with a clean, dry cloth to avoid spreading of the spill to the rest of the table.
Clean your Envirostone™ surface with a soft, clean cloth or sponge. Mix a solution of warm clean
water and mild dish soap to remove any surface dirt or mild spills. Rinse all soap solution off of the
tabletop and dry completely to avoid water spots. Regularly cleaning the Envirostone™ surface will
aid in a longer lasting product.
• Do not use petroleum-based or abrasive cleaning products. Do not use any harsh brushes when
cleaning the Envirostone™ surface.
• Do not slide products across the Envirostone™ surface to avoid permanent scratching and
damage.
• Always use protective mats such as coasters or placemats when eating on an Envirostone™
surface. These protective products will help absorb sweating on cool beverages and will block
out any heat rings from appearing beneath a warm mug or plate. When placing hot dishes on an
Envirostone™ surface, always use mats or hot pads.
• Envirostone™ surface must be covered at all times when not in use. Cover your product with an
outdoor furniture cover when not in use to protect it from the elements. Store your product indoors
during winter months. Avoiding extreme cold temperatures will prevent cracking of the tabletop.

1-866-771-2663 | Page 11
TROUBLESHOOTING
Problem Cause Solution
Igniter pin and burner are wet Dry off with a soft cloth
Igniter battery is incorrectly inserted Check which direction the battery is
inserted
Igniter pin is broken Contact Bond Manufacturing for a
replacement part
Electrode wire is loose or disconnected Reconnect wire to the igniter box located
inside the table behind the igniter box
Electrode wire is shorting between valve
and igniter pin
Contact Bond Manufacturing for a re-
placement part
No gas flow Check that the gas tank isn’t empty
Regulator isn’t connected securely to the
tank
Tighten regulator connection to the gas
tank
Gas flow is obstructed Check all hoses for kinks and bends
Burner ports are clogged Turn all gas flow connections off. Insert
an opened paperclip (or similar item) into
each of the burner ports to clear them
out.
Flame is obstructed at burner ports Check that all burner ports are free of any
small lava rocks/pumice stones/Lava-
Glass™ pieces
Regulator hose is kinked Straighten hose of all bends or kinks
No gas flow Check that the gas tank isn’t empty
Excess flow safety valve has been
activated
Turn the control knob to the ‘off’ posi-
tion. Close the tank valve and disconnect
propane gas tank. Turn the control knob
to ‘high’; wait 1 minute. Turn the control
knob back to the ‘off’ position. Recon-
nect propane gas tank. Light the fire unit
as indicated in the ‘To Light’ section of
this manual.
High or gusting winds Increase flame to ‘high’
No gas flow Check that the gas tank isn’t empty
Excess flow safety valve has been
activated
See ‘sudden drop in gas flow’ above
Heating unit won’t light
Burner won’t light
while using a match
Heating unit emits a lot
of black smoke
Sudden drop in gas
flow
Flame blows out easily

Page 12
WARRANTY
If you have any questions or concerns, please contact Bond Manufacturing Company at the below
resources:
CONTACT
Toll Free Phone 1-866-771-BOND (2663) | Monday - Friday, 8am - 4:30pm PST
Email customer[email protected]
Online www.bondmfg.com
The manufacturer warranty will be voided by, and manufacturer disclaims any responsibility for, the
following actions:
•Modication of the unit and/or components including the gas valve assembly.
•Use of any component part not manufactured or approved by Bond Manufacturing.
•Use and installation other than what is listed in this manual.
Please contact the manufacturer for replacement parts.

PELIGRO PELIGRO DE MONÓXIDO DE CARBONO
Este electrodoméstico puede producir
monóxido de carbono, el cual no produce
olor. Su uso en espacios cerrados puede
ser fatal. Nunca use este electrodoméstico
en un espacio cerrado, como dentro de
remolques, carpas, automóviles o casas.
Guarde estas instrucciones para uso futuro. Si
está montando esta unidad para otra persona,
dar a este manual para él o ella y leer y ahorrar
para el futuro.
Una instalación, ajuste, alteración, servicio o mantenimiento indebido puede causar daño corporal o de propiedad. Lea
atentamente el manual del usuario antes de instalar o hacerle cualquier tipo de mantenimiento a este equipo. Si no se sigue
la información de este manual exactamente al pie de la letra, un incendio o una explosión puede resultar causando daño de
propiedad, daño corporal o muerte.
PELIGRO
ADVERTENCIA
ADVERTENCIA
ADVERTENCIA
Si percibe olor a gas:
1. Cierre el suministro de gas hacia el
electrodoméstico.
2. Apague cualquier llama expuesta.
3. Si el olor persiste, manténgase
alejado del electrodoméstico y llame
de inmediato a su proveedor de gas o
al departamento de bomberos.
No almacene, ni use gasolina
ni otros vapores o líquidos
inamables cerca de este ni de
ningún otro electrodoméstico.
No deben almacenarse cilindros
de gas propano líquido que no
estén conectados para utilizarse
cerca de este ni de ningún otro
electrodoméstico.
Solo para uso en exteriores.
No. de artículo BH1609209917
No. de modelo HYFP50095-96
Manual del Usuario
JUEGO DE CHIMENEA PARA EXTERIORES DE GAS CON RESPALDOS DE LISTóN
5 PIEZAS -CHIMENEA PARA EXTERIORES

Page 14
• La instalación de este aparato debe cumplir con los códigos locales o con el Código Nacional de
Gas Combustible, ANSI Z223.1/NFPA 54, o CAN/CGA-B149.1, Código Nacional de Instalación de Gas
y Propano.
• ¡ESTE APARATO ESTÁ DISEÑADO ÚNICAMENTE PARA EL USO EN EXTERIORES! Este producto
debe utilizarse al aire libre, en un espacio ventilado, y no debe utilizarse en cualquier área cerrada.
• ¡Se debe utilizar este aparato únicamente con el gas propano! (en venta por separado)
• No conecte un suministro de gas remoto a este aparato.
• Utilice únicamente el gas propano con este aparato.
• Este aparato no está diseñado para el gas natural.
• La conversión de este aparato a gas natural es peligrosa y no se recomienda. La conversión de este
aparato anulará la garantía del fabricante.
• No utilice cualquier combustible sólido o carbón en este aparato.
• Durante el encendido de este aparato, aléjese del quemador, porque la llama se encenderá y puede
provocar lesiones.
• ADVERTENCIA DEL GAS LP: No supere una profundidad de 6.3 mm (1/4 pulg.) de rocas de lava/
piedras pómez/Lava Glass™en los oricios del quemador. El hacerlo sofocará la llama.
• Si una fuga en el tanque de gas propano está presente, es posible que escuche, vea o huela
un silbido. Haga lo siguiente: 1. Desconecte el tanque de gas propano. 2. No intente solucionar el
problema usted mismo. 3. Póngase en contacto con su proveedor de gas o el departamento de
bomberos para obtener ayuda.
• Aplicar demasiado propano puede provocar una accumulación de gas, lo cual no quemará. Permita
la entrada de aire fresco en el aparato para que el gas restante pueda ecaparse.
• No utilice una llama para vericar que no haya fugas de gas.
• La presión máxima de suministro: Presión max. de entrada 279 mm (11 pulg.) C.A. (2.74 kPa).
• Utilice tanques de propano LP con las dimensiones siguientes: diámetro de 30.5 cm (12 pulg.),
• Hay que utilizar un tanque de propano con un cuello para proteger la válvula del tanque.
• NO llene el tanque a un nivel más de 80%.
• El sistema de suministro del tanque debe estar diseñado para la extracción de vapor.
• Descontinúe el uso si una parte del tanque de propano está dañada. La corrosión y las abolladuras
pueden ser peligrosas y se deben revisar por un proveedor de gas.
• No queme otra cosa que los materiales proporcionados para esta mesa con chimenea.
• Aléjese del aparato durante los 20 primeros minutos después del encendido por primera vez, porque
las rocas de lava/ piedras pómez/Lava Glass™podrían saltar y provocar lesiones. Si algunas piedras
saltan afuera, deséchelos.
• Siempre asegúrese de que las rocas de lava/ piedras pómez/Lava Glass™estén completamente
secas antes del uso. El no hacerlo puede rajarlas o hacer que salten.
• No utilice el aparato hasta que todas las piezas estén completamente montadas.
• No pinte ni coloree ninguna parte de este aparato de calefacción.
• El aparato puede estar caliente al usarlo; no intente moverlo mientras esté en uso.
• Nunca deje este aparato de calefacción sin vigilancia durante el uso.
• Este aparato no está diseñado para cocinar.
• Mantenga los artículos inamables lejos y no utilice otra funda de chimenea para este aparato.
ADVERTENCIA
Antes de montar o de utilizar este aparato, lea todo este manual detenidamente. El no hacerlo puede
causar un incendio, una explosión, una herida o la muerte.
altura de 45.7 cm (18 pulg.) - capacidad de 20 libras.
INFORMACIÓN DE SEGURIDAD

1-866-771-2663 | Page 15
• Manténgase a una distancia segura para evitar la quema de la piel o de la ropa.
• No se siente ni descanse las manos o los pies en este aparato de calefacción.
• Nunca ponga las manos o los dedos en la parte superior de este aparato durante el uso.
• Mantenga los cables eléctricos y la manguera de suministro de gas alejados de supercies
calentadas.
• Materiales combustibles deberían situarse a una distancia mínima de 1.83 m (72 pulg.) de la parte
superior del aparato, o de 1.21 m (48 pulg.) alrededor del aparato entero.
• Mantenga el área del aparato despejada y libre de materiales combustibles , gasolina y otros
vapores y líquidos inamables.
• Si la llama se apaga al quemar, apague la válvula de gas. Espere 5 minutos antes de repetir el
proceso inicial de encendido. Una vez una llama se produce, mantenga oprimido el botón de control
durante un minuto.
• No eche agua al aparato.
• No utilice este aparato si cualquier parte ha sido sumergida en agua. Llame de inmediato a un técnico
en mantenimiento calificado a fin de que inspeccione el electrodoméstico y reemplace cualquier pieza
• No desconecte ninguna pieza durante el uso del aparato.
• No almacene un tanque de propano de recambio encima o cerca de este aparato.
• Si el aparato de calefacción está en interiores, desconecte el tanque de propano y déjelo afuera.
• No utilice este aparato en un vehículo o barco. Hay que utilizar este aparato ÚNICAMENTE en
terreno plano afuera.
• Retire siempre la funda protectora antes del uso (si procede).
• No ponga la funda protectora sobre el aparato hasta que esté apagado y completamente enfriado.
• Realice un ensayo de fugas después de períodos largos sin uso.
• Los niños nunca deben usar este aparato. Se debe vigilar a los niños cuando están cerca de
este aparato.
• Mantenga el tanque de gas a una distancia mínima de 1.5 m (5 pies) del aparato cuando está
encendido. (para un tanque externo)
• La presión máxima de suministro de gas es 250 psi.
• La instalación y los arreglos se deben efectuar solamente por un técnico de servicio
calicado. Se debe revisar este aparato una vez al año y limpiarlo regularmente.
• Revise todos los elementos de este aparato de calefacción antes de cada uso. Si hay daño, hay que
reemplazar el quemador.
• Coloque la manguera fuera de senderos para eliminar daños accidentales. (para un tanque externo)
• Tenga en cuenta los peligros de temperaturas elevadas y manténgase fuera del aparato para evitar
quemaduras o lesiones.
• El tanque de propano debe ser fabricado y marcado según las especicaciones para tanques de
gas LP del U.S. Department of Transportación (DOT) o de la Norma nacional de Canadá, CAN/CSA-B
339, Cilindros de gas, esferas y tubos para el transporte de mercancias peligrosas; y comisión.
• El tanque de gas LP debe tener un dispositivo homologado de protección contra el sobrellenado y
una conexión QCCI o de Tipo 1 (CGA810) para tanque de gas LP.
• No se debe utilizar este aparato de calefacción sobre escritorios de plástico o de madera articial.
• Los niños y los adultos deben mantenerse alertas a los peligros de las temperaturas altas de
supercie y mantener una distancia prudente para evitar quemaduras o incendio de ropa.
• Se debe vigilar con mucho cuidado a los niños pequeños cuando están cerca al aparato.
• No se debe colgar ropa u otros materiales inamables del aparato ni puestos encima o cerca
del aparato.
• Se debe reemplazar cualquier dispositvo de protección que se haya quitado para el servicio
del aparato antes de usarlo.
del sistema de control y cualquier control de gas que haya estado bajo agua.

Page 16
• La instalación y los arreglos se deben efectuar solamente por una persona de servicio
titulada. Se debe revisar el aparato antes de usarlo y por lo menos una vez al año por una
persona de servicio titulada. Puede requerirse limpieza frecuente. Es imperativo que el
compartimiento de control, quemadores y pasajes de circulación de aire del aparto se mantegan
limpios
SI PROCEDE:
• Deje que se enfríe completamente el aparato de calefacción antes de poner la funda.
• NO utilice el aparato de calefacción cuando la funda está instalada. Retire siempre la funda cuando
el aparato de calefacción se usa.
Utilice únicamente el regulador y el ensamblaje de manguera provistos con este aparato. Las piezas de
repuesto deben ser proporcionadas directamente por Bond Manufacturing Co.
Revise el quemador antes del uso de este aparato. Si el quemador presenta daños de cualquier tipo,
no utilice el aparato. Para obtener ayuda con la reparación o el reemplazo del quemador o de cualquier
otra pieza, comuniquése con Bond Manufacturing al 1.866.771.2663.
NOTA: Tiene que seguir todos los pasos para montar correctamente este aparato de
calefacción. Asegúrese de que la válvula de gas esté en la posición ‘OFF’ antes del montaje. NO
intente montarlo sin las herramientas adecuadas.
Espacio Libre Min.
121.9 cm (48 pulg)
Espacio Libre Min.
121.9 cm (48 pulg)
Espacio Libre Min.
121.9 cm (48 pulg)
Espacio Libre Min.
121.9 cm (48 pulg)
Materiales combustibles deberían situarse a
una distancia mínima de 1.83 m (72 pulg.) de la
parte superior del aparato, o de 1.21 m (48 pulg.)
alrededor del aparato entero.
INFORMACIÓN DE SEGURIDAD

1-866-771-2663 | Page 17
Artículo Descripción Cant.
A Chimenea 1
B Cuerpo 1
C Puerta 1
D Quemador 1
E Dispositivo de seguridad 1
F Rocas de lava 2 cajas
G Funda protectora 1
H Pila 1
I Botón de control (premontado) 1
J Encendedor eléctrico (premontado) 1
CONTENIDO
A
B
C
DE
F
G
H
I
J

Page 18
1. Verique que el botón de control (I) para el
sistema de suministro de gas esté en la posición
‘OFF’ antes de empezar cualquier montaje.
2. Retire la puerta del cuerpo (B) y coloque el
tanque de gas (no incluido) en el soporte de metal
adentro del cuerpo (B).
3. Gire la válvula del tanque en sentido
horario para cerrar el tanque de propano.
Conecte el regulador premontado del
cuerpo (B) a la válvula girando la tuerca
de acoplamiento del regulador en sentido
horario. Asegúrese de que esté bien
jado y apriete las conexiones a mano
solamente.
VÁLVULA DE TANQUE
VÁLVULA DE
DESCARGA
VÁLVULA
DE PURGA
TUERCA DE CONEXIÓN NEGRA
REGULADOR
gire en sentido horario para conectar
gire en sentido
horario para volver
a cerrarla
I
INSTRUCCIONES DE MONTAJE
B

1-866-771-2663 | Page 19
B
J
H
4. Una vez el tanque jado al regulador, asegúrese
de que el tanque de gas quede rmemente en
el soporte de metal dentro del cuerpo (B). Gire
el tornillo de mariposa al exterior del soporte de
metal en sentido horario para bien jar el tanque
de gas propano.
6. Retire el capuchón de goma del encendedor
eléctrico (J) destornillándolo y deslice la pila (H)
en el compartimiento de la pila. Asegúrese de que
el lado positivo de la pila esté hacia el exterior.
Enrosque bien el capuchón del encendedor
eléctrico (J) sobre la pila.
5. Vuelva a colocar la puerta (C) en el cuerpo (B).
B
C

Page 20
7. Vierta las rocas de lava (F) en la chimenea (A).
Para asegurar un funcionamiento adecuado, la
pantalla (E) de este quemador (D) debe estar libre
de rocas de lava en todo momento.
ADVERTENCIA
A
F
Table of contents
Languages:
Other better homes Outdoor Fireplace manuals
Popular Outdoor Fireplace manuals by other brands

Blumfeldt
Blumfeldt Isaris manual

HAPPATIO
HAPPATIO HPO-HPZ-M-H owner's manual

Firegear
Firegear FPB-G25RBSTMS-N Installation and operating instructions

Firegear
Firegear LOF-2412HTPSI-N Installation and operating instructions
Four Seasons Courtyard
Four Seasons Courtyard 99000 Assembly instructions

Landmann
Landmann 26765 Assembly and use instructions

EAST OAK
EAST OAK MT28BK1 owner's manual
Mayer Barbecue
Mayer Barbecue HEIZA MFS-420 Assembly instructions

ADURO
ADURO Fire Ball user manual
MaxxGarden
MaxxGarden 21014 instruction manual

Aura
Aura 450 Assembly, Safety & Operating Instructions
Regency Fireplace Products
Regency Fireplace Products Plateau PTO50-NG11 Owners & installation manual
