Beurer HK 62 Mobil User manual

HK 62 Mobil
BEURER GmbH • Söinger Str. 218 • 89077 Ulm (Germany)
Tel.: +49 (0)731 / 39 89-144 • Fax: +49 (0)731 / 39 89-255
www.beurer.de • Mail: [email protected]
D
Akku-Heizkissen
Gebrauchsanleitung
G
Battery-Operated Heating Pad
Instruction for Use
F
Coussin chauffant à piles
Mode d´emploi
E
Almohada eléctrica con
acumulador
Instrucciones para el uso
I
Termocuscino a batteria
Instruzioni per l´uso
T
Akülü ısı yastığı
Kullanma Talimatı
o
Аккумуляторная
электрогрелка
Инструкция по применению
Q
Poduszka elektryczna z
akumulatorem
Instrukcja obsługi
RUS

2
Объяснение условных
знаков на этикетке
Оглавление
Hinweise lesen!
Read instructions!
Lire les instructions!
¡Leer las instrucciones!
Leggere le avvertenze!
Açıklamaları Okuyunuz!
Читайте указания по применению!
Czytać wskazówki!
Nicht gefaltet oder zusammenge-
schoben gebrauchen!
Do not use when folded or creased!
Ne pas utiliser plié ou comprimé!
No utilizar estando plegado o
arrugado!
¡Non utilizzare ripiegato né accar-
tocciato!
Katlanmış veya kırıştırılmış olarak
kullanmayınız!
Не использовать в сложенном или
не расправленном состоянии!
Nie używać po sfałdowaniu lub po
zsunięciu!
Keine Nadeln hineinstechen!
Do not pierce with needles!
Ne pas enfoncer une aiguille!
¡No pinchar con agujas!
Non perforare con aghi!
İğne batırmayınız!
Не втыкать иголок!
Nie wbijać igieł!
D
Deutsch Seite 4-9
G
English Page 10-15
F
Français Page 15-20
E
Español Página 20-26
I
Italiano Pagina 26-31
T
Türkçe Sayfa 32-37
o
РУССКИЙ Стр 37-42
Q
Polski Strona 42-47
RUS

3
Die bei diesem Gerät eingesetzten
Textilien erfüllen die hohen hu-
manökologischen Anforderungen
des Öko-Tex Standards 100, wie
durch das Forschungsinstitut Zürich
nachgewiesen.
The textiles used for this device
meet the stringent human ecolo-
gical requirements of Oeko Tex
Standard 100, as veried by Zürich
Research Institute.
Les textiles employés sur cet
appareil ont subi le contrôle des
matières indésirables du point de
vue de l‘écologie humaine et ont
reçu le label Öko-Tex Standards
100, certié par l’institut de recher-
che Zürich.
Los textiles utilizados en el presente
aparato cumplen con los estrictos
requerimientos humanoecológicos
de las normas Ecotest 100, hecho
comprobado por el Instituto de
Investigación de Zürich.
I tessuti utilizzati in questo apparec-
chio soddisfano le esigenze umano-
ecologiche di Öko-Tex Standard
100 come certicato dall’istituto di
ricerca Zürich.
Bu cihazda kullan lm p tekstiller,
Zürich Arapt rma Enstitüsü taraf
ndan kan tland ö gibi, Öko-Tex
standart 100 dahilinde talep edilen
insanlar için geçerli ekolojik talep-
lere uygundur.
Использованные в этом приборе
ткани соответствуют высоким
требованиям стандарта Ökö-
Tex 100, что подтверждено
Исследовательским институтом
цюрих.
Zastosowane w tym urządzeniu
tekstylia spełniają wysokie wy-
magania ekologiczne Standardu
100 tekstyliów ekologicznych, jak
zostało to potwierdzone przez
Instytut Badawczy Zürich).

4
wir freuen uns, dass Sie sich für ein Produkt unseres Sortimentes entschieden haben. Unser
Name steht für hochwertige und eingehend geprüfte Qualitätsprodukte aus den Bereichen
Wärme, Gewicht, Blutdruck, Körper temperatur, Puls, Sanfte Therapie, Massage und Luft.
Bitte lesen Sie diese Gebrauchsanleitung aufmerksam durch, bewahren Sie sie für späteren
Gebrauch auf, machen Sie sie anderen Benutzern zugänglich und beachten Sie die Hinweise.
Mit freundlicher Empfehlung
Ihr Beurer-Team
1 Akku-Heizkissen, 1 Akku-Pack, 1 Ladegerät, 1 Kfz-Adapter,
1 Gurtbandverländerung, diese Gebrauchsanleitung
1. Wichtige Sicherheitshinweise –
sorgfältig lesen und für den
späteren Gebrauch aufbewahren
Ein Nichtbeachten der nachfolgenden Hinweise kann Personen- oder Sachschäden (elek-
trischer Schlag, Hautverbrennung, Brand) verursachen. Die folgenden Sicherheits- und
Gefahrenhinweise dienen nicht nur zum Schutz Ihrer Gesundheit bzw. der Gesundheit Dritter,
sondern auch zum Schutz des Produktes. Beachten Sie daher diese Sicherheitshinweise und
übergeben Sie diese Anleitung bei Weitergabe des Artikels.
• Benutzen Sie dieses Akku-Heizkissen nur zu dem in dieser Gebrauchsanleitung beschrie-
benen Zweck.
• Dieses Akku-Heizkissen ist nicht für den Gebrauch in Krankenhäusern bestimmt.
• Dieses Akku-Heizkissen ist nicht dafür bestimmt, durch Personen (einschließlich Kinder)
mit eingeschränkten physischen, sensorischen oder geistigen Fähigkeiten oder mangels
Erfahrung und/oder Wissen benutzt zu werden, es sei denn, sie werden durch eine für ihre
Sicherheit zuständige Person beaufsichtigt.
• Nicht bei Hilosen, Kleinkindern oder wärmeunempndlichen Personen (z.B. Diabetikern,
Personen mit krankheitsbedingten Hautveränderungen oder vernarbten Hautarealen im
Anwendungsgebiet, nach der Einnahme von schmerzlindernden Medikamenten oder Alkohol)
verwenden.
• Allzulange Anwendung kann zu Hautverbrennungen führen.
• Achtung! Auf keinen Fall einschlafen, während das Akku-Heizkissen in Betrieb ist.
• Setzen Sie das Akku-Heizkissen nicht an Körperpartien ein, die entzündet, verletzt oder an-
geschwollen sind. Im Zweifelsfall müssen Sie vor der Anwendung ärztlichen Rat einholen.
• Die von diesem Akku-Heizkissen ausgehenden elektrischen und magnetischen Felder können
unter Umständen die Funktion Ihres Herzschrittmachers stören. Sie liegen jedoch weit unter
den den Grenzwerten: elektrische Feldstärke: max. 5000 V/m, magnetische Feldstärke: max.
80 A/m magnetische Flussdichte: max. 0,1 Milli-Tesla. Bitte befragen Sie deshalb Ihren Arzt
und den Hersteller Ihres Herzschrittmachers vor der Benutzung dieses Akku-Heizkissens.
• Akkupack und Anschlüsse müssen vor Nässe, Stößen und direkter Sonneneinstrahlung
geschützt werden.

5
• Der Akku im Akkupack darf nicht auseinander genommen, ins Feuer geworfen oder kurzge-
schlossen werden.
• Verwenden Sie zum Auaden des Akkupacks nur das mitgelieferte Original-Ladegerät (Type
P-050B). Das Ladegerät ist für Innenräume konzipiert und darf keiner Feuchtigkeit ausgesetzt
werden.
• Dieses Akku-Heizkissen
– nur an die auf dem Gerät angegebene Spannung anschließen,
– nur in Verbindung mit dem mitgelieferten Original-Akkupack Type AP2 verwenden,
– nicht unbeaufsichtigt betreiben,
– nicht im gefalteten oder zusammengeschobenen Zustand einschalten,
– nicht einklemmen,
– nicht scharf knicken,
– nicht bei Tieren verwenden,
– nicht in feuchtem Zustand benutzen,
• Nicht in Verbindung mit anderen Wärmegeräten wie z.B. beheizten Autositzen oder Wär-
meunterbetten betreiben.
• Nicht an den Leitungen ziehen, drehen oder sie scharf knicken.
• Keine Nadeln oder spitzen Gegenstände in dieses Akku-Heizkissen hineinstecken.
• Dieses Akku-Heizkissen darf nicht von Kindern benutzt werden, es sei denn, der Schalter
ist von einem Elternteil oder einer Aufsichtsperson voreingestellt worden oder das Kind ist
ausreichend eingewiesen worden, wie es dieses Akku-Heizkissen sicher betreibt.
• Kinder sollten beaufsichtigt werden, um sicherzustellen, dass sie nicht mit dem Akku-Heiz-
kissen spielen.
• Dieses Akku-Heizkissen ist häug dahingehend zu prüfen, ob es Anzeichen von Abnutzung
oder Beschädigung zeigt. Falls solche Anzeichen vorhanden sind oder die Leitungen beschä-
digt sind oder falls dieses Akku-Heizkissen unsachgemäß benutzt worden ist, muss es vor
erneuter Benutzung zum Hersteller oder zum Händler gebracht werden.
• Reparaturen dürfen nur von Fachkräften oder in einer vom Hersteller anerkannten Reparatur-
werkstatt durchgeführt werden, da Sonderwerkzeuge erforderlich sind. Durch unsachgemäße
Reparaturen können erhebliche Gefahren für den Benutzer entstehen.
• Sollten Sie noch Fragen zur Anwendung dieses Akku-Heizkissen haben, so wenden Sie sich
bitte an unseren Kundenservice.

6
B
K
A
C
D
E
F
H
I
G
J
L
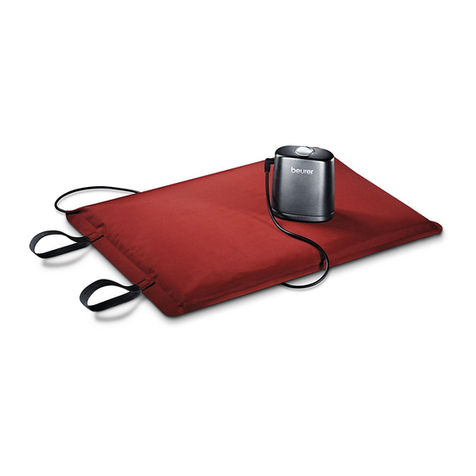
A Akkupack
B Funktionstaste für Temperaturstufen
C Funktionsanzeige des Akkupacks
D Anschluss für Akku-Heizkissen
E Anschluss für Kfz-Adapter oder Ladegerät
F Akku-Heizkissen
G Gummiband mit Klettverschluss
H Ladegerät
I Funktionsanzeige des Ladegerätes
J Kfz-Adapter
K Gürtelklipp (abnehmbar)
L Gurtbandverlängerung
3. Bestimmungsgemäße Verwendung
Dieses Akku-Heizkissen ist vorgesehen für die Erwärmung des menschlichen Körpers. Mit
diesem Akku-Heizkissen können Sie gezielt Wärme anwenden und sind nicht mehr auf eine
Steckdose angewiesen.
Bei jeder denkbaren Aktivität, ob drinnen oder draußen spendet Ihnen das Akku-Heizkissen
lang anhaltend, angenehme Wärme.
Dieses Akku-Heizkissen ist nicht für den Gebrauch in Krankenhäusern oder für den gewerb-
lichen Einsatz bestimmt. Es dürfen insbesondere keine Säuglinge, Kleinkinder, wärmeunemp-
ndliche oder hilose Personen und keine Tiere erwärmt werden.
Dieses Akku-Heizkissen aus atmungsaktivem Velours ist sehr anpassungsfähig und hautsym-
pathisch.
Beim ersten Gebrauch kann das Akku-Heizkissen einen Geruch nach Kunststoff entwickeln,
der sich jedoch nach kurzer Zeit verliert.
Dieses Akku-Heizkissen kann universell eingesetzt werden. Zum Beispiel am Bauch, am
Rücken, an den Gelenken und im Nacken. Für die Anwendung im Nackenbereich kann das
Akku-Heizkissen aufgerollt benutzt werden.
Die herausziehbaren Klettverschlussenden ermöglichen ein besonders einfaches Fixieren am
Körper. Durch den Gummizug hat das Akku-Heizkissen immer den optimalen Sitz.

7
4. Inbetriebnahme
– Wichtig: Der Akkupack muss vor dem erstmaligen Gebrauch bzw. längerer Nichtbenutzung
aufgeladen werden.
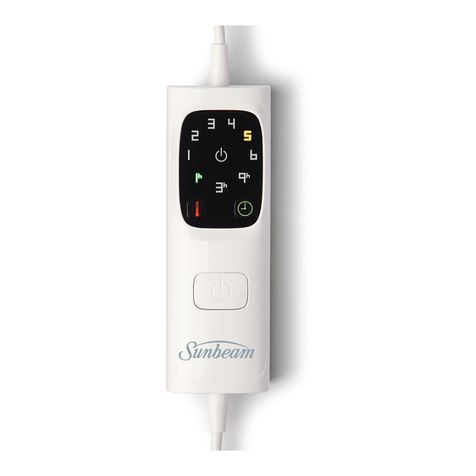
– Stecken Sie dann das Ladegerät in eine Steckdose mit einer Netzspannung entsprechend
den Angaben auf dem Ladegerät. Dabei leuchtet die grüne LED der Funktionsanzeige des
Ladegerätes.
– Verbinden Sie den Lade-Stecker mit dem Anschluss des Akkupacks „E“. Es leuchtet die rote
LED der Funktionsanzeige „C“ des Akkupacks.
– Laden Sie den Akkupack nur in trockener Umgebung und Temperaturen zwischen 10 °C und
35 °C auf.
– Der Akku ist voll aufgeladen, wenn die rote LED der Funktionsanzeige „C“ des Akkupacks
erlischt ( nach ca. 4 Stunden). Es erfolgt danach eine Erhaltungsladung des Akkupacks.
– Bitte beachten Sie, dass die volle Kapazität des Akkupacks erst nach einigen Lade- und
Entladezyklen erreicht wird.
– Der Akkupack sollte mindestens 2 x pro Jahr aufgeladen werden um seine Kapazität zu
erhalten.
– Decken Sie den Akkupack während des Ladevorgangs nicht durch Decken, Kissen oder
ähnlichem ab. Bei Überhitzung schaltet der Akkupack ab.
– Während des Ladevorgangs ist ein Betreiben des Heizkissens nicht möglich.
4.2 Betreiben des Akku-Heizkissens mit Akkupack
– Entfernen Sie den Lade-Stecker des Ladegerätes vom Akkupack.
– Verbinden Sie den Stecker des Akku-Heizkissens mit dem Anschluss „D“ am Akkupack.
– Wählen Sie mit der Funktionstaste „B“ die gewünschte Temperaturstufe.
Zur Temperaturwahl drücken Sie die Funktionstaste „B“.
Die schnellste Erwärmung des Akku-Heizkissens erreichen Sie, indem Sie zuerst die höchste
Temperaturstufe einstellen. Später kann bei Bedarf auf eine niedrigere Temperaturstufe zu-
rückgeschaltet werden.
Wir empfehlen bei einer länger andauernden Anwendung des Akku-Heizkissens die niedrigste
Temperaturstufe.
aus = keine LED leuchtet
minimale Wärme = 1 blaue LED leuchtet (1 x drücken)
mittlere Wärme = 2 blaue LED leuchten (2 x drücken)
maximale Wärme = 3 blaue LED leuchten (3 x drücken)
4.5 Abschaltautomatik
Dieses Akku-Heizkissen ist mit einer Abschaltautomatik ausgestattet. Diese stoppt
die Wärmezufuhr ca. 90 Minuten nach der Inbetriebnahme des Heizkissens. Die
Funktionsanzeige „C“ leuchtet danach nicht mehr.
Wenn der Akku entladen ist, blinkt die rote LED der Funktionsanzeige „C“ am Akkupack. Das
Akku-Heizkissen wird danach nicht mehr erwärmt. Laden Sie den Akkupack dann wie unter 4.1
beschrieben.
Bitte beachten Sie, dass der Akkupack vor extremer Kälte geschützt werden sollte (ggf. unter
der Kleidung), um seine volle Leistungsfähigkeit beizubehalten.

8
Blinken alle 3 blauen LED der Funktionsanzeige „C“ am Akkupack, so ist das Heizkissen
entweder nicht korrekt mit dem Akkupack verbunden oder weist einen Defekt auf. Kontrollieren
Sie die Verbindung. Falls die 3 blauen LED weiterhin blinken, senden Sie bitte das Akku-Heiz-
kissen zusammen mit dem Akkupack zur Reparatur ein.
4.7 Betreiben des Akku-Heizkissens im Kfz (an der 12 V-Buchse des
Zigarettenanzünders)
– Verbinden Sie den Stecker des Akku-Heizkissens mit dem Anschluss „D“ am Akkupack.
– Schließen Sie den Kfz-Adapter „J“ am Anschluss „E“ den Akkupacks an.
– Verbinden Sie den Kfz-Adapter mit der Buchse des Zigarettenanzünders im Kraftfahrzeug.
– Wählen Sie eine Temperaturstufe (siehe 4.3./4.4).
– Bitte beachten Sie, dass das Akku-Heizkissen nicht gleichzeitig in Verbindung zu evtl. vor-
handenen beheizten Autositzen betrieben werden darf.
– Wenn das Akku-Heizkissen nicht benutzt wird, sollte es ausgeschaltet (keine LED der Funkti-
onsanzeige leuchtet) und der Kfz-Adapter ausgesteckt werden.
– Der Akku wird während des Kfz-Betriebs nicht aufgeladen!
4.8 Akku des Akkupacks ersetzen
Wenn sich das Akku-Heizkissen bei voll aufgeladenem Akkupack nur noch über
einen kurzen Zeitraum erwärmt, empfehlen wir den Akku durch das Original-
Ersatzteil (siehe 4.9.) zu ersetzen.
- Schrauben Sie die Rückseite des Gehäuses auf (4 Kreuzschlitz-Schrauben).
- Nehmen Sie den Akku aus dem Gehäuse heraus
- Lösen Sie die Verbindung zwischen Akku und Platine indem Sie die weiße
Steckverbindung auseinander ziehen.
- Verbinden Sie den neuen Akku mit der Platine, indem Sie die beiden Teile der weißen Steck-
verbindung zusammenschieben.
- Legen Sie den neuen Akku in das Gehäuse ein.
- Achten Sie darauf, dass die Verbindungskabel über die Aussparung in der Platine geführt
werden (sonst lässt sich die Rückseite des Gehäuses nicht vollständig schließen).
- Schließen Sie dann das rückseitige Gehäuse und schrauben Sie die 4 Kreuzschlitz-Schrau-
ben wieder fest.
Sollten Sie Probleme mit dem Akku-Wechsel haben, wenden Sie sich bitte an den Kunden-
service.
4.9 Ersatzteile
Sie können folgende Ersatzteile direkt beim Kundenservice beziehen:
• Akku (Art. Nr. 162.271, ohne Gehäuse)
• Ladegerät (Art. Nr. 546.006)
• Kfz-Adapter (Art. Nr. 108.821)
5. Reinigung und Pflege
Trennen Sie vor der Reinigung des Akku-Heizkissen stets den Stecker des Akku-Heizkissens
Vom Anschluss „D“ des Akkupacks.
Kleinere Flecken auf dem Akku-Heizkissen können mit einem Tuch oder feuchten Schwamm
und eventuell etwas üssigem Feinwaschmittel entfernt werden. Verwenden Sie keine lösungs-
mittelhaltigen Reiniger.
Bitte beachten Sie, dass das Akku-Heizkissen nicht chemisch gereinigt, ausgewrungen, ma-
schinell getrocknet, gemangelt oder gebügelt werden darf.
Stellen Sie die Waschmaschine auf einen Schonwaschgang bei 40°C ein.

9
Waschen Sie das Akku-Heizkissen nur mit der Maschine, wenn es in einem Stoffbeutel oder
Kissenbezug eingelegt ist.
Aus ökologischen Gründen empfehlen wir Ihnen das Heizkissen nur zusammen mit anderen
Textilien zu waschen. Benutzen Sie ein Feinwaschmittel und dosieren Sie es nach Angaben
des Herstellers.
Bitte beachten Sie, dass das Heizkissen durch allzu häuges Waschen beansprucht wird. Das
Heizkissen sollte deshalb während der gesamten Lebensdauer max. 10 mal in einer Waschma-
schine gewaschen werden.
Befestigen Sie das Akku-Heizkissen zum Trocknen nicht mit Wäscheklammern oder Ähnlichem
und schalten Sie das Akku-Heizkissen auf keinen Fall zum Trocknen ein!
Verbinden Sie den Akku-Pack erst wieder mit dem Akku-Heizkissen, wenn der Stecker und
das Akku-Heizkissen vollständig trocken sind.
6. Aufbewahrung
Wenn Sie das Akku-Heizkissen längere Zeit nicht verwenden, empfehlen wir Ihnen, es in der
Originalverpackung in trockener Umgebung und ohne Beschwerung aufzubewahren.
Lassen Sie das Akku-Heizkissen vorher abkühlen.
7. Entsorgung
Bitte entsorgen Sie das Gerät gemäß der Elektro- und Elektronik Altgeräte Verordnung
2002/96/EC – WEEE (Waste Electrical and Electronic Equipment). Bei Rückfragen
wenden Sie sich bitte an die für die Entsorgung zuständige kommunale Behörde.
Der Akku muss zuvor aus dem Akkupack entfernt (siehe 4.5) und ebenfalls sachge-
recht entsorgt werden.
8. Garantie
Wir leisten 3 Jahre Garantie für Material- und Fabrikationsfehler des Produktes.
Die Garantie gilt nicht:
• im Falle von Schäden, die auf unsachgemäßer Bedienung beruhen,
• für Verschleißteile (z.B. Akkus),
• für Mängel, die dem Kunden bereits beim Kauf bekannt waren,
• bei Eigenverschulden des Kunden,
• bei Fremdeinwirkung.
Die gesetzlichen Gewährleistungen des Kunden bleiben durch die Garantie unberührt. Für
Geltendmachung eines Garantiefalles innerhalb der Garantiezeit ist durch den Kunden der
Nachweis des Kaufes zu führen. Die Garantie ist innerhalb eines Zeitraumes von 3 Jahren ab
Kaufdatum gegenüber der Beurer GmbH, Söinger Straße 218, 89077 Ulm, Germany geltend
zu machen. Der Kunde hat im Garantiefall das Recht zur Reparatur der Ware bei unseren eige-
nen oder bei von uns autorisierten Werkstätten. Weiter gehende Rechte werden dem Kunden
(aufgrund der Garantie) nicht eingeräumt.

10
Dear Customer
Thank you for choosing one of our products. Our name stands for high-quality, thoroughly te-
sted products for applications in the areas of heat, weight, blood pressure, body temperature,
pulse, gentle therapy, massage and air.
Please read these instructions for use carefully and keep them for later use, be sure to make
them accessible to other users and observe the information they contain. This diagnostic scale
is designed to make a signicant contribution to your health.
With kind regards
Your Beurer team
1 battery-operated heating pad, 1 battery pack, 1 charger, 1
car adapter, 1 belt extension, these instructions
1. Important safety information –
read carefully and keep for
later use
Failure to observe the information provided below can lead to personal injury or material dama-
ge electric shock, burns, re). The following safety and hazard information is not only intended
to protect your health and the health of other persons but also to protect the product. There-
fore, pay attention to this safety information and pass on these instructions together with the
appliance if you sell it or pass it on.
• Only use this battery-operated heating pad for the purpose described in the instructions for
use.
• This battery-operated heating pad is not intended for use in hospitals.
• This battery-operated heating pad is not intended for use by persons (including children)
with restricted physical, sensory or mental capacity or with no experience and/or knowledge,
unless they are supervised by a person who is responsible for their safety.
• It is not intended for use by helpless persons, small children or persons who are insensitive
to heat (e.g. diabetics, persons with skin changes resulting from disease or scarring on areas
of the skin in the area of application, after consuming pain-relieving medications or alcohol).
• Excessively long use can cause the skin to be burned.
• Caution! Never fall asleep while the battery-operated heating pad is switched on.
• Do not apply the battery-operated heating pad to parts of the body which are inamed, inju-
red or swollen. If in doubt, seek medical advice prior to use.
• The electric and magnetic elds emitted by this battery-operated heating pad may interfere
with the operation of your pacemaker in some circumstances. However, they are far below
the permissible limits: electric eld strength: max. 5000 V/m, magnetic eld strength: max. 80
A/m max., magnetic ux density: max. 0.1 millitesla. Please ask your doctor and the manuf-
acturer of your pacemaker before using this battery-operated heating pad.
• The battery pack and connections must be protected against moisture, impacts or direct
sunlight.

11
• The battery in the battery pack must not be disassembled, thrown into a re or short- circui-
ted.
• Only use the original battery charger (type P-050 B) to charge the battery pack. The battery
charger is designed for indoor use only and must not be exposed to moisture.
• Use the battery-operated heating pad as follows
– only connect it to the voltage specied on the appliance
– only use it with the original AP2 battery pack supplied
– do not operate it unattended
– never switch on when folded or compressed
– do not wedge it between objects
– do not bend it sharply
– do not use it with animals
– do not use it when damp
• Do not operate it along with other heating devices such as heated car seats or heating un-
derblankets.
• Never pull, twist or make any sharp kinks in the cables.
• Do not stick pins or pointed objects into this battery-operated heating pad.
• This battery-operated heating pad may not be used by children unless the switch has been
preset by a parent or supervisory person, or the child has been sufciently instructed on how
to use this battery-operated heating pad safely.
• Children should be supervised to ensure that they do not use the heating pad as a toy.
• This battery-operated heating pad must be checked often for signs of wear or damage.
If signs of this kind are discovered, or if this battery-operated heating pad has been used
incorrectly, it must be checked by the manufacturer or dealer before it is used again.
• Repairs may only be carried out by specially trained personnel at a repair workshop autho-
rized by the manufacturer, as special tools are required. Incorrectly conducted repairs can
lead to considerable danger for the user.
• Should you still have questions on using our appliance, please contact our customer service.

12
B
K
A
C
D
E
F
H
I
G
J
L
A Battery pack
B Function key for temperature adjustment
C Function display of battery pack
D Connection for battery-operated heating pad
E Connection for car adapter
F Battery-operated heating pad
G Elastic band with Velcro fastening
H Charger
I Function display of charger
J Car adapter
K Belt clip (removable)
L Belt extension
3. Proper Use
This battery-operated heating pad is designed for warming the human body. You
can use this heating pad to direct heat to specic parts of your body and you are no longer
reliant on an electrical outlet.
The battery-operated heating pad provides sustained, soothing heat during any conceivable
activity inside or outside.
This battery-operated heating pad is not intended for use in hospitals or for commercial
applications. It must not be used for warning infants, small children, helpless persons or
those insensitive to heat or for animals.
This battery-operated heating pad is made of breathable velour and is very adaptable and
soothing to the skin.
You may perceive a plastic smell when using the battery-operated heating pad for the rst
time.
This will disappear after a short time.
This battery-operated heating pad can be used all purposes, such as on the stomach,
back, joints and neck. If used for the neck area, the battery-operated
heating pad can be rolled up.
The pull-out Velcro fastenings make it very easy to fasten it to the
body. The elastic ensures that the battery-operated heating pad is always perfectly positioned.

13
4. Using it for the first time
4.1 Charging the battery pack
– Important: the battery pack must be charged prior to initial use or after prolonged periods
without use.
– plug the charger into an electrical outlet with a voltage corresponding to the specications on
the charger. The green LED on the charger function display lights.
– Connect the charging plug to socket „E“ on the battery pack. The red LED „C“ on the func-
tion display of the battery pack lights red.
– Only charge the battery pack in a dry environment and at temperatures between 10 °C and
35 °C.
– The battery is fully charged when red LED „C“ on the function display of the battery pack is
off (approx. 4 hours). This is followed by a maintenance charge of the battery pack.
– Please note that the full capacity of the battery pack is only reached after several charge and
discharge cycles.
– The battery pack should be fully discharged and recharged at least twice a year to maintain
its full capacity.
– Do not cover the battery pack with blankets, pillows or similar objects while it is charging.
The battery pack will switch off if it is overheated.
- The heating pad cannot be used during charging.
4.2 Operating the battery-operated heating pad with the battery pack
– Remove the charger plug from the battery pack
– Connect the heating pad plug to connection D on the battery pack
– Select the required temperature setting with function key B.
Press function key B to select the temperature.
The fastest way to heat up the heating pad is to set the switch to the highest setting rst
(level 2). You can switch back to a lower temperature setting later as required.
We recommend the lowest temperature setting for extended use of the heating pad.
off = no LED on
minimum heat = 1 blue LED on (press once)
medium heat = 2 blue LEDs on (press twice)
maximum heat = 3 blue LEDs on (press three times)
4.5 Automatic switch-off
The battery-operated heating pad has an automatic switch-off function. It stops the heat ap-
prox. 90 minutes after switching on the heating pad. Function key C switches off at this point.
4.6 Battery pack charge status
When the battery is discharged, red LED „C“ on the function display on the battery pack lights.
The heating pad then no longer provides warmth. Charge the battery pack as described in 4.1.
Please note that the battery pack should be protected against extreme cold (under clothing
if applicable) to maintain its full efciency.
If all three blue LEDs on the battery pack function display are ashing, the heating pad is not
correctly connected to the battery pack or there is a fault. Check the connection. If the three
blue LEDs continue to ash, please send the battery-operated heating pad and the battery
pack for repair.

14
4.7 Using the battery-operated heating pad in a car (plugged into the 12-V cigarette
lighter socket)
– Connect the heating pad plug to connection D on the battery pack
– Connect the car adapter to connection E on the battery pack.
– Connect the car adapter to the cigarette lighter socket in the car.
– Select a temperature setting (see 4.3/4.4)
– Please note that the battery-operated heating pad must not be used in conjunction with
heated car seats.
– If the battery-operated heating pad is not used, it should be switched off (LED on the func-
tion display off) and the car adapter disconnected.
– The battery is not charged during car operation.
4.8 Replacing the battery in the battery pack
If the battery-operated heating pad only heats for a short time, we recommend
replacing the
the battery with a new original spare part (see 4.9).
- Unscrew the back of the housing (4 Philips-head screws).
- Remove the battery from the housing.
- Disconnect the connection between the battery and the board by pulling the
white plug connector apart.
- Connect the new battery to the board by connecting the two parts of the white plug connector.
- Insert the new battery into the housing.
- Make sure that the connector wire feeds through the opening in the board (otherwise it will be
impossible to close the back of the housing completely).
- Close the back of the housing and screw in the 4 Philips-head screws tightly.
If you have any problems with replacing the battery, please contact our customer service.
You can obtain the following spare parts directly from Customer Service:
• Battery (Item No. 162.271 without housing)
• Battery charger (Item No. 546.006)
• Car adapter (Item No. 108.821)
5. Cleaning and care
Always disconnect the plug of the battery-operated heating pad from connector 0 of the
battery pack before cleaning it.
Smaller stains on the battery-operated heating pad can be removed with a cloth or damp
sponge and if necessary, some liquid detergent for delicate fabrics. Do not use cleaners con-
taining solvents.
Please note that the battery-operated heating pad must not be dry-cleaned, wrung out,
machine-dried, put through a mangle or ironed.
Set the washing machine at a gentle washing cycle at 40°C.
Machine-wash the battery-operated heating pad only in a cloth bag or pillow case.
For ecological reasons, we recommend that the heating pad is only washed together with
other textiles. Use a detergent for delicate fabrics in quantities specied by the manufacturer.
Please note that excessive washing will wear out the heating pad. The heating pad should only
be machine-washed a maximum of 10 times throughout its entire life.
Never use any clothes pegs or similar to secure the battery-operated heating pad when drying
and never switch it on to dry it.
Do not connect the battery-operated heating pad to the battery pack until the plug and
heating pad are completely dry.

15
If you do not use the battery-operated heating pad for longer periods, we recommend storing it
in the original packaging in a dry place without weighting it down.
Allow the battery-operated heating pad to cool down beforehand.
7. Disposal
Please dispose of the device in accordance with the Ordinance on Waste Electrical
and Electronic Equipment (WEEE - 2002/96/EC). If you have any questions, please
contact the municipal authorities responsible for waste disposal in your area.
The battery must be removed from the battery pack rst (see 4.5) and also properly
disposed of.
FRANÇ
Nous vous remercions d‘avoir choisi l‘un de nos produits. Notre société est réputée pour
l‘excellence de ses produits et les contrôles de qualité approfondis auxquels ils sont soumis,
dans les domaines suivants: chaleur, contrôle de poids, diagnostic de pression artérielle, me-
sure de température du corps et du pouls, thérapies douces, massage et purication d‘air.
Lisez attentivement cette notice, conservez- la pour un usage ultérieur, mettez-la à la disposi-
tion des autres utilisateurs et suivez les consignes qui y gurent. Ce pèsepersonne impédan-
cemètre se révélera être un allié de poids pour votre santé.
Sincères salutations,
Votre équipe Beurer
1 coussin chauffant à piles, 1 pack d’accus, 1 chargeur, 1 adaptateur Kfz,
1 rallonge de sangle et le présent mode d’emploi
1. Remarques importantes de
sécurité - à lire attentivement et à
conserver pour un usage ultérieur
La non-observation des remarques suivantes peut causer des dommages personnels ou maté-
riels (électrocution, brûlure, incendie).
Les observations suivantes relatives à la sécurité et aux dangers ne servent pas uniquement
pour la protection de votre santé ou de la santé de tiers, mais aussi pour la protection du pro-
duit. Respectez par conséquent ces observations de sécurité et transmettez ce mode d’emploi
lorsque vous remettez l’article.
• Utilisez ce coussin chauffant à piles uniquement pour l'usage décrit dans ce mode d'emploi.
• Ce coussin chauffant n'est pas conçu pour être utilisé dans les hôpitaux.
• Ce coussin chauffant n’est pas conçu pour une utilisation par des personnes (y compris les
enfants) dont les capacités physiques, sensorielles ou intellectuelles sont réduites ou faisant
preuve d’un manque d’expérience et/ou de connaissances, à moins que ces personnes ne
soient surveillées par une personne responsable de leur sécurité.

16
• Ne pas utiliser auprès de personnes impotentes, d’enfants en bas âge ou de personnes qui
ne sont pas sensibles à la chaleur (par exemple, les diabétiques, les personnes présentant
des modications cutanées à la suite de maladies ou des surfaces de peau avec cicatrices
dans la zone d’application, ainsi qu’après la prise de calmants ou d’alcool).
• Un emploi prolongé peut provoquer des brûlures de la peau.
• Attention ! Il ne faut en aucun cas s'endormir quand le coussin chauffant est en marche.
• N’employez pas le coussin chauffant sur des parties du corps qui sont enammées, pré-
sentent des lésions ou qui sont gonées. En cas de doute, demandez conseil à un médecin
avant de l'utiliser.
• Les champs électriques et magnétiques provenant de ce coussin chauffant peuvent, dans
certains cas, perturber le fonctionnement de votre stimulateur cardiaque. Et pourtant vous
êtes bien en dessous des valeurs limites : intensité du champ électrique : 0,1 (max.) 5000
V/m, Intensité du champ magnétique : 0,1 (max) 80 A/m., densité du ux magnétique : 0,1
milli-tesla max..
Pour cette raison, consultez votre médecin et le fabricant de votre stimulateur cardiaque
avant de vous servir de ce coussin chauffant.
• Le pack d’accus et les raccordements doivent être protégés de l’humidité, des chocs et
d’une exposition directe au soleil.
• L’accu dans le pack d’accus ne doit pas être démonté, jeté au feu ni court-circuité.
• Pour recharger le pack accus, servez-vous uniquement du chargeur d’origine (type P-050B)
fourni avec l’appareil. Le chargeur est conçu pour un usage à l’intérieur et il ne doit pas être
exposé à l’humidité.
• Pour ce qui est de ce coussin chauffant
– branchez-le uniquement sur la tension de secteur indiquée sur l'appareil
– utilisez-le uniquement avec le pack d’accus d’origine type AP2 fourni avec.
– ne jamais l’utiliser sans surveillance,
– ne pas l’allumer quand il est plié ou roulé.
– ne pas le coincer,
– ne pas le plier en cassant les angles,
– ne pas l’utiliser sur les animaux,
– ne pas l’utiliser quand il est humide.
• Ne pas le faire fonctionner en liaison avec d’autres appareils chauffants comme, par ex., des
sièges de voiture chauffants ou des chauffe-matelas.
• Ne pas tirer sur les cordons électriques, ne pas les enrouler ni les plier en cassant les angles.
• Ne pas enfoncer d’épingles ou d’objets pointus dans ce coussin chauffant.
• Ce coussin chauffant ne doit pas être utilisé par les enfants, sauf si l’interrupteur a été réglé
par les parents ou par une personne chargée de la surveillance ou si l’on a sufsamment
montré à l’enfant comment se servir de ce coussin chauffant en toute sécurité.
• Les enfants ne doivent pas être laissés sans surveillance an de s’assurer qu’ils ne jouent
pas avec le coussin chauffant.
• Par conséquent, il faut souvent vérier que ce coussin chauffant ne présente pas de signes
d’usure ou de détérioration. En cas de présence de tels signes ou en cas de détérioration
des câbles électriques ou si le coussin chauffant est utilisé de façon inappropriée, vous de-
vez avant toute nouvelle utilisation le ramener au fabriquant ou au vendeur.
• Les réparations doivent être effectuées uniquement par du personnel qualié ou par un ate-
lier de réparation agréé par le fabricant, des outils spéciaux étant nécessaires.
Les réparations non conformes peuvent présenter des risques sérieux pour l'utilisateur.
• Si vous avez d’autres questions quant à l’utilisation de ce coussin chauffant, veuillez
contacter notre service après-vente.

17
B
K
A
C
D
E
F
H
I
G
J
L
2. Description de l'instrument
A Pack d’accus
B Touche de fonction pour les niveaux de température
C Indicateur du pack d'accus
D Connexion pour le coussin chauffant
E Connexion pour l’adaptateur Kfz ou le chargeur
F Coussin chauffant à piles
G Elastique avec bande velcro
H Chargeur
I Indicateur du chargeur
J Adaptateur Kfz
K Clip pour la ceinture (peut être retiré)
L rallonge de sangle
3. Utilisation conforme à sa destination
Ce coussin chauffant est destiné à réchauffer le corps humain. Ce coussin chauffant vous
permet de proter de la chaleur où il faut, sans prise de courant à proximité.
Pour toute activité imaginable, que ce soit en intérieur ou en extérieur, le coussin chauffant
vous apporte une chaleur agréable et ce, de façon continue.
Ce coussin chauffant n'est pas conçu pour être utilisé dans les hôpitaux ou pour un usage
commercial. Il ne faut en particulier pas réchauffer les nourrissons, les enfants en bas âge,
les personnes qui ne sont pas sensibles à la chaleur ou les personnes impotentes, ainsi que
les animaux.
Ce coussin chauffant en velours thermoactif est très adaptable et agréable à la peau.
Lors de la première utilisation, le coussin chauffant peut dégager une odeur de plastique, qui
se dissipe cependant après un court laps de temps.
Ce coussin chauffant peut être utilisé partout. Par exemple, sur le ventre, sur le dos, au niveau
des articulations et dans la nuque. Pour une utilisation dans la zone de la nuque, le coussin
chauffant peut être utilisé enroulé.
Les extrémités amovibles de la fermeture Velcro permettent de xer le coussin de manière très
simple sur le corps. Grâce à l’élastique, le coussin chauffant est toujours placé de manière
optimale.

18
4. Mise en service
4.1 Charger le pack d'accus
– Important : Avant sa première utilisation ou après une longue période de non-utilisation, il
faut charger le pack d’accus.
– Branchez le chargeur sur une prise de courant dont la tension de réseau correspond à celle
indiquée sur le chargeur.
La LED verte de l’indicateur du chargeur s’allume.
– Raccordez la che du chargeur à la connexion du pack d’accus « E ». La LED rouge « C » de
l’indicateur du pack d'accus s’allume.
– Chargez le pack d’accus uniquement dans un environnement sec et à une température com-
prise entre 10°C et 35°C.
– L’accu est complètement chargé lorsque la LED rouge « C » de l’indicateur du pack d’accus
s’éteint ( après environ 4 heures). S’ensuit une charge de maintien du pack d’accus.
– Notez que le pack d’accus atteint sa capacité maximale seulement après plusieurs cycles de
charge et de décharge.
– Le pack d’accus doit être chargé au moins 2 x par an pour conserver sa capacité.
– Pendant le processus de charge, ne couvrez pas le pack d’accus d’une couverture, d’un
coussin ou d’objets similaires. En cas de surchauffe le pack d’accus s’éteint.
- Pendant le processus de charge, il n’est pas possible d’utiliser le coussin chauffant.
– Retirez la che du chargeur du pack d’accus.
– Branchez la che du coussin chauffant sur le raccord « D » du pack d’accus.
– A l’aide de la touche de fonction « B » sélectionnez le niveau de température souhaité.
Pour sélectionner la température, appuyez sur la touche de fonction « B ».
Pour chauffer le coussin chauffant le plus rapidement, réglez d’abord le thermostat sur la posi-
tion maximale. Ensuite vous pourrez revenir à une température plus basse si nécessaire.
En cas d’utilisation prolongée du coussin chauffant, nous recommandons de régler le thermo-
stat sur la position la plus basse.
éteint = aucune LED n’est allumée
Chaleur minimale = 1 LED bleue s’allume (appuyez 1 x)
Chaleur moyenne = 2 LED bleues s’allument (appuyez 2 x)
Chaleur maximale = 3 LED bleues s’allument (appuyez 3 x)
Ce coussin chauffant est pourvu d’un arrêt automatique. Celui-ci stoppe
l’apport de chaleur environ 90 minutes après la mise en marche du coussin chauffant. Les
fonctions de (L’indicateur) « C » ne s’allume alors plus.
Lorsque l’accu est déchargé, la LED rouge de l’indicateur « C » du pack d’accus s’allume. Dès
cet instant, le coussin chauffant à accus ne produit plus de chaleur. Chargez le pack d’accus
comme décrit au point 4.1.
Notez que le pack d’accus doit être protégé du froid extrême (le cas échéant sous
les vêtements) pour garder toute son efcacité.

19
Si les 3 LED bleues de l’indicateur « C » du pack d’accus s’allument, le coussin chauffant est
mal raccordé au pack d’accus ou bien présente un défaut. Vériez la connexion. Si les 3 LED
bleues sont encore allumées, merci de renvoyer le coussin chauffant avec le pack d’accus en
réparation.
4.7 Fonctionnement du coussin chauffant dans un véhicule (sur la prise 12 V de
– Branchez la che du coussin chauffant sur le raccord « D » du pack d’accus.
– Raccordez l’adaptateur Kfz au raccord « E » du pack d’accus.
– Raccordez l’adaptateur Kfz à la che de l’allume-cigare dans le véhicule.
– Sélectionnez le niveau de température (voir 4.3./4.4).
– Notez que le coussin chauffant ne doit pas être utilisé simultanément avec des sièges chauf-
fants éventuellement présents.
– Lorsque le coussin chauffant n’est pas utilisé, il doit être éteint (aucune LED de l’indicateur
allumée) et l’adaptateur Kfz doit être débranché.
– Quand le véhicule est en marche, l’accu ne se charge pas !
4.8 Remplacer l'accu du pack d'accus
Si le coussin chauffant, le pack d’accus entièrement chargé, ne chauffe encore
qu’un court moment, nous vous recommandons de remplacer l’accu par la pièce
de rechange d’origine (voir 4.9).
- Dévisser l’arrière du boîtier (4 vis à empreinte cruciforme).
- Sortez l’accu du boîtier
- Détachez la connexion entre l’accu et la platine en retirant la che de raccorde-
ment blanche.
- Raccordez le nouvel accu à la platine en emboîtant les deux parties de la che de raccorde-
ment blanche.
- Insérez le nouvel accu dans le boîtier.
- Veillez à ce que le câble de connexion soit passé par l’ouverture dans la platine (sinon
l’arrière du boîtier ne pourra pas se fermer complètement).
- Fermez ensuite l’arrière du boîtier et revissez xement les 4 vis à empreinte cruciforme.
En cas de problème lors du changement de l’accu, veuillez vous adresser à notre service
après-vente.
4.9 Pièces de rechange
Vous pouvez obtenir les pièces de rechange suivantes en vous adressant directement au
service après-vente :
• Accu (Art. n° 162.271, sans boîtier)
• Chargeur (Art. n° 546.006)
• Adaptateur Kfz (Art. n° 108.821)
5. Nettoyage et entretien
Avant le nettoyage du coussin chauffant, retirez toujours la prise du coussin chauffant
du raccord « D » du pack d’accus.
Les petites taches sur le coussin chauffant peuvent être enlevées à l'aide d'un chiffon ou
d'une éponge humide et avec un peu de lessive liquide pour textiles délicats éventuellement.
N'utilisez pas de produit nettoyant contenant un solvant.
Notez que le coussin chauffant ne doit pas être nettoyé avec des produits chimiques, essoré,
séché en machine ou repassé.
Réglez le lave-linge sur le programme pour textiles délicats à 40°C.

20
Ne nettoyez le coussin chauffant en machine que s’il est introduit dans un sac en tissu ou dans
une housse de coussin.
Pour des raisons écologiques, nous vous recommandons de laver le coussin chauffant avec
d’autres textiles. Employez un produit de lavage pour textiles délicats et dosez suivant les
indications du fabricant.
Attention de ne pas laver le coussin chauffant trop fréquemment pour ne pas le solliciter ex-
cessivement. Le coussin chauffant doit par conséquent être lavé pendant toute la durée de sa
vie au maximum 10 fois en machine.
Pour le séchage du coussin chauffant, ne le suspendez pas par des pinces à linge ou autres
et n’allumez en aucun cas le coussin chauffant lorsqu’il est en train de sécher !
Ne reconnectez le pack d’accus avec le coussin chauffant que lorsque la prise et le coussin
chauffant sont entièrement secs.
6. Rangement
Si vous n'employez pas le coussin chauffant pendant une assez longue période, nous vous
recommandons de le conserver dans l'emballage d'origine dans un endroit sec et de ne pas
poser d'objets dessus.
Laissez d’abord le coussin chauffant refroidir.
7. Elimination
Veuillez éliminer l’appareil conformément à l’ordonnance relative aux vieux appareils
électriques et électroniques 2002/96/EC – WEEE (Waste Electrical and Electronic
Equipment). Pour de plus amples informations, adressez-vous à l’administration locale
responsable de l’élimination de ces déchets.
L’accu devra d’abord être retiré du pack d’accus (voir 4.5) et sera aussi éliminé comme il se
doit.
Ñ
Nos alegramos de que haya elegido un producto de nuestra serie. Nuestro nombre es sinóni-
mo de productos de calidad de primera clase sometidos a un riguroso control en los ámbitos
del calor, el peso, la tensión arterial, la temperatura corporal, el pulso, las terapias no agresi-
vas, los masajes y el aire.
Lea atentamente estas instrucciones para el uso, consérvelas para su posterior utilización,
póngalas a disposición de otros usuarios y tenga en cuenta las indicaciones. Con esta báscula
para diagnóstico hace una contribución decisiva a su salud.
Atentamente,
Su equipo Beurer
Table of contents
Languages:
Other Beurer Heating Pad manuals

Beurer
Beurer UHP 24 User manual

Beurer
Beurer UHP 26 User manual

Beurer
Beurer HK 45 Cosy 110V User manual

Beurer
Beurer HK 55 EASYFIX User manual

Beurer
Beurer KR 40 User manual

Beurer
Beurer HK 55 EASYFIX User manual

Beurer
Beurer TS 23 User manual

Beurer
Beurer 27303 User manual

Beurer
Beurer UHP 54 User manual

Beurer
Beurer HK COMFORT User manual

Beurer
Beurer HK42 User manual

Beurer
Beurer HK 25 User manual

Beurer
Beurer HK 50 User manual

Beurer
Beurer HK 25 User manual

Beurer
Beurer HK 58 Cosy User manual

Beurer
Beurer HD 50 User manual

Beurer
Beurer UB30 User manual

Beurer
Beurer HD 75 Cosy Taupe User manual

Beurer
Beurer HD 71 User manual

Beurer
Beurer HK 45 Cosy User manual