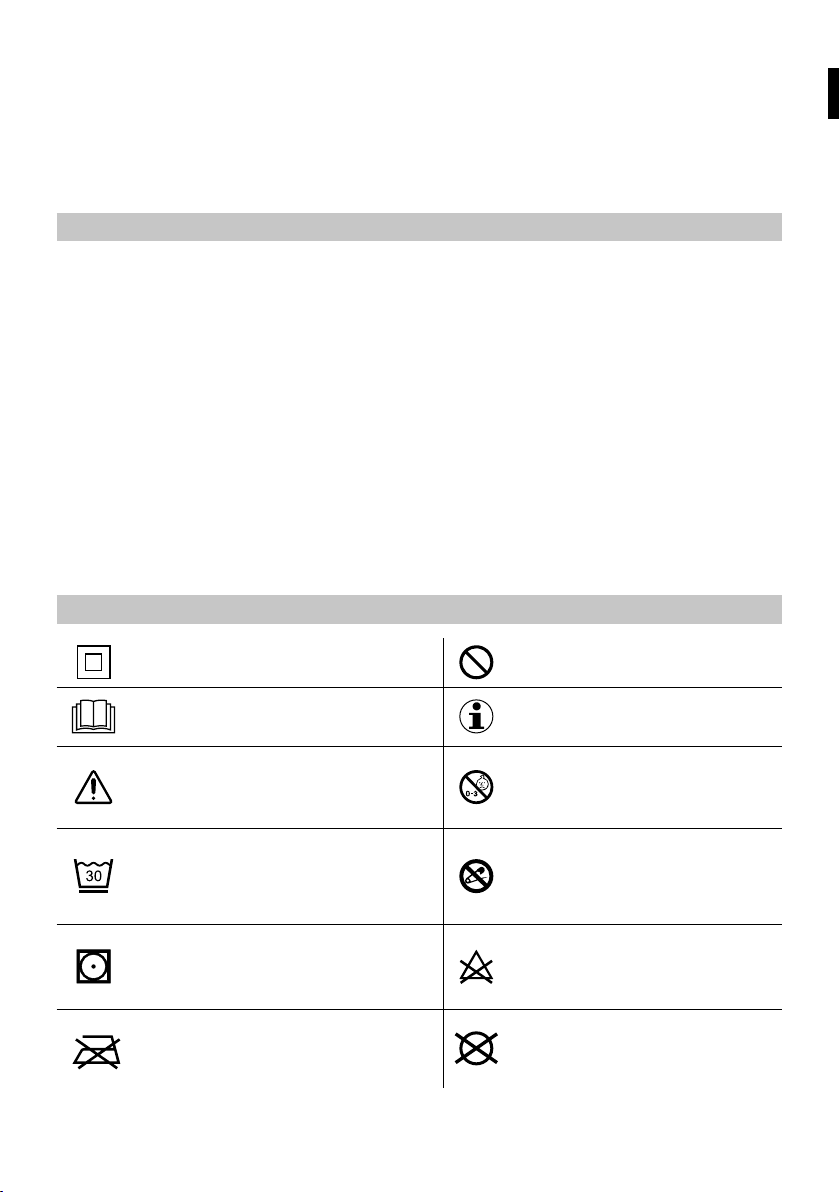
Dreamland R7521 User manual

Instructions for use
HEATED THROW
HEATED THROW
COUVERTURE CHAUFFANTE
SOFADEKEN
HEIZÜBERWURF
PLAID RISCALDABILE
VÄRMEFILT
EN
FR
NL
DE
IT
SE
PAGE 1
PAGE 11
PAGINA 21
SEITE 31
PAGINA 41
SIDA 51
TYPE R7521
R7526

1
EN
ILLUSTRATIVE GUIDE
DESCRIPTION OF THE APPLIANCE
TECHNICAL DATA
1. Throw connector
2. Control unit connector
3. Mains socket
4. Rating Label
5. Throw
6. Timer selector
7. ON/OFF button
8. Temperature selector
9. Stand-by LED
10. Auto shut off timer LED
11. Temperature LED
Temperature table
6Fast Pre-heat
5-4
Medium Pre-heat
3-1 Continuous or all
night use
[B]
3
5
4
[A]
1 2
[C]
6
7
8
911
10
TYPE R7521
220-240 V 50/60 Hz 150 W TYPE R7526
220-240 V 50/60 Hz 150 W

2
EN
Dear Customer, thank you for choosing our product. We feel certain
you will appreciate its quality and reliability as it was designed and
manufactured with customer satisfaction in mind. These instructions
for use are compliant with the European Standard EN 82079.
INDEX
Illustrative guide page 1
Description of the appliance page 1
Technical data page 1
Symbols page 2
Important instructions page 3
Use page 5
Cleaning and maintenance page 7
Storing the throw page 8
Troubleshooting page 9
Disposal page 9
Assistance and warranty page 10
SYMBOLS
Class II appliance Prohibition
Read the instructions Information
Caution/Warning/Danger NOT to be used by very
young children (0-3 years)
Wash at a maximum
temperature of 30 °C on a
delicate cycle
Do not insert pins
Dry in a tumble dryer on a cycle
at a moderate temperature Do not bleach
Do not iron Do not dry clean

3
EN
I
MPORTANT INSTRUCTIONS.
RETAIN FOR FUTURE USE.
WARNING! Instructions and warnings for safe use.
Before using this appliance, carefully read the instructions
for use and in particular the safety notes and warnings,
which must be complied with. Keep this manual together
with its illustrative guide for future consultation. Should
you transfer the appliance to another user, make sure
you hand over this documentation as well.
NOTE: should any part of this manual be difficult to understand or any
doubt arise, contact the company at the address indicated on the last
page before using the appliance.
NOTE: persons with impaired vision may consult these instructions for
use in digital format at the website www.tenactagroup.com
• After unpacking, make sure the appliance is intact, complete with all its parts as
shown in the illustrative guide and with no sign of damage. If in any doubt, do not
use the appliance and contact an authorised service centre.
WARNING! Risk of suffocation.
Children shall not play with the packaging. Keep the plastic bag
out of the reach of children.
• This appliance must be used only for the purpose for which it was
designed, namely as a throw (wrap) for home use. Any other use is
considered not compliant with the intended use and therefore dangerous.
• Before connecting the appliance to the mains supply, make sure that the
voltage and frequency indicated on the technical data of the appliance
correspond to those of the mains supply. The rating is on the appliance
or on the power supply unit, if any (see illustrative guide).
• This appliance can work automatically at a frequency of 50 Hz or 60 Hz.

4
EN
• This appliance is only to be used with the types of detachable control
unit that are marked on the appliance.
Children under the age of three are not to use this appliance
due to their inability to react to overheating.
• This appliance can be used by children older than 3 years and younger
than 8 years under supervision and with the control always set to
minimum temperature (heat setting 1).
• This appliance can be used by children aged from 8 years and above
and persons with reduced physical, sensory or mental capabilities or
lack of experience and knowledge if they have been given supervision or
instruction concerning use of the appliance in a safe way and understand
the hazards involved. Children shall not play with the appliance. Cleaning
and user maintenance must not be carried out by children without
supervision.
• This appliance must not be used by persons insensitive to heat and other
very vulnerable persons who are unable to react to overheating.
• The cable and control unit of the appliance can give rise to risks
of entanglement, strangulation, tripping or treading if not correctly
arranged. The user shall make sure that electric cords shall be arranged
in a safe way.
• Always disconnect the appliance from the mains supply before cleaning
or performing maintenance and when the appliance is not in use.
• Examine the appliance frequently for signs of wear or damage. If the
appliance has been misused or does not work, contact an authorised
technical service centre before switching it on again.
• If the supply cord is damaged, take the whole appliance to an authorised
technical service centre for the replacement of the control unit, so as to
prevent all risks.
• If the appliance is used on an adjustable bed, check that the blanket and
cord do not become trapped or rucked, for example in hinges.
• This appliance is not intended for medical use in hospitals.
• DO NOT use if wet.

5
EN
DO NOT INSERT PINS OR NEEDLES.
• When storing the appliance, allow it to cool down before folding.
WARNING! DO NOT crease the appliance by placing items
on top of it during storage.
WARNING! For use, cleaning, maintenance and storage of
the appliance, please follow the instructions specified in the
corresponding chapters.
• Persons with a pacemaker must NOT use this appliance.
• DO NOT use the appliance with wet hands or damp feet.
• DO NOT pull the power cable or the appliance itself to remove the plug
from the socket.
• DO NOT pull or lift the appliance by the supply cord.
• When using the appliance at home outside, do not expose the appliance
to humidity, to the effects of weather (rain, snow, etc. ) or to extreme
temperatures. DO NOT leave the appliance outside after use.
• If the appliance is faulty or malfunctions, switch it off and do not tamper
with it. Contact an authorised technical service centre for any repairs.
• DO NOT use this appliance to warm animals.
• DO NOT tuck in.
• See the external packaging for the characteristics of the appliance.
USE
• Spread the throw over your sofa, armchair or bed ensuring that the throw
connector is at the foot position.
• Place the throw over you without wrapping it tightly and without sitting on it as this
may cause the overheat protection system to activate.
CONNECTING THE CONTROL UNIT
• Insert the control unit connector (2) in the throw connector (1) to connect the control
unit to the throw.
• Insert the plug of the control unit cable in the mains socket (3). Every time the plug is

6
EN
inserted, the control unit automatically performs a self-diagnosis, lighting up all LEDs
(10, 11) in a clockwise sequence for around two seconds.
SWITCHING ON AND SELECTING THE RIGHT TEMPERATURE
The control unit can be set to the following temperature levels:
6: Fast pre-heat temperature
5-4: Medium pre-heat temperature
3-1: Continuous or all-night use
• To switch the throw on press the ON/OFF button (7). Every time the appliance is turned on,
the control unit automatically checks the appliance is working correctly, lighting up all LEDs
(10, 11) in a clockwise sequence. Following this check, the control unit automatically sets
temperature 6 and the timer (auto-o time) to 1 hour.
• For fast pre-heat, use maximum temperature 6. If you like a medium pre-heat temperature,
then you can select 4-5 by pressing the temperature selector button (8) until the LED for
the required temperature lights up (11). The higher the number selected, the higher the
temperature.
IMPORTANT: The time needed for the throw to warm up will depend on the room
temperature. To judge the temperature accurately, lie on your sofa with the throw
draped over you. Do not rely on a hand placed on the throw.
CONTINUOUS USE
For continuous use, set the control unit to temperature levels
from 1 to 3 only.
To set the control unit to the continuous use temperature, press the temperature selector button
(8) until LEDs 1, 2 or 3 light up (11).
DO NOT set the control unit to a higher temperature than
recommended for continuous use.
If the control unit is set to a higher temperature the user may
suer skin burns or heat stroke.
WARNING! DO NOT place the control unit under the pillow
or under the sheets when in use.

7
EN
AUTO SHUT OFF TIMER
The throw has an automatic shut o timer of 1,3 or 9 hours. When switched on, the control
unit automatically sets itself to 1 hour on the auto shut o timer and LED 1h lights up in
green (10). To set a dierent auto shut o timer, press the timer selector button (6) and
select the desired timer. Each time the auto shut o time is reset, the timer starts from
zero. When the time has elapsed, the throw switches o and the standby LED (9) lights
up in blue.
NOTE:
should the power supply accidentally be interrupted during use, when
the control unit is switched back on, it will maintain the temperature and timer
settings in use previously and the timer counter will start from zero.
NOTE: the light intensity reduces around 15 seconds after any button is last
pressed, so that the display light does not bother users. Similarly, the standby
LED becomes less bright 15 seconds after it is activated.
SWITCHING OFF
Switch the throw o by pressing the ON/OFF button (7) and remove the plug from the socket (3).
CLEANING AND MAINTENANCE
The throw is washable. Check the washing symbols on the label to ensure it is washed
correctly.
WARNING! Always disconnect the appliance from the mains
and disconnect the control connector from the throw before
cleaning or performing maintenance.
BEFORE WASHING
• Take the plug of the control unit cable out of the mains socket (3).
• Press the grip levers at the sides of the control unit connector (2) to remove the control
unit connector from the throw connector (1).
MACHINE WASHING
• The throw can be cleaned in the washing machine at 30°C, on a delicate cycle.
• Use only the delicate cycle for spinning. DO NOT make an additional spinning cycle.
DRYING IN THE TUMBLE DRYER
• The throw can be dried in a tumble dryer on a delicate cycle at a moderate temperature,

8
EN
but at the end of the drying cycle it must be air-dried to allow it to dry completely.
• Remove the throw from the tumble dryer at the end of the drying cycle and reshape it
to its original size.
• Allow the throw to fully air-dry before using it again.
DRYING IN THE OPEN AIR
• When the throw is spread out to dry on a clothes airer, it must be stretched so the original
size is more or less maintained. This is best done while the throw is still damp, working
alternately on the opposite corners and pulling one side at a time.You might have to repeat
this procedure several times until the throw is completely dry.
WARNING! Dry the appliance flat without using pegs to avoid
damaging it. Leave it to dry, laid out flat on a clothes airer, not
in direct sunlight
.
• Only use the throw when it’s thoroughly dry.
• Do not iron the throw.
WARNING! Examine the appliance against the light to make sure
the cables are not bent or twisted.
WARNING! If the appliance does not resume its original size or if
problems arise with the internal cables contact an authorised service
centre for a safety check.
STORING THE THROW
When not in use, store as follows:
• If the throw has been washed, wait until it’s completely dry;
• Fold it like a normal throw;
• You are advised to store the throw in the original packaging it was supplied in;
• When storing the appliance, allow it to cool down before folding;
• Put the throw away in a dry place.
Examine the appliance and its supply cord frequently for signs of wear or damage.
lf there are such signs or in the case of malfunction, contact an authorised technical
service centre.

9
EN
TROUBLESHOOTING
This chapter describes the most common problems that can arise using the
appliance. If the problems cannot be solved with the information below, please
contact the Authorised Service Centre.
Problem Solution
The LEDs on the control unit
do not light up.
Check that the control unit plug is fully inserted in
the socket (3). If the LEDs remain off, remove the
control unit plug from the socket (3) and return the
throw to an authorised technical service centre.
The blue warning light is
flashing.
Turn the control unit off and remove the plug from
the socket (3). Check that the control unit connector
(2) is fully inserted in the throw connector (1) and
reinsert the plug in the socket (3). If the standby LED
continues to flash, return the throw to an authorised
technical service centre.
Temperature LED 1 (11) is
flashing.
Return the throw to an authorised technical service
centre to be checked.
The product has been used
incorrectly or is damaged.
The power cable or another
internal wire is damaged.
The control unit is damaged.
There are holes or tears in the
fabric or stubborn creases that
do not spread out.
DISPOSAL
The packaging of the appliance is made of recyclable materials. Dispose of the packaging in
accordance with the environmental protection regulations.
Pursuant to Directive 2012/19/EU on waste electrical and electronic equipment (WEEE), the

10
EN
crossed bin symbol on the appliance or its packaging indicates that the appliance must be
disposed of separately from other waste at the end of its useful life.
The user must therefore take the appliance to an appropriate recycling centre for electrical and
electronic equipment. Alternatively, instead of handling the disposal, the user can hand over the
appliance to the retailer when a new, equivalent one is purchased. The user can hand over electronic
products measuring less than 25 cm to retailers of electronic products having a sales area of at least
400 m2free of charge and with no obligation to buy. Proper waste sorting prior to sending the equipment
no longer used for recycling, processing and disposal in a manner that respects the environment
contributes towards avoiding negative impacts on the environment and on health and promotes the
reuse and/or recycling of the equipment’s material.
ASSISTANCE AND WARRANTY
The appliance is guaranteed for a period of two years from the date of delivery. The warranty period
starts from the date indicated on the receipt/invoice (if clearly legible), unless the purchaser can
demonstrate that it was delivered at a later date. In the case of a product defect that existed prior to the
delivery date, its repair or replacement is guaranteed without any cost, unless one of the two remedies
is disproportionate with respect to the other.The purchaser is required to report the lack of conformity to
an authorised Service Centre within two months of the discovery of the defect.
The warranty does not cover all the parts that are defective as a result of the following:
a. damage from transport or accidental drops,
b. incorrect installation or inadequate electrical system,
c. repairs or alterations performed by unauthorised personnel,
d. insufficient or improper maintenance and cleaning,
e. products and/or product parts subject to wear and/or consumables, including the reduced operating
time of the batteries (if installed) due to usage or age,
f. non-observance of the operating instructions for the appliance, negligent or careless usage,
g. cable twisted and/or bent excessively,
h. cable pulled or torn,
i. heating panel bent during use, crumpled and/or torn,
j. incorrect washing (e.g. centrifuge, wringing, with control unit enabled, etc.),
k. obvious burn marks from external sources (cigarette etc.),
l. bent back on itself.
The above list is provided as a mere example, and is not complete, as this warranty does not apply to any
of the circumstances that cannot be connected to appliance manufacturing defects.The warranty is also
excluded in the case of improper use of the appliance and in case of professional use.The manufacturer
declines all liability for any damage that can be caused directly or indirectly to people, property or pets
as a result of the failure to observe all the instructions indicated in the “Instructions and warnings booklet”
regarding appliance installation, use and maintenance.
This does not apply to the seller’s contractual warranty actions.
Service mode
The appliance may only be repaired by an authorised service centre. If under warranty, the defective
appliance must be sent to the Service Centre together with proof of purchase that indicates the date of
purchase or delivery.

11
FR
GUIDE ILLUSTRÉ
DESCRIPTION DE L’APPAREIL
DONNÉES TECHNIQUES
1. Connecteur de la couverture
2. Connecteur de dispositif de
commande
3. Prise principale
4. Étiquette de données techniques
5. Couverture
6. Sélecteur de minuterie
7. Interrupteur d’allumage
8. Sélecteur de température
9. Voyant de veille
10. Voyant de minuterie arrêt automatique
11. Voyant de température
Table de température
6Pré-chauffage
rapide
5-4
Pré-chauffage
moyen
3-1 Utilisation continue
ou nocturne
[B]
3
5
4
[A]
1 2
TYPE R7521
220-240 V 50/60 Hz 150 W TYPE R7526
220-240 V 50/60 Hz 150 W
[C]
6
7
8
911
10

12
FR
Cher client, nous vous remercions d’avoir choisi notre produit. Nous
sommes certains que vous apprécierez la qualité et la fiabilité de cet
appareil, conçu et fabriqué afin de vous satisfaire. Le présent mode
d’emploi est conforme à la norme européenne EN 82079.
SOMMAIRE
Guide illustré page 11
Description de l’appareil page 11
Données techniques page 11
Symboles page 12
Instructions importantes page 13
Utilisation page 15
Nettoyage et entretien page 17
Stockage de la couverture page 18
Problèmes et solutions page 19
Mise au rebut page 19
Assistance et garantie page 20
SYMBOLES
Appareil de classe II Interdiction
Lire les instructions Information
Attention/Avertissement/
Danger
Les très jeunes enfants
(0-3 ans) NE DOIVENT
PAS l’utiliser
Laver à la température
maximale de 30°C sur un cycle
délicat
Ne pas insérer de broches
Sécher dans un sèche-linge
sur un cycle à une température
modérée
Ne pas utiliser d’eau de
javel
Ne pas repasser Ne pas nettoyer à sec

13
FR
INSTRUCTIONS IMPORTANTES.
À CONSERVER POUR UTILISATION FUTURE.
AVERTISSEMENT ! Instructions et avertissements pour une
utilisation sûre.
Avant d’utiliser cet appareil, il convient de lire
soigneusement le présent mode d’emploi et en particulier
les consignes de sécurité et avertissements, qui doivent
être respectés. Merci de conserver le présent manuel
avec son guide illustré pour consultation future. En cas
de transfert à un autre utilisateur, s’assurer de céder
également la présente documentation.
NOTE : en cas de difficulté de compréhension d’une partie de ce manuel
ou de doute, contacter la société à l’adresse indiquée sur la dernière
page avant d’utiliser l’appareil.
NOTE:les personnesmalvoyantes peuventconsulterlaversionnumérique
de ce mode d’emploi sur le site internet www.tenactagroup.com
• Après le déballage, s’assurer que l’appareil soit en parfait état, qu’il comprenne
bien tous les composants indiqués dans le guide illustré et qu’il ne présente aucun
signe de dommage lié au transport. En cas de doute, ne pas utiliser l’appareil et
contacter le service d’assistance agréé.
AVERTISSEMENT ! Risque d’étouffement.
Les enfants ne doivent pas jouer avec l’emballage. Tenir le sac
plastique hors de portée des enfants.
• Cet appareil doit être utilisé uniquement dans le but pour lequel il a été
conçu, à savoir comme une couverture (châle) à usage domestique.
Toute autre utilisation est considérée comme non conforme à l’usage
prévu et donc dangereuse.
• Avant de brancher l’appareil au réseau électrique, contrôler que la tension et la
fréquence indiquées sur les données techniques de l’appareil correspondent
à celles de la prise disponible. Les données techniques se trouvent sur
l’appareil et sur l’adaptateur, si elle est présente (voir le guide illustré).
• Cet appareil peut fonctionner automatiquement à une fréquence de
50 Hz ou de 60 Hz.

14
FR
• Cet appareil ne doit être utilisé qu’avec les types de dispositif de
commande séparables qui sont indiqués sur l’équipement.
Les enfants âgés de moins de trois ans ne doivent pas utiliser
l’appareil du fait de leur incapacité à réagir à une surchauffe.
• Cet appareil peut être utilisé par des enfants âgés de 3 à 8 ans sous
surveillance et avec la commande toujours réglée sur la température
minimale (réglage de la chaleur sur 1).
• Cet appareil peut être utilisé par des enfants âgés de 8 ans et plus et par des
personnes présentant des capacités physiques, sensorielles ou mentales
réduites ou un manque d’expérience et de connaissances s’ils sont sous
surveillance ou s’ils ont reçu des instructions concernant une utilisation en
toute sécurité de l’appareil et s’ils comprennent les risques impliqués. Ne
pas laisser les enfants jouer avec l’appareil. Le nettoyage et la maintenance
utilisateur ne doivent pas être effectués par des enfants sans surveillance.
• Cet appareil ne doit pas être utilisé par des personnes insensibles à la
chaleur et par d’autres personnes très vulnérables incapables de réagir à la
surchauffe.
• Le câble d’alimentation et le dispositif de commande de l’appareil
peuvent provoquer des risques d’enchevêtrement, de strangulation,
de trébuchement ou de piétinement s’ils sont mal installés. L’utilisateur
doit s’assurer que les câbles d’alimentation électrique sont disposés de
manière sûre.
• Débrancher toujours l’appareil de la prise avant de nettoyer ou d’effectuer
l’entretien de l’appareil ou s’il n’est pas utilisé.
• Examiner l’appareil fréquemment pour vérifier les signes d’usure ou de
dommage. Si l’appareil a été mal utilisé ou ne fonctionne pas, contacter
un centre d’assistance technique agréé avant de le rallumer.
• Si le câble d’alimentation est endommagé, amener l’appareil dans sa
globalité à un centre d’assistance technique agréé pour le remplacement
du dispositif de commande, de façon à prévenir tous les risques.
• Si l’appareil est utilisé sur un lit réglable, vérifier que la couverture et le
câble d’alimentation ne soient pas piégés ou coincés, par exemple dans
les articulations.
• Cet appareil n’est pas conçu pour un usage médical dans les hôpitaux.
• NE PAS UTILISER s’il est humide.

15
FR
NE PAS INTRODUIRE DE BROCHES OU D’AIGUILLES.
• Lors du rangement de l’appareil, le laisser refroidir avant de le replier.
AVERTISSEMENT ! NE PAS plisser l’appareil en plaçant
des éléments dessus pendant le rangement.
AVERTISSEMENT ! Pour l’utilisation, le nettoyage, l’entretien et
le stockage de l’appareil, il convient de suivre les instructions
spécifiées dans les chapitres correspondants.
• Les personnes porteurs d’un pacemaker ne doivent PAS utiliser cet appareil.
• NE PAS utiliser l’appareil avec les mains mouillées ou les pieds
humides.
• NE PAS tirer le cordon d’alimentation ou l’appareil même pour enlever
la fiche de la prise électrique.
• NE PAS tirer ou soulever l’appareil par le câble d’alimentation.
• En cas d’usage domestique à l’extérieur, ne pas exposer l’appareil à l’humidité,
aux agents atmosphériques (pluie, neige, etc.) ou à des températures
extrêmes. NE PAS laisser l’appareil à l’extérieur après l’utilisation.
• En cas de panne ou de mauvais fonctionnement de l’appareil, l’éteindre
et ne pas essayer de le modifier. Contacter un centre d’assistance
technique agréé pour les éventuelles réparations.
• NE PAS utiliser cet appareil pour réchauffer des animaux.
• NE PAS border.
• Pour les caractéristiques de l’appareil, consulter l’extérieur de
l’emballage.
UTILISATION
• Placer la couverture sur son canapé, son fauteuil ou son lit en s’assurant que le
connecteur se trouve au niveau des pieds.
• Placer la couverture sur soi sans la serrer et sans s’y asseoir dessus car cela
pourrait entraîner l’activation du système de protection contre la surchaue.
BRANCHEMENT DU DISPOSITIF DE COMMANDE
• Insérer le connecteur du dispositif de commande (2) dans le connecteur de la
couverture (1) pour connecter le dispositif de commande à la couverture.

16
FR
• Brancher la che du câble d’alimentation du dispositif de commande sur la prise
(3). À chaque fois que la prise est insérée, le dispositif de commande eectue
automatiquement un auto-diagnostic, et tous les voyants (10, 11) s’allument dans
une séquence horaire pendant environ deux secondes.
ALLUMAGE ET SÉLECTION DE LA BONNE TEMPÉRATURE
Le dispositif de commande peut être réglé aux niveaux de température suivants :
6: Température de pré-chauage rapide
5-4: Température de pré-chauage moyen
3-1: Utilisation continue ou nocturne
• Pour allumer la couverture, appuyer sur l’interrupteur d’allumage (7). À chaque fois que
l’appareil est allumé, le dispositif de commande vérie automatiquement que l’appareil
fonctionne correctement, en allumant tous les voyants (10, 11) dans une séquence horaire.
Suite à ce contrôle, le dispositif de commande règle automatiquement la température 6 et la
minuterie (durée d’arrêt automatique) à 1 heure.
• Pour un pré-chauage rapide, utiliser la température maximale 6. Pour une température de
pré-chauage moyen, sélectionner 4-5 en appuyant sur le bouton sélecteur de température
(8) jusqu’à ce que le voyant pour la température requise s’allume (11). Plus le numéro
sélectionné est haut, plus la température est élevée.
IMPORTANT : Le temps nécessaire pour que la couverture chauffe dépendra de la
température ambiante. Pour évaluer correctement la température, allongez-vous
sous votre couverture. Ne pas se fier à une main placée dessus.
UTILISATION CONTINUE
Pour une utilisation continue, régler le dispositif de commande
à des niveaux de températures 1 à 3 uniquement.
Pour régler le dispositif de commande sur la température d’utilisation continue, appuyer sur le
bouton sélecteur de température (8) jusqu’à ce que les voyants 1, 2 ou 3 s’allument (11).
NE PAS régler le dispositif de commande à une température
supérieure à celle recommandée pour une utilisation continue.
Si le dispositif de commande est réglé à une température
supérieure, l’utilisateur peut sourir de brûlures cutanées ou
de coup de chaud.
AVERTISSEMENT! NEPASmettrele dispositifde commande
sous l’oreiller ou sous les draps pendant l’utilisation.

17
FR
MINUTERIE ARRÊT AUTOMATIQUE
Votre couverture a une minuterie d’arrêt automatique de 1, 3 ou 9 heures. Lorsqu’il est
allumé, le dispositif de commande se règle automatiquement à 1 heure sur la minuterie
d’arrêt automatique et le voyant 1 h s’allume en vert (10). Pour régler une minuterie
d’arrêt automatique diérente, appuyer sur le bouton sélecteur de minuterie (6) et
sélectionner la minuterie souhaitée. À chaque fois que la durée d’arrêt automatique
est réinitialisée, la minuterie démarre à partir de zéro. Lorsque le temps s’est écoulé, la
couverture se coupe et le voyant de veille (9) s’allume en bleu.
NOTE :
Si l’unité d’alimentation électrique est accidentellement interrompue
pendant l’utilisation, lorsque le dispositif de commande est de nouveau allumé, il
maintiendra la température et les réglages de la minuterie précédemment utilisés
et le compteur de la minuterie démarrera à partir de zéro.
NOTE : L’intensité lumineuse est réduite environ 15 secondes après la
dernière pression d’un bouton quel qu’il soit de sorte que la lumière de
l’achage ne gène pas les utilisateurs pendant la nuit. De même, le voyant de
veille devient moins brillant 15 secondes après son activation.
EXTINCTION
Couper la couverture en appuyant sur l’interrupteur d’allumage (7) et débrancher la prise (3).
NETTOYAGE ET ENTRETIEN
La couverture est lavable. Vérifier les symboles de lavage sur l’étiquette du revêtement
pour s’assurer qu’elle a été lavée correctement.
AVERTISSEMENT ! Toujours débrancher l’appareil du secteur
et séparer le dispositif de commande de la couverture avant le
nettoyage ou de réaliser l’entretien.
AVANT LE LAVAGE
• Débrancher la che du câble d’alimentation du dispositif de commande de la prise (3).
• Appuyer sur les leviers de saisie sur les côtés du connecteur du dispositif de commande
(2) pour enlever le connecteur du dispositif de commande du connecteur de la
couverture (1).
LAVAGE EN MACHINE
• La couverture peut être nettoyée en machine à 30 °C, en cycle délicat.
• Utiliser uniquement le programme délicat pour l’essorage. IL EST INTERDIT d’eectuer
un cycle d’essorage supplémentaire.

18
FR
SÉCHAGE AU SÈCHE-LINGE
• La couverture peut être séchée au sèche-linge sur un cycle délicat à une température
modérée, mais à la n du cycle de séchage, elle doit être séchée à l’air pour lui
permettre de sécher totalement.
• Retirer la couverture du sèche-linge à la n du cycle de lavage et lui faire reprendre
sa forme originale.
• Laisser la couverture sécher totalement à l’air libre avant de la réutiliser.
SÉCHAGE À L’AIR LIBRE
• Lorsque la couverture est étalée pour sécher sur un séchoir, elle doit être étirée de façon à
maintenir plus ou moins sa taille originale.Cela se fait plus facilement lorsque la couverture
est encore humide, en travaillant alternativement sur les angles opposés et en tirant un
côté à la fois. Il peut s’avérer nécessaire de répéter cette procédure plusieurs fois jusqu’à
ce que la couverture soit totalement sèche.
AVERTISSEMENT ! Sécher l’appareil à plat sans utiliser de pinces
à linge pour éviter de l’endommager. La laisser sécher, disposée
à plat sur un séchoir et à l’abri de la lumière directe du soleil.
• Utiliser la couverture uniquement lorsqu’elle est parfaitement sèche.
• Ne pas repasser la couverture.
AVERTISSEMENT ! Examiner l’appareil face à la lumière pour
s’assurer que les câbles d’alimentation ne sont pas pliés ou tordus.
AVERTISSEMENT ! Si l’appareil ne reprend pas sa taille d’origine ou en
cas de problèmes avec les câbles d’alimentation intérieurs, contacter
un centre d’assistance technique agréé pour un contrôle de sécurité.
STOCKAGE DE LA COUVERTURE
Lorsqu’il n’est pas utilisé, stocker comme suit :
• Si la couverture a été lavée, attendre qu’elle soit totalement sèche ;
• La replier comme une couverture normale ;
• Nous vous conseillons de ranger la couverture dans son emballage d’origine ;
• Lors du rangement de l’appareil, le laisser refroidir avant de le replier ;
• Mettre la couverture dans un endroit sec.
Examiner fréquemment l’appareil et son câble d’alimentation an de vérier les signes
d’usure ou de dommages. Si ces signes apparaissent ou en cas de dysfonctionnement,
contacter un centre d’assistance technique agréé.

19
FR
PROBLÈMES ET SOLUTIONS
Ce chapitre indique les problèmes les plus courants liés à l’utilisation de l’appareil.
Si les problèmes ne peuvent être réglés grâce aux informations suivantes,
contacter le centre d’assistance technique agréé.
Problème Solution
Les voyants sur le dispositif de
commande ne s’allument pas.
Vérifier que la fiche du dispositif de commande est
totalement branchée dans la prise (3). Si les voyants
restent éteints, enlever la fiche du dispositif de com-
mande de la prise (3) et renvoyer la couverture à un
centre d’assistance technique agréé.
Le témoin d’avertissement bleu
clignote.
Couper le dispositif de commande et débrancher
la prise (3).Vérifier que le connecteur du dispositif
de commande (2) est totalement inséré dans le
connecteur de la couverture (1) et réinsérer la fiche
dans la prise (3). Si le voyant de veille continue
à clignoter, remettre la couverture à un centre
d’assistance technique agréé.
Le voyant de température 1 (11)
clignote.
Renvoyer la couverture à un centre d’assistance
technique agréé pour qu’elle y soit contrôlée.
Le produit a été utilisé de
manière incorrecte ou est
endommagé.
Le câble d’alimentation ou
tout autre câble interne est
endommagé.
Le dispositif de commande est
endommagé.
Il y a des trous ou des
déchirures dans le tissu ou des
plis tenaces qui ne partent pas.
MISE AU REBUT
L’emballage de l’appareil est réalisé en matériaux recyclables. Jeter l’emballage conformément aux
réglementations en matière de protection environnementale.
Conformément à la directive 2012/19/UE relative aux déchets d’équipements électriques et
électroniques (DEEE), le symbole de poubelle barrée sur l’appareil ou son emballage indique que
l’appareil doit être éliminé séparément des autres déchets à la fin de sa vie utile.
L’utilisateur devra donc remettre l’appareil arrivé en fin de vie aux centres appropriés de tri sélectif
des déchets électriques et électroniques.Alternativement, au lieu de s’occuper de la mise au rebut,
This manual suits for next models
1
Table of contents
Languages:
Other Dreamland Heating Pad manuals
Popular Heating Pad manuals by other brands

Sunbeam
Sunbeam Feel Perfect EP5000 Instruction booklet

inventum
inventum COMFORT instruction manual

Soehnle
Soehnle 68057 operating instructions

Sensede
Sensede DEEP RELAX CK10S operating instructions

inventum
inventum HNK115 instruction manual

Pure Enrichment
Pure Enrichment weighted warmth XL WEIGHTED PAD user manual