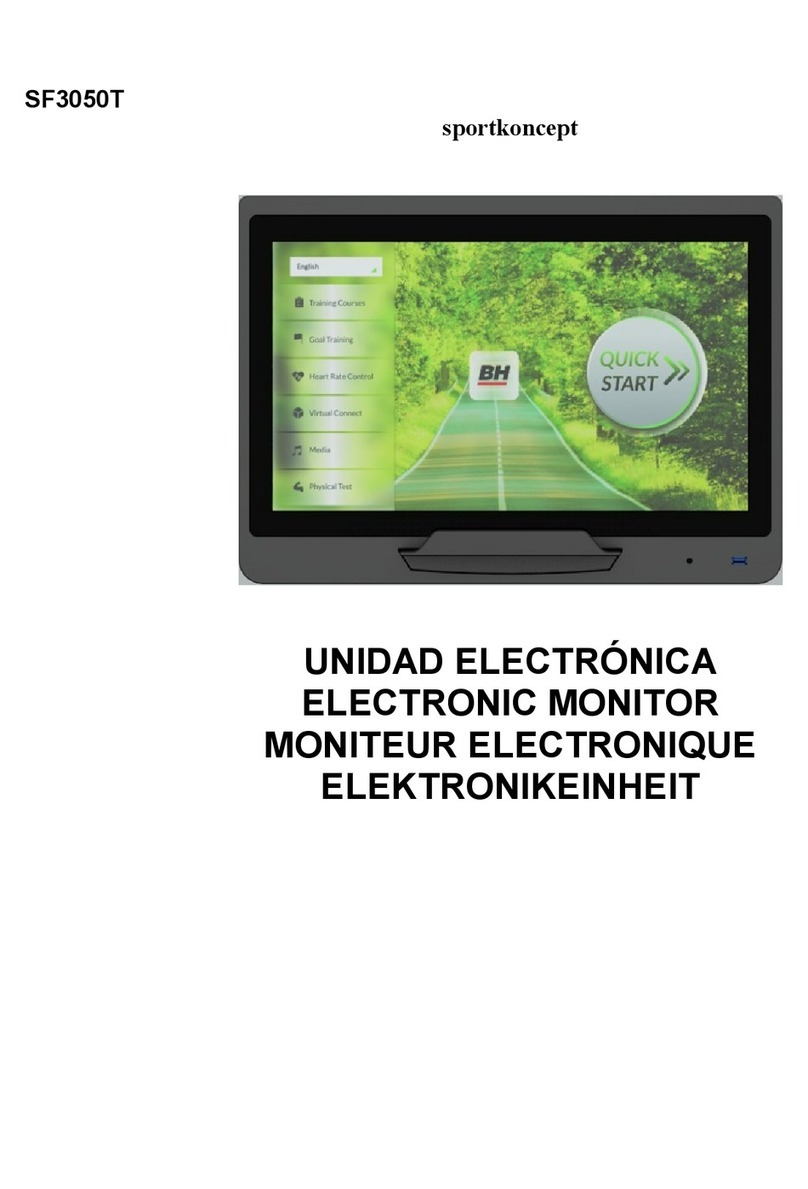
BH Lightfit 1030 User manual

1
G2336RF
UNIDAD ELECTRÓNICA
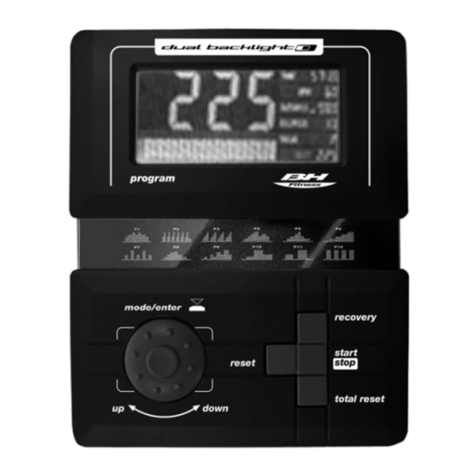
ELECTRONIC MONITOR
UNITÉ ÉLECTRONIQUE
ELEKTRONIKEINHEIT
UNIDADE ELECTRÓNICA
IMPIANTO ELETTRONICO
ELEKTRONISCHER MONITOR

2
Fig.1 Fig.2
Fig.3

3
Español
MONITOR ELECTRÓNICO.-
CONEXIÓN A LA RED.
Introduzca la clavija de enganche (m)
del transformador en el punto de
conexión (k), del cuerpo central,
(parte trasera inferior) y conecte el
transformador (92) de corriente a la
red de 220 V, Fig.1.
Para hacer más cómodo y simple el
control de su ejercicio este electrónico
muestra simultáneamente la
velocidad, la distancia, el tiempo de
ejercicio, las calorías consumidas y el
pulso. Si durante el desarrollo del
ejercicio pulsa el botón START/STOP
todas las funciones del electrónico se
pararán. Si pulsa de nuevo
START/STOP todas las funciones se
pondrán de nuevo en funcionamiento.
El monitor se apagará
automáticamente cuando la unidad
esté 4 minutos parada.
Importante: Deposite los
componentes electrónicos en
contenedores especiales, Fig.2.
FUNCIONES DEL MONITOR.-
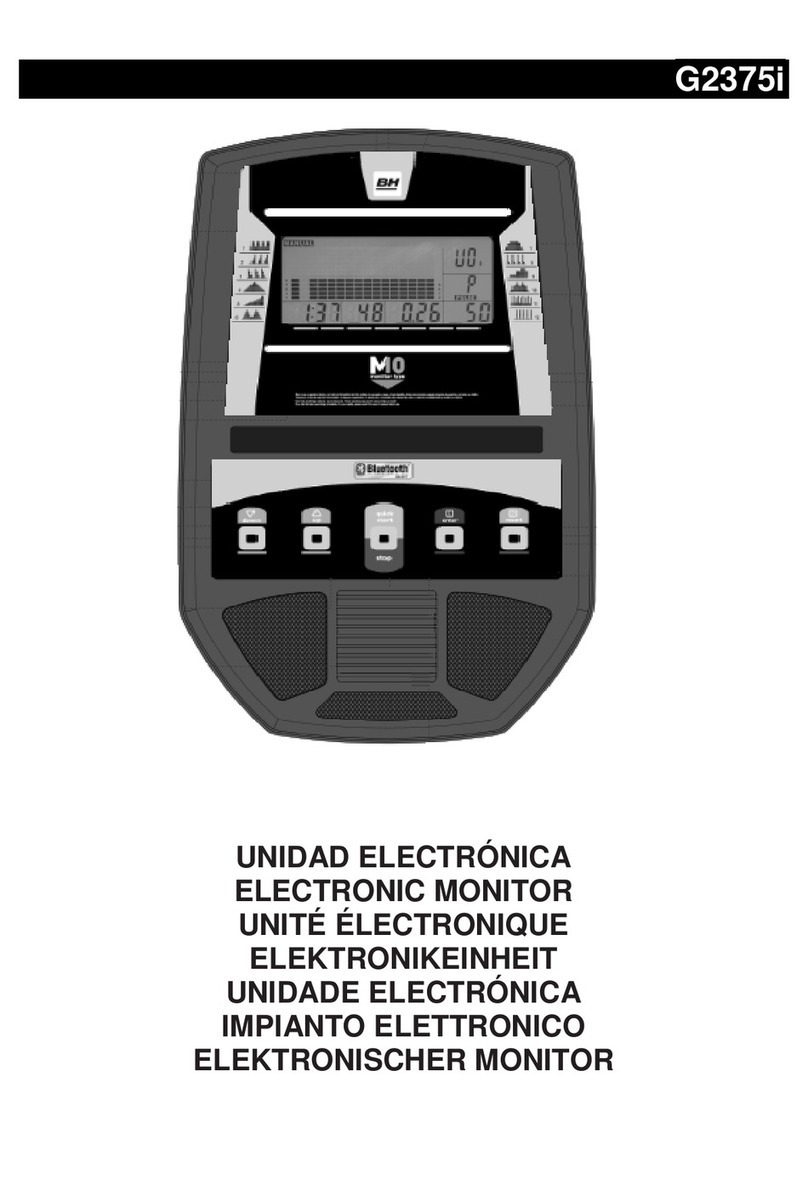
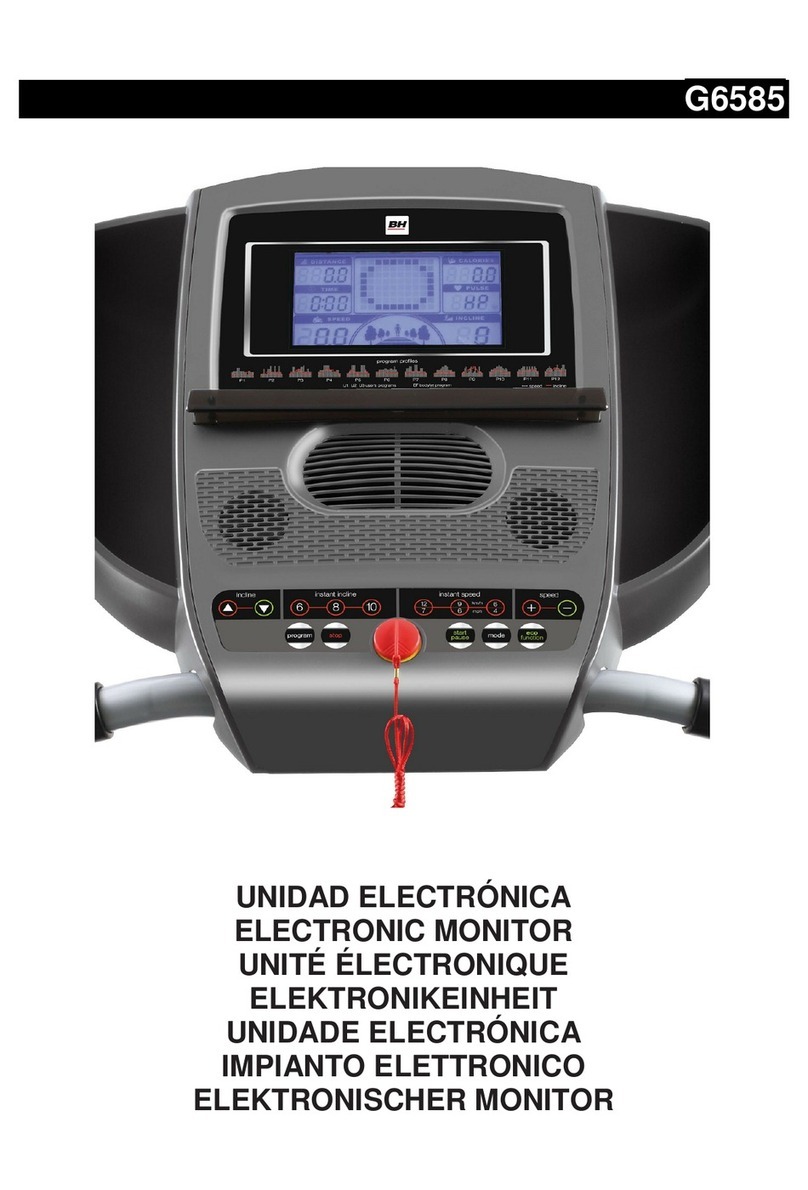
Este monitor dispone de 5 teclas
MODE, ENTER; UP; DOWN; START
/STOP. En el display muestra
simultaneamente en la parte central, el
nivel del programa que haya elegido y
la velocidad/RPM. En los laterales del
display muestran seis ventanas que le
indica el TIEMPO; DISTANCIA/ ODO
(ODO recorrido total); CALORÍAS/
WATIOS; PROGRAMA/NIVEL; THR
(TARGET HEART RATE); PULSO.
Este monitor dispone tambien de 1
programa manual; 12 programas
predefinidos de niveles de frenada; 4
programas de usuario; 5 programas de
control de ritmo cardiaco; 1 programa
de watios; 1 programa BODY-FAT.
Pulsando la tecla MODE se alternarán
los valores a visualizar.
FUNCION MANUAL P1.-
Pulse la tecla START/STOP, para
poner en marcha el monitor, le
aparecerá en el display PROGRAM 1.
Pulse la tecla START/STOP para
iniciar el ejercicio y con las teclas
UP/DOWNsuba o baje la
resistencia del ejercicio, teniendo 16
niveles de frenada.
Programación de tiempo.-
Pulse la tecla START/STOP, para
poner en marcha el monitor pulsando
la tecla ENTER y le parpadeara la
ventana del tiempo pulsando las teclas
UP/DOWN, puede programar el
tiempo de su ejercicio desde (1-99
Minutos), seleccione el tiempo y pulse
START/STOP para comenzar el
ejercicio. El tiempo irá en
disminución, hasta alcanzar el valor
“cero“ y el monitor le emitirá unos
pitidos advirtiéndole que ha llegado al
valor programado.

4
Programación de la distancia.-
Pulse la tecla START/STOP, para poner
en marcha el monitor pulsando la tecla
ENTER le parpadeará la ventana de la
distancia, pulsando las teclas
UP/DOWN, puede programar la
distancia de su ejercicio desde (1- 999
Km), seleccione la distancia y pulse
START/STOP para comenzar el ejercicio.
La distancia irá en disminución, hasta
alcanzar el valor «cero» y el monitor le
emitirá unos pitidos advirtiéndole que ha
llegado al valor programado.
Programación de las calorías.-
Pulse la tecla START/STOP, para
poner en marcha el monitor pulsando la
tecla ENTER le parpadeara la ventana
de las calorías, pulsando las teclas
UP/DOWN, puede programar las
calorías de su ejercicio desde (10- 9990
Cal.), seleccione las calorías y pulse
START/STOP para comenzar el
ejercicio. Las calorías irán en
disminución, hasta alcanzar el valor
“cero“ y el monitor le emitirá unos pitidos
advirtiéndole que ha llegado al valor
programado.
Programación del HEART RATE
(ritmo cardiaco).-
Pulse la tecla START/STOP, para
poner en marcha el monitor, pulsando la
tecla ENTER le parpadeará la ventana
de la edad (AGE), pulsando las teclas
UP/DOWNseleccione su edad. Al
introducir su edad, el monitor le puede
sugerir un ritmo cardiaco objetivo para
el ejercicio, este valor de ritmo cardiaco
es el 85% del resultado de la cifra 220
restar la edad, de este modo si el ritmo
cardiaco es igual ó superior al valor
objetivo parpadeará, ya que se trata de
un aviso para el usuario para que
pedalee mas despacio o baje el nivel de
frenada.
FUNCION PROGRAMAS P2-
P13
Pulse la tecla START/STOP, para poner
en marcha el monitor, le aparecerá en
el display PROGRAM 1, pulse las
teclas UP/DOWNy seleccione el
gráfico de programa (2-13) que desee
para hacer su ejercicio,
PROG 2 STEPS
PROG 3 HILL
PROG 4 ROLLING
PROG 5 VALLEY
PROG 6 FAT BURN

5
PROG 7 RAMP
PROG 8 MOUNTAIN
PROG 9 INTERVALS
PROG 10 RANDOM
PROG 11 PLATEAU
PROG 12 FARTLEK
PROG 13 PRECIPICE
Pulse la tecla START/STOP para
comenzar.
El tiempo de duración del gráfiico del
programa es de 30 minutos, repartidos
en diez escalas de 3 minutos. Si por el
contrario programa el tiempo de
duración del programa, la duración del
mismo será repartida entre las diez
escalas.
Una vez comenzado el ejercicio usted
puede variar la resistencia de frenada
pulsando las teclas UP/DOWN.
PROGRAMA DE USUARIO
P14-P17.-
EL programa 14 es un programa de
usuario, para seleccionar.
Pulse la tecla START/STOP, para poner
en marcha el monitor, le aparecerá en
el display PROGRAM 1, pulse las
teclas UP/DOWNy seleccione el
gráfico de programa usuario 14.
PROG U1-U4
Pulse ENTER y le parpadeara la
ventana de TIME, puede programar el
tiempo, Pulse ENTER programe la
distancia, Pulse ENTER, programe las
calorías, Pulse ENTER introduzca su
edad. Pulse ENTER y le parpadeara la

6
primera línea del perfil, con las teclas
UP/DOWNseleccione la escala de
resistencia de frenada, pulse ENTER y
pasara a la segunda escala y así
sucesivamente hasta completar el perfil
que usted desea realizar el ejercicio,
pulse START/STOP y comience el
ejercicio.
El tiempo de duración del perfil, si no
se ha introducido ningún valor en la
programación de Tiempo es de 30
minutos, repartidos en 3 minutos por
escala de frenada.
PROGRAMAS CONTROL DEL
RITMO CARDIACO P18-P22.-
Los programas del 18 al 22 están
defiinidos para el control del ritmo
cardiaco (HRC).
En el programa 22 se puede programar
el nivel constante de su ritmo cardiaco,
cuando el valor de su ritmo este por
encima del valor programado, la
máquina le bajará la frenada y se
ajustará para mantener su valor, en el
caso contrario se el valor de su ritmo
esta por debajo del valor programado,
la maquina le aumentara la frenada y
se ajustara al valor programado.
En los programas del 18 al 21 puede
programar directamente su ritmo
cardiaco con diferentes máximos de
su ritmo cardiaco según la edad
(cálculo del valor máximo, a la cifra
220 restar la edad).
El programa 18 esta calculado para
un ritmo cardiaco máximo del 55%.
El programa 19 esta calculado para
un ritmo cardiaco máximo del 65%.
El programa 20 esta calculado para
un ritmo cardiaco máximo del 75%.
El programa 21 esta calculado para
un ritmo cardiaco máximo del 85%.
Para programar, pulse la tecla
START/STOP, para poner en marcha
el monitor, le aparecerá en el display
PROGRAM 1, pulse las teclas
UP/DOWNy seleccione el gráfico
de programa del 18 al 22 .
PROG 18 55% H.R.C.
PROG 19 65% H.R.C.
PROG 20 75% H.R.C.
PROG 21 85% H.R.C.

7
PROG 22 TARGET H.R.C.
Pulse ENTER y le parpadeará la
ventana de TIME, puede programar el
tiempo, Pulse ENTER programe la
distancia, Pulse ENTER, programe
las calorías, Pulse ENTER introduzca
su edad pulse START/STOP y
comience el ejercicio. En estos
programas tienen que estar las manos
colocadas en los sensores de pulso
(R) Fig.3.
En la ventana inferior del display
(TARGET H.R) le saldrá el valor ya
calculado de su valor máximo de ritmo
cardiaco.
PROGRAMA DE WATIOS
CONSTANTES P23.-
Para programar, pulse la tecla
START/STOP, para poner en marcha
el monitor, le aparecerá en el display
PROGRAM 1, pulse las teclas
UP/DOWNy seleccione el gráfico
de programa del 23.
PROG 23 WATT CONTROL
Pulse ENTER y le parpadeará la
ventana de TIME, puede programar el
tiempo, Pulse ENTER programe la
distancia, Pulse ENTER, programe
los watios, Pulse ENTER introduzca
su edad pulse START/STOP y
comience el ejercicio.
El nivel de esfuerzo del ejercicio se
autoajustará en función de la
velocidad y los watios seleccionados.
PROGRAMA DE GRASA
CORPORAL P24.-
El programa numero 24 esta diseñado
para calcular el porcentaje de grasa
corporal del usuario y diseñar perfiles
de carga específicos. Pulse la tecla
START/STOP, para poner en marcha el
monitor, le aparecerá en el display
PROGRAMA 1, pulse las teclas UP
/DOWNy seleccione el programa 24.
PROG 24 BODY FAT
Pulse ENTER y, pulsando las teclas
UP/DOWN seleccione el sexo (Hombre
– Mujer) pulse ENTER para confirmar,
seleccione con las teclas
UP/DOWNla altura (HEIGHT 110-
199.5cm), pulse ENTER, seleccione
con las teclas UP/DOWN su peso
(WEIGHT 10–199.8Kg), pulse ENTER,
seleccione seleccione con las teclas
UP/DOWNsu edad (AGE 10–99
años).
Pulse la tecla START/STOP y coloque
las manos sobre los sensores (R) de
pulso (hand-grip) como muestra la
Fig.3 y al cabo de unos segundos le
dará el resultado en las pantallas
inferiores del display los valores FAT
% (% de grasa) BMR (Ratio
metabolismo basal); BMI (relación
altura–peso); y BODY TYPE (Tipo de
cuerpo).
En la pantalla principal le dará el tipo

8
de perfil para su tipo de cuerpo.
Si le aparece en el display el símbolo
«E-3» quiere decir que se ha tenido
un error, posicione bien las manos
sobre los sensores de pulso (R) de la
Fig.3.
TABLA DE REF. PORCENTAJE
GRASA CORPORAL % (BODY FAT)
GRASA%
BAJA BAJA /
MEDIA
MEDIA
ALTA
HOMBRE
<
13% 13%-
25,8% 26%-
30% >30%
MUJER <23%
23%-
35,8% 36%-
40% >40%
TABLA DE REF.: BMI
DELGADO
= NORMAL
+ LIGERO
SOBREPESO
SOBREPESO
<18,5 =18,5~24,9
=25~30 <30
TIPOS DE CUERPO / BODY TIPE:
Hay 9 tipos de cuero divididos según
el porcentaje de grasa calculado
TIPO 1
(5%-9%) Varón muy deportista
TIPO 2
(10%-14%) Varón deportista ideal
TIPO 3
(15%-19%) Muy esbelto
TIPO 4
(20%-24%) Deportista
TIPO 5
(25%-29%) Salud ideal
TIPO 6
(30%-34%) Esbelto
TIPO 7
(35%-39%) Demasiado obeso
TIPO 8
(40%-44%) Obeso
TIPO 9
(45%-50%) Ultra obeso
USO DEL HAND-GRIP.-
(PULSO).
El pulso de este modelo se mide
colocando ambas manos en los
sensores (R), que están puestos en el
manillar como se indica en la Fig.3.
Una vez colocadas ambas manos en
los sensores, comenzará a parpadear
el corazón en la parte derecha de la
pantalla que indica PULSE de la
pantalla del monitor y al cabo de
unos segundos aproximadamente
aparecerá el valor de su ritmo
cardíaco.
Si no tiene colocadas ambas manos
correctamente como muestra Fig.3, el
pulso no funciona.
Si en pantalla aparece un «0» o no
parpadea el corazón, asegúrese de
que tiene colocadas ambas manos en
los sensores y de que los conectores
estén conectados en la parte de atrás
del electrónico Fig.4.
GUIA DE PROBLEMAS.-
Problema: Se enciende el display y
sólo funciona la función de Tiempo.
Solución:
a.-Compruebe si el cable de conexión
está conectado.
(Transformador 9V-1000 m Amp)
Problema: No se enciende el monitor.
Solución:
a.-Compruebe la conexión a 220V.
b.-Compruebe la conexión de salida
del transformador, a la máquina.
c.- Compruebe la conexión de los
cables del monitor.
d.- Compruebe la conexión de los
cables del tubo remo.
Evite que le dé a su monitor electró-
nico la luz directa del sol, pues se
puede estropear la pantalla del cristal
líquido. No lo exponga tampoco al
agua ni a golpes.
Para cualquier consulta, no dude en
ponerse en contacto con el
(S.A.T).Servicio de Asistencia
Técnica, llamando al teléfono de
atención al cliente (ver página final del
presente manual).
BH SE RESERVA EL DERECHO A
MODIFICAR LAS ESPECIFICACIO-
NES DE SUS PRODUCTOS SIN
PREVIO AVISO.

9
English
ELECTRONIC MONITOR.-
MAINS CONNECTION.
Insert the jack (m) for the transformer
into the connection hole (k) on the
main body (bottom, rear of the
machine) and then plug the
transformer (92) into a 220 V mains
supply, Fig.1.
To give you greater control over your
exercise, this electronic unit provides
simultaneous read-outs of speed,
distance, exercise time, calories burnt
and pulse rate. If at any time during
exercise you press the START/STOP
button then all of the unit’s functions
will stop. Pressing the START/STOP
button again will restart the machine.
The monitor will switch itself off
automatically if the unit stands idle for
more than 4 minutes.
Important: Deposit electronic
components in special containers Fig.2.
MONITOR FUNCTIONS.-
This monitor has five keys: MODE;
ENTER; UP; DOWN; START /STOP.
The program level you have selected
and the speed/rpms are shown
simultaneously in the central section
of the display. The six windows at the
sides of the display show the TIME;
DISTANCE/ODOMETER (total
distance covered); CALORIES/
WATTs; PROGRAM/LEVEL; THR
(TARGET HEART RATE); PULSE
RATE. This monitor also has 1 manual
program, 12 pre-set exertion level
programs; 4 user defined programs; 5
Heart Rate Control programs; 1 Watt
program; 1 BODY FAT program.
Holding MODE key the alternative
values will be shown.
MANUAL FUNCTION P1.-
Press the START/STOP key to switch
the monitor on, the words PROGRAM
1 will appear on the screen.
Use the UP/DOWN keys to increase
or decrease the exertion level, there
are 16 exertion levels.
Programming a time limit:
Press the START/STOP key to switch
the monitor on, then press the ENTER
key until the time window starts to flash,
use the UP/DOWNto specify the
duration of the exercise (from 1 - 99
minutes), select the time limit and press
START/STOP to begin the exercise.
The time will begin to count down until it
reaches zero, at which point the monitor
will beep several times to advise you
that you have reached the programmed
value.
Programming a distance limit:
Press the START/STOP key to switch
the monitor on, then press the
ENTER key until the distance window
starts to flash, use the UP/DOWN
to specify the distance for the
exercise (from 11-999 km), select the
distance and press START/STOP to
begin the exercise.

10
The distance will begin to count down
until it reaches zero, at which point
the monitor will beep several times to
advise you that you have reached the
programmed value.
Programming a calorie limit:
Press the START/STOP key to switch
the monitor on, then press the
ENTER key until the calorie window
starts to flash, use the UP/DOWN
to specify the calories for the exercise
(from 10-9990 cal), select the calories
and press START/STOP to begin the
exercise. The calories will begin to
count down until they reach zero, at
which point the monitor will beep
several times to advise you that you
have reached the programmed value.
Programming the HEART RATE
function:
Press the START/STOP key to switch
the monitor on, press the ENTER key
until the AGE window starts to flash,
use the UP/DOWNkeys to select
your age. When you have entered
your age the monitor may suggest a
target heart rate for the exercise, this
suggested heart rate value
represents 85% of the result from 220
minus your age, this means that if
your actual heart rate is equal to or
greater than this value it will begin to
fl ash, advising you to either slow
down or lower the exertion level.
PROGRAM FUNCTION P2-
P13.-
Press the START/STOP key to switch
the monitor on, the words PROGRAM
1 will appear on the screen. Use the
UP/DOWN keys to select the program
graph (2–13) that you wish to use for
your exercise.
PROG 2 STEPS
PROG 3 HILL
PROG 4 ROLLING
PROG 5 VALLEY
PROG 6 FAT BURN

11
PROG 7 RAMP
PROG 8 MOUNTAIN
PROG 9 INTERVALS
PROG 10 RANDOM
PROG 11 PLATEAU
PROG 12 FARTLEK
PROG 13 PRECIPICE
Press the START/STOP key to begin.
The duration of the program graph is
30 minutes, divided into ten 3 minute
stages. If you decide to specify a time
limit for the program, then the
duration of this time limit will be
divided into ten stages.
You can vary the exertion level during
the exercise by pressing the
UP/DOWNkeys.
USER PROGRAMS P14-P17.-
Programs 14 are user defined
programs. To use these programs:
Press the START/STOP key to switch
the monitor on, the words PROGRAM
1 will appear on the screen. Use the
UP/DOWNkeys to select the
program graph from 14.
PROG U1-U4
Press ENTER and the TIME window
flash, you can now specify the
duration. Press ENTER to program in
the distance. Press ENTER to
program in the calories. Press ENTER
to program your age. Press ENTER
and the first line of the profile Hill
flash, use the UP/DOWMkeys to
specify the exertion level you require,

12
press ENTER and the second stage
will flash and so on until you have
completed the profi le for doing your
exercise, press START/STOP to begin
exercising. If you have not specified a
time limit in the TIME programming
then the default duration for the whole
profile will be 30 minutes, i.e. 3
minutes per stage.
HEART RATE CONTROL
PROGRAM P18-P22.-
Program 18 to 22 are used for Heart
Rate Control (HRC).
With program 22 you can specify a
constant heart rate level, whenever
your heart rate goes above the
programmed level the machine will
automatically decrease the exertion
level to maintain your specified value,
alternatively, if your heart rate is below
the programmed value then the
machine will increase the exertion level
in order to reach the specified value.
With programs 18 to 21 you can specify
various maximum heart rate levels
based on your age (maximum value
calculated from 220 minus your age).
Program 18 is for 55% maximum
heart rate level.
Program 19 is for 65% maximum
heart rate level.
Program 20 is for 75% maximum
heart rate level
Program 21 is for 85% maximum
heart rate level.
To use these programs: Press the
START/STOP key to switch the
monitor on, the words PROGRAM 1
will appear on the screen. Use the
UP/DOWNkeys to select the
program graph from 18 to 22.
PROG 18 55% H.R.C.
PROG 19 65% H.R.C.
PROG 20 75% H.R.C.
PROG 21 85% H.R.C.
PROG 22 TARGET H.R.C.
Press ENTER and the TIME window
flash, you can now specify the
duration. Press ENTER to program in
the distance. Press ENTER to
program in the calories.

13
Press ENTER to program your age.
Press START/STOP and begin the
exercise.
Your hands must be placed on the
pulse sensors (R) Fig.3, when using
these programs. The lower window on
the display (TARGET H.R) will show
you the calculated value for your
maximum heart rate level.
STEADY WATT RATE
PROGRAM P23.-
Press the START/STOP key to switch
the monitor on, the words PROGRAM
1 will appear on the screen. Use the
UP/DOWNkeys to select the
program graph 23.
PROG 23 WATT CONTROL
Press ENTER and the TIME window
flash, you can now specify the
duration. Press ENTER to program in
the distance. Press ENTER to
program in the watts. Press ENTER to
program your age. Press
START/STOP and begin the exercise.
The exertion level for the exercise is
self adjusting based on the speed and
number of watts selected.
BODY FAT PROGRAM P24.-
Program number 24 is designed to
calculate the user’s body fat
percentage and then create specifi c
load profiles.
Press the START/STOP key to switch
the monitor on, the words PROGRAM
1 will appear on the screen. Use the
UP/DOWNkeys to select
program 24.
PROG 24 BODY FAT
Press ENTER and then use the
UP/DOWMkeys to select your
sex (Male–Female), press ENTER to
confi rm. Use the UP/DOWNkeys
to select your HEIGHT (110-
199.5cm), press ENTER to confi rm.
Use the UP/DOWNkeys to select
your AGE (10-99 years).
Press the START/STOP key and
place your hands on the pulse
sensors (R) (Hand-grips), as shown
in Fig.3, and after a few seconds the
lower screens on the display will
show your FAT%; BMR (Basal
Metabolism Ratio); BMI (Body Mass
Index) and BODY TYPE.
The main screen will display the type
of profi le for your body type.
If the error code “E-3” appears then
this means that an error has
occurred, position your hands
correctly on the pulse sensors (R),
Fig.3.
REFERENCE TABLE: BODY FAT
PERCENTAGE %
SEX /
FAT% LOW LOW /
AVERAGE AVERAGE
HIGH
MALE <
13% 13%-
25,8% 26%-30% >30%
FEMALE <23% 23%-
35,8% 36%-40% >40%
REFERENCE TABLE: BMI
THIN= NORMAL+ SLIGHTLY
OVERWEIGHT OVER
WEIGHT
<18,5 =18,5~24,9 =25~30 <30

14
BODY TYPE
There are 9 body types based on the
percentage of fat calculated.
TYPE 1 (5%-9%) Extremely athletic
TYPE 2 (10%-14%) Ideal sportsman
TYPE 3 (15%-19%) Very slender
TYPE 4 (20%-24%) Sportsman
TYPE 5 (25%-29%) Ideal health
TYPE 6 (30%-34%) Slender
TYPE 7 (35%-39%) Very overweight
TYPE 8 (40%-44%) Overweight
TYPE 9 (45%-50%) Extremely obese
HAND-GRIP (PULSE)
INSTRUCTIONS/USE.-
On this model the pulse rate is
measured by placing both hands on
the sensors (R), located on the
handlebar, as shown in Fig.3.
When both hands are placed on the
sensors the heart symbol on the right-
hand side of the screen, marked
PULSE, will begin to flash and after a
few seconds a heart rate reading will
be displayed. If both hands are not
placed correctly as shown in Fig.3
then the pulse function will not work.
If a “0” appears on the screen or the
heart symbol does not flash then
make sure that both hands are placed
on the sensors and that the
connectors are connected at the back
of the electronic unit.
TROUBLESHOOTING GUIDE
Problem: The display comes on but
only the Time function Works.
Solution:
a.-Make sure that the connection
cable is connected.
(Transformer 9V-1000 m Amp)
Problem: The monitor does not
switch on.
Solution:
a.- Check the 220 V mains
connection
b.- Check the output connection from
the transformer to the monitor.
c.- Check the monitor cable
connections.
d.- Check the cable connections for
the main post.
Avoid leaving the electronic monitor
in direct sunlight as this might
damage the liquid crystal display.
Similarly, do not expose it to water or
knocks.
Do not hesitate to get touch with the
Technical Assistance Service if you
have any queries by phoning customer
services (see last page in manual)
BH RESERVES THE RIGHT TO
MODIFY THE SPECIFICATIONS OF
ITS PRODUCTS WITHOUT PRIOR
NOTICE

15
Français
MONITEUR ÉLECTRONIQUE.-
BRANCHEMLENT AU COURANT.
Introduisez la fiche de branchement (m)
du transformateur dans le point de
connexion (k) du corps central (partie
arrière inférieur) et connectez le
transformateur (92) de courant au
secteur de 220 V, Fig.1.
Pour vous permettre de contrôler
facilement et confortablement vos
exercices, cet appareil électronique
affiiche simultanément, la vitesse, la
distance, la durée de l’exercice, les
calories brûlées et le pouls.
Si durant le déroulement de l’exercice,
vous appuyez sur le bouton
START/STOP, toutes les fonctions de
l’électronique s’arrêteront. Si vous
appuyez à nouveau sur START/STOP,
toutes les fonctions se mettront à
nouveau en marche.
Si l’unité est 4 minutes arrêtée, l’écran
s’éteint automatiquement.
Remarque importante: Les compo-
sants électroniques hors d’usage
doivent être déposés dans des
conteneurs spécialement prévus à cet
effet Fig.2.
FONCTIONS DU MONITEUR.-
Ce moniteur dispose de cinq touches:
MODE; ENTER; UP; DOWN; START
/STOP. Le niveau du programme
sélectionné et les TPM/Vitesse s’affi
che simultanément au milieu du
display. Six fenêtres contenant: La
DURÉE, la DISTANCE/ODO (ODO
parcours total), les CALORIES/ WATT,
le NIVEAU/PROGRAMME ; THR
(TARGET HEART RATE), le POULS
sont affichées sur les côtés du display.
Ce moniteur dispose également d’un
programme manuel, de 12
programmes prédéfinis des niveaux de
freinage, de 4 programmes
d’utilisateur, de 4 programmes du
contrôle de la fréquence cardiaque,
d’un programme du WATTs et d’un
programme BODY-FAT.
En appuyant sur le bouton MODE
d'autres valeurs à afficher.
FONCTION MANUELLE P1.-
Pour mettre en marche le moniteur,
appuyez sur la touche START/STOP,
le mot PROGRAM 1 sera affiché au
display,
pour commencer l’exercice, appuyez
alors sur la touche START/STOP et à
l’aide des touches UP/DOWN
augmentez ou baissez la résistance de
l’exercice. Les niveaux de freinage
disponibles sont au nombre de 16.
Programmation de la durée:
Pour mettre en marche le moniteur,
appuyez sur la touche START/STOP,
appuyez sur la touche ENTER et la
fenêtre de la durée se mettra à
clignoter, en appuyant sur les touches
UP/DOWN, vous pourrez
programmer la durée de votre exercice
de (1 à 99 Minutes), sélectionnez la
durée et appuyez sur START/STOP
pour commencer l’exercice.

16
La durée diminuera jusqu’à atteindre la
valeur «zéro» et le moniteur émettra un
signal sonore pour indiquer que la
valeur programmée a été atteinte.
Programmation de la distance:
Pour mettre en marche le moniteur,
appuyez sur la touche START/STOP,
appuyez sur la touche ENTER et la
fenêtre de la distance se mettra à
clignoter, en appuyant sur les touches
UP/DOWN, vous pourrez
programmer la durée de votre exercice
de (1 à 999 km), sélectionnez la
distance et appuyez sur START/STOP
pour commencer l’exercice. La
distance diminuera jusqu’à atteindre la
valeur «zéro» et le moniteur émettra un
signal sonore pour indiquer que la
valeur programmée a été atteinte.
Programmation des calories:
Pour mettre en marche le moniteur,
appuyez sur la touche START/STOP,
appuyez sur la touche ENTER et la
fenêtre des calories se mettra à
clignoter, en appuyant sur les touches
UP/DOWN, vous pourrez
programmer les calories de votre
exercice de (10 à 9990cal),
sélectionnez la distance et appuyez sur
START/STOP pour commencer
l’exercice. Les calories diminueront
jusqu’à atteindre la valeur «zéro» et le
moniteur émettra un signal sonore pour
indiquer que la valeur programmée a
été atteinte.
Programmation de l’HEART RATE
(fréquence cardiaque):
Pour mettre en marche le moniteur,
appuyez sur la touche START/STOP,
appuyez sur la touche ENTER et la
fenêtre de l’âge (AGE) clignotera, en
appuyant sur les touches
UP/DOWN, vous pourrez
sélectionner l’âge. Lors de l’introduction
de l’âge, le moniteur peut vous
suggérer une fréquence cardiaque
cible pour l’exercice. Cette valeur de la
fréquence cardiaque est: 85% du
résultat que donne le nombre 220
auquel il a été soustrait l’âge. Par
conséquent si la fréquence cardiaque
est égale ou supérieure à la valeur
cible, celle-ci clignotera puisqu’il s’agit
d’un message d’avertissement adressé
à l’utilisateur pour qu’il pédale plus
lentement ou pour qu’il baisse le
niveau de freinage.
FONCTION PROGRAMMES
P2-P13.-
Pour mettre en marche le moniteur,
appuyez sur la touche START/STOP,
le mot PROGRAM 1 sera alors affi ché
au display, appuyez ensuite sur les
touches UP/DOWNet
sélectionnez le graphique du
programme (2-13) que vous souhaitez
utiliser pour votre exercice.
PROG 2 STEPS
PROG 3 HILL

17
PROG 4 ROLLING
PROG 5 VALLEY
PROG 6 FAT BURN
PROG 7 RAMP
PROG 8 MOUNTAIN
PROG 9 INTERVALS
PROG 10 RANDOM
PROG 11 PLATEAU
PROG 12 FARTLEK
PROG 13 PRECIPICE
Pour démarrer l’exercice, appuyez sur
la touche START/STOP. La durée du
graphique du programme est de 30
minutes divisées en étapes de 3
minutes. Par contre, si vous
programmez le temps de durée du
programme, la durée de celui-ci sera
divisée en dix étapes. Après avoir
commencé l’exercice, vous pouvez
modifier la résistance de freinage en
appuyant sur les touches UP/
DOWN.

18
PROGRAMMES DE
L’UTILISATEUR P14-P17.-
Les programmes 14 sont des
programmes d’utilisateur, destinés à la
sélection. Pour mettre en marche le
moniteur, appuyez sur la touche
START/STOP, le mot PROGRAM 1
sera affiché au display, ensuite appuyez
sur les touches UP/DOWNet
sélectionnez le graphique du
programme, du 14.
PROG U1-U4
Appuyez sur ENTER et la fenêtre TIME
clignotera, programmez alors la durée,
appuyez sur ENTER, programmez la
distance, appuyez sur ENTER,
programmez les calories, appuyez sur
ENTER, introduisez votre âge. Appuyez
sur ENTER, la première ligne du profil
clignotera. Avec les touches
UP/DOWN, sélectionnez le niveau
de résistance, puis appuyez sur
ENTER, le programme passera au
second niveau et ainsi de suite jusqu’à
la fin du profil sélectionné pour effectuer
l’exercice. Appuyez alors sur
START/STOP et commencez l’exercice.
Si aucune valeur n’a été introduite dans
la programmation de la durée, celleci
sera de 30 minutes divisées en 3
minutes par niveau de freinage.
PROGRAMMES POUR LE
CONTRÔLE DE LA FRÉQUEN-
CE CARDIAQUE P18-P22.-
Les programmes 18 à 22 ont été
définis pour le contrôle de la fréquence
cardiaque (HRC).
Dans le programme 22, il est possible
de programmer le niveau constant de
votre fréquence cardiaque quand la
valeur de votre fréquence cardiaque
dépasse la valeur programmée. La
machine fera baisser le freinage et
s’ajustera pour conserver sa valeur.
Dans le cas contraire, si la valeur de
votre fréquence cardiaque est en
dessous de la valeur programmée, la
machine augmentera le freinage et
s’ajustera à la valeur programmée.
Dans les programmes 18 à 21, il est
possible de programmer directement
votre fréquence cardiaque avec
différentes valeurs maximales de votre
fréquence, selon l’âge (calcul de la
valeur maximale: soustraire l’âge au
chiffre 220).
Le programme 18 est calculé pour une
fréquence cardiaque maximum de 55 %.
Le programme 19 est calculé pour une
fréquence cardiaque maximum de 65 %.
Le programme 20 est calculé pour une
fréquence cardiaque maximum de 75%.
Le programme 21 est calculé pour une
fréquence cardiaque maximum de 85%.
Pour programmer: Pour mettre en
marche le moniteur, appuyez sur la
touche START/STOP, le mot
PROGRAM 1 sera affiché au display,
ensuite appuyez sur les touches
UP/DOWNet sélectionnez le
graphique du programme, du 18 au 21.
PROG 18 55% H.R.C.

19
PROG 19 65% H.R.C.
PROG 20 75% H.R.C.
PROG 21 85% H.R.C.
PROG 22 TARGET H.R.C.
Appuyez sur ENTER et la fenêtre TIME
clignotera, programmez alors la durée,
appuyez sur ENTER, programmez la
distance, appuyez sur ENTER,
programmez les calories, appuyez sur
ENTER, introduisez votre âge, appuyez
sur START/STOP et commencez votre
exercice.
Pour pouvoir réaliser les exercices avec
ces programmes, les mains doivent être
bien posées sur les senseurs de pouls
(R). La valeur déjà calculée de votre
fréquence cardiaque maximale sera
affichée à la fenêtre inférieure du
display (TARGET H.R).
PROGRAMME WATTS
CONSTANTS P23.-
Pour programmer: Pour mettre en
marche le moniteur, appuyez sur la
touche START/STOP, le mot
PROGRAM 1 sera affiché au display,
ensuite appuyez sur les touches
UP/DOWNet sélectionnez le
graphique du programme P23.
PROG 23 WATT CONTROL
Appuyez sur ENTER et la fenêtre TIME
clignotera, programmez alors la durée,
appuyez sur ENTER, programmez la
distance, appuyez sur ENTER,
programmez les watts, appuyez sur
ENTER, introduisez votre âge, appuyez
sur START/STOP et commencez votre
exercice.
Le niveau de l’effort de l’exercice se
réglera automatiquement d’après la
vitesse et les watts sélectionnés.
PROGRAMME GRAISSE
CORPORELLE P24.-
Le programme numéro 24 a été
spécialement conçu pour calculer le
taux de graisse corporelle de
l’utilisateur et pour dessiner des profi ls
de charge spécifiques. Pour mettre en
marche le moniteur, appuyez sur la
touche START/STOP, le programme 1
sera affi ché au display. Appuyez sur
les touches UP/DOWNet
sélectionnez le programme 24.

20
PROG 24 BODY FAT
Appuyez alors sur ENTER puis sur les
touches UP/DOWNpour sélection-
ner le sexe (Homme-Femme), et sur
ENTER pour accepter. Avec les
touches UP/DOWN, sélectionnez la
taille (HEIGHT 110-199.5cm), appuyez
sur ENTER. Avec les touches
UP/DOWN, sélectionnez votre poids
(WEIGHT 10-199.8kg), appuyez sur
ENTER. Avec les touches
UP/DOWN, sélectionnez votre âge
(AGE 10-99ans).
Ensuite appuyez sur la touche
START/STOP et posez les mains sur
les senseurs (R) de pouls (hand-grip)
comme indiqué dans la Fig.3 et dans
les secondes qui suivent, les résultats
seront affichés sur les écrans inférieurs
du display, à savoir: valeurs FAT % (%
de graisse) BMR (Ratio métabolisme
de base), BMI (rapport taille - poids) et
BODY TYPE (Type de physique).
Le profil répondant le mieux à votre
type de physique sera affi ché à l’écran
principal.
En cas d’erreur, le message “E-3” sera
affiché à l’écran, vous devrez alors
poser correctement les mains sur les
senseurs de pouls (R) de la Fig.3.
TABLEAU DE RÉFÉRENCE TAUX
DE GRAISSE CORPO- RELLE %
(Body Fat)
SEXE/
GRAISSE%
FAIBLE
FAIBLE/
MOYEN
MOYEN
ÉLEVÉ
HOMME < 13% 13%-
25,8% 26%-
30% >30%
FEMME <23% 23%-
35,8% 36%-
40% >40%
TABLEAU DE RÉFÉRENCE BMI
MINCE NORMAL+ LÉGER
SURPOIDS SURPOIDS
<18,5 =18,5~24,9 =25~30 <30
TYPES DE PHYSIQUE/ BODY TIPE:
Les physiques classés selon le taux
de graisse calculé, sont au nombre de
9, à savoir:
TYPE 1 (5%-9%) Homme très sportif
TYPE 2 (10%-14%) Homme sportif idéal
TYPE 3 (15%-19%) Très svelte
TYPE 4 (20%-24%) Sportif
TYPE 5 (25%-29%) Santé idéale
TYPE 6 (30%-34%) Svelte
TYPE 7 (35%-39%) Trop obèse
TYPE 8 (40%-44%) Obèse
TYPE 9 (45%-50%) Super obèse
MODE D’EMPLOI DU HAND-
GRIP.-
(POULS)
Sur ce modèle, le pouls se mesure en
posant les deux mains sur les senseurs
(R) placés sur le guidon, comme indiqué
dans la Fig.3. Dès que vos mains seront
posées sur les senseurs, un cœur
commencera à clignoter sur la droite de
l’écran PULSE de l’écran du moniteur et
votre fréquence cardiaque sera affichée
dans les secondes suivantes. Si vos
deux mains ne sont pas posées
correctement comme indiqué dans la
Fig.3, la fonction pouls ne fonction-nera
pas.
Si un “0” s’affi che à l’écran ou si le
cœur ne clignote pas, vérifiez si vos
mains sont bien posées sur les
senseurs et si les connecteurs sont bien
connectés en partie arrière de
l’électronique.
This manual suits for next models
1
Table of contents
Languages:
Other BH Fitness Electronic manuals
