BH H-493 User manual
H-493
UNIDAD ELECTRONICA
ELECTRONIC MONITOR
UNITÉ ÉLECTRONIQUE
ELEKTRONIKEINHEIT
UNIDADE ELECTRÓNICA
IMPIANTO ELETTRONICO
ELEKTRONISCHER MONITOR

Fig.1 Fig.2
Fig.3 Fig.4

Fig.5 Fig.6

4
Español
MONITOR ELECTRONICO.-
Importante. Deposite las pilas usadas
o residuos del embalaje en
contenedores especiales, Fig.1.
COLOCACIÓN CABLE PRINCIPAL.-
Tome el cable (M), que sale del tubo
remo (6), enchúfelo en el conector (N)
situado en la parte trasera del monitor
(P). Fig.2.
COLOCACION CABLE HAND-GRIP.
Tome el conector (Z) del hand-grip
Fig.3 y enchúfelo en el conector (Y)
de la parte trasera del monitor (P),
Fig.3 .
COLOCACIÓN DEL MONITOR
ELECTRÓNICO.-
Suelte los tornillos (4), Fig.,2, de la
parte trasera del monitor, seguido
introduzca el monitor de arriba hacia
abajo deslizándolo por la chapa del
tubo remo (6), Fig.3, teniendo cuidado
de no pillar los cables, coloque los
tornillos (4) soltados anteriores y
apriete.
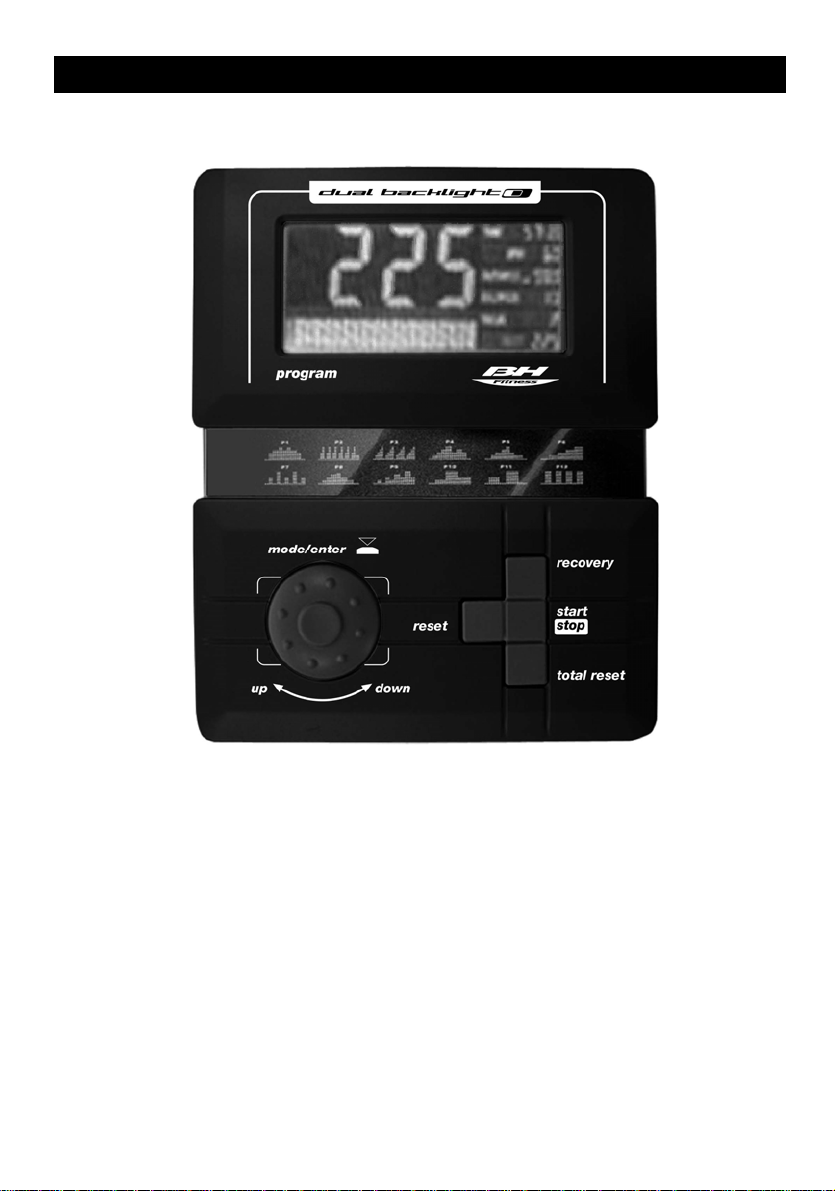
MONITOR ELECTRONICO.-
Para hacer más cómodo y simple el
control de su ejercicio, este
electrónico muestra simultáneamente
en la parte inferior del display de su
monitor el tiempo, la distancia y el
pulso, y alternativamente las
revoluciones por minuto (RPM) y la
velocidad, aparecerá la gráfica del
programa elegido con su número
(programas del 1 al 12) o la gráfica del
funcionamiento manual seleccionando
del esfuerzo que desee.
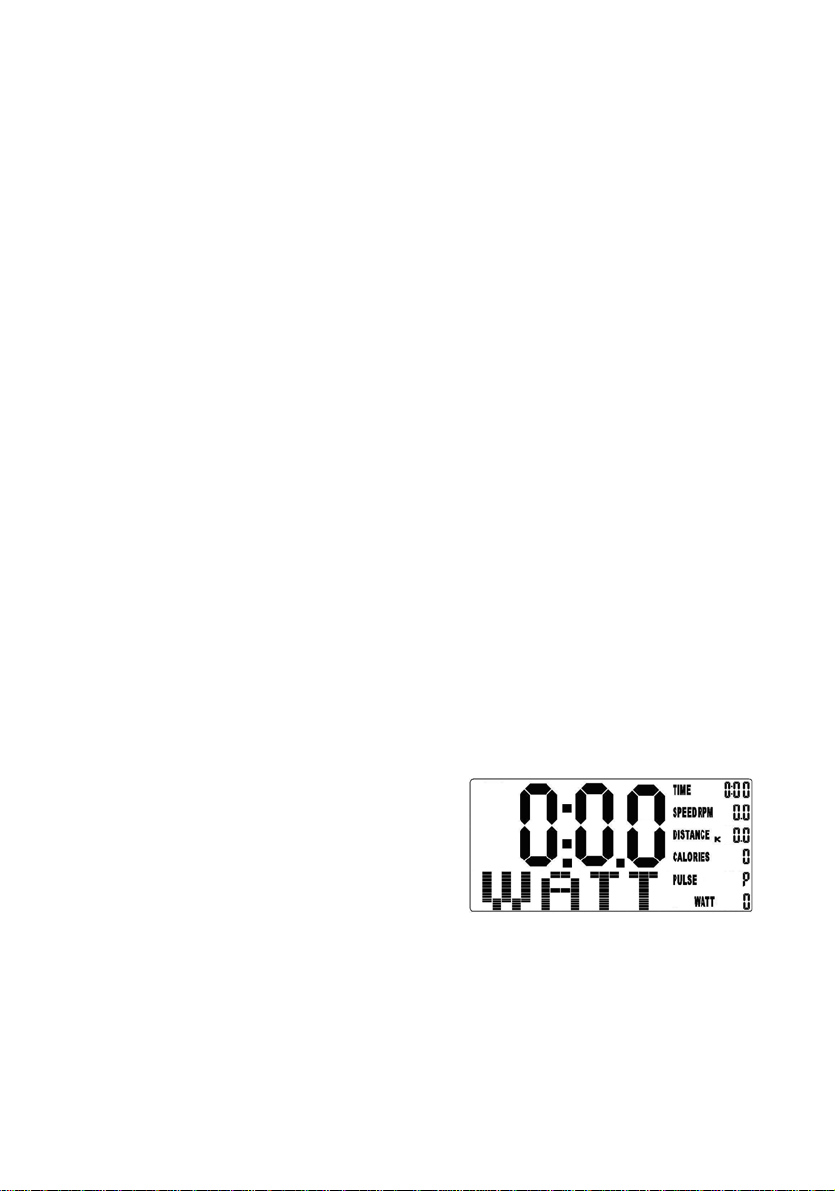
La pantalla se encenderá
automáticamente al enchufar el
transformador, en la parte trasera
inferior de la maquina, visualizando en
el display.
Cuando el monitor esta en modo
descanso, la pantalla principal
muestra la hora, fecha y
temperatura.
PUESTA EN FECHA Y HORA.-
Siempre que se desconecte el
adaptador (138) Fig.4 toma de
corriente ,al monitor se le borran todas
las memorias ,incluida la fecha, para
poner la fecha, siga los siguientes
pasos.
Conecte el adaptador (138) a la toma
de corriente, en el monitor le
aparecerá unos caracteres. Pulse la
MODE/ENTER y le parpadeara el
año, con la rueda UP/DOWN ▲▼,
seleccione el año, pulse la tecla
MODE/ENTER y le parpadeara el
mes, con la rueda UP/DOWN ▲▼,
seleccione el mes, pulse la tecla
MODE/ENTER y le parpadeara el día,
con la rueda UP/DOWN ▲▼,
seleccione el día, pulse la tecla
MODE/ENTER y le parpadeara la
hora, con la rueda UP/DOWN ▲▼,
seleccione la hora, pulse la tecla
MODE/ENTER y le parpadeara los
minutos, pulse la tecla MODE/ENTER

5
y le aparecerá en el display los
caracteres para comenzar el ejercicio.
- START/STOP:
Para comenzar o finalizar el
entrenamiento.
- RESET:
1. Pone a cero todas las mediciones
(tiempo, velocidad, calorías,). Para
ello mantenga pulsado el botón
RESET durante 2 segundos y todas
las variables se quedarán en cero.
- MODE/ENTER:
1.- Para seleccionar cada función
(Tiempo, distancia, calorías, pulso).
2. Para volver a la opción de
seleccionar el modo Manual,
Programas, Usuario o Pulso.
- UP(ARRIBA):
Para ajustar los datos hacia arriba.
- DOWN(ABAJO):
Para ajustar los datos hacia abajo.
- RECOVERY:
Función de recuperación.
PASO DE UN MODO DE
TRABAJO A OTRO.-
Este monitor tiene la posibilidad de
trabajar con 5 modos diferentes:
Manual, Programas, Usuario (USER)
y Pulso (TARGET HRC), Watios
(WATT).
MODO MANUAL.-
Una vez seleccionado el modo
Manual, pulsando el botón
START/STOP se puede comenzar el
ejercicio directamente. La regulación
de la intensidad de frenado se hará
con los botones UP y DOWN.
Si desea programar el tiempo, la
distancia, las calorías, los watios y el
pulso, pulse el botón MODE/ENTER
antes de comenzar el ejercicio para
programarlos. Cada vez que pulse
MODE/ENTER parpadeará una
variable diferente que podrá
programar con UP y DOWN. Una vez
programados pulse START/STOP.
Pulsando durante mas de dos
segundos la tecla RESET todos los
valores pasan a cero a excepción de
la información personal.
FUNCIÓN TIEMPO.-
La función cuenta o descuenta en
incrementos de un segundo hasta un
máximo de 99:59 segundos.
Pulsando durante mas de dos
segundos la tecla RESET todos los
valores pasan a cero a excepción de
la información personal.
1. Pulsando la tecla MODE/ENTER
parpadeara la ventana pequeña de
TIME.
2. Pulsando las teclas UP ó DOWN
seleccione el tiempo ( 1-99 Minutos).
3 Comience el ejercicio y empezara a
disminuir el tiempo, una vez haya
llegado a cero emitirá unos pitidos
durante 8 segundos, advirtiéndole que
ha llegado al tiempo seleccionado.
FUNCIÓN DISTANCIA.-
La función cuenta o descuenta en
incrementos de 0,01 Km./ml hasta un
máximo de 99,99 Km./ml.
6
Pulsando durante mas de dos
segundos la tecla RESET todos los
valores pasan a cero a excepción de
la información personal.
1. Pulsando la tecla MODE/ENTER
parpadeara la ventana pequeña de
DIST (DISTANCIA).
2. Pulsando las teclas UP ó DOWN
seleccione la distancia (0,1-99,9 Km.).
3. Comience el ejercicio y empezará a
disminuir la distancia, una vez haya
llegado a cero emitirá unos pitidos
durante 8 segundos, advirtiéndole que
ha llegado al valor seleccionado.
FUNCIÓN CALORÍAS.-
La función cuenta y descuenta de una
en una caloría, hasta un máximo de
999 calorías.
Pulsando durante mas de dos
segundos la tecla RESET todos los
valores pasan a cero a excepción de
la información personal.
1. Pulsando la tecla MODE/ENTER
parpadeara la ventana pequeña de
CAL (CALORIAS).
2. Pulsando las teclas UP ó DOWN
seleccione las calorías ( 10-990 Cal.).
3. Comience el ejercicio y empezará a
disminuir las calorías, una vez haya
llegado a cero emitirá unos pitidos
durante 8 segundos, advirtiéndole que
ha llegado al valor seleccionado.
FUNCIÓN PULSO.-
La función pulso le muestra las p.p.m.
(pulsaciones por minuto). Para ello
coloque las manos Fig.6 sobre los
sensores del manillar (R) y al cabo de
unos segundos le mostrara su ritmo
cardíaco. No es un aparato médico
por lo cual el valor es orientativo.
Para seleccionar el THR (ritmo
cardíaco objetivo ) siga los siguientes
pasos:
1. Pulsando la tecla MODE/ENTER
parpadeara la ventana pequeña de
pulso.
2. Pulsando las teclas UP ó DOWN
seleccione el valor del pulso que
usted quiere hacer el ejercicio entre
10 y 240 (PPM), valor inicial
programado en el monitor 150 PPM.
3. Comience el ejercicio y visualizará
en la pantalla PULSE, su ritmo
cardíaco, una vez haya llegado al
valor seleccionado emitirá unos
pitidos, advirtiéndole que ha
alcanzado el valor seleccionado.
NOTA:
Si no visualiza ninguna señal de
pulsaciones después de 15 segundos
en la pantalla le mostrara «E 3»,
asegúrese de tener colocadas ambas
manos sobre los sensores (R) del
manillar, Fig.5. Si no hay ninguna
señal después de transcurridos 5
segundos, la pantalla principal volverá
a su función anterior.
PROGRAMA WATIOS.-
Pulsando la rueda UP/DOWN ▲▼,
puede programar las calorías de su
ejercicio entre (10 - 350 Watt.).
Seleccione los watios y pulse
START/STOP para comenzar el
ejercicio. El nivel de esfuerzo del
ejercicio se auto ajustará en función
de la velocidad y los watios
seleccionados. Tres símbolos le
ayudarán a realizar el entrenamiento:

7
▲– Dentro del margen de trabajo,
indica que la velocidad es muy alta y
es necesario reducirla.
▼- Dentro del margen de trabajo,
indica que la velocidad es muy baja y
es necesario aumentarla.
------- Indica que los watios que se
están desarrollando están fuera del
margen de trabajo (ya sea por exceso
o por defecto) y es necesario reducir o
aumentar la velocidad acordemente.
El monitor emitirá unos pitidos para
indicar este estado.
MODO PROGRAMAS.-
Una vez seleccionado el modo
Programas, presionar MODE/ENTER
y con el botón UP o DOWN
seleccionar el perfil de entrenamiento
deseado (P1-P12).
Con el botón START/STOP se puede
comenzar directamente el
entrenamiento.
Existe también la posibilidad de
programar las variables de tiempo,
distancia, calorías, watios y pulso con
el botón MODE/ENTER y las teclas
UP y DOWN.
MODO USUARIO (USER U1-
U4).-
Este modo ofrece la posibilidad al
usuario de diseñar su propio
programa.
Cada vez que pulse el botón
MODE/ENTER parpadeará una
columna de minutos y con UP y
DOWN podrá programar la intensidad
del ejercicio en cada minuto. Dicho
perfil queda grabado para usos
posteriores.
Con el botón START/STOP se puede
comenzar directamente el
entrenamiento.
Existe también la posibilidad de
programar las variables de tiempo,
distancia, calorías, watios y pulso con
el botón MODE/ENTER y las teclas
UP y DOWN.
MODO PULSO (TARGET
HRC).-
Este modo permite introducir la
Frecuencia Cardiaca con la que se
quiere trabajar y la tensión se irá
ajustando automáticamente
dependiendo de las pulsaciones que
tengamos en cada momento.
Una vez seleccionado el modo
TARGET H.R., presionar
MODE/ENTER.
En el centro del display parpadeará la
edad (AGE). Pulsando las teclas
DOWN / UP seleccione su edad y

8
pulse MODE/ENTER. Tras introducir
su edad, deberá seleccionar el ritmo
cardiaco objetivo para el ejercicio.
Con las teclas DOWN / UP seleccione
la opción deseada (55%, 75%, 90% o
THR) y pulse la tecla MODE/ENTER.
Las tres primeras indican el
porcentaje respecto al pulso cardiaco
máximo (220-edad) y la cuarta se
utiliza para introducir el ritmo cardiaco
objetivo de forma manual.
En los tres primeros casos, en la
ventana inferior del display (PULSE
TARGET H.R) le saldrá el valor ya
calculado de su valor máximo de ritmo
cardiaco. Si elige THR, deberá utilizar
las teclas DOWN / UP para
seleccionar el ritmo cardiaco deseado
y pulsar MODE/ENTER.
Pulse START/STOP para comenzar el
ejercicio. El nivel de frenada se
ajustará automáticamente de acuerdo
al valor de pulso seleccionado. Si el
valor de pulso está por debajo del
valor objetivo, la frenada aumentará
un nivel cada 60 segundos hasta
llegar al máximo de 16. Si el valor de
pulso está por encima del valor
objetivo el monitor emitirá unos pitidos
de aviso y la frenada disminuirá un
nivel cada 15 segundos hasta llegar al
mínimo de 1.
Si aún así el valor del pulso se
mantiene por encima del valor objetivo
durante más de 30 segundos, el
monitor se parará por protección del
usuario y emitirá unos pitidos de
aviso.
En estos programas tienen que estar
las manos colocadas en los sensores
de pulso (R) Fig.5.
DETENER EL
ENTRENAMIENTO.-
Entrenamiento con datos
programados. En cuanto las
variables programadas (tiempo,
distancia, etc.) lleguen a cero, el
monitor pitará 8 veces para avisar y
se detendrá. Si presiona el botón
START/STOP comienza el
entrenamiento de nuevo con los
mismos parámetros programados
anteriormente.
Interrumpir el entrenamiento. En
cualquier momento podrá detener el
monitor pulsando el botón
START/STOP.
RECOVERY TEST:
ESTADO DE FORMA
Este electrónico está equipado con la
función de test de recuperación. Esto
tiene la ventaja de que usted puede
medir el pulso de recuperación
después de terminado el ejercicio.
Después de terminar su ejercicio y sin
quitar las manos de los sensores de
pulso, presione el botón de «Recovery
Test» y comenzará la cuenta atrás de
un minuto. Solamente estarán
encendidas las líneas de las funciones
de Tiempo y de Pulso. El electrónico
medirá su pulso durante este minuto.
El pulso de recuperación irá
apareciendo en la línea del pulso.
Si en cualquier momento de este
minuto de recuperación quiere salirse
del test, pulse el botón de « Recovery
Test» y saldrá a la pantalla principal.
Cuando termine este minuto, el
electrónico calcula y valoriza la
diferencia y la nota de su estado de
forma aparecerá en la pantalla: F1,
F2,..., F5, F6; siendo F1 el mejor
(estado de forma: «Excelente») y F6
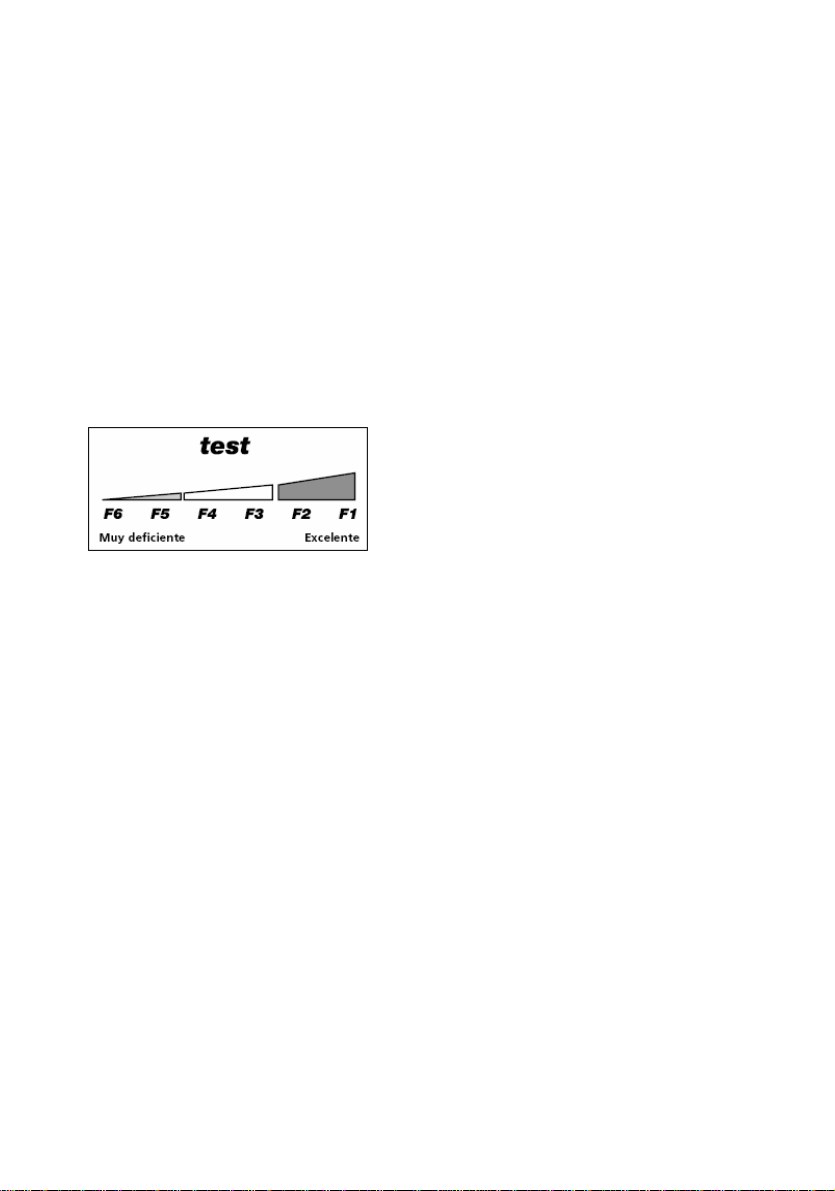
9
el peor (estado de forma: «Muy
Deficiente»).
La comparación entre el pulso de
esfuerzo y el pulso de recuperación es
una posibilidad sencilla y rápida de
controlar su estado de forma. La nota
de su estado de forma es un valor
orientativo para su capacidad de
recuperación después de esfuerzos
físicos. Si usted efectúa un
entrenamiento regular, usted
comprobará que su nota mejora.
El test no funciona si el sensor no está
colocado adecuadamente o si en la
pantalla aparece la letra «P».
INSTRUCCIONES - USO DEL
HAND-GRIP.-
El pulso de este modelo se mide
colocando ambas manos en los
sensores (R) que están puestos en el
manillar como se indica en la Fig.6.
Una vez colocado ambas manos en
los sensores, comenzará a parpadear
el corazón de la pantalla del monitor y
al cabo de unos segundos
aproximadamente aparecerá el valor
de su ritmo cardíaco.
Si no tiene colocadas ambas manos
correctamente Fig.6, el pulso no
funciona.
Si en pantalla aparece una “P” o no
parpadea el corazón, asegúrese de
que tiene colocadas ambas manos en
los sensores y de que los conector (Z)
estén conectados en la parte de atrás
del monitor (P).
INSTRUCCIONES DE
SEGURIDAD.-
Siempre que utilice un aparato
eléctrico, deberá seguir estas
recomendaciones :
-Antes de enchufar la unidad
compruebe si el voltaje de su
instalación coincide con el de la
máquina. El voltaje de su instalación
debe ser de 220 V y debe asegurarse
de que está conectada a una salida
con la misma configuración del
enchufe. No debe usar ningún
adaptador.
- Para reducir el riesgo de sacudidas
eléctricas, desenchufe siempre la
unidad inmediatamente después de
su utilización y antes de proceder a su
limpieza.
- No deje nunca sola la unidad cuando
esté conectada. Desenchufe una vez
utilizada.
- No permita que los niños, inválidos o
personas incapacitadas utilicen el
aparato sin la estricta supervisión de
una persona cualificada.
- No use accesorios no recomendados
por el fabricante.
- No utilice la máquina con el cable
eléctrico dañado o desgastado.
- Mantenga el cable eléctrico lejos de
superficies calientes.
- Nunca utilice la máquina al aire libre
o con lluvia. Evite que le dé a su
monitor electrónico la luz directa del
sol, pues se puede estropear la
pantalla del cristal líquido. No lo
exponga tampoco al agua ni a golpes.
GUIA DE PROBLEMAS.-
Problema: Se enciende el display y
sólo funciona la función de Tiempo
Solución:
a.- Compruebe si el cable de conexión
está conectado.

10
Problema: El display no se enciende
o la visualización de los segmentos
del display es muy débil.
Solución:
a.- Compruebe que esté enchufado el
transformador.
b.- Compruebe la salida de tensión del
transformador.
Problema: Si algún segmento de
alguna función no se enciende o si se
producen indicaciones erróneas en
alguna función.
Solución:
a.- Compruebe que están bien
conexionados los cables (p) y (p1).
Ver manual de instrucciones de
montaje, Fig.4B.
b.- Compruebe si están bien
conexionados el cable (M) en su
alojamiento (N) del monitor.
c.- Si los pasos anteriores no le
ayudan, reemplace el monitor
electrónico
Evite que le dé a su monitor
electrónico la luz directa del sol, pues
se puede estropear la pantalla del
cristal líquido. No lo exponga tampoco
al agua ni a golpes.
BH SE RESERVA EL DERECHO A
MODIFICAR LAS
ESPECIFICACIONES DE SUS
PRODUCTOS SIN PREVIO AVISO.

11
English
THE ELECTRONIC
MONITOR.-
Important. Deposit all spent batteries
or waste packaging in special
containers, Fig.1.
FITTING THE MAIN CABLE Take
cable (M), sticking up out of the main
post (6), and plug it into connecter (N),
located at the back of the monitor (P).
Fig.2.
FITTING THE HAND-GRIP CABLE.
Take hold of the Hand-grip connector
(Z), Fig.3, and plug it into the
connector (Y) at the back of the
monitor (P), Fig.3 .
FITTING THE ELECTRONIC
MONITOR.-
Remove screws (4), Fig,2, from the
base of the monitor, then slide the
front of the monitor onto the plate on
the main post (6), Fig.3, making sure
not to snag any of the wires, fit the
screws (4) removed previously and
tighten securely.
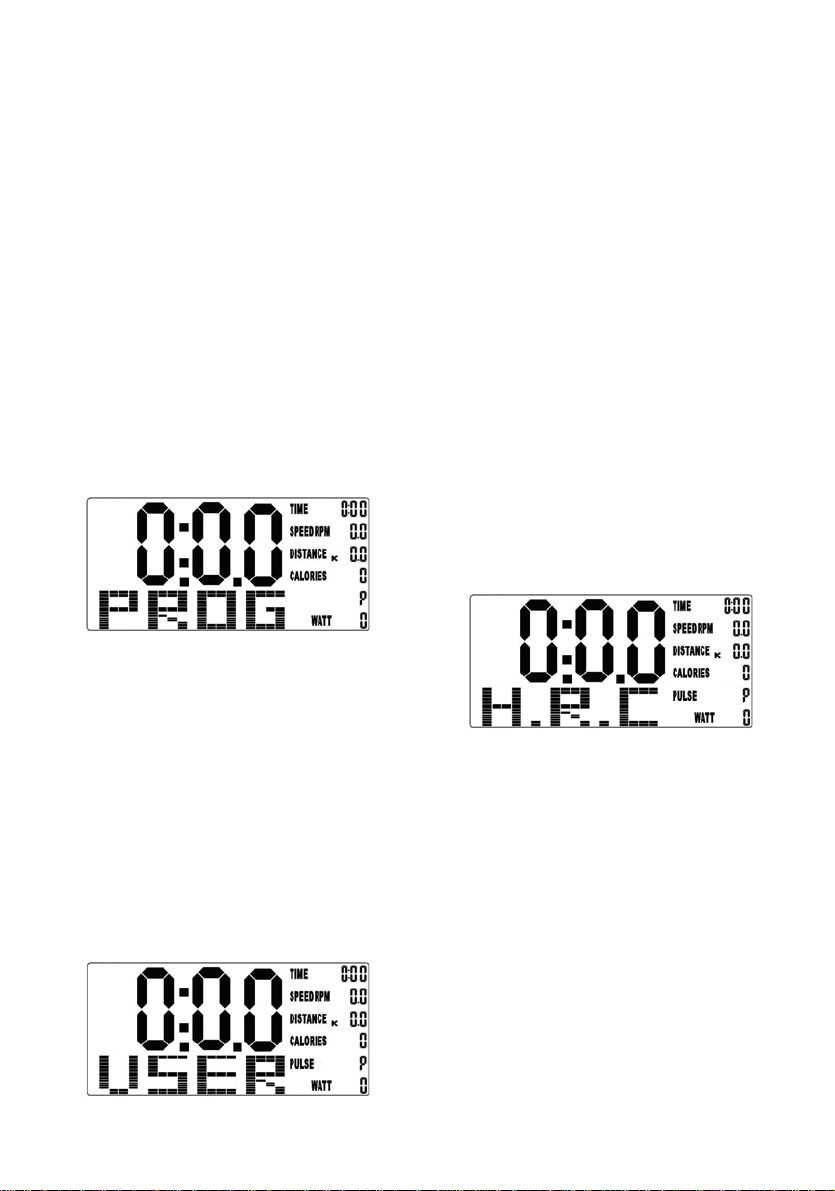
ELECTRONIC MONITOR.
To make control over the exercise
more comfortable and less
complicated, the lower section of the
display on this electronic device gives
simultaneous readings of time,
distance and pulse rate, or
alternatively, revolutions per minute
(RPM), speed, calories and watts. The
top of the display shows a graph for
the selected program, along with its
number (programs from 1 to 12), or a
manual operation graph for gauging
the desired exercise settings.
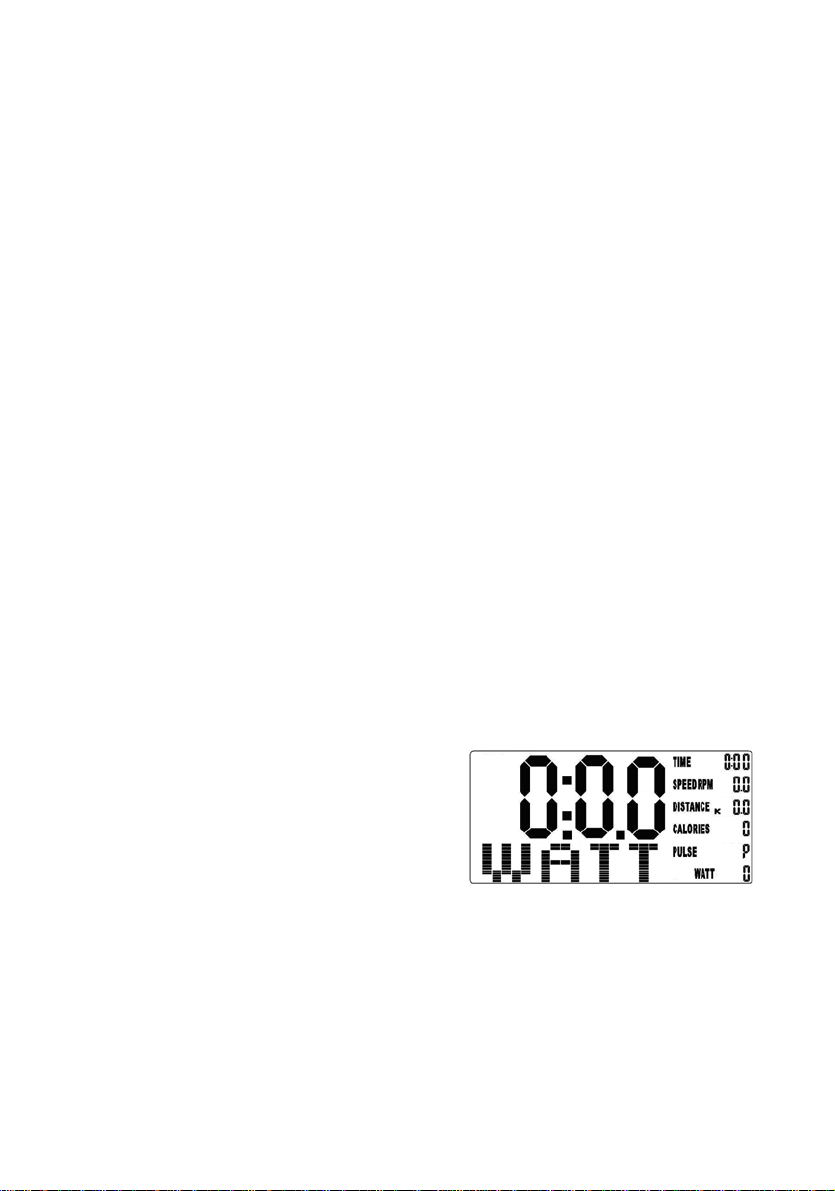
As soon as the transformer is plugged
into the back of the machine the
display will come on automatically
showing the message.
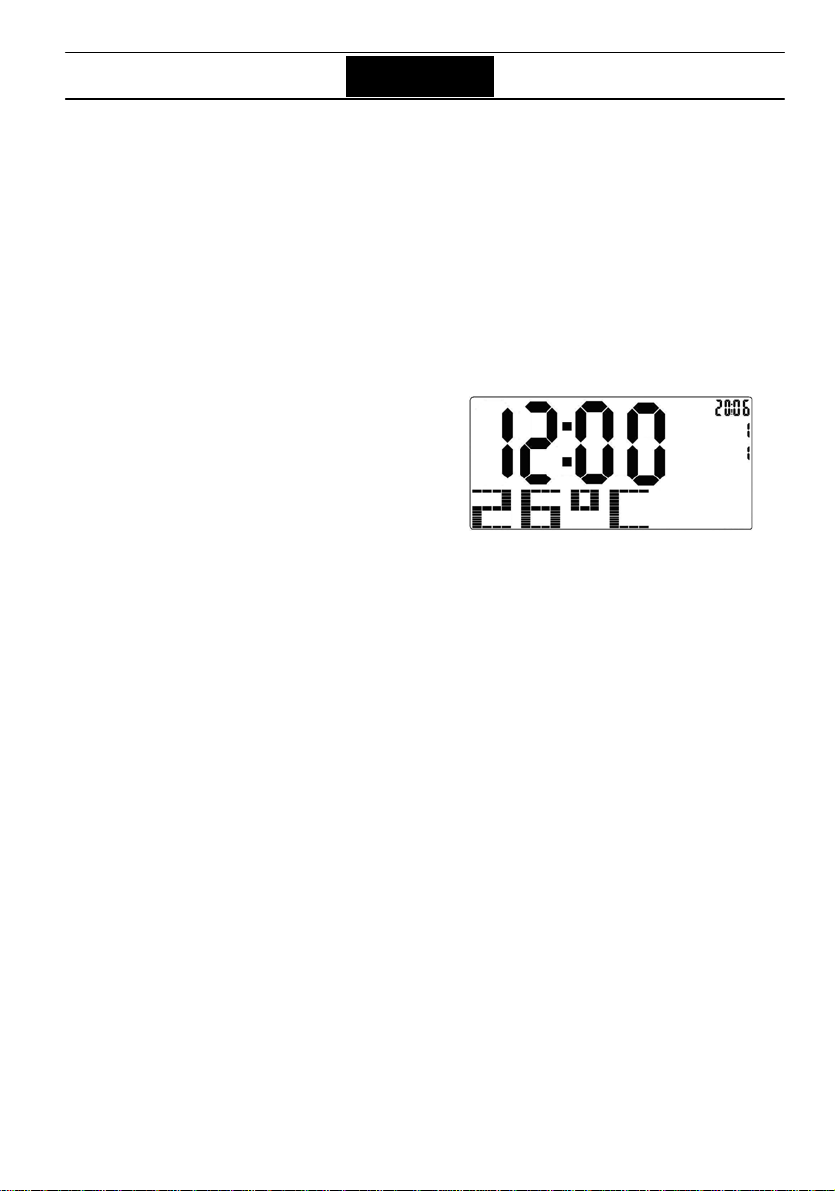
When the monitor is in stabd-by
mode, the screen displays the time,
date and temperature.
SETTING THE DATE & TIME.-
Whenever the adapter (138) Fig.4 is
unplugged from the mains supply the
memory erases all of the memories,
including the date. To set the date
follow these steps:
Plug the adapter (138) into the mains
socket. Characters will appear on the
monitor. Press MODE/ENTER and the
year will flash. Use the ▲▼ wheel
UP/DOWN to select the year. Press
the MODE/ENTER key and the month
will flash. Use the ▲▼ wheel
UP/DOWN to select the month. Press
the MODE/ENTER key and the hour
will flash. Use the ▲▼ wheel
UP/DOWN to select the hour. Press
the MODE/ENTER key and the
minutes will flash. Use the ▲▼ wheel
UP/DOWN to select the minutes.
Press the MODE/ENTER key and the
display will be ready to begin the
exercise.

12
- ST/STOP:
Used to start or stop training.
- RESET:
1. This resets all of the measurements
(time, speed, calories,...) back to zero.
To use it, keep the RESET button
pressed down for 2 seconds and this
will reset the variables back to zero.
- MODE/ENTER:
1. To select each function (Time,
distance, calories, pulse rate,...)
2. To go back to the option for
selecting Manual, Program, User or
Pulse mode.
- UP:
To move up through the settings.
- DOWN:
To move down through the settings.
- RECOVERY:
Recovery function:
CHANGING FROM ONE
WORK MODE TO ANOTHER.-
This monitor allows you to work in 5
different modes: Manual, Program, User
(USER), Pulse (TARGET HR), Watt. In
order to pass from one mode to another
press the START/STOP button to stop
the monitor, then press RESET and,
with the help of the UP / DOWN buttons,
select the desired mode.
MANUAL MODE.-
You can start exercising straightaway
after having selected Manual mode,
done by pressing the START/STOP
button. The applied braking force can
be adjusted by using the UP and
DOWN buttons.
If you wish to program time, distance,
calories, watts and pulse settings,
then press the MODE/ENTER button
before beginning the exercise in order
to program in the values. Each time
you press MODE/ENTER a different
variable will flash, which you can set
by using UP and DOWN. After having
programmed them in, press
START/STOP.
Pressing the RESET key for more
than two seconds will reset all of the
values, except those relating to
personal information.
TIME FUNCTION.-
This function counts up or down in
steps of one second, up to a
maximum of 99:59 seconds. Pressing
the RESET key for more than two
seconds will reset all of the values,
except those relating to personal
information.
1. Press the MODE/ENTER key to
start the small TIME window flashing.
2. Press the UP or DOWN keys to
select the time (1-99 Min.)
3. Begin the exercise and the time
value will begin the countdown, when
it reaches zero it will beep for 8
seconds, advising you that the
selected time has elapsed.
DISTANCE FUNCTION.-
This function counts up or down in
steps of 0.01 km/ml, up to a maximum
of 99.99 km/ml. Pressing the RESET
key for more than two seconds will
13
reset all of the values, except those
relating to personal information.
1. Press the MODE/ENTER key to
start the small DIST (DISTANCE)
window flashing.
2. Press the UP or DOWN keys to
select the distance.
3. Begin the exercise and the distance
value will begin the countdown, when
it reaches zero it will beep for 8
seconds, advising you that the
selected distance has been covered.
CALORIE FUNCTION.-
This function counts up or down in
steps of one calorie, up to a maximum
of 999 calories. Pressing the RESET
key for more than two seconds will
reset all of the values, except those
relating to personal information.
1. Press the MODE/ENTER key to
start the small CAL (CALORIE)
window flashing.
2. Press the UP or DOWN keys to
select the calories.
3. Begin the exercise and the calorie
value will begin the countdown, when
it reaches zero it will beep for 8
seconds, advising you that the
selected calorie value has been
reached.
PULSE FUNCTION.-
The pulse function shows you heart
beats per minute (BPM). To use this
function place your hands on the
handlebar sensors (R), Fig.6, and your
heart rate will be displayed after a few
seconds. This is not a medical
appliance and therefore these values
are for guideline purposes only.
To select the THR (Target Heart Rate)
carry out the following steps:
1. Press the MODE/ENTER key to
start the small pulse window flashing .
2. Press the UP or DOWN keys to set
the pulse rate value that you wish to
use during the exercise, between 10
and 240 (BPM), the monitor’s default
value is 150 BPM.
3. Begin exercising and your heart rate
will be displayed in the PULSE window,
when you reach the selected value the
monitor will beep to advise you that you
have reached the set pulse rate.
NOTE:
If, after 15 seconds, the sensor does
not detect a signal then the error code
“E 3” will appear on the screen, make
sure that both your hands are placed
on the handlebar sensors (R), Fig. 6. If
no signal is received after a further 5
seconds then the screen will revert to
the previously displayed function.
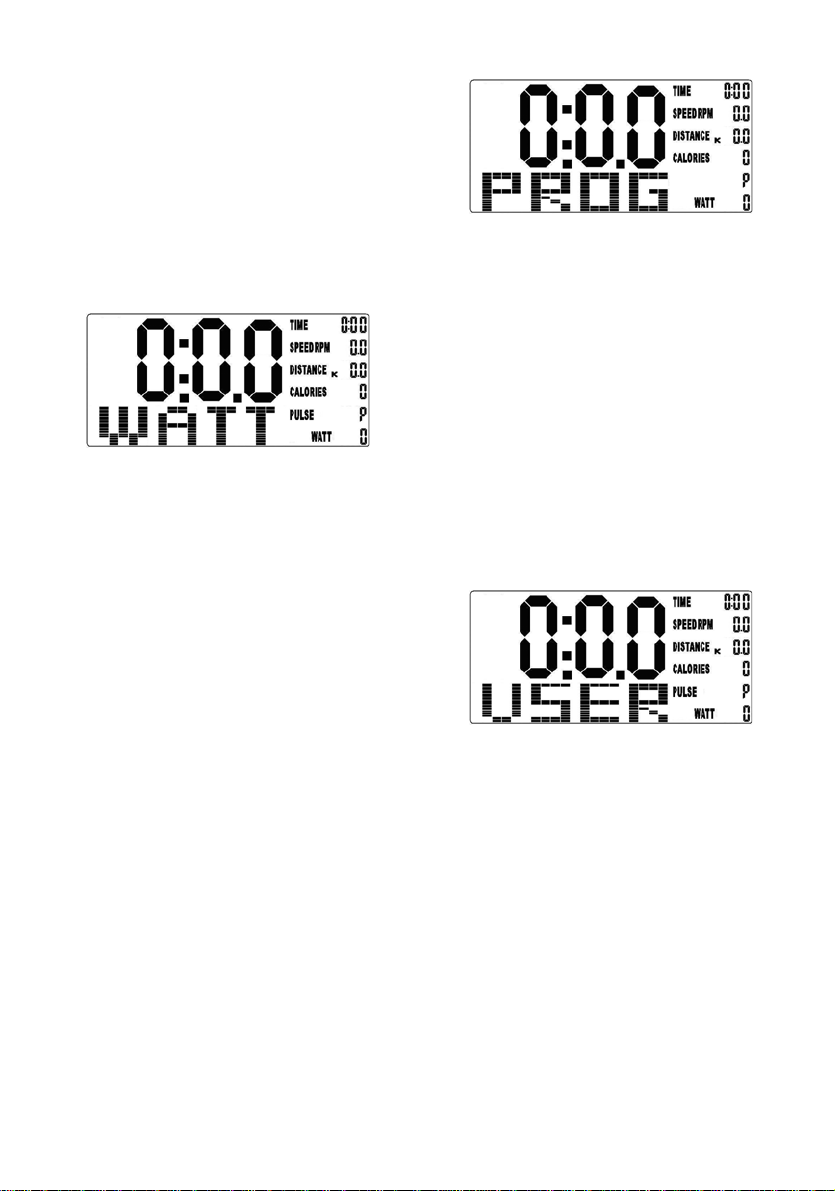
PROGRAM WATTS .-
If, after selecting manual mode, you
press the ENTER key four times the
watts window will start flashing. By
pressing the wheel UP/DOWN ▲▼
keys you can program the watts to
produce for the exercise (between 10-
350 Watt.).
Select the watts and press
START/STOP to begin the exercise.
The exertion level for the exercise is
self adjusting based on the speed and
number of watts selected. Three
symbols will help you with your
training sessions:
14
▲– Within the work margin, this
indicates that the speed is too high
and you should slow down.
▼– Within the work margin, this
indicates that the speed is too low and
you should speed up.
------- This indicates that the watts
being produced are outside the work
limit (either too high or too low) so you
should speed up or slow down
accordingly. The monitor will beep
several times to indicate this status.
PROGRAM MODE.-
After having selected Program mode,
press MODE/ENTER and select the
desired training profile by using the
UP and DOWN buttons (P1-P12).
You can then start training by pressing
the START/STOP button.
It is also possible to program in
variables of time, distance, calories,
watts and heart rate by using the
MODE/ENTER button and the UP and
DOWN keys.
USER PROGRAM (USER U1-
U4).-
This mode allows the user to design
his/her own personal program.
A minute column will flash each time
the MODE/ENTER button is pressed
and with the help of the UP and
DOWN keys you can program in the
intensity of the exercise for each
minute. The said profile will be
recorded for future use.
It is also possible to program in
variables of time, distance, calories,
watts and heart rate by using the
MODE/ENTER button and the UP and
DOWN keys.
PULSE PROGRAM (TARGET
HRC).-
This mode allows you to specify the
Heart Rate at which you would like to
work, the exertion level will adjust
itself automatically based on your
heart rate at any given time.
After having selected TARGET H.R
mode, press MODE/ENTER.
The word AGE will start flashing in the
centre of the display. Select your age
using the DOWN/UP keys and press
MODE/ENTER. After entering your age
you should select the target heart rate
for your exercise. Use the DOWN/UP
keys to select the desired option (55%,
75% 90% or THR) and press the
MODE/ENTER key. The first three
represent the percentage with respect
to maximum heart rate (220-age) and
the fourth is used to specify the target
heart rate manually. In the first three
cases, the lower window on the display
(TARGET H.R) will show you the

15
calculated value for your maximum
heart rate level. If you choose THR
then you should use the DOWN/UP
keys to select the desired heart rate
and then press MODE/ENTER.
Press START/STOP to start the
exercise. The exertion level will adjust
automatically in accordance with the
selected hart rate value. If the pulse
rate is below the target value then the
exertion setting will increase by one
level every 60 seconds until it reaches
the maximum 16. If the pulse rate is
above the target value the monitor will
give out warning beeps and reduce
the exertion settings by one level
every 15 seconds until it reaches the
minimum 1. If the pulse rate still stays
above the target value for more than
30 seconds the monitor will beep and
stop in order to protect the user.
Your hands must be placed on the
pulse sensors (R) when using these
programs Fig.5.
STOPPING THE EXERCISE.-
Exercising with programmed data.
As soon as the programmed variables
(time, distance,.etc) reach zero, the
monitor will emit 8 warning beeps and
then halt.
If the START/STOP button is pressed
then exercising will start again, using
the same programmed parameters as
before.
Interrupting the exercise. You can
stop the monitor whenever you like by
pressing the START/STOP button.
RECOVERY TEST:
FITNESS.-
This electronic device is equipped with a
recovery test function. This offers you
the advantage of being able to measure
how long it takes your heart rate to
recover after having finished the
exercise. Upon finishing the exercise
leave your hands on the pulse gauges
and press the “Recovery Test” button,
this will start a one minute countdown.
Only the Time and Pulse rate function
read-outs will remain displayed. The
electronic device will measure your
pulse rate during this minute. The heart
rate recovery time will be displayed on
the Heart rate line.
If, at any time during this minute, you
decide to abandon this test then press
the “Recovery Test” button and this will
take you back to the main screen.
When the minute is up, the electronic
device will work out the difference and
your fitness rating will be displayed up
on the screen: F1, F2,..., F5, F16; where
F1 is the best (fitness “Excellent”) and
F6 the worst (fitness “Very Poor”).
The comparison between the worked
heart rate and the recovery heart rate
provides a fast, simple method of
gauging how fit you are. Your fitness
rating is a guideline that shows you
how fast your heart recovers after
physical exertion. If you exercise
regularly then you will see your fitness
rating improve.
The test will not work if the sensor is
not positioned correctly or if the letter
“P” is shown on the screen.
USE OF THE HAND-GRIP.-
On this model the pulse rate is
measured by placing both hands on

16
the sensors (R), located on the
handlebar, as shown in Fig.6.
When both hands are placed on the
sensors the heart symbol on the
screen will begin to flash and after a
few seconds your heart rate reading
will be displayed.
If both hands are not placed correctly
Fig.6 then the pulse function will not
work.
If a “P” appears on the screen or the
heart symbol does not flash then
make sure that both hands are placed
on the sensors and that connector (Z)
is connected at the back of the
monitor (P).
SAFETY INSTRUCTIONS.-
Always follow this advice when using
electrical appliances.
- Make sure that the mains supply
voltage is suitable for the machine
before plugging it in.
The supply voltage should be 220 V
and the wall socket outlet must match
the plug on the machine. Do not use
any type of adapter.
- To reduce the risk of electrical shock,
always unplug the unit immediately
after use and before attempting to
clean it.
- Never leave the unit unattended
when it is plugged in. Unplug it after
use.
- Do not allow children or the disabled
to use the appliance without the strict
supervision of a qualified person.
- Never use accessories that are not
recommended by the manufacturer.
- Do not use the machine if the mains
cable becomes damaged or worn.
- Keep the mains cable away from hot
surfaces.
- Do not use the machine outdoors or
in the rain.
Avoid leaving the electronic monitor in
direct sunlight as this might damage
the liquid cristal display. Similarly, do
not expose it to water or knocks.
TROUBLESHOOTING GUIDE.-
Problem: The display comes on but
only the Time function works
Solution:
a.- Make sure that the connection
cable is connected.
Problem: The display does not come
on or the displayed segments are very
weak
Solution:
a.- Check that the transformer is
plugged in.
b.- Check the voltage output from the
transformer.
Problem: Display segments of a
function read-out are not visible or
error messages for a particular
function appear.
Solution:
a.- Check that cables (p) and (p1) are
connected properly. Please refer to
the assembly manual, Fig.4B.
b.- Check that cable (M) is plugged
into the monitor socket (N) correctly.
c.- If the above steps do not help then
replace the electronic monitor.
Avoid leaving the electronic monitor in
direct sunlight as this might damage
the liquid crystal display. Similarly, do
not expose it to water or knocks.
BH RESERVES THE RIGHT TO
MODIFY THE SPECIFICATIONS OF
ITS PRODUCTS WITHOUT PRIOR
NOTICE.
17
Français
MONITEUR ÉLECTRONIQUE.-
Remarque importante: Les piles
usées ou les déchets de l’emballage
doivent être déposés dans des
conteneurs spéciaux prévus à cet
effet, Fig.1.
INSTALLATION DU CÂBLE
PRINCIPAL.-
Prendre le câble (M) qui dépasse du
tube (6), et branchez-le au connecteur
(N) placé derrière le moniteur (P).
Fig.2.
MISE EN PLACE DU CÂBLE
HAND-GRIP.
Prendre le câble (Z) de l’Hand-Grip,
Fig.3 et branchez-le au connecteur (Y)
placé en partie arrière du moniteur
(P), comme indiqué sur la Fig.3.
INSTALLATION DU
MONITEUR ÉLECTRONIQUE.-
Dévissez les vis (4), Fig,2, de la partie
arrière du moniteur, ensuite introduire
le moniteur de haut en bas en le
faisant glisser dans la rainure du tube
(6) Fig.3 en faisant attention à ne pas
pincer les câbles, placer les vis (4) qui
ont été dévissées tout à l’heure et
revissez-les.
MONITEUR ÉLECTRONIQUE.-
Pour que vous puissiez contrôler
facilement et confortablement votre
exercice, cet appareil électronique
affiche simultanément, en bas de
l’écran du moniteur, la durée, la
distance et le Pólux et alternativement
: révolutions par minute (RPM), la
vitesse, les calories et les watts. Le
graphique du programme choisi ainsi
que le numéro correspondant
(programmes du 1 au 12 ) ou le
graphique du fonctionnement manuel
avec la sélection de l’effort voulu,
seront affichés en-haut de l’écran.
En branchant le transformateur en bas
de la machine, l’écran s’allumera
automatiquement et le display
affichera.
Quand le moniteur se trouve dans
le mode pause, l’heure, la date et la
température s’affichent à l’écran.
MISE EN DATE ET HEURE.-
À chaque fois que l’adaptateur (138)
Fig.4 est débranché de la prise de
courant, toutes les mémoires y
compris la date s’effacent du
moniteur. Pour mettre la date, faire
comme indiqué ci-après:
Brancher l’adaptateur (138) sur la
prise de courant, des caractères
s’afficheront alors sur le moniteur.
Appuyer sur la touche MODE/ENTER
et l’année clignotera, avec le roulette
UP/DOWN ▲▼, sélectionner l’année.
Appuyer sur MODE/ENTER et le mois
clignotera, avec le roulette UP/DOWN
▲▼, sélectionner le mois. Appuyer
sur la touche MODE/ENTER et le jour
clignotera, avec le roulette UP/DOWN
▲▼, sélectionner le jour. Appuyer sur

18
la touche MODE/ENTER et l’heure
clignotera, avec le roulette UP/DOWN
▲▼, sélectionner l’heure. Appuyer
sur la touche MODE/ENTER et les
minutes clignoteront. Appuyer sur la
touche MODE/ENTER et le display
affichera les caractères pour
commencer l’exercice.
- ST/STOP :
Pour commencer ou pour terminer
l’entraînement.
- RESET :
1. Met à zéro toutes les valeurs
(durée, vitesse, calories, etc).
2 Pour ce faire, appuyez secondes sur
le bouton RESET et toutes les valeurs
reviendront sur zéro.
- MODE/ENTER :
1. Pour sélectionner chaque fonction
(durée, distance, calories, pouls, etc).
2. Pour revenir à l’option de sélection
du mode Manuel, Programmes,
Utilisateur ou Pouls.
- UP (EN-HAUT) :
Pour régler les données vers le haut.
- DOWN (EN-BAS) :
our régler les données vers le bas.
- RECOVERY :
Fonction de récupération.
POUR PASSER D’UN MODE
DE TRAVAIL À L’AUTRE.-
Ce moniteur peut travailler avec 5
modes différents:
Manuel, Programmes, Utilisateu
(USER) et Pouls (TARGET HR), watts
(WATT). Pour passer d’un mode à
l’autre, il faut appuyer sur le bouton
START/STOP pour arrêter le
moniteur, ensuite appuyer sur SET
puis sélectionner le mode voulu par
l’intermédiaire des boutons UP et
DOWN.
PROGRAMME MANUEL.-
Après avoir sélectionné le mode
Manuel, appuyez sur le bouton
START/STOP pour commencer
directement l’exercice. Le réglage de
la force de freinage s’effectue à l’aide
des boutons UP et DOWN.
En appuyant + de deux secondes sur
la touche RESET, toutes les valeurs
reviennent sur zéro, excepté les
informations personnelles.
La programmation de la durée, de la
distance, des calories, des watts et du
pouls doit être faite en appuyant sur le
bouton MODE/ENTER avant de
commencer l’exercice. À chaque
appui sur le bouton MODE/ENTER,
une valeur différente clignotera et
vous pourrez la programmer à l’aide
des boutons UP et DOWN. Après la
programmation, appuyez sur
START/STOP.
FONCTION DURÉE.-
Cette fonction ajoute ou soustrait par
des incréments d’une seconde jusqu’à
un maximum de 99:59 secondes. En
appuyant + de deux secondes sur la
touche RESET, toutes les valeurs
reviennent sur zéro, excepté les
informations personnelles.
1. En appuyant sur la touche

19
MODE/ENTER la petite fenêtre TIME
clignotera.
2. Pour sélectionner la durée, appuyez
sur les touches UP ou DOWN.
3. Commencez l’exercice, le compte à
rebours commencera et à la fin de la
durée programmée, le moniteur émet
un signal sonore durant 8 secondes
pour signaler que le temps
sélectionné.
FONCTION DISTANCE.-
Cette fonction ajoute ou soustrait par
des incréments de 0.01 km/ml jusqu’à
un maximum de 99,99 km/ml. En
appuyant + de deux secondes sur la
touche RESET, toutes les valeurs
reviennent sur zéro, excepté les
informations personnelles.
1. En appuyant sur la touche
MODE/ENTER la petite fenêtre DIST
(DISTANCE) clignotera.
2. Pour sélectionner la distance,
appuyez sur les touches UP ou
DOWN.
3. Commencez l’exercice, la distance
commencera à diminuer et à la fin de
la distance programmée, le moniteur
émet un signal sonore durant 8
secondes pour signaler que la
distance sélectionnée.
FONCTION CALORIES.-
Cette fonction ajoute ou soustrait les
calories, une à une, jusqu’à un
maximum de 999 calories. En
appuyant + de deux secondes sur la
touche RESET, toutes les valeurs
reviennent sur zéro, excepté les
informations personnelles.
1. En appuyant sur la touche
MODE/ENTER la petite fenêtre CAL
(CALORIES) clignotera.
2. Pour sélectionner les calories,
appuyez sur les touches UP ou
DOWN.
3. Commencez l’exercice, les calories
commenceront à diminuer et à la fin
des calories programmées, le
moniteur émet un signal sonore durant
8 secondes pour signaler que les
calories sélectionnées.
FONCTION POULS.-
La Fonction pouls affiche les P.P.M
(pulsations par minute). Pour ce faire,
posez les mains Fig.6 sur les
senseurs du guidon (R) et dans les
secondes suivantes votre fréquence
cardiaque sera affichée. Ce moniteur
n’est pas un appareil médical, par
conséquent les valeurs sont données
à titre purement indicatif.
Pour sélectionner le THR (cadence
cardiaque cible), faire comme indiqué
ci-après:
1. En appuyant sur la touche
MODE/ENTER la petite fenêtre du
pouls clignotera et la fréquence.
2. En appuyant sur les touches UP ou
DOWN, sélectionnez la valeur du
pouls avec laquelle vous voulez
réaliser l’exercice entre 40 et 240
(PPM), valeur initiale programmée
dans le moniteur 150 PPM.
3 Commencez l’exercice et votre
fréquence cardiaque sera affichée à
l’écran PULSE dès que la valeur
sélectionnée sera atteinte, le moniteur
émettra un signal sonore pour indiquer
que cette valeur a été atteinte.
NOTA:
Si au bout de 15 secondes aucun
signal de pulsations n’est affiché, le
message «E 3» sera affiché à l’écran,
vérifiez si vos deux mains sont bien
posées sur les senseurs (R) du
guidon, Fig.5. Si aucun signal n’est
donné au bout de 5 secondes, l’écran
20
reviendra à la fonction précédente.
PROGRAMME WATTS.-
Si après avoir sélectionné la fonction
manuel, vous appuyez quatre fois sur
la touche ENTER, la fenêtre watts
clignotera. En appuyant sur le roulette
UP/DOWN ▲▼, vous pourrez
programmer les watts de l’exercice
entre 10 et 350 watts.
Pour commencer l’exercice,
sélectionner les watts et appuyer sur
la touche START/STOP. Le niveau de
l’effort de l’exercice se réglera
automatiquement d’après la vitesse et
les watts sélectionnés. Les trois
symboles ci-après vous aideront dans
votre entraînement:
▲– Dans la marge de travail, ce
signe indique que la vitesse est très
élevée et qu’il faut la baisser.
▼– Dans la marge de travail, ce
signe indique que la vitesse est très
basse et qu’il faut l’augmenter.
------- Indique que les watts sont hors
de la marge de travail (trop ou pas
assez) et qu’il faut baisser ou
augmenter la vitesse comme il se doit.
Le moniteur émettra un signal sonore
pour indiquer cet état.
MODE PROGRAMMES.-.
Après avoir sélectionné le mode
Programmes, appuyez sur
MODE/ENTER et avec le bouton UP
ou DOWN, sélectionnez le profil
d’entraînement voulu (P1-P12).
Appuyez sur le bouton START/STOP
pour commencer l’exercice
directement.
Possibilité également de programmer
les valeurs de durée, de distance, de
calories, de watts et du pouls avec le
bouton MODE/ENTER et les touches
UP et DOWN.
PROGRAMME UTILISATEUR
(USER U1-U4 ).-
Par l’intermédiaire de ce mode,
l’utilisateur peut dessiner lui-même
son propre programme.
À chaque appui sur le bouton
MODE/ENTER, une colonne de
minutes se met à clignoter et avec les
boutons UP ET DOWN, l’utilisateur
pourra programmer Trè insuffisant
Excellent l’intensité de l’exercice à
chaque minute. Ce programme est
enregistré pour des utilisations
ultérieures.
Appuyez sur le bouton START/STOP
pour commencer l’exercice
directement.
Possibilité également de programmer
les valeurs de durée, de distance, de
calories, de watts et du pouls avec le
Table of contents
Languages:
Other BH Fitness Electronic manuals


