Bikefitting Position Simulator User manual


Introduction
The Position Simulator has been developed to
round off the Bikefi tting.com Standard analysis.
This device is very unique because you can
determine exactly the right seat-angle. The
measurement of the seat angle is rather complex
but due to the Position Simulator it is very easy
to determine. In one handling you can measure
the proportion upperleg length and underleg
length by taking into account the infl uence which
the saddle height and the position on the saddle
have on the correct seat angle. The functions of
the Position Simulator are as follows:
• measurement of the correct seat angle as
a condition for an optimal transmission
of power during cycling.
• measurement of an asymmetric position
on the bicycle.
• the cyclist can immediately experience
the position which Bikefitting.com is
advising.
MANUAL POSITION SIMULATOR
Copyright© 1996-2007 bikefitting.com b.v. All rights reserved.

Theory
To optimize the cycling motion of the physical
locomotion there are fi ve parameters:
1 Anatomical saddle middle
2 Saddle height
3 Crank length
4 Position of the shoe cleats
5 Seat angle
The correct sizes and adjustments of the data 1
to 3 are the result of the Bikefi tting.com Standard
computer analysis. Position 4 is the result of the
Shoe Cleat Adjuster measurement.To determine
the correct seat angle (position 5) the Position
Simulator and the Professional online software
have been developed especiallly.
Physical locomotion
Anatomical
saddle middle
Seat angle
Saddle height
Crank length
MANUAL POSITION SIMULATOR
Copyright© 1996-2007 bikefitting.com b.v. All rights reserved.

Contrary to common belief, it is not possible to
determine the correct seat angle through the
proportion of underleg - upperleg. First of all it
is almost impossible to measure this proportion
exactly and, secondly, the saddle height and
the position of the cyclist on the saddle have an
effect on the correct seat angle.
In accordance with theory the point where the
power of the upper leg goes into the under leg
has to be above the centre of the pedal axle
when crank and pedal are horizontal. It not only
gives a correct fl uency of power but also has an
effect on the position on the saddle. If the power
transmission of the movement locomotion and
the pedal mechanism of the bicycle are not in
one line then the result will be a very unrestful
position on the saddle, which can lead to lost
effi ciency.
Position of the shoe cleats
MANUAL POSITION SIMULATOR
Copyright© 1996-2007 bikefitting.com b.v. All rights reserved.

Procedure
The measurement with the Position Simulator is an addition to the Standard online computer measurement. The cyclist should be
dressed in her/him cyclist outfi t. You will get the best results when the measurement is taken with the cyclist‘s own saddle and
the pedal system, or, in case of a new bike, with the manufacturer’s saddle and pedal system. As explained earlier, the position on
the saddle has an effect on the correct seat angle. Before we start with the procedure of the adjustment of the Position Simulator,
four important points need to be taken into account.
1 After the Position Simulator is adjusted, the cyclist should cycle a few minutes to fi nd the right position on the saddle. Make
sure that this position is kept during the whole measurement.
2 The hands are on the handle bar (check the adjustment of the stem).
3 It is not necessary to adjust the shoe cleats before the measurement.
4 Adjust the resistance unit in such a way that the cyclist can easily pedal with a feeling of resistance.
MANUAL POSITION SIMULATOR
Copyright© 1996-2007 bikefitting.com b.v. All rights reserved.

Step 1
Adjust the seat angle at the standard 73.5
degrees angle. An exception is the Time Trial Tri-
athlon analysis with a seat angle of 78.0 degrees.
The seat angle can be adjusted with the black
nut below of the top tube.
black nut
resistance unit
seat angle
MANUAL POSITION SIMULATOR
Copyright© 1996-2007 bikefitting.com b.v. All rights reserved.

Step 2
Mount the saddle in a horizontal position and
place the anatomic middle of the saddle into
the centre of the seatpost tube by means of the
saddle centring device.
anatomical
saddle middle
saddle centring
device
MANUAL POSITION SIMULATOR
Copyright© 1996-2007 bikefitting.com b.v. All rights reserved.

Step 3
Adjust the saddle height in accordance with
the coordinate of the Professional online
measurement. The saddle height is the distance
from the axle centre to the top of the anatomical
saddle middle. The saddle height can be adjusted
with the Saddle Height Adjuster.
anatomical
saddle middle
axle centre
saddle height
MANUAL POSITION SIMULATOR
Copyright© 1996-2007 bikefitting.com b.v. All rights reserved.
Step 4
Adjust the stem height in accordance with
the coordinate of the Professional online
measurement program.
This size needs to be read at the top of the
stem holder. top of the stem holder
MANUAL POSITION SIMULATOR
Copyright© 1996-2007 bikefitting.com b.v. All rights reserved.

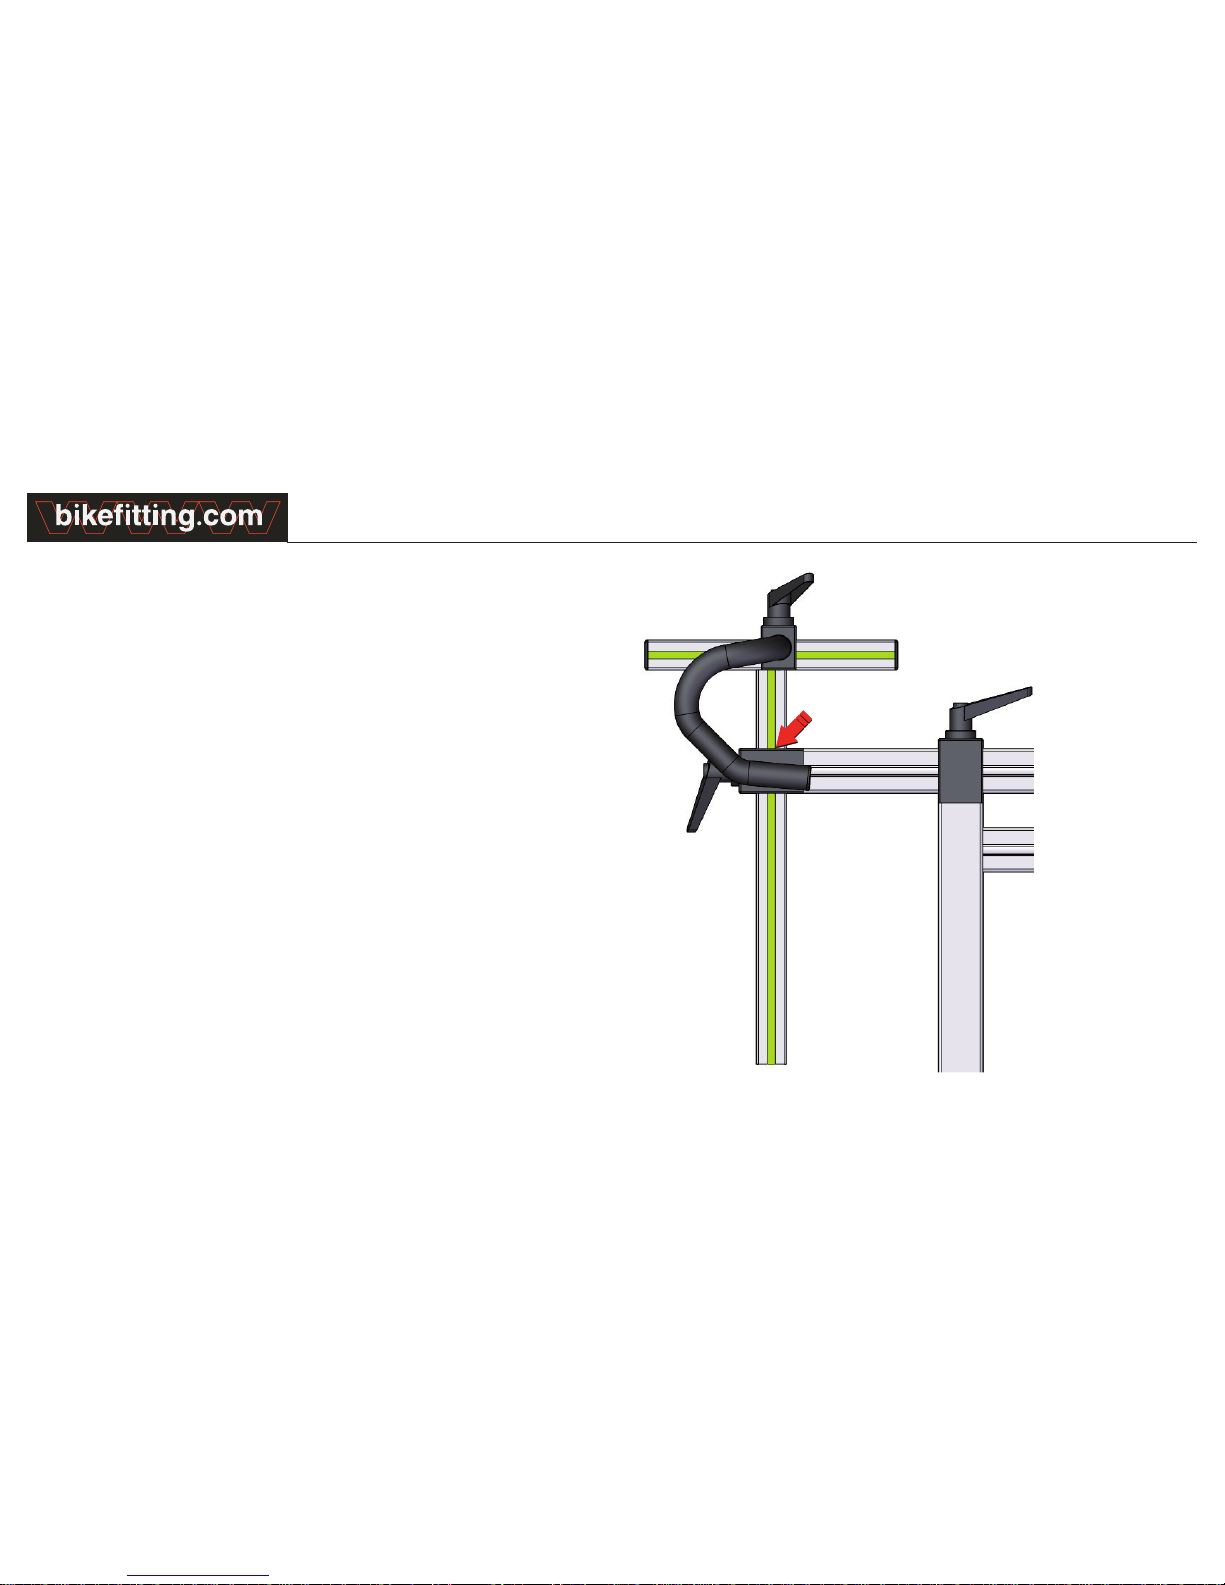
Step 5
Adjust the stem length in accordance with
the coordinate of the Professional online
measurement program.
This size needs to be read on the cyclist’s side
of the grey handlebar holder.
cyclist’s side handlebar holder
MANUAL POSITION SIMULATOR
Copyright© 1996-2007 bikefitting.com b.v. All rights reserved.

Step 6
When the cyclist has taken a seat on the Position Simulator the actual measurement can start.
1 The hands are positioned on the break levers.
2 The shoes are locked into the pedal system.
3 After having found the correct position on the saddle, it is important that the cyclist stays in this position during
the whole measurement.
4 The left crank should be fi xed by placing the locking pin through the hole in the crank into the fi xation pipe of
the vertical tube.
5 The left pedal should be fi xed in a horizontal position.
6 The knee stop should be placed in and against the holder on the horizontal tube. Furthermore, the knee stop should be
turned into the direction of the front of the knee.
7 If the stop is behind or in front of the knee, the black nut should be turned in such a way that the front of the knee and the
brass knee stop are in connection with each other.
8 Repeat point 4 to 7 for the right knee.
9 If there is a difference between the left and right knee position, you have to take the average of both measurements.
10 Read the seat angle at the end of the horizontal outside tube and type the data into the Professional online program
and compute the custom drawing.
MANUAL POSITION SIMULATOR
Copyright© 1996-2007 bikefitting.com b.v. All rights reserved.

knee-pedal-axle-line
seat angle
crank and pedal are horizontal
knee stop
MANUAL POSITION SIMULATOR
Copyright© 1996-2007 bikefitting.com b.v. All rights reserved.
Popular Fitness Equipment manuals by other brands


G-FITNESS
G-FITNESS AIR ROWER user manual

CAPITAL SPORTS
CAPITAL SPORTS Dominate Edition 10028796 manual

Martin System
Martin System TT4FK user guide

CIRCLE FITNESS
CIRCLE FITNESS E7 owner's manual

G-FITNESS
G-FITNESS TZ-6017 user manual

Accelerated Care Plus
Accelerated Care Plus OMNISTIM FX2 CYCLE/WALK user manual


