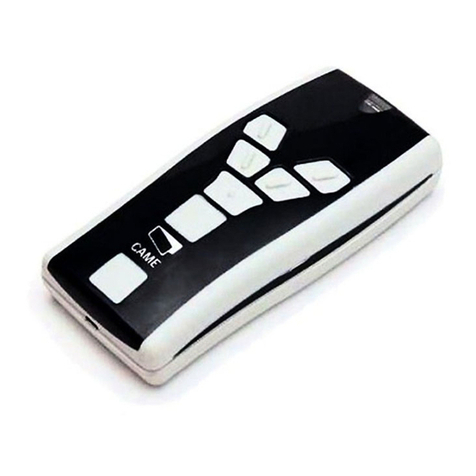
Bintronic BT-073 User manual

Table of Contents
OPEN
CLOSE STOP
MODE
SET
How to open Battery Compartment Cover
Push the cover out
How to replace Battery Compartment Cover
Insert latches
Insert latches into
corresponding slots
Place Battery
Compartment Cover
to engage it with Slides
Push the cover in
making settings
Key check-points prior to When setting Upper-/Lower-Limit points,
set Upper-Limit first, then the Lower-Limit. modification of Upper-/Lower-Limit points. In case the Roller Shade moves in the
opposite direction, refer to the Steps of Item 3-1 in Table of Contents to correct the direction.
upwards by pressing UP and downwards by pressing DOWN. After that, carry out setting or
First, make sure if the direction of movement is correct. Verify if the Roller Shade moves
Upper-Limit is activated.
makes a twitch, indicating the setting mode of
Press [SET] + [Open] keys until the Motor
back
the Motor will make a twitch
Press [Open] or [Close] key to move the Roller Shade to a
pre-determined position, to be set as the Upper-Limit.
Press for 2 seconds,
Tap to fine tune.
tune to the place where you would like
damage to the motor.Then, tap to fine
[Stop] to stop the movement to avoid
While the Shade is getting close to
CAUTION
reaching the Upper-Limit, please press
it to be set up as the Upper-Limit.
press [Stop]
and tap to fine tune
to the Upper-Limit
Press for 2 seconds,
and it will move continuously.
CAUTION
While the Shade is getting close to
reaching the Upper-Limit, please press
[Stop] to stop the movement to avoid
damage to the motor. Then, tap to fine
tune to the place where you would like
it to be set up as the Upper-Limit.
STEP-1 STEP-2
4-1 Clear off Password
1-2 Setting or modifying position of Lower-Limit
6-2 Product Specifications
6-1 Battery Replacement
5-1 Externally connected Manual Switch Box
3-1 Alter direction of Smart Roller Shades movement
2-1 Adding another Remote Control Unit
6-4 Instructions for using Remote Control Holder
6-3 Quick Setting Index
1-1 Setting or modifying position of Upper-Limit
time as a response.
twitch, the Roller Shade
will move upwards and
downwards at the same
When the Motor makes a
P. 1
Instruction Manual
s

When the pre-determined position is reached,
the setting is completed when Motor makes a twitch.
press [Stop] key once to stop the movement;
press any of the blank keys [Left] and [Right] + [Set] to confirm;
press [Stop] of the blank keys
press any
makes a twitch.
The motor
as a response.
and downward at the same time
When the Motor makes a twitch,
the Roller Shade will move upward
Setting Completed
the Upper-Limit setting is completed, too.
And the setting of Lower-Limit has been cleared as well.
When all procedures are done,
indicating that the setting mode of Lower-Limit is activated.
Press [SET] + [Close] keys until Motor makes a twitch,
back
the Motor will make a twitch
Press [Open] or [Close] key to move the Roller Shade
to a pre-determined position, to be set as the Lower-Limit. Tap to fine tune.
and it will move continuously.
Press for 2 seconds,
press [Stop] press any
of the blank keys
The motor makes a twitch.
Setting Completed
the mode will be deactivated if no keys are pressed within 5 seconds.
When entering the Lower-Limit position setting mode,
CAUTION
Plus, previous setting will not be recorded. Please go back to STEP-1 and reset it.
the Roller Shade will move
When the Motor makes a twitch,
upwards and downwards at the
same time as a response.
press any of the blank keys [Left] and [Right] + [Set] to confirm; the setting is completed when the Motor makes a twitch.
When the pre-determined position is reached, press the [Stop] key once to stop the movement;
When all procedures are done,
the Lower-Limit setting is completed, too.
response.
downwards at the same time as a
Roller Shade will move upwards and
When the Motor makes a twitch, the
When the Motor makes a
twitch, the Roller Shade
will move upwards and
time as a response.
downwards at the same
P. 2

is activated.
Press and hold [SET] + [Stop] until the Motor makes a twitch,
indicating that the setting mode of Adding another Remote Control Unit
back
the Motor will make a twitch
the adding process is completed when the Motor makes a twitch.
Now press [Stop] key of the Remote Control to be added;
the Motor will make a twitch Setting Completed
and wait for 5 seconds until
is completed.
indicating that the setting
When all procedures are done,
the Motor makes a twitch,
please do not press any key
indicating the activation of the setting mode.
Press [SET] + [Stop] keys until the Motor makes a twitch,
back
the Motor will make a twitch
the Motor rotates in reverse
direction for the 1st time
direction for the 2nd time
the Motor rotates in forward
Now press [Open] + [Stop] + [Close] keys all together,
Motor rotates in reverse direction;
press [Open] + [Stop] + [Close] keys all together again,
Motor rotates in forward direction.
Setting Completed
is completed.
When all procedures are done,
please do not press any key
and wait for 5 seconds until
indicating that the setting
the Motor makes a twitch,
response.
Roller Shade will move upwards and
When the Motor makes a twitch, the
downwards at the same time as a
response.
Roller Shade will move upwards and
When the Motor makes a twitch, the
downwards at the same time as a
same time as a response.
upwards and downwards at the
the Roller Shade will move
When the Motor makes a twitch,
P. 3

Unplug power supply of the Motor, wait for 15 seconds, resume power supply of it.
Press [Open] + [Stop] + [Close] + any of blank keys [Left] and [Right],
altogether 4 keys, within 8 seconds until Motor makes a twitch. Password is cleared off when the Motor makes a twitch.
After Motor makes a twitch, simultaneously press [Open] + [Close] keys
of the Remote Control within 8 seconds;
the Motor will make a twitch Setting Completed
erased.
is not added, the old password will not be
others will be erased. If a new password
only the password of this remote remains,
When all the procedures are done,
Signal Ground
RX TX
Power Output
(Optional)
System Manual Switch
Green: Signal Ground
Brown: RX
Red: TX
(Optional)
Yellow: Power Output
A brief contact will activate the function; DO NOT short-circuit continuously.
With flat side (positive +) of the Battery facing
upwards, making sure that the Battery is latched
up by two spring plates, insert Battery in a
slanted angle to enter it into the Battery Holder.
Completed.
flat side (positive +)
latched up
by two spring plates
same time as a
downwards at the
the Roller Shade will
makes a twitch,
When the Motor
response.
move upwards and
time as a response.
downwards at the same
will move upwards and
twitch, the Roller Shade
When the Motor makes a
P. 4

Encoding Method: Internally-burnt fixed coding
Battery: CR2450 3V(One-time type lithium battery)
Dimensions: L 13CM, W 4.8CM, H 1.1CM
Standby Current: <1ua
Modulation Method: OOK
Transmission Frequency: 433.92MHz
Antenna Type: on board, Gain=0 dbi
Weight (including battery) 66g
Upper-Limit Setting: [SET]+ [Left] or [Right] blank key
Lower-Limit Setting: [SET]+ [Left] or [Right] blank key
Set Favorite Position: [SET]+ [Close] *twice
Add another Remote Control: [SET] + [Stop], (Remote Control 2) [Stop]
Alter direction of Roller Shade movement:
[SET] + [Stop], [Open] + [Stop] + [Close] (reverse direction),
[Open] + [Stop] + [Close] (forward direction)
Clear off Password:
[Open] + [Stop] + [Close] +
any of [Left] and [Right] blank key, [Open] + [Close].
Vertical Holder
for the use as a vertical holder.
Open-up support plate on the back
open up
Wall-mount Holder
Apply the provided double-face
on the wall, as a wall-mounted holder.
and stick it onto the desired position
adhesive tape on the back of Holder
apply the adhesive tape
stick it onto the desired position
P. 5
Popular Remote Control manuals by other brands
Universal Remote Control
Universal Remote Control UR5L-9000L-IP operating instructions
Funke
Funke ATR833-II Operation and installation
LG
LG Magic Remote Quick setup guide
PSA
PSA LIFESAVER 6000THL user guide
Hearth & Home
Hearth & Home IntelliFire IFT-ACM installation instructions
Marquant
Marquant 926033 operating instructions
