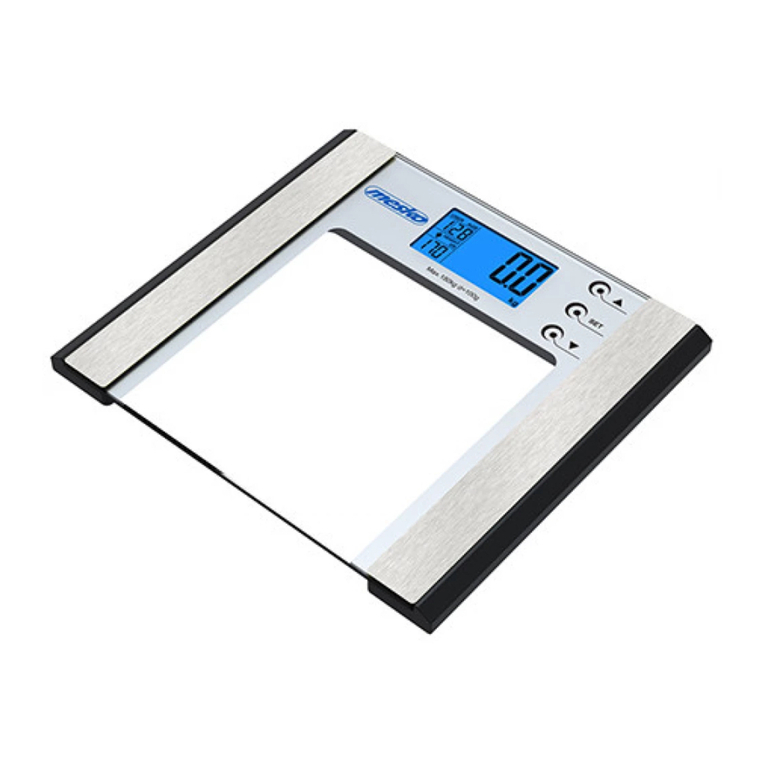
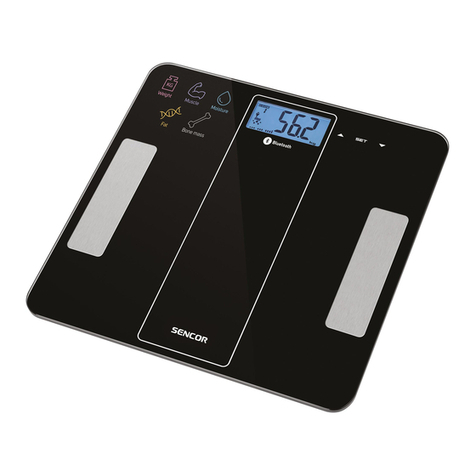
Biocomfort BSC105 User manual

scaleo-comfort
Diagnostic scale
BSC105/BSC205
Operating manual
Issued in 11/2006 REF: 590109

3
1 Introduction 7
2 Interesting facts and information 8
2.1 The measuring principle of the
diagnostic scale 8
2.2 Weighing correctly 8
2.3 Important information 10
3 How to start up your scaleo-comfort
diagnostic scale 12
3.1 Inserting / exchanging batteries 12
3.2 Switching on 14
3.3 Button functions 16
3.4 Configuring the device 18
3.5 Setting the common setting values 20
3.5.1 Setting the date and time 20
3.5.2 Setting the units of measurement
for weight and height 23
3.5.3 Selection of percentage values to
be displayed after a measurement 24
3.5.4 Clearing the measured value
memory 25
3.5.5 Resetting the wireless connection
(type BSC 105 only) 26
3.6 Personal settings 29
3.6.1 Activating/releasing the user no. 30
3.6.2 Setting the gender 32
3.6.3 Setting the age 32
3.6.4 Setting the height 33
3.6.5 Setting the level of fitness 34
4 Carrying out a measurement 37
4.1 Measuring weight only in
“guest” mode 37
4.2 Measuring weight, body fat,
body water and muscle percen-
tages 40
5 Measured value memory 46
5.1 Storing the measured values 46
5.2 Calling the stored measured values 46
Contents 6 Tips for use and guide values 51
6.1 Tips for use 51
6.2 Guide values for body fat 51
7 Error messages/causes of error and
measures to take 53
8 Technical data 56
9 Manufacturer warranty and
guarantee 59
10 Symbols and abbreviations 60

4 5
Setting mode active
Display block for measured
and set values
Symbol: Active wireless
connection
Battery symbol: Weak battery
Symbols: gender
l.: female, r.: male
Symbols for the trend display:
higher, constant, lower
UP/MEM button:
1. Switch on device
(memory mode)
2. Select user
3. Set default values via
“up” function
SET button:
1. Switch on device
(setting mode)
2. Select next input field
(in setting mode)
START button:
1. Switch on device
(measuring mode)
2. Switch off device
3. Confirm a setting/
selection
Control elements
User no. is displayed
Memory mode active
Unit of measurement kg
Unit of measurement percent
Unit of measurement stone/
pounds
Symbol: percent muscle
Symbol: percent body fat
Symbol: percent water
Display elements
Standing area
with electrodes

6 7
Dear User,
We are pleased that you have decided in
favour of the scaleo-comfort diagnostic scale.
It will be a reliable aid to you in keeping
track of your body values, your weight, as
well as your percentage body fat, body water
and muscle mass. The device is easy to oper-
ate and works reliably. The measured values
can be transferred to your PC for further
processing.
This operating manual contains important
information for you.
Please read the operating manual carefully
before using the measuring system for the first
time and observe all information. Best would
be for you to carry out a practice measure-
ment.
All control elements and displays are exactly
explained.
Keep the operating manual in a safe place
for future reference. We recommend that you
also instruct other persons in how top operate
the measuring system.
Introduction
11 Introduction

8 9
2.1 The measuring principle of the diagnos-
tic scale
This scale measures body weight, and also
the percentage body water, body fat and
muscle mass according to the B.I.A. (bio-
electric impedance analysis) principle.
Here, within seconds, the body composi-
tion is measured by means of an unnotice-
able, completely harmless current. With this
measurement of the electric resistance (im-
pedance) and taking into account the con-
stant factors/individual values (age, height,
gender, level of activity), the percentage of
fat, water and muscle of the body can be
determined. Muscle tissue and water have
good electric conductivity and therefore
have a lower resistance. Fat tissue, however,
has a lower conductivity, since the fat cells
hardly conduct current due to the very high
resistance.
Transparent electrodes integrated in the
standing area:
New innovative technologies are used to
manufacture a transparent and, at the same
time, conductive glass coating.
This coating is used for 4 fields on this scale,
which act as electrodes for the impedance
measurement in order to determine the per-
centage body fat, body water and muscle.
The values, displayed in percent, indicate the
respective percentage of the total weight.
Together with the large-area buttons, which
can be pressed with the foot, the advantage
of this technology becomes clear, and clean-
ing is much easier compared to standard
electrodes.
2.2 Weighing correctly
Try to always weigh yourself at the same
time of day (best would be in the morning),
after using the bathroom, on an empty stom-
ach and without clothing, in order to get
comparable results. Only the long-term trend
counts. Short-term weight deviations within a
few days are usually only due to fluid loss:
Body water only plays a major role for your
feeling of well being, however. The interpre-
tation of the results is oriented toward the
changes in:
1. total weight
2. percentage body fat
3. percentage body water
4. percentage muscle mass
as well as toward the period of time in which
these changes take place. Fast changes in the
day-range are to be distinguished from me-
dium-term changes (week-range) and long-
term changes (month-range). A rule of thumb
is that short-term weight fluctuations are al-
most always due to changes in water content,
while medium- and long-term changes can
also involve body fat and muscle.
– If weight goes down short-term, but the
body fat percentage goes up or remains the
same, you have only lost water, e.g. after
exercising, going to the sauna or if you’ve
been on a limiting diet for fast weight loss.
– If your weight goes up in the medium term,
but the body fat goes down or remains the
same, you might have built up valuable
muscle mass or you may have an increased
accumulation of body water (e.g. as a re-
sult of taking medicine or weakening heart
function of older people).
– When weight and the body fat percentage
go down at the same time, your diet is
working – you are losing body fat. Ideally,
you should support your diet with physical
activity, fitness training or weight lifting.
You can increase your percent muscle
mass in the medium term this way.
And don’t forget: Physical activity is the basis
for a healthy body.
Interesting facts and information
2
2 Interesting facts and information

10 11
2.3 Important information - keep in a safe
place for later reference!
Caution:
The scale may not be used by persons who
have electronic implants (e.g. cardiac pace-
makers). Otherwise, their function may be
impaired.
Caution – for your safety
– Careful, do not stand on the scale with wet
feet and do not stand on the scale if the
surface is wet; you may slip!
– You should keep your scale from being
bumped, and away from moisture, dust,
chemicals, extreme temperature fluctua-
tions and heat sources (ovens, radiators).
– Repairs may only be carried out by
Biocomfort customer service or an
authorised manufacturer. Before making
any complaints, however, first check the
batteries and exchange these, if necessary.
– All scales meet the EC directive 89/336 +
supplements. If you should have any ques-
tions about how to use our devices, please
contact your dealership or Biocomfort
customer service.
– From time to time, the device should be
cleaned with a moist cloth. Never use ag-
gressive cleaning agents, and never hold
the device under water.
– The device is suitable for personal use.
– For the diagnostic scale, ages from
10–100 years and heights from
100–220 cm (3–03”-7–03”) can be preset.
The scale capacity is max. 150 kg (330 lb,
24 St). In the weight measurement, the
results are displayed in steps of 100g
(0.2 Ib, 1/4 St). The results of the per-
centage body fat, body water and muscle
measurement are displayed in steps of
0.1%.
– In the delivered condition, the scale is set
to “cm” and “kg”. This can be changed to
“inches”, “pounds” and “stones” (lb, St)
via the settings menu (Section 3.5).
Interesting facts and information
2

3 How to start up your
scaleo-comfort diagnostic scale
12 13
3.1 Inserting / exchanging batteries
The scaleo-comfort diagnostic scale is
delivered with two 1.5 V alkaline batteries
[type AAA/LR03] which are enclosed sepa-
rately. They can be found in the bottom part
of the outer packaging in the two recesses.
Before the first measurement,they must be
inserted in the battery compartment on the
bottom side of the scale. .
If a battery symbol appears on the display,
this is a sign that the battery is weak and must
be exchanged. Measurement is no longer
possible.
When batteries are exchanged, all settings
which have been made on the device are
retained, as well as the stored measurements.
Bottom view of scale:
Please follow the following steps for insert-
ing/exchanging batteries:
Step 1:
Please always switch off the device before
exchanging the batteries.
Step 2:
Press the fastening device on the battery
compartment and remove the cover.
Step 3:
Remove any used batteries and dispose of
them properly in accordance with the valid
regulations.
Step 4:
Insert the two 1.5 V alkaline batteries accord-
ing to the symbols in the battery compartment.
Step 5:
Replace the battery compartment cover and
click the fastening device into place.
Step 6:
Afterwards, check whether the battery has
been correctly inserted by briefly pressing the
START button. If this is the case, all display
elements appear for about two seconds as a
function test.
Notes:
– Please make sure that you always have a
replacement battery on hand.
– New batteries (1.5 V alkaline batteries
[type AAA/LR03]) have a lifetime of more
than 18 months at 5 measurements per
day.
– When the batteries are exchanged and
when the meter is stored without batter-
ies, the contents of the measured value
memory are retained.
– When the batteries are removed, the inter-
nal clock of the measuring device doesn’t
continue to run, so when the device is
used again after exchanging the batteries
or after storing the device without batter-
ies, the date and time may have to be reset
(see Section 3.4).
Place the scale on a solid floor; a hard floor
surface is a prerequisite for correct measure-
ment.
Getting started
3

14 15
3.2 Switching on
When the scale is in its idle state – the so-
called sleep mode – the current time is al-
ways displayed (Fig. 3.2), which only has to
be set once the first time the scale is put into
operation (see 3.4 Configuring the device).
Fig. 3.2
Switch your scaleo-comfort diagnostic scale
by pressing one of the three buttons: START,
UP/MEM or SET, or by heavily tapping on the
standing area. Every time you turn it on,
all display elements appear for about two
seconds as a function test. Please make sure
that the display elements can really be seen
completely, as shown in the figure on page 5.
If a segment is missing, this could lead to a
false display of later measurements.
Depending on the way you switch on the
scale, one of the operating modes named
below will be activated:
Activating by operating mode
1 Tapping the standing area or pressing the
START button with the user no. selection 0
Weighing in guest mode
2 Tapping the standing area or pressing the
START button with the selection of one’s
own user no. (no. 1...8)
Weighing and determining body data with storage of
measured data
3 Pressing the SET button with the selection
of user no. 0
Setting mode for making the common settings, such as
date, time or unit of measurement
4 Pressing the SET button with the selection
of user nos. 1–8
Setting mode for making the personal settings, such as
gender, age, height, level of activity
5 Pressing the UP/MEM button Display of stored measured data of the user
Getting started
3

16 17
3.3 Button functions
SET button:
1. When the scale is in sleep mode: Starts the
configuration mode both for setting the com-
mon as well as personal parameters, whereby
the first setting which can be set is the per-
sonal user no.
If nothing or the number “0” is selected here,
you get into the settings menu for the com-
mon parameters (valid for all users); if, how-
ever, a user no. other than “0” is selected,
you get into the settings menu for the per-
sonal parameters which are only valid for the
activated user no.
You can tell which parameter can be set at
any given time by its blinking.
2. When you press the SET button after se-
lecting a parameter value in one of the con-
figuration menus, this value is accepted and
you proceed to the next settable parameter.
UP/MEM button:
1. When the scale is in sleep mode:
Starts memory mode for displaying the stored
measurements of a user.
2. Selection or setting of a parameter or func-
tion. There are two activation options:
–
Brief pressing, if necessary several con-
secutive times: Incrementing the parameter
value by one or switching to next param-
eter symbol.
– Keeping button pressed: Automatic incre-
menting of a value.
START button:
1. When the scale is in sleep mode:
Starts a measurement without and with input
of the user no. if the desired number isn’t
already displayed.
2. In the input menu: Selected value or pa-
rameter is accepted by pressing the UP/MEM
button and the scale switches to the next
menu item.
3. In the display menu: Switches to next
menu item.
4. By pressing the START button for a longer
time (at least two sec.): Exits the currently
active operating mode with transition into
sleep mode.
Note:
If no measurement is started or if no key
is pressed within one minute, the scaleo-
comfort diagnostic scale automatically goes
into sleep mode, where the current time is
displayed.
Getting started
3

18 19
3.4 Configuring the device
Before you use the scale for the first time or if
you want to adapt the device to your needs,
you must make a few settings in the settings
menu. To do this, the scale must be in the
so-called configuration mode. To activate
this mode and to set the required parameters,
press the buttons as described below.
You get into the settings menu when you
press the SET button with the device switched
off. The SET button can be found in the front,
underneath the large START and UP/MEM
buttons.
Fig. 3.3: Pressing the SET button
Fig. 3.5
In this settings menu, you have the choice
of whether you want to set common param-
eters for all users (such as date and time) or
your personal data required for determin-
ing the body fat, body water and muscle
percentages. The personal values include
gender, age, height and estimated level of
fitness.
You enter the menu for setting the common
parameters when you press the START but-
ton directly after the user no. 0 is displayed.
If you select another number with the UP/
MEM button, i.e. a number in the range
from 1 to 8, you enter the menu for setting
your personal data.
Attention:
The selected number is your personal user
no. which you should memorise since you
must select this number at the beginning of
every measurement.
Notes:
–
Before starting up your scaleo-comfort
diagnostic scale for the first time, you
should call up the settings menu of
common parameters to be able to
correctly set the date and time and the
unit of weight, or to be able to make
measured values disappear, which you
don’t want displayed during measure-
ment.
– You can tell which parameter in the menu
display can be set at any given time by
its blinking. If you press the SET key after
selecting the set value, you confirm the
set parameter and proceed to the next
settable parameter.
As soon as you have pressed the SET button,
first all display elements appear as a self-test
(Fig. 3.4).
Fig. 3.4
After about two seconds, you get into the
first settings menu for setting the personal
user no., whereby in the upper left field of
the display, the “set” symbol appears, and
under the “user” symbol, the user no. 0 ap-
pears (Fig. 3.5). The “set” symbol remains on
the display as long as the scale is in setting
mode.
Getting started
3

20 21
– By pressing the START button for a longer
time (at least two sec.) you can exit the
settings menu. The scale then switches to
sleep mode. If the scale was in a settings
menu, the last setting isn’t accepted here.
Step 1:
As already described in Section 3.4, with the
device switched off, first press the SET button
and when the user no. “0” appears, press the
START button. A four-digit year appears, fol-
lowed by a blinking “Y” (for year) separated
by a dot (Fig. 3.6).
Fig. 3.6
Step 2:
Setting the year
To set the current year, press the UP/MEM
button until the correct year is displayed.
Press the SET or the START button to perma-
nently store the set value.
Afterwards, a menu image appears for enter-
ing the date (Fig. 3.7). First the month begins
to blink (digits in the 3rd and 4th places) as
well as the character “d” (for date) in the last
place, separated by a dot.
Fig. 3.7
Step 3:
Setting the month
The current month can be selected, again
using the UP/MEM button as described be-
fore. Press the SET or START button again.
Now the display for the day is blinking to-
gether with the “d” (for date).
3.5 Setting the common setting values
For the scale type BSC105 (scale with wire-
less module), the parameters are set via the
Health Manager from the PC or PDA. It is not
possible to make settings via the correspond-
ing scale menus, but the values can be
viewed to make sure they’re correct.
3.5.1 Setting the date and time
Note:
The measured body data, the weight, as well
as the fat, water and muscle percentages, are
stored with the date and time. The correct
setting of the date and time makes it easier
for you to make a correct time allocation of
your measurements. In order to set the cor-
rect date and time on your scaleo-comfort
diagnostic
scale, proceed as follows:
Getting started
3

22 23
Step 4:
Setting the day
The current day can be selected, again
using the UP/MEM button. Then press the
SET or the START button to store the current
value.
Afterwards, a menu image appears for
entering the time (Fig. 3.8). First the hour
begins to blink (digits in the 1st and 2nd
places) as well as the character “t” (for time)
in the last place, which is separated by
a dot.
Fig. 3.8
Step 5:
Setting the hour
The current hour can be selected, again using
the UP/MEM button. Then press the SET or
the START button to store the current value.
The display for the minute now starts blink-
ing, together with the “t” (for time).
Step 6:
Setting the minute
The current minute can be selected, again
using the UP/MEM button. Then press the SET
or the START button again to store the cur-
rent value. Now the menu image appears for
selecting the unit of measurement for weight
with “kg” being the setting made in the fac-
tory, “lb” for pounds, and “st:lb” for stones
(Fig. 3.9). First the unit of measurement set in
the factory starts to blink, or that which was
previously set.
Step 7:
If you do not wish to make any further set-
tings, exit the settings menu by pressing the
START button for a longer period of time.
Otherwise, continue with the settings as
described below.
3.5.2 Setting the units of measurement
for weight and height
Notes:
– The weight measurements can be dis-
played either in kg, lb (pounds) or in
st/lb (stone/pound).
–
The unit of measurement for height is
set at the same time as that for weight,
which is needed for entering the height.
If the unit “kg” is set, then the unit of
length “cm” is set at the same time.
Otherwise, “ft:inch” is set.
– If you would like to set the unit of
measurement without changing the
date and time, press the SET button until
the menu image for the unit of measure-
ment appears (Fig. 3.9). It can be found
in the sequence after the date and time
setting.
Fig. 3.9
When the menu image for selecting the unit
of measurement for weight appears, whereby
“kg” is the factory setting, “lb” stands for
pounds and “st:lb” for stones (Fig. 3.9), the
desired unit of measurement can be selected
by repeatedly pressing the UP/MEM button.
The unit currently activated is blinking here,
initially the factory set unit of measurement,
or that previously set.
Getting started
3

24 25
Press the SET or the START button to per-
manently store the set unit. Afterwards, the
menu image for the display selection of the
percentage values appears (Fig. 3.10).
3.5.3 Selection of percentage values to be
displayed after a measurement
Your scaleo-comfort
diagnostic
scale allows
the percentages for body fat, body water
and muscle mass calculated from the im-
pedance analysis to be displayed after a
measurement. With this menu, it can be
specified how many or whether any of
these percentages should be displayed.
There are the following selection options:
1. Display of all three percentages:
Body fat, body water and muscle mass
(Fig 3.10)
2. Display of body fat and body water
(Fig. 3.11)
3. Display of body fat (no fig.)
4. No display of percentages (no fig.)
Fig. 3.10
Fig. 3.11
The selection is made by repeatedly pressing
the UP/MEM button, whereby the respec-
tively selected combination is indicated by
the display of the corresponding percentage
symbol(s).
By pressing the SET or START button, the
selected combination is stored permanently.
Note:
After a measurement, all percentages are
calculated every time and stored in the meas-
ured value memory, even if no percentages
were selected for display.
3.5.4 Clearing the measured value memory
Note:
The function for clearing the measured value
memory can be found after the display selec-
tion of the percentage values in the settings
menu sequence. If you would like to select
the function without setting the previous
parameters, keep pressing the SET button in
setting mode until the corresponding menu
image appears.
Fig. 3.12: Don’t clear the measured value
memory
Fig. 3.13: Clear the measured value memory
Getting started
3

26 27
Step 1:
When the menu image for clearing the
measured value memory appears, where
the “mem” symbol is blinking in the top
line of the display and in the line for the
value display the abbreviation “noCLr”
(“no clear”) appears (Fig. 3.12), you
can switch the display to “CLr” (“clear”)
(Fig. 3.13) with the UP/MEM button,
which means that the entire measured
value memory is cleared. If you press
the UP/MEM several times, you toggle
between “noCLr” and “CLr”.
Step 2:
In order to really clear the stored measured
data in the measured value memory, press
the SET or START button when “CLr” ap-
pears on the display. If the memory should
not be cleared, press one of the buttons
when “noCLr” appears on the display.
Note:
If you do not press any button for a period of
one minute, the scale returns to sleep mode
without clearing the measured value memory.
Step 3:
If you do not wish to make any further set-
tings, exit the settings menu by pressing the
START button for a longer period of time.
Otherwise, continue with the settings of the
currently displayed menu image. If no button
is pushed within a period of two minutes,
the scale returns to sleep mode.
3.5.5 Resetting the wireless connection
(type BSC 105 only)
With this function, you can reset (clear) an
allocation existing via a wireless connection
to a PC or PDA.
(see the Health Manager software instructions).
Notes:
–
The scaleo-comfort
diagnostic
scale with
the type designation BSC105 is equip-
ped with a wireless interface, with which
you can transfer the measured body val-
ues wirelessly to a PC or PDA equipped
with a Biocomfort wireless module for
further processing (e.g. complex statisti-
cal analyses) or archiving. The wireless
Biocomfort module USB105 and CFC105
for PCs or PDAs are available as acces-
sories.
– The wireless connection should only
be reset on the device when it is no
longer possible to reset it with the
Health Manager software.
– Details can be found in the software
instructions. The configuration of the
wireless interface can be found after
the function for clearing the measured
value memory in the settings menu
sequence. If you would like to select
the function without setting the previous
parameters, keep pressing the SET button
in setting mode until the corresponding
menu image appears (Fig. 3.14).
Fig. 3.14: Wireless allocation is maintained
Fig. 3.15: Wireless allocation is reset
Getting started
3

28 29
Step 1:
In the menu image for resetting the wireless
connection, the radio symbol on the bot-
tom line is blinking and on the line for the
value display, either the abbreviation “on”
(Fig. 3.14) or “oFF” (Fig. 3.15) is displayed.
If “oFF” appears, this means that no wire-
less connection could be established to
your PC or PDA. If “on” appears, there is
already a wireless allocation and the wire-
less connection to your PC or PDA is estab-
lished.
You can now toggle back and forth between
the two by pressing the UP/MEM button.
If you switch from “oFF” to “on”, this
means that a wireless allocation is to be
set up to your PC or PDA. If you switch
from “on” to “oFF”, you can release the
wireless allocation so that, for example,
a wireless connection can be made to an-
other PC or PDA. Otherwise, the wireless
allocation is maintained.
Step 2:
If you really would like to reset the wireless
connection, select “oFF” by pressing the
UP/MEM button and press SET or START.
Otherwise, press the SET or START button
when “on” appears.
Step 3:
The menu for resetting the wireless con-
nection is the last setting menu for the
common parameters. After confirming the
setting, the word “End” appears to let you
know this (Fig 3.16).
You can now switch the scale to sleep
mode by pressing the START button for at
least 2 seconds.
Fig. 3.16: End of the setting menu
3.6 Personal settings
Before the first measurement, personal
parameters must be stored which are
required for determining the percentage
body fat, body water and muscle. In addi-
tion, the scale has 8 personal basic data
memory places, where the user, e.g. each
family member, can store and call up his
or her data, such as gender, age, height
and approximate activity level. Each user
can be assigned a personal user no. ranging
from 1 to 8. At each later measurement,
the user in question first has to input his
user no. for identification before he begins
with the measurement. The personal set-
tings can be made in the menu-guided set-
ting mode of the scale.
Step 1:
To activate the setting mode, first press
the SET button when the scale is in sleep
mode as described in Section 3.4 – i.e.
when the scale is in its idle state – and
select your personal user no. (from 1 to 8)
with the UP/MEM button after the user no.
0 appears. Afterwards, press the SET or
START button to confirm.
The menu image then appears on the dis-
play for the activation/enabling (Fig. 3.17 /
3.18).
Attention:
If several people would like to use the
scale, make sure that each person is as-
signed a different user no. No two people
should have the same number.
Getting started
3

30 31
3.6.1 Activating/releasing the user no.
Note:
The scaleo-comfort
diagnostic
scale has a
battery-fail-safe measured value memory, in
which the measured body values for each
user can be stored who have valid personal
data on the scale.
To do this, the personal user no. must first
be activated. It can be released again, how-
ever, when the number is no longer needed
or when the number is to be assigned to a
different person. In this case, the measured
data allocated to this number already stored
in the measured value memory is cleared.
This memory area is then available to another
user.
Fig. 3.17: User no. is activated
Fig. 3.18: User no. is released
Step 1:
After selecting and confirming the user no,
the menu image for activating/releasing
this number appears. Hereby, in addition
to the user no, “on” (Fig. 3.17) or “oFF”
(Fig. 3.18) is displayed, depending on
whether the number is already active (“on”)
or is free (“oFF”).
You can now select the desired function
with the UP/MEM button. Every time you
press it, the display toggles between “on”
and “oFF”. If you select “on”, you can
activate the user no. or, if “on” is displayed
already, you can make changes to the set-
tings of this user no. This might be neces-
sary, for example, if you would like to
adapt the age or fitness level setting.
If you select “oFF”, you can release the
user no. again or, if “oFF” is displayed
already, leave it deactivated.
Step 2:
By pressing the SET or START key, you con-
firm the selected function and proceed to
the next setting menu image for setting the
gender (Fig. 3.19).
Step 3:
If you do not wish to make any further set-
tings, exit the settings menu by pressing the
START button for a longer period of time.
Otherwise, continue with the settings of the
next displayed menu (Fig. 3.19).
Notes:
– If personal values have already been set
for the selected user no., the current set
values are displayed in the following
personal setting menu. Otherwise, the
factory settings are displayed.
– If the scale is to be used by several per-
sons, it is important that the respective
user knows which user no. is reserved
for him.
Getting started
3

32 33
– Before each measurement, make sure
that the correct user no. was selected.
– The procedure for clearing the entire
measured value memory is described in
Section 3.5.4.
3.6.2 Setting the gender
Fig. 3.19
The menu image for setting the gender
(“female” or “male”) follows directly after
the setting menu for activating/releasing
the user no. (Fig. 3.19). The two symbols for
“female” or “male” appear below the user
no., whereby the current symbol (previously
set one) is blinking. Select the proper gender
by pressing the UP/MEM button and confirm
the selection with the SET or START button.
3.6.3 Setting the age
Fig. 3.20
The menu image for setting the age follows
the gender setting menu. A big blinking “A:”
(for age) appears, and after the colon, the
preset age in years (Fig. 3.20).
Set the desired age by pressing the UP/MEM
button and confirm the set age with the SET
or START button.
3.6.4 Setting the height
Fig. 3.21
The menu image for setting the height
(Fig. 3.21) follows the age setting menu.
A big blinking “H:” (for height) appears
and, after the colon, the preset height in “cm”
(Fig. 3.21). Set the desired height by pressing
the UP/MEM button and confirm the set age
with the SET or START button.
Note
If a menu image appears which looks like
the display for setting the height in Fig. 3.22,
then the unit of measurement is “ft:inch”.
This unit of length can be switched in the
settings menu for the common settings to-
gether with the unit of weight. In order to
specify the height in centimetres, the unit of
measurement “kg” must be set, which also
sets the unit of length. The height menu im-
age as shown in Fig. 3.21 is then displayed.
Fig. 3.22
Getting started
3

34 35
3.6.5 Setting the level of fitness
Fig. 3.23
The menu image for setting your in-
dividual activity/fitness level follows
the setting menu for height (Fig. 3.23).
A large blinking “L:” (level) appears,
and, after the colon, the preset level of
fitness, whereby there are three possible
settings:
– Fitness 1: No or little physical activity,
possibly overweight
– Fitness 2: Average amount of physical
activity
– Fitness 3: Intensive physical activity
(athletic)
Set your estimated value by pressing the UP/
MEM button and confirm the set value with
the SET or START button.
The menu for setting your level of activity is
the last setting menu for the personal param-
eters. After confirming the setting, the word
“End” appears to let you know this (Fig 3.16).
You can now switch the scale to sleep mode
by pressing the START button for at least
2 seconds.
Explanation of activity levels:
Fitness 1:
No or little physical activity, possibly over-
weight.
This level is also the normal introductory
mode which should be initially selected if
you would like to start an exercise program
or diet.
You should begin with physical exercise
which is limited to max. 20 minutes and only
done twice a week, e.g. walking, light yard
work or aerobic exercises. After about 6 to
10 weeks, you can switch to the next activity
level.
Fitness 2:
Average amount of physical activity.
This can be physical exertion which you
do 2 to 5 times a week, 20 minutes each,
such as jogging, bike riding or tennis.
This mode should be selected as soon as an
improvement in your general feeling of well
being or general fitness can be noticed dur-
ing exercise/your diet. After 8-12 weeks of
continuous exercise/dieting, you can switch
to the next level of activity.
Fitness 3:
Intensive physical activity (athletic).
You should set this mode if you already exer-
cise intensively every day or have physically
demanding work, e.g. intensive running,
construction work, etc. Overall, you should
be very flexible and have long endurance and
strength for this mode, and you should main-
tain this level over a long period of time.
Getting started
3

36 37
4.1 Measuring weight only in “guest” mode
This mode can be activated if only the
weight is to be measured without storing
the measured values or if the scale is used
by a person whose data wasn’t entered in
the parameter memory, such as a guest.
The scale is first in its idle state, the so-
called sleep mode, where only the current
time is displayed (Fig. 3.2).
Step 1:
Now tap with your foot briefly and firmly
on the standing area of your scale, or press
the START button. All display elements
(Fig. 3.4) appear until the user no. of the
user is displayed who used the scale last.
Or “0” appears, which means that the
scale is already in guest mode, where the
impedance value isn’t measured, which
also means that there is no analysis of the
4 Carrying out a measurement
Carrying out a measurement
4

38 39
Fig. 4.3: Scale measuring
other body data, and no measured values
are stored. Set the user no. to “0” to put
the scale in guestmode. After the user no.
“0”, the weight display “0.0” appears after
about 3 seconds (Fig. 4.2). The time can be
reduced by pressing the START button.
If you step onto the scale beforehand, the
error “E:1” is displayed. Then you must get
off the scale and restart the measurement.
Fig. 4.1: User no. “0” (guest mode)
Fig. 4.2: Scale is ready for measurement
Step 2:
The scale is now ready to measure your
weight. Stand on the scale. Stand still on the
scale with your weight distributed evenly
on both legs. The scale immediately begins
with the measurement. As long as the meas-
ured value is being recorded, two dashes are
shown on the display instead of the weight
(Fig. 4.3). Afterwards, the result is displayed
(Fig. 4.4).
If you step off the standing area, the scale
switches off automatically after 30 seconds.
Fig. 4.4: Display of the weight
Note:
If the body fat, body water and muscle per-
centages should also be measured in addition
to the weight, or if the measurement should
be stored permanently, the required personal
user data must be input before using the scale
for the first time via the settings menu of the
scale together with the personal user no.
Carrying out a measurement
4
This manual suits for next models
1
Table of contents


