Biomorph DPF1C User manual

biomorph
®
premium ergonomic furniture
DPF1C
May or may not have digital dispplay
HOW TO OPERATE YOUR BIOMORPH DESK.
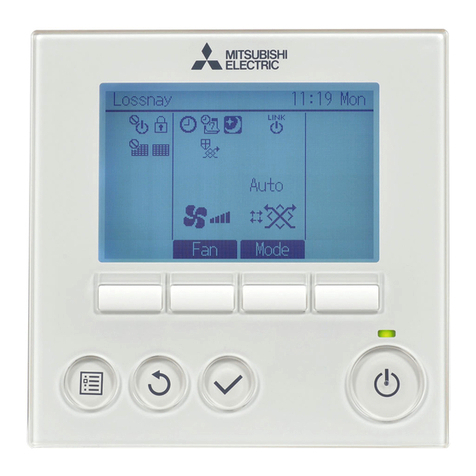
DPF1C control switch for Level2Plus, Maxo Series, and Flexo Series desks. DPF4T control switch for Plus Series Dual Drive Desks
DPF4T
Setting Initial Height.
It may be necessary to adjust the displayed height due to different thick-
nesses of desktops, or addition of casters, etc. The DPF1C will as standard
either show 68 cm or 24.5 inch as the default desk height.
Procedure:
Press /\ and \/ keys at the same time and keep them pressed for 5 seconds.
This allows the initial height to be adjusted. Until the initial height can be
adjusted, the display will show three minuses (---) hereafter the display will
revert to showing the height. The height can then be adjusted by either /\ or
\/ until desired height has been reached. The system will return to normal
operation (and give a short blink) after 5 seconds of inactivity on the keys.
To Adjust Height in Regular Use:
= Up
V = Down
S = Store memory
• = Memory 1
•• = Memory 2
••• = Memory 3
Just push either the up or down button to adjust height and the system will
move until the button is released again or the system reaches end position.
To Set Memory:
The four small round buttons are used for memory drive/storing memory.
To store memory
• Press S – button, the display will ash for 2 seconds
• Within these two seconds press one of the small buttons with dots and
the position will be stored at this button.
• The panel will acknowledge by showing “1”, “2” or “3” in the display
depending on chosen position (if panel is included)
Memory drive (small round buttons with dots)
Press one of the memory buttons and the system will start driving to the
pre-programmed memory position.
Keep the button pressed until the position is reached. Release button and
press again to go past that position.
Display function (only included on dual or multiple drive tables) shows the
actual height in either cm or inch.
V
Dual Surface Adjustment
The DPF4T switch can operate both surfaces independently.
The default setting shows the number 1 in the digital display which refers
to the near surface. By pushing the toggle button the display will show
number 2 which will then operate the rear surface. Press toggle again to
return to number 1.
Setting Initial Height.
It may be necessary to adjust the displayed height due to different thick-
nesses of desktops, or addition of casters, etc. The DPF4T will as standard
either show 68 cm or 24.5 inch as the default desk height.
Procedure:
Press /\ and \/ keys at the same time and keep them pressed for 5 seconds.
This allows the initial height to be adjusted. Until the initial height can be
adjusted, the display will show three minuses (---) hereafter the display will
revert to showing the height. The height can then be adjusted by either /\ or
\/ until desired height has been reached. The system will return to normal
operation (and give a short blink) after 5 seconds of inactivity on the keys.
Repeat for each surface.
To Adjust Height in Regular Use:
Choose near or rear surface using toggle button.
= Up
V = Down
S = Store memory
• = Memory 1
•• = Memory 2
Just push either the up or down button to adjust height and the system will
move until the button is released again or the system reaches end position.
To Set Memory:
The four small round buttons are used for memory drive/storing memory.
To store memory
• Press S – button, the display will ash for 2 seconds
• Within these two seconds press one of the small buttons with dots and the
position will be stored at this button.
• The panel will acknowledge by showing “1” or “2” in the display depend-
ing on chosen position.
Memory drive (small round buttons with dots)
Press one of the memory buttons and the system will start driving to the pre-
programmed memory position for BOTH of the surfaces.
Keep the button pressed until the both positions are reached. Release button
and press again to go past that position.
Display function shows the actual height in either cm or inch.
V
Questions? Call 888 302 3375 or email [email protected]
Ground Support Equipment (US) ltd., DBA Biomorph, 11 Broadway, New York, NY 10004. Tel and Fax 888 302 3375 [email protected]
www.biomorph.com
Toggle between surfaces

TROUBLESHOOTING GUIDE FOR BIOMORPH MAXO, FLEXO, LEVEL, AND PLUS SERIES DESKS
Biomorph motorized desks may occasionally need to be reset - this is necessary when the desk is first built, when the surfaces will
only move down, and whenever the desk is unplugged. This does not indicate a problem with the product, but there are complex
systems that need to be maintained.
1. Check for obstructions above, below and around the desk that may impede movement through the desk’s full adjustment
range of 22” - 48.5”. If there is anything more than 18” high under either surface then it will cause an obstruction and error E29
when the surface is lowered to the lowest position to reset the system, and cause the system to freeze.
2. Re-check the power outlet with another electrical device to ensure that you have power to the desk.
Check power cord connection to controller box, and check all other connections from the legs and switch(es) to the controller box.
3. Hold the DOWN button to cycle the table to its lowest position. If the table does not move at rst take your nger off the
down button, then press and release the down button, and then immediately press and hold the down button until the desktop is at
the lowest position, aprx. 22” off the oor.
4. Once the desk has lowered to its lowest point allow the table to come to a complete stop and then take you finger off of the
down button.
5. With the desk lowered in the lowest position press and hold the down button for 5-10 seconds. The table will adjust up and
down a fraction of an inch, and may show E codes if the switch has a display, which is normal, then show the height. This is the
sign that the table has fully reset.
6. If the desk does not level off after pressing and holding the down button, then press the down button again for 5-10 sec-
onds until the desk adjusts up the fraction of an inch and shows the height. This may need to be attempted up to three times in suc-
cession before movement is seen depending on the reason why the table needs to be reset. The digital readout may cycle through
several E codes - this is normal.
7. If the above does not work initially then unplug all electrical connections and re-plug all connections back in to ensure
good connections with all electrical parts, and repeat the above process. At this point the table should adjust up and down freely. If
you have a dual surface desk then this procedure must be done with both surfaces using the toggle button.
8. If the surface(es) will not move at all after the above procedure note the E Code (if any) and call us at 888 302 3375 for fur-
ther troubleshooting support.
biomorph
®
premium ergonomic furniture
Ground Support Equipment (US) ltd., DBA Biomorph, 11 Broadway, New York, NY 10004. Tel and Fax 888 302 3375 [email protected]
www.biomorph.com
This manual suits for next models
1

