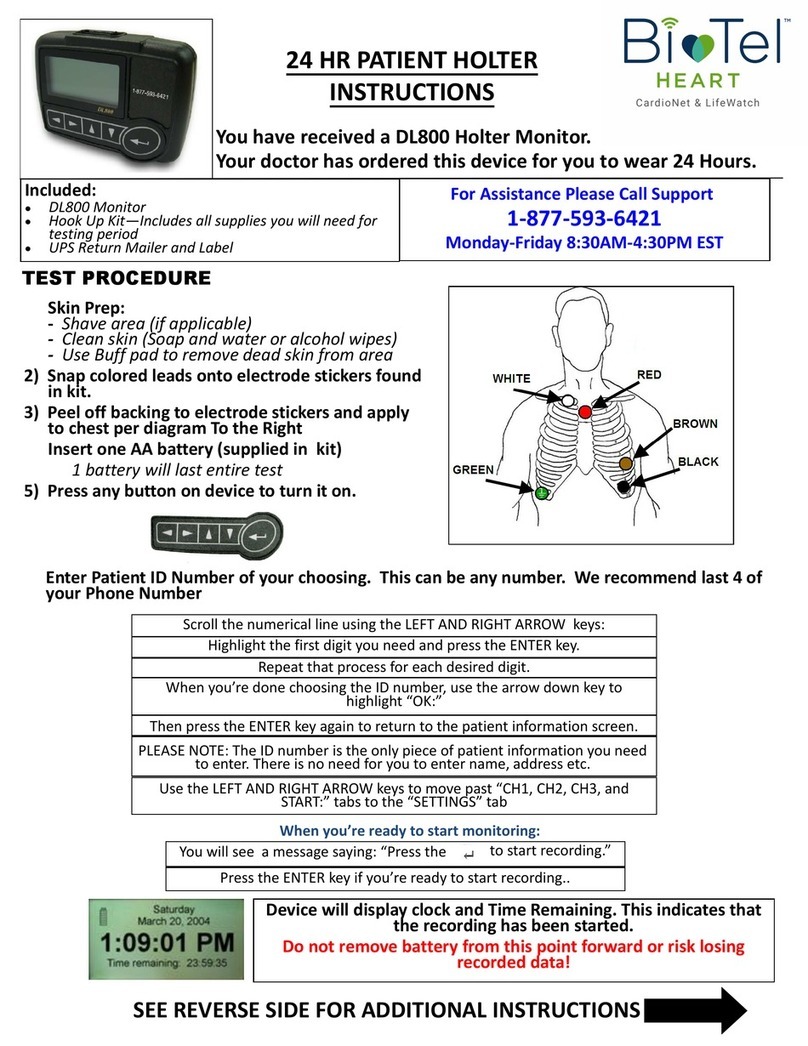
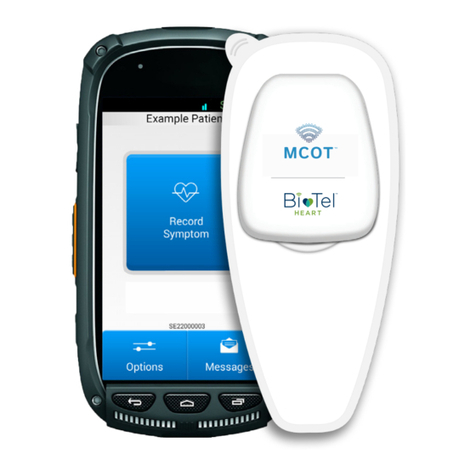
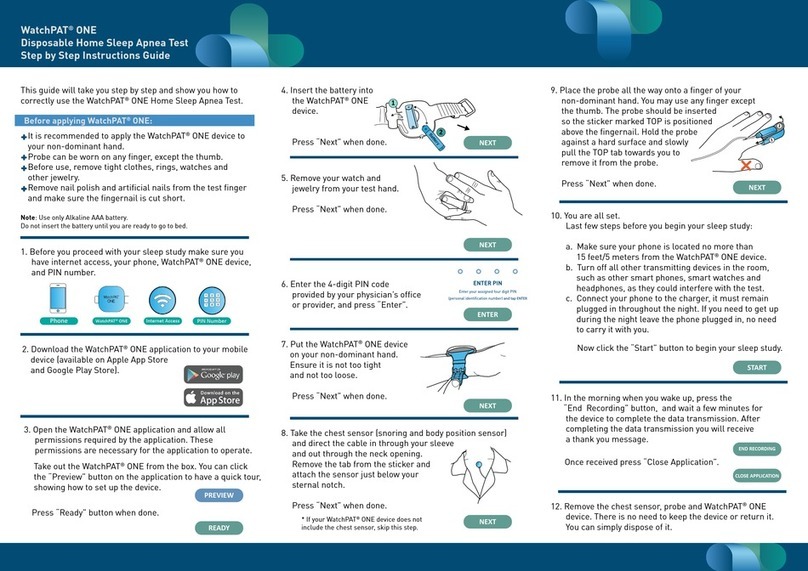
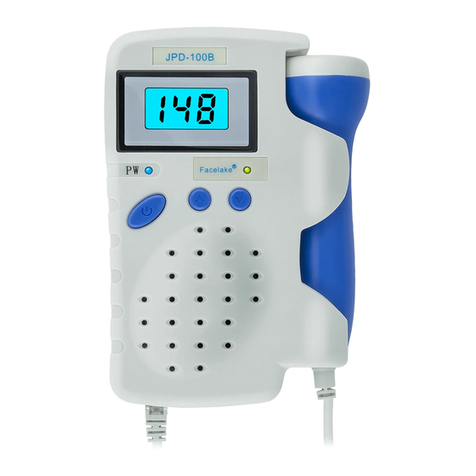
BioTel Heart Heartrak ECAT2 User manual

Patient Handbook
EXTERNAL CARDIAC
AMBULATORY TELEMETRY

2

3
CONTENTS
PAGESTEP
INTRODUCTION ........................................................................................................
4
PATIENT RESPONSIBILITIES .................................................................................
4-5
1.
CHECK CONTENTS OF PATIENT KIT ...................................................................
6
2.
INSERT MONITOR’S BATTERY ..............................................................................
7-8
3.
USING THE COMMUNICATOR ..............................................................................
9
4.
ATTACH ELECTRODE PATCHES TO YOUR BODY ...........................................
10 -11
5.
CONNECT MONITOR AND BEGIN MONITORING ...........................................
12
6.
CONFIRM ACTIVE CONNECTION BETWEEN MONITOR
AND COMMUNICATOR ..........................................................................................
13
7.
PRESS RECORD BUTTON, THEN SELECT SYMPTOM
AND ACTIVITY LEVEL ..............................................................................................
14-15
8.
MONITOR RECORDS ECG DATA AUTOMATICALLY .......................................
15
9.
SENDING ECG DATA TO MONITORING CENTER ............................................
16
10.
RETURN EQUIPMENT AND UNUSED MATERIALS
TO MONITORING CENTER .....................................................................................
17-18

4
Cardiac arrhythmias are abnormal heart rythms such as
fast, slow, or irregular heartbeat. Symptoms that may
lead a physician to suspect arrhythmia include fainting or
nearly fainting, palpitations, and fatigue among others.
The Heartrak ECAT2 monitor provides continuous cardiac
monitoring over an extended period of time in an eort
to capture and record sporadic cardiac asymptomatic or
symptomatic arrhythmias. Your physician will review the
recorded data and will consider it along with other factors
to determine a diagnosis and best treatment. Asymptomatic
arrhythmias are arrhythmias that occur without any
symptoms. Arrhythmias do not necessarily indicate an
underlying cardiac disorder.
THE HEARTRAK ECAT
2
MONITORING SYSTEM is the Heartrak
ECAT
2
Monitor and Heartrak® Communicator equipment
included in the Patient Kit plus Monitoring Service.
The monitor records ECG data and sends data to the
Communicator, which sends data to Monitoring Center.
INTRODUCING HEARTRAK ECAT®2MONITORING SYSTEM
Heartrak ECAT2is not an emergency response system.
If symptoms cause you concern, call your physician.
In an emergency, use a landline or cellular telephone
to call 911 and/or local emergency services.

5
•The Heartrak ECAT2monitoring system has been prescribed
to you by your physician to aid in the potential diagnosis of
arrhythmia. You must wear the monitor both day and night
for the length of time that your physician prescribed for
your monitoring study. You may participate in your normal
activities while wearing the monitor unless those activities will
place the monitor, Communicator, or lead wires in areas that
are wet, damp, extremely hot, or dusty. For example, to avoid
damaging the equipment, you must take the monitor, lead wires,
and Communicator o and place them in another room before
entering the bathroom to take a bath or shower.
•If you are not able to wear the monitor for more than 4 hours, call
Monitoring Center and tell them when you will take the monitor
o and when you will put it back on.
•Contact Monitoring Center at any time if you need help using the
equipment or you think it is not functioning properly.
•If you plan air travel during your monitoring study, ask your
airlines what the airport security and airline regulations are for
packing and/or wearing electrode patches and using the monitor
and Communicator, which are electronic devices. According to
FAA guidelines for portable electronic devices, you will need to
turn o and stow Heartrak ECAT2monitor and Communicator
during the ight.
•Take good care of the equipment that the Monitoring Center
has loaned you. At the end of your study, you must return
equipment and unused materials to the Monitoring Center.
You will be billed for the replacement cost of any equipment
that is either damaged or not returned.
INTRODUCING HEARTRAK ECAT®2MONITORING SYSTEM
PATIENT RESPONSIBILITIES

6
1. CHECK CONTENTS OF PATIENT KIT
12
3 4
STEP 2: Save the container and pre-paid return envelope, if one
was provided, to return equipment and all unused materials
to Monitoring Center. See return instructions on page 17.
STEP 1:Make certain that you have all of the items shown below.
Call Monitoring Center if any items are missing.
1. Monitor and Belt-Clip Holster
2. Communicator and Case
3. Lead Wires
4. Communicator Charger
5. Disposable Batteries for Monitor (not shown)
6. Electrode Patches (not shown)
7. Patient Handbook and Communicator Features sheet (not shown)
8. Pre-paid, Return Envelope will be included if you are to mail the
equipment and all unused materials back to the Monitoring
Center (not shown)

7
STEP 2:Locate the battery cover on the left side of the monitor.
Hold the bottom of the monitor in one hand, with the other
hand hold the top of the monitor, and with your thumb
push down and toward the bottom of the monitor to slide
the battery cover o. See illustration below of battery
correctly placed in monitor.
STEP 3:Insert an “AA” battery, included in the Patient Kit, into the
battery compartment following the polarity instructions
(“+” on the battery to “+” on the wall of the battery
compartment and “–” on the battery to “–” on the wall of
the battery compartment; that is, at end of battery against
the spring). Position and then slide the battery cover shut.
STEP 1: Remove the monitor from the belt-clip holster as follows:
A) Hold the bottom of the belt-clip holster with one hand.
B) Hold the top of the monitor with your other hand, and
then pull the monitor out of the belt-clip holster.
2. INSERT MONITOR’S BATTERY

8
When the monitor emits 1 beep every 15 seconds and the RED
Battery status light begins to blink, change the monitor’s battery.
You can expect to replace the battery every 2 days.
Blinking RED Battery light
indicates low battery.
Please dispose of all used batteries properly.

9
3. USING THE COMMUNICATOR
STEP 1:The Communicator’s battery should be fully charged when
you receive it, if not, please recharge it.
STEP 2:Turn on Communicator.
STEP 3:
Do not turn the Communicator OFF during the entire monitoring
period.
In order to conserve power, the Communicator
screen display light turns o. You may illuminate the screen
by pressing any key on the Communicator.
STEP 4:
For best performance, keep the monitor and Communicator
within 10 feet of each other at all times. You can attach the
monitor and Communicator to the waistband of your clothing
during the day. At night attach the monitor to the waistband
of your clothing and charge the Communicator nearby.
STEP 5: Charge the Communicator’s battery each night in a location
within 10 feet of where you will be sleeping. Insert the
Communicator’s charger connector into the Communicator.
See Communicator Features sheet for the location of the
charger slot. Insert the charger’s power plug into a wall
power outlet.
The Communicator sends ECG data to Monitoring Center. The
Communicator also displays system status messages and is used for
communication with Monitoring Center. See the Communicator
Features sheet for information on how to use the Communicator.

10
STEP 4:Lead wire with WHITE SNAP — remove backing from the
electrode patch and place on the upper-right portion of
your chest, 2 to 3 inches below the collarbone.
STEP 5: Lead wire with RED SNAP — remove backing from the
electrode patch and place below your left breast, over your
lower ribcage.
STEP 1:If necessary, shave hair from the areas on the chest where
the electrode patches are to be placed.
STEP 2:At each location where you plan to place an electrode,
clean your skin with water or rubbing alcohol and let your
skin dry thoroughly.
STEP 3:Snap one electrode patch onto each lead wire.
4. ATTACH ELECTRODE PATCHES TO YOUR BODY
LEAD WIRE
WITH WHITE SNAP
LEFT FRONTRIGHT FRONT
HEARTRAK ECAT2
MONITOR
LEAD WIRE WITH
BLACK SNAP
LEAD WIRE WITH
RED SNAP
ELECTRODE PATCH
LEAD WIRE WITH SNAP

11
STEP 6:Lead wire with BLACK SNAP — remove backing from the
electrode patch and place it on the upper-left portion of
your chest, 2 to 3 inches below the collarbone.
STEP 7:Change electrode patches every other day or any time they
become loose. Removing an electrode patch is like removing
a bandage. You can keep electrode patches on when you
shower or take a bath and rub water and soap on the area
around electrodes. Then while pressing down with one
nger to hold the skin near the patch taut, slowly, carefully
pull back portions of the electrode patch and remove it.
STEP 8:Be sure to let your skin dry thoroughly before you reapply
electrodes. To protect your skin, avoid reapplying the
electrode patch to the exact, same spot on consecutive
days. You can place electrode patches about 2 inches in any
direction from the location where you placed the electrode
patch before.
STEP 9:Tangled lead wires can become disconnected easily. Place
the electrodes on your chest, get dressed, and then reach
under your clothing to neatly arrange the wires from the
electrodes to the place where you will attach the monitor
to the waistband of your clothing.
CAUTION: Remove Communicator, monitor, and lead wires and
place them in another room before you enter the bathroom to
take a bath or shower.

12
Blinking GREEN Monitoring
light conrms monitor is
actively monitoring.
Connector end
STEP 1:Position the lead wire connector as illustrated above
and then gently insert the connector into the monitor.
The monitor will emit one short beep.
STEP 2:Attach monitor to the waistband of your clothing.
STEP 3:To be certain that monitoring has begun, look at the front
of the monitor. If the GREEN Monitoring light is blinking,
the monitor is actively monitoring.
5. CONNECT MONITOR AND BEGIN MONITORING

13
6. CONFIRM ACTIVE CONNECTION BETWEEN MONITOR
AND COMMUNICATOR
STEP 1:Press any key on the Communicator to illuminate screen.
A) If a GREEN check mark displays,
there is an active connection
between Communicator and
monitor and you are ready to
follow instructions in Section 7.
B) If a RED displays, there is
NO active connection between
Communicator and monitor.
To correct:
1. Move monitor within 10 feet of Communicator.
2. Make certain battery is NOT low in monitor.
3. Make certain battery is charged in Communicator.
If there is still NO active connection, call Monitoring Center
for assistance.
C) If “Activation Pending” displays,
use a landline or cellular phone
to call Monitoring Center and
ask them to activate your
Communicator.
6. CONFIRM ACTIVE CONNECTION BETWEEN MONITOR
AND COMMUNICATOR

14
STEP 1:When you experience a symptom, briey press and then
release the RECORD button on the top of the monitor. The
monitor will emit a short, 1-second beep to signify that a
recording has begun and will emit two short beeps when
the recording has ended. The GREEN Monitoring light will
be on and non-blinking.
Within a minute or two, the GREEN Monitoring light will begin
to blink and the Communicator will display a list of symptoms.
STEP 2:Symptoms
See Communicator Features sheet that describes how to
select symptom(s) and activity level.
A) Select Baseline for the baseline recording you will
make at the request of a Monitoring Center technician
at the beginning of your study. Activity level should
be None for the baseline recording.
7. PRESS RECORD BUTTON, THEN SELECT SYMPTOM
AND ACTIVITY LEVEL

15
If the monitor begins recording automatically and the monitor is
within 10 feet of the Communicator, the monitor will send ECG data
to Communicator and then Communicator will send ECG data to
Monitoring Center.
8. MONITOR RECORDS ECG DATA AUTOMATICALLY
B) When you experience a symptom or symptoms and
press the RECORD button, use Communicator to select
one or more symptoms that are applicable: Shortness of
breath, Dizziness/Lightheaded, Palpitations/Skipped
beats, Chest pain, Rapid heart beat, Fluttering.
C) Select Accidental if you pressed the RECORD I button
by mistake.
STEP 3:Activity Level
Select the one activity level: None, Light, Medium, or
Heavy/Exercising that best describes the level of your
activity when you experienced the symptom or symptoms
that prompted you to press the RECORD button.
Note: The Communicator will display the symptom(s) and activity
level screens for about 2½ minutes. If you cannot submit your
selections within 2½ minutes, call the Monitoring Center and tell
them your symptom(s) and activity level.

16
After an ECG recording is made, the monitor’s slowly blinking BLUE
Communication light will indicate that the monitor has ECG data to
send to the Communicator.
When the monitor’s BLUE Communication light begins blinking
rapidly, it is actively sending ECG data to the Communicator.
When there is active connection between the monitor and the
Communicator, the Communicator receives data from the monitor
and sends data to the Monitoring Center.
BLUE Communication light on the monitor:
1) Slowly blinking, conrms
monitor has ECG data to send
to the Communicator;
2) Rapidly blinking, conrms
monitor is actively sending
data to the Communicator.
9. SENDING ECG DATA TO MONITORING CENTER

17
STEP 1: Turn o the monitor by disconnecting the lead wire
connector and removing the battery. Turn o the
Communicator. Unplug the Communicator charger.
STEP 2:Place the monitor and belt-clip holster, lead wires,
unused batteries, Communicator, Communicator charger,
Communicator case, Patient Handbook, Communicator
Features sheet, and unopened electrodes package in the
container that Monitoring Center provided.
STEP 3:Follow the instructions to return equipment.
10. RETURN EQUIPMENT AND UNUSED MATERIALS
TO MONITORING CENTER
At the conclusion of your cardiac monitoring period, the
Communicator screen will display, “MONITORING COMPLETE.
PLEASE RETURN EQUIPMENT.” Follow your Monitoring Center’s
instructions to return equipment and all unused materials. You will
be billed for the replacement cost of any equipment that is either
damaged or not returned.

18
STEP 4:Place equipment and all unused materials into the container
provided by Monitoring Center and then into the pre-
paid, return mailing envelope that was provided. Close the
envelope and use the envelope’s self-adhesive strip to seal it.
IF MONITORING CENTER HAS INSTRUCTED YOU TO
RETURN EQUIPMENT AND ALL UNUSED MATERIALS BY
MAIL, TAKE THE FOLLOWING STEPS:
Thank you for your participation in our cardiac monitoring service.

19
To greatly facilitate recording and transmission of ECG data, Heartrak ECAT2communicates wirelessly.
The RF (Radio Frequency) module embedded in Heartrak ECAT2meets Bluetooth v 2.0 standards and is
FCCapproved. Universal Medical,Inc.designed, built, andtested HeartrakECAT2in compliance withthe
following standards: ANSI/AAMI EC38:1998, IEC 60601-1- 2:2007 Medical Electrical Equipment Part 1-2
General Requirements for Basic Safety and Essential Performance, IEC 60601-1:2005 Medical Electrical
Equipment Part 1: General requirements for basic safety. IEC 60601-1- 11:2010 Medical electrical
equipment – Part 12-11: General requirements for basic safety and essential performance collateral
standard: requirements for medical electrical equipment and medical electrical systems used in
home healthcare environment. IEC 60601-2- 47:2012 Medical Electrical Equipment Safety including
essential performance of ambulatory electrocardiographic systems and Code of Federal Regulations,
Chapter 21, Part 898 (Performance Standard for Electrode Lead Wires and Patient Cables). Warnings:
IEC 60601-1- 2:2014 - Use of Heartrak ECAT2device adjacent to or stacked with other equipment should
be avoided because it could result in improper operation. If such use is necessary, this equipment
and the other equipment should be observed to verify that they are operating normally. Portable
RF communications equipment should be used no closer than 30 cm (12 inches) to any part of the
Heartrak ECAT2device. Otherwise, degradation of the performance of this equipment could result. FDA
Guidance for RF devices - Other equipment could interfere with the equipment or system, even if the
other equipment complies with CISPR emission requirements.
Wireless Communication

HT-ECAT2-Patient Handbook-Rev.1.0
External Cardiac
Ambulatory Telemetry
Patient Handbook
®
Manufactured by:
Table of contents
Other BioTel Heart Medical Equipment manuals
Popular Medical Equipment manuals by other brands

Stryker
Stryker HeartSine Gateway LIFELINKcentral user manual

Nipro
Nipro SURDIAL Service manual

bort medical
bort medical 930 300 quick guide

Cosentyx
Cosentyx SENSOREADY PEN Quick tips
Veridian Healthcare
Veridian Healthcare ProKit Combo quick start guide
Otto Bock
Otto Bock 50A10 Omo Immobil Instructions for use
