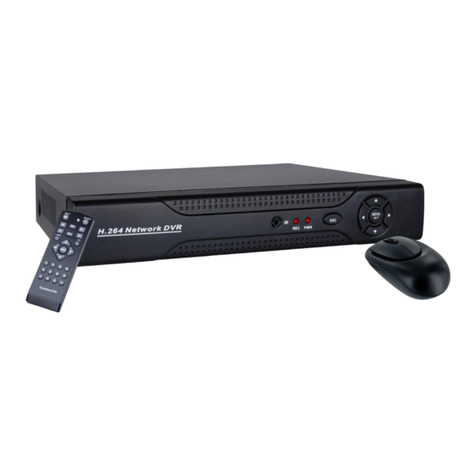
BioTrack VT-AHDKIT4A User manual

www.BiotrackSoftware.com
BASIC INSTALLATION DIAGRAM | DIAGRAMA DE INSTALACIÓN BÁSICA
DVR
Camera
Internet

www.BiotrackSoftware.com
INDICACIONES
Instale el equipo de acuerdo al diagrama de conexión de la página al dorso.
Tome en cuenta que el Kit tiene el disco duro instalado de fábrica para
almacenar las grabaciones. No tendrá que realizar ningún paso al respecto.
Ventana de Bienvenida / Primer uso:
Conecte el DVR a una red con salida a Internet.
Oprima el botón derecho del mouse sobre la vista principal de cámaras
y seleccione “Menú Principal”.
Vaya a Sistema-> Red.
Verifique que la opción “DHCP Activo” esté seleccionada.
Reinicie el dispositivo.
•
•
•
•
•
CONFIGURACIÓN PARA MONITOREO EXTERNO
1.
2.
Si más adelante desea repetir este asistente oprima el botón derecho del
mouse sobre la vista de las cámaras en su pantalla y seleccione “guía”.
Si desea ver las 4 cámaras simultáneamente presione el botón derecho
del mouse y seleccione “Vista 4”.
Si desea ver una sola cámara ampliada presione el botón derecho del
mouse, seleccione “Vista 1” y la cámara que desea ver.
Para otras funciones avanzadas refiérase al manual del producto que
podrá encontrar en nuestra página web.
3.
4.
5.
6.
Si no desea mostrar esta pantalla nuevamente marque la casilla “Don’t
display this wizard again”. Por esta primera vez no marque esta
opción y oprima el botón “Next”.
El usuario por defecto es “admin” y la clave queda vacía. Oprima OK.
Ajuste los parámetros de fecha y hora. Cambie si desea el idioma en
“Language” a Español. Oprima el botón “Next”. Si cambió el idioma
el equipo se reiniciará.
Si desea monitorear externamente las cámaras (mediante un dispositivo
móvil) debe configurar las opciones de red en este paso. Siga el
procedimiento indicado en la sección “configuración para monitoreo externo”
más adelante. Si no va a monitorear las cámaras externamente omita este paso
oprimiendo el botón “omitir” y si a futuro lo desea hacer entonces siga los
pasos descritos en la sección “Configuracion para Monitoreo Externo”.
Seguidamente verá los códigos que podrá leer desde su celular para
instalar las aplicaciones de monitoreo externo de acuerdo al sistema
operativo que use. Si no va a usar esta opción omita este paso.
Ahora verá el código con la serie del equipo que necesitará para
agregarlo en la aplicación de monitoreo externo que veremos más
adelante. Oprima el botón “Next”.
Finalice el asistente oprimiendo OK.
a)
b)
c)
d)
e)
f)
g)
Configuración de los parámetros de red del DVR:
Oprima el botón derecho del mouse sobre la vista de las cámaras y seleccione
“guía”. Oprima “Next” varias veces hasta que encuentre los códigos QR
según el sistema operativo de su dispositivo móvil. Instale la aplicación en
su dispositivo móvil leyendo el código que corresponda (su dispositivo
móvil debe tener una aplicación instalada para lectura de códigos QR).
También puede buscar manualmente esta aplicación en su tienda de
aplicaciones bajo el nombre “XMEye” la cual no tiene ningún costo.
•
Instalación de la Aplicación en su dispositivo móvil:
Abra la aplicación XMEye en su dispositivo móvil y oprima el botón + en
la esquina superior derecha.
Digite un nombre para su equipo (ejemplo: Casa).
En el campo “Serial Num” lea el código con el número de serie del equipo
oprimiendo el botón con imagen de código QR. Para encontrar este código
oprima el botón derecho del mouse sobre las imágenes de las cámaras y seleccione
“guía”. Avance hasta la pantalla que contiene el código “SN” (serial number).
•
•
•
Agregar su dispositivo en la aplicación móvil:
INSTRUCTIONS
Install the equipment according to the connection diagram on the back
page. Note that the kit has a factory-installed hard disk to store the
recordings. No need to make any step in this regard.
Welcome Screen / First use:
You must connect your DVR to a network with Internet.
Press the right mouse button on the main view of cameras and select
“Main Menu”.
Go to System-Network.
Check the option “DHCP Enable”.
Restart the device.
•
•
•
•
•
CONFIGURATION FOR EXTERNAL MONITORING
1.
2.
If you later want to repeat this wizard click the right mouse button on the
camera view on your screen and select “Guide”.
To view the 4 cameras simultaneously press the right mouse button on
your screen and select “View 4”.
If you want to see a single enlarged camera view press the right mouse
button on your screen, select “View 1” and the camera to view.
Other advanced features related to the product can be found in the
product user manual located in our website.
3.
4.
5.
6.
For this time leave the option “Don’t display this wizard again”
unchecked and press the “Next” button.
Default user is “admin” and blank password. Press OK.
Set the date and time parameters. If you want to change the language
use the “Language” option. Press the “Next” button. If you changed
the language the device will restart.
If you want to externally monitor cameras (using a mobile device) you
must configure the network options in this step. Follow the procedure
in the “Configuration for External Monitoring” section below. If you
are not going to externally monitor cameras skip this step by pressing
the “skip” button and do it later if you want following the steps in
“Configuration for External Monitoring” section below.
Then you will see the codes could read from your mobile device to
install the application for external monitoring according to the
operating system you use. If you will not use this option skip this step.
You will now see the code with the device serial number needed to
add it in the application for external monitoring to be discussed later.
Press the “Next” button.
Complete the wizard by pressing OK.
a)
b)
c)
d)
e)
f)
g)
Network configuration in DVR:
Press the right mouse button on the camera view on your screen and
select “Guide”. Press “Next” several times until you find QR codes
depending on the operating system of your mobile device. Install the
application on your mobile device reading the appropriate QR (your
mobile device must have a tool to read QR codes). You can also manually
find this application in its app store under the name “XMEye” which has
no cost.
•
Installing the application on your mobile device:
Open the XMEye application on your mobile device and press the +
button in the upper right corner.
Type a name for your DVR (eg House).
In the “Serial Num” field read the code with the serial number of the DVR
by pressing the button with QR code image. To find this code press the
right mouse button on the camera view on your screen and select “Guide”.
Advance to the screen that contains the QR code “SN” (serial number).
•
•
•
Adding your DVR to your mobile application:
Popular Security System manuals by other brands

Elan
Elan M1 Gold Integration note

Honeywell
Honeywell PID-95P Quck Start Guide

schmersal
schmersal AZM300 operating instructions

PSG Dover
PSG Dover Wilden SafeGuard Engineering, operation & maintenance
Crestron
Crestron CH-LMD1 Operations & installation guide

Honeywell
Honeywell ADEMCO VISTA-40 Installation and setup guide


