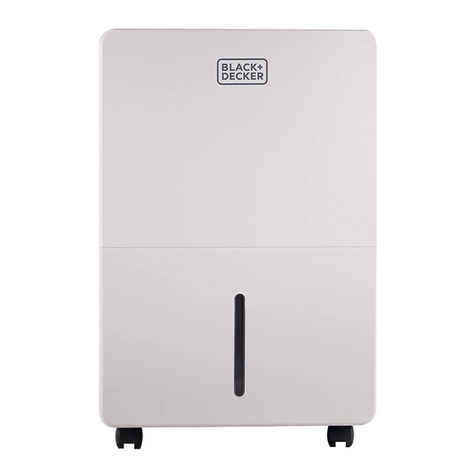
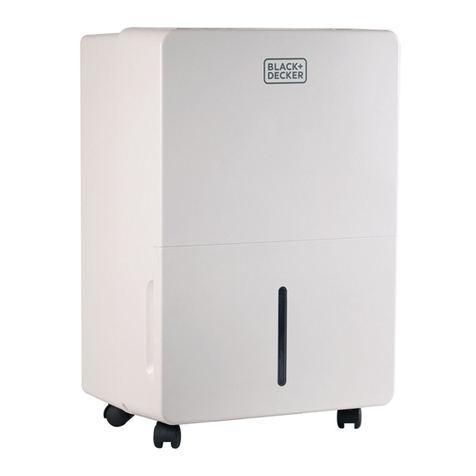
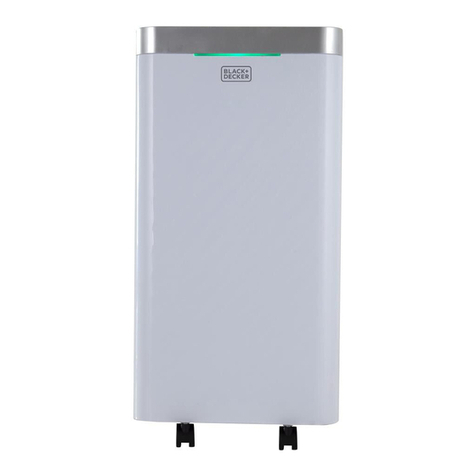
Black & Decker BXDH12E User manual

FR ENDEITESPTNLPLELRUROBG
www.blackanddecker.eu
BXDH12E_BXDH20E

BXDH12E
BXDH20E
HIGH
LOW
INSIDE DRYING
H
%
AUTO
DRY CLOTHES
1 2 3
4
5
6 7 8
> 10cm
Fig1

BXDH12E
BXDH20E
HIGH
LOW
INSIDE DRYING
H
%
AUTO
DRY CLOTHES
(3S-LOCK)
1 2 3
4
5
6 7 8

ENGLISH (Original instructions)
4
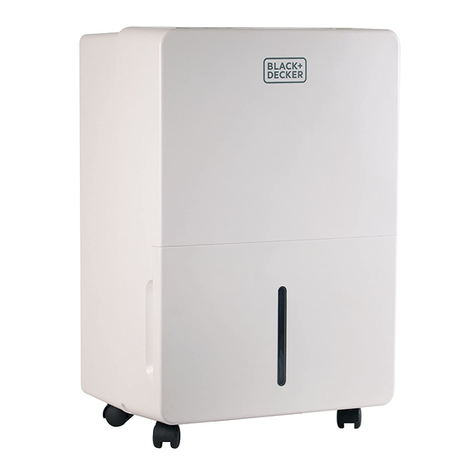
DEHUMIDIFIER
BXDH12E
BXDH20E
Dear customer,
Many thanks for choosing to purchase a BLACK+DECKER brand product.
Thanks to its technology, design and operation and the fact that it exceeds the strictest
quality standards, a fully satisfactory use and long product life can be assured.
for future reference.
WARNING
Do not use means to accelerate the defrosting process or to clean, other than those
recommended by the manufacturer.
Do not pierce or burn.
4 m2.
WARNING
-
rant gas.
When defrosting and cleaning the aplliance, do not use
any tools other than those recommended by the manu-
facturing company.
continuously sources of ignition (for example: open
Do not puncture and do not burn.
-
part of the refrigerant circuit.
If the appliance is installed, operated or stored in a non-
the accumulation of refrigerant leaks resulting in a risk of
-
accredited organization that ensures competence in
recognized by associations in the industry.
Repairs must be performed based on the recommenda-
tion from the manufacturing company. Maintenance and
-
SAFETY ADVICE AND WARNINGS
This appliance may be used by children aged 8 years
-
training in the use of the appliance in a safe and Unders-
-
-
regulations.
-
around the appliance.
function properly.
If the mains connection is damaged, it must be replaced.
not attempt to disassemble or repair it yourself as it may
be dangerous.
This appliance is intended for household use only, not
for professional or industrial use.
rating plate.
plug. Do not use plug adapters.
appliance.
Check the condition of the electrical connection cable. Damaged or entangled cables
increase the risk of electric shock.
It is recommended as an additional protection in the electrical installation that feeds
is a leak.
Do not place the appliance in direct sunlight.

ENGLISH
(Original instructions)
5
Do not use or store the appliance outdoors.
increase the risk of electric shock.
USE AND CARE:
Use the handles to take or transport the appliance.
cleaning operations.
SERVICE
original spare parts or accessories are used to replace existing parts/ accessories.
A Handle
B Control Panel
C Front Panel
D Back Panel
G Water Tank
H Casters
I Filter Frame
M Drainage Hose
1 Timer
2 Inside drying
4 Full tank
5 LED display
6 Humidity control
7 Mode / Clothes drying
Installation
-
sure it is locked in the right position.
It is recommended to insert pads or damping rubber sheets, etc. under this dehumidi-
disappear.
USE:
Extend the cable completely before plugging in.
Plug the appliance into the mains.
Turn the appliance on, by using the on/off button.
Select the desired function.
-
section.
procedure lasts approximately 1 hour.
To cancel this function, press the button again.
appliance.
mode selected.
clothes to dry quicker.

ENGLISH (Original instructions)
6
FAN SPEED:
To unlock the control panel, repeat the process for turning it on.
emits a buzzing sound to alert the user.
Unplug the appliance from the mains.
Clean the appliance.
-
table transportation.
-
CLEANING
cleaning task.
dry.
products, for cleaning the appliance.
parts of the appliance.
If the appliance is not in good condition of cleanliness, its surface may degrade and
to use.
Then dry all parts before its assembly and storage.
detergent, rinse them off and let them dry completely in a shady place.
Anomalies Cause Solution
again.
Normal phenomenon. The appliance does not run in these condi-
tions for safety resons.
Noise is abnormal during operation.
-
menon.
Water leaks. Connection of drainage pipe becomes loose Fasten drainage pipe.
Drainage system is blocked
Frosting occurs.
defrosting function.

ENGLISH
(Original instructions)
7
ecology and recyclability of the product
The materials that constitute the packaging of this apparatus, are integrated in a
them, you can use the appropriate public containers for each type of material.
its life, you must deposit it by the appropriate means at the disposal of an
WARRANTY AND TECHNICAL ASSISTANCE
-
Checks to the area
are necessary to ensure that the risk of ignition is minimised. For repair to the refrige-
on the system.
Work procedure
Work shall be undertaken under a controlled procedure so as to minimise the risk of a
Checking for presence of refrigerant
-
rants, i.e. nonsparking, adequately sealed or intrinsically safe.
No ignition sources
Ventilated area
released refrigerant and preferably expel it externally into the atmosphere.
Checks to the refrigeration equipment
-
refrigerant containing components, unless the components are constructed of materials
so corroded.
Repair and maintenance to electrical components shall include initial safety checks and
component inspection procedures. If a fault exists that could compromise safety, then
the fault cannot be corrected immediately but it is necessary to continue operation, an
Initial safety checks shall include: that capacitors are discharged: this shall be done in
continuity of earth bonding.
During repairs to sealed components, all electrical supplies shall be disconnected from
permanently operating form of leak detection shall be located at the most critical point
affected.
-
-
CABLING
or fans.
Under no circumstances shall potential sources of ignition be used in the searching for
or detection of refrigerant leaks. A halide torch (or any other detector using a naked

ENGLISH (Original instructions)
8
-
not a potential source of ignition and is suitable for the refrigerant used. Leak detection
equipment shall be set at a percentage of the LFL of the refrigerant and shall be
brazing process.
When breaking into the refrigerant circuit to make repairs – or for any other purpose
-
-
equipment. Hoses or lines shall be as short as possible to minimise the amount of
refrigerant contained in them.
Cylinders shall be kept upright.
refrigerant.
Before carrying out this procedure, it is essential that the technician is completely
refrigerant sample shall
be taken in case analysis is required prior to reuse of reclaimed refrigerant. It is essen-
appropriate standards.
-
tions.
it has been cleaned and checked.
LABELLING
Equipment shall be labelled stating that it has been decommissioned and emptied of
refrigerant. The label shall be dated and signed.
-
mable refrigerant.
are employed. Ensure that the correct number of cylinders for holding the total system
-
-
-
manufacturer if in doubt.
-
-
cuation process shall be carried out prior to returning the compressor to the suppliers.
process. When oil is drained from a system, it shall be carried out safely.
General
Special training additional to usual refrigerating equipment repair procedures is requi-
In many countries, this training is carried out by national training organisations that
legislation.
Training
-
Information about the different safety concepts:
enclosure is opened.
before.
during repair procedures.
Information about the concept of sealed components and sealed enclosures according
Commissioning
duct is assembled in a correct manner.
ENGLISH
(Original instructions)
9
Maintenance
refrigerant leak is possible.
short circuit the capacitor terminals usually creates sparks.
Repair
refrigerant leak is possible.
order:
danger. In doubt, one person should guard the outlet. Take special care that drained
Decommissioning
refrigerant leak is possible.
danger. In doubt, one person should guard the outlet.
Disposal
danger. In doubt, one person should guard the outlet.
Cut out the compressor and drain the oil.

FRANÇAIS (Instructions initiales)
10
DÉSHUMIDIFICATEUR
BXDH12E
BXDH20E
Cher Client,
-
K+DECKER.
AVERTISSEMENT
Ne pas percer ou brûler.
2.
AVERTISSEMENT
Merci de lire toutes les mises en garde.
-
Ne pas percer ou brûler.
-
-
les associations sectorielles.
-
-
tionner correctement.
-
raison des risques que cela implique.
-
tique et non professionnel ou industriel.

FRANÇAIS
(Instructions initiales)
11
-
cas de fuite.
du soleil.
Utilisation et entretien:
fonctionnement
et de connaissances.
-
-
tuelles blessures.
-
SERVICE
-
B Panneau de commande
C Panneau frontal
H Roues
technique.
1 Minuterie
5 Écran LED
Installation
-
chers en bois, placer des tampons, des bandes de caoutchouc ou similaires sous le
rapidement.
-
VÊTEMENTS.
-

FRANÇAIS (Instructions initiales)
12
-
VITESSE DU VENTILATEUR :
-
secondes.
le retirer soigneusement.
bouchon. Connecter le tuyau de sortie.
nettoyer.
robinet.
-
-
-
-

FRANÇAIS
(Instructions initiales)
13
-
tion:
Écologie et recyclage du produit
com/
-
-
-
-
-
Anomalies Cause Solution
Bruit anormal pendant le fonctionnement.
Un « faible rire » se fait entendre.
Retirer les obstacles et redresser le tuyau.

FRANÇAIS (Instructions initiales)
14
parties.
-
-
potentiellement dangereuse.
-
-
-
-
-
-
-
DÉMANTÈLEMENT
-
-

FRANÇAIS
(Instructions initiales)
15
-
-
-
dans les bidons.
-
Dans de nombreux pays, cette formation est fournie par des organismes nationaux de
Formation
incorrecte.
-
-
-
Entretien
-
-
-
-
rant est en cours.
Élimination
-
-

FRANÇAIS (Instructions initiales)
16
-
trop proches les uns des autres.
fabricant.

DEUTSCH
Übersetzung aus den ursprünglichen anweisungen
17
ENTFEUCHTER
BXDH12E
BXDH20E
Sehr geehrte Kundin
Wir danken Ihnen für Ihre Entscheidung, ein BLACK+DECKER Gerät zu kaufen.
Die Technologie, das Design und die Funktionalität dieses Produkts, das die anspruchs-
WARNUNG
-
prozess zu beschleunigen oder das Gerät zu reinigen,
-
ein laufendes Gasgerät oder eine laufende Elektrohei-
Nicht bohren oder brennen.
Beachten Sie, dass die Kältemittel geruchlos sein kön-
nen.
2. installiert, betrieben und gelagert
WARNUNG
Lesen Sie alle Warnungen sorgfältig durch.
-
-
Nicht bohren oder brennen.
Dieses Gerät enthält Gramm Kühlgas 52 Gramm Kühl-
-
trichtlinien entspricht. Bohren Sie in keinen Teil des
Kältemittelkreislaufs.
Wenn das Gerät in einem nicht belüf- teten Bereich
-
-
dgefahr oder Explosionsgefahr, aufgrund der Zündung
des Kältemi- ttels durch elektrische Heizungen, Öfen
-
Personen, die am Kältemittelkreis- lauf arbeiten oder
diesen betreiben, müssen über eine entsprechende Zer-
-
gen, um die Kompetenz im Umgang mit den Kältemitteln
Die Reparaturen müssen auf Grundlage der Empfehlung
des Herstellers erfolgen. Wartungsund Reparatu- rarbei-
-
nal erfor- dern, müssen unter der Aufsicht einer Person
Kältemitteln spezialisiert ist.
-
nen es an Wissen im Umgang mit dem Gerät mangelt,
geistig behinderte Personen oder Kinder ab 8 Jahren
dürfen das Gerät nur unter Aufsicht oder Anleitung über
den sicheren Gebrauch des Gerätes, so dass sie die
benutzen.
Dieses Gerät ist kein Spielzeug. Kin- der nicht unbeau-
fsichtigt lassen, um sicherzustellen, dass sie das Gerät
Das Gerät gemäß den nationalen Verkabelungsregeln
installieren.
oder ande- ren Hindernissen und dem Gerät eingehalten
um das Gerät.
Das Gerät benötigt eine geeignete Lüftung zum Betrieb.
Wenn der Netzanschluss beschädigt ist, muss er ersetzt
Technischen Kundendienst. Versuchen Sie nicht, das
Gerät selbst auseinanderzubauen und zu reparieren.
Dabei kann es zu Gefahrensituationen kommen.
nicht geeignet.
Sie den Apparat an das Stromnetz anschließen.
Das Gerät an ein Stromnetz mit mindestens 10 Ampere
anschließen.

DEUTSCH Übersetzung aus den ursprünglichen anweisungen
18
Der Stecker des Geräts muss mit dem Steckdosentyp des Stromanschlusses übere-
Kabel nicht zum Anheben oder Transportieren des Geräts. Den Stecker nicht am Kabel
aus der Dose ziehen.
Kabel nicht um das Gerät rollen.
Achten Sie darauf, dass das elektrische Verbindungska- bel nicht mit heißen Teilen des
Geräts in Kontakt kommt.
Überprüfen Sie den Zustand des elektrischen Ver- bindungskabels. Beschädigte oder
-
Berühren Sie den Stecker nicht mit feuchten Händen.
oder undicht ist.
Dieses Gerät ist nicht für den Gebrauch im Außenbe- reich geeignet.
Wenn das Gerät im selben Raum mit anderen Geräten oder Brenngasgeräten einsetzt
Nicht an Stellen platzieren, an denen das Gerät der direkten Sonneneinstrahlung
ausgesetzt ist.
Stellen Sie das Gerät auf eine ebene und stabile, für hohe Temperaturen geeignete
Gerät gelangt, erhöht die Elektroschockgefahr.
WARNUNG: Das Gerät nicht in Wassernähe benützen.
Kabel nicht zum Anheben oder Transportieren des Geräts. Den Stecker nicht am Kabel
Solange das Gerät in Betrieb oder ans Netz geschlossen ist, darf es nicht umgedreht
Reinigung beginnen.
-
Gerät nie am Stromnetz angeschlossen und ohne Aufsicht lassen. Sie sparen dadurch
Haftung des Herstellers.
SERVICE
BESCHREIBUNG
A Transportgriff
B Bedienungspaneel
C Vorderes Bedienfeld
D Hinteres Bedienfeld
G Wassertank
H Räder
I Rahmen des Filters
SCHALTTAFEL
1 Zeituhr
2 Innere Trocknung
5 LED-Display
6 Feuchtigkeitskontrolle
Wenn Sie meinen, dass das Gerät nicht mit dem oben angeführten Zubehör ausgestattet
Installation
Entfernen Sie unbedingt das gesamte Verpackungsmaterial aus dem Gerät.
der richtigen Position blockiert hat.
BENUTZUNGSHINWEISE
Vor Der Benutzung:
Entfernen Sie unbedingt das gesamte Verpackungsmaterial aus dem Gerät.
-
belüfteten Raum in Betrieb zu lassen.
Benutzung:
Schließen Sie das Gerät an das Stromnetz an Stellen Sie das Gerät an, indem Sie den
An-/Ausschalter betätigen.
-
-
TELLUNG
Jedes Drücken fügt eine Stunde hinzu.

DEUTSCH
Übersetzung aus den ursprünglichen anweisungen
19
Die obere Betriebsleuchte schaltet sich ein.
Drücken Sie die Taste Innere Trockung.
Die obere Betriebsleuchte schaltet sich ein.
Sie dauert ca. 1 Stunde.
-
-
-
-
Um die Funktion zu stornieren, drücken Sie erneut die Taste, der automatische Modus
beginnt.
KINDERSICHERUNG:
-
den lang gedrückt.
Gerät gibt eine akustische Warnung ab.
Der Kompressor und der Ventilator hören auf zu funktionieren.
Nehmen Sie den Wassertank heraus. Geben Sie die Hände in die Vertiefungen und
-
tung, um den Entfeuchter neu zu starten.
Abdeckung ab und nehmen Sie den Deckel heraus. Schließen Sie den Schlauch an
den Ausgang an.
Das untere Ende des Schlauches muss mindestens 10 cm unterhalb des Wasseraus-
ganges liegen.
bitte folgende Fig. 1
Nach der Benutzung des Geräts:
Den Stecker aus der Netzdose ziehen.
Reinigen Sie das Gerät.
Für ein leichtes und bequemes Tragen ist dieses Gerät an der Seite mit einem Trage-
REINIGUNG
Reinigung beginnen.
Reinigen Sie die elektrische Einheit und den Netzstecker mit einem feuchten Tuch
FLÜSSIGKEIT EINTAUCHEN.
Reinigen Sie das Gerät mit einem feuchten Tuch mit ein paar Tropfen Reinigungsmittel.
Lassen Sie kein Wasser oder andere Flüssigkeiten in die Belüftungsöffnungen eindrin-
Das Gerät nicht in Wasser oder andere Flüssigkeiten tauchen und nicht unter den
Wasserhahn halten.
seine Wirkung reduziert.
-
STÖRUNGEN UND REPARATUR
Lösungen zur Behebung kleiner Störungen können Sie der folgenden Tabelle entneh-
men:

DEUTSCH Übersetzung aus den ursprünglichen anweisungen
20
Das Gerät enthält brennbares Kältemittel
Für die EUAusführungen des Produkts und/ oder für Länder, in denen diese Vorschrif-
Ökologie und Recycling des Produkts
-
orgen möchten, können Sie die öffentlichen Container für die einzelnen Materialarten
zugelassenen Entsorgungsstelle
-
GARANTIE UND TECHNISCHER SERVICE
geschützt. Um Ihre Rechte und Interessen geltend zu machen, müssen Sie eines
anfordern, indem Sie sich mit uns in Verbindung setzen (siehe letzte Seite des Hand-
-
ALLGEMEINE ANWEISUNGEN
Kontrolle des Bereiches
Vor Beginn der Arbeiten an Systemen, die brennbare Kältemittel enthalten, sind Sicher-
heitskontrollen erforder- lich, um sicherzustellen, dass das Risiko einer Entzün- dung
-
Arbeiten zu minimieren.
Allgemeiner Arbeitsbereich
Das gesamte Wartungspersonal und andere in der Umgebung tätige Personen
-
-
Antibeschlag, ordnungsgemäße Abdichtung und eigensicher.
-
sein.
Keine Zündquellen
Keine Person, die Arbeiten in Verbindung mit einem Kühlsystem ausführt, bei dem
-
Belüfteter Bereich
Sie das System demontieren oder heiße Arbeiten ausführen. Während der Arbeitszei-
Atmosphäre austreten lassen.
Kontrollen an den Kühlgeräten
Anomalien Ursache Lösung
Das Gerät funktioniert nicht. Stecken Sie den Stecker in die Steckdose.
Entfernen Sie das Wasser aus dem Tank und bringen Sie ihn
erneut an.
Normales Phänomen Das Gerät funktioniert aus Sicherheitsgrün-
den nicht.
Sind die Umgebungstemperatur oder die Feuchti-
reduziert.
Es tritt keine Luft aus.
Bringen Sie den Entfeuchter in die Gerade.
hören.
Wasserlecks. Befestigen Sie den Drainageschlauch.
Das Drainagesystem ist blockiert. Entfernen Sie die Hindernisse und richten Sie den Schlauch
gerade.
Es entsteht Raureif.
auf den Anti-Frost-Modus.
Es handelt sich um ein normales Phänomen und der Entfeuchter
This manual suits for next models
1
Table of contents
Languages:
Other Black & Decker Dehumidifier manuals

Black & Decker
Black & Decker BXEH60003GB User manual

Black & Decker
Black & Decker BDT20WTB User manual

Black & Decker
Black & Decker BDT30WTA User manual

Black & Decker
Black & Decker BDT70PWT User manual

Black & Decker
Black & Decker BDT50 Series User manual

Black & Decker
Black & Decker BDT30 Series User manual

Black & Decker
Black & Decker BXHU050 Quick reference guide