OPERATION INSTRUCTIONS
1. When rst operating the dehumidier, press MODE button, select “continuous”
and allow to run for 24 hours.
NOTE: Unit may shut off automatically during 24 hour period if collection bucket
is full (see below). If continuous drainage mode is utilized, and drain hose
is connected, the unit will operate continuously (see page 12).
2. Press the POWER button once to turn the unit on. Press POWER button again
when you’re ready to turn it off.
3. Press the or buttons just under the display to select the desired relative
humidity in the room. Each press will change the room humidity by 5%. The
room humidity is selectable from 35-80% or continuous. The unit will cycle on
and off to maintain the humidity level chosen on the digital display. If you want
the dehumidier to operate continuously regardless of the room humidity,
press MODE button until you see “CO” on the display. This will enable
continuous operation and “CONTINOUS” indicator will light up on the control
panel.
4. Press the FAN SPEED button to select between High, Medium and Low. The
selected speed will be conrmed by the indicator on the control panel.
TIMER FUNCTION
To program the unit to automatically turn ON, press the TIMER button when
the unit is OFF. Press or to increase the timer in 30 minute increments
up to 10 hours. After 10 hours, each press of the will increase the timer in 1
hour increments up to 24 hours. Once the desired time is reached, the unit will
automatically turn ON.
To program the unit to automatically turn OFF, press the TIMER button when
the unit is ON. Each press of the or buttons will change the timer setting in
30 minute increments up to 10 hours. After 10 hours, each press of the or
buttons will increase or decrease the timer in 1 hour increments up to 24 hours.
Once the desired time is over, the unit will automatically power OFF.
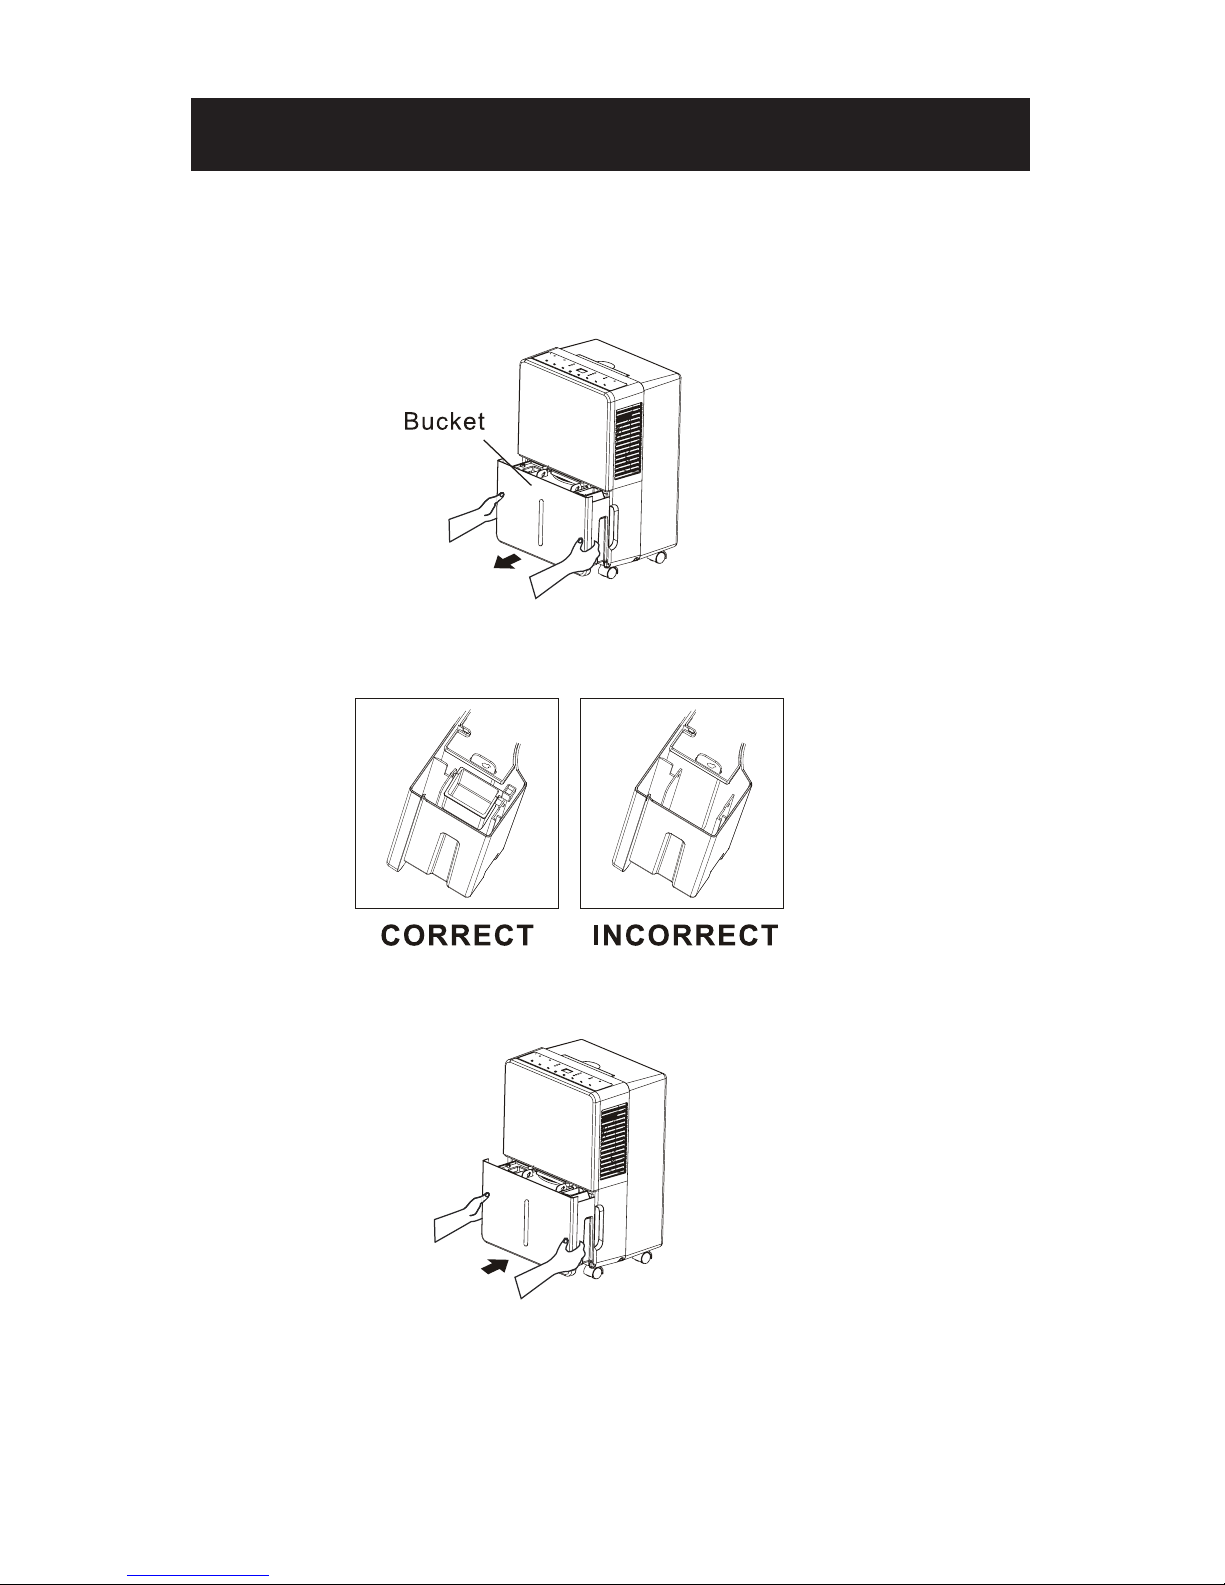
FULL WATER COLLECTION BUCKET
When the water collection bucket is full, the unit will shut off automatically, make
a beeping noise and the BUCKET FULL indicator will light. The dehumidier will
not run again until the bucket is emptied and properly placed back inside the
unit.
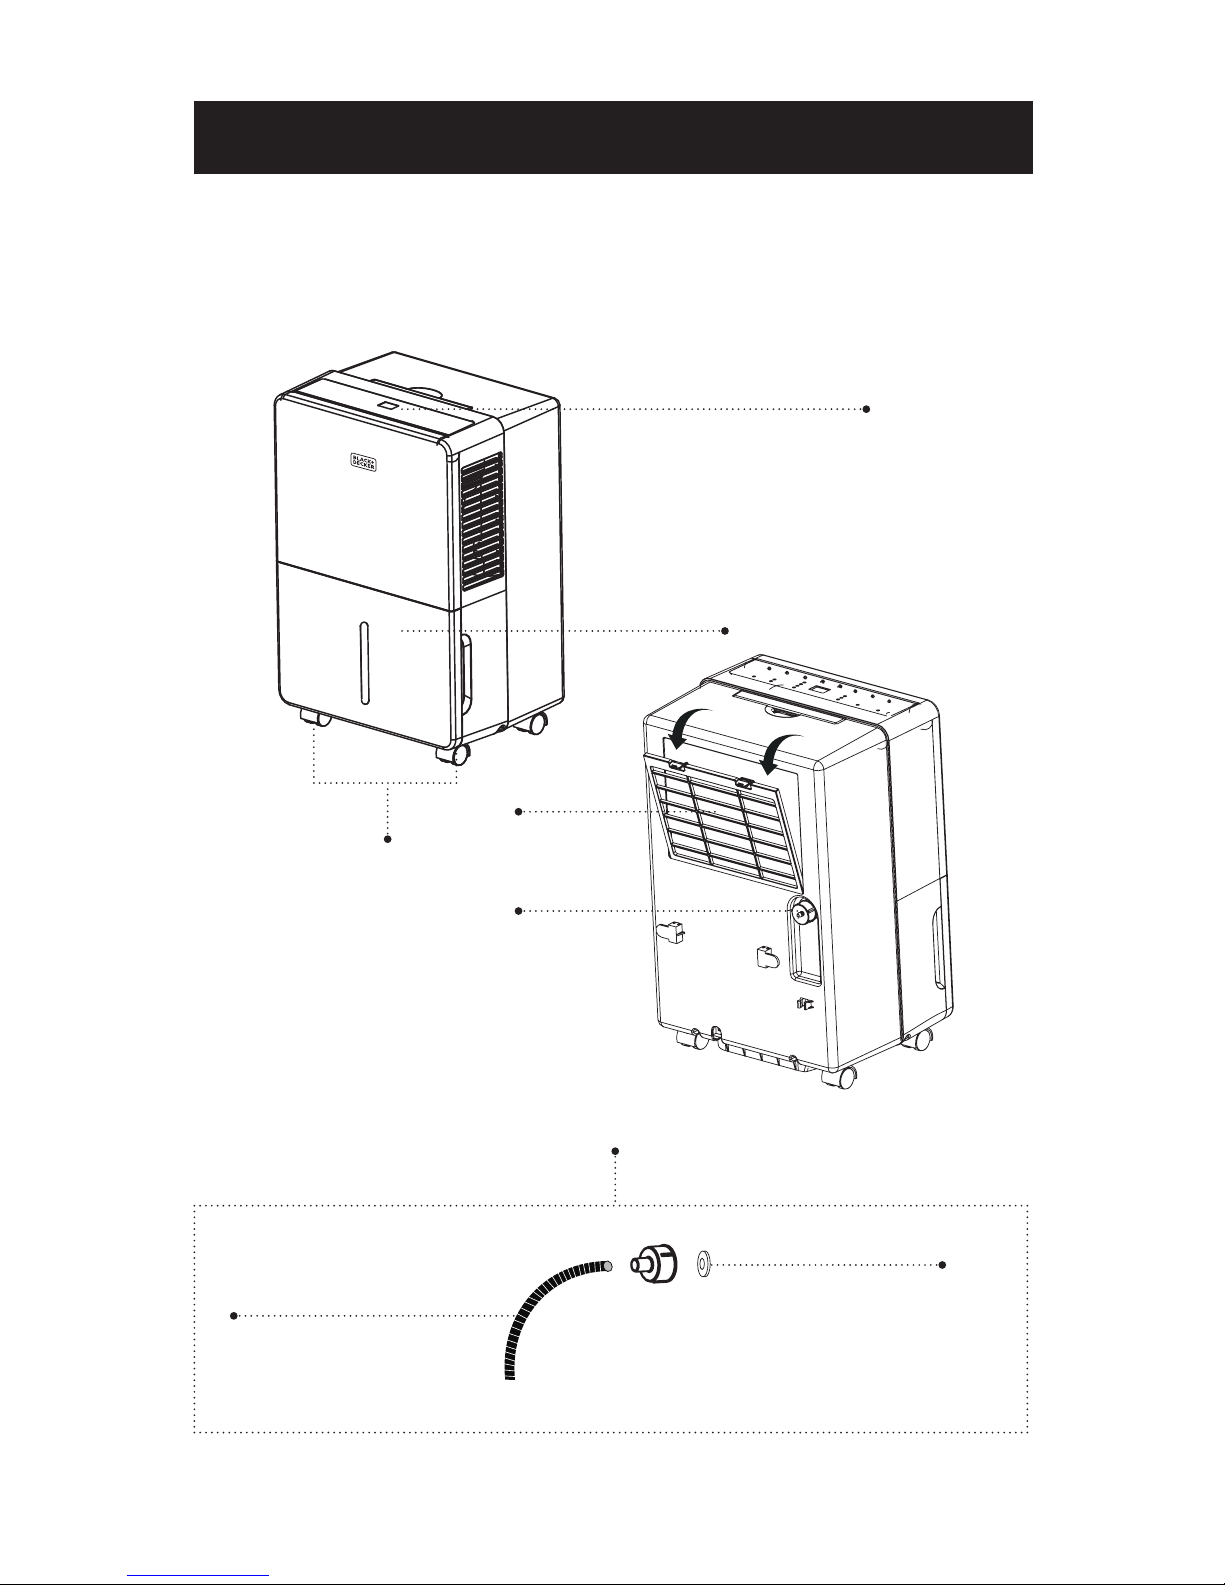
SET UP & USE
Page 9