ENGLISH (Original instructions)
8
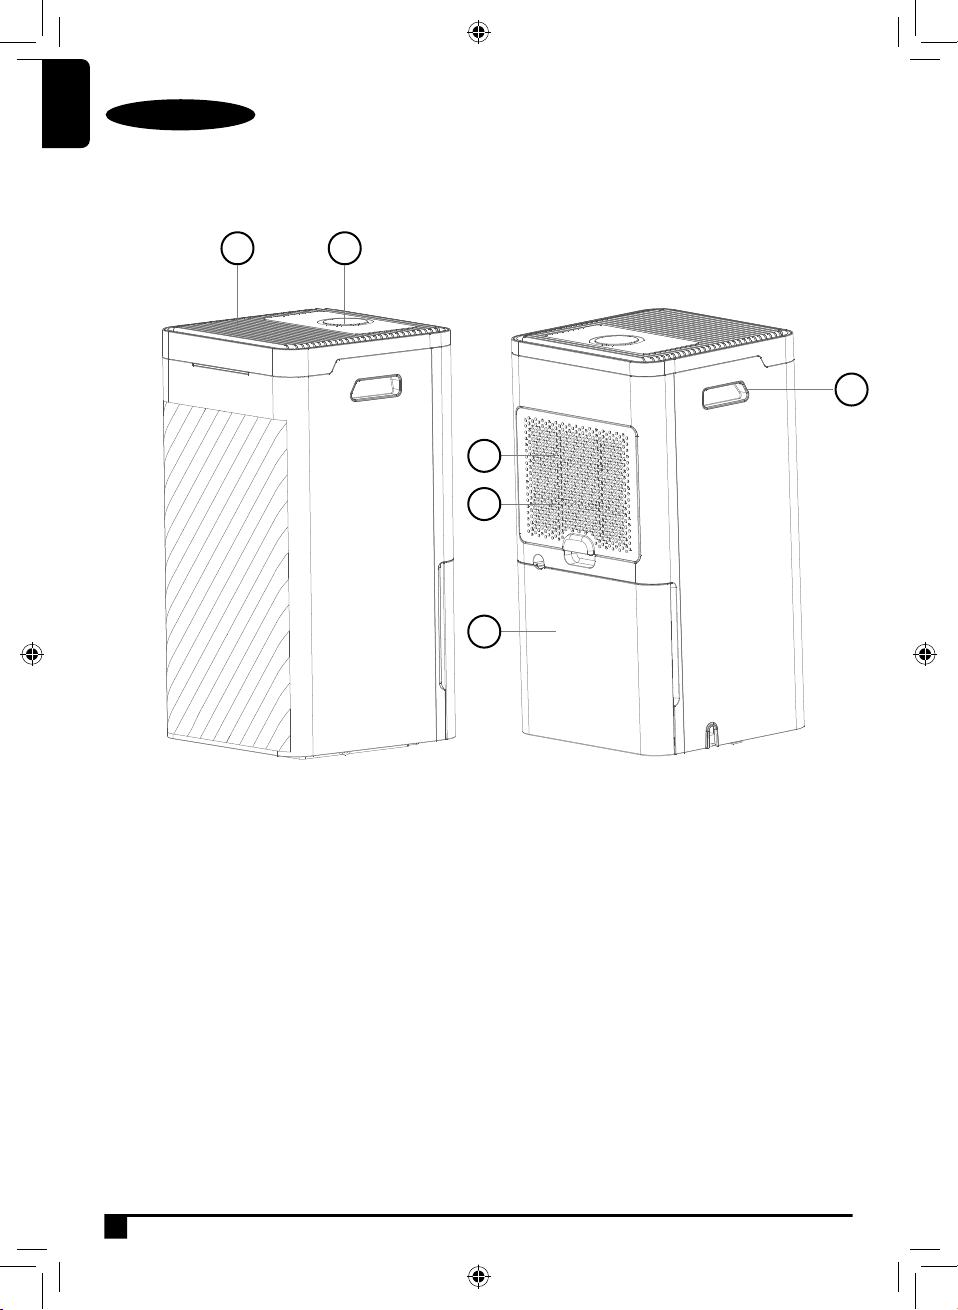
Control Panel
1. Low fan speed indicator
2. High fan speed indicator
3. Fan speed selector
4. LED display (Humidity, Timer & Modes)
5. Defrost indicator
6. Water tank full indicator
7. Sleep button
8. Timer button
9. Humidity & timer touch control slider
10. Mode button
11. ON/OFF button
Turning The Unit On Or Off
Note: To avoid damage, place the unit in an upright
position for at least 24 hours before rst use.
Note: Always ensure the water tank is empty and in
place before turning the unit on.
Note: During the operation, keep doors and
windows closed to save energy.
♦ To power the unit on, rst plug it into a mains
socket. A single beep will be heard. The unit will
be in stand-by mode.
♦ Press the ON/OFF button to turn the unit on.
The ON/OFF button and the fan speed light on the
unit’s control panel will illuminate and air will start
emitting from the top grille. The display screen will
show the current room humidity %.
♦ Press the ON/OFF button again to power the unit
off. Air will stop emitting from the grille to show the
unit has been powered down. All lights will go off.
♦ To shut the unit off completely, unplug it from the
mains socket.
WARNING: DO NOT store the unit immediately
after turning it off. Allow time for the unit to cool
down before storing.
Dehumidification Modes
There are 4 modes to select from:
- Normal dehumidication – adjustable fan
speed and adjustable humidity
- Continuous dehumidication – a set low fan
speed and humidity is not adjustable
- Ventilation mode – adjustable fan speed and
humidity is not adjustable
- Drying mode –a set high fan speed and set
humidity is not adjustable
Press the mode button to cycle through the
options, respective symbols will show in the display.
The mode selected will ash for 5 seconds and then
remain visible in the display.
Humidity Setting
♦ In Normal dehumidication mode, slide your nger
across the symbol horizontally to set
the humidity between 30%-80% (in increments
of 5%).
♦ The humidity selected will ash for 5 seconds in
the display.
♦ The display will then show the room’s current
humidity.
♦ To check the humidity selected at any time, press
the humidity setting symbol and it will ash in the
display for 5 seconds.
Timer Operation
♦ Whilst the unit is operating the timer is used to set
the time to turn the appliance off.
♦ Whilst the unit is in stand-by mode the timer is
used to set the time to turn the appliance on.
♦ Press the timer button to select a time
between 1-24hrs.
♦ With each press of the timer button the time will
increase by 1 hour. The time selected will ash for
5 seconds and the will illuminate in the display.
♦ To check the time selected at any time, press the
timer button and it will ash in the display for 5
seconds.
41 52 63
7 8 9 10 11