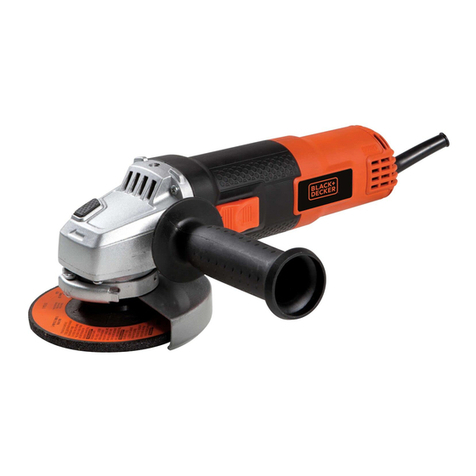
BLACK DECKER KG711 User manual

www.blackanddecker.tr
ENTR
KG711
KG911
KG912
KG752

ENGLISH
2
(Original instructions)
1
4
2 3
B
4
7
5
69
9
8
A
13
11
10
5
4
12

3
ENGLISH
(Original instructions)
D
C
11
13
14
13
16
15
10
5
E

4
ENGLISH (Original instructions)
Intended use
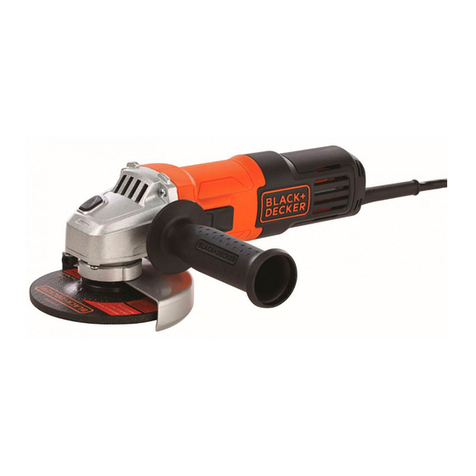
Your BLACK+DECKER™ KG711, KG911, KG912,
KG752 Angle Grinder has been designed for
grinding and cutting metal and masonry
using the appropriate type of cutting or
grinding disc. When fitted with the
appropriate guard, this tool is intended for
consumer use only.
Safety instructions
General power tool safety warnings
Warning! Read all safety warnings
and all instructions. Failure to
follow the warnings and instructions
listed below may result in electric shock, fire
and/or serious injury.
Save all warnings and instructions for
future reference.
The term “power tool” in all of the warnings
listed below refers to your mains operated
(corded) power tool or battery operated
(cordless) power tool.
1. Work area safety
a. Keep work area clean and well lit.
Cluttered or dark areas invite accidents.
b. Do not operate power tools in explosive
atmospheres, such as in the presence of
flammable liquids, gases or dust. Power
tools create sparks which may ignite the
dust or fumes.
c. Keep children and bystanders away
while operating a power tool.
Distractions can cause you to lose
control.
2. Electrical safety
a. Power tool plugs must match the outlet.
Never modify the plug in any way. Do
not use any adapter plugs with earthed
(grounded) power tools. Unmodified
plugs and matching outlets will reduce
risk of electric shock.
b. Avoid body contact with earthed or
grounded surfaces such as pipes,
radiators, ranges and refrigerators.
There is an increased risk of electric
shock if your body is earthed or
grounded.
c. Do not expose power tools to rain or wet
conditions. Water entering a power tool
will increase the risk of electric shock.
d. Do not abuse the cord. Never use the
cord for carrying, pulling or unplugging
the power tool. Keep cord away from
heat, oil, sharp edges or moving parts.
Damaged or entangled cords increase the
risk of electric shock.
e. When operating a power tool outdoors,
use an extension cord suitable for
outdoor use. Use of a cord suitable for
outdoor use reduces the risk of electric
shock.
f. If operating a power tool in a damp
location is unavoidable, use a residual
current device (RCD) protected supply.
Use of an RCD reduces the risk of electric
shock.
3. Personal safety
a. Stay alert, watch what you are doing and
use common sense when operating a
power tool. Do not use a power tool
while you are tired or under the
influence of drugs, alcohol or
medication. A moment of inattention
while operating power tools may result in
serious personal injury.
b. Use personal protective equipment.
Always wear eye protection. Protective
equipment such as dust mask, non-skid
safety shoes, hard hat, or hearing
protection used for appropriate
conditions will reduce personal injuries.
c. Prevent unintentional starting. Ensure
the switch is in the o-position before
connecting to power source and/or
battery pack, picking up or carrying the
tool. Carrying power tools with your
finger on the switch or energising power
tools that have the switch on invites
accidents.
d. Remove any adjusting key or wrench
before turning the power tool on. A
wrench or a key left attached to a
rotating part of the power tool may result
in personal injury.

5
ENGLISH
(Original instructions)
e. Do not overreach. Keep proper footing
and balance at all times. This enables
better control of the power tool in
unexpected situations.
f. Dress properly. Do not wear loose
clothing or jewellery. Keep your hair,
clothing and gloves away from moving
parts. Loose clothes, jewellery or long
hair can be caught in moving parts.
g. If devices are provided for the
connection of dust extraction and
collection facilities, ensure these are
connected and properly used. Use of
dust collection can reduce dust-related
hazards.
4. Power tool use and care
a. Do not force the power tool. Use the
correct power tool for your application.
The correct power tool will do the job
better and safer at the rate for which it
was designed.
b. Do not use the power tool if the switch
does not turn it on and o. Any power
tool that cannot be controlled with the
switch is dangerous and must be
repaired.
c. Disconnect the plug from the power
source and/or the battery pack from the
power tool before making any
adjustments, changing accessories, or
storing power tools. Such preventive
safety measures reduce the risk of
starting the power tool accidentally.
d. Store idle power tools out of the reach
of children and do not allow persons
unfamiliar with the power tool or these
instructions to operate the power tool.
Power tools are dangerous in the hands
of untrained users.
e. Maintain power tools. Check for
misalignment or binding of moving
parts, breakage of parts and any other
condition that may aect the power
tools operation. If damaged, have the
power tool repaired before use. Many
accidents are caused by poorly
maintained power tools.
f. Keep cutting tools sharp and clean.
Properly maintained cutting tools with
sharp cutting edges are less likely to bind
and are easier to control.
g. Use the power tool, accessories and tool
bits etc., in accordance with these
instructions, taking into account the
working conditions and the work to be
performed. Use of the power tool for
operations dierent from those intended
could result in a hazardous situation.
5. Service
a. Have your power tool serviced by a
qualified repair person using only
identical replacement parts. This will
ensure that the safety of the power tool is
maintained.
Additional power tool safety
warnings
Warning! Additional safety warnings
for grinding, sanding,wire brushing,
polishing or abrasive cutting-o
operations
• This power tool is intended to function
as a grinder, sander, polisher or cut-o
tool. Read all safety warnings,
instructions, illustrations and
specifications provided with this power
tool. Failure to follow all instructions
listed below may result in electric shock,
fire and/or serious injury.
• Operations for which the power tool was
not designed may create a hazard and
cause personal injury.
• Do not use accessories which are not
specifically designed and recommended
by the tool manufacturer. Just because
the accessory can be attached to your
power tool, it does not assure safe
operation.
• The rated speed of the accessory must
be at least equal to the maximum speed
marked on the power tool. Accessories
running faster than their rated speed can
break and fly apart.
• The outside diameter and the thickness
of your accessory must be within the
capacity rating of your power tool.
Incorrectly sized accessories cannot be
adequately guarded or controlled.

6
ENGLISH (Original instructions)
• The arbour size of wheels, flanges,
backing pads or any other accessory
must properly fit the spindle of the
power tool. Accessories with arbour
holes that do not match the mounting
hardware of the power tool will run out
of balance, vibrate excessively and may
cause loss of control.
• Do not use a damaged accessory.
Before each use inspect the accessory
such as abrasive wheels for chips and
cracks, backing pad for cracks, tear or
excess wear, wire brush for loose or
cracked wires. If power tool or
accessory is dropped, inspect for
damage or install an undamaged
accessory. After inspecting and
installing an accessory and run the
power tool at maximum no-load speed
for one minute. Damaged accessories
will normally break apart during this test
time.
• Wear personal protective equipment.
Depending on application, use face
shield, safety goggles or safety glasses.
As appropriate, wear dust mask, hearing
protectors, gloves and workshop apron
capable of stopping small abrasive or
workpiece fragments. The eye
protection must be capable of stopping
flying debris generated by various
operations. The dust mask or respirator
must be capable of filtering particles
generated by your operation. Prolonged
exposure to high intensity noise may
cause hearing loss.
• Keep bystanders a safe distance away
from work area. Anyone entering the
work area must wear personal
protective equipment. Fragments of
workpiece or of a broken accessory may
fly away and cause injury beyond
immediate area of operation.
• Hold power tool by insulated gripping
surfaces only, when performing an
operation where the cutting accessory
may contact hidden wiring or its own
cord. Cutting accessory contacting a
"live" wire may make exposed metal
parts of the power tool "live" and shock
the operator.
• Position the cord clear of the spinning
accessory. If you lose control, the cord
may be cut or snagged and your hand or
arm may be pulled into the spinning
accessory.
• Never lay the power tool down until the
accessory has come to a complete stop.
The spinning accessory may grab the
surface and pull the power tool out of
your control.
• Do not run the power tool while carrying
it at your side. Accidental contact with
the spinning accessory could snag your
clothing, pulling the accessory into your
body.
• Regularly clean the power tool's air
vents. The motor's fan will draw the dust
inside the housing and excessive
accumulation of powdered metal may
cause electrical hazards.
• Do not operate the power tool near
flammable materials. Sparks could ignite
these materials.
• Do not use accessories that require
liquid coolants. Using water or other
liquid coolants may result in electrocution
or shock.
Note: The above warning does not apply for
power tools specifically designed for use
with a liquid system.
Kickback and related warnings
Kickback is a sudden reaction to a pinched
or snagged rotating wheel, backing pad,
brush or any other accessory. Pinching or
snagging causes rapid stalling of the
rotating accessory which in turn causes the
uncontrolled power tool to be forced in the
direction opposite of the accessory's
rotation at the point of the binding.
For example, if an abrasive wheel is snagged
or pinched by the workpiece, the edge of
the wheel that is entering into the pinch
point can dig into the surface of the material
causing the wheel to climb out or kick out.
The wheel may either jump toward or away
from the operator, depending on direction of
the wheel's movement at the point of
pinching.
Abrasive wheels may also break under these
conditions.
Kickback is the result of power tool misuse
and/or incorrect operating procedures or
conditions and can be avoided by taking
proper precautions as given below.
7
ENGLISH
(Original instructions)
• Maintain a firm grip on the power tool
and position your body and arm to
allow you to resist kickback forces.
Always use auxiliary handle, if provided,
for maximum control over kickback or
torque reaction during start-up. The
operator can control torque reactions or
kickback forces, if proper precautions are
taken.
• Never place your hand near the rotating
accessory. Accessory may kickback over
your hand.
• Do not position your body in the area
where power tool will move if kickback
occurs. Kickback will propel the tool in
direction opposite to the wheel's
movement at the point of snagging.
• Use special care when working corners,
sharp edges etc. Avoid bouncing and
snagging the accessory. Corners, sharp
edges or bouncing have a tendency to
snag the rotating accessory and cause
loss of control or kickback.
• Do not attach a saw chain woodcarving
blade or toothed saw blade. Such blades
create frequent kickback and loss of
control.
Safety warnings specific for
grinding and abrasive cutting-o
operations
• Use only wheel types that are
recommended for your power tool and
the specific guard designed for the
selected wheel. Wheels for which the
power tool was not designed cannot be
adequately guarded and are unsafe.
• The grinding surface of centre
depressed wheels must be mounted
below the plane of the guard lip. An
improperly mounted wheel that projects
through the plane of the guard lip cannot
be adequately protected.
• The guard must be securely attached to
the power tool and positioned for
maximum safety, so the least amount of
wheel is exposed towards the operator.
The guard helps to protect operator from
broken wheel fragments and accidental
contact with wheel.
• Wheels must be used only for
recommended applications. For
example: do not grind with the side of
cut-o wheel. Abrasive cut-o wheels
are intended for peripheral grinding, side
forces applied to these wheels may cause
them to shatter.
• Always use undamaged wheel flanges
that are of correct size and shape for
your selected wheel. Proper wheel
flanges support the wheel thus reducing
the possibility of wheel breakage. Flanges
for cut-o wheels may be dierent from
grinding wheel flanges.
• Do not use worn down wheels from
larger power tools. Wheel intended for
larger power tool is not suitable for the
higher speed of a smaller tool and may
burst.
Additional safety warnings specific
for abrasive cutting-o operations
• Do not "jam" the cut-off wheel or apply
excessive pressure. Do not attempt to
make an excessive depth of cut. Over
stressing the wheel increases the loading
and susceptibility to twisting or binding
of the wheel in the cut and the possibility
of kickback or wheel breakage.
• Do not position your body in line with
and behind the rotating wheel. When the
wheel, at the point of operation, is
moving away from your body, the
possible kickback may propel the
spinning wheel and the power tool
directly at you.
• When wheel is binding or when
interrupting a cut for any reason, switch
o the power tool and hold the power
tool motionless until the wheel comes to
a complete stop. Never attempt to
remove the cut-o wheel from the cut
while the wheel is in motion otherwise
kickback may occur. Investigate and take
corrective action to eliminate the cause of
wheel binding.
• Do not restart the cutting operation in
the workpiece. Let the wheel reach full
speed and carefully re-enter the cut. The
wheel may bind, walk up or kickback if
the power tool is restarted in the
workpiece

ENGLISH
8
(Original instructions)
• Support panels or any oversized
workpiece to minimize the risk of wheel
pinching and kickback. Large
workpieces tend to sag under their own
weight. Supports must be placed under
the workpiece near the line of cut and
near the edge of the workpiece on both
sides of the wheel..
• Use extra caution when making a
"pocket cut" into existing walls or other
blind areas. The protruding wheel may
cut gas or water pipes, electrical wiring
or objects that can cause kickback.
Safety warnings specific for
sanding operations
• Do not use excessively oversized
sanding disc paper. Follow
manufacturers recommendations, when
selecting sanding paper. Larger sanding
paper extending beyond the sanding pad
presents a laceration hazard and may
cause snagging, tearing of the disc or
kickback.
Safety warnings specific for
polishing operations
• Do not allow any loose portion of the
polishing bonnet or its attachment
strings to spin freely. Tuck away or trim
any loose attachment strings. Loose and
spinning attachment strings can entangle
your fingers or snag on the workpiece.
Safety of others
• This appliance is not intended for use by
persons (including children) with
reduced physical, sensory or mental
capabilities, or lack of experience and
knowledge, unless they have been given
supervision or instruction concerning use
of the appliance by a person responsible
for their safety.
• Children should be supervised to ensure
that they do not play with the appliance.
Residual risks.
Additional residual risks may arise when
using the tool which may not be included in
the enclosed safety warnings. These risks
can arise from misuse, prolonged use etc.
Even with the application of the relevant
safety regulations and the implementation of
safety devices, certain residual risks can not
be avoided. These include:
• Injuries caused by touching any
rotating/ moving parts.
• Injuries caused when changing any parts,
blades or accessories.
• Injuries caused by prolonged use of a
tool. When using any tool for prolonged
periods ensure you take regular breaks.
• Impairment of hearing.
• Health hazards caused by breathing dust
developed when using your tool
(example:- working with wood,
especially oak, beech and MDF.)
Vibration
The declared vibration emission values
stated in the technical data and the
declaration of conformity have been
measured in accordance with a standard test
method provided by EN 60745 and may be
used for comparing one tool with another.
The declared vibration emission value may
also be used in a preliminary assessment of
exposure.
Warning! The vibration emission value during
actual use of the power tool can dier from
the declared value depending on the ways in
which the tool is used. The vibration level
may increase above the level stated.
When assessing vibration exposure to
determine safety measures required by
2002/44/EC to protect persons regularly
using power tools in employment, an
estimation of vibration exposure should
consider, the actual conditions of use and
the way the tool is used, including taking
account of all parts of the operating cycle
such as the times when the tool is switched
o and when it is running idle in addition to
the trigger time.

9
ENGLISH
(Original instructions)
When assessing vibration exposure to
determine safety measures required by
2002/44/EC to protect persons regularly
using power tools in employment, an
estimation of vibration exposure should
consider, the actual conditions of use and
the way the tool is used, including taking
account of all parts of the operating cycle
such as the times when the tool is switched
o and when it is running idle in addition to
the trigger time.
Labels on tool
The following pictograms are shown on the
tool:
Warning! To reduce the risk of injury,
the user must read the instruction
manual.
Wear safety glasses or goggles
when operating this tool.
Wear ear protection when operating
this tool.
Electrical safety
This tool is double insulated;
therefore no earth wire is required.
Always check that the power supply
corresponds to the voltage on the
rating plate.
• If the supply cord is damaged, it must be
replaced by the manufacturer or an
authorised BLACK+DECKER Service
Centre in order to avoid a hazard.
Features
This tool includes some or all of the
following features.
1. On/o switch
2. Side handle
3. Spindle lock
4. Guard
Assembly
Warning! Before assembly, make sure that
the tool is switched o and unplugged.
Fitting and removing the guard
(fig. A)
The tool is supplied with a guard intended
for grinding purposes only. If the unit is
intended to perform cutting operations, a
guard specific for this operation must be
fitted. A suitable guard for cutting opera-
tions part numbers 1004702-27 and
1004702-28 for KG711/KG911 and KG912/
KG752 is available and can be obtained from
BLACK+DECKER service centres.
Fitting and removing the guard
(fig. A) KG912 Only
The tool is supplied with a guard intended
for cutting off purposes only. If the unit is
intended to perform grinding operations, a
guard specific for this operation must be
fitted. A suitable guard for grinding opera-
tions part number 1004702-36 is available
and can be obtained from BLACK+DECKER
service centres.
Fitting
• Place the angle grinder on a table, spindle
(5) up.
• Align the lugs (8) with the notches (9).
• Press the guard (4) down and rotate it to
the required position.
• Securely tighten the screw (6).
• To remove the guard, slacken the screw
Warning! Never use the tool without the
guard.
Fitting the side handle
• Screw the side handle (2) into one of the
mounting holes in the tool.
Warning! Always use the side handle.
Fitting and removing grinding or
cutting discs (fig. B - D)
Always use the correct type of disc for your
application. Always use discs with the
correct diameter and bore size (see
technical data).

10
ENGLISH (Original instructions)
Fitting
• Fit the guard as described above.
• Place the inner flange (10) onto the
spindle (5) as shown (fig. B). Make sure
that the flange is correctly located on the
flat sides of the spindle.
• Place the disc (11) onto the spindle (5) as
shown (fig. B). If the disc has a raised
centre (12), make sure that the raised
centre faces the inner flange.
• Make sure that the disc locates correctly
on the inner flange.
• Place the outer flange (13) onto the
spindle. When fitting a grinding disc, the
raised centre on the outer flange must
face towards the disc (A in fig. C). When
fitting a cutting disc, the raised centre on
the outer flange must face away from the
disc (B in fig. C).
• Keep the spindle lock (3) depressed and
tighten the outer flange using the
two-pin spanner (14) (fig. D).
Removing
• Keep the spindle lock (3) depressed and
loosen the outer flange (13) using the
two-pin spanner (14) (fig. D).
• Remove the outer flange (13) and the
disc (11). Fitting and removing sanding
discs (fig. D & E) For sanding, a backing
pad is required. The backing pad is
available from your BLACK+DECKER
dealer as an accessory.
Fitting
• Place the inner flange (10) onto the
spindle (5) as shown (fig. E). Make sure
that the flange is correctly located on the
flat sides of the spindle.
• Place the backing pad (15) onto the
spindle.
• Place the sanding disc (16) onto the
backing pad.
• Place the outer flange (13) onto the
spindle with the raised centre facing
away from the disc.
• Keep the spindle lock (3) depressed and
tighten the outer flange using the
two-pin spanner (14) (fig. D). Make sure
that the outer flange is fitted correctly
and that the disc is clamped tightly.
Removing
• Keep the spindle lock (3) depressed and
loosen the outer flange (13) using the
two-pin spanner (14) (fig. D).
• Remove the outer flange (13), the sanding
disc (16) and the backing pad (15).
Use
Warning! Let the tool work at its own pace.
Do not overload.
• Carefully guide the cable in order to avoid
accidentally cutting it.
• Be prepared for a stream of sparks when
the grinding or cutting disc touches the
workpiece.
• Always position the tool in such a way
that the guard provides optimum
protection from the grinding or cutting
disc.
Switching on and off
• To switch on, slide the on/off switch (1)
forward. Note that the tool will continue
running when you release the switch.
• To switch off, press the rear part of the
on/o switch.
Warning! Do not switch the tool o while
under load.
Soft Start Feature
The soft start feature allows a slow speed
build-up to avoid an initial jerk when
starting. This feature is particularly useful
when working in confined spaces.
No-Volt
The No-volt function stops the grinder
restarting without the switch being cycled if
there is a break in the power supply.
Hints for optimum use
• Firmly hold the tool with one hand
around the side handle and the other
hand around the main handle.
• When grinding, always maintain an angle
of approx. 15° between the disc and the
workpiece surface.

11
ENGLISH
(Original instructions)
Maintenance
Your BLACK+DECKER corded/cordless
appliance/tool has been designed to
operate over a long period of time with a
minimum of maintenance. Continuous
satisfactory operation depends upon proper
tool care and regular cleaning.
Warning! Before performing any
maintenance on corded/cordless power
tools:
• Switch off and unplug the appliance/tool.
• Or switch off and remove the battery
from the appliance/tool if the
appliance/tool has a separate battery
pack.
• Or run the battery down completely if it
is integral and then switch o.
• Unplug the charger before cleaning it.
Your charger does not require any
maintenance apart from regular cleaning.
• Regularly clean the ventilation slots in
your appliance/tool/charger using a soft
brush or dry cloth.
• Regularly clean the motor housing using
a damp cloth. Do not use any abrasive or
solvent-based cleaner.
• Regularly open the chuck and tap it to
remove any dust from the interior (when
fitted).
Protecting the environment
Separate collection. This product
must not be disposed of with normal
household waste.
Should you find one day that your
BLACK+DECKER product needs replace-
ment, or if it is of no further use to you, do
not dispose of it with household waste.
Make this product available for separate
collection.
Separate collection of used products
and packaging allows materials to be
recycled and used again. Reuse of
recycled materials helps prevent environ-
mental pollution and reduces the demand
for raw materials.
Local regulations may provide for separate
collection of electrical products from the
household, at municipal waste sites or by the
retailer when you purchase a new product.
BLACK+DECKER provides a facility for the
collection and recycling of BLACK+DECKER
products once they have reached the end of
their working life. To take advantage of this
service please return your product to any
authorised repair agent who will collect
them on our behalf.
You can check the location of your nearest
authorised repair agent by contacting your
local BLACK+DECKER oce at the address
indicated in this manual. Alternatively, a list
of authorised BLACK+DECKER repair agents
and full details of our after-sales service and
contacts are available on the Internet at:
www.2helpU.com.
TECHNICAL DATA
KG711
Input voltage
VAC
220-240
Power input W 750
Rated speed min-1 12,000
Disc diameter mm 115
Disc bore mm 22
Max disc thickness
grinding discs mm 6
cutting discs mm 3.5
Spindle size M14
Weight kg 2

12
ENGLISH (Original instructions)
LpA (sound pressure) 94.5 dB(A), Uncertainty
(K) 3 dB(A)
LWA (sound power) 105.5 dB(A), Uncertainty
(K) 3 dB(A)
Vibration total values (triax vector sum)
according to EN60745:
Surface grinding (ah,SG) 9.9 m/s2, uncertainty
(K) 1.5 m/s2
Cutting-o (ah) 9.1 m/s2, uncertainty (K) 1.5
m/s2
Polishing (ah,P) 5.0 m/s2, uncertainty (K) 1.5
m/s2
Disc sanding (ah,DS) 3.3 m/s2, uncertainty (K)
1.5 m/s2
KG752
LpA (sound pressure) 92.6 dB(A), Uncertainty
(K) 3 dB(A)
LWA (sound power) 103.6 dB(A), Uncertainty
(K) 3 dB(A)
Vibration total values (triax vector sum)
according to EN60745:
Surface grinding (ah,SG) 9.9 m/s2, uncertainty
(K) 1.5 m/s2
Cutting-o (ah) 4.6 m/s2, uncertainty (K) 1.5
m/s2
Polishing (ah,P) 4.5 m/s2, uncertainty (K) 1.5
m/s2
Disc sanding (ah,DS) 9.6 m/s2, uncertainty (K)
1.5 m/s2
KG711,KG911,KG912
KG911-KG912-KG752
Input voltage
VAC
220-240
Power input W KG911 = 900W
KG912 = 900W
KG752 = 800W
Rated speed min-1 12,000
Disc diameter mm KG711, KG911 = 115
KG912, KG752 = 125
Disc bore mm 22
Max disc thickness
grinding discs mm 6
cutting discs mm 3.5
Spindle size M14
Weight kg KG711, KG911 = 2.1
KG752 = 2.1
KG912 = 2.2

13
ENGLISH
(Original instructions)
Guarantee
Black + Decker is confident of the quality of
its products and oers an outstanding
guarantee. This guarantee statement is in
addition to and in no way prejudices your
statutory rights.
If a Black + Decker product becomes
defective due to faulty materials,
workmanship or lack of conformity, within
24 months from the date of purchase,
BLACK+DECKER guarantees to replace
defective parts, repair products subjected to
fair wear and tear or replace such products
to make sure of the minimum inconvenience
to the customer unless:
• The product has been used for trade,
professional or hire purposes.
• The product has been subjected to
misuse or neglect.
• The product has sustained damage
through foreign objects, substances or
accidents.
• Repairs have been attempted by persons
other than authorised repair agents or
Black + Decker service sta.
To claim on the guarantee, you will need to
submit proof of purchase to the seller or an
authorised repair agent. You can check the
location of your nearest authorised repair
agent by contacting your local
BLACK+DECKER oce at the address
indicated in this manual. Alternatively, a list
of authorised BLACK+DECKER repair agents
and full details of our aftersales service and
contacts are available on the Internet at:
www.2helpU.com
EC declaration of conformity
MACHINERY DIRECTIVE
KG711, KG911, KG912, KG752
BLACK+DECKER declares that these
products described under "Technical data"
are in compliance with: 2006/42/EC,
EN60745-1:2009 +A11:2010;
EN60745-2-3:2011 +A2:2013 +A11:2014
+A12:2014
These products also comply with Directive
2004/108/EC (until 19.04.2016),
2014/30/EU (from 20.04.2016) and
2011/65/EU.
For more information, please contact
BLACK+DECKER at the following address or
refer to the back of the manual.
The undersigned is responsible for
compilation of the technical fi le and makes
this declaration on behalf of
BLACK+DECKER.
R. Laverick
Engineering Manager
BLACK+DECKER Europe, 210 Bath Road,
Slough,
Berkshire, SL1 3YD
United Kingdom
01.2017

TÜRKÇE
14
(Çevirisi orijinal talimatlardan yapılmıştır)
Kullanım amacı
BLACK+DECKER™ KG711, KG911, KG912,
KG752 avuç taşlama makineniz uygun tipte
kesme ve taşlama diskini kullanarak metal ve
taşların taşlanması ve kesilmesi için
tasarlanmıştır. Bu alet sadece hafif hizmet ve
hobi kullanımı içindir.
Güvenlik talimatları
Genel elektrikli alet güvenlik uyarıları
Uyarı! Bütün güvenlik uyarılarını ve
talimatlarını mutlaka okuyun.
Aşağıda yer alan uyarılar ve
talimatların herhangi birisine uyulmaması
elektrik çarpması, yangın ve/veya ciddi
yaralanma riskine neden olabilir.
Bütün uyarı ve güvenlik talimatlarını ileride
bakmak üzere saklayın. Aşağıda yer alan
uyarılardaki «elektrikli alet» terimi şebeke
elektriğiyle (kablolu) veya akü/pille (şarjlı)
çalışan elektrikli aletinizi ifade etmektedir.
1. Çalışma alanının güvenliği
a. Çalışma alanını temiz ve aydınlık tutun.
Karışık veya karanlık alanlar kazaya
davetiye çıkartır.
b. Elektrikli aletleri, yanıcı sıvılar, gazlar ve
tozların bulunduğu yerler gibi yanıcı
ortamlarda çalıştırmayın. Elektrikli
aletler, toz veya dumanları
ateşleyebilecek kıvılcımlar çıkartır.
c. Bir elektrikli aleti çalıştırırken
çocuklardan ve etraftaki kişilerden uzak
tutun. Dikkatinizi dağıtıcı şeyler kontrolü
kaybetmenize neden olabilir.
2. Elektrik güvenliği
a. Elektrikli aletlerin fişleri prizlere uygun
olmalıdır. Fiş üzerinde kesinlikle hiçbir
değişiklik yapmayın. Topraklı elektrikli
aletlerde hiçbir adaptör fişi kullanmayın.
Değiştirilmemiş fişler ve uygun prizler
elektrik çarpması riskini azaltacaktır.
b. Borular, radyatörler, ocaklar ve
buzdolapları gibi topraklanmamış
yüzeylerle vücut temasından kaçının.
Vücudunuzun topraklanması halinde
yüksek bir elektrik çarpması riski vardır.
c. Elektrikli aletleri yağmura maruz
bırakmayın veya ıslatmayın. Elektrikli
alete su girmesi elektrik çarpması riskini
arttıracaktır.
d. Elektrik kablosunu uygun olmayan
amaçlarla kullanmayın. Elektrikli aleti
kesinlikle kablosundan tutarak taşımayın,
çekmeyin veya prizden çıkartmayın.
Kabloyu sıcaktan, yağdan, keskin
kenarlardan veya hareketli parçalardan
uzak tutun. Hasarlı veya dolaşmış kablolar
elektrik çarpması riskini arttırır.
e. Elektrikli bir aleti açık havada
çalıştırıyorsanız, açık havada kullanıma
uygun bir uzatma kablosu kullanın. Açık
havada kullanıma uygun bir kablonun
kullanılması elektrik çarpması riskini
azaltır.
f. Eğer bir elektrikli aletin nemli bir
bölgede çalıştırılması zorunluysa, bir
artık akım aygıtı (RCD) korumalı bir
kaynak kullanın. Bir RCD kullanılması
elektrik şoku riskini azaltır.
3. Kişisel güvenlik
a. Elektrikli bir aleti kullanırken her zaman
dikkatli olun, yaptığınız işe yoğunlaşın ve
sağduyulu davranın. Elektrikli bir aleti
yorgunken veya ilaç ya da alkolün etkisi
altındayken kullanmayın. Elektrikli aletleri
kullanırken bir anlık dikkatsizlik ciddi
kişisel yaralanmayla sonuçlanabilir.
b. Kişisel koruyucu ekipmanları mutlaka
kullanın. Daima koruyucu gözlük takın.
Koşullara uygun toz maskesi, kaymayan
güvenlik ayakkabıları, baret veya kulaklık
gibi koruyucu donanımların kullanılması
kişisel yaralanmaları azaltacaktır.
c. İstem dışı çalıştırılmasını önleyin. Aleti
güç kaynağına ve/veya aküye
bağlamadan, yerden kaldırmadan veya
taşımadan önce açma/kapama
düğmesinin kapalı konumda olduğundan
emin olun. Aleti, parmağınız düğme
üzerinde bulunacak şekilde taşımak veya
açık konumdaki elektrikli aletleri elektrik
şebekesine bağlamak kazaya davetiye
çıkartır.
d. Elektrikli aleti açmadan önce tüm
ayarlama anahtarlarını çıkartın. Elektrikli
aletin hareketli bir parçasına takılı kalmış
bir anahtar kişisel yaralanmaya neden
olabilir.

15
TÜRKÇE
(Çevirisi orijinal talimatlardan yapılmıştır)
e. Ulaşmakta zorlandığınız yerlerde
kullanmayın. Daima sağlam ve dengeli
basın. Bu, beklenmedik durumlarda
elektrikli aletin daha iyi kontrol
edilmesine olanak tanır.
f. Uygun şekilde giyinin. Bol elbiseler
giymeyin ve takı takmayın. Saçınızı,
elbiselerinizi ve eldivenlerinizi hareketli
parçalardan uzak tutun. Bol elbiseler ve
takılar veya uzun saç hareketli parçalara
takılabilir.
g. Eğer kullandığınız üründe toz emme ve
toplama özellikleri olan ataşmanlar
varsa bunların bağlı olduğundan ve
doğru şekilde kullanıldığından emin
olun. Bu toz toplama ataşmanların
kullanılması tozla ilgili tehlikeleri
azaltabilir.
4. Elektrikli aletlerin kullanımı ve bakımı
a. Elektrikli aleti zorlamayın. Uygulamanız
için doğru elektrikli aleti kullanın. Doğru
elektrikli alet, belirlendiği kapasite
ayarında kullanıldığında daha iyi ve
güvenli çalışacaktır.
b. Düğme açmıyor ve kapatmıyorsa
elektrikli aleti kullanmayın. Düğmeyle
kontrol edilemeyen tüm elektrikli aletler
tehlikelidir ve tamir edilmesi
gerekmektedir.
c. Herhangi bir ayarlama, aksesuar
değişimi veya elektrikli aletlerin
saklanması öncesinde fişi güç
kaynağından çekin ve/veya aküyü
elektrikli aletten ayırın. Bu tür önleyici
güvenlik tedbirleri aletin istem dışı olarak
çalıştırılması riskini azaltacaktır.
d. Elektrikli aleti, çocukların
ulaşamayacağı yerlerde saklayın ve
elektrikli aleti tanımayan veya bu
talimatları bilmeyen kişilerin elektrikli
aleti kullanmasına izin vermeyin.
Elektrikli aletler, eğitimsiz kullanıcıların
elinde tehlikelidir.
e. Elektrikli aletleri iyi durumda muhafaza
edin. Hareketli parçalardaki hizalama
hatalarını ve tutuklukları, parçalardaki
kırılmalar ve elektrikli aletin çalışmasını
etkileyebilecek tüm diğer koşulları
kontrol edin. Hasarlı ise, elektrikli aleti
kullanmadan önce tamir ettirin. Kazaların
çoğu, elektrikli aletlerin bakımının yeterli
şekilde yapılmamasından kaynaklanır.
f. Kesim aletlerini keskin ve temiz tutun.
Bakımı uygun şekilde yapılmış keskin
kesim uçlu kesim aletlerinin sıkışma
ihtimali daha düşüktür ve kontrol edilmesi
daha kolaydır.
g. Elektrikli aleti, aksesuarlarını ve aletin
diğer parçalarını kullanırken bu
talimatlara mutlaka uyun ve çalışma
ortamının koşullarını ve yapılacak işin ne
olduğunu göz önünde bulundurun.
Elektrikli aletin öngörülen işlemler
dışındaki işlemler için kullanılması tehlikeli
durumlara neden olabilir.
5. Servis
a. Elektrikli aletinizi, sadece orijinal yedek
parçaların kullanıldığı yetkili servise
tamir ettirin. Bu, elektrikli aletin
güvenliğinin muhafaza edilmesini
sağlayacaktır.
Elektrikli el aletleri için ek güvenlik
talimatları
Uyarı! Taşlama, zımparalama,
fırçalama, polisaj veya aşındırıcı
diskle kesme işleri için ek güvenlik
talimatları.
• Bu elektrikli alet bir taşlama,
zımparalama, fırçalama, polisaj veya
kesme makinesi olarak kullanılmak üzere
tasarlanmıştır. Bu elektrikli alet ile
verilen tüm güvenlik uyarıları, talimatlar,
resimli açıklamalar ve teknik özellikleri
okuyun. Aşağıda belirtilen tüm
talimatların herhangi birisine uyulmaması
elektrik çarpması, yangın ve/veya ciddi
yaralanma riskine neden olabilir.
• Elektrikli aletin tasarlanma amacı
dışındaki işlemler tehlike ve kişisel
yaralanmalara neden olabilir.
• Üretici firma tarafından özel olarak
tasarlanmamış ve tavsiye edilmemiş
aksesuarları kullanmayın. Aksesuarın
elektrikli aletinize takılabilir olması güvenli
bir çalışma temin edeceği anlamına
gelmemektedir.
• Aksesuarın nominal hızı en az elektrikli
alet üzerinde yazan maksimum hıza eşit
olmalıdır. Nominal hızından daha hızlı
çalışan aksesuarlar kırılabilir ve etrafa
saçılabilir.

• Aksesuarınızın dış çapı ve kalınlığı
elektrikli aletinizin kapasite oranı içinde
olmalıdır. Yanlış ebatlı aksesuarlar yeteri
kadar korunamaz ve kontrol edilemez.
• Disk, flanş, taban ya da diğer
aksesuarların mil çapı elektrikli aletin
miline tam olarak uymalıdır. Elektrikli
aletin montaj donanımına uymayan mil
çapına sahip aksesuarlar dengesiz çalışır,
aşırı titreşim yapar ve kontrolü
kaybetmeye neden olabilir.
• Hasar görmüş olan bir aksesuarı
kullanmayın. Her kullanımdan önce
aksesuarları inceleyin, örneğin diski
talaş ve çatlaklara karşı, tabanı çatlak,
kopma ya da aşırı kullanıma karşı, tel
fırçayı gevşek ya da kırık tellere karşı
kontrol edin. Elektrikli alet ya da
aksesuar düşürülürse, hasar olup
olmadığını kontrol edin ya da sağlam
aksesuar takın. Aksesuarın incelenmesi
ve monte edilmesinden sonra bir dakika
boyunca elektrikli aleti boşta ve
maksimum hızda çalıştırın. Bu test
süresince hasarlı aksesuarlar normal
olarak kırılarak dağılacaktır.
• Kişisel koruyucu ekipmanları mutlaka
kullanın. Uygulamaya bağlı olarak yüz
kalkanı, koruyucu gözlük ya da güvenlik
gözlükleri kullanın. Yeri geldiğinde
küçük aşındırıcı maddeleri ya da işleme
tabi tutulan parçaları durdurabilen toz
maskesi, kulaklık, eldiven ve iş önlüğü
giyin. Göz koruması, çeşitli işlemler
sonucu açığa çıkan uçan parçacıkları
durdurabilmelidir. Toz maskesi ya da gaz
maskesi yaptığınız işlem sonucu açığa
çıkan parçacıkları filtreleyebilmelidir.
Uzun süreli yüksek şiddetli gürültüye
maruz kalınması işitme kaybına neden
olabilir.
• Çevrede bulunan şahısları çalışma
alanından uzakta güvenli bir mesafede
tutun. Çalışma alanına giren şahıslar
kişisel koruyucu ekipman giymelidir.
İşleme tabi tutulan parçanın ya da kırık
bir aksesuarın parçacıkları fırlayabilir ve
çalışma alanının yakın çevresinde
yaralanmalara neden olabilir.
• Kesme aksesuarının gizli kablolara veya
kendi kablosuna temas edebileceği
yerlerde çalışma yaparken elektrikli aleti
yalıtımlı kavrama yüzeylerinden tutun.
Kesme aksesuarının «akım taşıyan» bir
kabloya temas etmesi durumunda
elektrikli aletin metal kısımları da «akım
taşır» hale gelecek ve kullanıcının
çarpılmasına neden olabilir.
• Kabloyu dönen aksesuardan uzak tutun.
Kontrolü kaybederseniz kablo kesilebilir
ya da kopabilir ve eliniz ya da kolunuz
dönen aksesuar içine çekilebilir.
• Aksesuar tamamen durmadıkça elektrikli
aleti asla yere koymayın. Dönen aksesuar
yüzeyi yakalayabilir ve elektrikli aleti
kontrolünüzden çıkarabilir.
• Elektrikli aleti yanınızda taşırken
çalıştırmayın. Kaza ile temas halinde,
dönen aksesuar giysinize takılabilir,
aksesuarı vücudunuza doğru çekebilir.
• Elektrikli aletin hava çıkışlarını düzenli
olarak temizleyin. Motor fanı, tozu
muhafaza içine çeker ve aşırı metal
toplanması elektriksel tehlike yaratabilir.
• Elektrikli aleti yanıcı malzemelerin
yakınında çalıştırmayın. Kıvılcım bu
malzemeleri tutuşturabilir.
• Sıvı soğutucu gerektiren aksesuarlar
kullanmayın. Su ya da diğer sıvı
soğutucuların kullanılması elektrik
çarpması ya da şok ile sonuçlanabilir.
Not: Yukarıdaki uyarı sıvı sistemle çalışmak
üzere tasarlanmış elektrikli el aletleri için
geçerli değildir.
Geri tepme ve ilgili uyarılar
Geri tepme, sıkışmış veya takılmış bir disk,
taban, fırça veya diğer aksesuarlara verilen
ani tepkidir. Sıkışma veya takılma dönen
aksesuarın aniden durmasına neden olur, bu
daha sonra temas noktasında elektrikli aletin
kontrolsüzce, aksesuarın dönme yönünün
tersine doğru zorlanmasına yol açar.
Örneğin, bir aşındırıcı disk, işleme tabi
tutulan parçaya takılır ya da sıkışırsa; sıkışma
noktasına giren disk kenarı malzemenin
yüzeyine saplanarak, diskin geri tepmesine
ya da fırlamasına neden olabilir. Disk, sıkışma
noktasındaki hareket yönüne bağlı olarak ya
kullanıcıya doğru ya da kullanıcıdan uzağa
fırlayabilir. Aşındırıcı diskler bu koşullar
altında kırılabilir.
TÜRKÇE
16
(Çevirisi orijinal talimatlardan yapılmıştır)

Geri tepme, elektrik aletin yanlış
kullanılmasından ve/veya yanlış çalıştırma
işlemleri veya koşullarından kaynaklanır ve
aşağıda da belirtilen uygun tedbirler alınarak
önlenebilir:
• Elektrikli aleti sıkıca tutun, vücudunuzu
ve kolunuzu geri tepme gücüne karşı
koyacak şekilde konumlandırın. Geri
tepmeye ya da çalıştırma sırasındaki
döndürme momenti tepkisine karşı
maksimum kontrol sağlamak için eğer
varsa yan tutma kolunu kullanın. Doğru
önlemler alınırsa döndürme momenti
tepkileri ya da geri tepmeler kullanıcı
tarafından kontrol edilebilir.
• Döner aksesuar civarına asla elinizi
sokmayın. Aksesuar elinizde geri tepme
etkisi yapabilir.
• Geri tepmenin meydana gelmesi
durumunda vücudunuzu elektrikli aletin
hareket edeceği alanda bulundurmayın.
Geri tepme hareketi aleti takılma
noktasında disk hareketine ters yönde
itecektir.
• Köşe, keskin kenarlar vb. yerlerle
çalışırken özellikle dikkatli olun.
Aksesuarın sekmesinden ve
takılmasından kaçının. Köşeler, keskin
kenarlar ya da sektirme hareketi döner
aksesuarı engelleme eğilimindedir ve
kontrolün kaybedilmesine ya da geri
tepmeye neden olabilir
• Zincirli testere zinciri, ahşap oyma
bıçağı ya da dişli daire/gönye testere
bıçağı takmayın. Bu tür bıçaklar sık sık
geri tepme ve kontrol kaybı oluşturur.
Taşlama ve aşındırıcı kesme
uygulamaları için özel güvenlik
uyarıları
• Sadece elektrikli aletiniz için tavsiye
edilen disk türlerini ve seçilen disk için
tasarlanmış özel muhafazayı kullanın.
Elektrikli aletin birlikte kullanılmak için
tasarlanmadığı diskler yeteri kadar
korunamazlar ve güvenli değillerdir.
• Basık merkezli disklerin taşlama yüzeyi
muhafaza çıkıntısı düzeyinden aşağıda
monte edilmelidir. Muhafaza çıkıntısı
düzeyinden dışarı doğru çıkan yanlış
monte edilmiş diskler gerektiği gibi
korunamazlar.
• Muhafazanın elektrikli alete güvenli bir
şekilde bağlanması ve maksimum
güvenlik için konumlandırılması gerekir,
böylece diskin çok az bir kısmı
kullanıcıya açık olacaktır.
• Muhafaza, kullanıcının kırılan disk
parçacıklarından ve disk ile istenmeyen
temaslardan korunmasına yardımcı olur.
• Diskler sadece önerilen uygulamalar için
kullanılmalıdır. Örneğin: kesme diskinin
kenarı ile taşlama yapmayın. Aşındırıcı
kesici diskler çevresel aşındırma için
tasarlanmıştır, bu disklere uygulanan yan
kuvvetler diskleri parçalayabilir.
• Her zaman seçilen disk için doğru ebat
ve şekilde, hasarsız flanşları kullanın.
Uygun flanşlar, diski destekler ve disk
kırılması olasılığını azaltır. Kesme diski
flanşları taşlama diski flanşlarından farklı
olabilir.
• Daha büyük çaplı taşlamaların yıpranmış
disklerini kullanmayın. Daha büyük
elektrikli aletler için tasarlanmış disk daha
küçük bir aletin yüksek hızları için uygun
değildir ve parçalanabilir.
Aşındırıcı kesme uygulamalarına
özel ilave güvenlik uyarıları
• Kesme diskini sıkıştırmayın veya aşırı
basınç uygulamayın. Çok derin kesmeye
çalışmayın. Diske aşırı yük uygulamak
yüklemeyi, diskin kesim sırasında bükülme
veya engellenme hassasiyetini ve geri
tepme veya disk kırılması olasılığını artırır.
• Vücudunuzu döner diskle aynı hizaya
veya döner diskin arkasına
konumlandırmayın. Disk işlem sırasında
sizden uzaklaşıyorsa, olası geri tepme,
dönen diski ve elektrikli aleti doğrudan
size doğru itebilir.
• Disk herhangi bir nedenle kesimi
engelliyor veya yarıda kesiyorsa,
elektrikli aleti düğmesinden kapatın ve
disk tamamen durana kadar elektrikli
aleti hareket ettirmeden tutun. Disk
hareket halindeyken, kesme diskini
kesimden uzaklaştırmayı asla
denemeyin, aksi takdirde geri tepme
meydana gelebilir. Diskin engellenme
nedenlerini ortadan kaldırmak için
inceleme yapın ve düzeltici önlemler alın.
17
TÜRKÇE
(Çevirisi orijinal talimatlardan yapılmıştır)

TÜRKÇE
18
(Çevirisi orijinal talimatlardan yapılmıştır)
• İşleme tabi tutulan parça üzerinde
kesme işlemine tekrar başlamayın.
Diskin son hıza ulaşmasını sağlayın ve
kesim yerine dikkatle tekrar girin.
Elektrikli alet işleme tabi tutulan parça
içinde yeniden çalıştırılırsa disk
engellenebilir, ilerleyebilir veya geri
tepebilir
• Disk sıkışması ve geri tepmesi riskini en
aza indirmek için, panelleri veya işleme
tabi tutulan herhangi bir büyük boy işi
destekleyin. İşleme tabi tutulan büyük
parçalar kendi ağırlıkları altında bükülme
eğilimindedir. Destekler, kesme çizgisi
yakınındaki işleme tabi tutulan parçanın
altına ve diskin her iki yanında işleme tabi
tutulan parçanın yakınına
yerleştirilmelidir.
• Var olan duvarların veya diğer kör
alanların içine bir «cep kesim» yaparken
aşırı özen gösterin. Kesilen malzemeden
çıkan disk, gaz veya su borularını, elektrik
tesisatını veya geri tepmeye neden
olabilecek nesneleri kesebilir.
Zımparalama uygulamalarına özel
ilave güvenlik uyarıları
• Çok büyük zımpara diski kullanmayın.
Zımpara diski seçerken üreticinin
tavsiyelerine uyun. Zımpara tabanından
taşan zımpara diski paralanma tehlikesi
yaratır ve takılmaya, diskin yırtılmasına ya
da geri tepmeye yol açabilir.
Polisaj uygulamalarına özel ilave
güvenlik uyarıları
• Polisaj bonesinin sarkan kısımlarının ya
da bağlantı iplerinin serbestçe
dönmesine izin vermeyin. Sarkan
bağlantı iplerini bonenin içine sokun ya
da kesin. Sarkan veya dönen bağlantı
ipleri parmaklarınıza dolanabilir veya
çalışma malzemesine takılabilir.
Diğer kişilerin güvenliği
• Bu alet fiziksel ve zihinsel kapasitesinin
yanı sıra algılama gücü azalmış olan veya
yeterince deneyim ve bilgisi bulunmayan
kişiler (çocuklar dahil) tarafından
kullanılmak üzere üretilmemiştir. Bu tür
kişiler aleti ancak güvenliklerinden
sorumlu bir kişi tarafından aletin
kullanımıyla ilgili talimatların verilmesi
veya sürekli kontrol altında tutulması
durumunda kullanabilir.
• Çocuklar, aletle oynamalarını önlemek
amacıyla kontrol altında tutulmalıdır.
Diğer tehlikeler
Aletin kullanımıyla ilgili ekte sunulan güvenlik
uyarılarına dahil olmayan ilave kalıcı riskler
ortaya çıkabilir. Bu riskler, hatalı, uzun süreli
kullanım vb. dolayısıyla ortaya çıkabilir.
Emniyet tedbirlerini düzenleyen
yönetmeliğin uygulanmasına ve emniyet
sağlayıcı aygıtların kullanılmasına rağmen,
başka belirli risklerden kaçınılamaz. Bunlar:
• Aletin dönen ve hareket eden
parçalarına dokunma sonucu ortaya
çıkan yaralanmalar.
• Herhangi bir parçayı, disk veya aksesuarı
değiştirirken ortaya çıkan yaralanmalar.
• Aletin uzun süreli kullanılması sonucu
ortaya çıkan yaralanmalar. Herhangi bir
aleti uzun sürelerle kullanacaksanız
düzenli olarak çalışmanıza ara verin.
• Duyma bozukluğu.
• Aleti kullanırken ortaya çıkan tozun
solunması sonucu ortaya çıkan sağlık
sorunları (örnek: ahşapta çalışırken,
özellikle meşe, akgürgen ve MDF).
Titreşim
Teknik veriler ve uygunluk beyanatı içerisinde
belirtilen titreşim emisyon değerleri
EN60745 tarafından belirlenen standart bir
test yöntemine uygun olarak ölçülmektedir
ve diğer bir aletle karşılaştırma yaparken
kullanılabilir.
Beyan edilen titreşim emisyon değeri aynı
zamanda maruz kalmanın önceden
değerlendirilmesinde de kullanılabilir.
Uyarı! Elektrikli aletin mevcut kullanımı
sırasındaki titreşim emisyon değeri, aletin
kullanım yöntemine bağlı olarak, beyan
edilen değere göre farklılık sergileyebilir.
Titreşim düzeyi belirlenen seviyenin üzerinde
artış gösterebilir. İşyerinde düzenli olarak
elektrikli alet kullanan çalışanları korumak
amacıyla 2002/44/EC tarafından getirilen
elektrik güvenliği önlemlerini belirlemek
üzere titreşime maruz kalmayı
değerlendirirken, çalışma döngüsü içerisinde
örneğin

19
TÜRKÇE
(Çevirisi orijinal talimatlardan yapılmıştır)
aletin kapalı olduğu ve aktif durumda
olmasının yanı sıra boşta çalıştığı zamanlar
gibi, bütün zaman dilimleri dahil olmak
üzere mevcut kullanım durumu ve aletin
kullanım şekli göz önünde bulundurularak
değerlendirilmelidir.
Alet üzerindeki etiketler
Alet üzerinde, aşağıdaki uyarı sembolleri
bulunmaktadır:
Uyarı! Yaralanma riskini en aza
indirmek için kullanıcı kullanım
talimatlarını mutlaka okumalıdır.
Bu aleti kullanırken koruyucu gözlük
kullanın.
Aletle çalışırken kulaklık takın
Elektrik güvenliği
Bu alet çift yalıtımlıdır. Bu yüzden hiçbir
topraklama kablosuna gerek yoktur.
Her zaman şebeke geriliminin aletin
üretim etiketinde belirlenmiş
değerlere uyup uymadığını kontrol
edin.
• Elektrik kablosu hasarlı ise, bir tehlike
oluşmasını önlemek için üretici ya da
yetkili Black & Decker Servis Merkezi
tarafından değiştirilmelidir.
Özellikler
Bu alet, aşağıdaki özelliklerin bir kısmını
veya tümünü içermektedir.
1. Açma/kapama düğmesi
2. Yan kol
3. Mil kilidi
4. Muhafaza
Montaj
Uyarı! Montajdan önce aletin kapalı ve
fişinin çekilmiş olduğundan emin olun.
Muhafazanın takılması ve
çıkartılması (Şekil A)
Alet sadece taşlama amaçlı muhafaza ile
donatılmıştır. Eğer alet kesme işleri için
kullanılacaksa, kesmeye özel muhafaza
takılmalıdır. Kesme işlerine uygun
muhafaza1004702-27 parça numarası ve
1004702-28 parça numarası (KG711/KG911
ve KG912/KG752 için) ile mevcut olup,
BLACK+DECKER servisinden temin edilebilir.
Muhafazanın takılması ve
çıkartılması (Şekil A) Sadece
KG912
Alet sadece kesme amaçlı muhafaza ile
donatılmıştır. Eğer alet taşlama işleri için
kullanılacaksa, taşlamaya özel muhafaza
takılmalıdır. Taşlama işlerine uygun
muhafaza1004702-36 parça numarası ile
mevcut olup ve BLACK+DECKER servisinden
temin edilebilir.
Takılması
• Taşlama makinesini, mili (5) yukarı
bakacak şekilde bir masaya yatırın.
• Çıkıntıları (8) oyuklarla (9) hizalayın.
• Muhafazayı (4) aşağı doğru bastırın ve
gerekli konuma döndürün.
• Muhafazayı çıkartmak için vidayı gevşetin.
Uyarı! Aleti, kesinlikle muhafazası olmadan
kullanmayın.
Yan kolun takılması
Yan kolu (2) aletteki montaj deliklerinden
birine takın.
Uyarı! Daima yan kolu kullanın.
Taşlama veya kesme disklerinin
takılması ve çıkartılması (Şekil B -
D)
Daima uygulamanız için doğru tipte diski
kullanın. Daima doğru çap ve mil bağlantı
ölçüsüne sahip diskleri kullanın (Teknik
özelliklerine bakın).
Takılması
• Muhafazayı, yukarıda belirtildiği gibi takın.
• flanşı (10) gösterildiği gibi milin (5)
üzerine yerleştirin (Şekil B). Flanşın, milin
düz tarafının üzerine doğru bir şekilde
yerleştirildiğinden emin olun.
• Diski (11) gösterildiği gibi milin (5) üzerine
yerleştirin (Şekil B). Disk çıkıntılı bir
göbeğe sahipse (12), çıkıntılı göbeğin iç
flanşa baktığından emin olun.
• Diskin iç flanşın üzerine doğru
yerleştirildiğinden emin olun.

TÜRKÇE
20
(Çevirisi orijinal talimatlardan yapılmıştır)
• Dış flanşı (13) milin üzerine yerleştirin.
Taşlama diskini takarken dış flanştaki
yüksek merkez diske bakmalıdır (Şekilde
C, A kısmı). Kesme diskini takarken dış
flanştaki yüksek merkez diskin aksi yöne
bakmalıdır (Şekilde C, B kısmı).
• Mil kilidini (3) basılı tutun ve dış flanşı çift
pimli anahtarı (14) kullanarak sabitletin
(Şekil D).
Çıkartılması
• Mil kilidini (3) basılı tutun ve dış flanşı
(13) çift pimli anahtarı (14) kullanarak
gevşetin (Şekil D).
• Dış flanşı (13) ve diski (11) çıkartın.
Zımparalama disklerinin takılması ve
çıkartılması (Şekil D ve E). Zımparalama
için taban gerekmektedir. Tabanı
BLACK+DECKER yetkili servisinden
temin edebilirsiniz.
Takılması
• flanşı (10) gösterildiği gibi milin (5)
üzerine yerleştirin (Şekil E). Flanşın, milin
düz tarafının üzerine doğru bir şekilde
yerleştirildiğinden emin olun.
• Tabanı (15) milin üzerine yerleştirin.
• Zımparalama diski (16) taban üzerine
yerleştirin.
• Dış flanşı (13), yüksek merkez diskten ters
tarafa bakacak şekilde milin üzerine
yerleştirin.
• Mil kilidini (3) basılı tutun ve dış flanşı çift
pimli anahtarı (14) kullanarak sabitletin
(Şekil D). Dış flanşın doğru takıldığından
ve diskin sıkıca bağlandığından emin
olun.
Çıkartılması
• Mil kilidini (3) basılı tutun ve dış flanşı
(13) çift pimli anahtarı (14) kullanarak
gevşetin (Şekil D).
• Dış flanşı (13), zımparalama diski (16) ve
tabanı (15) çıkartın.
Kullanım
Uyarı! Aletin kendi hızında çalışmasına izin
verin. Aşırı yüklenmeyin.
• Kaza ile kablonun kesilmesini önlemek için
çalışırken kabloya dikkat edin.
• Taşlama veya kesme diski, üzerinde
çalışılan parçaya temas ettiğinde bir
kıvılcım akımına hazırlıklı olun.
• Aleti daima, muhafazanın, taşlama veya
kesme diskinden en uygun korunmayı
sağlamasına olanak tanıyacak şekilde
tutun.
Açılması ve kapatılması
• Aleti çalıştırmak için, açma/kapama
düğmesini (1) ileriye kaydırın. Düğmeyi
bıraktığınızda aletin çalışmaya devam
edeceğine dikkat edin.
• Aleti kapatmak için açma/kapama
düğmesinin arka tarafına basın.
Uyarı! Aleti yük altındayken kapatmayın.
Yumuşak ilk hareket özelliği
Yumuşak ilk hareket özelliği, başlarken
başlangıç sarsıntısını önlemek için yavaşça
hızlanmayı sağlar. Bu özellik, kısıtlı alanlarda
çalışırken kullanışlıdır.
Akım korumalı tetik
Akım korumalı tetik, güç kaynağında bir arıza
olduğunda, açma/kapama düğmesi devreye
sokulmadan taşlama makinesinin yanlışlıkla
çalıştırılmasını önler.
En uygun kullanım için yararlı
tavsiyeler
• Aleti tek elinizle yan kolun etrafından
diğer elinizle ise ana koldan sıkı bir
şekilde tutun.
• Taşlama yaparken, daima disk ile üzerinde
çalıştığınız parçanın yüzeyi arasında
yaklaşık 15°'lik bir açı bırakın.
Bakım
BLACK+DECKER elektrikli/şarjlı aletiniz
minimum bakımla uzun bir süre çalışacak
şekilde tasarlanmıştır. Kesintisiz olarak
memnuniyet verici bir şekilde çalışması
gerekli özenin gösterilmesine ve düzenli
temizliğe bağlıdır.
This manual suits for next models
3
Table of contents
Languages:
Other BLACK DECKER Grinder manuals

BLACK DECKER
BLACK DECKER KFBEG110 User manual

BLACK DECKER
BLACK DECKER BEG110 User manual

BLACK DECKER
BLACK DECKER G650 Series User manual

BLACK DECKER
BLACK DECKER ADBEG115 User manual

BLACK DECKER
BLACK DECKER KG115 User manual

BLACK DECKER
BLACK DECKER G720P User manual

BLACK DECKER
BLACK DECKER G850 User manual

BLACK DECKER
BLACK DECKER G915 User manual

BLACK DECKER
BLACK DECKER BEG010 User manual

BLACK DECKER
BLACK DECKER KA401 User manual